Repairing Hunter 40 damage from Hurricane Matthew

May 8, 2013
629
Hunter 40 Dataw Island, SC
Mark,

I've been enjoying and learning from your pictures for some time now (at least a couple of years). I have to ask: how close are you to being able to go out for a sail, or an overnight? If you've already said and I missed it, sorry!
The boat is seaworthy and able to go out under its own power, but not yet under sail. I decided during the hard dodger construction that the entire running rigging setup needed a thorough re-think and I haven't completed that yet. I'm still sorting out new rope clutch combos and I need to find new deck organizers (the current ones are resisting my efforts to refurbish them :biggrin:). Along with that will be relocating two of the winches and servicing all the winches. It's a time management thing at the moment - we've got some big things happening now (which I will reveal soon!) that forced me to double down on finishing the interior first.

So to answer your question, the (re)maiden voyage has not happened yet. It's too dang hot right now anyway!

Mark
 
May 8, 2013
629
Hunter 40 Dataw Island, SC
Cushions for our tushies:

Last episode I teased a picture of an electric carving knife. No, we did not roast a turkey (though that sounds delish!). I moved all the foam from the attic to the boat and went to town:


Note: that's not ALL the foam ;). I've had this foam taking up space in the attic since the week before Matthew - back then I had big plans to cut new cushions and sew up new covers. That's still the plan - I just rebuilt the boat around the cushions in the interim :biggrin:.

No real drama, just careful measuring (I did wear out a few Sharpies in the process) and cutting along the lines. Ok, now the truth - Sailrite makes a foam cutter and I WILL be buying one for the next set of cushions I do! Using the electric knife is possible, just a major PITA. but in the end some usable cushions started happening:


Just like most things I jump into, the proficiency factor increased and the cussing factor decreased with some practice and repetition:


Once all the cushions were done in the main cabin and aft seat, I turned to the vee-berth. Here I was able to reuse the original foam mattress (which was saved, washed, dried and stored after Matthew). There were two problems with this though: One, it was one-piece, and completely unmanageable since it was odd-shaped, heavy and huge! So I sectioned it into several manageable pieces:


Two, it never fit in the first place :yikes:. But, after cutting it into manageable size pieces I started trimming until it did fit. when I was done with all the sections, there was two full bags of leftover foam bits I had trimmed off. That's how badly it didn't fit before! Last to fit in place was the insert:


I nicked one edge a bit but I'll be gluing batting to the pieces before slipping the covers on so that should plump things up and hide my boo-boos!

Next up, how to - and more importantly, how NOT to - make upholstery covers!

Cheers,

Mark
 
Apr 5, 2009
2,825
Catalina '88 C30 tr/bs Oak Harbor, WA
Looks good. We have the Sail rite foam cutter and it is most certainly THE TOOL for foam. Before you put the covers on, make sure that you have a supply of plastic silk. That stuff is a game changer for inserting the foam into the covers.
 
May 8, 2013
629
Hunter 40 Dataw Island, SC
Looks good. We have the Sail rite foam cutter and it is most certainly THE TOOL for foam. Before you put the covers on, make sure that you have a supply of plastic silk. That stuff is a game changer for inserting the foam into the covers.
Agreed, I will be getting the foam cutter next time, and I already knew about the plastic silk. My canvas/upholstery guy uses it all the time.
 
  • Like
Likes: Hayden Watson
May 8, 2013
629
Hunter 40 Dataw Island, SC
A few tasks before the upholstery fiasco:

I tidied up a few things after cutting and fitting the cushions. First was solving a lighting conundrum - the bulkhead separating the galley and the aft cabin needed a light on both sides but I had to figure out a way to hide the wiring for the lights if I mounted the lighting to the bulkhead. Here's what I came up with:


I made up the same fixtures for the sconces to match the lights in the forward salon, but I routed out channels for the wiring to run both from the light and the switch. The fixture on the galley side of the bulkhead has the wires running through a hole in the bulkhead then runs through the routed channel on the fixture for the aft side of the bulkhead. That fixture edges up against the fiddle on the locker next to it, so it was easy to continue the wiring behind the fiddle to a busbar in the locker. Easy!


The lights work so I must have done something right :biggrin:.

I also checked off an item on the never-ending list - the table separating the seats on the port side. This one needed a little bit of engineering because the table location protrudes into a portion of the locker door:


I used flush hinges here so the edge of the table can swing out of the way for locker access. All that remains is to clearcoat the table (and the light fixtures).

Next up, showing the world how little i know about sewing!

Cheers,

Mark
 
May 8, 2013
629
Hunter 40 Dataw Island, SC
How NOT to learn to sew:

Way back before Matthew I had planned on a complete cushion/cover upgrade, so I started stocking materials. I got the foam, batting and had a pretty good idea of the color I wanted but I didn't settle on a color and fabric - then Matthew and fast forward to now. After getting the interior done and the floor in I had a color in mind that would suit my vision. So far so good, except:

The last five years has been a journey in DIY boat repair, refit and redesign. Not a single job farmed out and I wanted to keep it that way with the cushions. Only one problem: I have exactly one experience in sewing (a button) and it failed (promptly fell off) :yikes:. Not a great background for a good cushion outcome. But in my usual style, I figured the best way is to jump in and give it a go. I decided to be smart though - rather than ruin a bunch of really expensive fabric during the learning process, I decided I would teach myself the basics with a substitute, so I searched around and bought a cheap sewing machine and a couple of packs of sheets in a similar color to what I wanted:


Keep in mind that this machine will not do heavy fabrics, it's just for learning and practice. So far so good, or so I thought ;). I studied the directions for the machine, figured out the intricacies of the thread, the bobbin and all the magic, watched a few YouTube vids and jumped right in. Big, big mistake! First problem, I couldn't find anything other than a Sharpie that would leave a mark on the sheets for a cut line. Next, it was impossible to cut a straight line! Not starting out very good :(. After finally getting a few sample pieces, off to the machine! Big fail - all I managed to do was create a spaghetti-like ball of thread that jammed the machine up. A little more research, a few tweaks to the machine, and off we go! Um, nope, another spaghetti factory.

This is not starting well but I persevered and finally got two pieces of sheet sewn together. Ugly, but successful. Next up, try to make a cover. In the end I did manage a (marginally) passable cover (minus the zipper, that's another big fail :biggrin:) and I tried to fit it to the cushion. Since the cushion was not square it didn't fit - I managed to sew the cover backwards. Or inside out, or reverse. Whatever :banghead:. After a few more comically failed attempts I gave up and hit the rum!

Next time in town I stopped by to see my upholstery guy and confessed. He laughed (and laughed, and laughed). Asked why I decided to try a dumbsh*t stunt like that, and pointed me to the Sailrite videos where they work with real fabric, not the junk I tried to play with. He did confide to me that he once tried to sew up a torn sheet and said it was like trying to sew a wet noodle together. Made me feel a little bit better :biggrin:. Now on the right track, he gave me a sample book to take home.

Bruised ego fixed, but now I have several packages of sheets that will not fit anything we own, so what to do with them. One of my purchases was a couple of rolls of two-sided fabric tape - this stuff is gooey-sticky - so I decided to cut and fit the sheets on the cushions to check to color. Just in case I wanted to change colors before ordering the big roll of fabric! I wrapped the cushions up like Christmas presents an taped them together- first ones:


Ok so far so I pressed on:


Alright, I got the hang of this until I accidently wrapped one of these backward:


No biggie, this is for visual confirmation only. Finished up:


I like the color so I picked the closest one from the sample book, checked the website only to find it discontinued. I found another one I liked - big box of goodies currently on the way.

Lesson learned - if your expert in the field is a drinking buddy, ask him first before doing something stupid!

Next up, getting some altitude.

Cheers,

Mark
 

jssailem

SBO Weather and Forecasting Forum Jim & John
Oct 22, 2014
21,171
CAL 35 Cruiser #21 moored EVERETT WA
if your expert in the field is a drinking buddy, ask him first
Mark, Am I to understand that the suggestion of SailRite has earned said buddy a bottle of Rum?

Damn... I could have shared that. They are talented folk with good product. Another missed bottle of Rum.
 
  • Like
Likes: B757Captain
Oct 26, 2010
1,906
Hunter 40.5 Beaufort, SC
I've never been a fan of the high gloss finishes on interiors either. I probably mentioned this - about 30 pages ago :) - but I did a bunch of test panels before coming up with the finish I liked. I finally settled on mixing the Minwax satin and semi-gloss in equal parts.. The semi-gloss was still too glossy and the satin was too satiny :biggrin:.
I like that mix too. I haven't used it on the interior yet but refinished the teak wood on the stern seats and really like it. When it cools off, I'll be refinish the interior of my Hunter 40.5
 
Last edited:
  • Like
Likes: B757Captain
Jan 17, 2010
19
Hunter Legend 40 Edgewater
I hope to see you soon out cruising and we would love to take a tour of your finished master piece. If you see Monarch on the horizon give us a call. We are in Maine and will head to the Bahamas this winter.
 
  • Like
Likes: B757Captain
May 8, 2013
629
Hunter 40 Dataw Island, SC
Checking in from Flight Level 290:

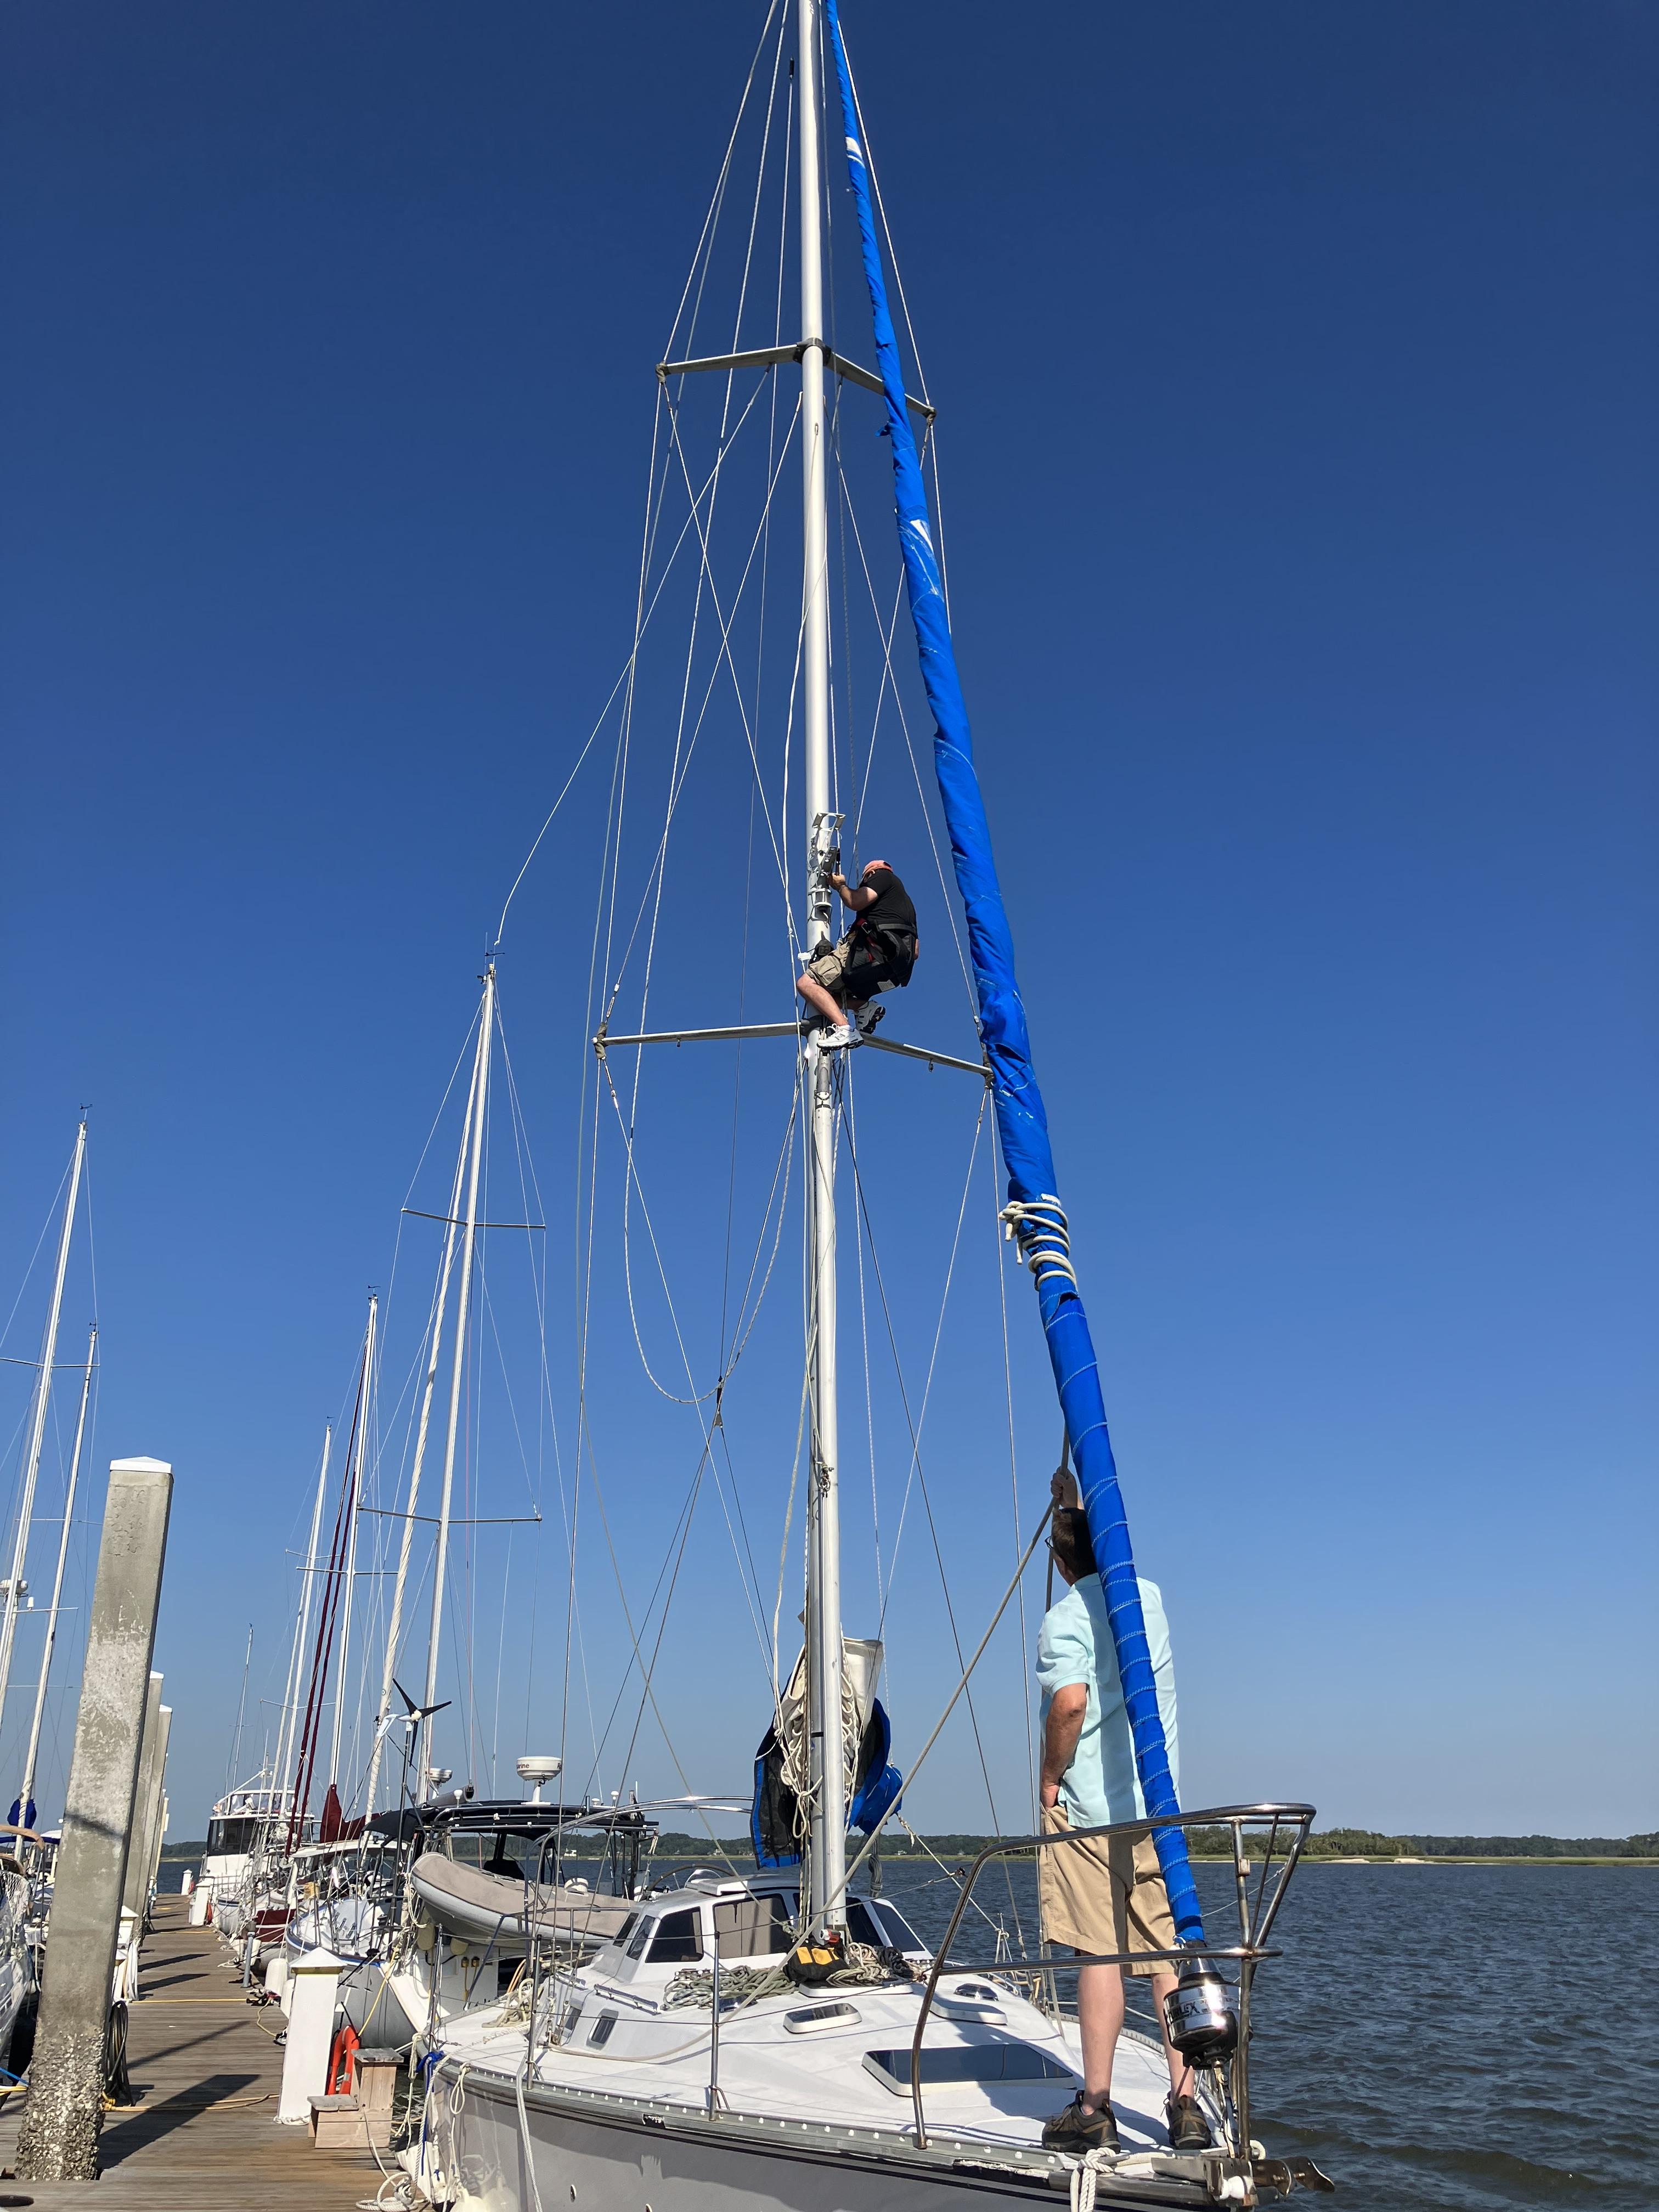
I needed something to do while I waited for the fabric to arrive so I looked at my list of to-do items and decided it was time to empty a really big box sitting in the attic which contained the radar. Fortuitously my BIL was in town visiting so I had a helper who could crank me up the mast. I was hoping that the mounting holes for the new radar (Garmin) would magically fit the existing mounting bracket from the old radar (Furuno) and I would only have to make one trip up the mast. Alas, no:


Not only not close, but not even remotely close! But I had a Plan A and a backup Plan B. Plan A was - if the mount was close I had some 1/4" aluminum strips that could extend the reach for the bolts. Problem: the bracket wound up too small, so scrap Plan A. Insert Plan B: remove the bracket from the mast and enjoy the rest of the weekend while I engineer something to mate the two.

After some over-engineering thoughts, I found some 1/2" Starboard at the local WM and mounted the radar to the bracket. KISS, you know :)! Now up the mast again, but this time I don't have my helper anymore. I searched and found my climbing gear, suited up, strapped up and hoisted myself up the mast with one leader line tied to the radar/bracket and another line tied to my toolbag, plus a safety line. I must have looked like a mess of spaghetti going up :biggrin:.

After reaching the midpoint of the mast (and spending a few minutes catching my breath - I have gained a few pounds since the last time I used this stuff!) it was as simple as hoisting up the radar and bolting the bracket back in place:


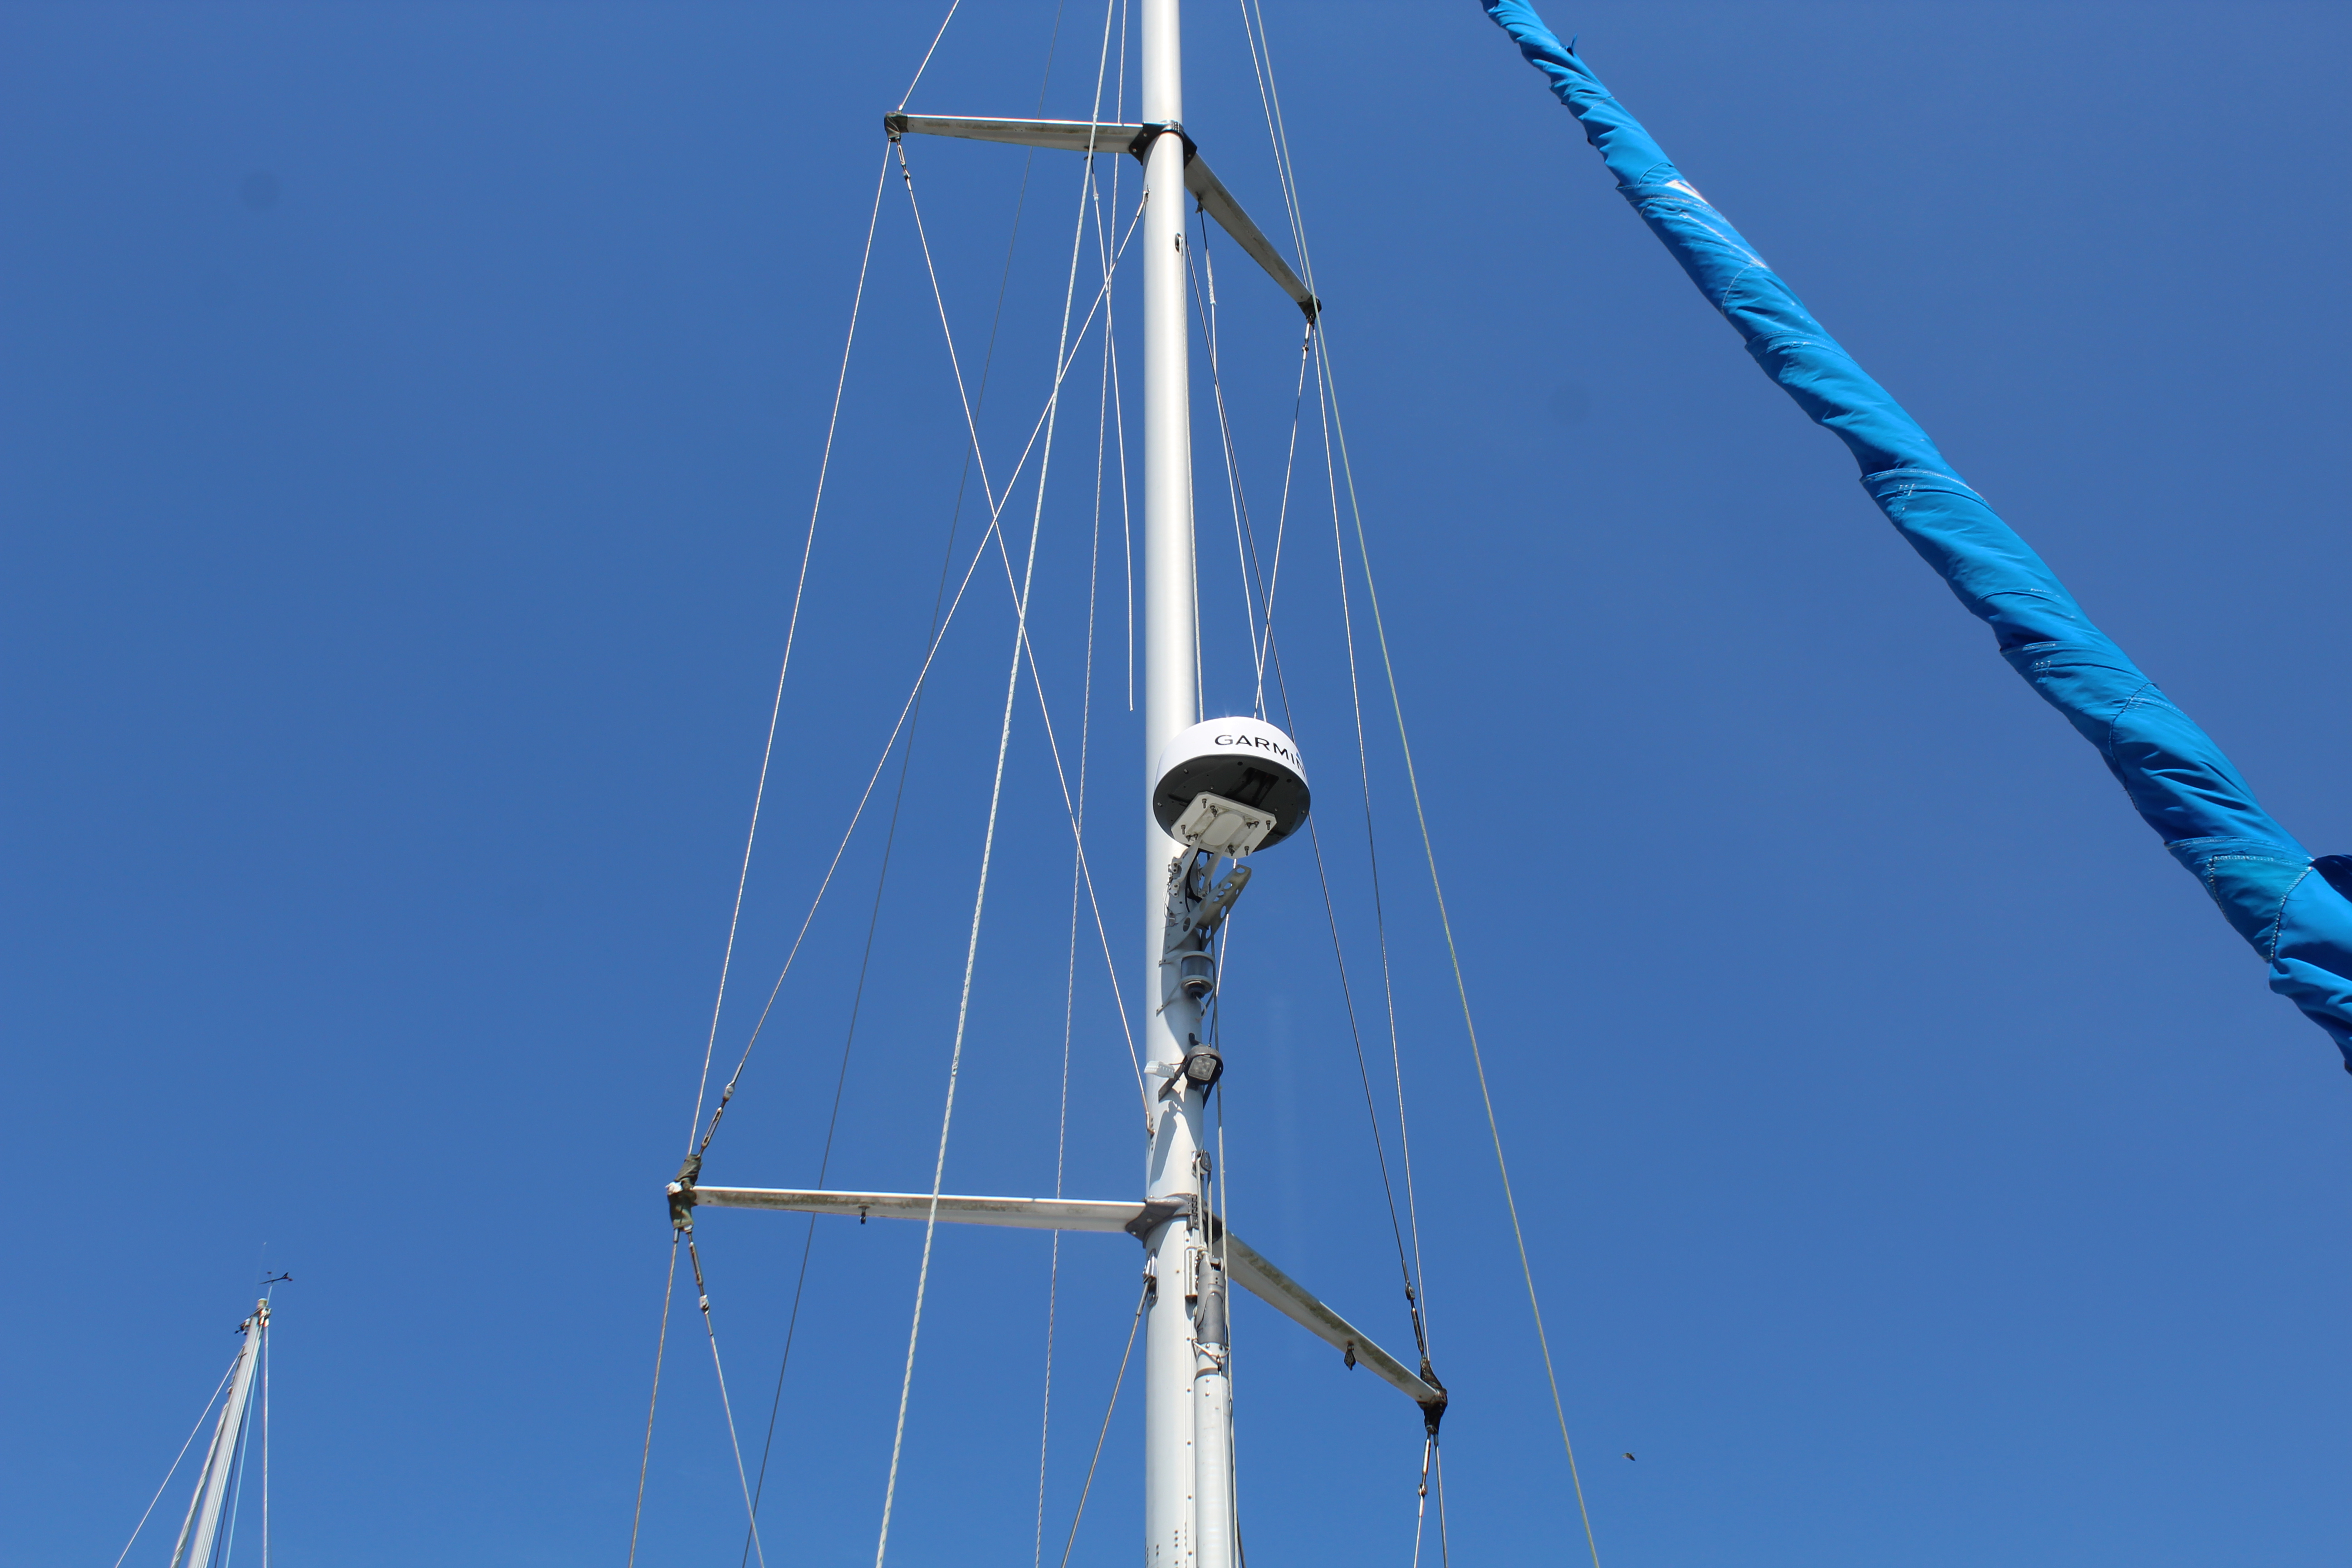
With all the hard work done I took a few minutes to wave at the audience that had gathered and took a few pics from above:


And the installed radar:


I am eventually going to have to go all the way up the mast when I decide on which sailing instrumentation to go with but for now I'm safely back on the ground!

Next up, wiring and cabling for the radar and mast lights.

Cheers,

Mark
 
Oct 26, 2010
1,906
Hunter 40.5 Beaufort, SC
@B757Captain
Mark, I'm down in Beaufort. If you need to go up to the top again and you're looking for someone to hoist you up or just a line tender while you are up, pm me and if it fits my schedule too I'd be happy to help. I'll probably need some help myself since I have to go up and check/change bulb in my masthead anchor light sometime.

I'm down at the BYSC in Beaufort. Hope to see you out on the St Helena Sound soon. Look for Song of the Sea with a white hull and blue canvas. I come up to anchor off Morgan (Monkey) Island across from you, listen to the monkey's, drink a single malt or two, smoke a cigar then sail back home the next morning after a leisurely cup of coffee. It's a little hot right now but when it cools off its a nice relaxing sail up there and back from Beaufort. When you are out on the water come on down to Beaufort and I'm sure I can host you for a night on the club dock.
 
Jun 8, 2004
272
Hunter 49 60803 Lake Erie
I was excited to see some of the upholstery shots as it is the first time in a while (like 9,517 projects ago) that you posted a shot that showed a wide angle view of all your interior work. We've only seen close ups for a while. Any way the interior looks fabulous. All your hard work and projects have come together in a very nice looking cohesive package. Having owned this same model in the past it amazing how much storage and livability you've created on your version vs the factory version. All I can say is amazing. (Oh and I have a few projects on my boat if you happen to be up Lake Erie.)
 
Last edited:
  • Like
Likes: B757Captain
May 8, 2013
629
Hunter 40 Dataw Island, SC
I was excited to see some of the upholstery shots as it is the first time in a while (like 9,517 projects ago) that you posted a shot that showed a wide angle view of all your interior work. We've only seen close ups for a while. Any way the interior looks fabulous. All your hard work and projects have come together in a very nice looking cohesive package. Having owned this same model in the past it amazing how much storage and livability you've created on your version vs the factory version. All I can say is amazing. (Oh and I have a few projects on my boat if you happen to be up Lake Erie.)
Yeah, sometimes I get caught up in the detail side and forget wide-angle shots. I'll work on that in the future :). I figure that even though the factory boats have improved as the owner use profile has changed over the years, I've got he same basics to work with and improve upon, so why not? ;). No plans to be up your way for the foreseeable future though, unfortunately :(.
 
May 8, 2013
629
Hunter 40 Dataw Island, SC
Long overdue update:

My only excuse is that for reasons to be disclosed soon, this last month has been a ball-buster! I have tons of pics on several ongoing projects, and even completed a few! First up, some upholstery.

After ordering all the materials for the cushion covers, my buddy and I worked out a schedule for me to use his shop (and expertise!) and it was off to the races - on the weekends. So, first day he coached me through the first cushion and let me go to town. I picked one of the easiest ones and, surprisingly, it turned out pretty good. The acid test though would come the next day when I was all by myself. After a long (long!) day I turned out three more - and only forgot a few steps along the way, nothing critical thankfully. The following is a step-by-step of the process, not in any way should you guys construe this as a tutorial on upholstery!

Since I had already cut and fit the foam, I used them as templates directly onto the fabric:


Mark the corners, remove the cushion and connect the dots. Remember to add the seam allowance!


Next do the same for the bottom. I used mesh fabric here so the cushions can breathe:


Several things I learned through the process - since all the sewing will be done inside-out, always mark the insides and use reference marks for where seams will align (ask me how I figured that out!). Set the bottom aside for now and start on the sides (boxing). Patterning this can get tricky depending on the cushion angles and shapes so I'm glad I started on the easy ones first:


Once the boxing was done I set that aside and worked on the zippers. Instead of making life difficult by placing the zippers along the boxing, my buddy suggested hitting the easy button and putting them on the bottom mesh:


Here's where remembering inside-out comes in handy (ask me how I know :yikes:)!

I'll continue this in the next post to keep the pictures under control -

Cheers,

Mark
 
May 8, 2013
629
Hunter 40 Dataw Island, SC
Cushions for dummies (continued):

After the zippers are in, the backs need snaps. Only the seat backs since the bottom cushions are held in place by the fiddles. They are much easier to add before the cushion is done! Ask me how I know :biggrin::


Time to start sewing, right? Not so fast! A little prep here will pay big dividends later. Lay all the pieces out as they will go together, check all your reference marks and cut some witness marks into the pieces:


This helps tremendously as you work around the whole seam so you can adjust here and there. Your corners will thank you!. The witness marks make a huge difference when the top (with boxing now sewn on) is mated to the bottom:


Transfer the witness marks to the bottom of the boxing, then (here's a great trick that made the final step super-duper easy) staple the bottom mesh to the boxing while aligning the witness marks. Then the bottom can be sewn in one continuous run. Well, most times ;). When done, open the zipper, turn everything inside-out (outside-out?) and check your seams. Fix as necessary. Or decide it's good enough :biggrin:.

Next, glue on the batting:


And wrap the cushion up in silk film. This is a lifesaver, it makes inserting the cushions a breeze! After wrapping, stick a vacuum against the foam and it sucks down very nicely to a manageable size. Insert foam/film/vacuum assembly into the cover, release the vacuum, and voila!:


Close the zipper (and don't get the silk film caught in the zipper - ask me how I know! :biggrin:) and it's a cushion!

Next, repeat 17 more times and cushions will be done!

Next up, more cushion action, finished photos, and lots of other stuff.

Cheers,

Mark

Ps: Don't forget to remove the staples BEFORE stuffing the foam, or eventually the staples will rust and stain the fabric. Ask me how I know :yikes:!
 
May 8, 2013
629
Hunter 40 Dataw Island, SC
Upholstery for dummies, Final Chapter:

I was getting into a groove - sort of - of doing 4 cushions every weekend when my buddy says he needs all his tables and machines soon for a big upcoming project so why don't I just finish up what's left as quickly as I can? No prob I say. Long story short, 4 days later all cushions done!


I ran out of batting when I got to the v-berth cushions so I pressed on without, thus they covers look a little slack. I have more batting on order and it's not hard to remove the foam, add the batting and reassemble:


The notches in the forward cushion against the sides were a bear to figure out! And the corners gave me fits on these pieces:


But in the end all will be covered by sheets and blankets so only my pride is hurt :). I left out photos of a few cushion locations, didn't want to bore you guys!

Next up, the big news I've been hinting at.

Cheers,

Mark