
Thanks for the pics. It is good to know what is under there.I got the pics of the counter area with the countertop off for ya. Like I said, there isn’t much going on here, mainly just a fiberglass counter.
Luna, The Story of a Forgotten Catalina 30.
- Thread starter mikeracca
- Start date
Not a big update, but I did 3D print another part for the boat last night. These are going to the former AC wall outlets the previous owner installed in the forward V- berth and on the chart table. I’m thinking of modifying the one at the chart table to also have a 12v power port to charge my hand held radios instead of modifying their charging cables.
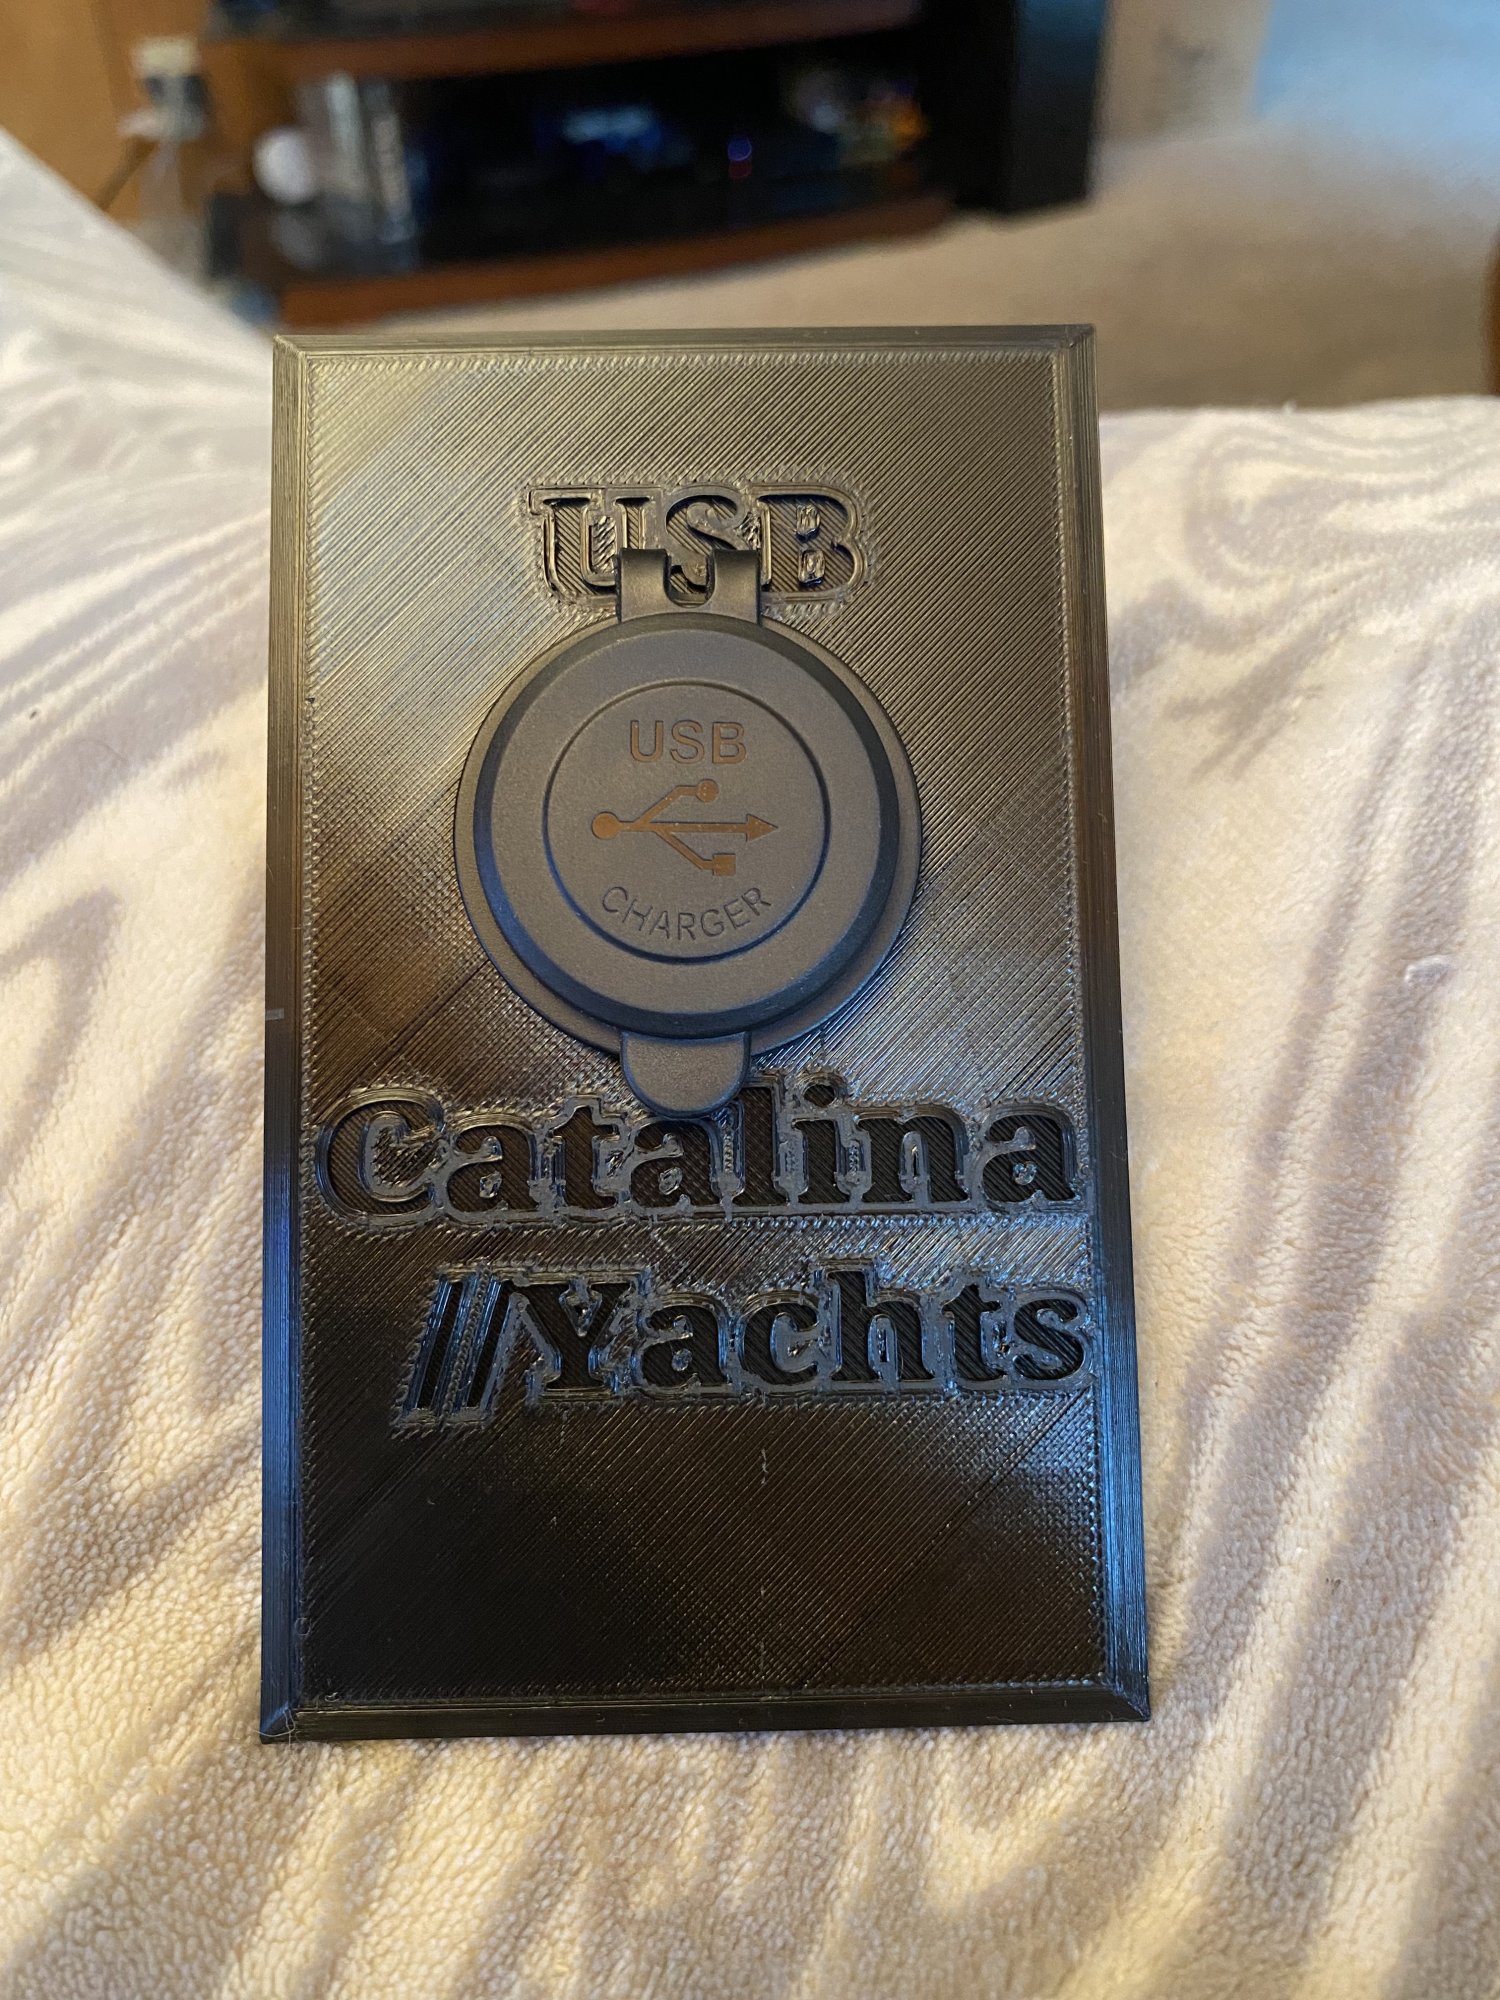
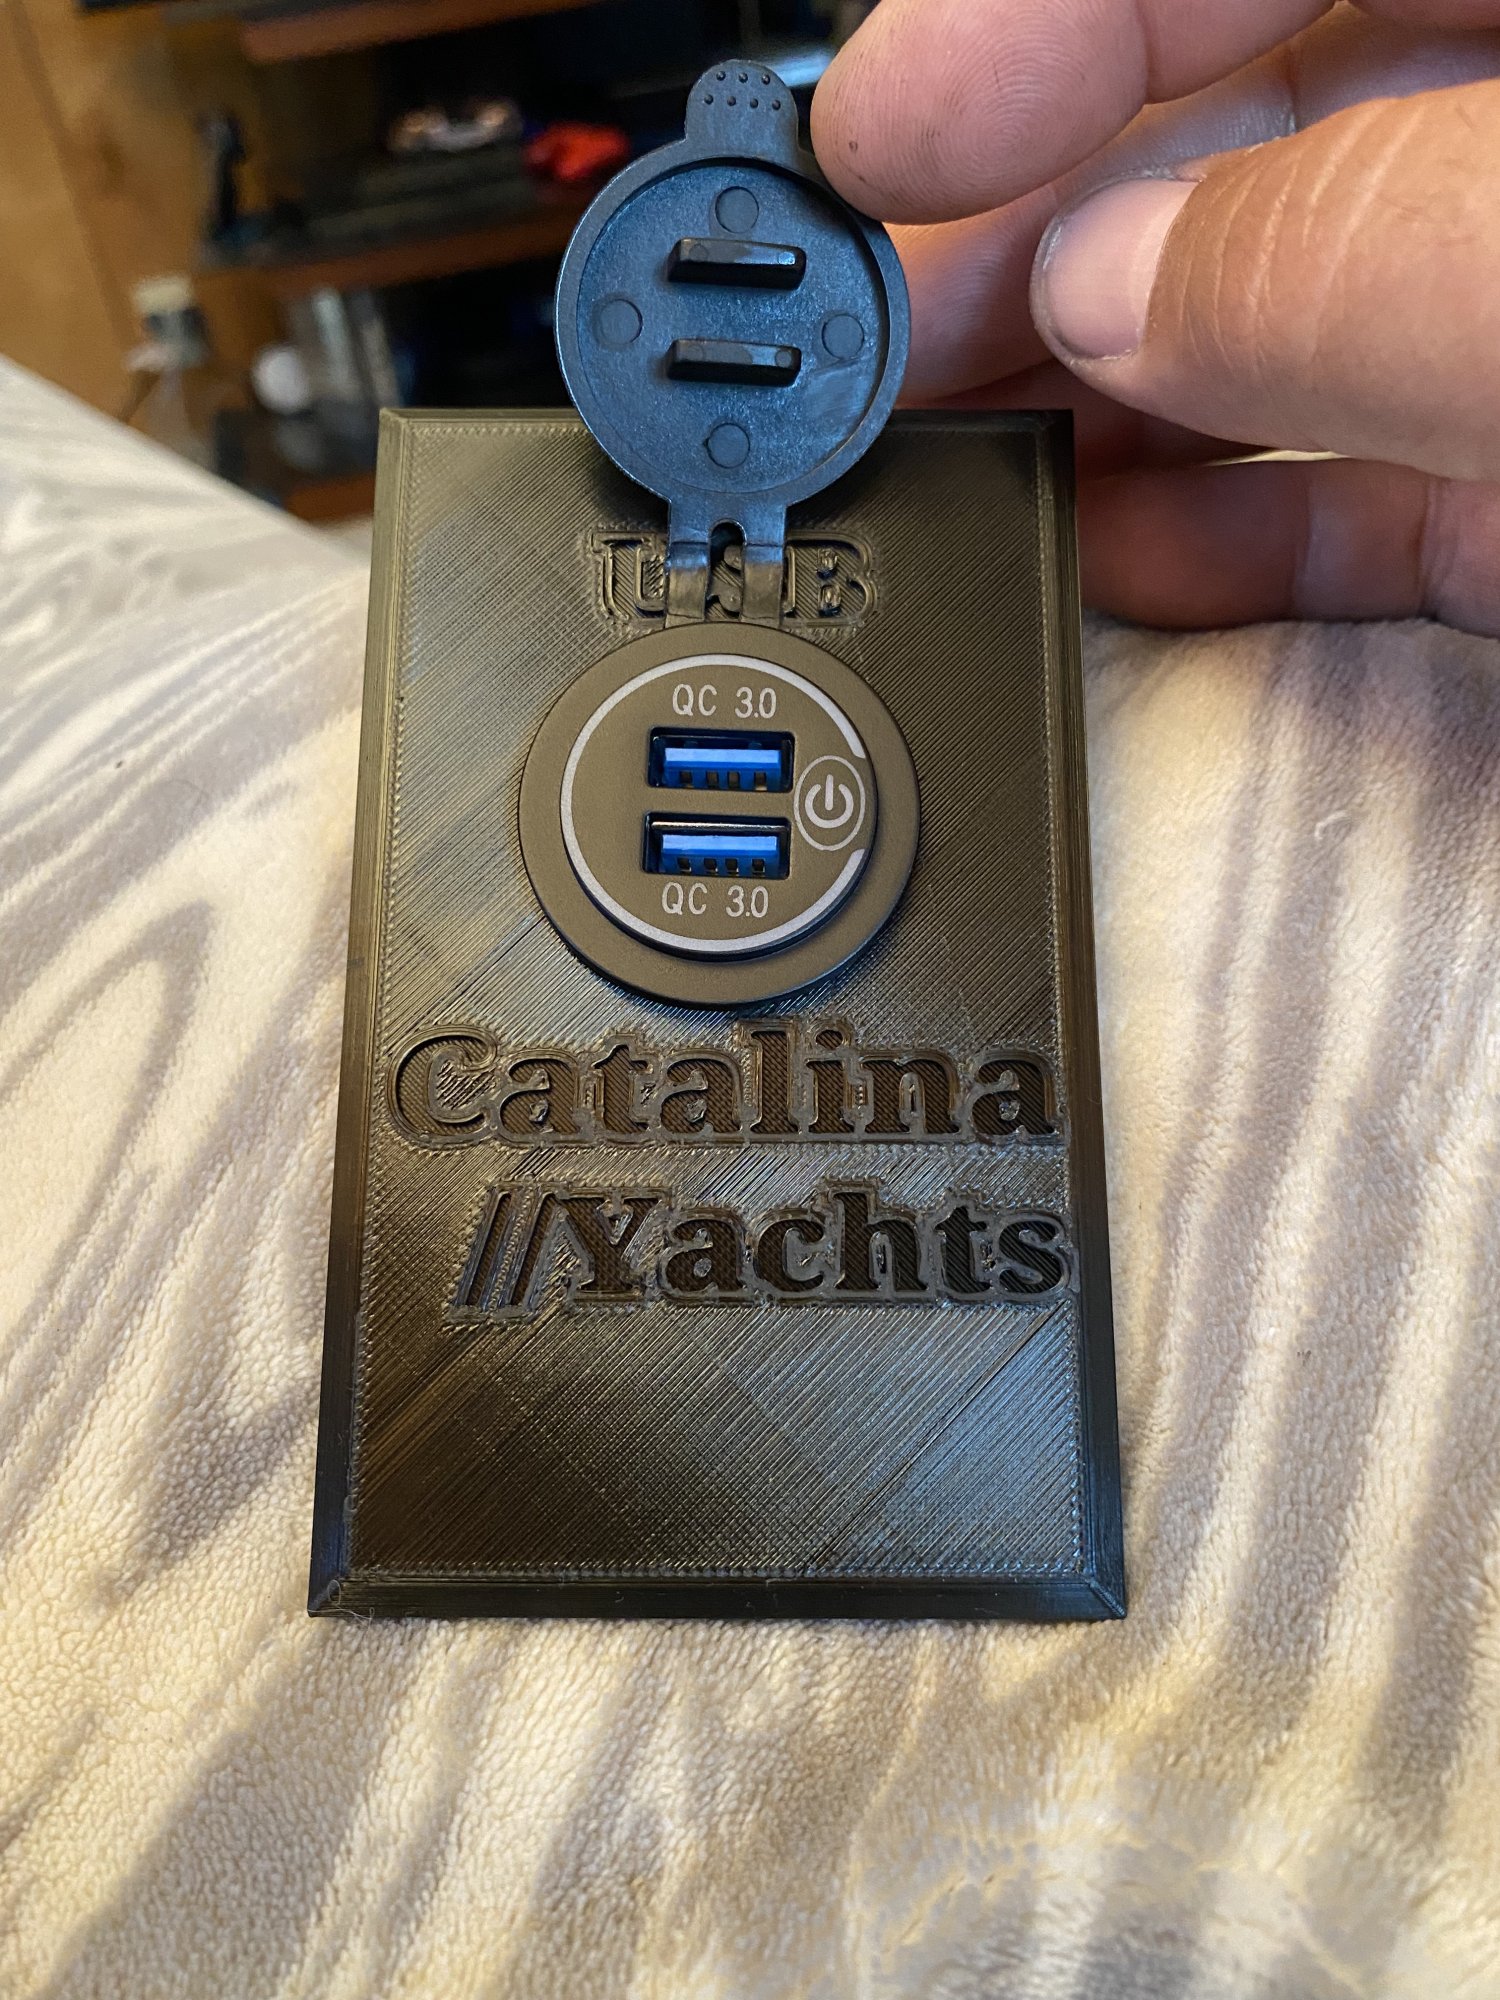
Yes I need to drill the holes for the screws, I figured it would be easier to simply drill them instead of trying to figure out exactly where to put them in the print.
Yes I need to drill the holes for the screws, I figured it would be easier to simply drill them instead of trying to figure out exactly where to put them in the print.

Ironically, I bought it for model railroad projects, but I have yet to build one item for my railroad with it.Mike, You are making excellent use of that 3D printer.
jssailem
SBO Weather and Forecasting Forum Jim & John
- Oct 22, 2014
- 24,589
Boats have a way of encouraging you to spend your time and money in the pursuit of their pleasure.
My son and I went to visit Luna today. I ran the 2 hardest of the AC cables today, the main input and the battery charger. The last 2 are the cables to the outlets on the port and starboard. I also got the main sail back on the mast. It didn’t look very good, but then again I don’t think I got it stretched out proper. I couldn’t get the sail pulled across the boom very well, and I couldn’t remember how the reefing lines were routed so if anyone can post a pic of theirs I would appreciate it. I’m not sure running the halyard back to the cockpit was the best idea either as the only routable path takes me through a block of teak which gives a bit too much friction. I left plenty of rope to change the routing however I need. I think it will be fine when I get my new traveler and some proper jam cleats but this is what I have for right now. I also need to change some of the routing so the boom vang goes to the port side not the starboard. Right now I have 4 lines starboard and 2 port. 3 x 3 would be better.
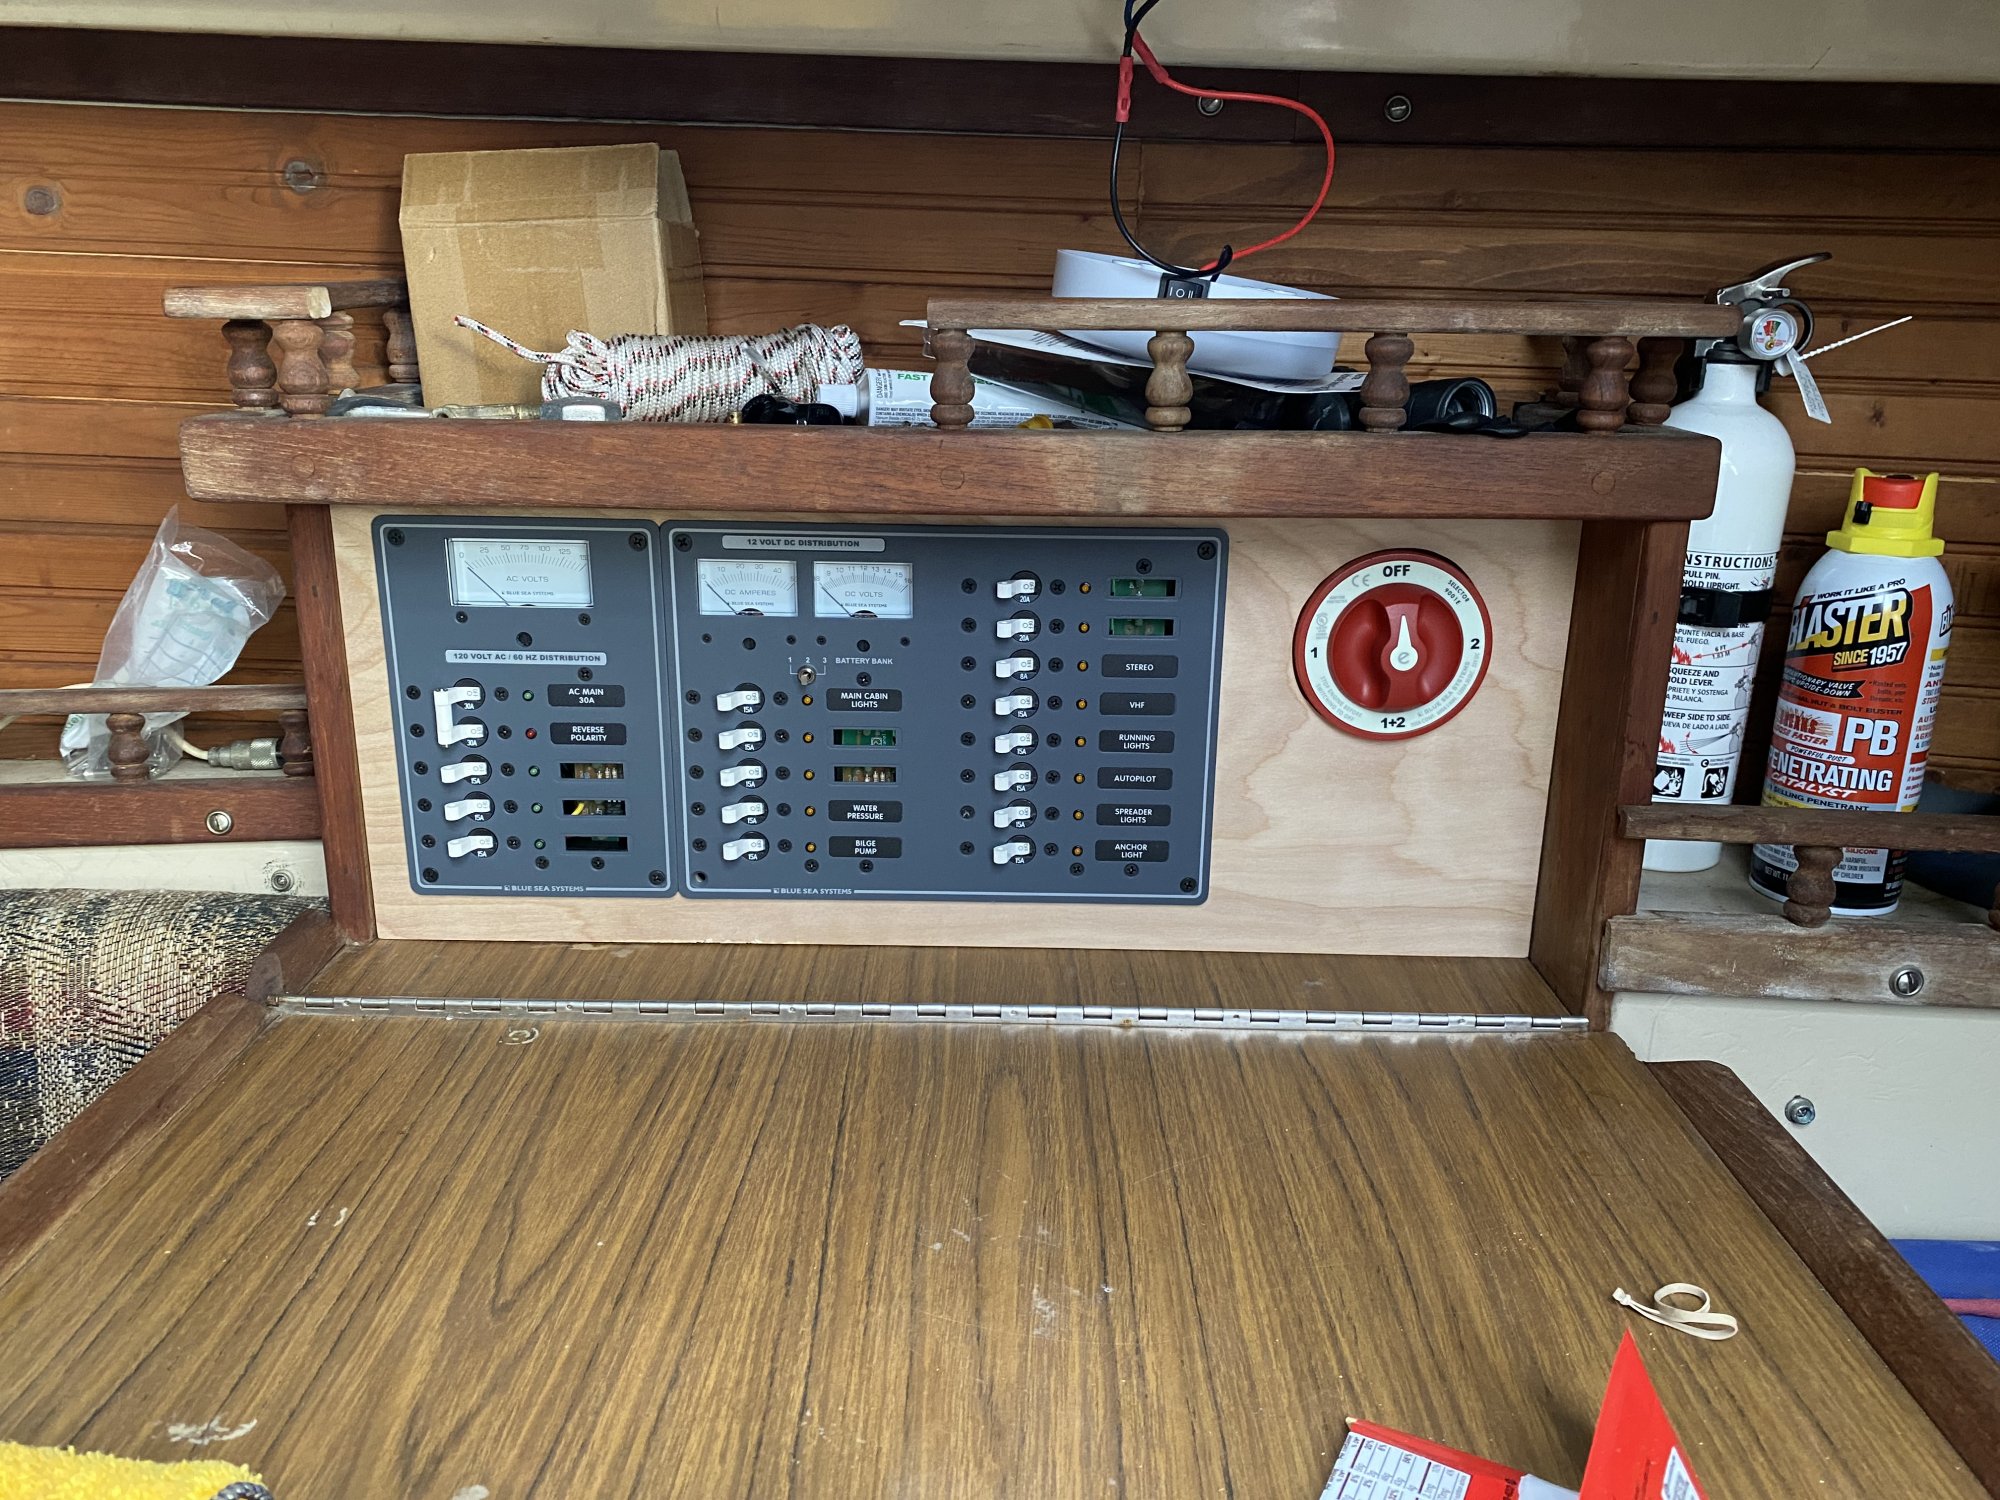
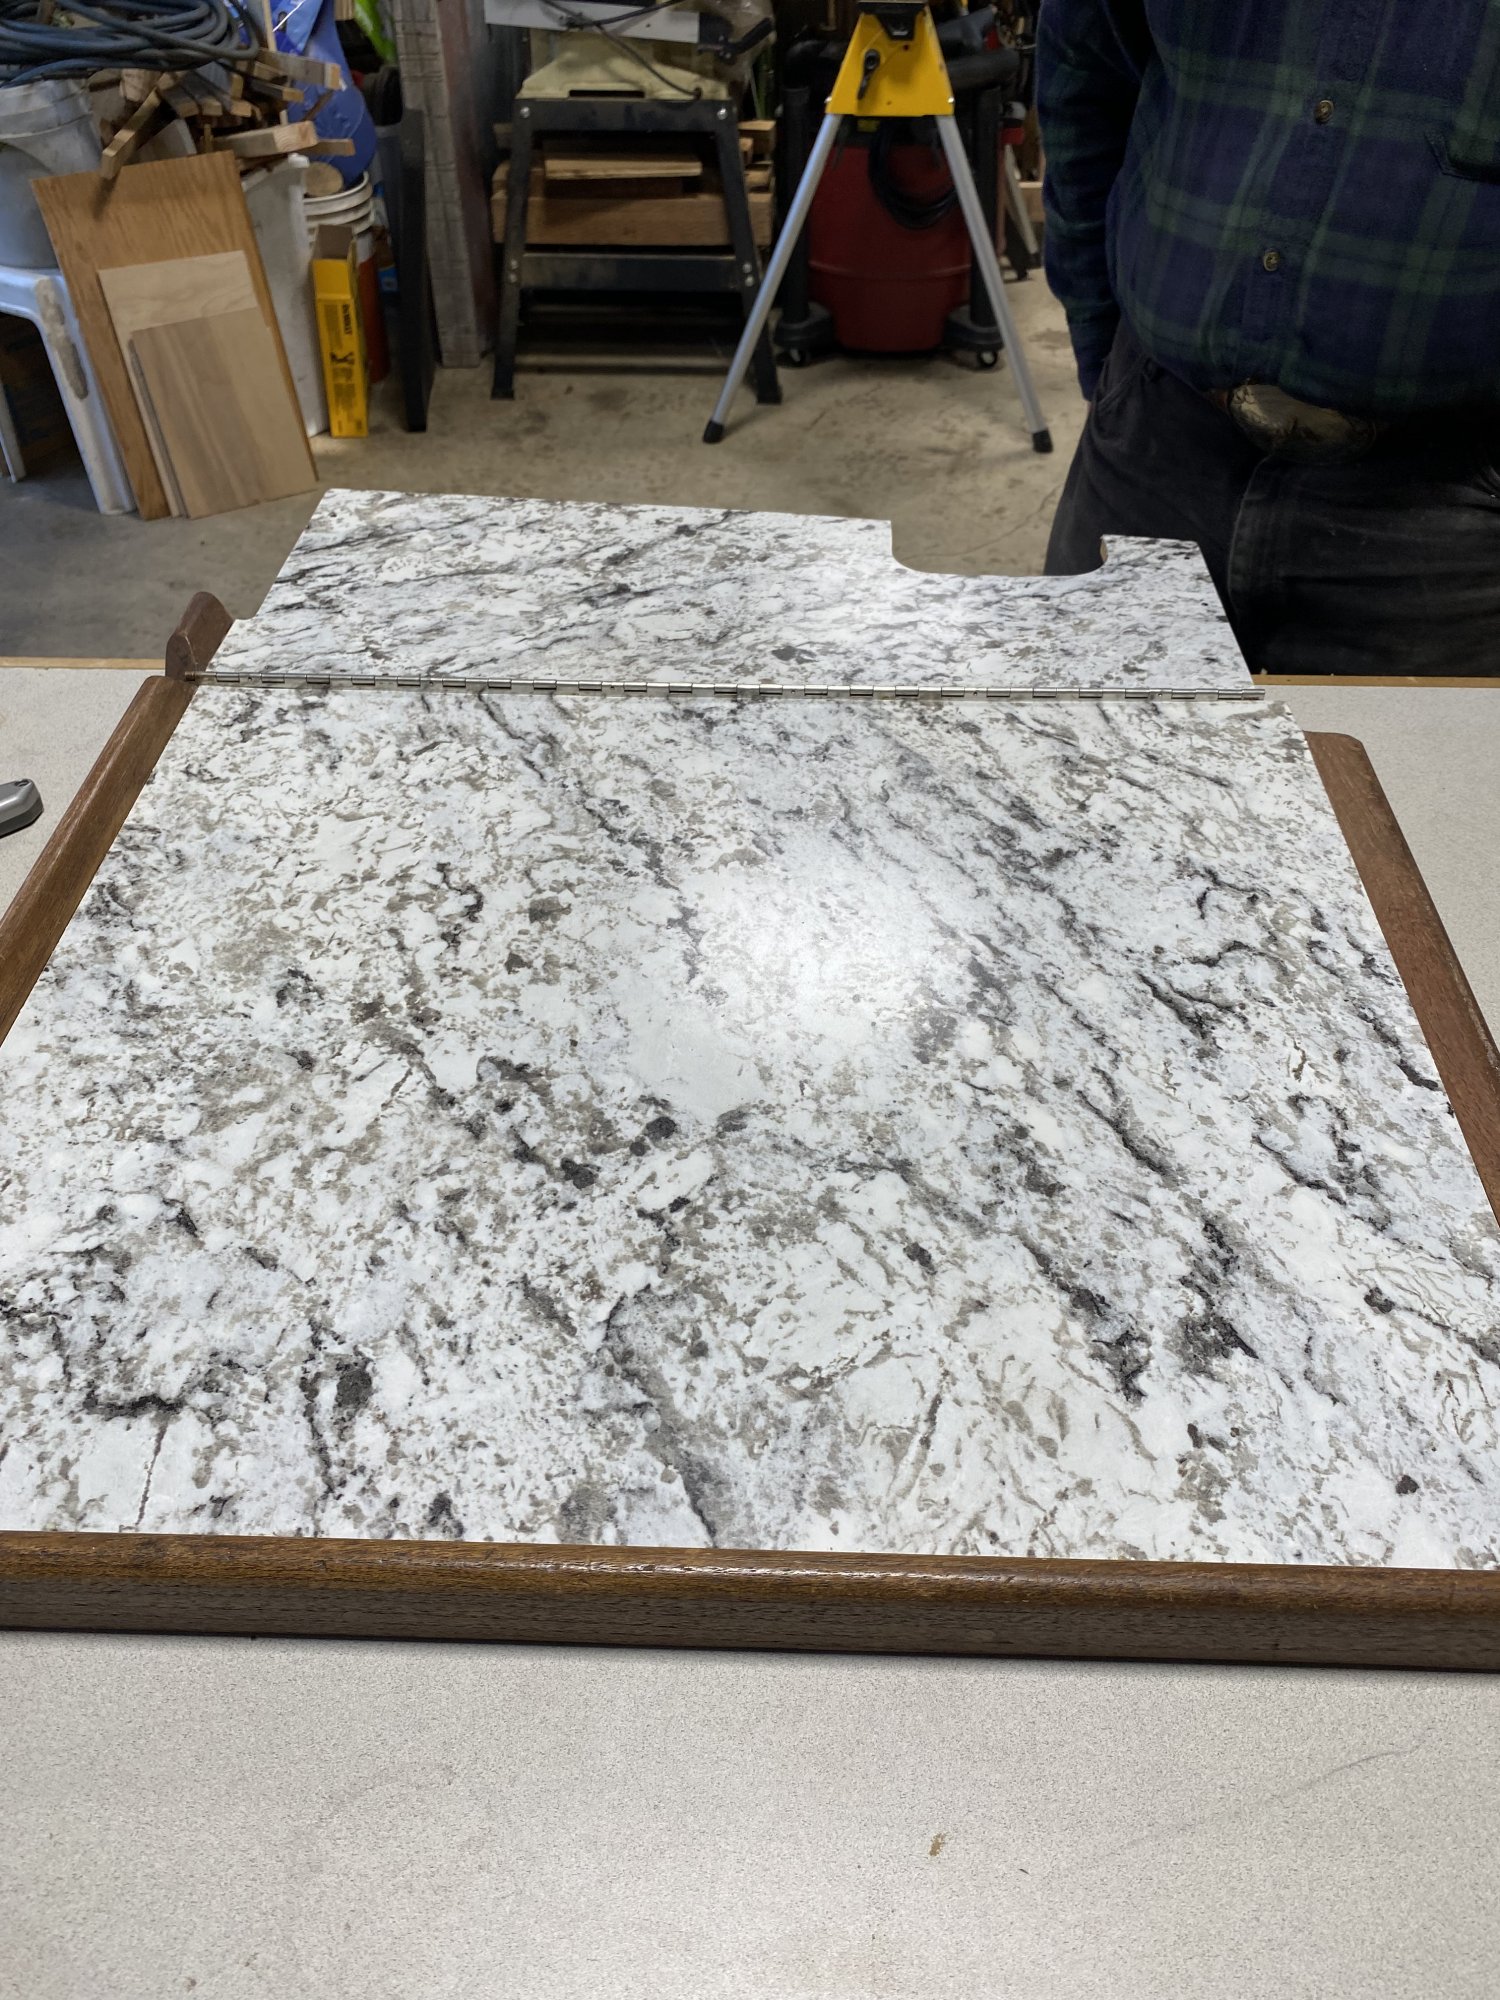
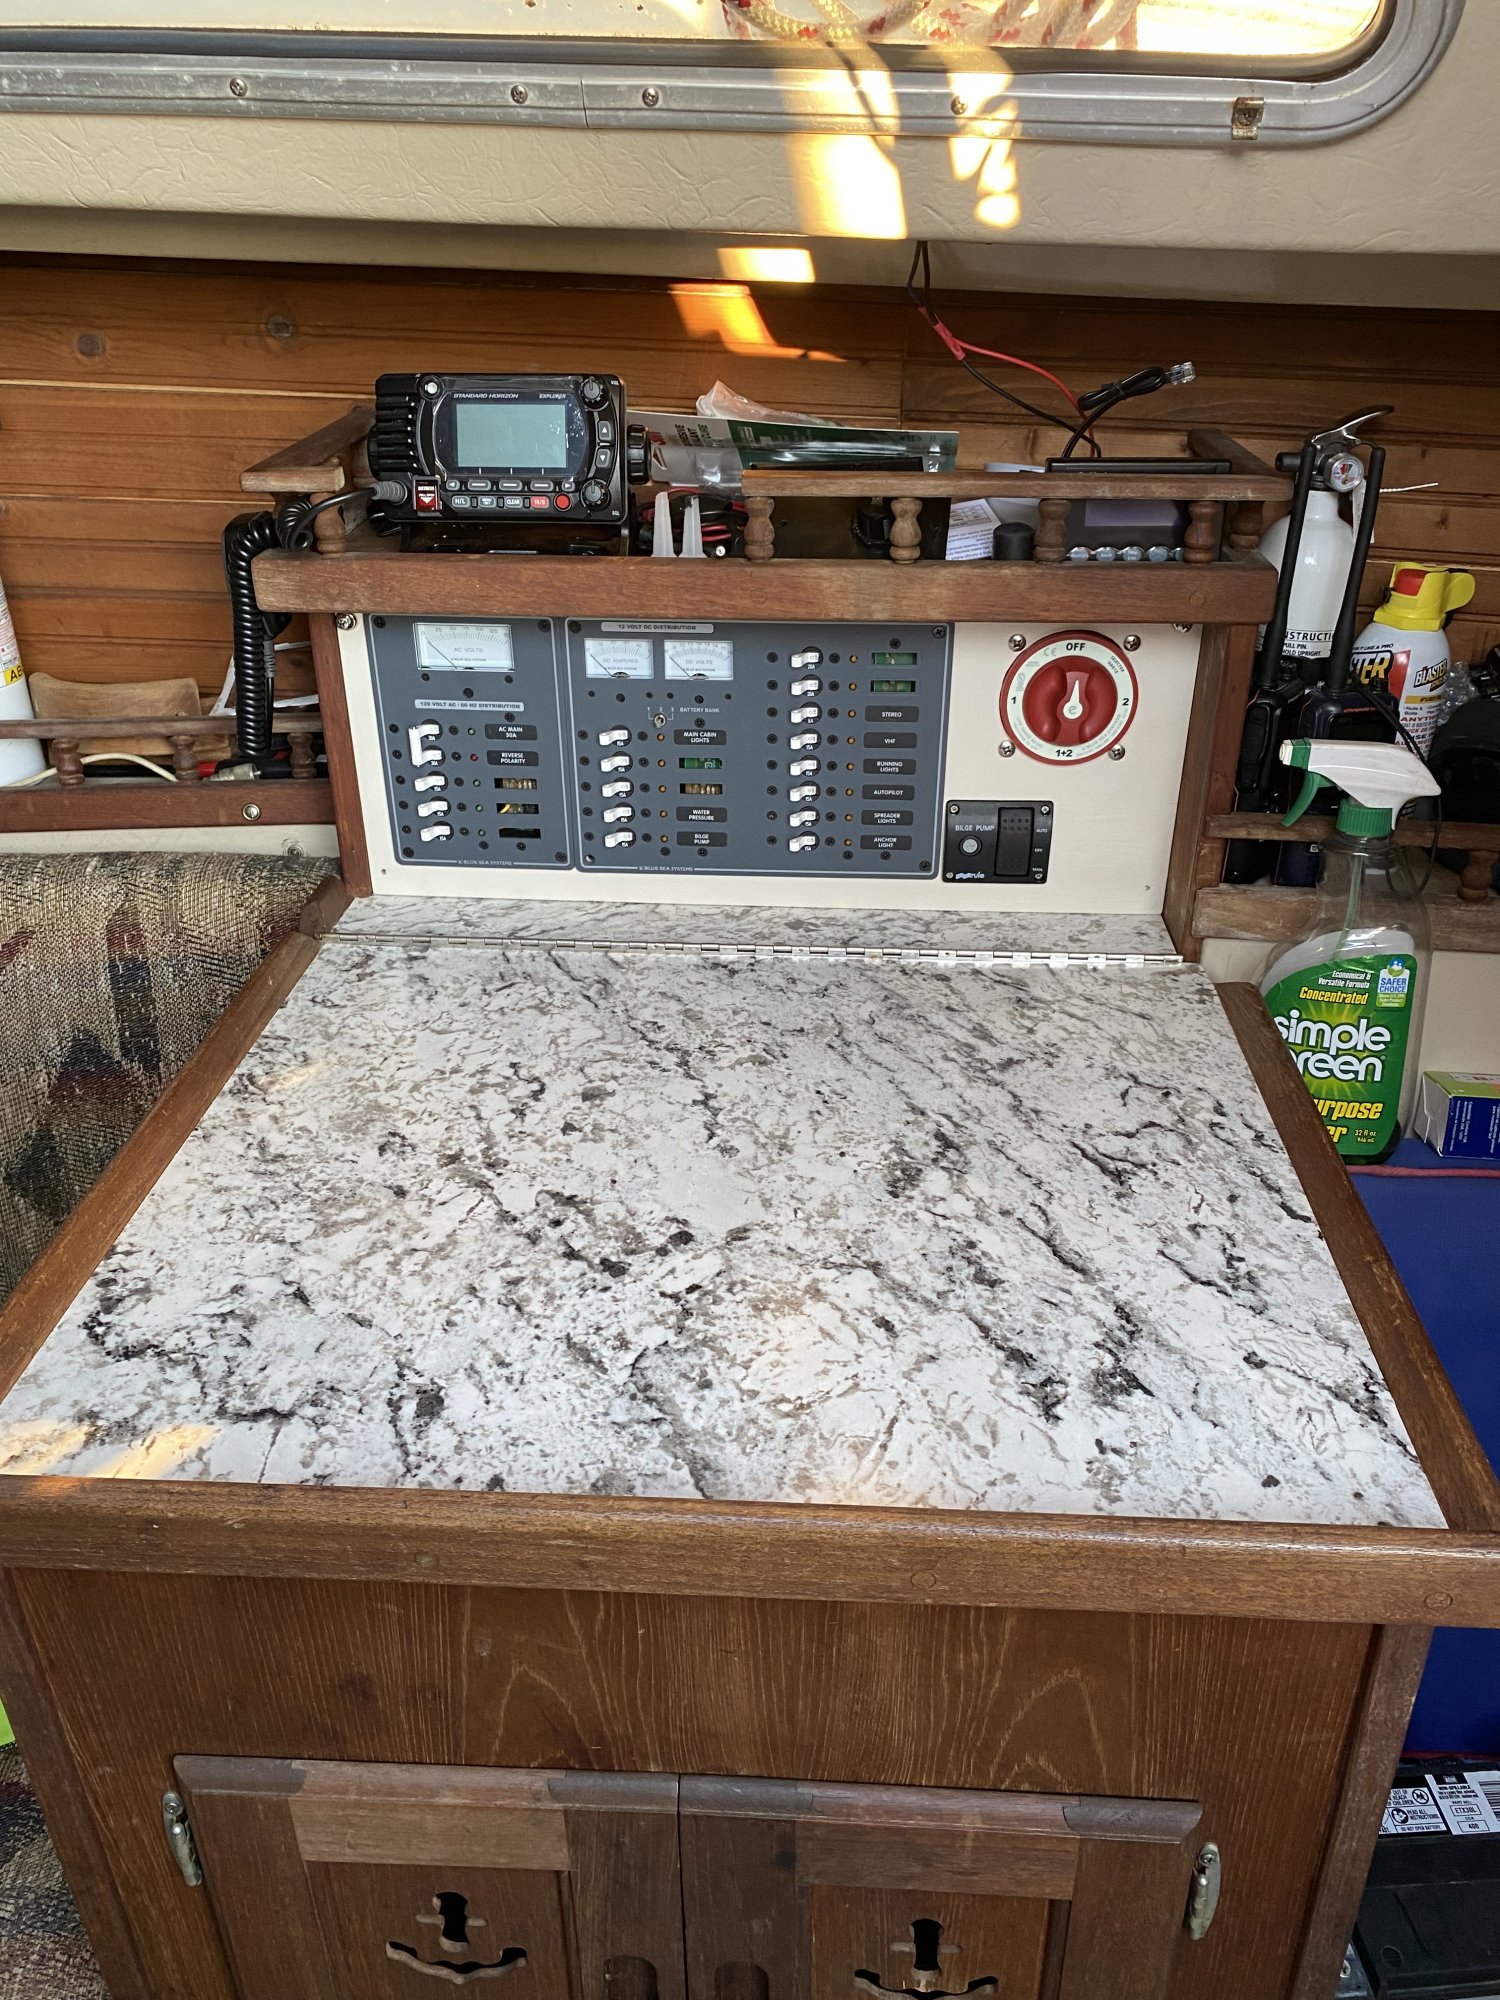
Spending the night on Luna tonight, and some good news, some bad and some pretty. So the good news is more wiring has been completed, I’m building the last couple cables and wiring up all the DC stuffs. Bad news is my new bow running lights are not working  I’m hoping it’s something with the LEDs being backwards or something, I will check in the morning. Thankfully I left enough wire to make repairs such as this. And the pretty… I got my chart table laminated today and I put it back where it belongs!
so it went from this:
To this!
I’m hoping it’s something with the LEDs being backwards or something, I will check in the morning. Thankfully I left enough wire to make repairs such as this. And the pretty… I got my chart table laminated today and I put it back where it belongs!so it went from this:
To this!
Today was a busy day. I got all the DC wires ran from the panel to the fuse blocks and tested. They all work as they should. I need to make a map still but that’s easy enough. I wired in a couple of the circuits to their end points and again all is good. Still no bow lights, but then again I didn’t go up there to check them out either. I need to make a cable from the engine battery to the 1-2-B switch and the DC to the panel is done!
On the AC side of the house I got the main, charger and starboard outlets wired I need to run the port outlet cable still. Once that is done the AC side of the house will be done… well once I make the final connections at the devices that is!
It’s been a long road, and I’m almost there.
In other news around the marina, there is a really nice looking 22’ sailboat that had a wooden mast. It broke just above the upper shrouds last year, and the other day it finally came all the way off. Well about a foot of the mast fell anyway. A couple of us helped the owner lower the mast so that he can get himself a new one. It went pretty well, the mast fell the last 5 or so feet on its own, the cam cleat we were using as a brake was no longer strong enough to hold it at that point. All was well, no one hurt, no damage to the boat or the marina. We stripped the hardware off the mast and threw it in the water! On Monday the marina will use the forklift to lift it out of the water and load it on his trailer so he can take it home for firewood! The new mast should be here next week.
And for your viewing pleasure, the back of the panel all wired up… at least to this point.
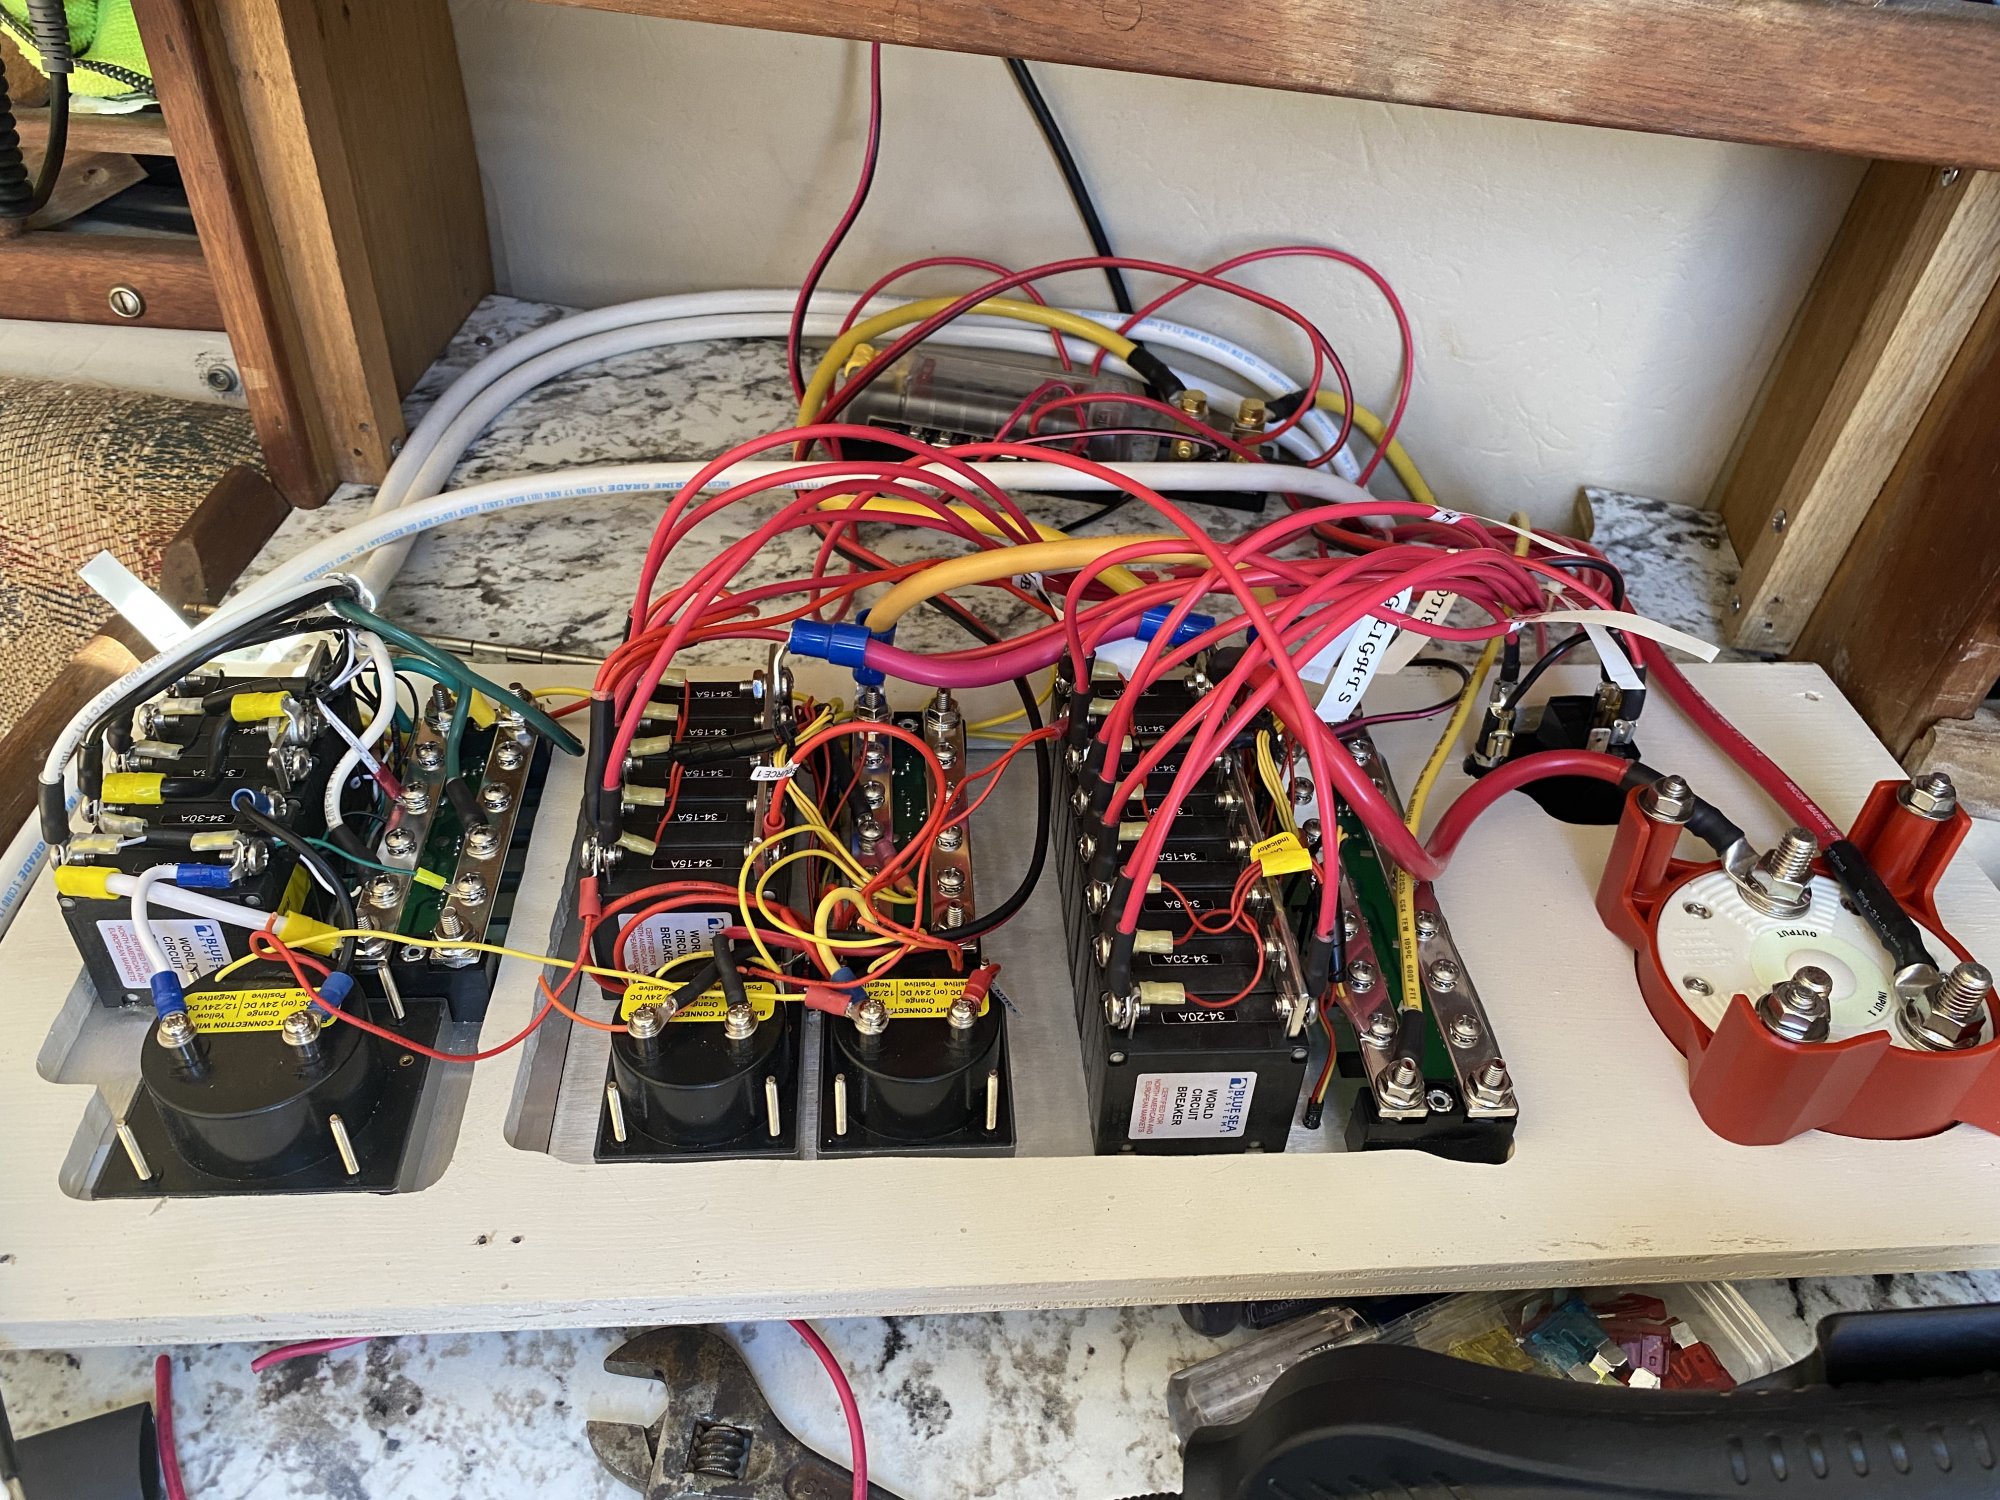
Oh, and I did catch the mistake on the main input being on the wrong side of the breaker. It’s fixed now… how many of you caught it before reading this?
On the AC side of the house I got the main, charger and starboard outlets wired I need to run the port outlet cable still. Once that is done the AC side of the house will be done… well once I make the final connections at the devices that is!
It’s been a long road, and I’m almost there.
In other news around the marina, there is a really nice looking 22’ sailboat that had a wooden mast. It broke just above the upper shrouds last year, and the other day it finally came all the way off. Well about a foot of the mast fell anyway. A couple of us helped the owner lower the mast so that he can get himself a new one. It went pretty well, the mast fell the last 5 or so feet on its own, the cam cleat we were using as a brake was no longer strong enough to hold it at that point. All was well, no one hurt, no damage to the boat or the marina. We stripped the hardware off the mast and threw it in the water! On Monday the marina will use the forklift to lift it out of the water and load it on his trailer so he can take it home for firewood! The new mast should be here next week.
And for your viewing pleasure, the back of the panel all wired up… at least to this point.
Oh, and I did catch the mistake on the main input being on the wrong side of the breaker. It’s fixed now… how many of you caught it before reading this?
Today was a milestone in the restoration of this boat. Luna now has POWER! The AC circuits are 100% complete and functional. Port side plug is a gfi due to the proximity to the galley and the starboard side has a USB A and C port built in for charging devices. The battery charger picked my batteries as SLAs but I have open lead acid so I had to make a quick change to it’s settings.
On the DC side of things I now have all lights except the bow nav lights. I checked the voltage there and they have 1.5v so something isn’t right there. I will just run a new wire and abandon in place the old one. If I were to guess it would be where the stern and bow wires are joined that is the problem, and I’m going to guess the problem is corrosion. I just done know where that is located to research it more. Anyway, the auto pilot powers up and when I told it to deviate +10 and -10 it had no problem moving the helm. My VHF works great and my USB charging ports are also doing good. I still have to wire up the water pump, and the stereo but neither of those are a priority for sailing to Swantown to get hauled out next weekend.
Here is the back of my electrical panel right before putting it in place for the last time!
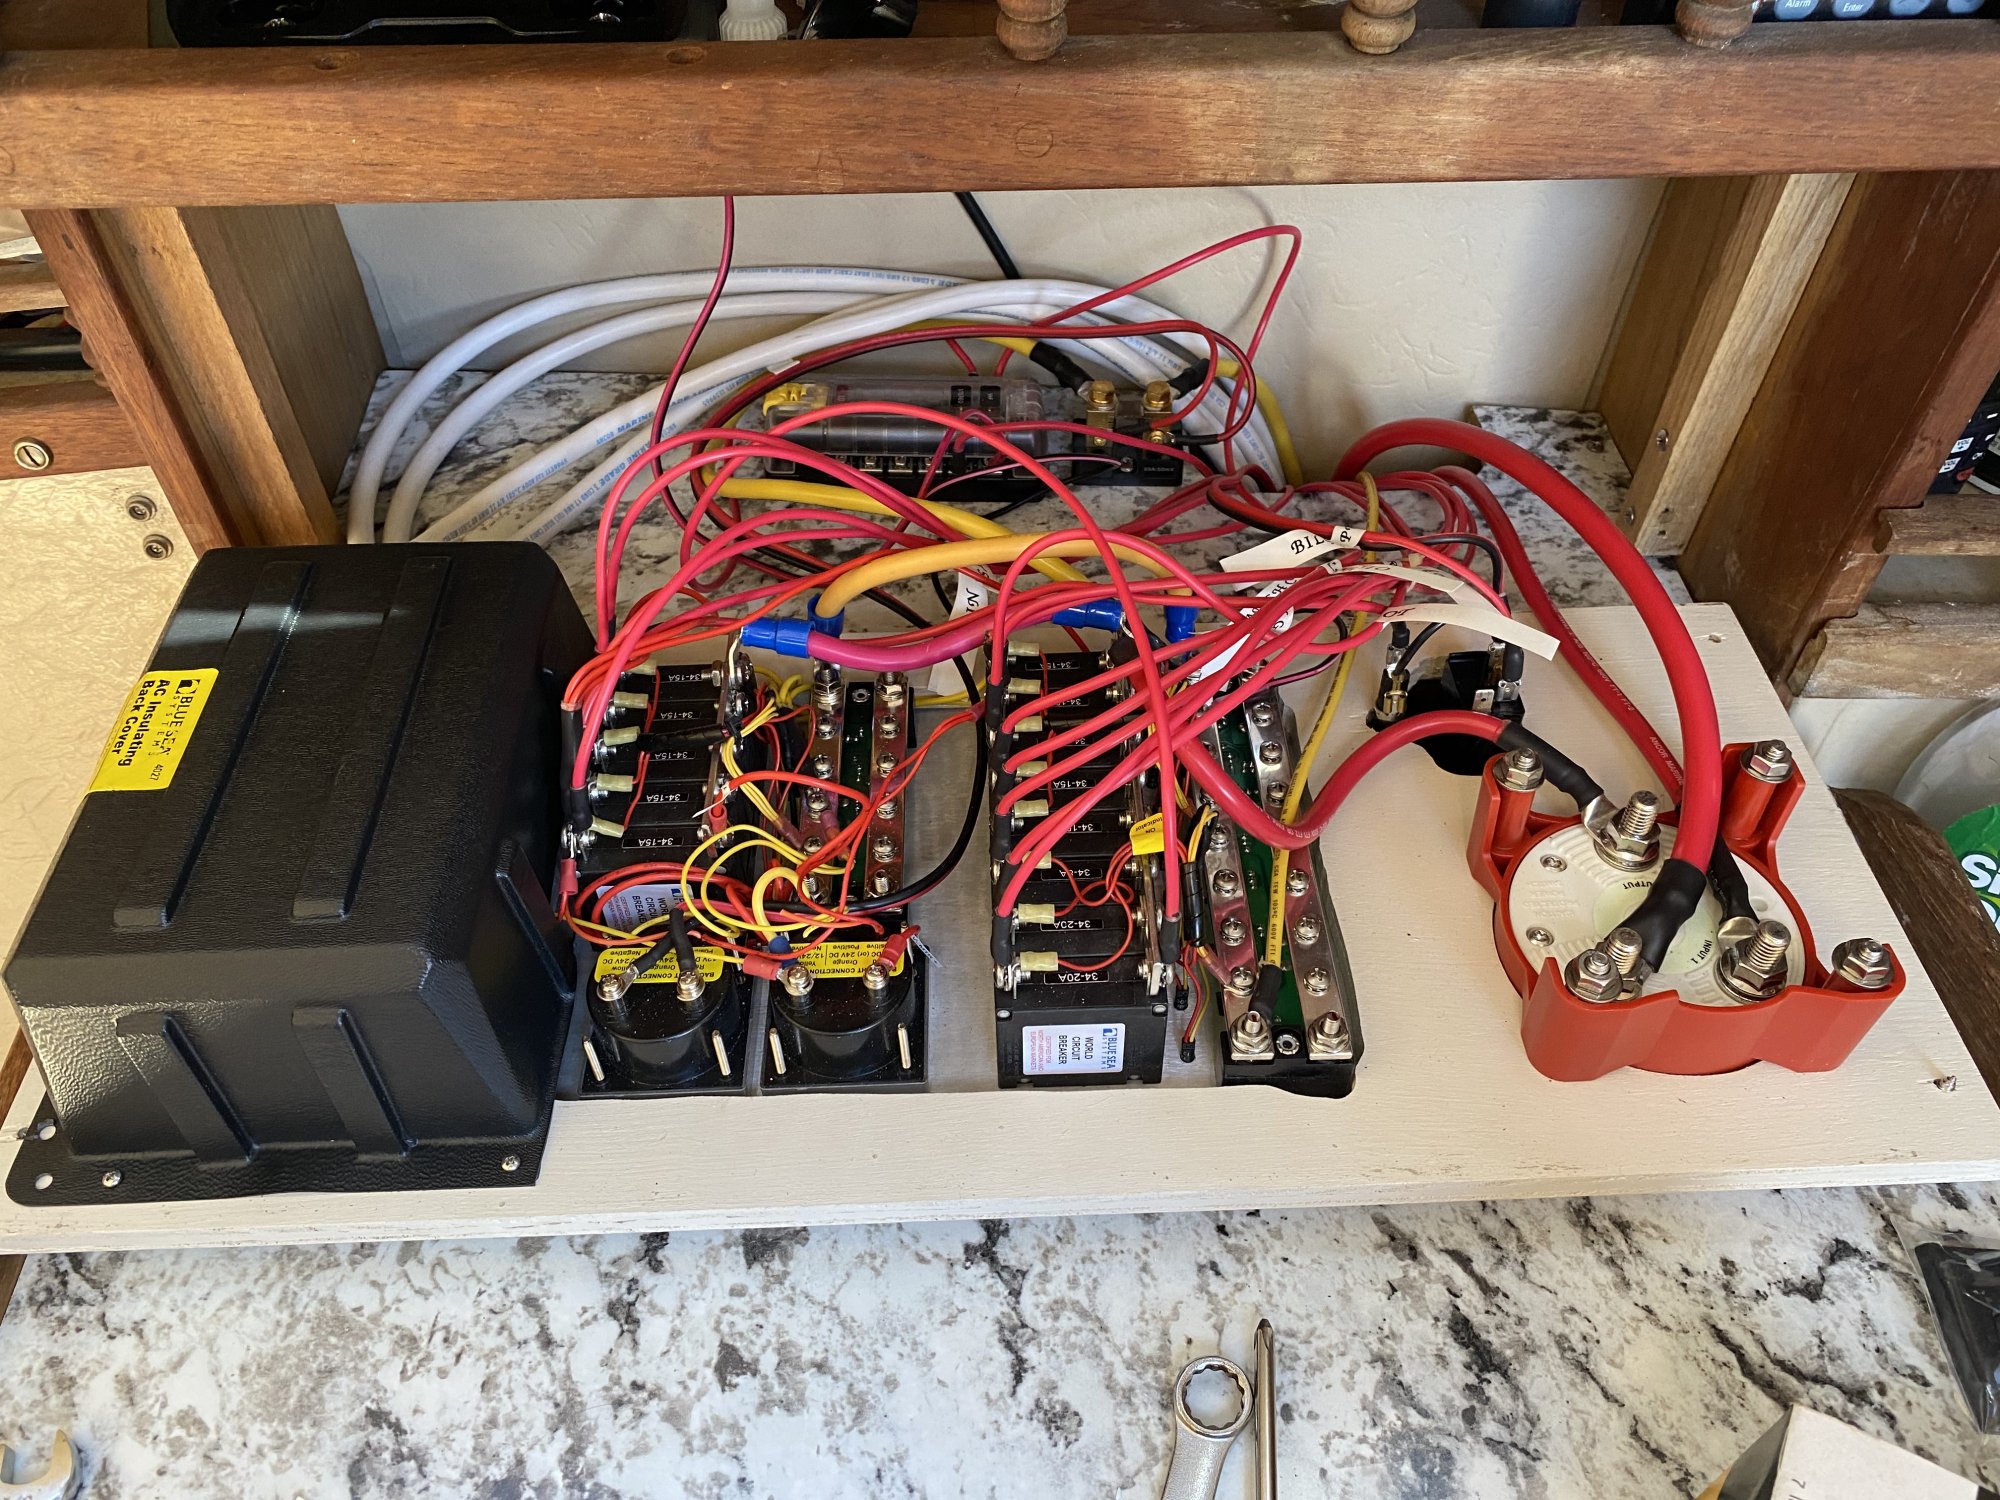
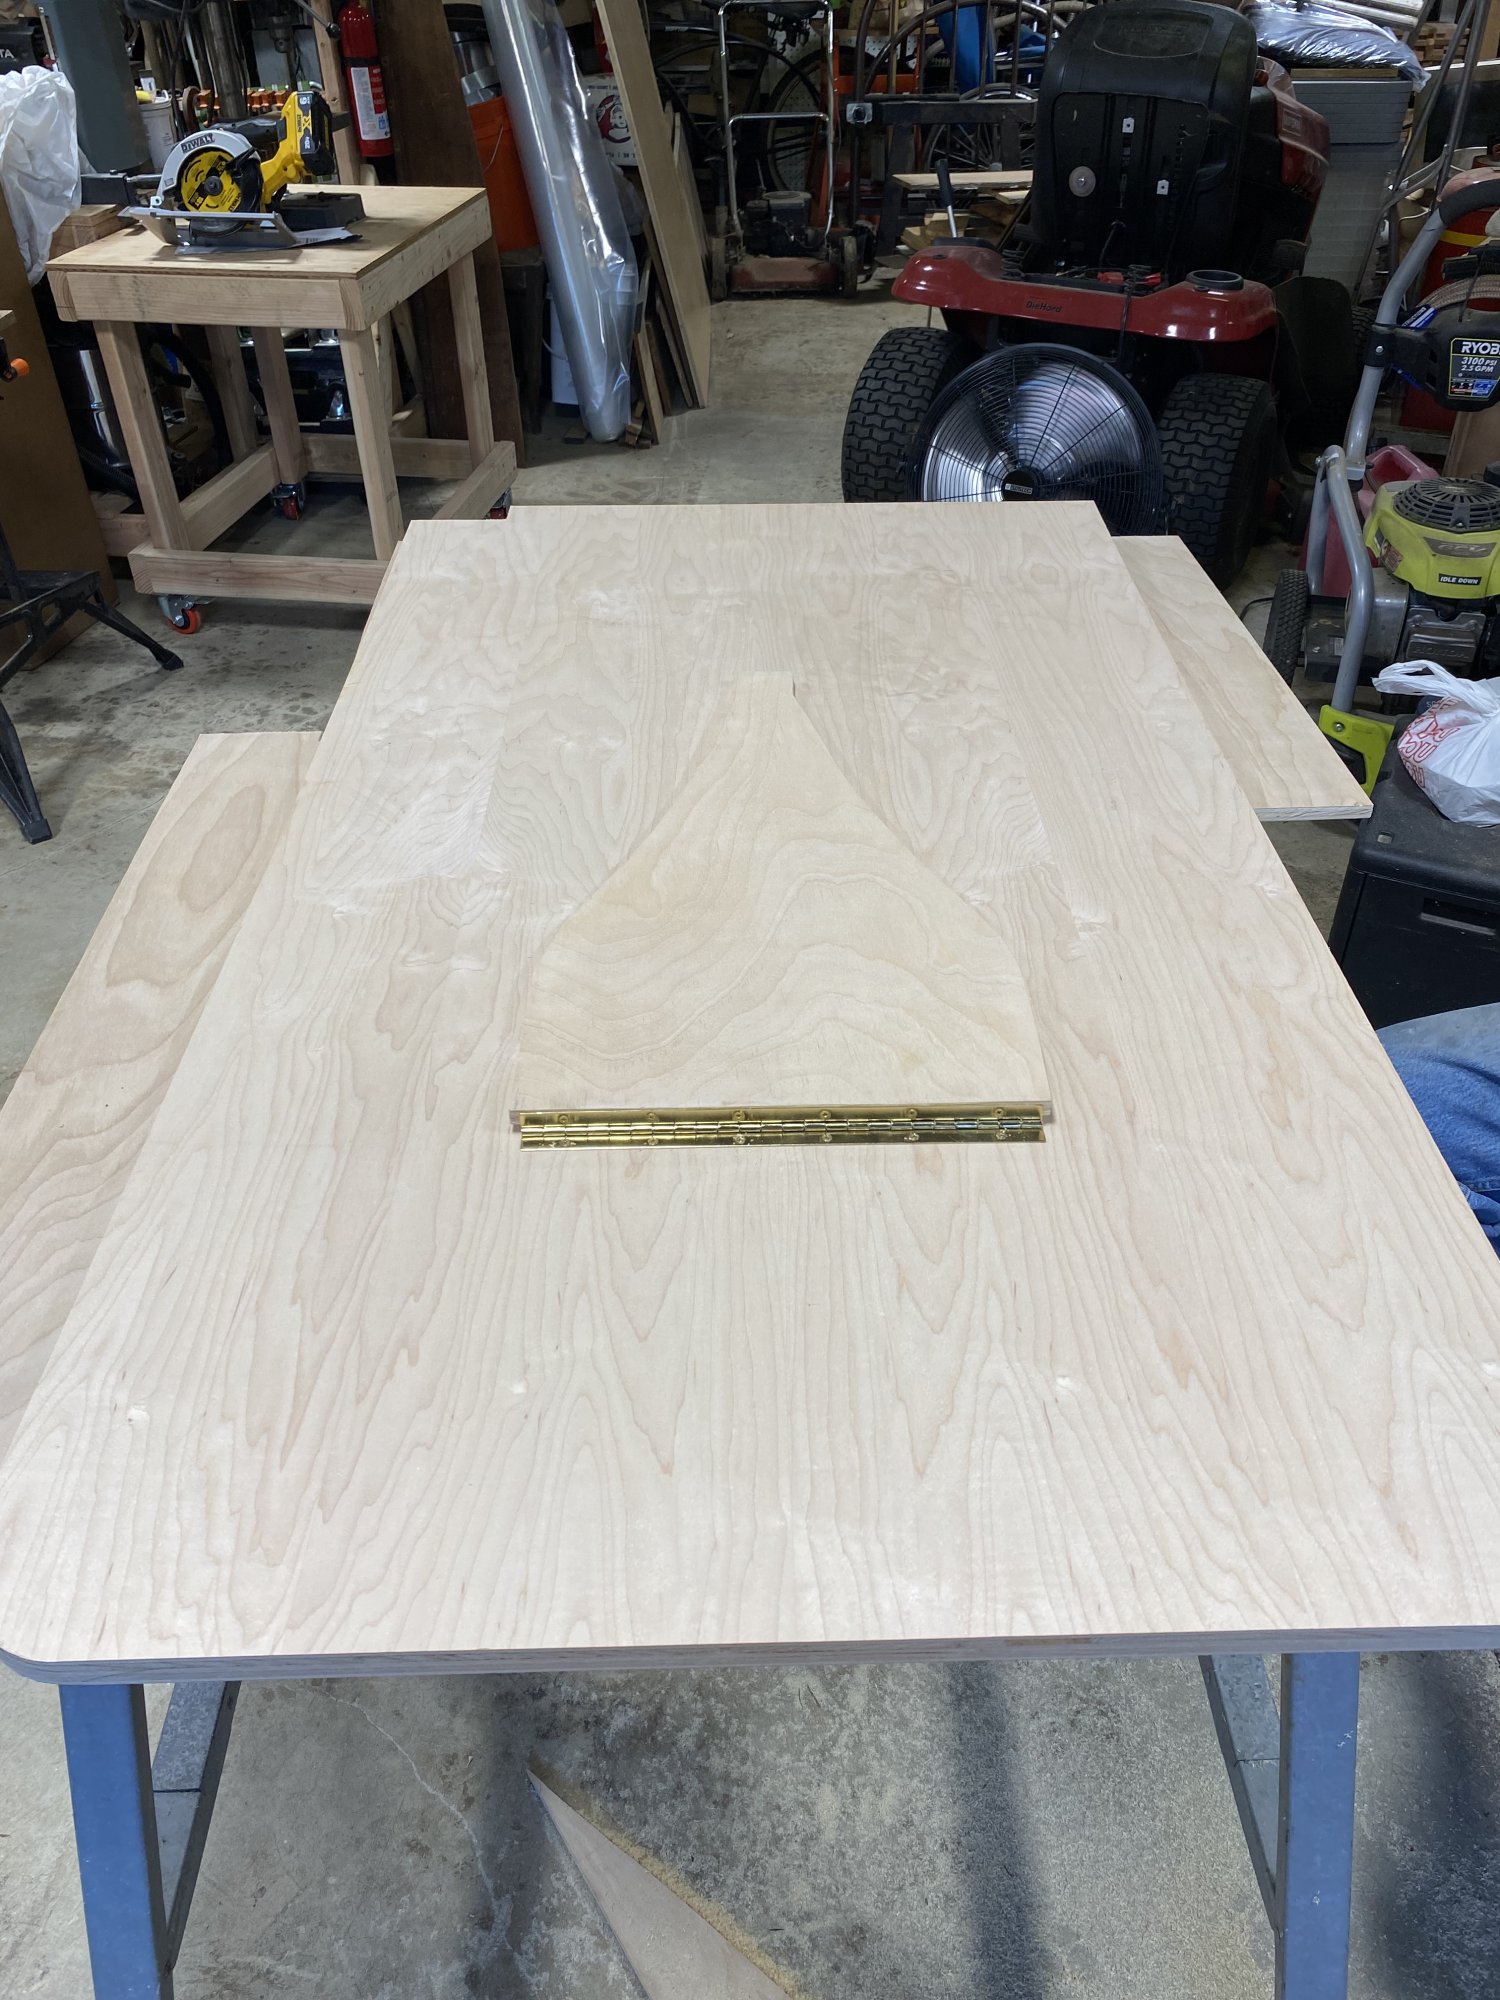
Went to check Luna out today. Everything went well with the battery charger, my batts were topped up just like they should be. I decided to pump the poo bladder in prep for the trip to Swantown, and that means moving the boat. So I moved out of the marina and wondered around Commencement Bay for 5 or 6 miles so I could test out the engine at various speeds as well as the auto pilot. All went quite well, I’m very happy. Tomorrow I’m going to build the dinette table out of a piece of maple ply with oak coaming.
Swantown here I come! Oh, and I acquired my paint and other materials needed to finish the underside of the hull Over the weekend.
Swantown here I come! Oh, and I acquired my paint and other materials needed to finish the underside of the hull Over the weekend.
Last edited:
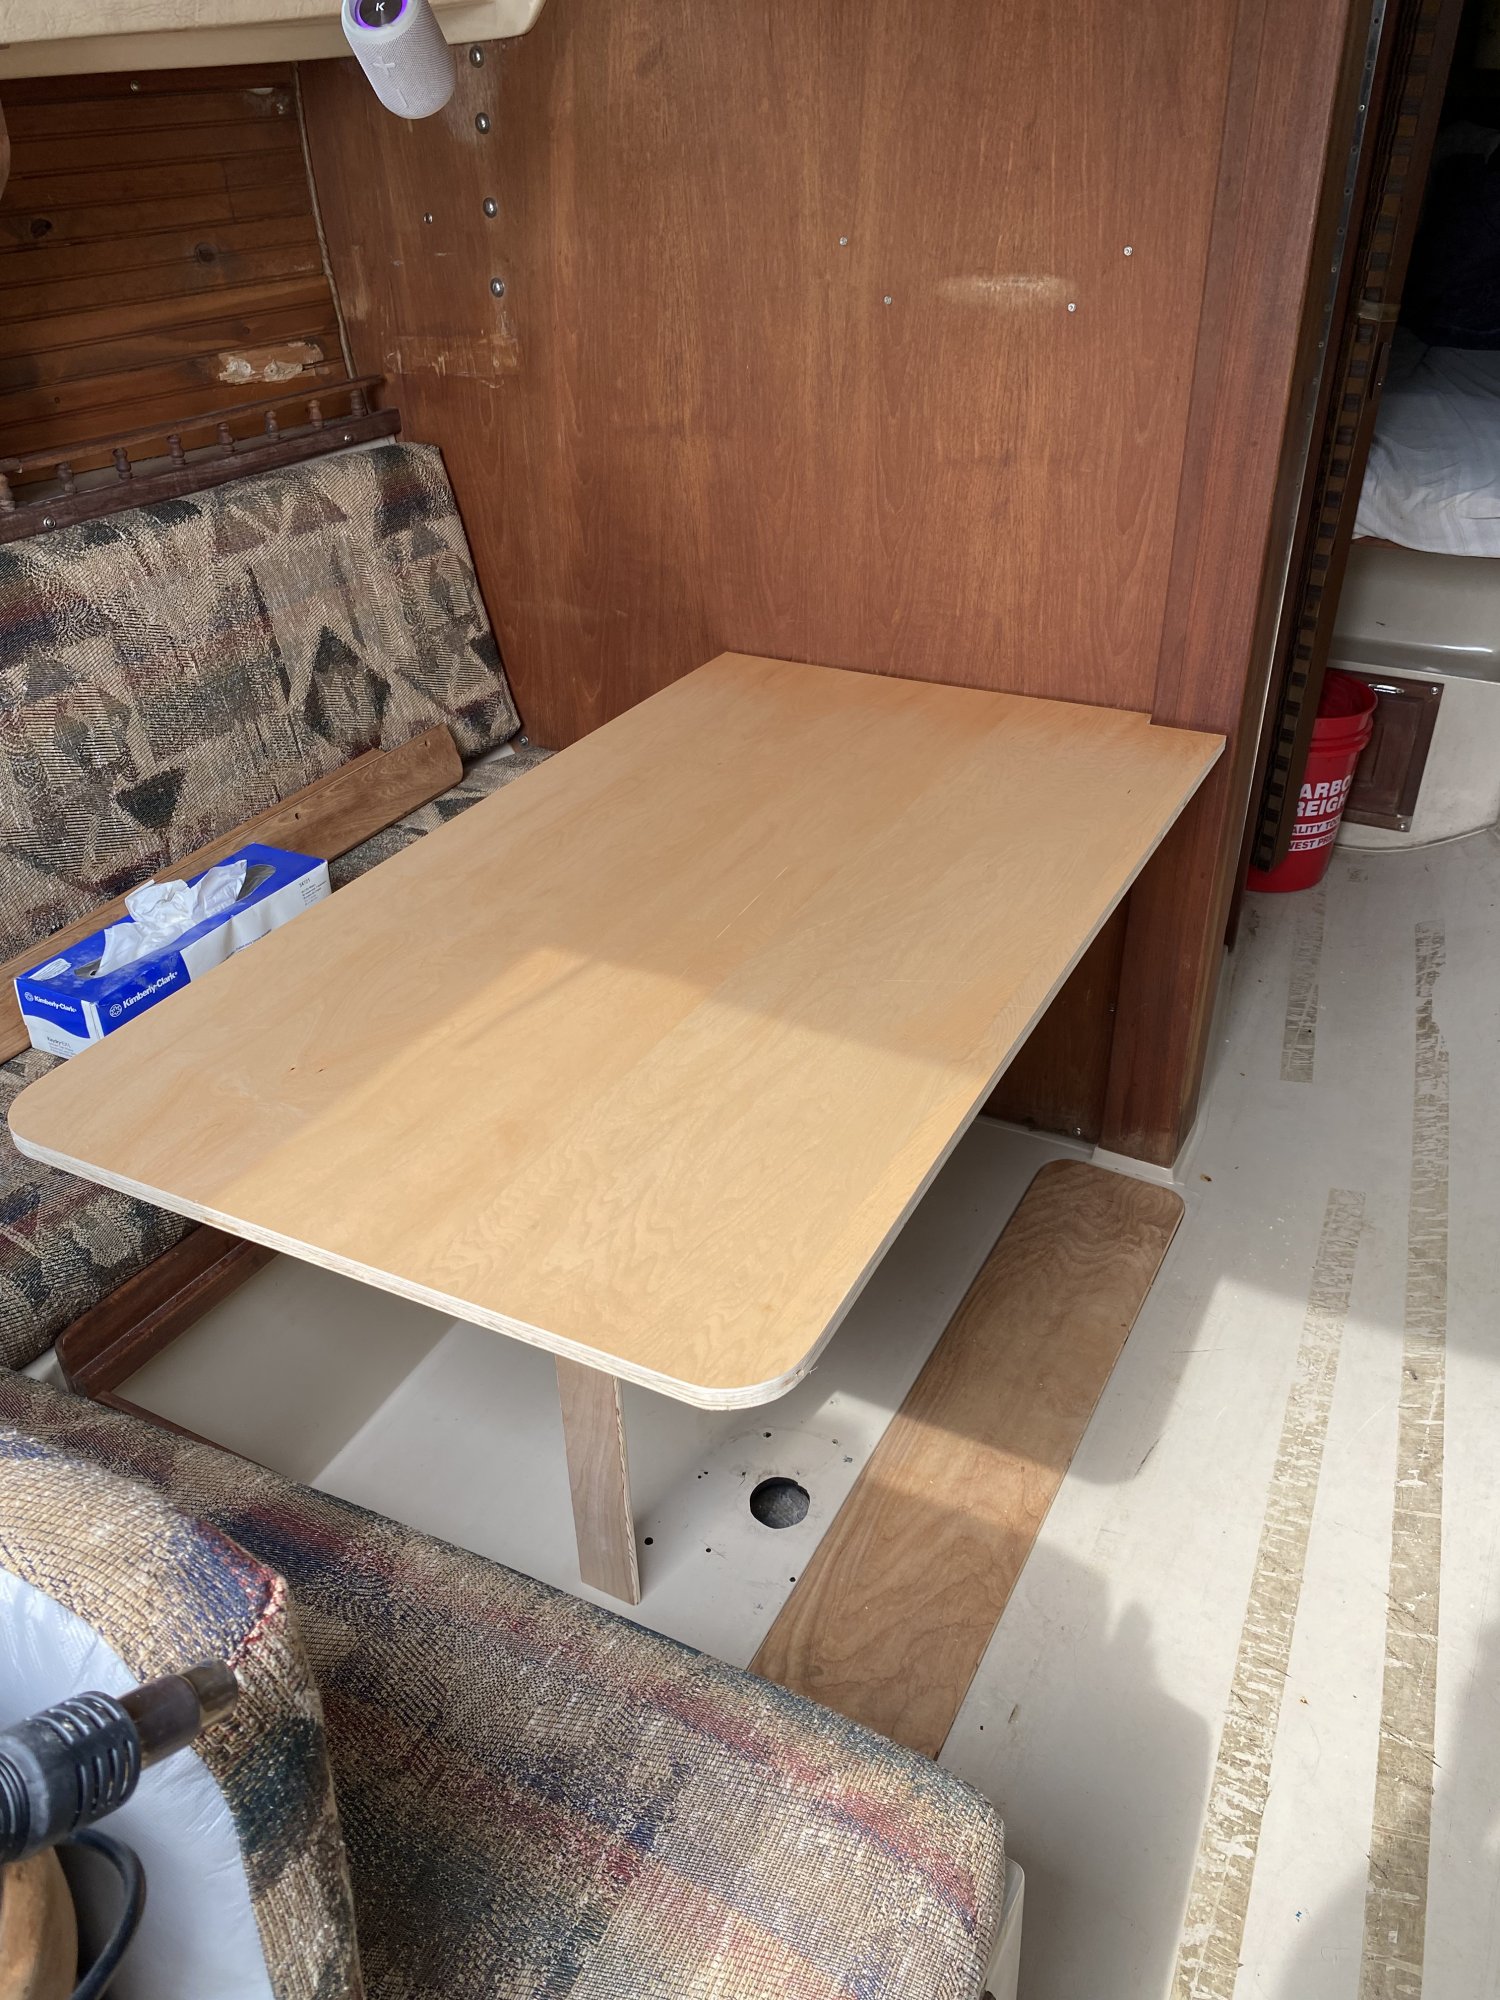
Maple is cut, new table has been made! I will be making the coamings here soon but before I do that I need to make sure I don’t have to trim the table anywhere. The coamings are going to be made from oak taken out of the Seattle federal building that was built in the early 1900’s. 100+ year old tight grained oak. It’s beautiful wood. Anyway that will prolly come after the haul out.
The leg I made will prolly have to be “adjusted” as I didnt have the correct measurement with me when I cut it out so I made it a bit long… then I came home, found the pic of the measurements and discovered I made my let almost 8 inches too long. It’s all good, I will cut it then reshape it a bit to look pretty. Prolly when I remove the table for the coaming installation, I will reshape the leg. For now enjoy the pics and hopefully tomorrow there will be a pic of the table installed.
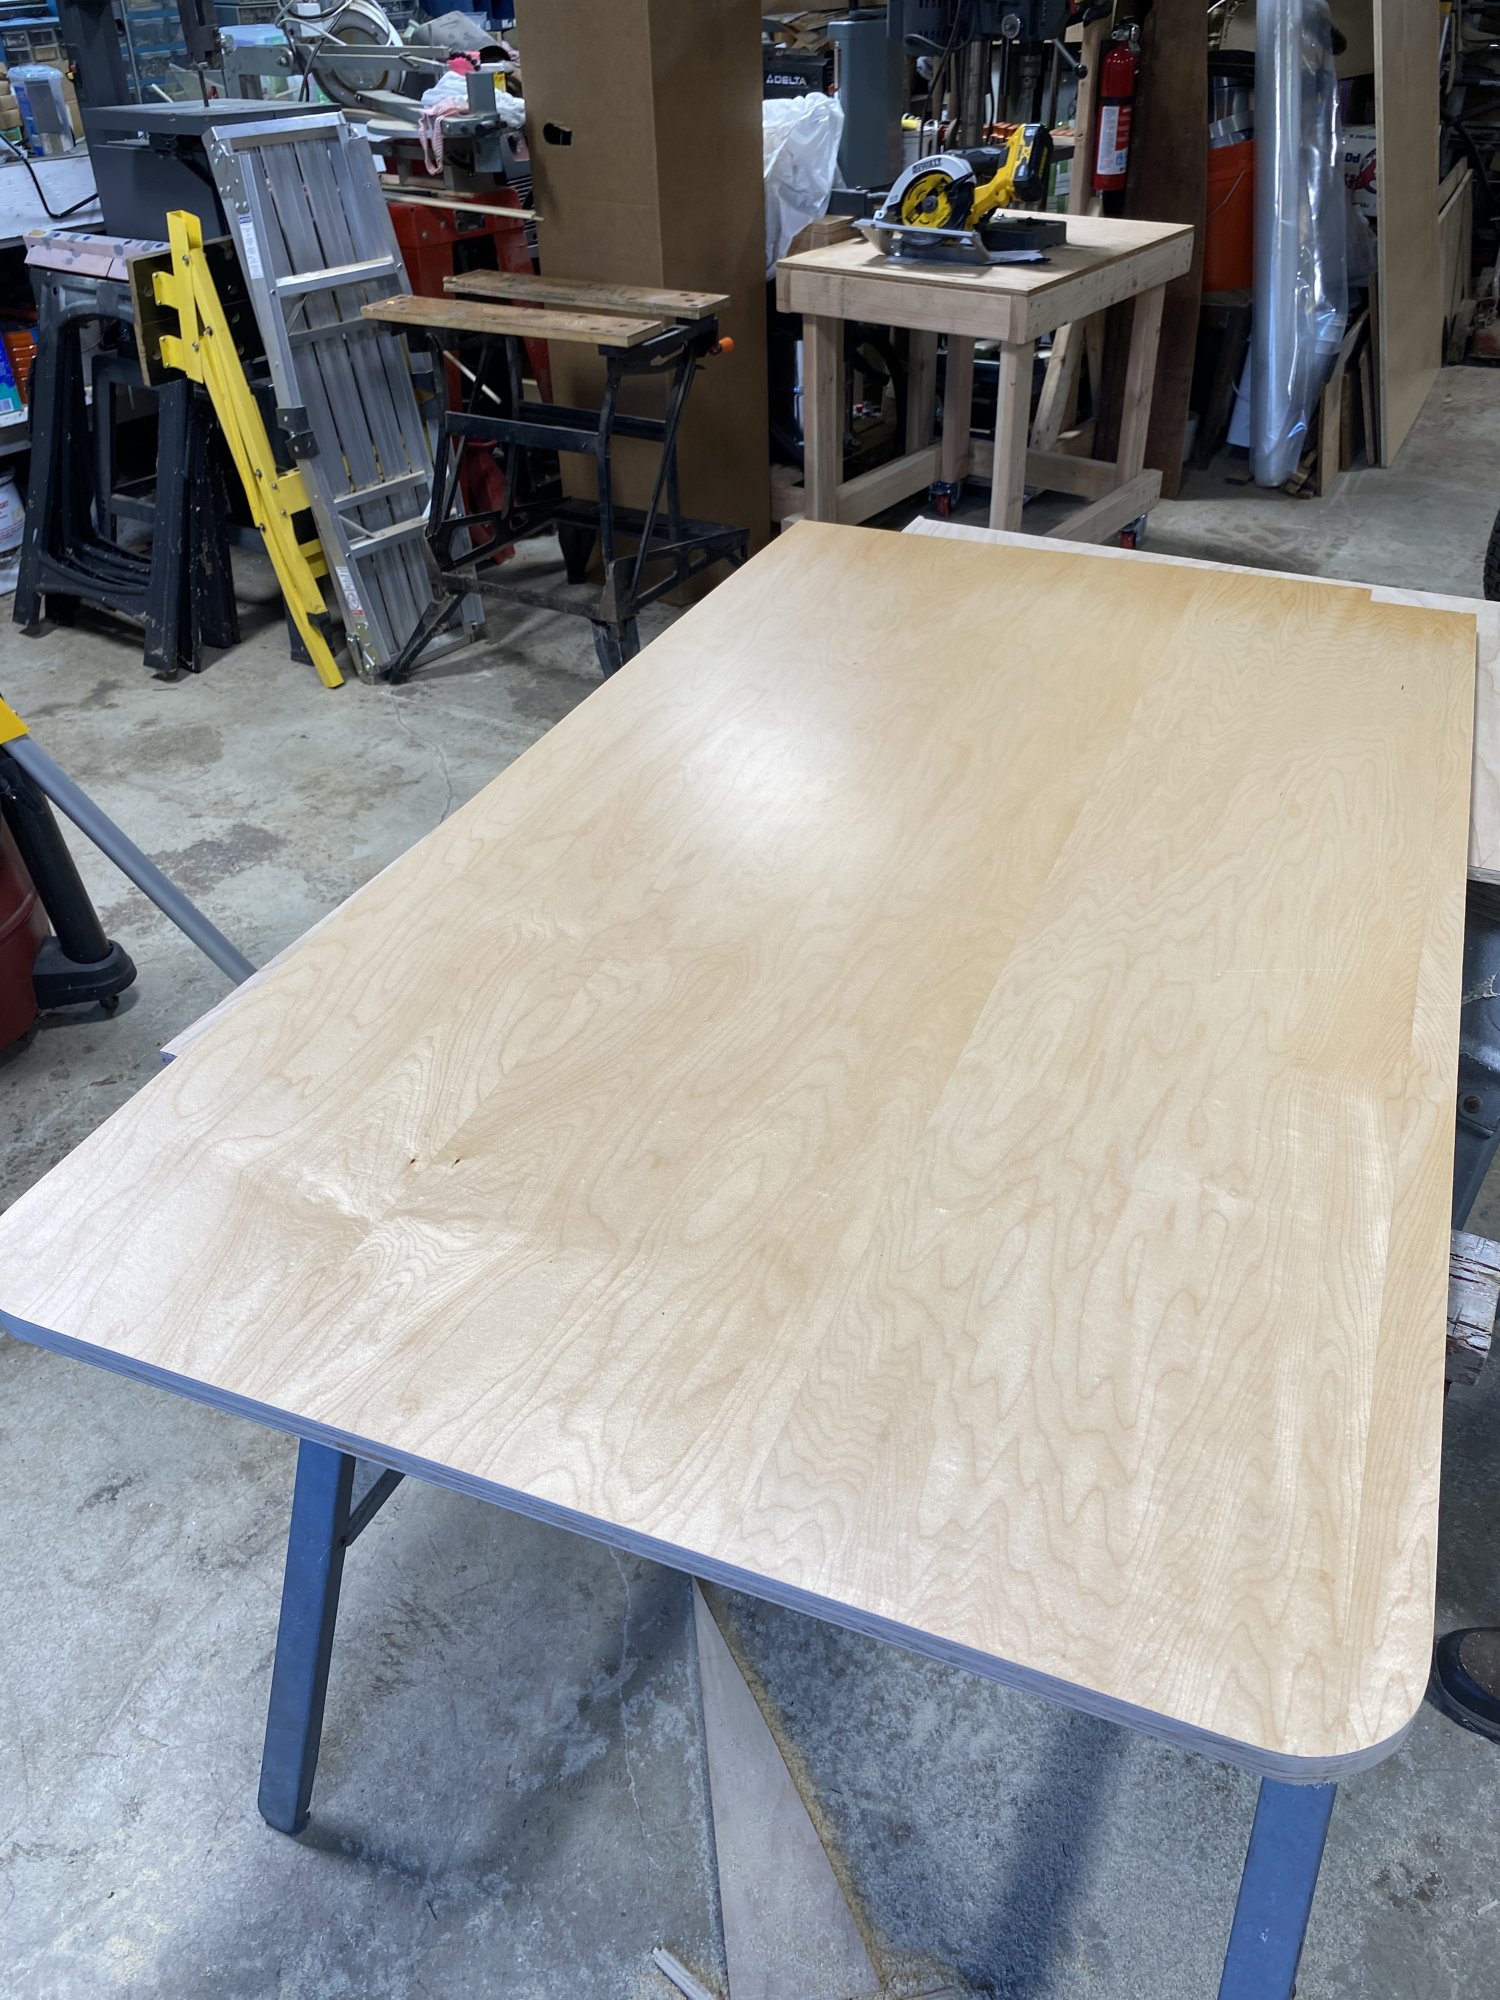

The leg I made will prolly have to be “adjusted” as I didnt have the correct measurement with me when I cut it out so I made it a bit long… then I came home, found the pic of the measurements and discovered I made my let almost 8 inches too long. It’s all good, I will cut it then reshape it a bit to look pretty. Prolly when I remove the table for the coaming installation, I will reshape the leg. For now enjoy the pics and hopefully tomorrow there will be a pic of the table installed.
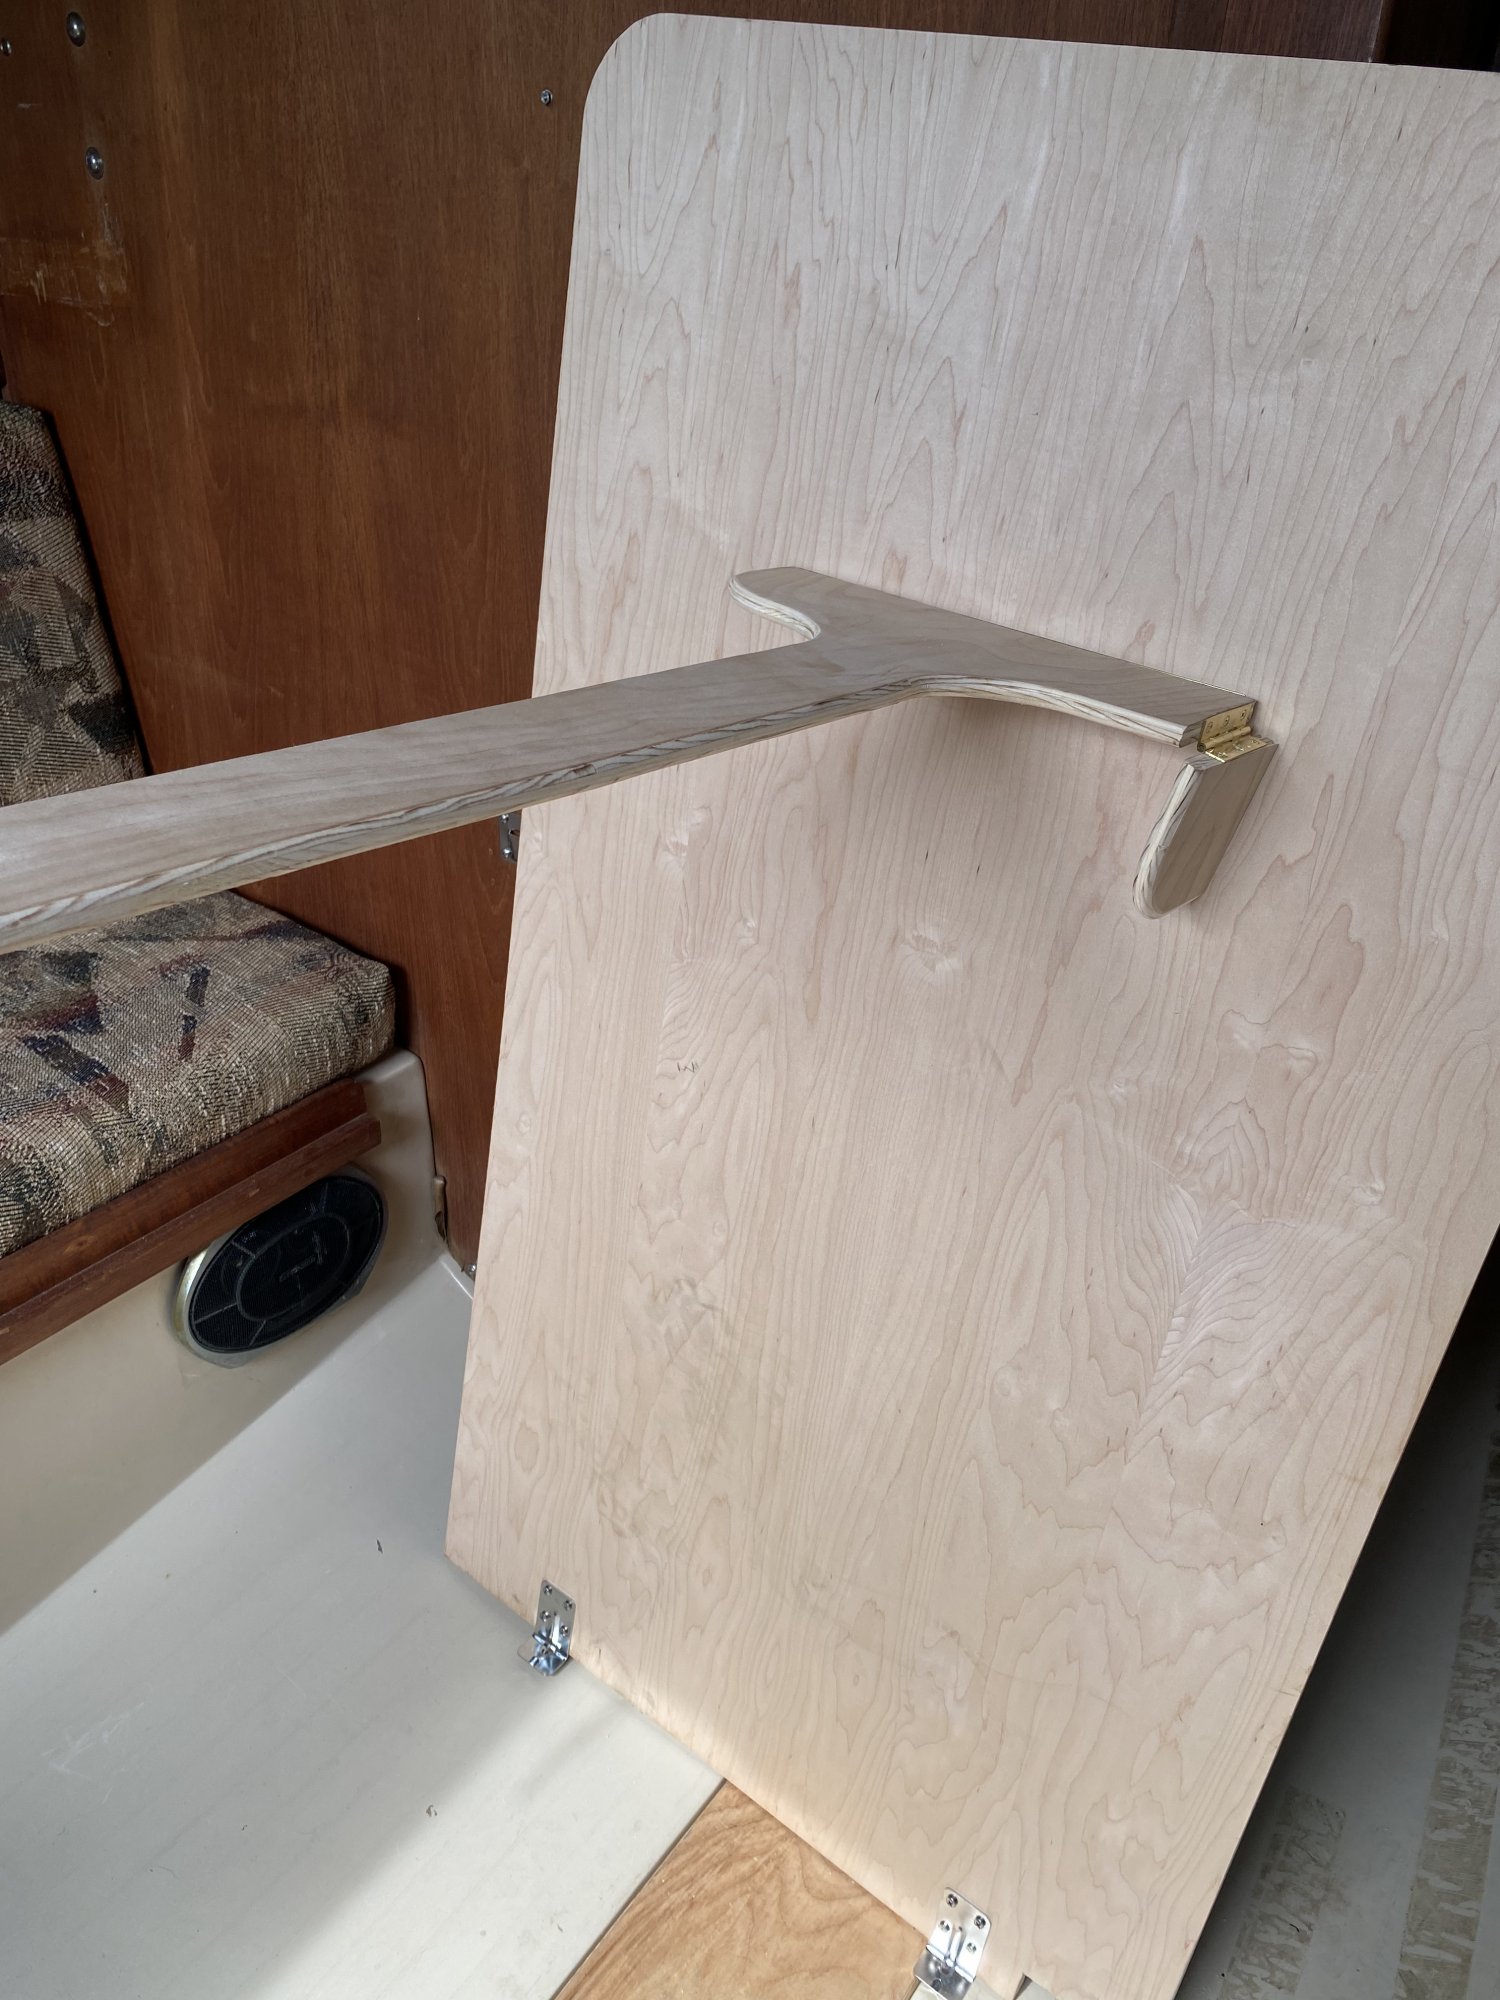
Well my fancy tear drop shaped leg was an absolute failure. 2 reasons it failed. First off the measurements I received showed the leg to be 21 inches long. Ok so I know mine isn’t going to be in the exact same location as the other boat’s was and other things may be different so I made mine 23” and brought a saw with me to chop off what I didn’t need. Well I needed a leg 28” long…great… so I propped it up anyway using the top of a battery box and a piece of teak I had laying around. And here is where I found problem #2.
It was too wide. So unless I wanted to sit with my legs splayed open when at the head of the table this wouldn’t work. Now I see why Catalina made the leg like a “T”. I also discovered it was pretty easy to bump and knock inwards so my new leg has a feature that will prevent that.
Sorry no pics tonight of the new leg, I will get some tomorrow after I get finished building it and reattach it to the table. Speaking of table, here it is stowed on my bulkhead.
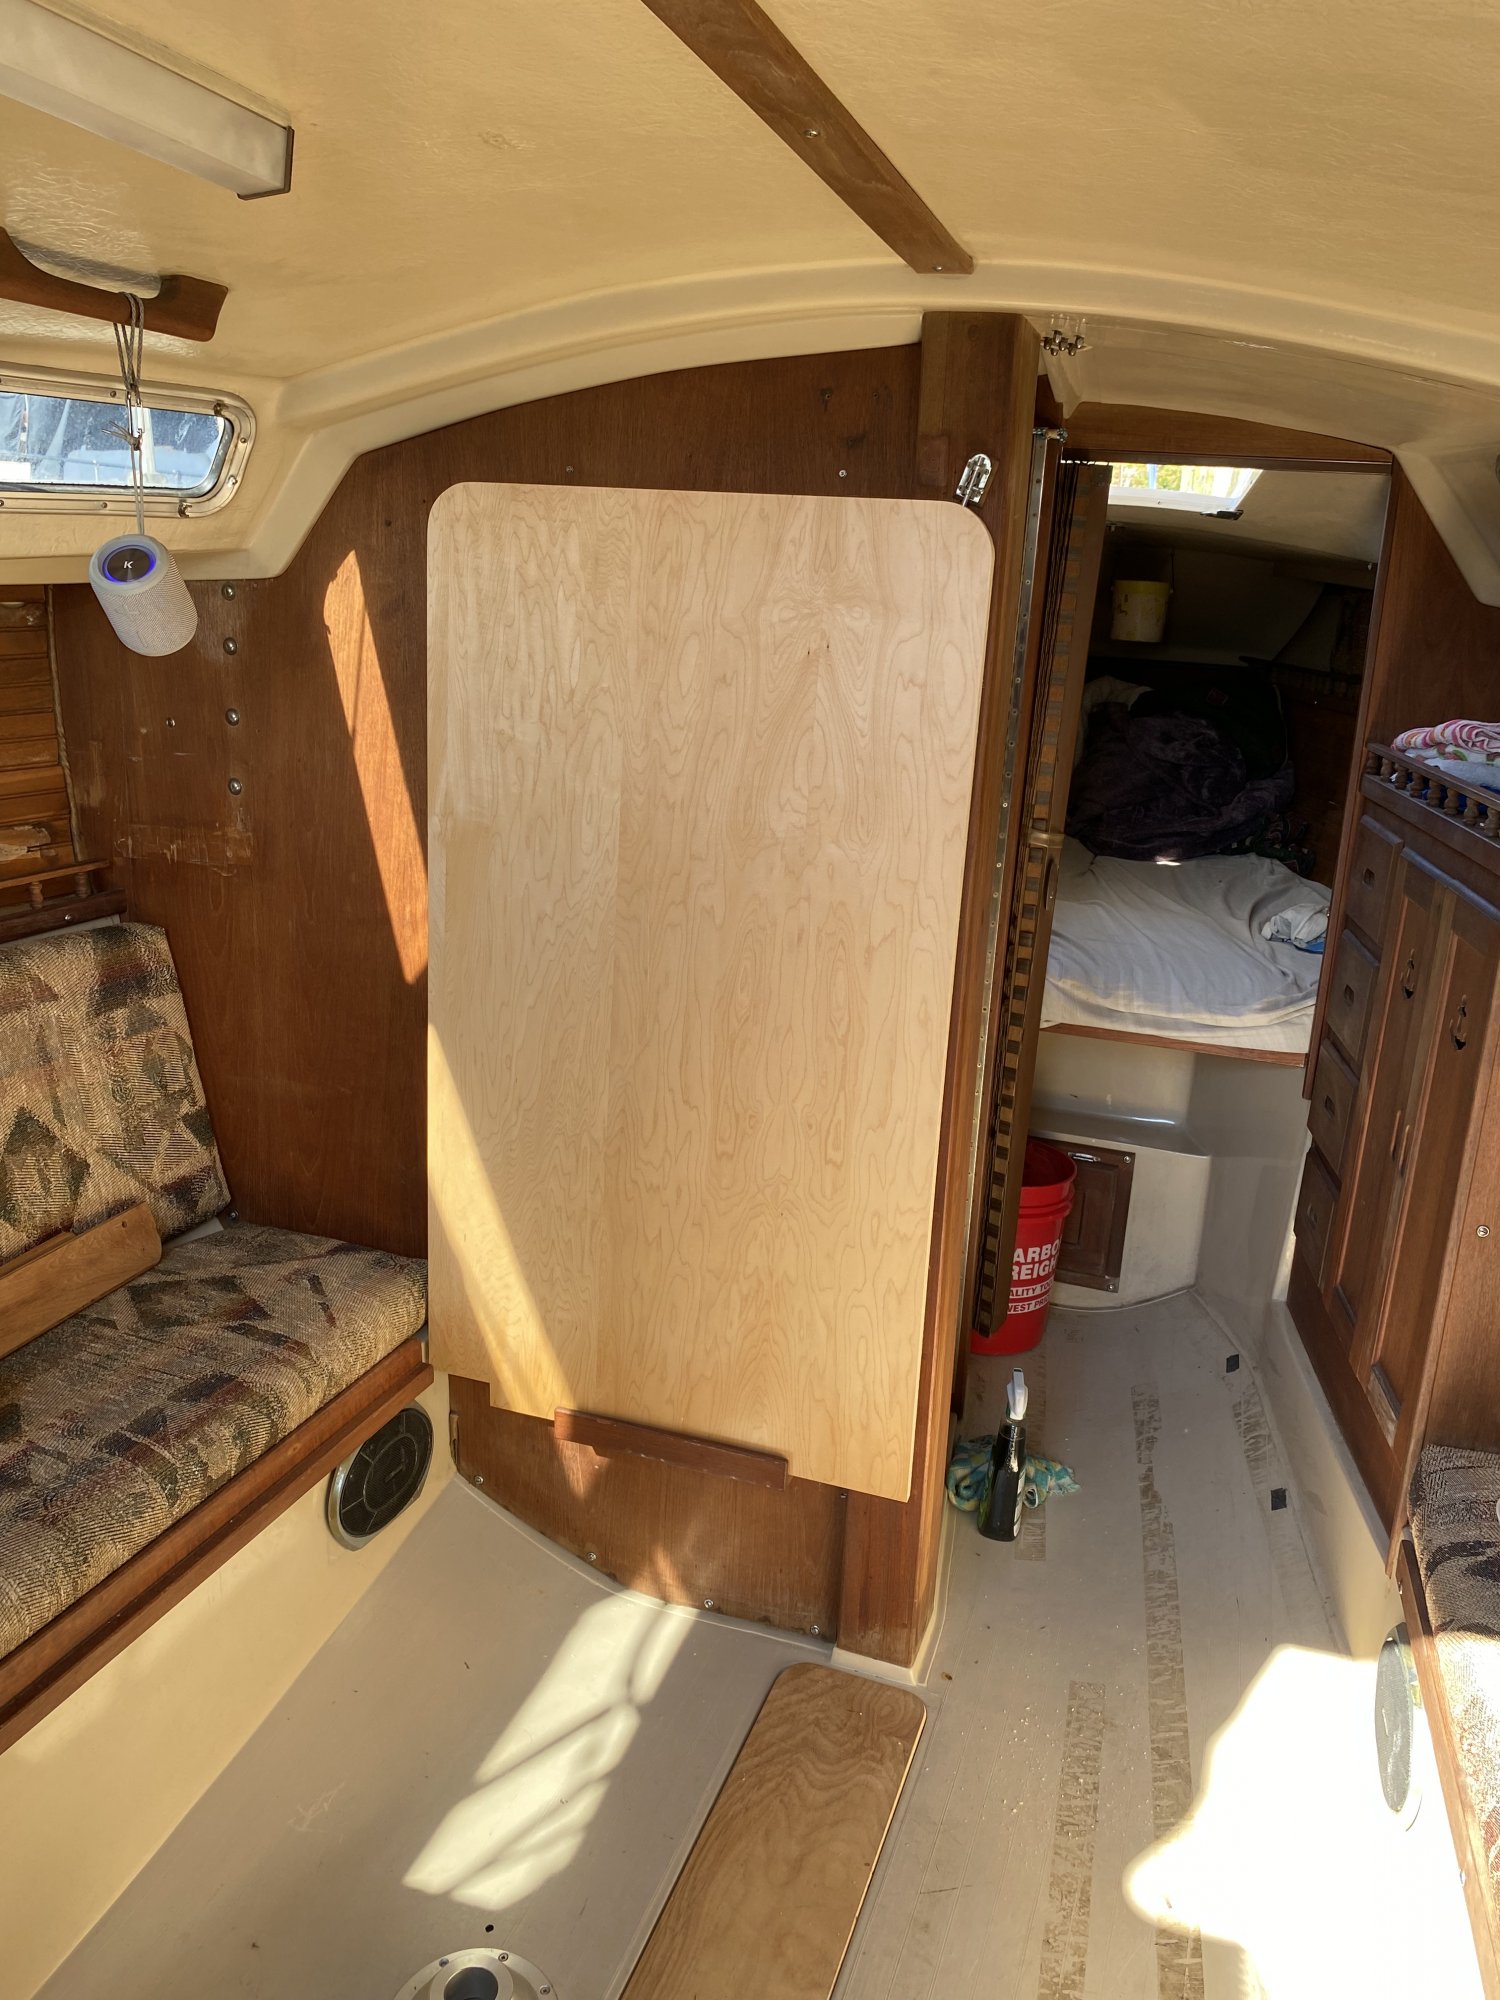
Well I thought I posted the above post last night… but I guess it didn’t go through, it was waiting for me to post it today. So I did!
Now to tonight’s post. I redesigned the leg and made it the correct length. It’s more like Catalina designed it but with a slight modification to prevent me from kicking it over. I discovered there is a hole in the deck for this very purpose but I didn’t know that till another Catalina group Im in informed me. Either way my way is simple and it works just as good.
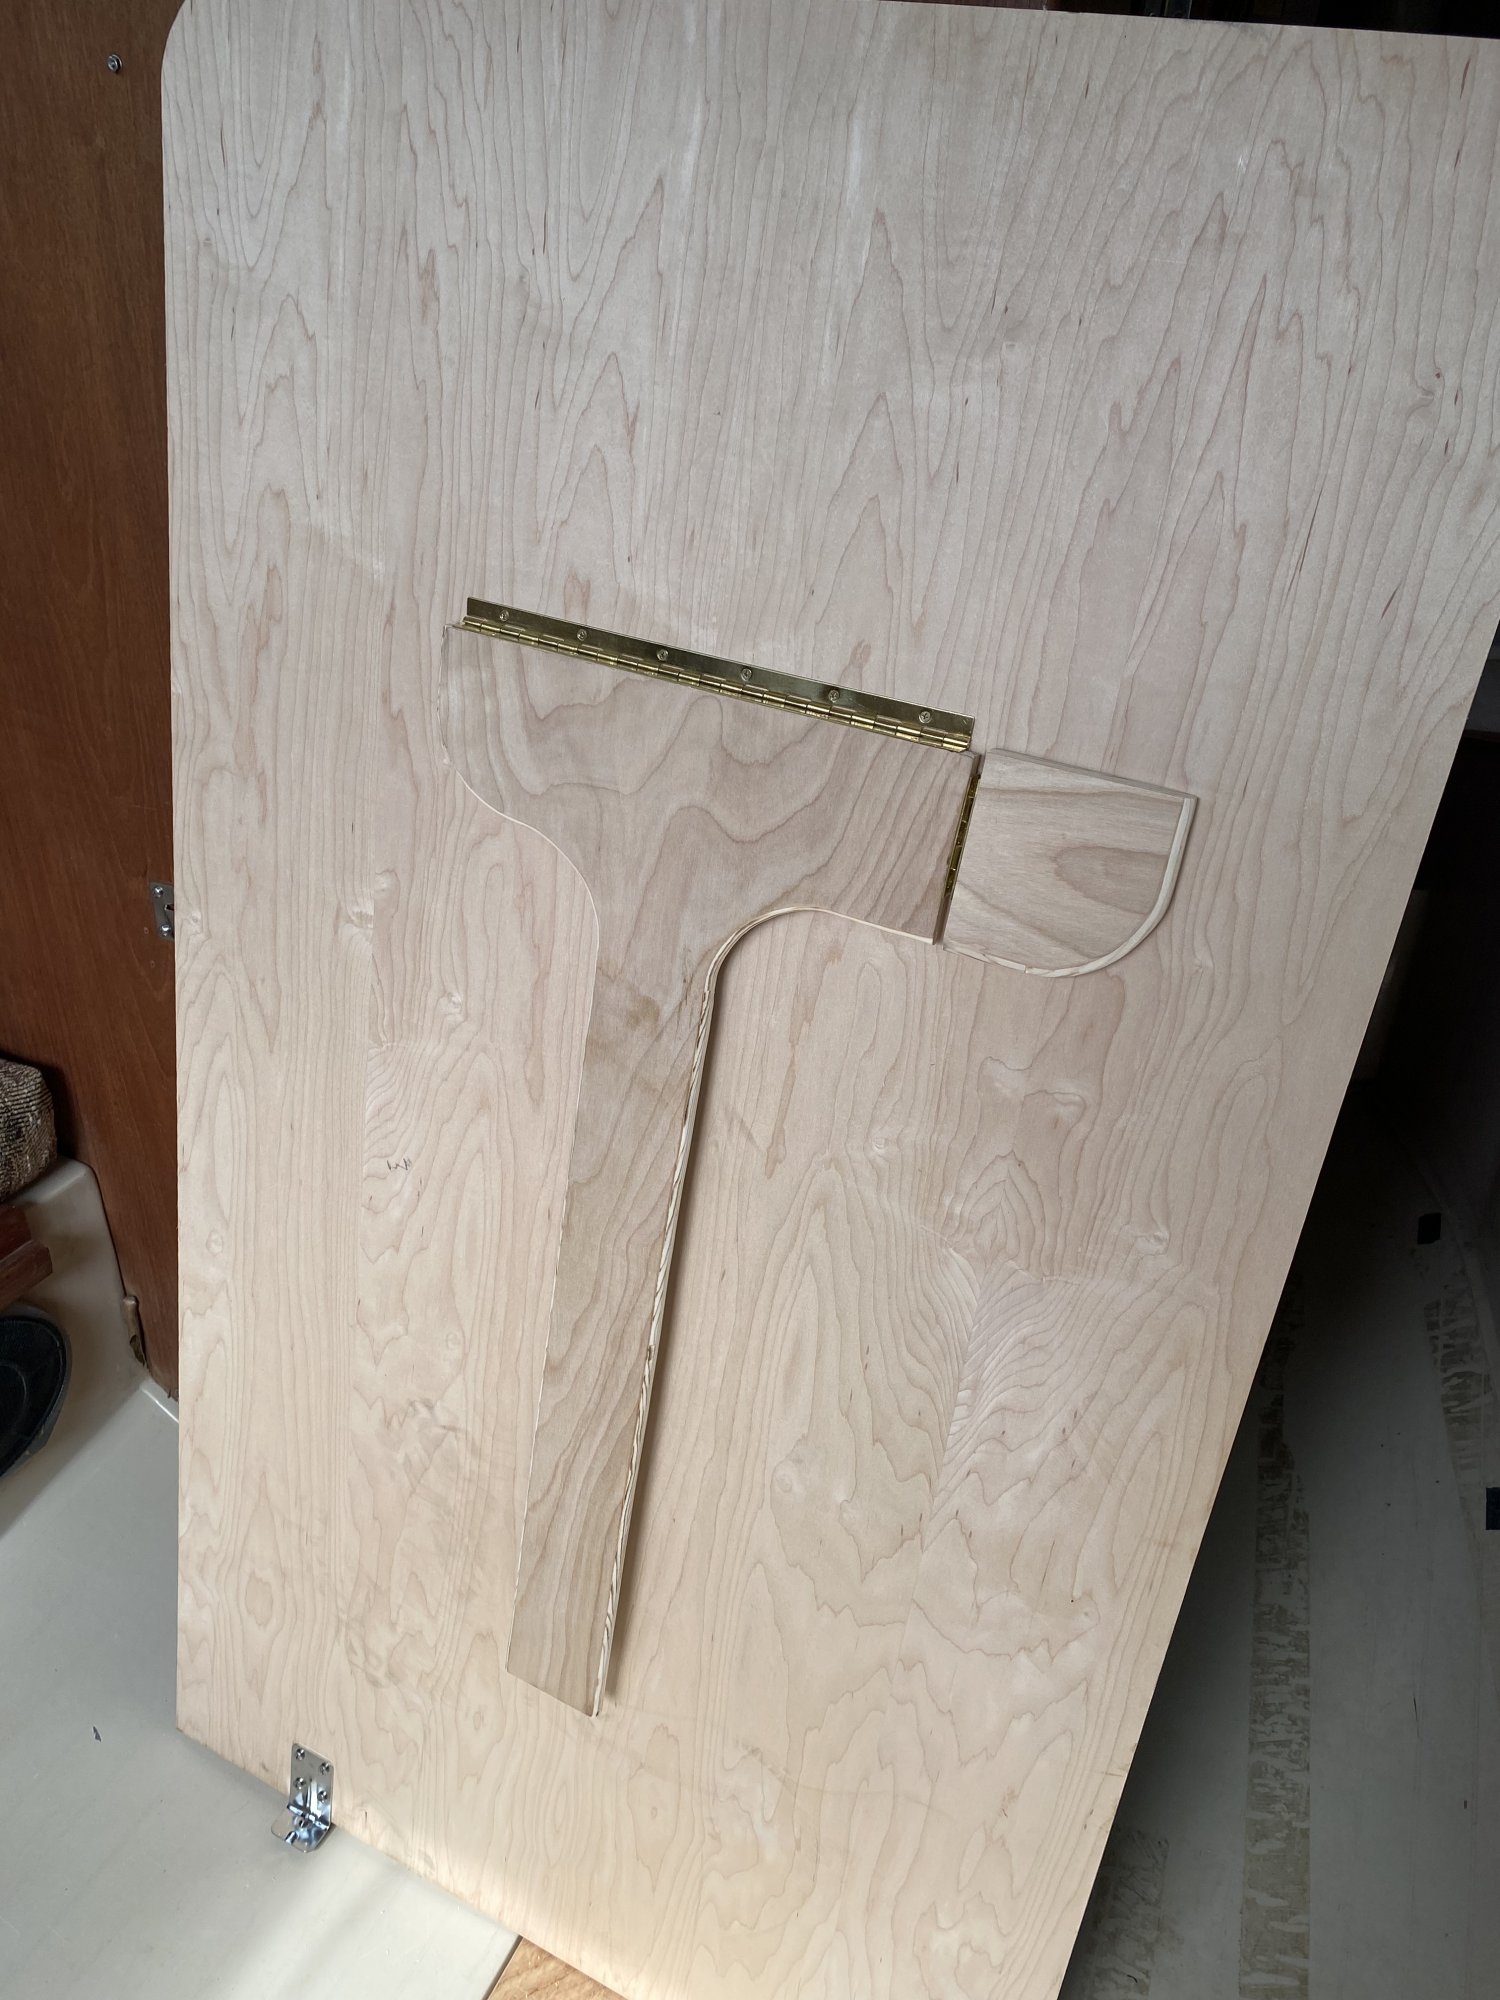
Now to tonight’s post. I redesigned the leg and made it the correct length. It’s more like Catalina designed it but with a slight modification to prevent me from kicking it over. I discovered there is a hole in the deck for this very purpose but I didn’t know that till another Catalina group Im in informed me. Either way my way is simple and it works just as good.
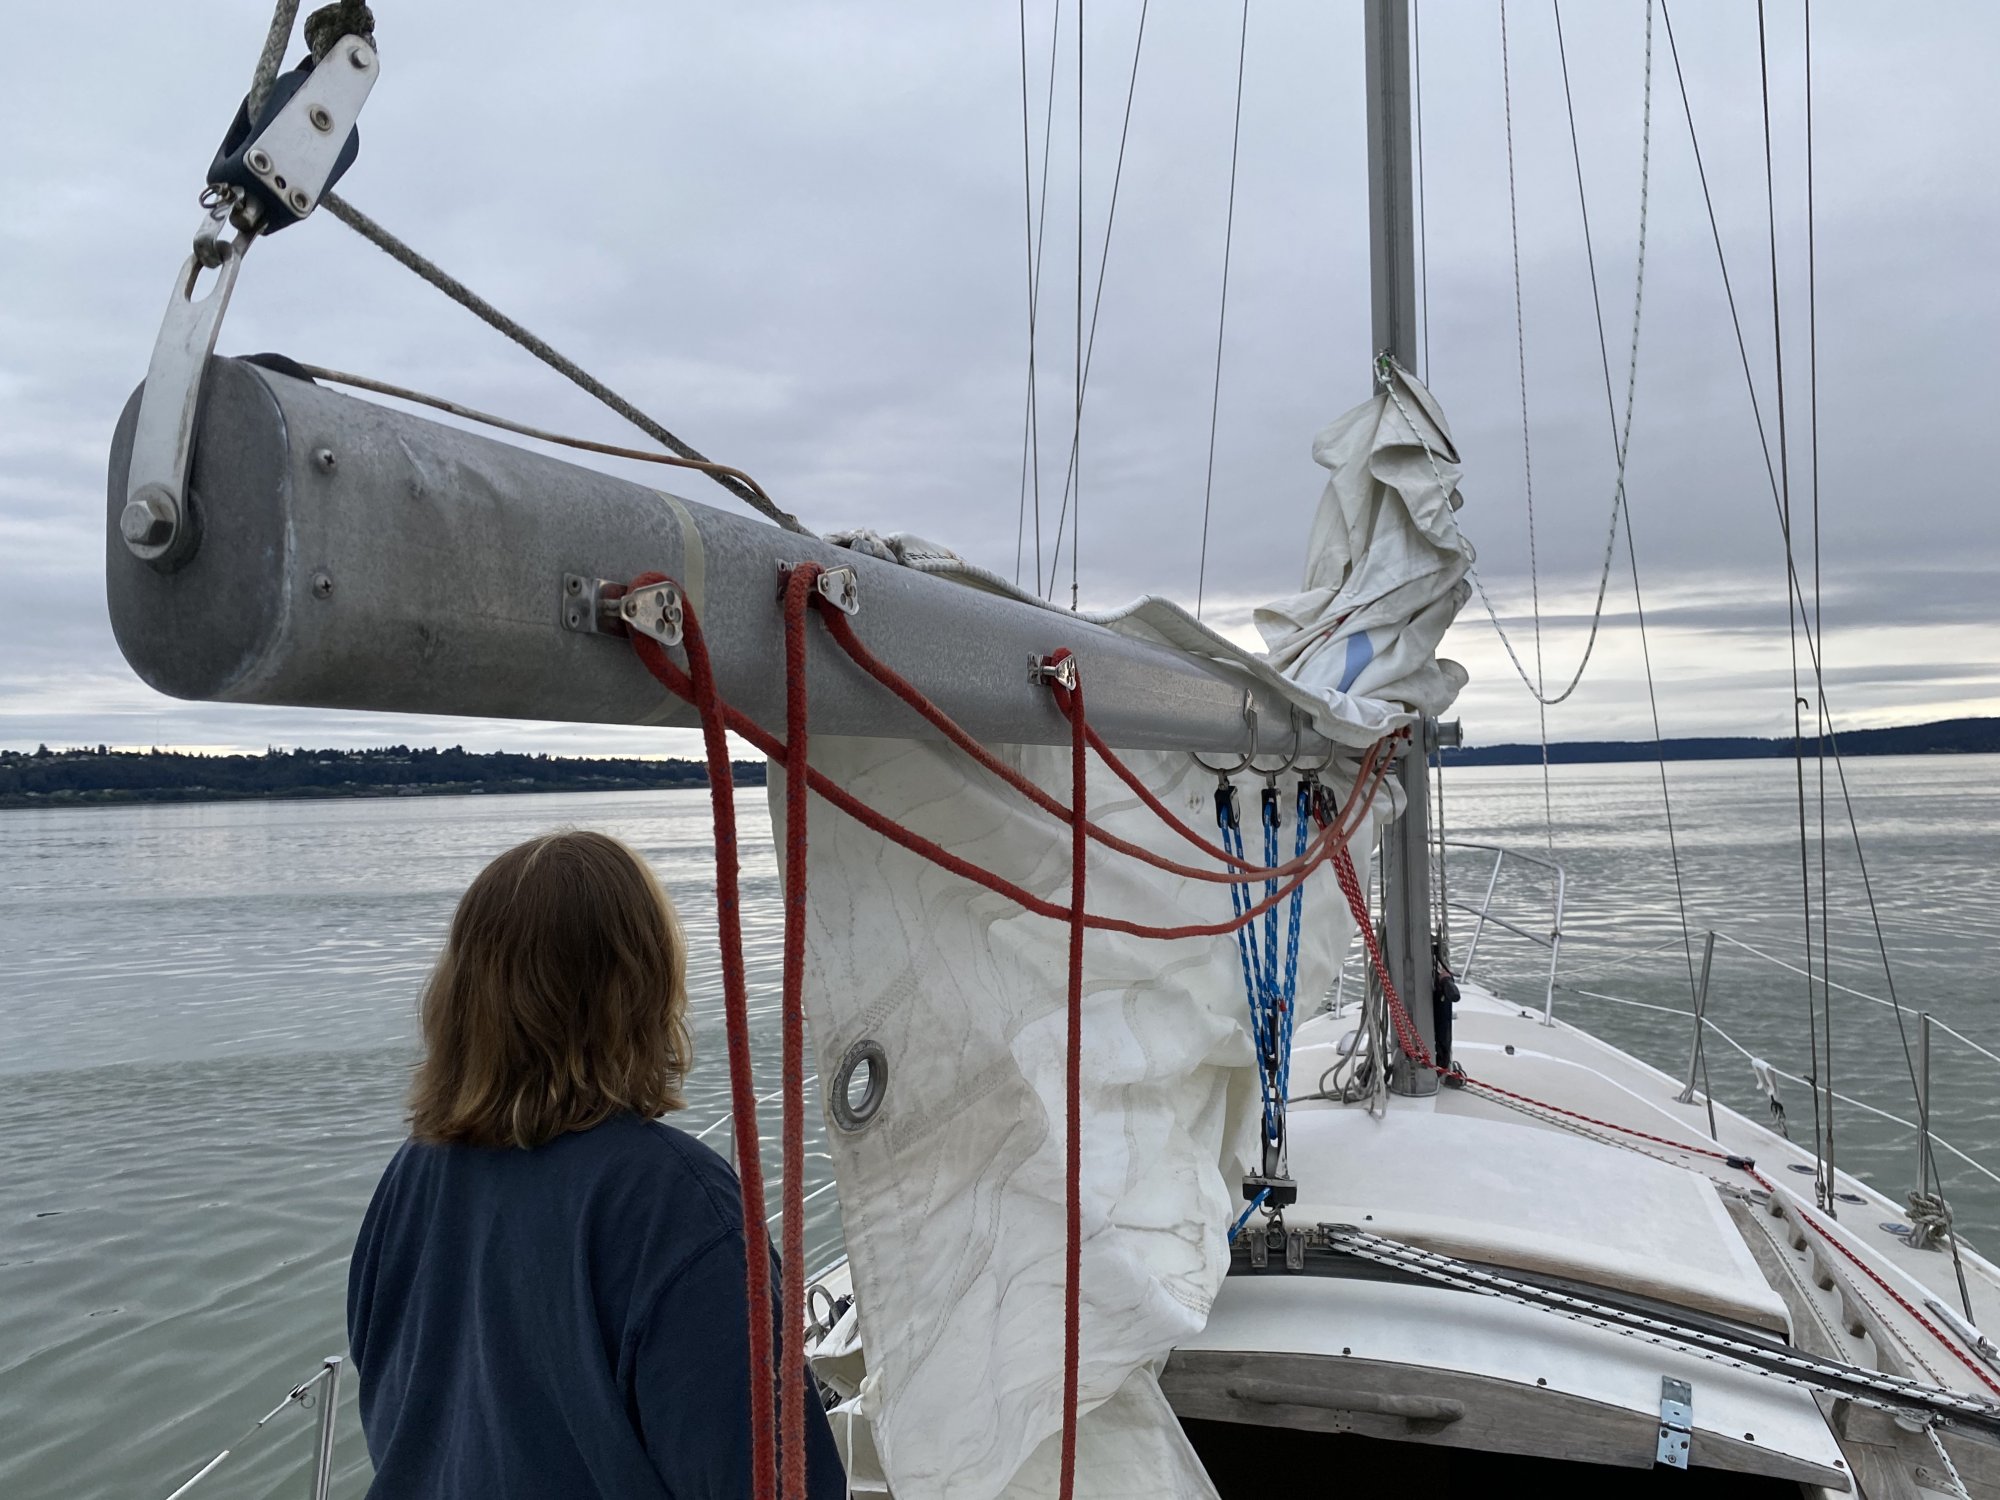
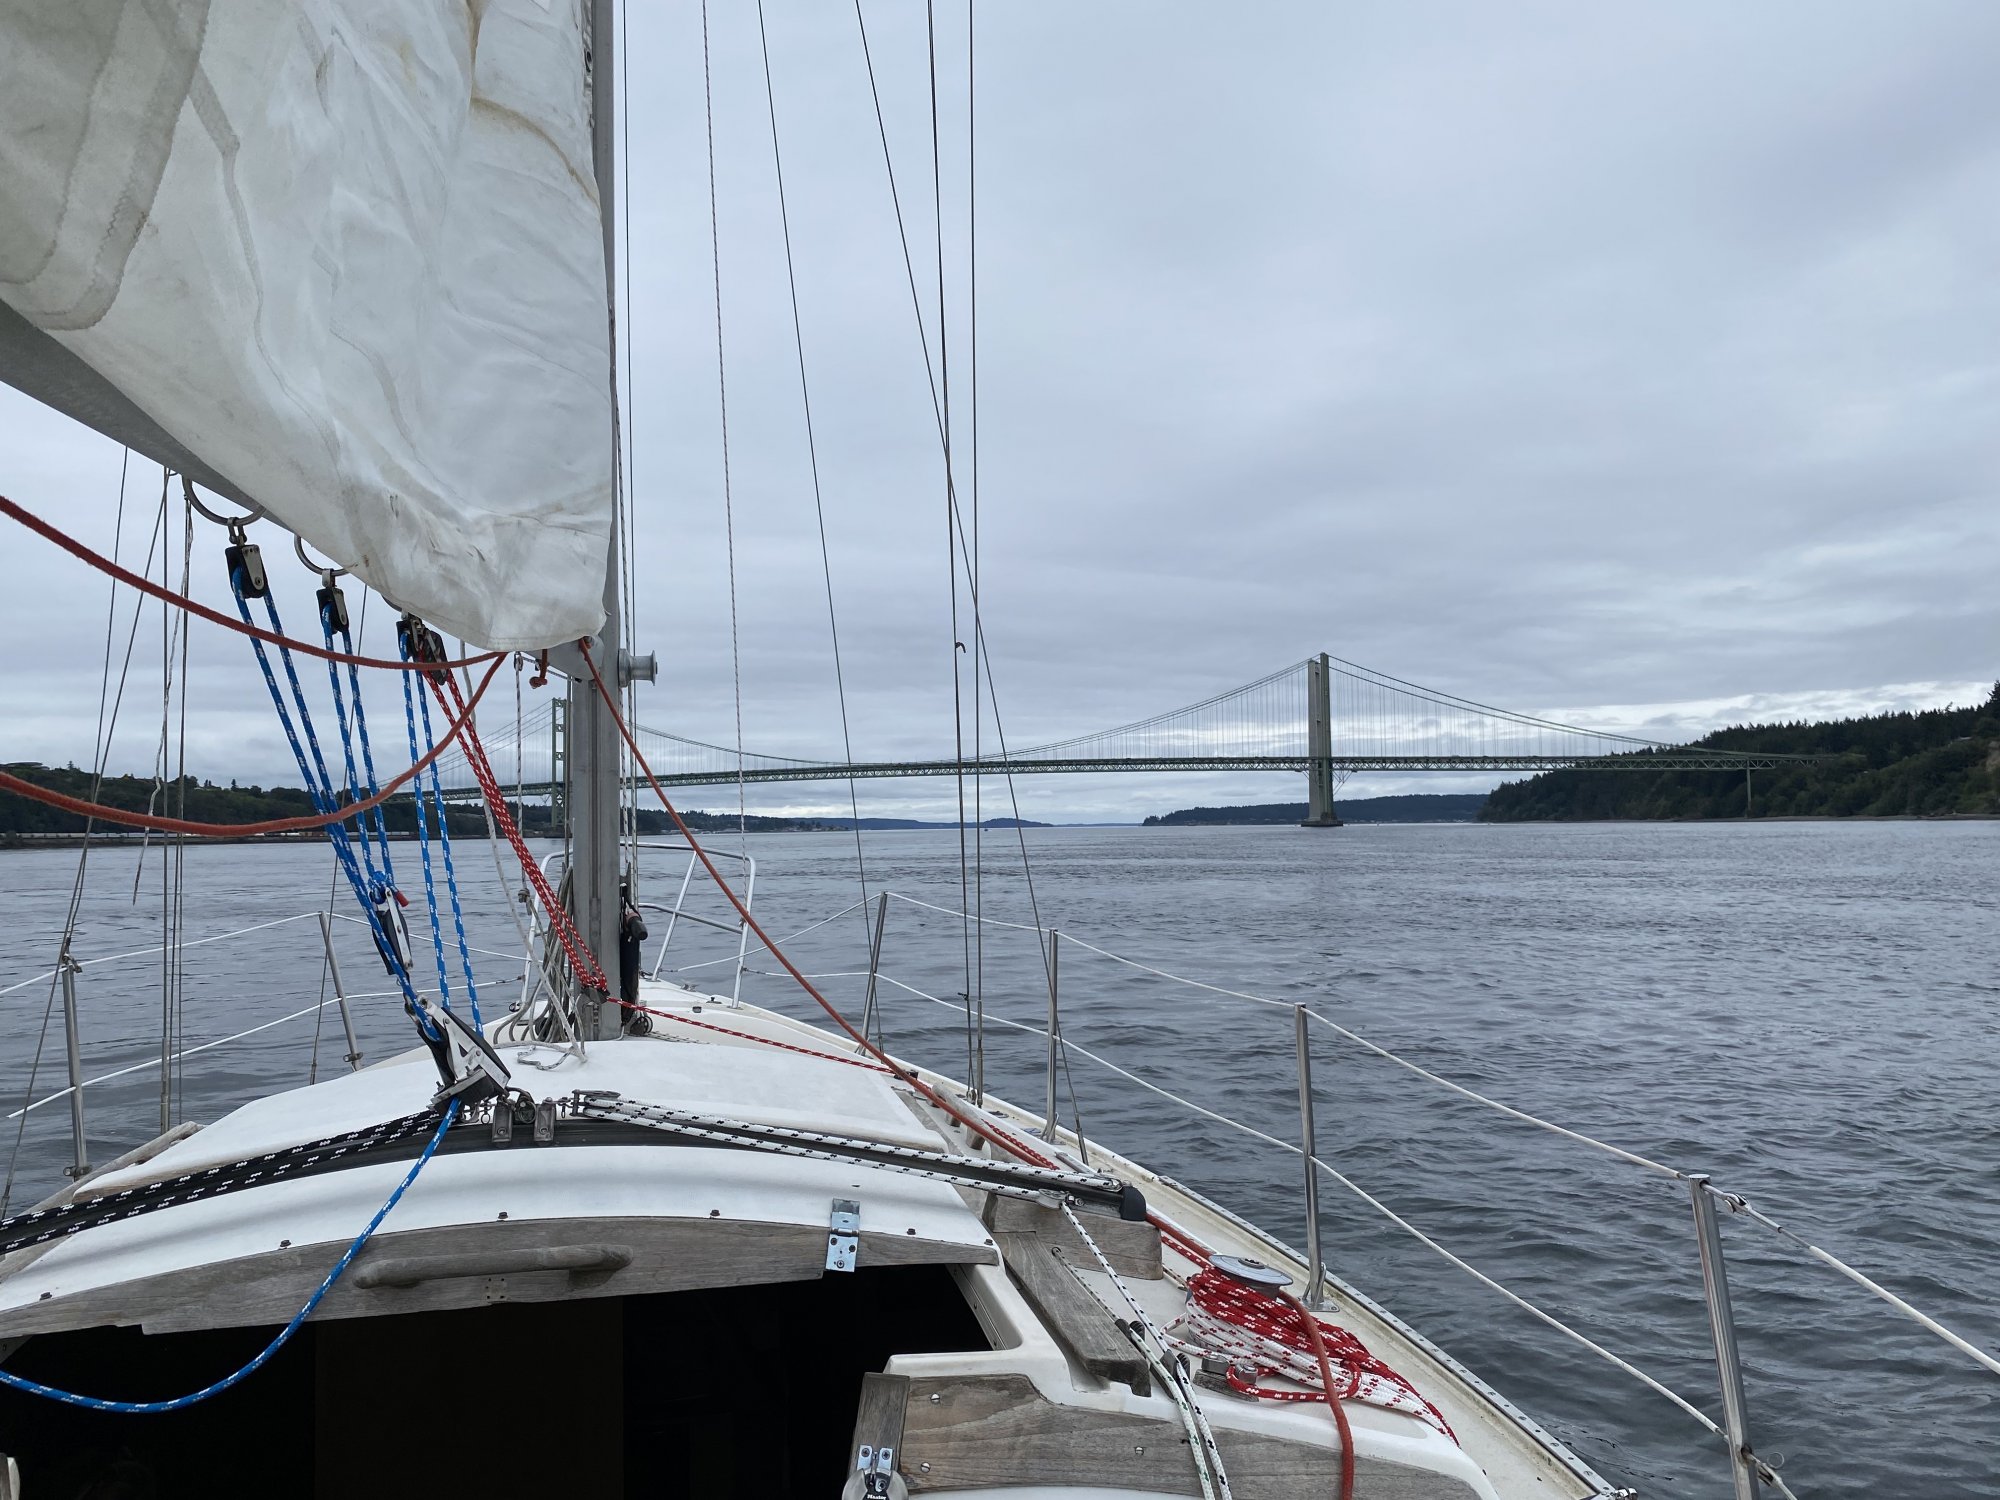
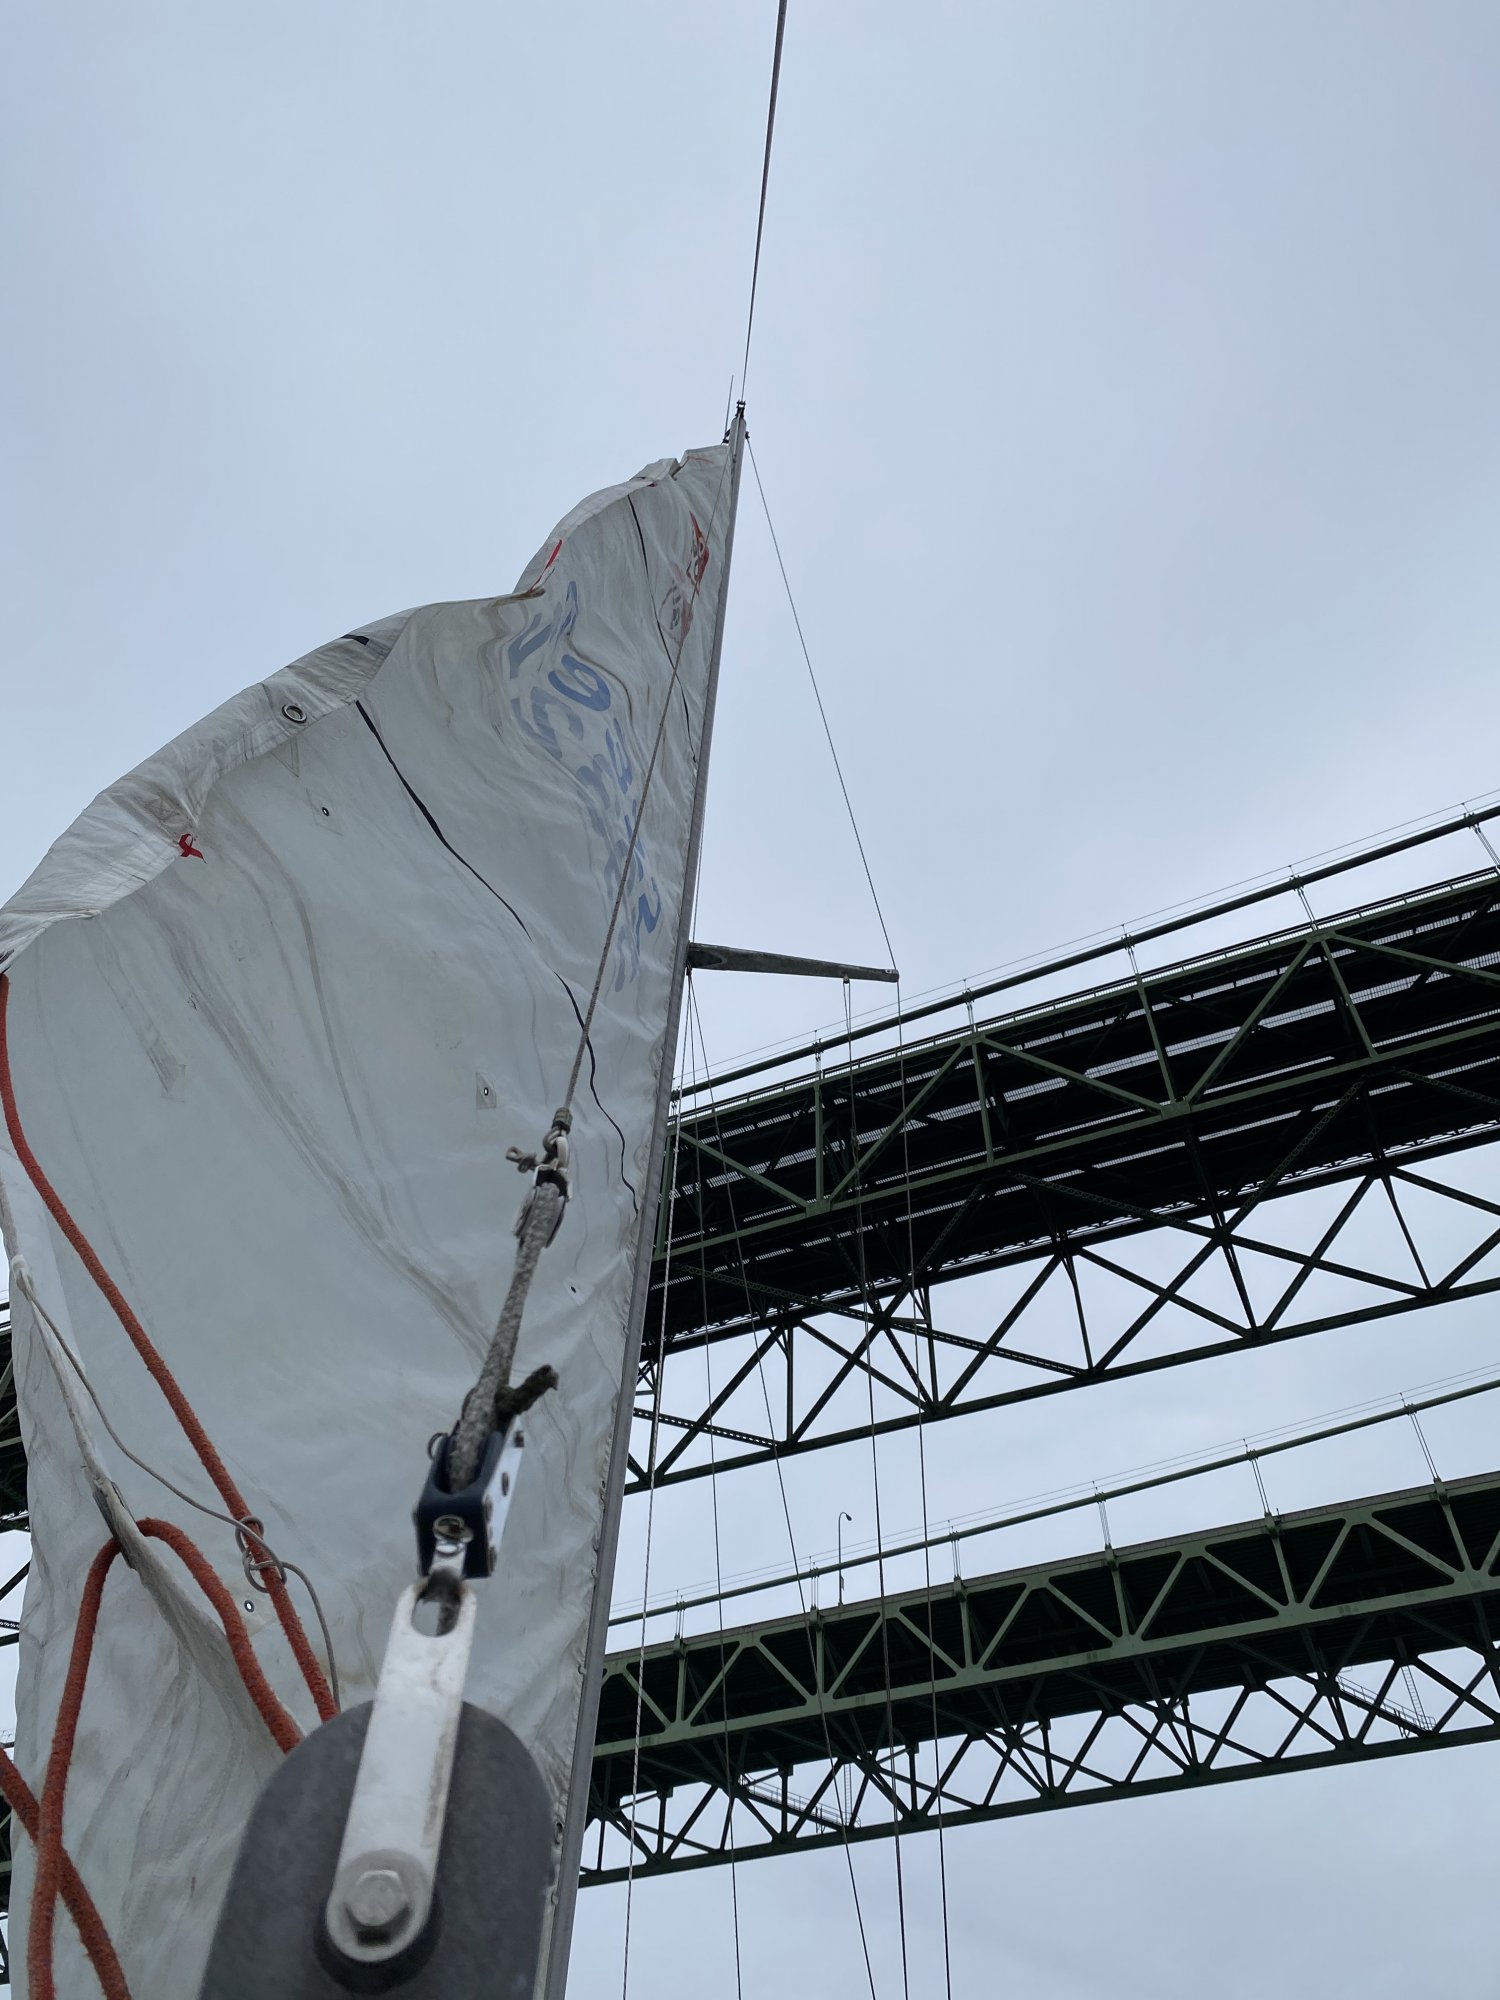
Luna is in Olympia now! Monday she gets hauled out of the water. Unfortunately it was a motor all the way kind of day. I am not sure, but my sails do not look right on the boom. There is a lot of, for lack of a better word, slack just above the boom. We left the sails up for over 1/2 the trip but were only able to motor sail near the Narrows. While motor sailing we were able to make 7kts which was great. My Genoa was a PITA it kept getting hung up in the shrouds whenever I would switch sides. I also figured out how my reefing lines were supposed to go. Below is a pic of the system I have on my boom. Sorry I didn’t get one of them all hooked back up, but it’s simple, through the sail, around the boom then tie back to the pulley. Oh, and I forgot to bring the batons for the sails, so when I did catch some wind the sails didn’t hold its shape on the end very well.
The only issue we ran into is we started taking on water. I found a drip that just needed a bolt tightened, but it turned out the bolt was (is) a 1/4 turn away from breaking. It was where the exhaust outlet bolts to the manifold. It was the lower of the 2 bolts. At first the bilge pump was turning on every 45 minutes, but by the time we got to Swantown it would turn on about every 15 minutes. Just one more thing to fix. I love boats!
My reefing lines.
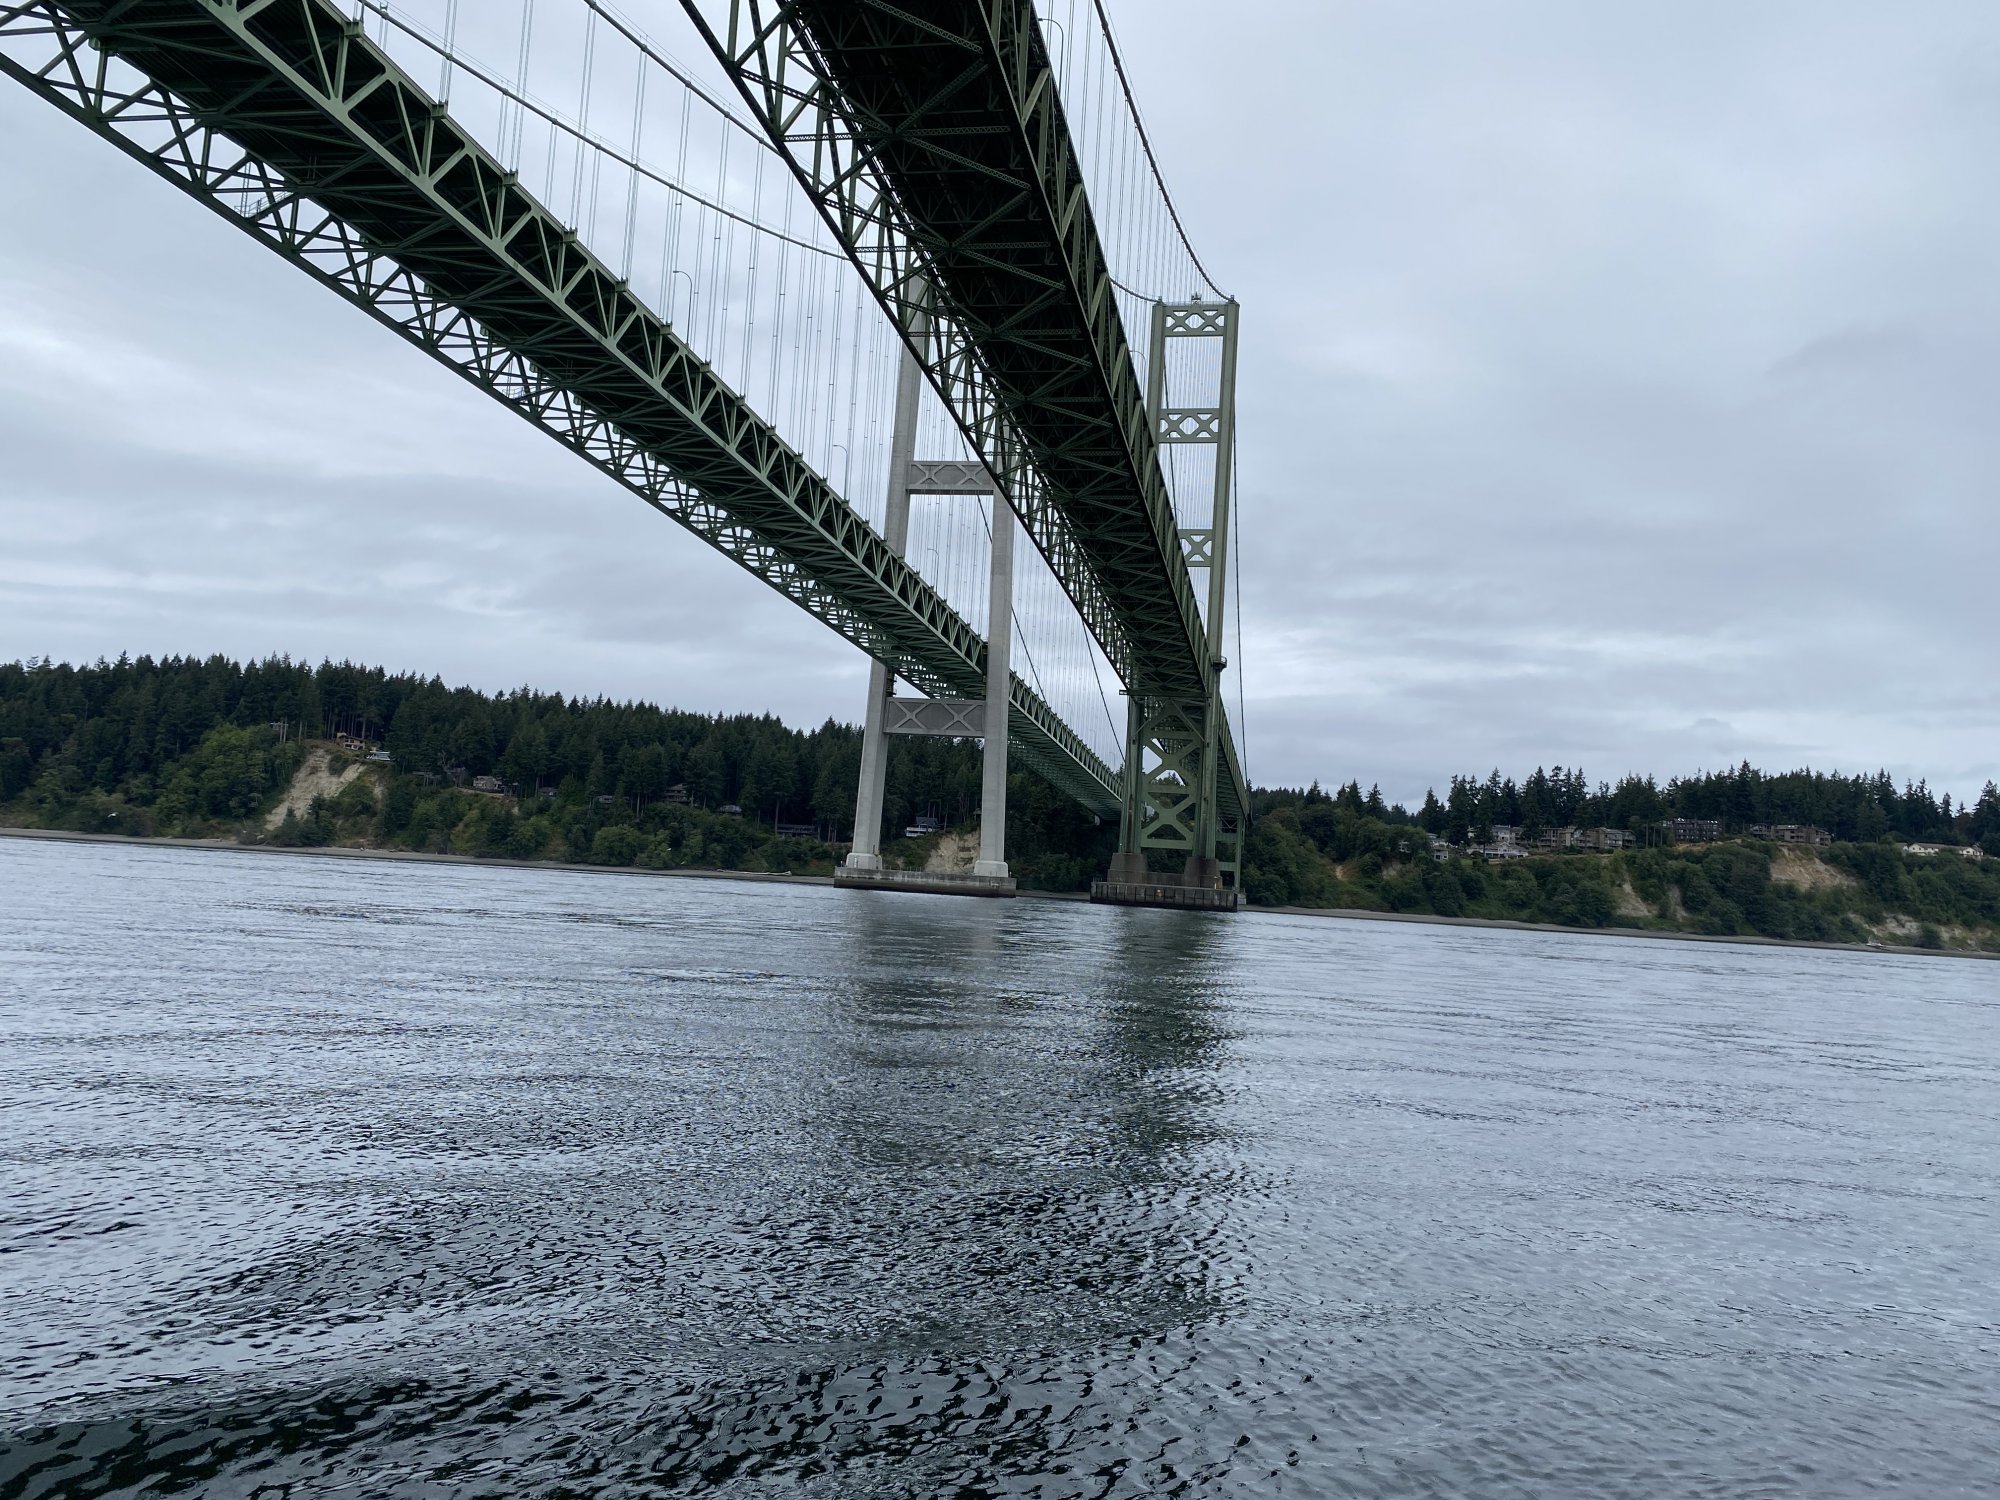
The Tacoma Narrows Bridges.
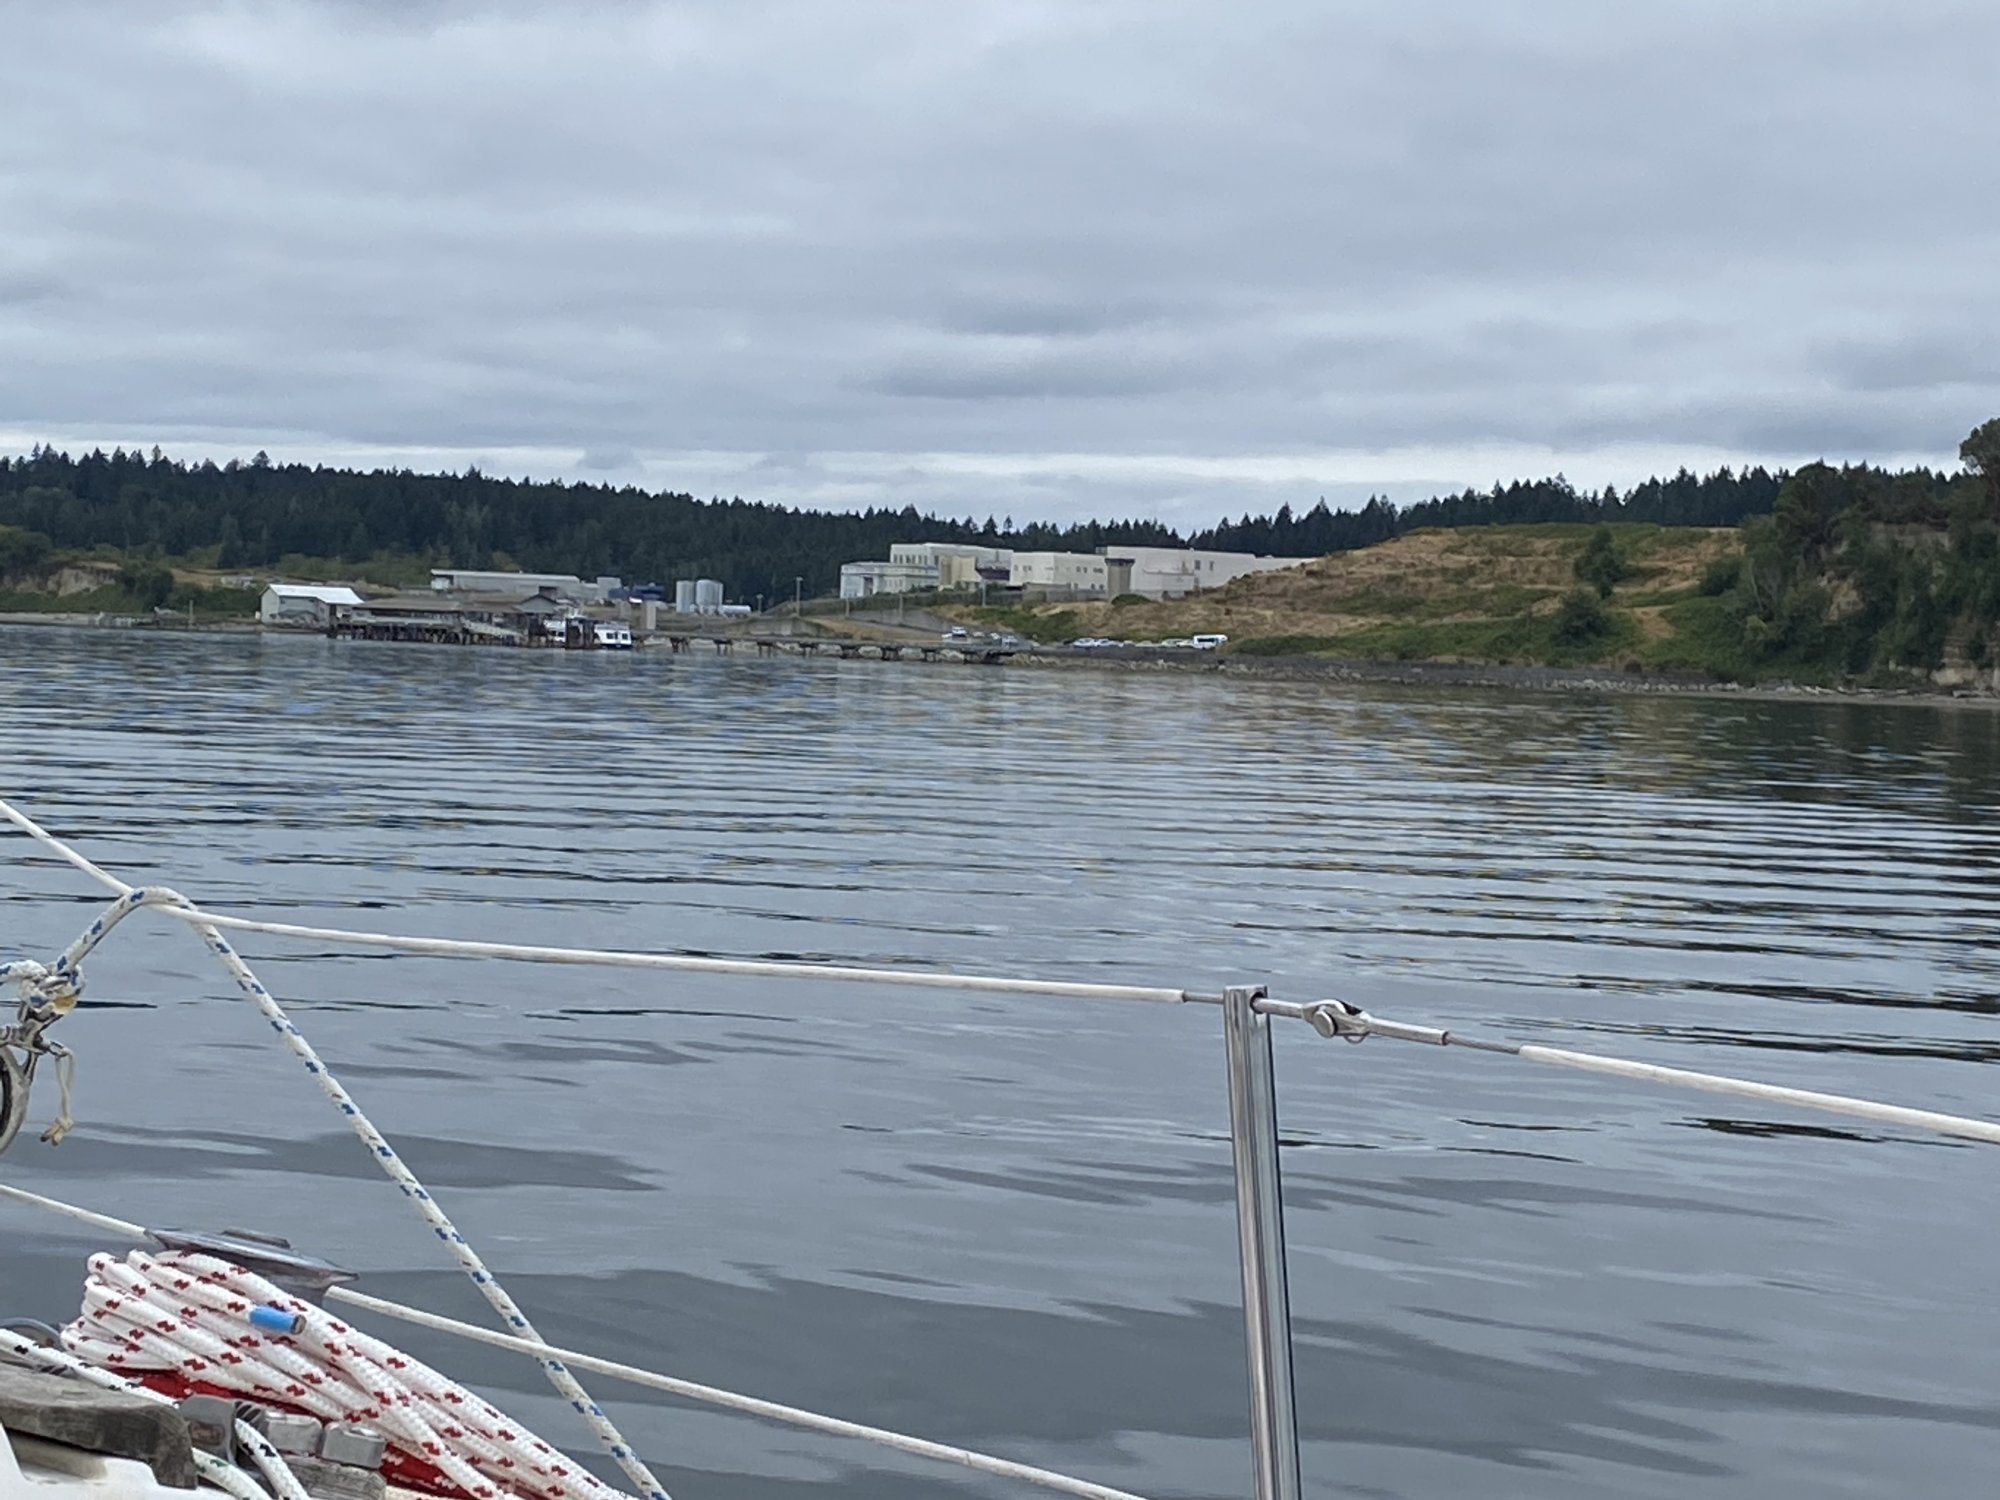
And McNeil Island and the prison.
The only issue we ran into is we started taking on water. I found a drip that just needed a bolt tightened, but it turned out the bolt was (is) a 1/4 turn away from breaking. It was where the exhaust outlet bolts to the manifold. It was the lower of the 2 bolts. At first the bilge pump was turning on every 45 minutes, but by the time we got to Swantown it would turn on about every 15 minutes. Just one more thing to fix. I love boats!
My reefing lines.
The Tacoma Narrows Bridges.
And McNeil Island and the prison.
It looks to me like it was not fully hoisted. A lot more halyard tension and letting off the toping lift would greatly improve the sail shape.It looks as if the main is too large for your setup.
Yup, that's what happens with large, overlapping genoas. My boat came with 155% and 130% genoas. I don't use the big one just because it is a pain to tack, the smaller one is much easier and I have an asymmetrical spinnaker for light downwind days.My Genoa was a PITA it kept getting hung up in the shrouds whenever I would switch sides.
@mikeracca it is great to see the new life you have breathed into this boat, keep up the amazing work!
In the photo of your main hoisted, you can see scallops between the sail slugs at the mast which indicates taht you do not have enough halyard tension. The bagginess along the boom that you talk about and is seen in the photo is called the "foot shelf" and is normal on a boom footed sail. It is there to allow for curvature to the main to transition back to the straight boom. Your sail was designed to have the foot rope slid into the track in the boom. You are setting it "loose footed" which is the way that I set my main. The shelf is not needed for a loose footed main but will not hurt anything. If you are setting the sail loose footed, you will need to have a very good working outhaul because it will be used more often in this setup.