Repairing Hunter 40 damage from Hurricane Matthew
- Thread starter B757Captain
- Start date
I didn't seem to have a big problem with this with the old cabinet doors and I'm using much better quality wood now, so:It will be interesting to see how those doors hold up, especially in a humid environment. Normally when you make a panel door, the sides go the full length and the rails fit into the sides, rather than the picture frame like 45 degree corners. There are two reasons for this. Obviously the rails being jointed into the sides makes for a much stronger joint. The second reason is that the panel must be floating, otherwise when it expands, because of the grain, it will expand at a different rate than the frame. They put rubber space balls in the slot, so the center panel does not rattle. But it definitely floats.
Here is a link that will explain it in detail;
Wood Movement
More like this is my thinking. I didn't have the depth on some of the door to do T&G so I used the rabbeting bit to make steps in both pieces so there's a slotted joint instead of a butt joint, greatly increasing the glue joint surface area. Everything was/is/will be glued with thickened epoxy and I am not tightly clamping the pieces, instead allowing some epoxy thickness between parts. This will either be a genius move or a monumental screwup. We'll seeFor solid wood panels, most definately. Plywood panels, not usually a problem. The other issue with mitred corners is if the rails and runners shrink or expand, the angle of the cut will change, causing a gap either on the inside or on the outside of the joint. Use a good stable, kiln dried wood and finish appropriately. Epoxy makes a good barrier from moisture transfer. A well cut tongue and groove or splined joint will help act more like a cross laminated piece of wood.
-Will (Dragonfly)
") . All surfaces will be sealed from moisture as well.
. All surfaces will be sealed from moisture as well.Can't biscuit join the corners in the traditional way because the rabbit cut around the edges would cut into the biscuit at the corners. Got a different approach once the undercuts are done.was just going to post , make sure you biscuit joint the corners!
BTW, the mitered "picture frame" corners was purely a styling choice.
Mark
Story of my lifeHmmmm .... hopefully Mark isn't thinking "now you tell me"
The quality of the wood doesn't really matter. It is if the has a tight grain or a very open grain. Open grains such as Red Oak absorb moister. Tighter grains such as White Oak do not. IF this survives, it will be because the wood it well sealed.
As far the type of joint, end grains do not glue well. This is why overlapping type joints were created. Your strength is in gluing the panel to the frame. But gluing to the frame does not allow expansion. Hopefully if the panel is plywood, this will minimize the expansion.
As far the type of joint, end grains do not glue well. This is why overlapping type joints were created. Your strength is in gluing the panel to the frame. But gluing to the frame does not allow expansion. Hopefully if the panel is plywood, this will minimize the expansion.
More doors & hurricane/TS stuff:
With the process of making the pieces and assembling the doors down, it's time to crank things up:
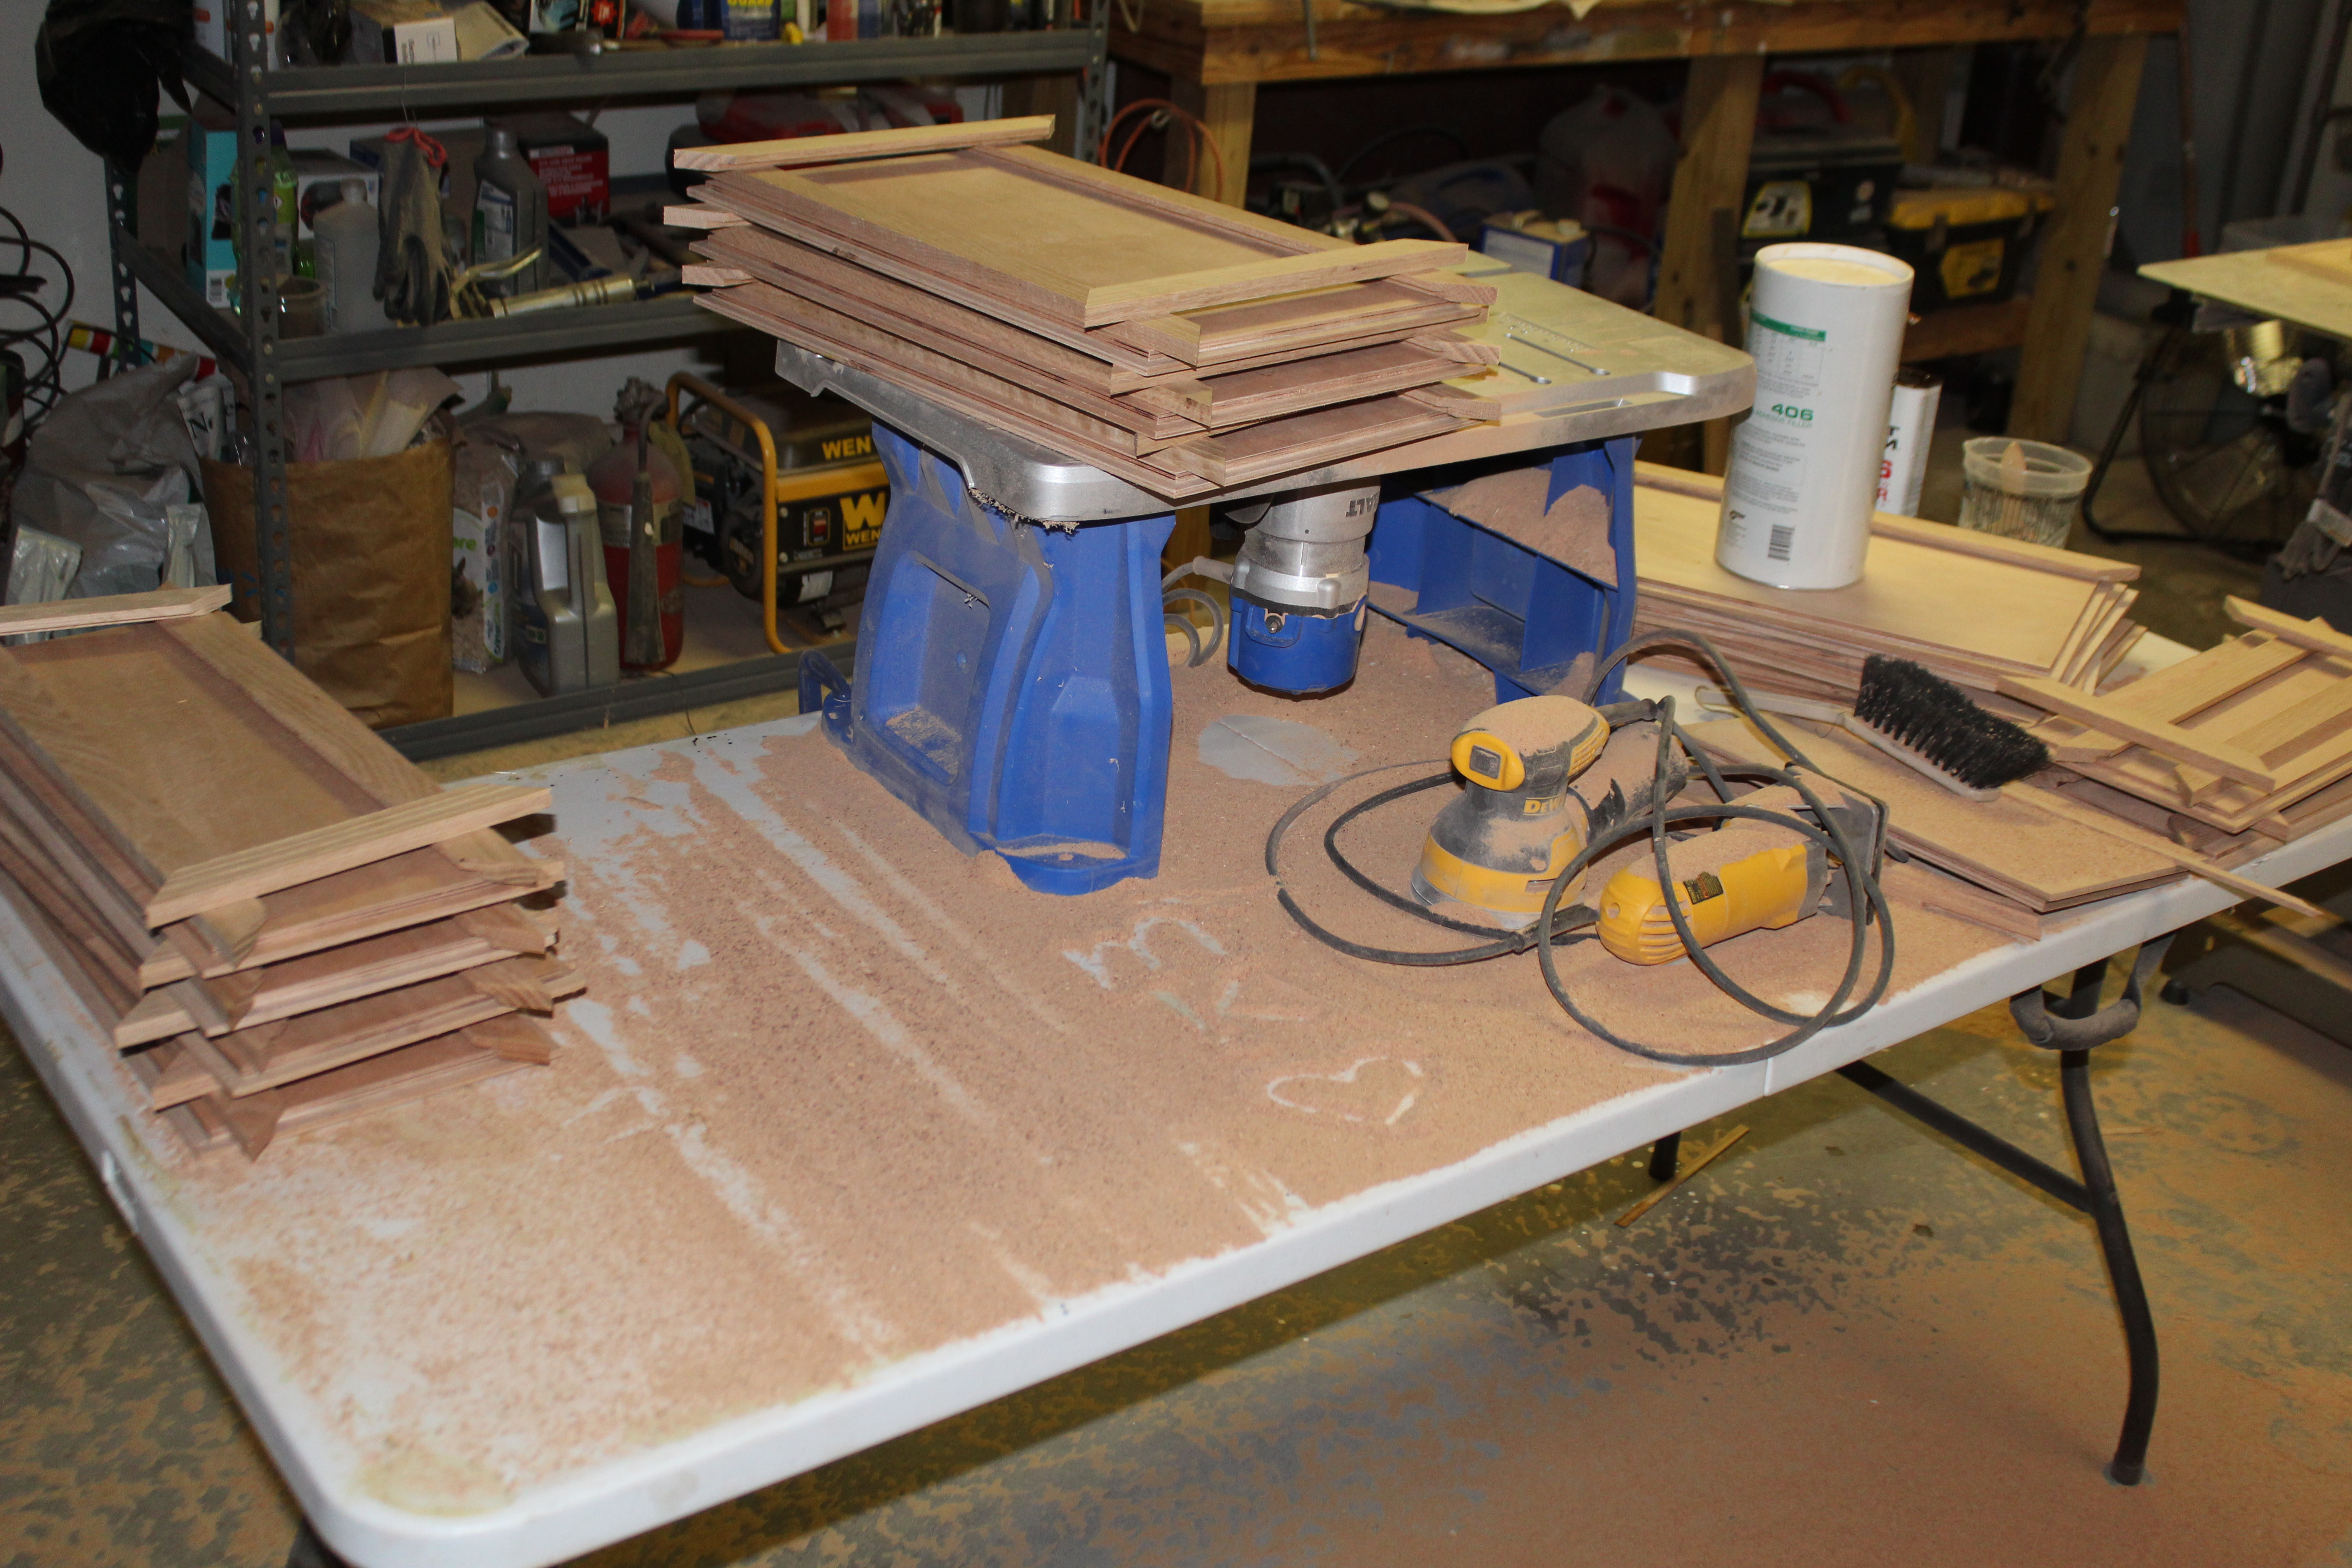
Boy, the router puts out mountains of sawdust!
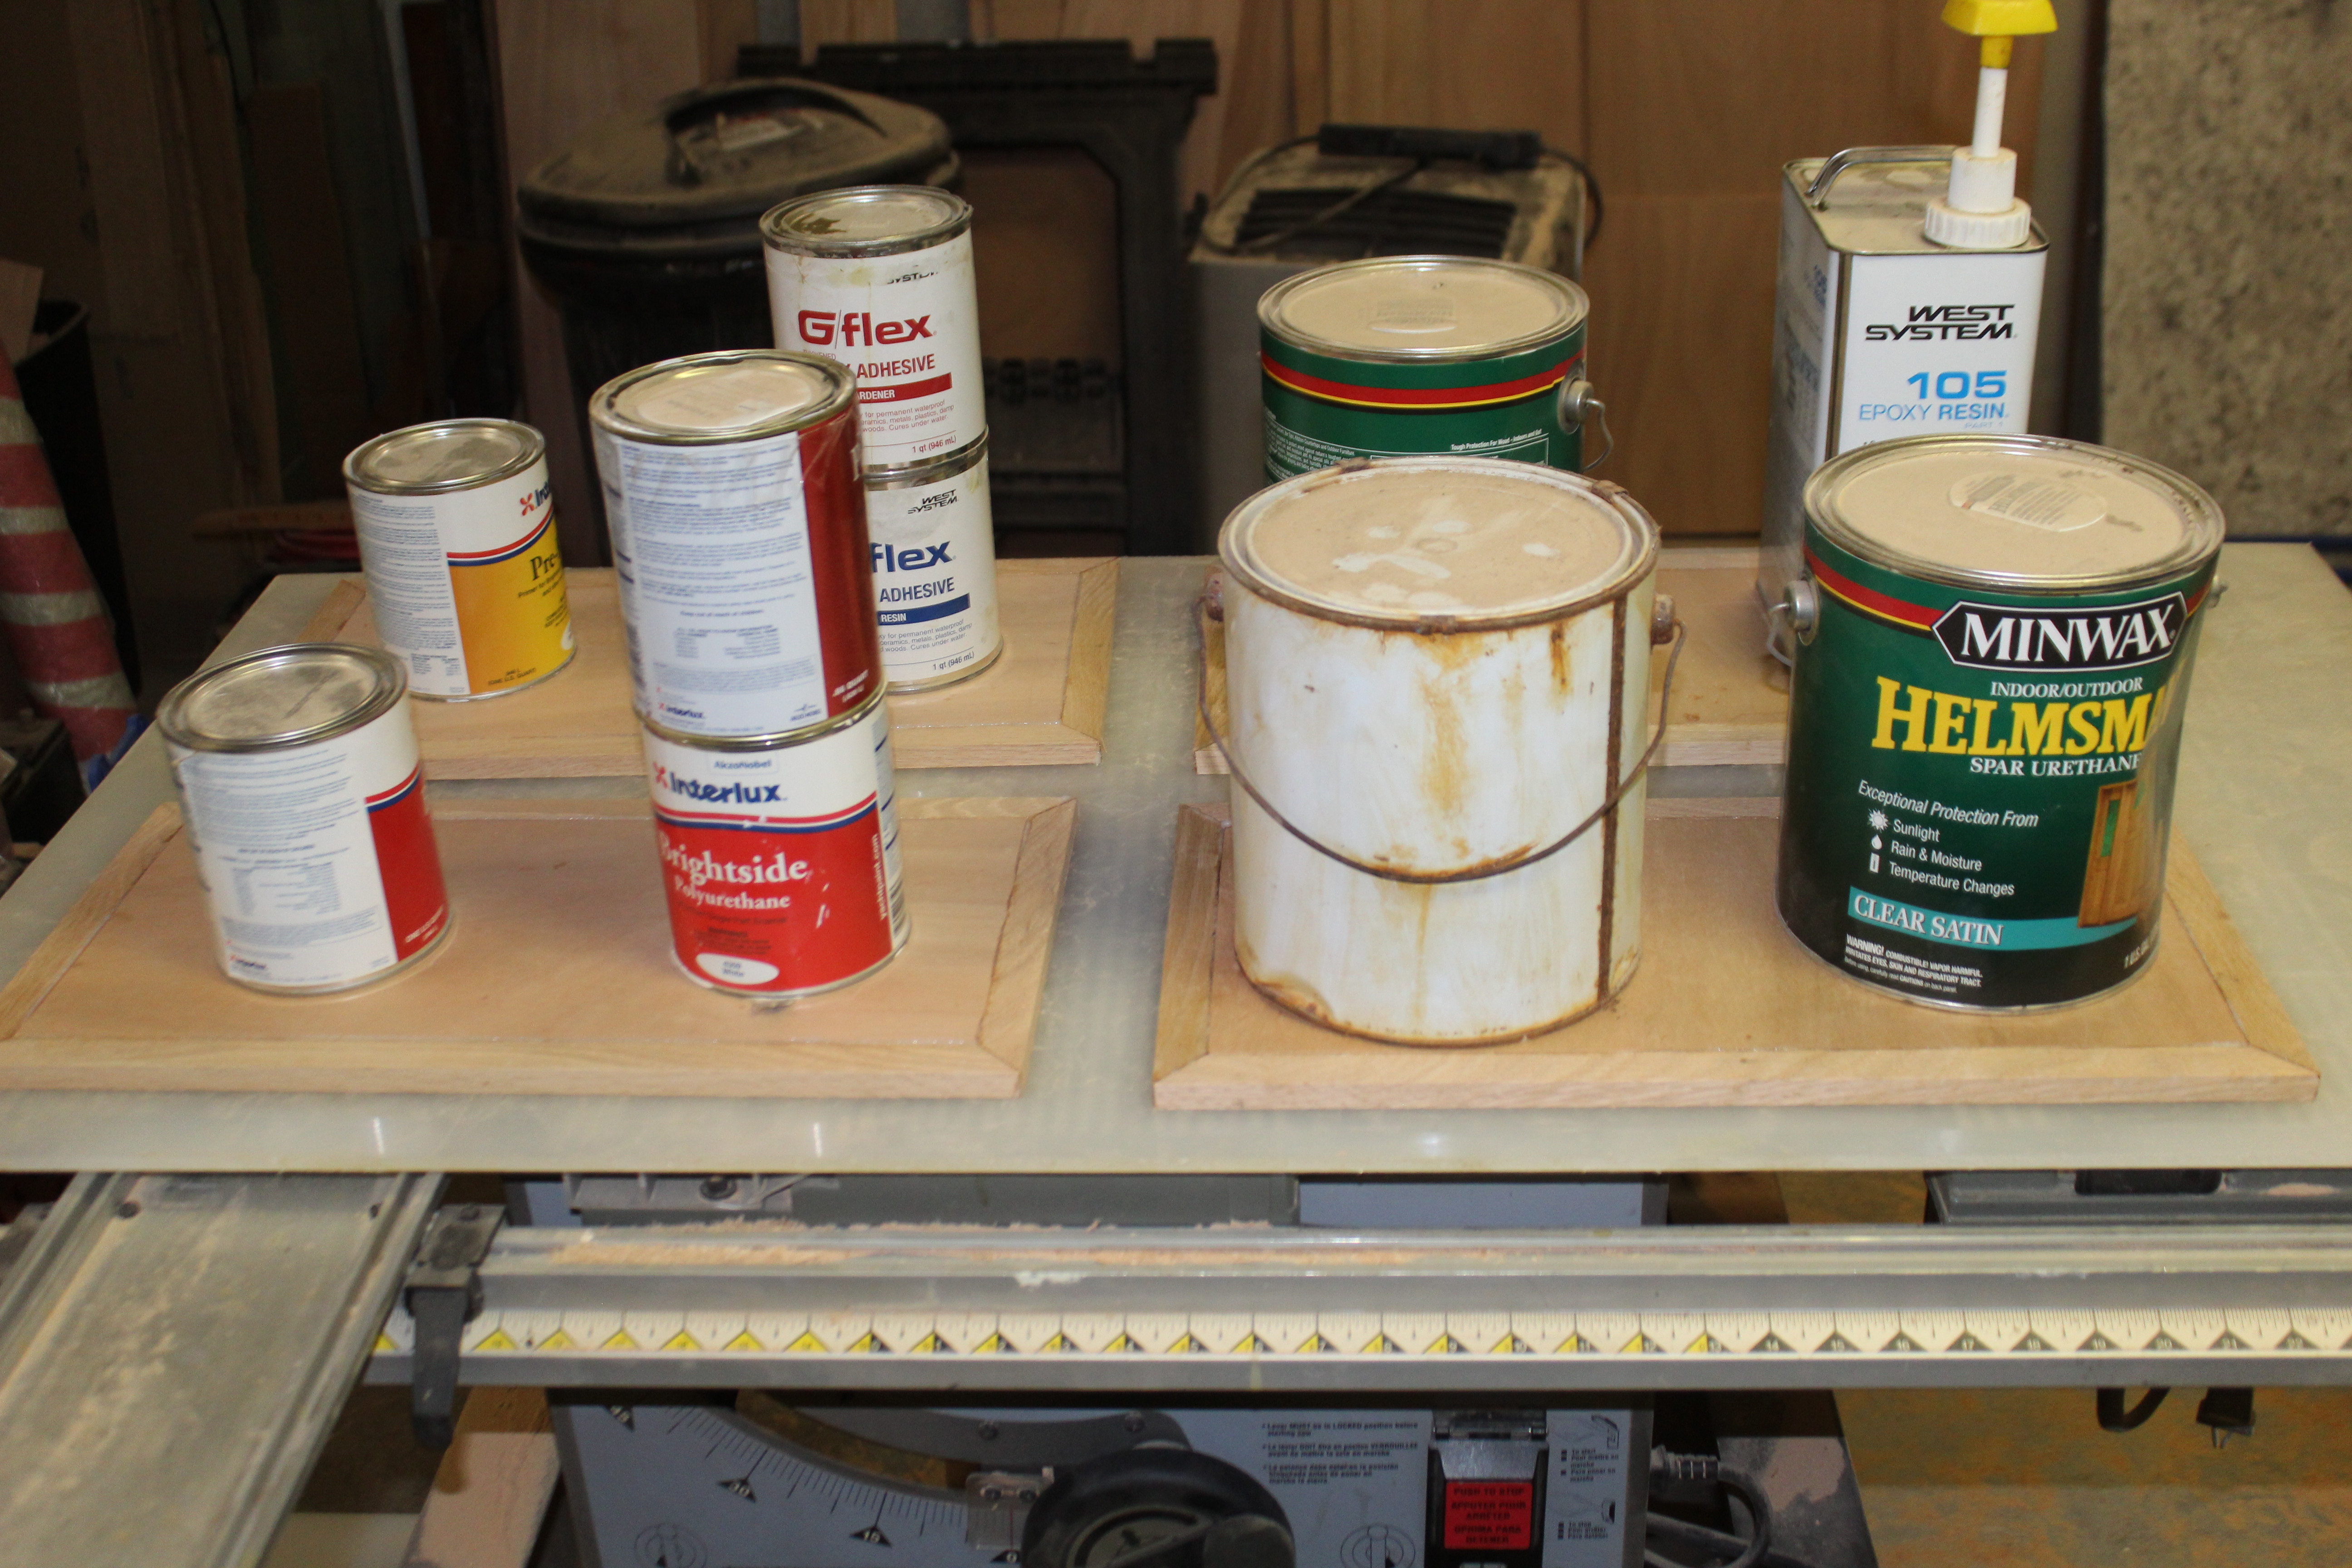
Next up, thickened epoxy to glue everything together:
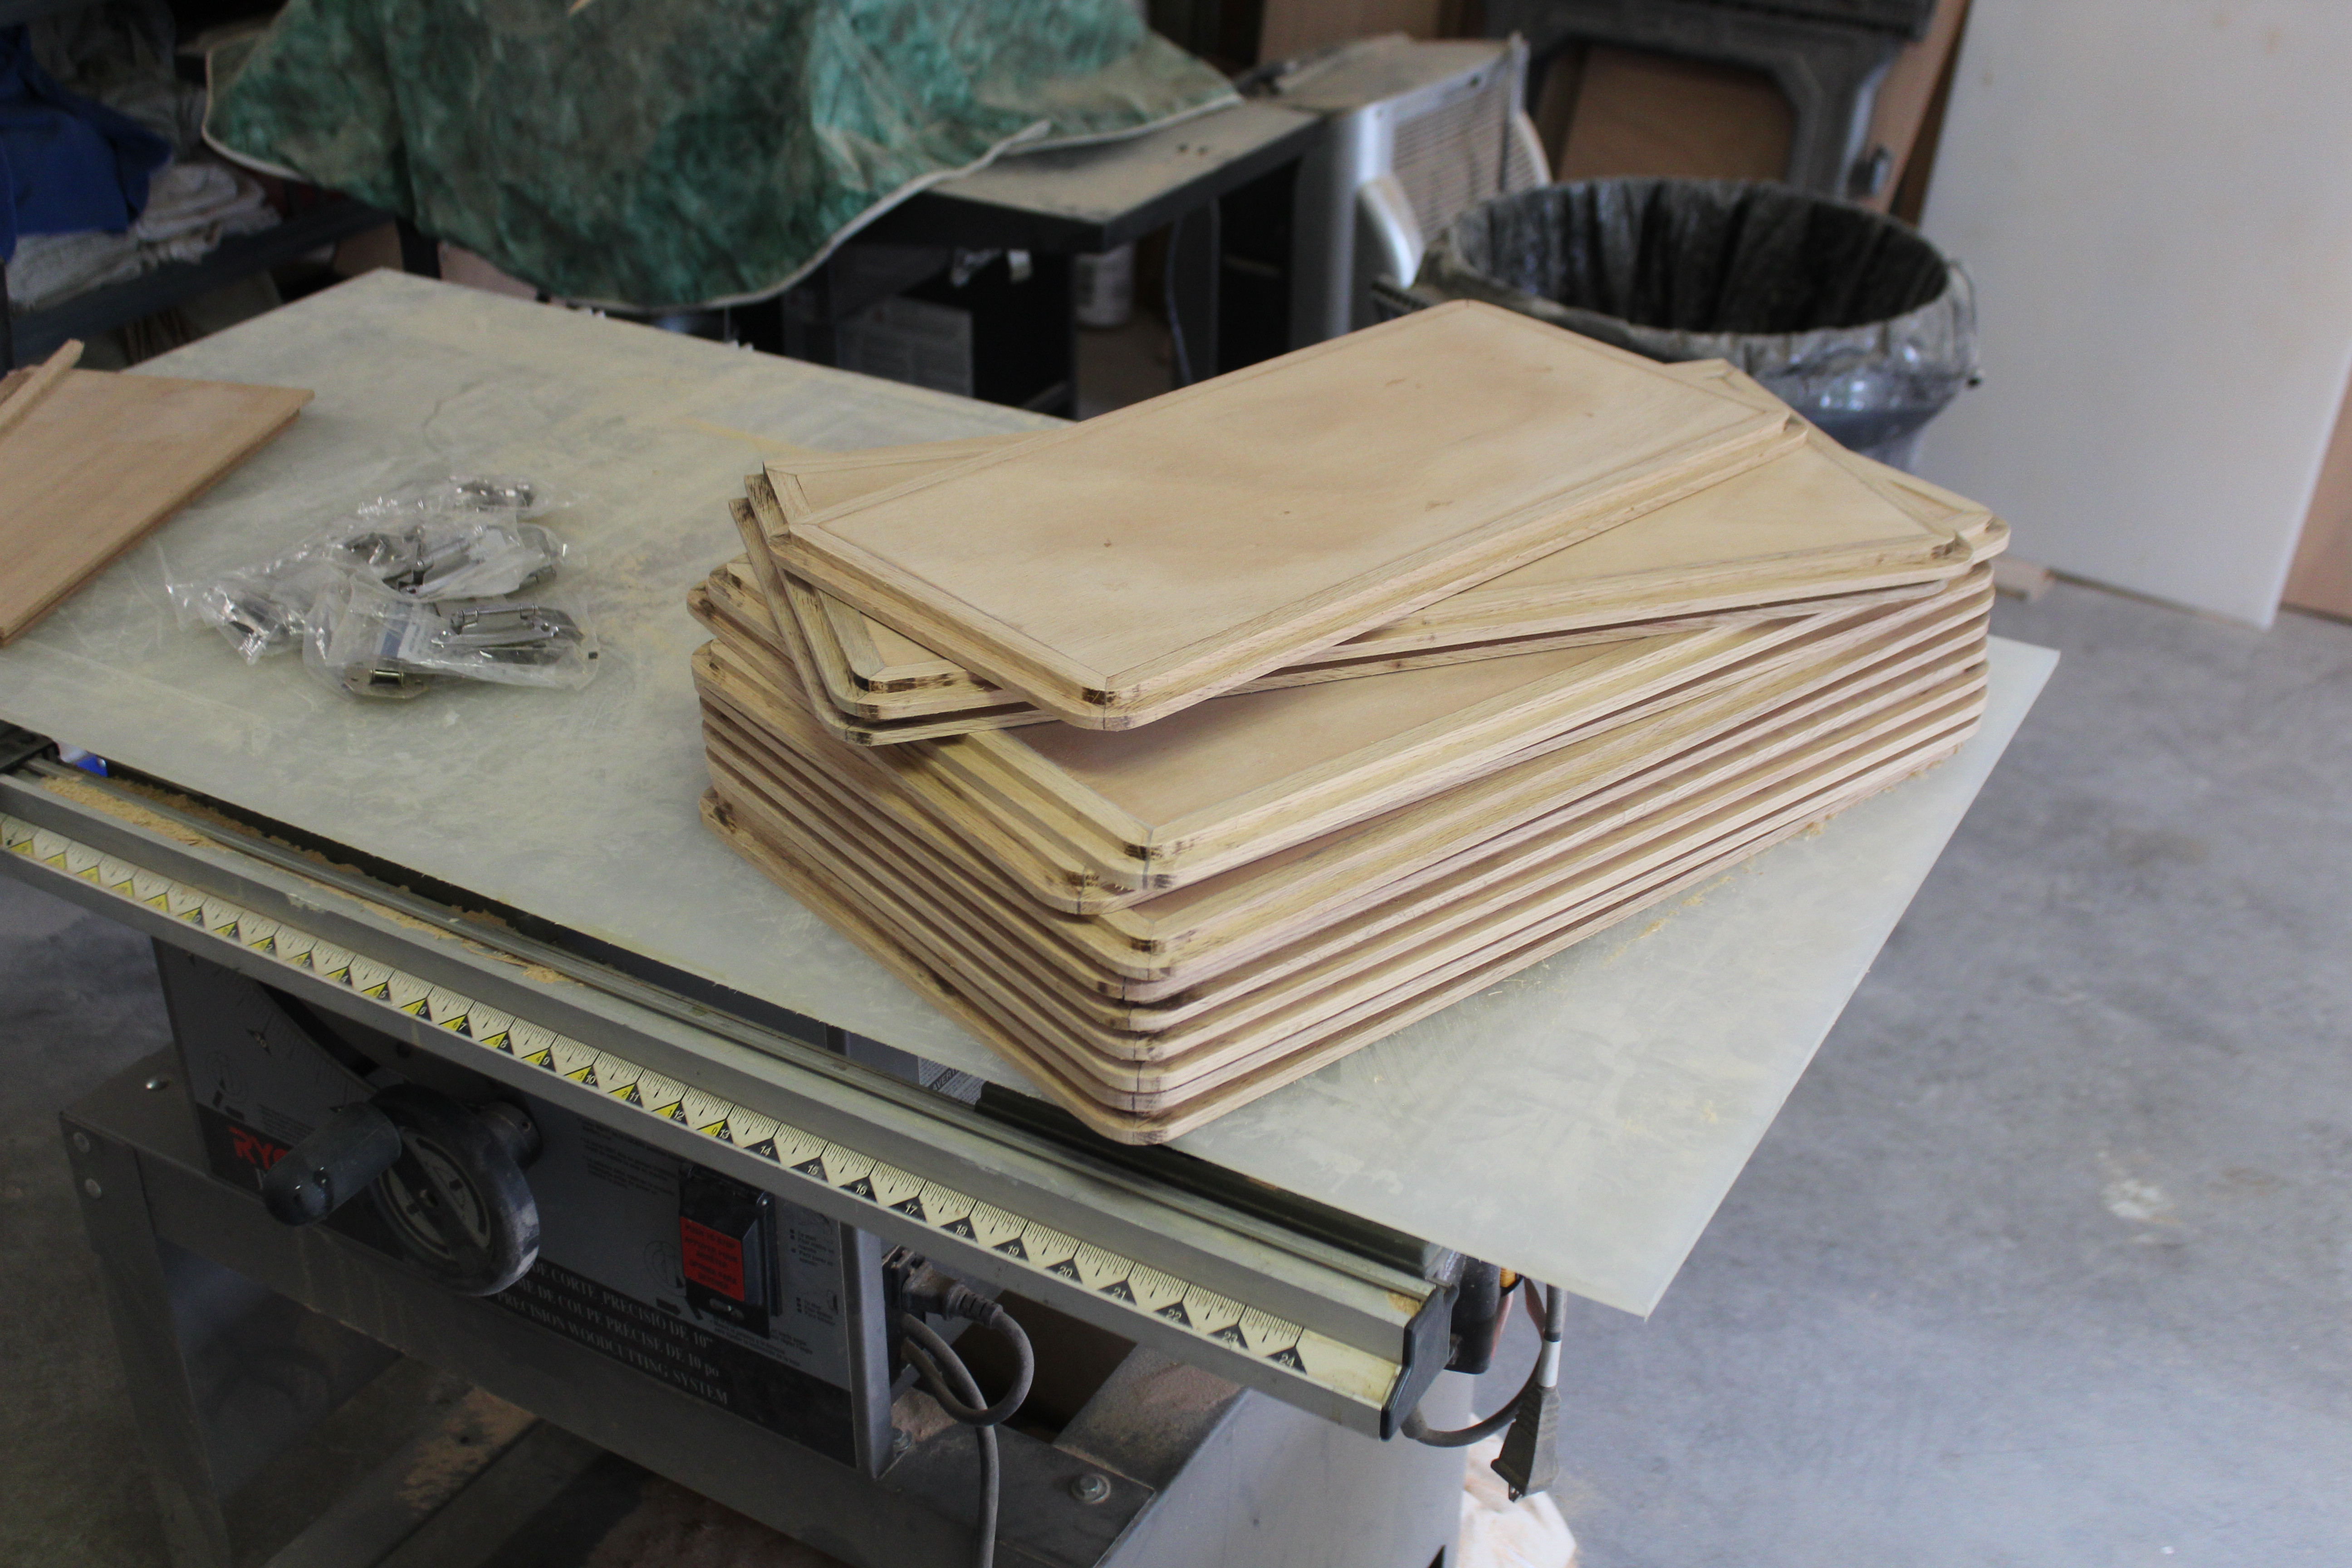
And final shaping and routing. These are the doors for the main cabin upper one of the hanging lockers and one I forgot to make for the heads:
Current events: The rains from TS I(whatever or however it's pronounced) literally just started here. We're looking at maybe an inch of rain and 20 - 25 mph winds but everything is battened down just in case. Looks like landfall up the coast around Myrtle Beach as a Cat 1. Everyone in the path stay safe.
With the process of making the pieces and assembling the doors down, it's time to crank things up:
Boy, the router puts out mountains of sawdust!
Next up, thickened epoxy to glue everything together:
And final shaping and routing. These are the doors for the main cabin upper one of the hanging lockers and one I forgot to make for the heads:
Current events: The rains from TS I(whatever or however it's pronounced) literally just started here. We're looking at maybe an inch of rain and 20 - 25 mph winds but everything is battened down just in case. Looks like landfall up the coast around Myrtle Beach as a Cat 1. Everyone in the path stay safe.
Hi, Im a "little" late to this party I suppose but this is very impressive. I own a Hunter 40 and I lived on it for 12 years until last year when I finally got off the boat. Even with best intentions its pretty impossible to live aboard and do any kind of major maintanence or upgrade, as Im sure you know. Now that I have time and space to work with the first change I wanted to make was to extend those silly shelves that run the length of the salon and have the weird laid back sliding doors as that whole setup is pretty useless.
This thread is gonna take some serious review to see what I can glean from what you have done!!!
Thanks for sharing so much!!
This thread is gonna take some serious review to see what I can glean from what you have done!!!
Thanks for sharing so much!!
Welcome to SBO, Himilou. You have certainly started your projects with the right resource. These guys have decades of experience and are happy to share it. You won't find a better group of sailors anywhere.
I am looking forward to reading more about your own projects, seeing some pictures and learning from you as much as you are from this forum.
Fair winds.
-Will (Dragonfly)
I am looking forward to reading more about your own projects, seeing some pictures and learning from you as much as you are from this forum.
Fair winds.
-Will (Dragonfly)
Thanks, I used to race those things that comprise your Avatar....Welcome to SBO, Himilou. You have certainly started your projects with the right resource. These guys have decades of experience and are happy to share it. You won't find a better group of sailors anywhere.
I am looking forward to reading more about your own projects, seeing some pictures and learning from you as much as you are from this forum.
Fair winds.
-Will (Dragonfly)
Hey 757Captain,
I by no means want to hijack your thread but I had a couple of quick questions:
Where is the water storage now located? Im also curious as to why you didnt like it under the forward berth? It could certainly be shaped to hold a greater volume but it seems like a reasonable location to me.
I too am going to eliminate that silly 10 gallon holding tank in the front, Im pondering possibly locating a very small Honda generator in that location, as they are fairly quiet and compact. Thoughts?
I also have some wood questions. Wood hates me, I'm pretty sure that when I walk through the forest all the plants wither and after I leave. I have a plan to enlarge the salon shelving by extending the top shelves inward so that basically the sliding acrylic doors will stand parrallel to the mast. What kind of wood would you recommend?
Thanks in advance!!
One thing at a time! My project list needs to shrink a bit before growing againIf my boat ever sinks, I'm shipping it to you!
Welcome aboard Himilou!Hey 757Captain,
I by no means want to hijack your thread but I had a couple of quick questions:
Where is the water storage now located? Im also curious as to why you didnt like it under the forward berth? It could certainly be shaped to hold a greater volume but it seems like a reasonable location to me.
I too am going to eliminate that silly 10 gallon holding tank in the front, Im pondering possibly locating a very small Honda generator in that location, as they are fairly quiet and compact. Thoughts?
I also have some wood questions. Wood hates me, I'm pretty sure that when I walk through the forest all the plants wither and after I leave. I have a plan to enlarge the salon shelving by extending the top shelves inward so that basically the sliding acrylic doors will stand parrallel to the mast. What kind of wood would you recommend?
Thanks in advance!!
No worries about thread hijacking - I do it myself all the time!
As to your questions, first, water storage: I am still in the process of building the tanks but the plan is to relocate about 30 gallons below the floor with SS tanks built to fit in the voids in the floor grid with the remaining volume in tanks under the main cabin settees. I'm going to lose about 20 gallons vs. the original v-berth tank but I'm also seriously looking at a water maker so total volume may not be a huge concern. Several reasons for eliminating the forward tank - one was to better manage the weight distribution up front. I plan to greatly increase the ground tackle and several more hundreds of pounds of weight of chain up front was going to be a problem. I had already noticed a big handling issue when the forward water tank was full (800+ lbs.) vs. empty with my current chain and anchor(s). Another was the tank itself - Hunter made the tanks from fairly thin wall aluminum and I was having problems with the front tank corroding and leaking. My solutions for this are not for the faint of heart - the only real way to deal with this tank is by deconstructing the forward half of the interior!
Forward holding tank - what was Hunter thinking?!?! As to locating a generator there, are you talking storage only for the genny or permanent location for use? That area is a really odd shape when it's empty - it's a 15 gallon triangle basically. I think you could fit a Honda 2000 there if you cut out parts of the inner liner and built a shelf setup in the void but I would be cautious with the whole idea because if for storage remember you're bringing a gas tank down below with all the dangers associated. If you want to run it in that location the dangers multiply unless you can confidently isolate the forward compartment from the fumes. I plan on using that space as a wet locker of sorts.
Main cabin shelves: not a bad idea! Agreed the originals were not very user friendly. As far as wood selection, the factory used teak ply and replacing with the same would be ok, though trying to match the factory wood will be almost impossible. If you keep the sliding acrylic panels and just lean them closer to the vertical matching the inner wood pieces is not a big deal, just the trim around the acrylic. I would recommend using a marine ply though - be careful with the cheap stuff from Lowes
. Another thought on reusing the acrylic sliding panels - if you reuse the factory pieces you are still giving up a significant amount of locker space vertically. What about having new pieces cut that are taller? Acrylic is fairly cheap and by raising the height you can reduce the volume of the open shelves above the cabinets.Cheers,
Mark

Himilou, let me help you out. 1st have a hurricane pick up your boat smash it down on a pylon putting a good size hole in it and then pick it up again and set it gently in ~5’ of water. Second, Start the repair and realize that PO’s and some of the original craftsmen did some less than stellar work. Third, Strip the boat down to the bilge. Fourth, Then use mad skills to re-engineer everything. Fifth, Then use even madder carpentry, glass, painting, and mechanical skills to rebuild it. All while finishing your career half way around the world. I think that pretty much sums the thread to this point.Hi, Im a "little" late to this party I suppose but this is very impressive. I own a Hunter 40 and I lived on it for 12 years until last year when I finally got off the boat. Even with best intentions its pretty impossible to live aboard and do any kind of major maintanence or upgrade, as Im sure you know. Now that I have time and space to work with the first change I wanted to make was to extend those silly shelves that run the length of the salon and have the weird laid back sliding doors as that whole setup is pretty useless.
This thread is gonna take some serious review to see what I can glean from what you have done!!!
Thanks for sharing so much!!
Seriously, welcome aboard. Great resources here and generally a good time had by all.
Himilou, let me help you out. 1st have a hurricane pick up your boat smash it down on a pylon putting a good size hole in it and then pick it up again and set it gently in ~5’ of water. Second, Start the repair and realize that PO’s and some of the original craftsmen did some less than stellar work. Third, Strip the boat down to the bilge. Fourth, Then use mad skills to re-engineer everything. Fifth, Then use even madder carpentry, glass, painting, and mechanical skills to rebuild it. All while finishing your career half way around the world. I think that pretty much sums the thread to this point.
Seriously, welcome aboard. Great resources here and generally a good time had by all.
I am ******* on the floor dying !!!!Himilou, let me help you out. 1st have a hurricane pick up your boat smash it down on a pylon putting a good size hole in it and then pick it up again and set it gently in ~5’ of water. Second, Start the repair and realize that PO’s and some of the original craftsmen did some less than stellar work. Third, Strip the boat down to the bilge. Fourth, Then use mad skills to re-engineer everything. Fifth, Then use even madder carpentry, glass, painting, and mechanical skills to rebuild it. All while finishing your career half way around the world. I think that pretty much sums the thread to this point.
Seriously, welcome aboard. Great resources here and generally a good time had by all.
I feel bad about this but, I was looking at your pictures and I noticed we both have the same stanchions. Then in another thread I discovered that these better models are available right here!!!
Break Out Another Thousand
I just thought that since I want these, you would too!!!!
Break Out Another Thousand
I just thought that since I want these, you would too!!!!
August update:
Hi fellas! Sorry for being absent for the last few weeks but I got wrapped up in some other things that have kept me from the boat.
It seems my fiberglass escapades have grown wings - literally! My buddy down the street has a kit plane that I fly occasionally that went to the mechanics for its annual inspection. Well, seems there was a soft spot on the port wing that concerned the guys so my buddy asked me to go out and look at it for him. I took the essential tool - phenolic hammer - and found two other bad spots! So, what next? There is no local fiberglass guy where the airplane is, so I'm it. I've spent quite a bit of time the last few weeks conversing with the factory, mechanics, inspectors and other interested parties about a repair plan. I'll probably start grinding and glassing next month sometime because 2020 has struck again! Gotta go to New Mexico later this week to the FIL's place, planning to be there until mid-September or so.
And lastly, the heat wave has finally gotten to me! It's just too dang hot during the day and there has been no reliefI've still got loads of parts and pieces that have needed cleaning and sorting so I've been catching up on that lately. I have started hinging the cabinet doors, pics of that soon.
FWIW, I'll be the guy test flying the airplane after the repairs so it WILL be done right!
Cheers,
Mark
Hi fellas! Sorry for being absent for the last few weeks but I got wrapped up in some other things that have kept me from the boat.
It seems my fiberglass escapades have grown wings - literally! My buddy down the street has a kit plane that I fly occasionally that went to the mechanics for its annual inspection. Well, seems there was a soft spot on the port wing that concerned the guys so my buddy asked me to go out and look at it for him. I took the essential tool - phenolic hammer - and found two other bad spots! So, what next? There is no local fiberglass guy where the airplane is, so I'm it. I've spent quite a bit of time the last few weeks conversing with the factory, mechanics, inspectors and other interested parties about a repair plan. I'll probably start grinding and glassing next month sometime because 2020 has struck again! Gotta go to New Mexico later this week to the FIL's place, planning to be there until mid-September or so.
And lastly, the heat wave has finally gotten to me! It's just too dang hot during the day and there has been no relief
I've still got loads of parts and pieces that have needed cleaning and sorting so I've been catching up on that lately. I have started hinging the cabinet doors, pics of that soon.FWIW, I'll be the guy test flying the airplane after the repairs so it WILL be done right!
Cheers,
Mark