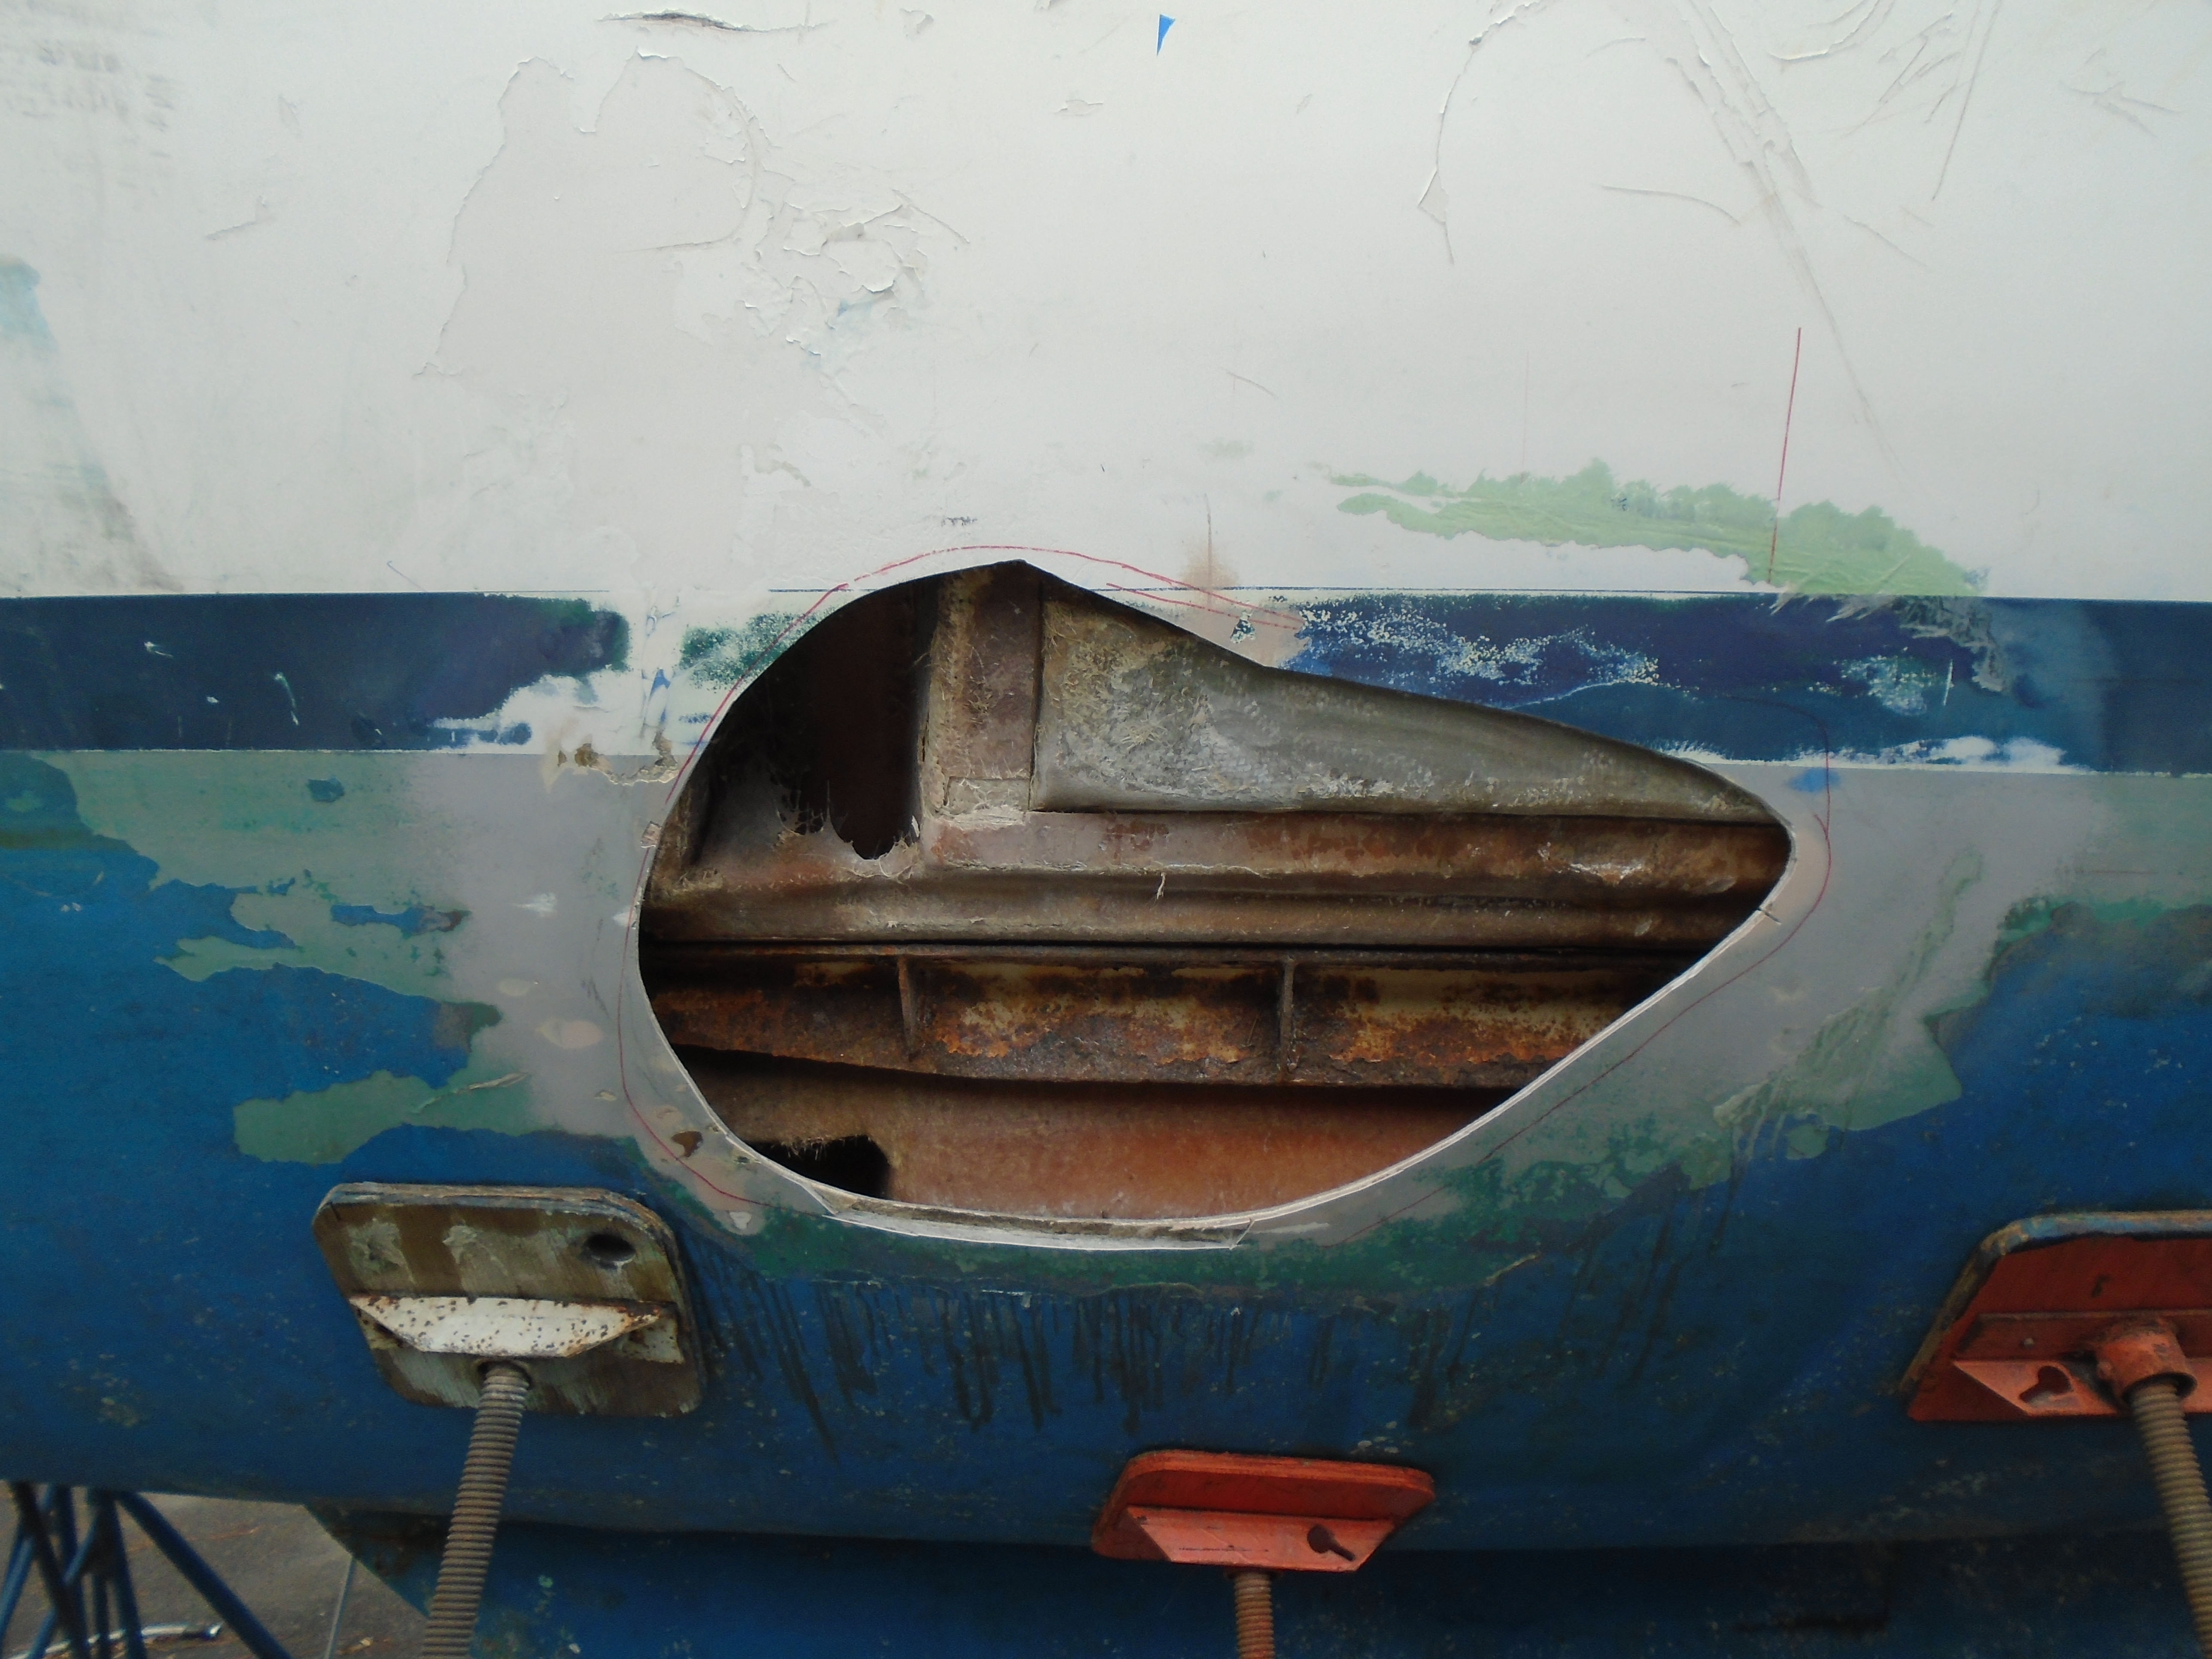
Repairing Hunter 40 damage from Hurricane Matthew

May 8, 2013
629
Hunter 40 Dataw Island, SC
Mark, did you inspect the chain plates while everything was apart? There was another thread that showed rusted out iron chain plates in a Hunter and that stainless rod reminds of that setup.
I read that thread and saw the pics and:

:yikes::yikes::yikes:

Thankfully I had full access to inspect my portside chainplate anchor:


Although there was some rust there were no deep spots or rot and the chainplate rod area was in good shape. I treated the metal with several applications of rust converter and sprayed the heck out of it with rust-block paint. I had partial access to the starboard chainplate setup while doing repairs and inspected the rest with my endoscope. Same for that side and I hit as much of the starboard side as I could get to with the rust treatment.
 
May 8, 2013
629
Hunter 40 Dataw Island, SC
Working inside:

With the holes filled and the vent fixed I painted the upper cabin liner:


The headliner has molded-in patterns (probably just for visual effect, I can see no structural need) so I hit these with a different shade - Interlux White overall and Matterhorn White for the patterned areas. I did this when I painted the V-berth and forward head overhead and liked the subtle contrast so I will carry it over to the entire boat:


After giving the headliner a few days to dry I could start putting everything back together :thumbup::


And the cabinet faces finished and installed:


This pic must have had a flash or something, the cabinet wood grain in person looks more subdued.

Next up, more interior work!

Cheers,

Mark
 
May 8, 2013
629
Hunter 40 Dataw Island, SC
The year in review:

Merry New Year to everyone!

With all the hype about how sucky 2020 and 2021 was and how 2022 might be saying "hold my beer" :yikes:, I thought a review of my 2021 might be enlightening - and maybe entertaining - and I would bring everyone up to date on overall costs of the repair/rebuild and refit.

So here we go!

2020 literally ended for me with a snowstorm in West Texas that delayed my departure from New Mexico back to South Carolina. Jan 1st, 2021 started off driving a U-Haul pulling a 1941 Studebaker through several hundred miles of the white stuff. Not a good start but the year got better :).

Early 2021 consisted of a bunch of little tasks on the boat and progress on the interior, mainly framing up, painting and finishing the woodwork in the V-berth and painting the forward head. The first quarter of the year was dominated by getting my FIL ready for his move to SC so I couldn't start too many new projects. That said, I did repaint my wife's car, swapped the V-6 in my Dakota for a V-8 and got it ready for paint, and readied the boat to be splashed.

April was moving month, described in detail a few pages ago. Late in April the boat saw water for the first time in over 4 years! I'm still smiling about that! :biggrin::biggrin::biggrin:

May was mostly painting the Dakota but I did start enabling the air conditioning on the boat. So much easier working down below when you're not sweating buckets! The A/C and interior projects rounded out May and covered most of June as well.

July - hard dodger! Started framing the dodger. I swapped comfort below for sweating buckets on deck. Took some time to complete but when finished up I think I can be proud of it ;)

The dodger project continued to late September and next up, time to start finishing the interior. After the realization that my TIG welding skills made Swiss-cheese out of some expensive SS, a realignment of water tank construction took place. The port-side tanks were completed and I'm finishing up the port-side cabinetry to end the year.

Overall, pretty productive, I think!

Where am I at on repair and refit costs? Believe it or not, almost right on budget! For the repairs, that is :). When I sat down to budget the project I tried to separate repair vs. refit costs. I overestimated some of the repair costs and wildly underestimated others :biggrin:, but overall I'm pretty close to what I originally estimated. I never really budgeted for refit items but to date - repair: ~$22,000 and refit so far: ~$14,000. Labor: (my invested time) -

Need room for this: HAHAHAHAHA! HAAHAAAHAAHAAAHAAAHAAAAHAAA!

Seriously, it has been a labor of love and I have enjoyed just about all the time spent so, overall, I'm putting a ++ stamp on my 2021. To all, cheers and hopes for a good year for us all!

Mark
 
Jan 17, 2010
19
Hunter Legend 40 Edgewater
If possible can I get some dimensions off the mast base for the location of the voids under the floor that you used to build the water tank? I want to open mine up for storage.

I finished the rebuild of my steering pedestal, control cables and I rotated the rudder bearing collar to get a new wear surface thereby raising the rudder a quarter inch. The hardest part was getting the old aluminum drive wheel off the stainless rudder and the five stainless bolts holding the split casting together.
 

Attachments

Jan 24, 2017
666
Hunter 34 Toms River Nj
Mark,
You put the energizer bunny to shame. I have to drink a Red Bull or 5 hr. Energy drink just to eep up with your post! :biggrin:
The work you have done so far is absolutely outstanding, I’ve been following your thread from the beginning and look forward to all of your updates. Again outstanding job so far resurrecting the boat from what most people would have considered it to be a total loss. Glad to see the you have save this boat from the sailboat grave yard.

You joke about the hours spent on repairs. If we were to estimate on the hours spent on actual repairs plus how much time you have spent just working out in your mind just how to do accomplish them, I think you probably have about a million dollar boat. Awesome job! I wish that some marine technicians had 1/8 of your craftsmanship and work ethic’s.
Again absolutely outstanding, I hope when you are all done that you post a before and after photo album so people can truly get a grand scale off what you have done since the hurricane damage and sinking.
Bravo! :clap::clap::clap::clap::beer:
 
Last edited:
Aug 28, 2006
564
Bavaria 35E seattle
+1 for Will and Capt Robbie's comments. And, a very happy, healthy, prosperous, and productive New Year to you and your family! Always looking forward to the posts. I almost don't want your project to end. :biggrin:
 
  • Like
Likes: B757Captain
May 8, 2013
629
Hunter 40 Dataw Island, SC
If possible can I get some dimensions off the mast base for the location of the voids under the floor that you used to build the water tank? I want to open mine up for storage.

I finished the rebuild of my steering pedestal, control cables and I rotated the rudder bearing collar to get a new wear surface thereby raising the rudder a quarter inch. The hardest part was getting the old aluminum drive wheel off the stainless rudder and the five stainless bolts holding the split casting together.
Congrats on the quadrant rebuild! I still have to replace my steering chains and reset the pulleys - #438 of 1197 items to go! :biggrin:

If you can wait a few more days I will start disassembly of the starboard side and can get some measurements from there. The forward grid voids should be similar. I'm not too sure there is much underfloor space accessible if your cabin and cabinetry is factory, though. Take a look at some of my pics with the port side floor removed - the aft void is the factory holding tank and the other two forward of that are bisected by the settee. There is a sizeable space starboard side in the aft area of the galley; in fact I am going to open that area up and use it for storage.
 
May 8, 2013
629
Hunter 40 Dataw Island, SC
Mark,
You put the energizer bunny to shame. I have to drink a Red Bull or 5 hr. Energy drink just to eep up with your post! :biggrin:
The work you have done so far is absolutely outstanding, I’ve been following your thread from the beginning and look forward to all of your updates. Again outstanding job so far resurrecting the boat from what most people would have considered it to be a total loss. Glad to see the you have save this boat from the sailboat grave yard.

You joke about the hours spent on repairs. If we were to estimate on the hours spent on actual repairs plus how much time you have spent just working out in your mind just how to do accomplish them, I think you probably have about a million dollar boat. Awesome job! I wish that some marine technicians had 1/8 of your craftsmanship and work ethic’s.
Again absolutely outstanding, I hope when you are all done that you post a before and after photo album so people can truly get a grand scale off what you have done since the hurricane damage and sinking.
Bravo! :clap::clap::clap::clap::beer:
Thanks Capt and all you guys!

I am putting an album together for a boat show here at the marina later this year with select before, during and after photos and short descriptions. It might make for a good separate forum thread when the time comes.
 
May 8, 2013
629
Hunter 40 Dataw Island, SC
And now for a brief interlude:

We got the tail end of that storm that swept (is sweeping?) the east coast with the worst of the winds early Monday morning. We had rough seas and strong winds from a direction not normally seen here. Way too rough to try to hold saws and other power tools! On my morning trip to check on the boat I found this:


Since we are all side ties presently I always double up my lines but one had chafed completely through - thank goodness for the remaining line! I have never had much of a problem with line chafe but the aft lines have chafed before occasionally. The new dock configuration has the cleats a bit too close for a bigger boat and narrows the angle the line takes compared to what I was used to.

As is normal for me :biggrin:, I applied my engineering mindset and determined that the aft cleat and the end of the toe rail were too close to each other, possibly contributing to separating the line:


Note that in this pic I have re-routed the dock line to make room for the following operation:


Partial toe-rail-ectomy. I got my angle grinder out and lopped off about 6 inches of the upper rail to give the line more swing room. Also smoothed out the edges (the original end was pretty sharp-edged). This should help reduce the chafe, at least until these arrive:


I'll post pics of the completed dock line revamp when parts arrive!

Now back to your regularly scheduled programming.

Cheers,

Mark
 
  • Like
Likes: Will Gilmore

DArcy

.
Feb 11, 2017
1,691
Islander Freeport 36 Ottawa
And now for a brief interlude:

We got the tail end of that storm that swept (is sweeping?) the east coast with the worst of the winds early Monday morning. We had rough seas and strong winds from a direction not normally seen here. Way too rough to try to hold saws and other power tools! On my morning trip to check on the boat I found this:


Since we are all side ties presently I always double up my lines but one had chafed completely through - thank goodness for the remaining line! I have never had much of a problem with line chafe but the aft lines have chafed before occasionally. The new dock configuration has the cleats a bit too close for a bigger boat and narrows the angle the line takes compared to what I was used to.

As is normal for me :biggrin:, I applied my engineering mindset and determined that the aft cleat and the end of the toe rail were too close to each other, possibly contributing to separating the line:


Note that in this pic I have re-routed the dock line to make room for the following operation:


Partial toe-rail-ectomy. I got my angle grinder out and lopped off about 6 inches of the upper rail to give the line more swing room. Also smoothed out the edges (the original end was pretty sharp-edged). This should help reduce the chafe, at least until these arrive:


I'll post pics of the completed dock line revamp when parts arrive!

Now back to your regularly scheduled programming.

Cheers,

Mark
But Mark, you can't use those on your stern, those are bow chocks!

Hopefully you have access to through bolt those chocks. I had to remove my bow chocks last year. Fortunately there was an access port in the anchor well and with a great deal of contortionism I was able to reach the nuts on the back. Some butyl tape while re-installing got them sticky enough to help hold them in place until I could get a few turns on them.
 
  • Like
Likes: B757Captain
May 8, 2013
629
Hunter 40 Dataw Island, SC
But Mark, you can't use those on your stern, those are bow chocks!

Hopefully you have access to through bolt those chocks. I had to remove my bow chocks last year. Fortunately there was an access port in the anchor well and with a great deal of contortionism I was able to reach the nuts on the back. Some butyl tape while re-installing got them sticky enough to help hold them in place until I could get a few turns on them.
Luckily, my stern self-identifies as a bow so it's all good ;)

Sorry, this was the best I could come up with :biggrin:

I have great access underneath the toe rail to through-bolt the chocks. Should be an easy install and upgrade.
 
  • Like
Likes: DArcy
Jan 17, 2010
19
Hunter Legend 40 Edgewater
No rush on the pan dimensions. Regarding the toe rails attached is a photo of the modification I made to my toe rail for a mid-ship cleat. I needed a cleat for 3/4" rope and I couldn't find a two hole aluminum so I went with a high end stainless cleat.

I also replaced all the toe rail machine screws as the stainless bolts were reacting to the toe rail and eating up the aluminum around the machine screws. I caulked the screws and nuts so hopefully I the galvanic reaction will not come back for a few years. I used an impact driver to get the old screws out which saved me a lot of trouble.
 

Attachments

  • Like
Likes: Will Gilmore
May 8, 2013
629
Hunter 40 Dataw Island, SC
Back to our regularly scheduled programming:

Still lots to do to finish up the port side cabinetry. I got a few coats of clear on the wall sconce plate, mounted the light and switch/outlet and with everything in place and wired:


We have lights! (Well, A light anyway :)). I received the USB outlets for the wall plate but forgot to order the covers - they should be here tomorrow - so I'll get the USB and a DC light switch added soon.

I still have some work to do at the aft end where the electrical panels are. This shelf needed an edge trim piece but I couldn't add it until the other shelves were in place:


Once the trim was added and finished, I could reinstall the shelf and aft bulkhead:


The doors were off for finishing so I'll add them next. Since each piece of cabinetry needs 3 coats of clear, and each coat needs a minimum of 4 hours to dry, there's a good bit of waiting time between coats, so I started on the cabinet latches.

I have donned my steel body armor for the following statement: In my opinion, those chinzy push-button latches that seem to have become popular are horrible! Terrible! Awful! They are really bad at doing their design task, which is keeping the locker doors closed. I tried them years ago and spent lots of time picking up and replacing the contents of the cabinets numerous times before I gave up on them. I looked high and low for a positive latching system that A; worked, B: looked more like a cabinet piece and less like an industrial handle, and C: didn"t break the bank. Never found anything I liked, so:

Here's what I came up with. First in component form:


From center moving left, first the handle, ~$2.50 from Lowes/Home Depot. Starts life as a cabinet handle. Accepts an 8-32 screw. Next a few #8 washers. Next a 1/4" OD sleeve - length determined by the door thickness. Next a teflon spacer, 1/4" ID, 1/2" OD and 1/4" thick. Next a #8 washer, then an 8-32 nut. I fabbed up an aluminum cam and drilled/tapped for an 8/32 bolt. Tapping this will allow the bolt/cam/nut to jam when tightened to prevent the tab from moving. Finally an 8/32 machine screw which will be cut to length for proper compression fit. Assembled unit on the right.

I then locate and drill a 1/4" hole in the door for the latch (remember that the handle will pivot on the upper arm so remember that when drilling ;). I have, on occasion, forgot!). On the back side of the door use a 1/2" auger bit to create a depression 1/4" for the teflon spacer to fit. Slide everything in and screw the handle on the front. Then take it all apart at least once to get proper tension. When it all works:


Voila! a positively locking latch with minimal effort (and minimal cost - each latch costs about $3.25 total in parts). Depending on the depth of the cam I add either a block on the inside of the cabinet to get a tight door gap, but an alternate method I have recently discovered is to cut and slide a piece of 3/8" rubber hose on the end of the cam for a soft pressure seal when closing and latching the door. I'll use these latches for all the doors in the galley and main cabin but I have other, more traditional latches for drawers and some of the other cabinet doors around the boat.

I really hate hearing the contents of my lockers crashing to the deck on the first tack!

Next up, more interior work.

Cheers,

Mark
 
  • Like
Likes: Will Gilmore
Jan 17, 2010
19
Hunter Legend 40 Edgewater
I like the cabinet pulls/latches but do you have a concern about them being a head knocker above the salon benches/seating? The cabinets are really something!
 
May 8, 2013
629
Hunter 40 Dataw Island, SC
I like the cabinet pulls/latches but do you have a concern about them being a head knocker above the salon benches/seating? The cabinets are really something!
The latches are a carry-over from interior version 2.0 so I have several years of use from them - no knocked heads or other bodily damage so far!

A quick update - I'm two-finger typing at present since I currently have a total of three fingers spread across both hands out of action, the result of two separate "unfavorable" encounters with power tools :yikes::(.

The first was a "you dummy" encounter that will heal when two fingernails grow back :), but yesterday's mishap with the table saw scared me. Came within a whisker of losing a finger when the saw kicked back (trying something I should NOT have been doing) and I'm lucky it just took a big chunk (only) out of my finger instead of much more. Lesson learned - time to slow down a bit and engage brain before power switch.

As a result, work on the boat will slow down for a few days while things heal (and I replenish my blood volume :biggrin:). I do have a few weeks worth of updates to catch up on though, when I can type a bit faster!

Cheers,

Mark
 
May 9, 2020
135
Hunter Legend 37 Harrison Twp, MI
Scary moments like those always make me think I should buy a Sawstop... or at the least, a reason to watch the slow-motion again!

Heal quickly, in the mean time... enjoy this!
 
Last edited: