Repairing boat after Hurricane Zeta

Feb 14, 2014
7,425
Hunter 430 Waveland, MS
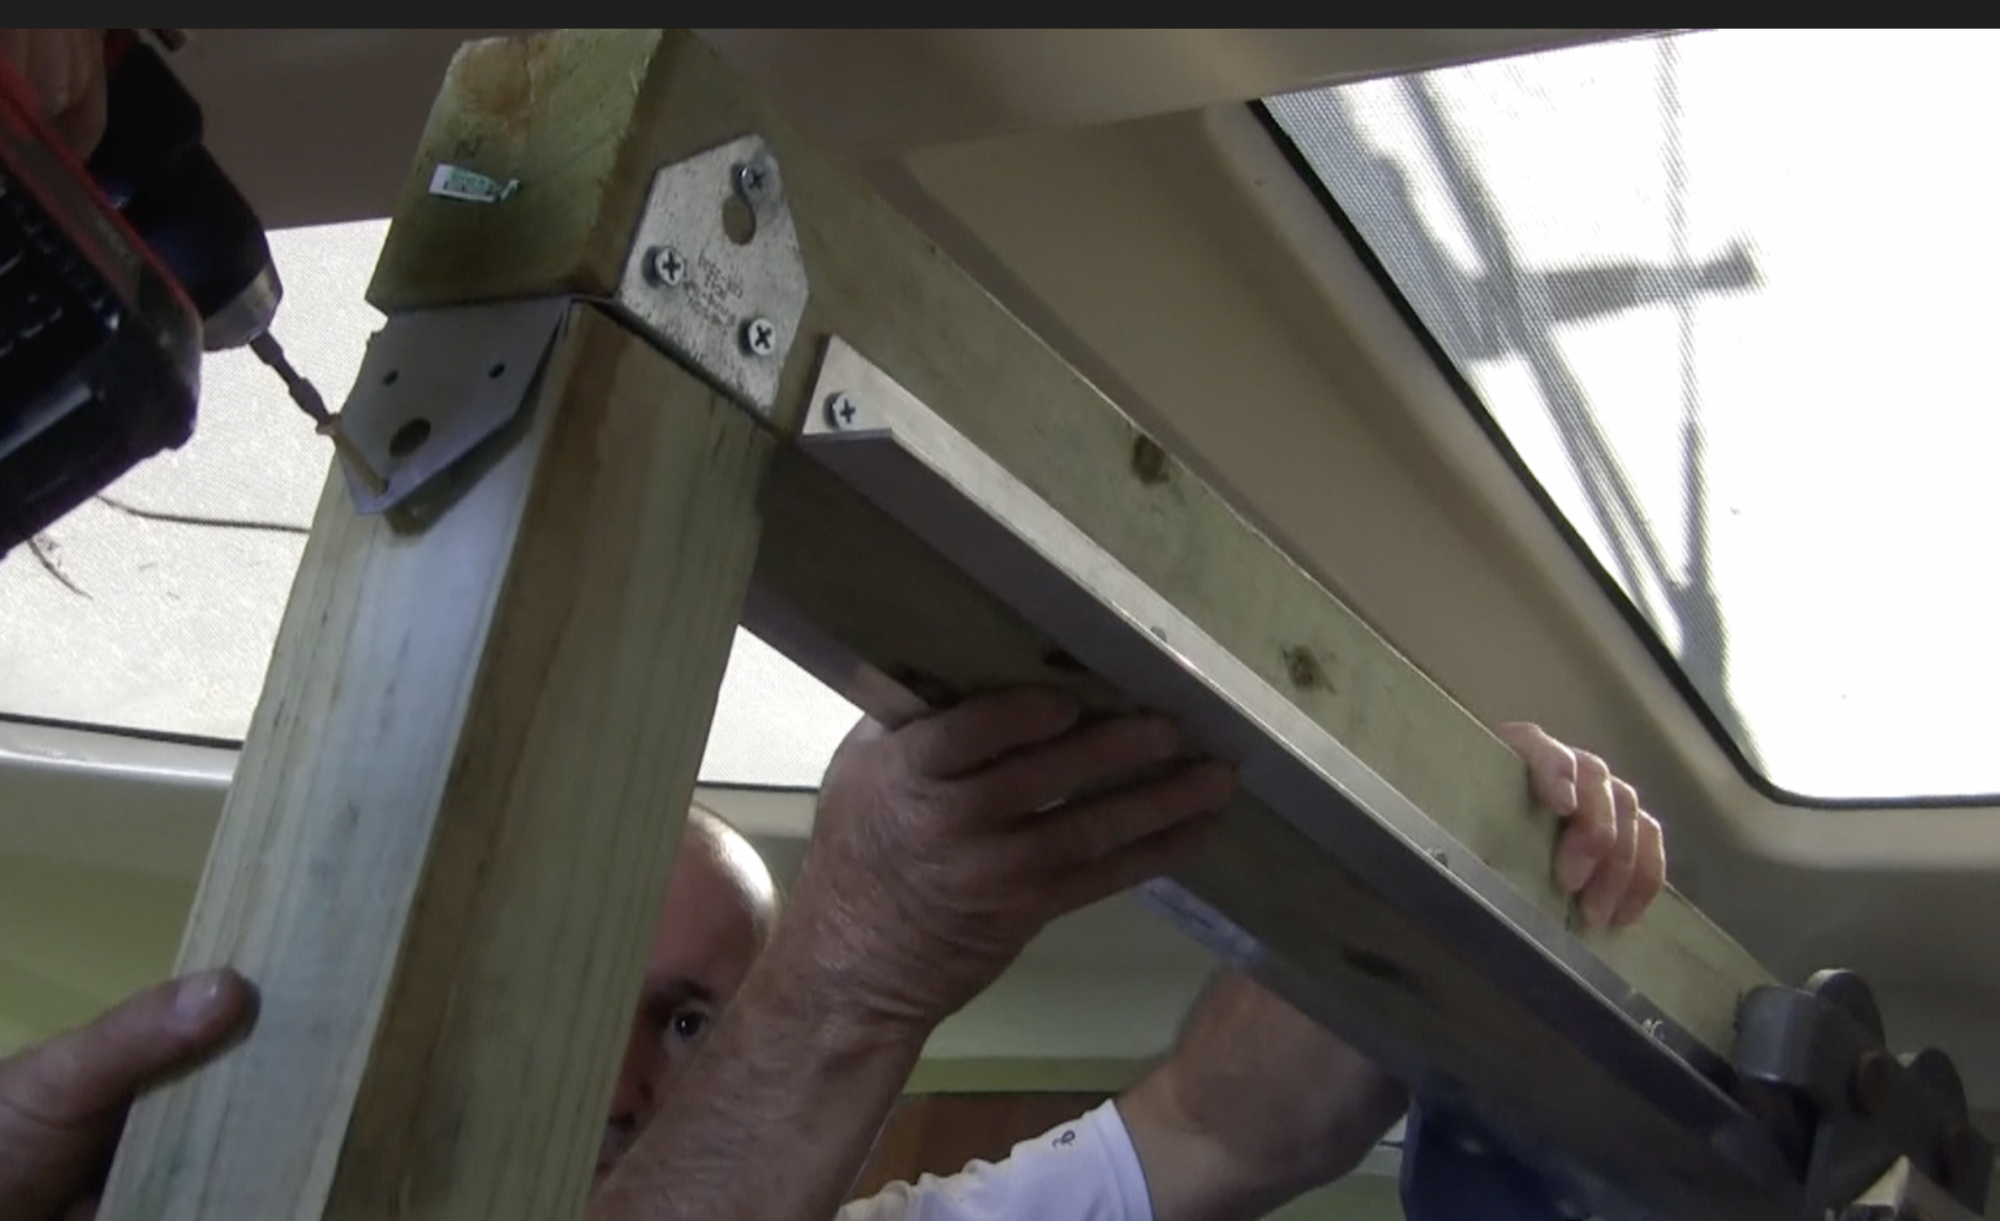
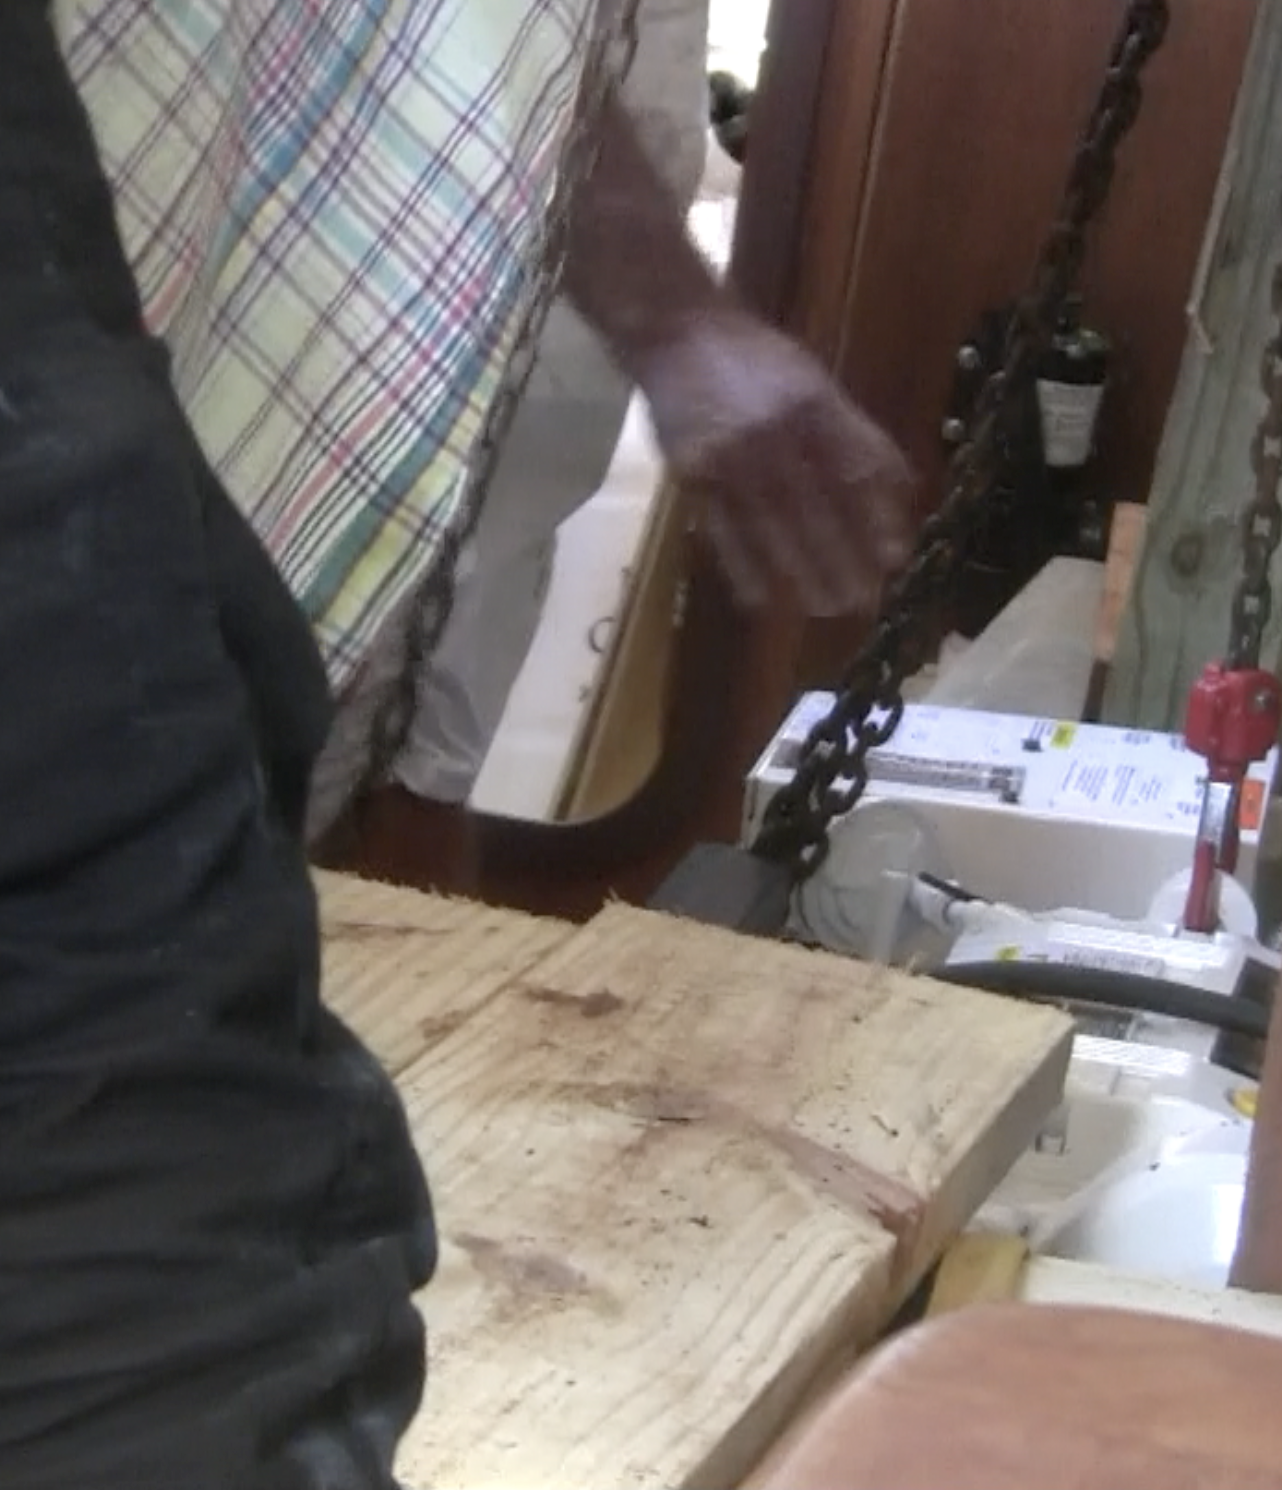
More pictures showing how to hold up and prevent tipping of the Tram Way.

I am doing these details to show SBO folks how to remove heavy things from inside your boat.

We used 4x4 posts and beams, plus brackets. We bought all items at Lowes.com

Aft Bracket being screwed to Tram Way.

postBrackets.png


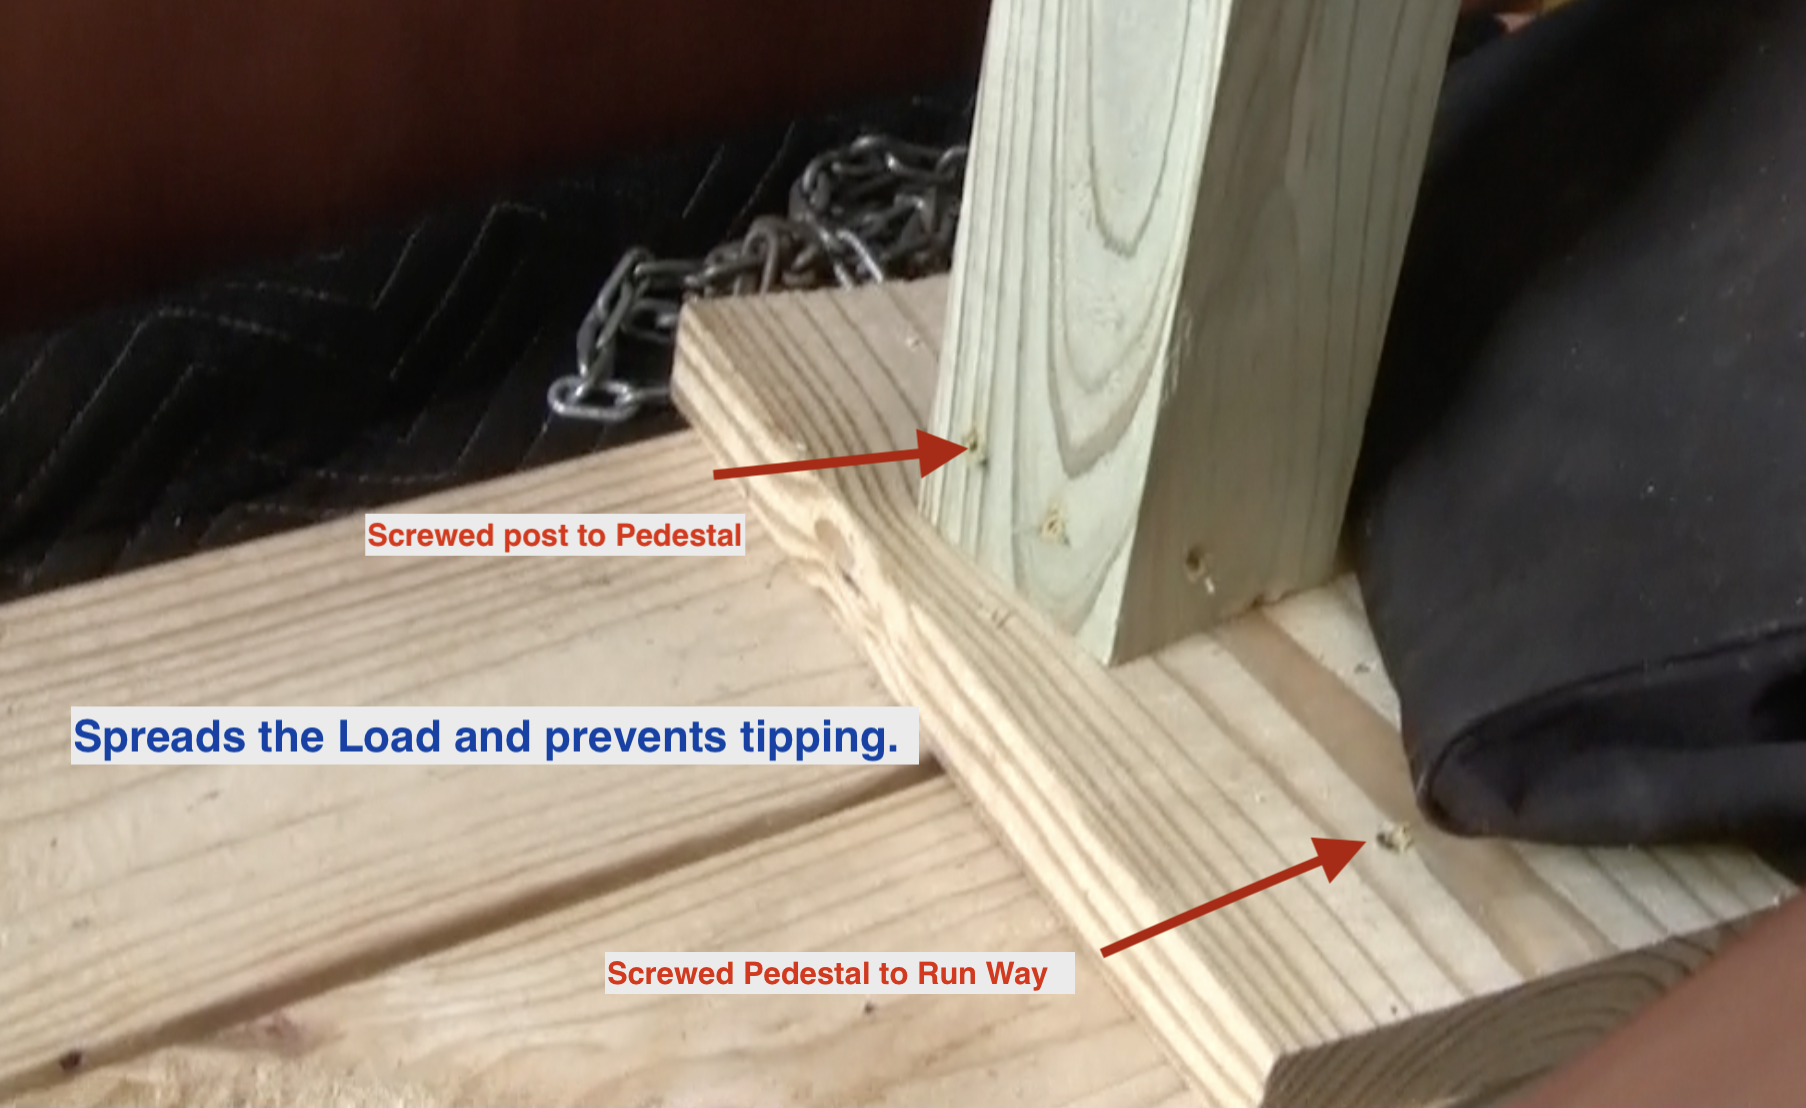
Next to secure the Pedestal support to Run Way

Screwed To Runway.png


________

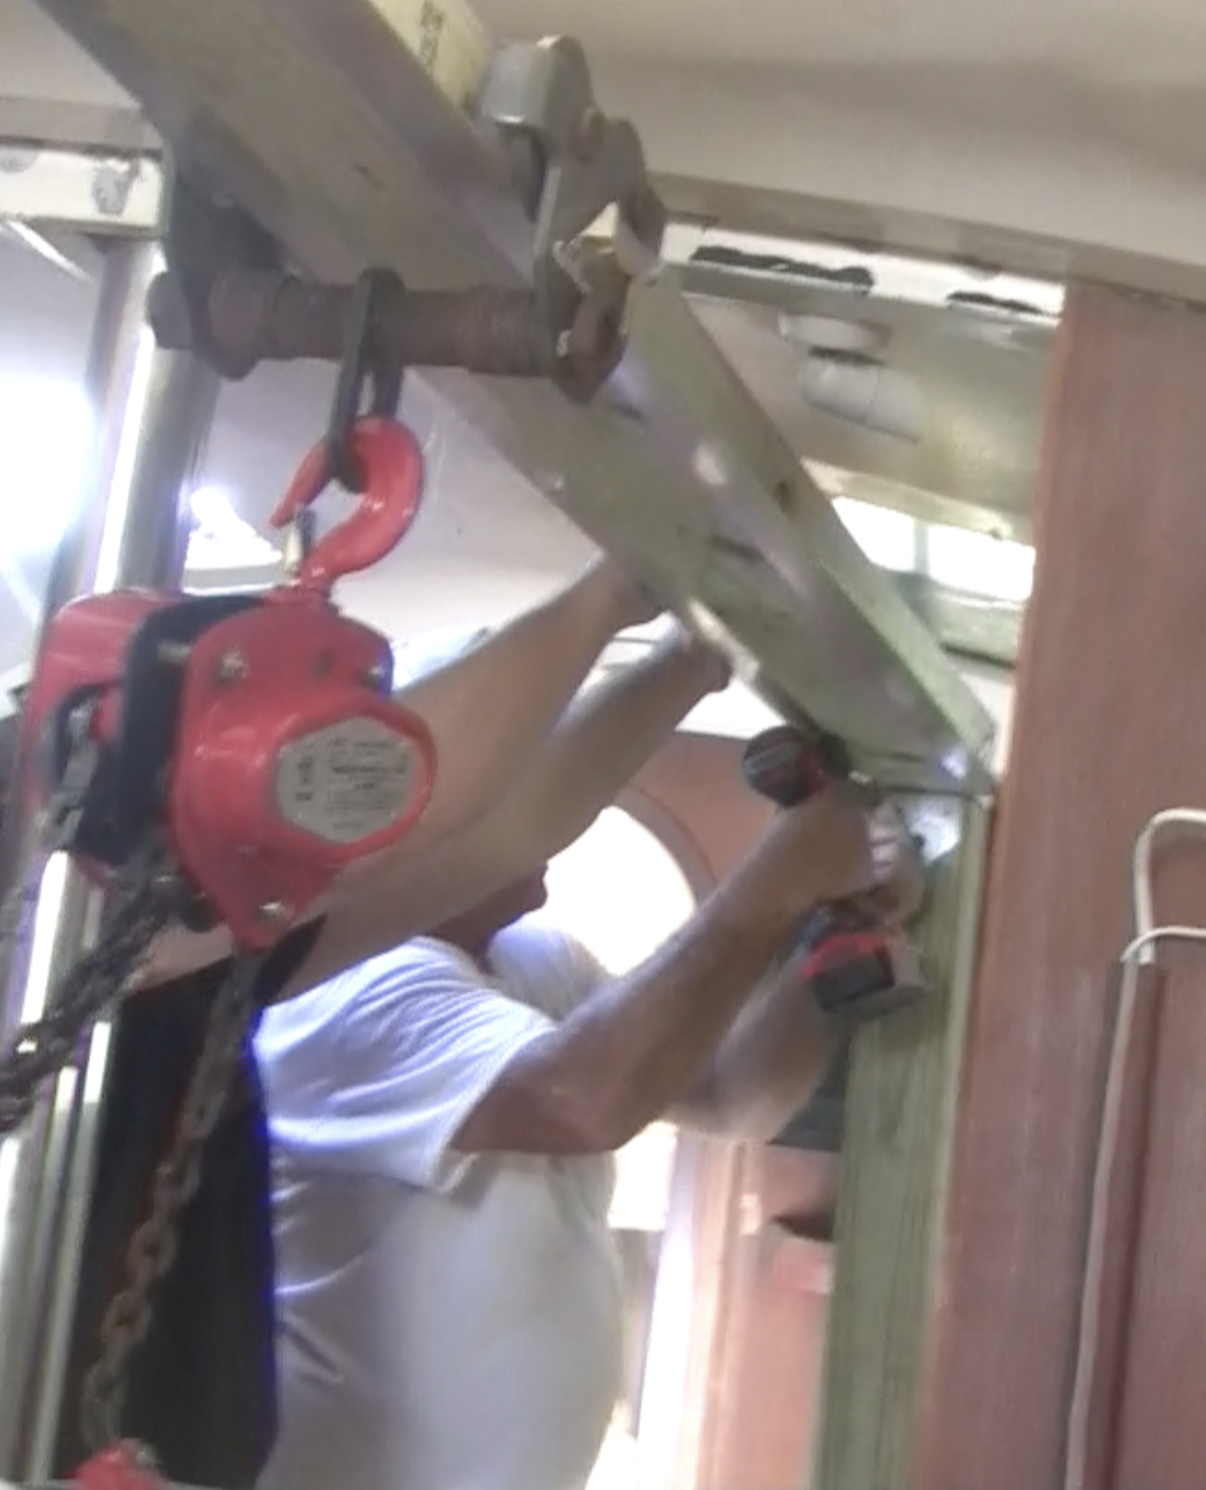
Next : do the same thing to the Bow Post and Pedestal, but not screwed down to boat. We used Muscle power on that post.

BowPostBracket.png


Then roll it down the Tram Way and lower the Genset.

Going Down.png


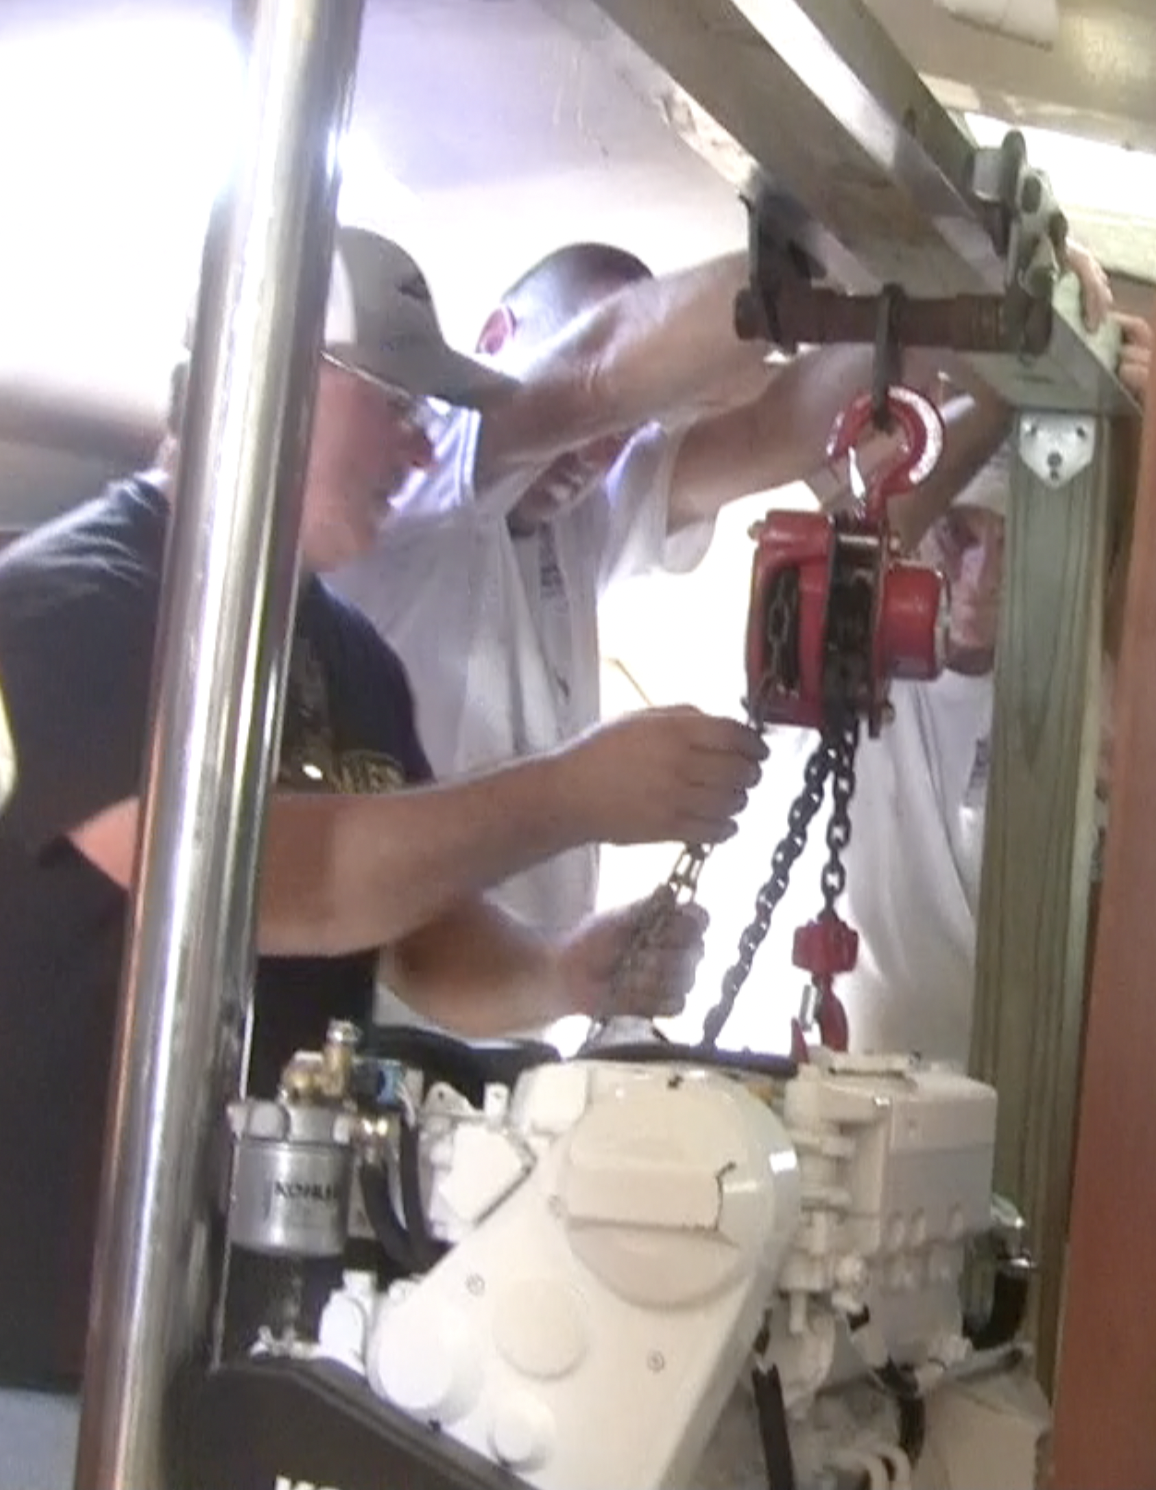
Note our Muscle power , Thibodaux, is stabilizing the Bow Post.

Safely set down in the boat!!

SetDown.png

:wow3::clap::biggrin:

_________
Of course, the new Genset Oil Catching Pan was smaller.:facepalm:

Adapt or no 9KW generator.
SmallerPan.png


But that is easy, so to speak

Thar she is ...
Yay!.png


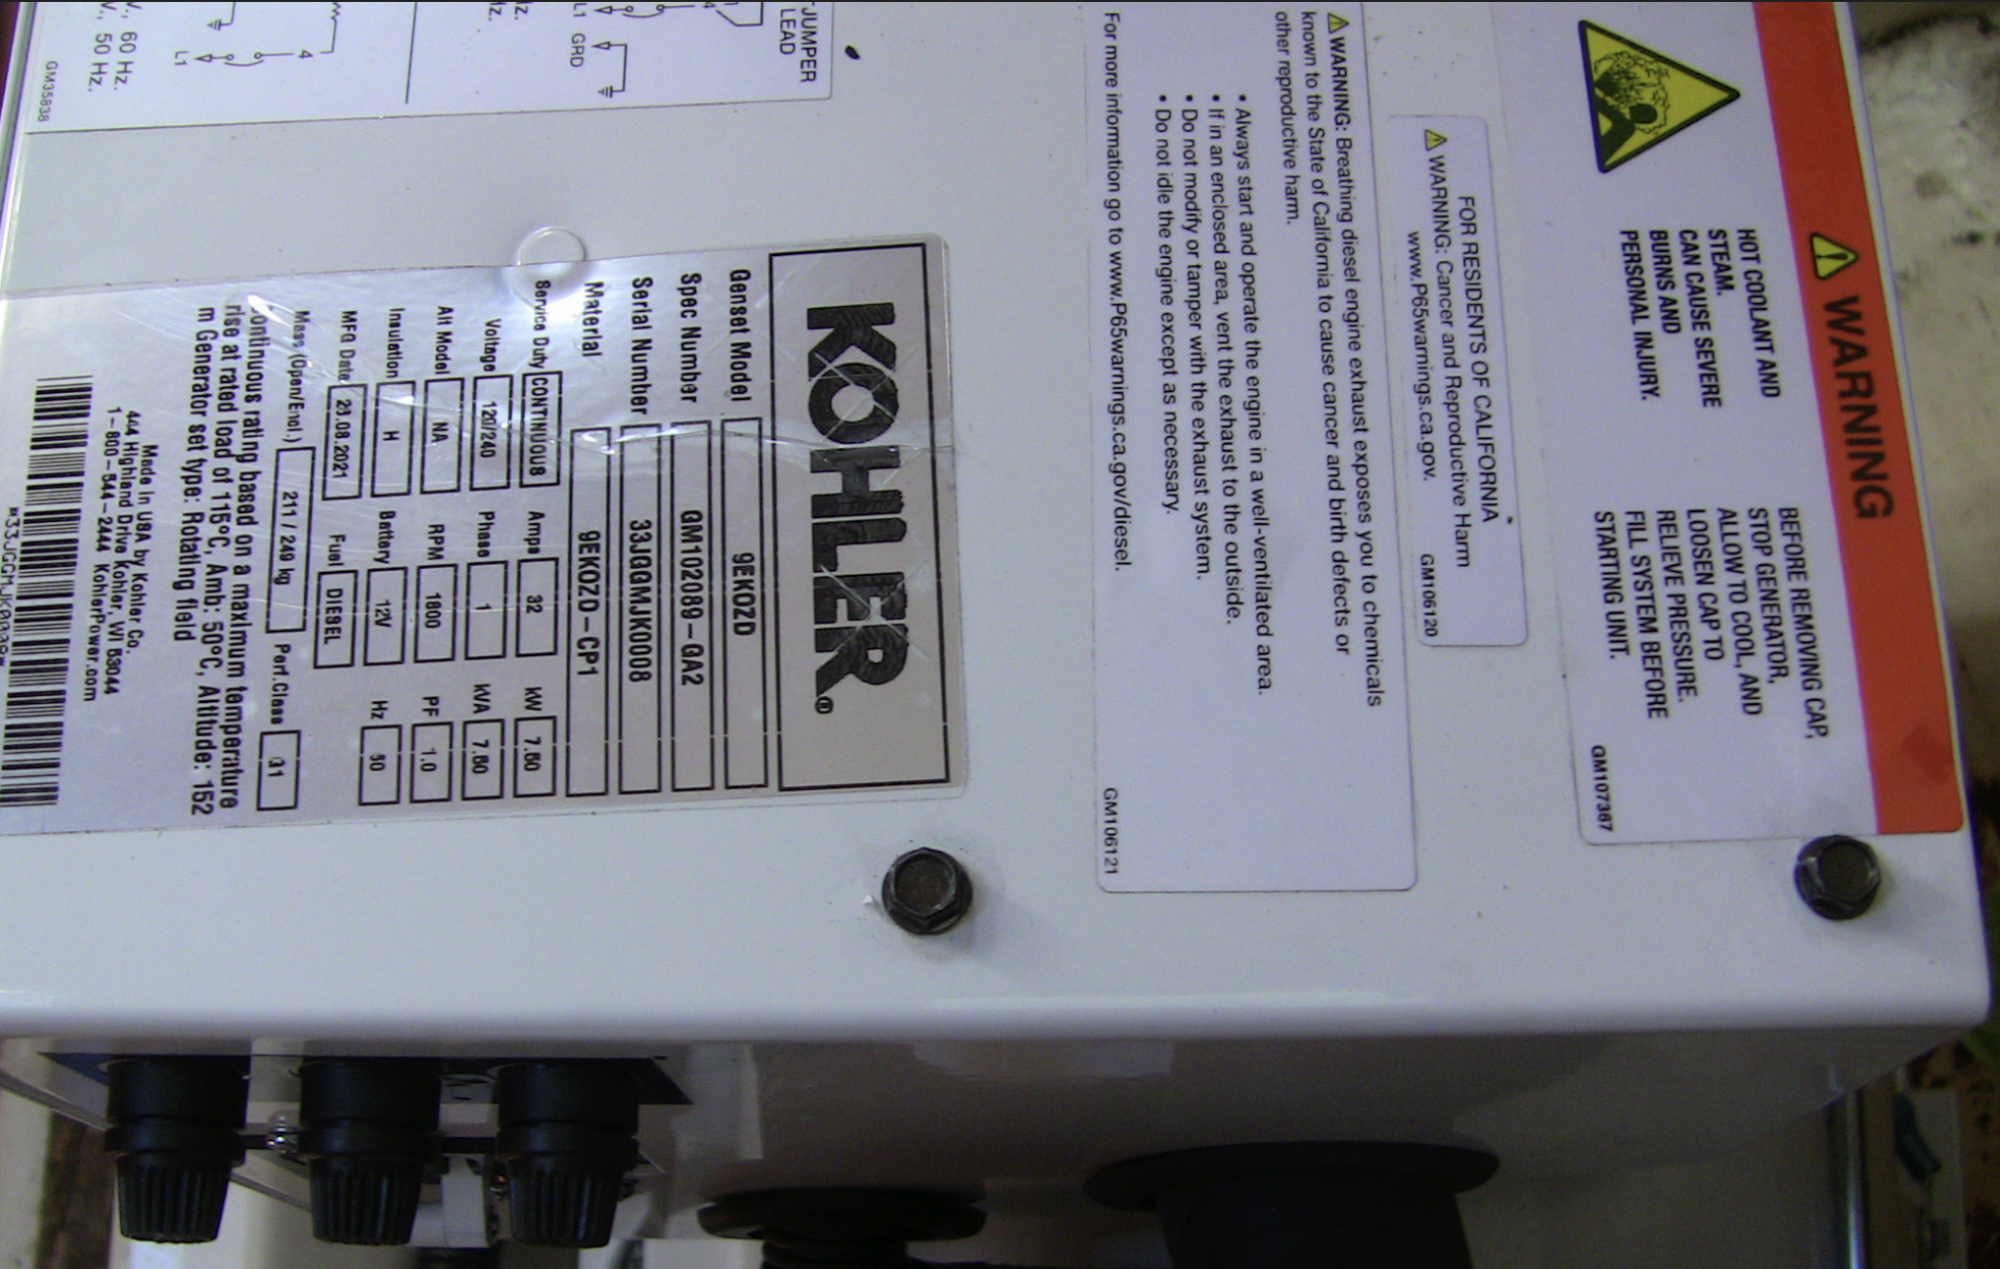
Note the 3 horizontal Black fuse holders that we have to buy fuses in their Maintenance Kit. The kit includes Oil Filter and Diesel Cleaner Cartridge, Pencil Zinc too.:biggrin:

________

This next picture is How I was feeling before the start on Monday.

image010.jpg


From start to finish with all Wood Posts etc, tools and people off the boat = 3 HOURS
Well planned ahead of time. [Captain Jim takes a bow:waycool:]
______
When I finally arrived home that day, this is how I felt.
image008.jpg


As @jssailem said to me... my humor is back.

Captain and Engineer
Jim...
 
Feb 14, 2014
7,425
Hunter 430 Waveland, MS
Adapt or no 9KW generator.
I decided to use the original OEM threaded holes [4] to hold the generator to the Boat.
We used the OEM bolts for them [size in pict below]

Adapting...
1)
Added the Aluminum Angle and attached it to the Oil Drip Pan [Starboard Side]
NewAtt.png

This picture notes a lot of items. I color coded the arrows. We used lock washers on side bolts.

Also the hull shape got in our way.
CutAngle.png


2) We had to shift the Oil Drip pan to match Port side hold downs. One hole was not in correct position.
PortSideMod.png


My mechanically talented guy, lifted the pan slightly and drilled through it to match OEM hole.
NewBolt in pan.png:):)

All dissimilar metals were coated with Lanocote®
V4A9298-LOW.jpg
__________________________

Finally attached to the Boat:clap::clap:
________
Next step is underway now.

Connect up the new Generator !!!

Jim...

PS: All metal parts purchased from Lowes.
 
Feb 14, 2014
7,425
Hunter 430 Waveland, MS
Before we did a full Generator hook up, I decided to beautify the inside hull area and other dingy spots on the hull too.
I got this paint from Lowes. One Quart goes a long ways, but it will need 2.

Screenshot 2023-04-11 at 8.58.39 AM.png

These are a few pictures.

The big hose is AC air duct for Front Head. The other is Genset exhaust hose.
BeautyBegins.jpeg


IMG_2912.jpeg


Other Dingy spot example.
Screenshot 2023-04-11 at 9.06.32 AM.png

Our Sailboat is aging, dunked in water, and now being reassemble.

Slow repairs, but progress.
Jim...
 

DArcy

.
Feb 11, 2017
1,705
Islander Freeport 36 Ottawa
Jim, how did you clean and prep the hull interior prior to painting? I don't mind painting but I'm not a fan of cleaning. My boat could use some freshening in the hidden spots like this.

I don't think I would trust this product on topsides without a good recommendation but in hidden areas I may give it a try. Did you apply with brush, roller or spray? How did you find the application?
 
Feb 14, 2014
7,425
Hunter 430 Waveland, MS
Jim, how did you clean and prep the hull interior prior to painting?
See my before picture on my post#159 above.

Steps to clean the inner hull.
1) Brushed on, thinly, Naval Jelly, then lots of water rinsing to flush off the Phosphoric Acid to my Main Bilge Pump.
2) Then we vacuumed all dust and dirt with a 2 Gallon Wet/Dry vacuum I have aboard the boat.
3) We used a small paint roller and brushes [for detailing]
4) Came back to boat [4 days] for 2nd coat.

You can use Top Side Paint, [$25/Qt] since not exposed to the ocean water. Epoxy paint not needed > $350

We even painted the Aluminum Angles and Stainless Steel bolts, needed to Mount the new Generator. post#163.

Go to Lowes.com for all things we needed.

Jim...
 
  • Helpful
Likes: DArcy
Feb 14, 2014
7,425
Hunter 430 Waveland, MS
How much does that Genny weigh?
470 pounds.

The next video will shows I was 4 inches too high in my calculations. [see post #159 above]
[I forgot the Bed Light over the berth, which was the front bed over Genny]:facepalm:

We had to remove the furniture mover [4 inches] and it nearly tipped over.:yikes:

More to come on full generator hook up which now complete. :biggrin:

Jim...
 
Feb 14, 2014
7,425
Hunter 430 Waveland, MS
The new 9KW Kohler layout had been redesign for optimum ease of owner servicing and startup.

1) Oil Change
2) Coolant Change and overflow level viewable.
3) Pencil Zinc
4) Belts.
5) Fuses
6) Fuel filter and pump
7) see the drawing

Screenshot 2023-05-16 at 7.17.51 AM.png

Amazing :biggrin:

The engine is a more efficient Lombardini versus Yanmar and less weight.
_____
We did have to lengthen the Positive 2/0 gauge starter wire.

More on final connections on next post.

Happy Jim...
 
Feb 14, 2014
7,425
Hunter 430 Waveland, MS
We did have to lengthen the Positive 2/0 gauge starter wire.
We mounted a new cable wall holder.

Cableholder.jpeg

The Black ground wire had wall mount OEM.
Ground Wallmount.jpeg


Note: Joe Kerr wired our boat OEM.

Next we connected the 2/0 gauge wire to the Wall mounts.

Wiring.jpeg


_______
With new 2/0 Gauge Red wire, we set it to the correct length, and the new Engine had a cable holder on it that prevents heat damage from touching.:clap:

I bought, from Amazon, the Kit with Black and Red wire and multiple crimps. $70 for 5 each Black and Red 2/0.:biggrin:

New Cable etc.jpeg

_________
The helpers that did it all. Ronnie on the left, Son-in-Law, ABYC electrician with grey hair.

Screenshot 2023-06-11 at 10.10.45 AM.png


_______
What brought big smiles to all.

1) Continuity checks done.
2) Switched on Start Battery.
3) The front panel of the Kohler genet lit up.
4) Genset ran its start up check list.:cool:

Amazing what was verified on Genset screen, from Battery state, oil level, coolant level, fuses etc.

Note: We did not start it up since we are not in the water yet.

Next we mounted primary fuel filter and Heat removing Fan.

Jim...
 
  • Like
Likes: jssailem
Feb 14, 2014
7,425
Hunter 430 Waveland, MS
Soon, right?
No.
I am trying to update our work here, but slow progress on boat.

Here are a few teasers.
ForwardBed.jpeg

Assembling forward berth and Genset enclosure [teak]

Now...
WallClosed.jpeg

Now Genset is Ready
_____

Electrical check out 99% done.

ElectricPaneljpeg.jpeg


Labor tough to find.

Jim...
 
  • Wow
Likes: kappykaplan
Feb 14, 2014
7,425
Hunter 430 Waveland, MS
I am replacing all of the Seacocks [9] and discovered this.

Hose Barbs.jpeg


This is a new one.

GoodNewBarb.png

What happened?

The old genset, now gone, had pencil Zinc to protect it.

I found one in the Previous Owners supplies and I changed it, but the PO, never changed it.:facepalm:

Kohler said change every 300 hour of use or 1 per season.

1500 hr of use, when I changed it.

Boat sinking failure waiting to happen.:yikes:

Good thing I am now a Seacock/Thru hull expert since I read this advice.
Seacocks, Strainers & Hose Clamps Archives - Marine How To

New Kohler is now well protected.:biggrin:

Jim...

PS: Working our way back to new sails soon.

ThruHulls.jpg