when something little turns in to something more

jmczzz

.
Mar 31, 2013
515
O'Day 26 CB New Orleans
Hawk, What an amazing post. Your determination to make these repairs is inspirational. You show me that it is possible to deal with pretty much anything I might encounter in restoring my own old model 22. I will get "Grace" moved into her new work shed in the next couple of days and get started lifting her off the trailer and dropping the keel to correct the Po’s installing the brackets upside down.
Thanks for this thread and all the info. I will start a separate thread and hope you will check in on the progress and post advice.
Regards, James
 
Apr 1, 2010
398
Cal 33 and Sea Pearl 21 . Crystal River, FL
Well I got the third coat of cetol natural teak on EVERY piece of wood on/in the boat (except I forgot the dang compression post, ill get it next!!) here is a teaser for that


and I filled the hole created from the weldment mishap. the actual circular hole was filled with 14 layers of 1708 then capped off with 5 more layers graduating in size from roughly 1"x1" (size of the hole) to about 10"x10". should be WAY stronger than what was there before

 
Sep 8, 2014
2,551
Catalina 22 Swing Keel San Diego
Hawk, how did you prep your teak before the oil, just sanding? Did you bleach the wood? My teak is a mess, lots of varnish residue and stains, but some of the grain is so dried out that if I try to sand it out flat I think I'll remove too much material. I'm not sure if I should use chemical stripping, bleaching, or what...?
 
Apr 1, 2010
398
Cal 33 and Sea Pearl 21 . Crystal River, FL
I cleaned the wood with a mixture of 1 cup TSP, 1 qt bleach and ~3qts hot water. That got almost all of the teak to a nice "soft tan" color. The interior wood cleaned up even nicer and that's where I made the only regrettable mistake in the process. since the interior wood looked better than the exterior, I sanded down the exterior (80grit on da for rough sanding then 240 grit on a linear sand to sand with the grain and get rid of DA swirls). I did not do this on the inside wood. The end result is that the inside wood is real light in finished color. I am not happy with it. for now it will slide since im on a time line, but I see myself pulling it and sanding it down to bare wood at some point and giving it another go.
 
Apr 1, 2010
398
Cal 33 and Sea Pearl 21 . Crystal River, FL
i should also mention that the handrails are brand new. my old ones were so worn that i didn't trust them to hold my 260lbs if i was falling. my local west marine had them for $47 a piece.
 
Apr 1, 2010
398
Cal 33 and Sea Pearl 21 . Crystal River, FL
here is a pic of what I was talking about, the darker pieces were sanded prior to cetol, the lighter pieces were not


today was a relatively productive day. I sanded down all the filler in the cabin and applied what should be the last coat of filler. tomorrow I will sand that and hopefully the whole rest of the cabin. then I will spray all questionable areas with bleach then hose the whole cabin.

I think I also put the final coat of filler on the trailing edge of the keel...

then I stripped all the windows. by that, I mean I removed all the glass from the frames. I need to research how to make old glass look new then get the glass off to tint

then I worked on finishing up my ruddercraft rudder (conversion from my other boat) and have that all wrapped up, except I need 2 bolts to mount the "gudgeons" to the rudder for the mast crutch

 
Nov 19, 2008
2,129
Catalina C-22 MK-II Parrish, FL
You're going to LOVE that Rudder-Craft rudder. Have you checked out my article in the latest MainBrace on the Rudder-Craft rudders?

Don
 
Apr 1, 2010
398
Cal 33 and Sea Pearl 21 . Crystal River, FL
sorry I forgot to reply Don! I appreciate the measurements you gave me in the other thread, it helped me to move the pintles into the proper location. I saw the article but I didn't read it. since I had the rudder already I figured I didn't need to be convinced LOL

as for progress on the boat, not many pictures to show. I have completed painting the inside and what a difference!! just doesn't come out will in pictures though... then I flipped the keel over in the jawhorse so I can work on the leading edge and get the keel wrapped up. after that I moved on to crib board trim pieces (not sure what they are called. my old ones were cracked, port to the point of being un-usable. I made some new ones out of red oak and they are ready for cetol now. then after coming in to get out of the heat (90 today) I sorted fastners... ever wonder how many were on your boat? and I would say at least 10% are not here...


this week was also my last big week for receiving parts. got cleats, renogy 50w solar panel/controller, bimini and 13lb mantus anchor. here is a size reference pic


oh and the other day I got decals in. I wet sanded and buffed the area where the decals were going... this paint shines up nice!


Dec 5, 2011
550
Catalina Catalina 22 13632 Phenix City
She's going to be a beautiful boat when you get done with her, keep the pictures coming.
 
Sep 8, 2014
2,551
Catalina 22 Swing Keel San Diego
Hawk, I soaked all my hardware in that welding cleaner I always talk about (phosphoric acid) and then I threw them into my tumble polisher with Walnut Shells and Brasso. All the hardware looks shiney and new, I can re-use the majority of it. Quick tip, I wouldn't suggest tumble polishing the Phillips head screws... The walnut shells get packed into the head and then I have to sit there use a tiny pick to clear them all out, lol! Otherwise this method had worked wonders on all the bolts, washers, nuts, and other expensive stainless bits that I won't have to re-purchase.
 
Apr 1, 2010
398
Cal 33 and Sea Pearl 21 . Crystal River, FL
Great tip Luke, if I had a tumble polisher I would give it a whirl. Sucks about having to pick the Phillips screws though! As if you didn't have enough to do!

Thanks for the kind words everyone!
 
Apr 1, 2010
398
Cal 33 and Sea Pearl 21 . Crystal River, FL
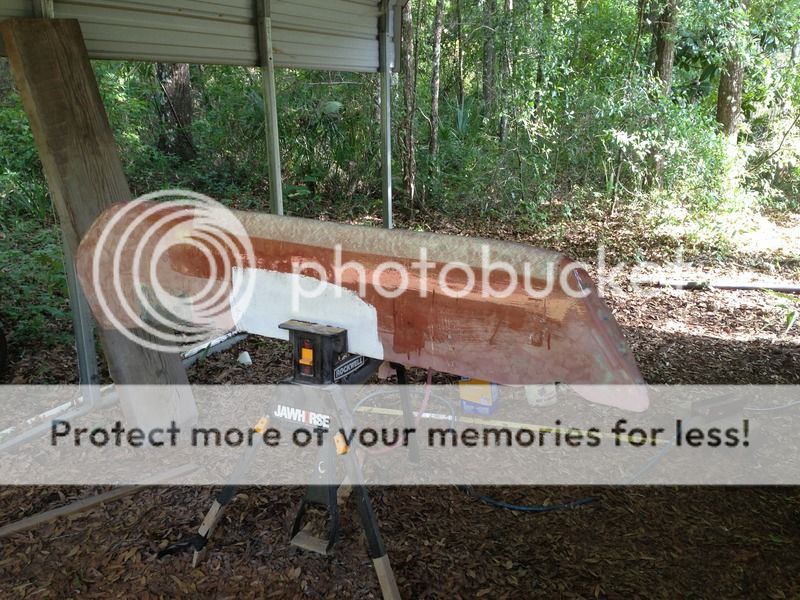
suddenly I found myself done with all of the BIG projects that take up days on end. I stumbled for a few days completely overwhelmed with all of the small tasks remaining. I finally put it all down on paper (well, excel) and prioritized. it was then that I realized that I am ready for the keel but the keel is not ready! so back to the keel it is! I put down a layer of 1708 along the leading edge (I intentionally left the leading edge of the profile low for this reason) in a attempt to help reduce any damage caused by hitting something under water. in hindsight, I should have done the same on the bottom, but I didn't.


since I decided to ditch the factory nylon 2 bolt cleats and go with some hereshoff style stainless cleats I had to fill the holes. unfortunately I didn't decide this until after paint a kiwigrip. then I realized that this would be a good test of how easy both the paint (foreward cleats) and kiwigrip (aft cleats) would be to touchup. needless to say, I will be ALOT less concerned about bumps now. here is the touched up area, note that it is not where the cleat is in the pic but the area to the left where the kiwi grip is (its filthy from sanding dust, excuse the mess)


and here I am pointing to where the two holes are. not too bad for my first repair attempt, as least I think


I don't have pics of the bow repair yet, it is still being painted.

I also worked on the sliding hatch as well as the other hatch. got them sanded and first coat of paint.
 
Apr 1, 2010
398
Cal 33 and Sea Pearl 21 . Crystal River, FL
gene you remind me, something I shouldn't do but want to do... hold on a minute...


very rough calculations have me at ~310hrs of work so far (minimum of 2hrs per day EVERY day after work (more like 4 since daylight savings time, but I calculated at 2) and anywhere from 10-20 hrs per weekend (calculated 12-16)) hopefully I am on the water by 350, but we will see...

thanks luke, I actually posted the kiwigrip bit just for you. I know you were on the fence about it and here is an example of how easy it is to touch it up. there were two 1/4" holes at the tips of my fingers. I beveled them out, filled, sanded the touched up with kiwi grip and a brush
 

jmczzz

.
Mar 31, 2013
515
O'Day 26 CB New Orleans
Time is relative to pleasure from accomplishment. I'd say you have invested yours well. That kiwi looks like a good plan to me. I'll go with that also. I just hope I can do as good a job on mine as you have done.
James
 
Apr 1, 2010
398
Cal 33 and Sea Pearl 21 . Crystal River, FL
James, I assure you that you can do "as good of a job". Kiwi is SUPER easy! I mean, two clowns like gene neill and I can get these results! For the whole boat it took from about 10am to 6pm to mask everything, wipe down with acetone and apply the kiwi grip. I used the finest teeth on one of the little 4" west trowels and used roughly 3/4 gallon on the whole boat. I do have some areas I will have to recoating as I have some bleedthrough. Oh, as far as my time estimate, bare in mind that my boat was stripped so I didn't have to mask any hardware or anything, basically just the lines. If the boat is rigged masking will take a bit longer
 
Apr 1, 2010
398
Cal 33 and Sea Pearl 21 . Crystal River, FL
she is starting to look like a boat again!!


its really helpful to have a petite wife!!


that was yesterdays progress. today I didn't get much done as I had to bleed the steering on my hewes (taking some friends fishing next weekend) and take it out to make sure all was well.

I did manage to get the last coat of oyster white on the hatches and finish up the "gudgeons" on the rudder. that should shave 5 min off of both the setup and take down of the boat!