Sailing and restoring #9874

AaronD

.
Aug 10, 2014
728
Catalina 22 9874 Newberg, OR / Olympia, WA
Charging sockets

Port side bulkhead.
One USB socket (for phones) and a lighter plug with high-power USB charger for the iPads (a tablet takes a long time to charge from the low-power USB socket, my only complaint about the Blue Sea outlets - I wish their USB outlet supported 2A+ charging).
P9150091.jpg

Starboard-side cockpit pocket:
Also a 12v outlet, usually with a high-current USB charger. For iPads when used in the cockpit, etc.
PC110602.jpeg

Starboard v-berth:
USB socket for phone or Kindle. That's my sleeping spot, so now I have some reading material handy when I wake up earlier than the kids. This one went in a cheap plastic electronics enclosure, as there wasn't a convenient bit of liner in which to drill a hole and hide the wiring.
PC110601.jpeg

Aft dinette locker:
Our handheld spotlight and dustbuster live down here; now we can keep them fully charged at all times. Another enclosure; I tried to stick this one on with double-sided tape, but that came off last season; I'll have to go back and do a better mounting job. I'll probably tap threads into a bit of FRP or G10, mount that plate with epoxy, and then screw the enclosure to it.
IMG_1327.jpeg

Starboard side bulkhead:
One lighter plug with a 4-outlet high-power USB charger (the kids walkie talkies, kindles, etc.). Unfortunately, our new Standard Horizon HX890's charger isn't USB, which would have made everything simple. I didn't find a convenient location for another 12v outlet, so I'm going to hard-wire the charger to the starboard-side cabin power bus (with a 2A inline fuse, as the charger cord is 20 AWG, much too small for the cabin power breaker).
IMG_1326.jpeg

I used Blue Sea outlets for all of them. I could have saved a little with off-brand outlets, but that seems like a false economy. I might add another USB charger in the port side of the V-berth, or in the port cockpit pocket. But 6 is enough for this season. :)

Cost: ~$150 (including a little wire and a few multiport USB chargers from Amazon)
Time: ~4 hours
 

AaronD

.
Aug 10, 2014
728
Catalina 22 9874 Newberg, OR / Olympia, WA
NMEA -> Wifi Bridge (AIS on the iPads)

We've really appreciated the integrated AIS receiver in our Standard Horizon GX-2200 VHF. But the screens (on the unit itself and on the RAM3 remote microphone) are really small, so it's hard to keep track of more than a couple AIS targets (and as Class B transmitters grow in popularity, there are a lot more targets than there were a few years ago).

The GX-2200 includes NMEA 0183 output, and NMEA -> Wifi bridges are also getting cheaper than they once were. I used the 'Yakker' model. They also have a 2-port model and a few other products for reasonable prices, but the single-port is fine for this application; they also sell on eBay as well if you prefer ordering that way.

Wiring is really simple - just power and the NMEA leads from the back of the VHF; I just stuck the bridge to the top of the VHF with double-sided tape (hope you can ignore the dirty VHF. Other projects ongoing too...)

I configured the VHF to include AIS and GPS information on the NMEA output (the setup is in the VHF manual, and pretty straightforward). The bridge creates its own Wifi network (you can also have it join an existing network if you already have a boat Wifi system). It defaults to transmitting via UDP; that should be simpler than TCP, but I didn't see a signal over UDP, so I switched to TCP and everything worked fine.

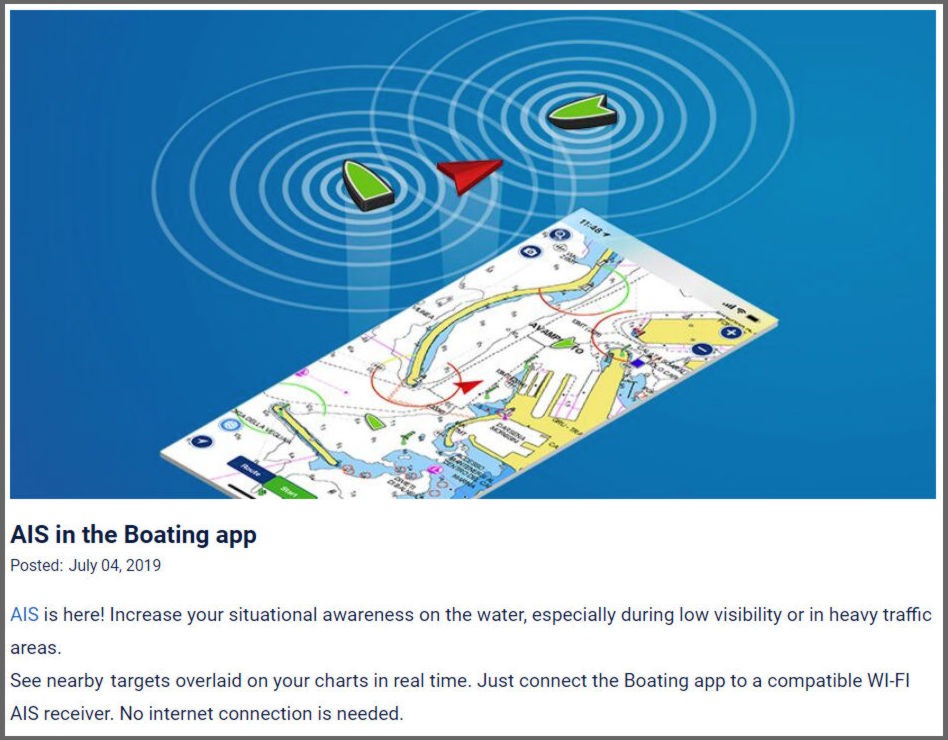
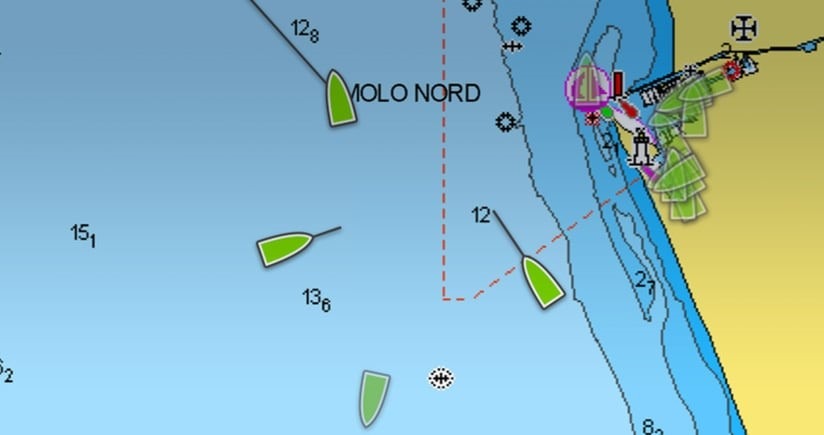
We've tried a few iOS charting applications, but always come back to Navionics. I know there are more powerful options, but it's seemed like the best combination of charts and user interface for us. Navionics added support for AIS last year, and we used it last year. and we used it last season. I found it to be a bit flaky - occasionally I'd see a target disappear and then (seemingly magically) reappear a few minutes later. I'm not sure if that's the NMEA link, the Yakker unit, the brand-new AIS feature in Navionics, or ???.

Sorry, I didn't think to take any screenshots, but you can look at the official website at and at Panbo's reviews including:

(Note that Navionics / Garmin has been working on the issues Panbo mentioned - hopefully it will be smoother next year).

Cost: ~$50
Time: ~2 hours (mostly testing and playing with it on the iPad)
 

Attachments

Nov 8, 2019
9
Benetau 19 La Spezia
NMEA -> Wifi Bridge (AIS on the iPads)

We've really appreciated the integrated AIS receiver in our Standard Horizon GX-2200 VHF. But the screens (on the unit itself and on the RAM3 remote microphone) are really small, so it's hard to keep track of more than a couple AIS targets (and as Class B transmitters grow in popularity, there are a lot more targets than there were a few years ago).

The GX-2200 includes NMEA 0183 output, and NMEA -> Wifi bridges are also getting cheaper than they once were. I used the 'Yakker' model. They also have a 2-port model and a few other products for reasonable prices, but the single-port is fine for this application; they also sell on eBay as well if you prefer ordering that way.

Wiring is really simple - just power and the NMEA leads from the back of the VHF; I just stuck the bridge to the top of the VHF with double-sided tape (hope you can ignore the dirty VHF. Other projects ongoing too...)

I configured the VHF to include AIS and GPS information on the NMEA output (the setup is in the VHF manual, and pretty straightforward). The bridge creates its own Wifi network (you can also have it join an existing network if you already have a boat Wifi system). It defaults to transmitting via UDP; that should be simpler than TCP, but I didn't see a signal over UDP, so I switched to TCP and everything worked fine.

We've tried a few iOS charting applications, but always come back to Navionics. I know there are more powerful options, but it's seemed like the best combination of charts and user interface for us. Navionics added support for AIS last year, and we used it last year. and we used it last season. I found it to be a bit flaky - occasionally I'd see a target disappear and then (seemingly magically) reappear a few minutes later. I'm not sure if that's the NMEA link, the Yakker unit, the brand-new AIS feature in Navionics, or ???.

Sorry, I didn't think to take any screenshots, but you can look at the official website at and at Panbo's reviews including:

(Note that Navionics / Garmin has been working on the issues Panbo mentioned - hopefully it will be smoother next year).

Cost: ~$50
Time: ~2 hours (mostly testing and playing with it on the iPad)
I found the AIS integration in Aqua Map much reliable. I use it alongside Navionics and the combination USACE surveys/SonarChart is invaluable in ICW.
 
  • Helpful
Likes: AaronD

AaronD

.
Aug 10, 2014
728
Catalina 22 9874 Newberg, OR / Olympia, WA
The Perfect C-22 Cockpit Cooler
(well, perfect after some modifications, as you might expect)

We keep a small cooler in the port cockpit locker, mostly for fruit and drinks (and no, the latter aren't all alcoholic!) Dumping in cubed ice works great for drinks, but makes for very mushy salad and cheese. So we keep the latter in a larger cooler in the cabin and limit the cubed ice to the cockpit cooler.

We had a normal 28-quart cooler in the cockpit locker for a couple years, but it only held ice for (at best) a day or so. Last year, we replaced it with a Coleman XTreme 3 model with better seals and insulation. The '3' means it's supposed to keep ice for 3 days, and while that might be slightly optimistic, it's definitely a big improvement over our previous small cooler, and just barely fits in the locker (there's plenty of room once you get it below; it's tight to maneuver it through the locker lid, but that's fine; thus the 'perfect' C-22 cockpit cooler - well insulated, and the largest you can fit practically.

IMG_1490.jpeg IMG_1491.jpeg

The old-design locker is molded for a fuel tank. And the cooler wouldn't sit neatly in that molded spot. So I screwed on a couple scraps of starboard to level it.
IMG_1489.jpeg

I don't want it bouncing around while trailering or in rough seas. The handle didn't seem like a great anchor. And, unlike our previous cooler, there wasn't an obvious place to add tiedowns. So I added footman's loops, using an approach very similar to how I sometimes mount low-load deck hardware.
IMG_1493.jpeg
I thought I snapped some pictures of this process, but now I can't find them, so you'll have to imagine. I drilled holes of ~3/16", dremeled out some of the foam around the holes (maybe 1/2" total inside the between-the-skins space), and filled it with thickened epoxy. The theory being that, although the epoxy won't really bond well to the plastic (and probably not much to the foam insulation), it should make a nice solid 'blob'. behind the plastic skin that can't really go anywhere.

Finally, I tapped threads into the epoxy and mounted the footmans loops. I think I recall a Practical Sailor test of ways of mounting low-load hardware. Tapping into epoxy wasn't the best, but it's surprisingly strong, and it seems like it's working for this application. Mounting footmans loops in the locker liner was much easier - just drill, tap threads, and go.

If you want a reasonably efficient cockpit cooler, this one is recommended.

Cost: ~$30
Time: ~2 hours
 
Last edited:

AaronD

.
Aug 10, 2014
728
Catalina 22 9874 Newberg, OR / Olympia, WA
Cockpit locker netting

Somewhat related to the previous post (at least it's in the same location). I added a shock-cord cargo net behind the cooler (the kind used in the back of a station wagon). It holds a couple foam stadium seats (for use on the dock) and our foam life jackets (for use in the dinghy or kayaks, when we'd prefer not to accidentally blow up our sailing inflatable PFDs). The cargo net keeps them from sliding around into some inaccessible region of the coffin. I don't know if it will help anyone else, but it's been working for us.
IMG_1494.jpeg IMG_1495.jpeg
Cost: ~$14
--Cargo net: $11 (yes, that one came from Amazon - it's not something SBO or another sailing-specific source is likely to carry :)
--Eye straps: ~$3
Time: 1 hour
 

AaronD

.
Aug 10, 2014
728
Catalina 22 9874 Newberg, OR / Olympia, WA
Batteries and Electrical

panels.JPG


This covers various additions over several years, and some choices I probably wouldn't make again. But perhaps someone will find it helpful.

Besides the normal electronics for a trailerable boat (VHF, interior and navigation lights, phones and iPads for GPS and entertainment, etc.), we usually carry a small electric trolling motor. We bought it because a few of the lakes we'd like to explore someday don't allow gasoline engines; prior to buying a nearly-new Tohatsu Sailpro, we carried it as a backup to our 35 year old outboard and my poor skills as a mechanic. It has tie-downs and a spot in the coffin, and it's still habit to carry it, so I haven't removed it. It won't get us anywhere fast, but we can get to shore or back into a dock.

The downside to the electric motor is a pretty hefty power draw (40+ amps at max throttle). To keep up with that demand (for a little while at least), we installed 2x 10⁵ amp-hour Lifeline AGM batteries. We chose AGMs because they don't run out of water (if not abusively overcharged), can't leak in a knockdown, and don't outgas when charging (at least not at normal charge rates). And Lifeline because @Maine Sail has often recommended them as a solid brand. I paid $636 for 2 Group-31s from Stored Energy Products.

If I could have fit both of them in the space under the V-berth, I probably would have done that. That would move some more weight forward and colocate the battery bank. But I didn't manage to wiggle them in there, and I already had a battery mounting location beneath the companionway step. So I split the bank - one forward and one aft (from the old wiring I found, it appears a previous owner had done the same, although when we bought the boat, she only had a single non-deep-cycle battery).
aftbatt.JPG fwd_batt.JPG
And tie-downs for the forward battery; 1/2" of G10, tapped for threads to mount footmans loops, and epoxied to the hull
IMG_1533.jpeg
Note that it's important to cross-wire the batteries (positive off one battery, negative off the other). Otherwise, the two (or more) batteries will never balance properly (due to their internal resistance). That's important even if all batteries of your bank are within inches, and even more-so when they're a few feet apart. So you need 3 cables between them - I did:
--Positive from fwd to aft battery and from there to load
--Negative from aft battery to forward battery; back from there to the shunt, and then to load.

After calculating the cable runs and voltage drop, I chose AWG-2 cable and built cables using supplies from GenuineDealz and an FTZ crimper (see Making Your Own Battery Cables - Marine How To). If you're mounting 2 batteries, but aren't trying to push 40+ amps, you could probably use AWG 8 or 10 for the main inter-battery connections. But a big shore charger might push you up close to what I used. In any case, I found that 3 runs of AWG 2 fit in the under-floor channel. But only just - any more and I think you'd have to route around one side or the other of the liner (which I think should also work just fine).

ABYC standards say all positive connections should be protected with fuses or breakers within 7 inches of the battery terminal. I put a breaker on the front battery and another at the load (maybe not quite 7", but less than 12). Later, I realized I should protect the inter-battery run at the aft end too. So now there's a terminal fuse on that as well.

I installed terminal bars (mostly from Blue Seas) in various locations around the boat - small ones for the cabin and navigation circuits on the lips of the liner in the coffin and quarterberth, and a large one for the outboard in the coffin. I'm embarrassed to show some of those; they've gotten pretty seriously messy (go see @Ward H's pictures to see how you should do it!). One of these is in the coffin (wiring for the electric outboard). Another is on a little lip of fiberglass under the starboard bulkhead (a convenient place for wiring lights, VHF, etc. on that side)
coffin_bus.JPG IMG_1535.jpeg
The previous owner had had the circuit-breaker panel replaced recently, and I left it as-is in the port-side cabin wall. I mounted various other electrical panels and components nearby:
--Xantrex LinkLite battery monitor
--Xintex fuel vapor detector (with the sensor in the bilge area, as fuel vapors are heavier than air). It's labeled as a gasoline vapor alarm, but the sensor is the same as for the 'Propane' model - it detects gasoline, propane, butane, and presumably most other hydrocarbon vapors. I always hang propane canisters in a bag off the stern rail at night, so the alarm is really overkill. But it's a bit of extra protection, and helps me sleep better.
--Xintex CO Detector: Serves the same purpose as the vapor alarm - I.e., so I can sleep better. Or in that case, maybe more importantly so I can wake up from said sleep...
--Solar charge controller panel (I'll post some pictures of the rest of the solar system at some point)
--Additional switch panel (cabin lights, deck light, etc.)

Here's the current wiring diagram (including a couple things that aren't described here; perhaps more details to come later).
Breezy_Wiring.png
Cost (that I can recall): ~$1600
--Batteries (2x Lifeline Group 31): $636
--CO Detector (Xintex CMD5-MD-R): $85 (West Marine - we're actually on our second now, as they age out after 5 years)
--Fuel vapor alarm (Xintex M-1): $136
--Battery monitor (Xantrex LinkLite): $163 (Amazon)
--Terminal bars (5, various sizes): ~$75
--Wire and battery cable: ~$100
--Fuses and breakers: ~$100
--Lugs, heat-shrink connectors, shrink tubing: ~$75

--Crimpers: ~$210 (Battery lug ~$180, single-crimp ~$30)
I bought mine before @Maine Sail was selling them, but if I was buying now, I'd support him at MarineHowto.com

Protips:
--Read @Maine Sail's articles on crimpers and connectors, and buy the best crimper you can afford. And if you're in the Portland area (or near Olympia in the summers, when we're up there often), you're welcome to borrow my big crimper for battery lugs. They're an expensive and rarely-used item. Wish I had someone close I could have borrowed from.
--Stock up on wiring, connectors, and heat-shrink tubing - just go ahead and buy a good assortment. You won't regret having the right connectors when you need them. SBO and GenuineDealz both carry good stuff.
 
Last edited:

Tarkus

.
May 22, 2020
35
Catalina 22 Middle River, MD
It's still (officially) winter, at least for another day or two, and it'll be awhile before I make it back on the water. So I'm going to entertain myself (and perhaps one or two other bored souls) with pictures from some C-22 projects. Nothing comparing to @CloudDiver, but maybe a couple things others might find useful. Most or all of these projects have at least one summer of sailing behind them, so I might be able to include a few 'I wish I'd have thought of...' recommendations. On the downside, that means most of my pictures are of earlier projects that have accumulated a season or two of crud in them. Ah well, you can't be sparkling clean all the time.

"Breezy" is a 1981 C-22, skippered by a slightly paranoid engineer (me). We sail with a crew of 4 - two adults and 2 kids (currently 7 and 11). I'm just a run of the mill do-it-yourselfer. I'm reasonably comfortable with standard tools, and I have a shop big enough to park the boat in. But I don't do fine aluminum fabrication like @Meriachee, and you won't find me starting projects with "...I pulled out my plasma cutter..." (new head question).

One other bit of importance: The rest of my family all swim better than I do, so I'm especially motivated to stay afloat. This brings out my 'slightly paranoid engineer'... So, I've rarely met a boat project that I couldn't quickly extend well beyond overkill. But I like to think I'm taking my family out in the safest vessel I can, and one with many of the creature comforts we can fit into 22 feet.

First, I'll give short shrift to a few of the 'normal' issues everyone has dealt with, and then move on to a few that might be more interesting. Very much not chronologically - ordered as I can find or take pictures of each.


Replaced chainplates with new ones from CD; she already had 1/2" chainplates (of unknown vintage), but the older design with smaller unachored bases that turn too easily. A couple had clearly leaked at some point. The bases of the new design screw into the deck so they won't swivel, and the butyl tape can do its job. Properly epoxied, countersunk, etc. per @Main Sail's process.

For the anchor screws, I overdrilled, filled the holes with thickened epoxy, waxed the screws and screwed them into the epoxy while it kicked. That makes nice threaded holes that can't leak into the core even if the butyl tape ever leaked. For a few other projects, I've overdrilled, filled with thickened epoxy, and tapped machine threads into the epoxy. I think either system works for relatively low-load applications (and everything with higher loads is through-bolted anyway).

View attachment 162673

Replaced all standing rigging
Again, with the CD kit - I considered going synthetic (probably with New England WR2), which would save a few pounds up high. It seemed like an interesting project, but a big time commitment. And we needed new turnbuckles, which are included in the ~$480 CD kit, but would be expensive to purchase separately. Between turnbuckles and terminators for synthetic line, the DIY project priced out quite a bit higher than the stainless kit. Maybe I'll go synthetic next time.

Note: I initially failed to pin the turnbuckles. The old ones had never slipped a bit, so I didn't think about it. But the new ones are nicely lubricated and work out on their own while sailing (duh!). My son caught one about to let go - he may well have saved the mast. They're all pinned now with split rings. Maybe I'll buy cotter pin wraps / scar pins sometime to make tuning a little easier.

Time: 7.25 hours (rigging and chainplates)
Cost: ~$650

Replaced bow eye backing pad with Starboard version from CD (no picture; it's covered with anchor rode, but you all know what it looks like anyway)

Midship cleats
View attachment 162676

Replaced keel winch and cable, turning ball, etc.
Not much to say here that hasn't been said in many other posts. I found a little rot in the step / winch support, but nothing too terrible. It ground out pretty easily, and I epoxied and bolted a plate of 1/4" G10 in place. It should be pretty solid now.

Time: 15.5 hours (about half building a stern cradle and modifying my trailer)
Cost: ~$250
View attachment 162677
Before:
View attachment 162678
Nice job on all of it! What do you use for "thickened epoxy"
 

AaronD

.
Aug 10, 2014
728
Catalina 22 9874 Newberg, OR / Olympia, WA
Nice job on all of it! What do you use for "thickened epoxy"
I use West System epoxy and their fillers / hardeners to thicken it. I've mostly used their Colloidal Silica (406) because it's a compromise between strength and sandability. But you might select a different filler depending on the job you're doing. I buy epoxy in 1 gallon jugs, and a gallon seems to last me a couple years.

There are cheaper epoxy systems than West System, but it's a reliable brand; they've run lots of experiments to evaluate how it behaves in different situations and have it really well documented on their website. And I'm willing to spend a few $$ more to support a company that's done as much for boating as the Gougeon brothers (founders of West System).
 
  • Like
Likes: Tarkus
Jul 13, 2015
919
Catalina 22 #2552 2252 Kennewick, WA
There are cheaper epoxy systems than West System
+1 for @AaronD you can spend less-- you cannot find a better solution, there are viable alternatives but you really cannot go wrong with the West system (no monetary value gained from my endorsement :) I spend!)
 

AaronD

.
Aug 10, 2014
728
Catalina 22 9874 Newberg, OR / Olympia, WA
Things living in my bilge

OK - not exactly alive, but a couple things that stay in the easily-accessed space under the companionway step.

You have to remember that I'm paranoid. And I've heard enough stories of rigging failures to want to be prepared (or at least feel prepared). There's always some spare line, blocks, etc. around the boat somewhere, but with 4 of us living on a C-22, finding anything in a hurry is... unlikely, shall we say. So we carry a few essentials where they're easy to get to, in "don't touch it except for emergencies" bags.

IMG_1540.jpeg

Emergency rigging supplies:
--50' of 3/16" Amsteel (with eye splices)
--1x 40mm block (working load ~880 lbs)
--2x 1/4" Wichard shackles (WLL 1320 lbs)
--2x wire-gate carabiners (breaking strength 22 kN / ~5000 lbs)

I figure I can improvise a lot with that if needed.

Tools:
--Felco C-9 hard cable cutters (a quick way to cut standing rigging cables if it were ever necessary)
--Small hammer (for pounding a tapered plug into a failed through-hull)
--Dessicant (trying to keep the tools from rusting, and mostly successful thus far; I replace these occasionally with bags from packaged items)

I watched for awhile and found the Felco cutters slightly used for $63. Not cheap, but they also come in handy around home, for espalier wiring, etc. (we've had good luck repurposing some bits of our retired standing rigging for landscaping tasks).
 
Last edited:

AaronD

.
Aug 10, 2014
728
Catalina 22 9874 Newberg, OR / Olympia, WA
Battery Monitor

I'm reasonably happy with my Xantrex LinkLite. I believe I've wired it correctly (all negative connections route through the shunt). And it seems to give a good idea of current charge / discharge rates.

P9170001.JPG

But I haven't found it to be incredibly reliable as far as total state-of-charge (SOC). It drifts 'downward' slightly over time, even when the batteries are being topped off (by solar) every day. I occasionally have to manually reset it (as @Maine Sail says, that's probably a good practice anyway). So I added 'Check SOC and reset battery monitor' to my list when returning to the boat in her slip. And I do the same a few times during the winter. We don't live where it's incredibly cold or snowy, so I leave the batteries connected over the winter, with a small solar panel outside the shop to keep them charged. That lets me test my winter electrical projects. At least it works here where winter mostly means rain. Those in more northern climes would just have an outside panel covered in snow.

If I were starting over, I'd consider the Balmar SmartGauge; it's more expensive, but sounds like a real improvement.
 

AaronD

.
Aug 10, 2014
728
Catalina 22 9874 Newberg, OR / Olympia, WA
A few days in the South Sound

Breezy is back in her happy place, floating in her slip at Swantown.
IMG_1575.jpeg

We got in a traditional family boat trip - 4 people, 5 boats (Breezy, Walker-Bay rowing dinghy, 2 6-foot kayaks and an inflatable paddleboard). 2 nights at Jarrell Cove State Park, complete with a Bald Eagle and front-row seating to the neighborhood fireworks show.

More importantly, a little Code Zero weather along the way. My 12-year-old crew helmed for most of the sailing, with a giant grin the whole time.

IMG_1570.jpeg
 
Sep 30, 2013
3,562
1988 Catalina 22 North Florida
A few days in the South Sound

Breezy is back in her happy place, floating in her slip at Swantown.
View attachment 182011

We got in a traditional family boat trip - 4 people, 5 boats (Breezy, Walker-Bay rowing dinghy, 2 6-foot kayaks and an inflatable paddleboard). 2 nights at Jarrell Cove State Park, complete with a Bald Eagle and front-row seating to the neighborhood fireworks show.

More importantly, a little Code Zero weather along the way. My 12-year-old crew helmed for most of the sailing, with a giant grin the whole time.

View attachment 182010

How do you like your Code Zero? Never seen one on a C22 before.
 

AaronD

.
Aug 10, 2014
728
Catalina 22 9874 Newberg, OR / Olympia, WA
How do you like your Code Zero? Never seen one on a C22 before.
Absolutely love it! With the light winds we often see in the South Puget Sound, we use it far more than our regular genoa. In theory, it's good to about 50 degrees apparent, but I'm not really good enough to trim it quite that close - I can usually make progress at 60-70 degrees apparent (at least in light winds - maybe I could go tighter in 8-10 knots, but then we're usually switching to the 120% genoa).

It's a "Cruising Code Zero", so the midgirth is narrower than the minimum to measure in as a spinnaker for racing (which, I think mostly means you don't have extra leech flapping all the time). @DrJudyB made it for us when she was still running Hyde Sails Direct. Lots more details on the sprit, furler, etc. in my original post and a few that follow it. Expensive, but definitely the most fun addition to our C-22. Recommended!
 

AaronD

.
Aug 10, 2014
728
Catalina 22 9874 Newberg, OR / Olympia, WA
Trailer Brakes

As you can see, our trailer brakes were pretty well shot; probably more rust than remaining material. On our tow home last year, they finally collapsed completely - the actuator was sliding freely from stop to stop, which made for a very nerve-wracking tow, even with a hugely oversized tow rig.
IMG_1341.jpeg IMG_1579.jpeg

Over the winter, I replaced the whole system with disc brakes. Demco 8605001 actuator and Kodiak 10" hub / rotor set, lines (+ new wheel bearings and bearing buddies, while I was at it). Breezy is towing smoother than ever before!
IMG_1578.jpeg IMG_1576.jpeg

I decided to go for discs, primarily because I can rinse off the salt water, whereas water will always pool inside the drums and rust them out faster. I couldn't quite justify going for all-stainless disc setup, partly because I think in the long run I'd prefer to upgrade the trailer with a 5k axle, which would mean larger discs (with 6-bolt studs). So I compromised with standard discs, with the expectation that if I do upgrade the axle eventually, at least the actuator and lines will be good, and I'll consider stainless brakes then.

The previous actuator was welded on, so that meant a lot of time with an angle grinder; a 10-pack of cutting discs was a big win - new discs make a huge difference. My son helped me drill mounting holes in the trailer tongue (it's nice to have an assistant to squirt cutting fluid). Before mounting the new actuator, I slid a scrap of galvanized pipe into the tube, having read somewhere that it's a good idea to ensure the bolt pressure can't crush the square tubing. Probably completely unnecessary, but I don't think it can hurt anything, and it might help (in the picture, it's sitting on a scrap of round rod, to hold it in place while I slide on the actuator and then push the bolt through).
IMG_1520.jpeg IMG_1524.jpeg

I'd never done anything brake-related more complex than changing pads before, so I spent a lot of time scratching my head and watching YouTube videos, but we eventually got there.

Unlike drums, disc brakes work well in reverse, but that's more of a bug than a feature (you don't generally need braking while backing into a parking space or across to a launch ramp).

The actuator has electric lockout, but that won't be available when backing into the water (with lights disconnected), or when towing with a vehicle without a 7-prong connector. So I added a high-pressure brass ball valve from McMaster to manually disable the brakes. Part number 4112T53. It's threaded 3/8-27 pipe thread (vs. 3/8-24 flare fittings for all the other connections). But with a couple adapters from Napa, it seems to be working great - I was very grateful for it last weekend, as my electric lockout wasn't working - it looks like there's something wrong with my wiring; I couldn't test the lockout until we borrowed the tow rig, and by then I decided just to go without and troubleshoot later.

IMG_1577.jpeg

I'm very happy with the outcome (and yes, the rest of the trailer will get some sanding and spray paint while Breezy is in her slip this summer).

Time: 16.5 hours
Cost: ~$610
--Actuator: $185
--Brakes, lines, bearings, bearing buddies: $410
--Adapters, fluid, etc.: ~$15
 
Apr 5, 2009
2,993
Catalina '88 C30 tr/bs Oak Harbor, WA
Trailer Brakes
...I decided to go for discs, primarily because I can rinse off the salt water, whereas water will always pool inside the drums and rust them out faster. I couldn't quite justify going for all-stainless disc setup, partly because I think in the long run I'd prefer to upgrade the trailer with a 5k axle, which would mean larger discs (with 6-bolt studs). So I compromised with standard discs, with the expectation that if I do upgrade the axle eventually, at least the actuator and lines will be good, and I'll consider stainless brakes then.
I use a product called Salt Away to flush out my outboard motor and to rinse the hull after sailing. Works very well to remove the clorides.
 

AaronD

.
Aug 10, 2014
728
Catalina 22 9874 Newberg, OR / Olympia, WA
Case for Tension Gauge and Windex (after a lengthy detour)

I know you all have much better shop habits than mine, but my socket bars and combination-wrench racks tend to look like this: with the 10mm, 12mm, 7/16", 1/2", and all the other useful sizes are scattered around the shop somewhere, in the middle of one of the many projects simultaneously in flight.
IMG_1537.jpeg

If I was being vindictive, I could try to blame my kids distractions; "Dad, could you cut this for me?", "Dad, can I drill a hole in this board?", "Dad, I pulled on this board and the whole stack fell down." But in reality, 1) I love having my kids out in the shop with me, so I'd better not complain; and 2) If I leave my tools laying around, I can't realistically blame my kids anyway. :)

My solution was to buy a couple more small tool sets - the cheap ones that come with only the middle-of-the-range sizes. But those are the ones I'm usually missing anyway, and those sets often come on sale for ~$50. So now, my socket drawer has a couple backups for most sizes. Definitely a worthwhile investment!
IMG_1538.jpeg

Equally importantly, one of those sets came in a molded plastic case. I was about to throw it out, when I realized it would be a perfect (I.e. free) case to use to replicate @Meriachee's excellent idea. @Meriachee carries two Loos gauges; for my C-22, I only need one. But carrying the windex safely has always been a bit of a pain. We've kept it in a cardboard tube with some bubble wrap, but that tube never seems to be easy to find during rigging. Hopefully the case will be easy to spot.

I dremeled out the pre-molded tool slots, and fit in egg crate foam (from Amazon). The foam fits nicely around the edges, and I didn't even have to glue it. Presto: A nicely padded case for the Loos gauge and associated stuff:

IMG_1539.jpeg IMG_1552.jpeg

Also note the rig adjustment tool, made of some 1/4" CF rod and a little 2mm dyneema leash (Idea stolen from Sail22). It seemed like that should live with the Loos gauge as well.

Time: 1 hour
Cost: ~$10
 

Attachments

Last edited:
  • Helpful
Likes: Meriachee
Aug 1, 2011
3,972
Catalina 270 255 Wabamun. Welcome to the marina
Case for Tension Gauge and Windex (after a lengthy detour)
Equally importantly, one of those sets came in a molded plastic case. I was about to throw it out, when I realized it would be a perfect (I.e. free) case to use to replicate @Meriachee's excellent idea. @Meriachee carries two Loos gauges; for my C-22, I only need one. But carrying the windex safely has always been a bit of a pain. We've kept it in a cardboard tube with some bubble wrap, but that tube never seems to be easy to find during rigging. Hopefully the case will be easy to spot.
Time: 1 hour
Cost: ~$10
Tensile Strength
Most excellent. The admiral got me hooked on tote bags. I worked my way through blow- molded cases and bought a small industrial sewing machine. Be aftaid!
 
  • Ha
Likes: AaronD

AaronD

.
Aug 10, 2014
728
Catalina 22 9874 Newberg, OR / Olympia, WA
Double-ended Main Sheet

IMG_1572.jpeg

This project seems to get good reviews from everyone who's done it. If you're considering doing this, read Stingy Sailor's description and Joe Becker's in the C-22 Association's Technical Manual. On lazy light-wind days, we often sail with the bimini up; the forward sheet end isn't as useful then, but when we have the bimini down, it really rocks!

I actually spent just a bit more than the $222 kit from Catalina Direct, but got better parts and a new Salsa mainsheet in the process. Stingy used a double block on the aft end of the boom; I elected to use 2 separate blocks - one of them a ratchet block, the same as the CD kit. So the forward sheet end is held by ratchet pressure when it's not cleated, which is nice.

This system reuses the existing lower fiddle block w/cam. I might eventually replace with a new fiddle block with a ratchet on that end as well. If a day of weakness coincides with a good sale or eBay deal... :)

Mounting the aft blocks was pretty simple - just tie the soft-attach lines as described in the block's instruction sheet (using the existing eye strap for the aft block and adding another one for the forward block). Note that the aft block takes the full load of the sheet, but the forward block is at the end of the tackle arrangement and only sees ~1/3 of the load. So I was fine with just a simple eye strap for that one.
IMG_1571.jpeg

Pivot Block: At the forward end (on the boom), Stingy used a Viadana 28mm pivot block. But it maxes out at 5/16" line, which seems really small for a mainsheet. CD uses what appears to be a Harken 140 (40mm sheave). Even that seemed small to me, and I went for a Harken 2135 instead (57mm sheave).
P6060182.jpg

The force on the pivot block will be sideways as well as downward; when I took a look at the block, I had 2 concerns:
1) The radius of the block's mounting plate is (unsurprisingly) considerably larger than our skinny C-22 boom. So the plate might tend to rock back and forth. I cut and sanded a little piece of black Starboard to match the 2 radii (you can see it in the picture above if you look closely).

2) I was a little paranoid about using only 2 small fasteners into the thin aluminum of the boom. Tapping threads into the boom or riveting - either one seemed like it might eventually work loose or pull out of the aluminum (again, because of the sideways forces that might tend to work the fastener free over time).

So I added a thin insert of G10 inside the boom and tapped threads into it. Threads in G10 should match SS bolt strength at ~1 bolt diameter of thickness - I.e., good threads in 1/4" G10 will match the strength of a 1/4" bolt. So tapping into ~3/8" G10 should easily exceed the strength of #10 screws.
P6050175.jpg P6050177.jpg P6060180.jpg P6050176.jpg

From memory, I believe I:
1) Laminated together 2 layers of 1/4" G10, approximately 5" x 1"
2) Sanded it down to match the interior curvature of the boom
3) Drilled and tapped a hole for one of the two mounting bolts
4) Drilled the first mounting hole in the boom
5) Wrapped duct tape around a long rod, sticky-side-out
6) Stuck the insert to that tape and used the rod to position it inside the boom (aligning the holes I'd already drilled in the insert and the boom); screwed the insert to the boom (anchoring it solidly for the next steps)
7) Drilled the second mounting hole in the boom and insert, tapping the latter
8) Mounted the pivot block

Sheet: 10mm Salsa single-braid. @Jackdaw swears by Maffoili Swiftcord, but I couldn't quite swing the $3.67/ft. When I found a 50' hank of NER Salsa for $1/ft, I went with that. It feels at least as nice as the thicker 1/2" Dacron it replaced, and the single-braid coils neatly. Recommended.

Time: 2.75 hours
Cost: $226

* Harken 2157 Pivot Block: $63
* Harken 2159 T2 Ratchet Block: $39 @eBay (all eBay blocks were new old stock items)
* Harken 2149 T2 Block: $29 @eBay
* Harken 2135 57mm ratchet block: $44 @eBay
* 50' 10mm Salsa line: $51 @Hamiltonmarine