
Restoration of 1981 C-22 swing keel #10580
- Thread starter CloudDiver
- Start date
Don, I was at West Marine this past weekend looking at Interlux paints and was seriously considering this. Rolling paint would be faster than mixing batches of unthickened epoxy for sure, but then again I have a gallon of West 105 on hand... What concerns me more at this point is the bleeding moisture. I checked the keel last night and it is still bleeding from the various small areas where I cleared the paint/fairing compound down to cast iron. I'm worried that even if I sandblast it will continue to weep for days after. I'm going to call Catalina and see what they think. I may 'tent' the keel with a small dehumidifer in the garage for a few weeks before I have it blasted. The timing will be critical to ensure no moisture (or as little as possible) is present in the porous cast iron when the barrier coat is applied.
Luke,
Just a suggestion, when I refinished the keel on my first C-22, I had it sandblasted, then brought it home and started rolling on multiple coats of Interlux 2000/2001 epoxy barrier coat, (and it makes one heck of a primer for steel/iron). This stuff has lot's of solvents so it will quickly get into every nook and cranny in the cast iron and I just kept rolling coat after coat about every 45 minutes or so to build up a nice coat fairly quickly. After it cured, I did the keel fairing with thickened WEST epoxy.
Nice set-up there for working on the boat!
Keep them photos coming!
Don
CloudDiver,
You might be surprised at what is under the existing filler/fairing material on your keel. When I stripped mine, I found 3 large cavities in the casting on one side that needed to be filled in. If this is true with your keel, then I'm sure the water is just seeping out of those areas. Once you get all the material removed and down to bare metal, it should be fine.
Blue skies!
Greg
Attachments
-
 51.3 KB Views: 731
 -
 44 KB Views: 1,350
 -
 45.9 KB Views: 677
Very interesting Greg, thanks for the info and pics. I think the only way to know for sure is to get the blasting done. I talked to West System tech support again and I have a good plan to deal with any residual weeping if it continues after blasting. He also told me G-flex prethickened epoxy is a great filler and sands well for the damaged areas.
CloudDiver,
You might be surprised at what is under the existing filler/fairing material on your keel. When I stripped mine, I found 3 large cavities in the casting on one side that needed to be filled in. If this is true with your keel, then I'm sure the water is just seeping out of those areas. Once you get all the material removed and down to bare metal, it should be fine.
Blue skies!
Greg
Yeah, the castings are pretty rough, and don't forget that big "MEXICO" on the side also. Years ago when I re-finished my keel, I simply had it sand blasted, then it was probably the next day or so that I started rolling on the Interlux epoxy barrier coating. It's some kind of metal primer and grips the steel or iron tenaciously! The barrier coat filled in most of the smaller cavities in the keel. I built the barrier coat/primer thick enough so a light sanding gave plenty of bite for the fairing with the thickened WEST epoxy. Once you mix it, you gotta just keep using it. Don't forget, there is a good chance that the hole might have to have a bushing installed. So if it developed a slight film of surface rust while the bushing was being installed, a good power wire brushing will clean that up plenty good for the barrier coating application. Don't worry, there will be plenty of uses for that gallon of 105! It's not going to go bad.
Don
Don
This weekend consisted of removing the port windows and most of the remaining the deck hardware. Just about everything is off the hull at this point, just a few small bits left. I am over-drilling every hole by one drill size and adding a taper to the top with a counter sink bit. I'm checking everything for water damage and really finding none at all which is good news. There is some rust staining and a little 'blackness' that comes out with the drill shavings but I am left with clean, bright wood core in the hole when I am done. The holes to the motor mount in the transom were the worst. The PO had done a horrible job installing them, the upper starboard being a mash of 3 diff 3/8 holes. I overbored the whole mess to 9/16".... yes, thats a big hole.
All the vertical holes in the deck will be an easy fill with straight resin. Anything horizontal and big like those motor mount holes and the rudder gudgeon mounts will get special treatment. I'm going to get some small fiberglass tubes from a fishing rod repair shop. I'll fill them with resin and let cure, then I can cut them on my mitre-saw to length to make plugs that will set in with thickened epoxy.
I cleared out the majority of the nasty mash-up of poor electrical work being careful to leave the factory wires that run into the hull for the cabin lights, bow light, stern light, etc. I'll be doing a complete new 12V system similar to Stingy Sailor but I think I'll be moving my panel.
I'm almost done clearing everything from the interior. It's really amazing how much stuff and hardware comes out of this little boat! I think I've said that before. More good news, when cleaning out under the fwd port settee (where the keel locking bolt is) I found two great things;
- there was a standard 'wheel' sensor in a thru hull for old 'Speed Log' knot meter. the wheel was non-op due to marine growth anyway. I was pleased to see the thru-hull in excellent condition and appeared to be professionally installed, no need to replace. Also, the fitting came with a spare blank 'plug' so I could remove the old sensor and keep the thru hull water-tight.
- When looking around the area for any damage that needed repair I noticed the factory 'missed' a few areas with glass cloth and resin. This turns out to be in my favor, since the place they missed was the top corner of the vertical lumber that is glassed in to transfer the compression post load. The top corner is dry as bone! So that answers my question about the condition of that area and there will be no digging into that area for any major hull repair! Also, I am not 100% sure yet, but it appears I may have a 4"x 4" in there vice a 2 x 4 which would be really nice to confirm.
Hardware clear and interior GRP repairs/upgrades
As of last night I finshed clearing all of the deck hardware with the exception of the genoa tracks and the Mainsheet Traveler Bar. I also got all the junk, dust, and odd bits out of the bilge areas/under-stowage. All this time under the deck with a bright work light has left me wondering about several things and how my schedule of work is going to play out. So I'll make this list and please feel free to comment on any or all. What I decide to do next will effect what work will be done before I flip the hull over for bottom paint and what can wait until after I turn it right side up again.
- Removing the Genoa tracks is a PITA, the tiny nuts are difficult to get to. Putting them back will be worse. I noticed many people have moved them inboard because it helps you point higher into the wind (did I get that right?). Does moving the Genoa Tracks inboard a mere 6 inches really make that much of difference? I don't think I'm that skilled of a sailor yet to notice the difference and the boat just really won't be THAT fast. On the other hand if I do re-mount them inboard the backing nuts will be a heck of a lot easier to get to! With the tracks inboard will any of the rigging interfere with the life-lines, stanchions, or other rigging?
- When I was unbolting the life-line stanchions I lost my grip and one of the stanchions fell to the shop floor, slightly bending the base. I can fix it but it led to me ask myself if I really want to put them back on at all? I noticed many 22's don't have them, racing or not. I'll keep my bow and Stern Pulpits for sure, and I can always reinstall the stanchions pretty much any time. I think it will be nice to have less deck clutter while I figure out what running rigging set-up I will like.
- When I was removing the 30 year old bilge pump from under the port cockpit seat I noticed how thin the GRP wall is, especially when you pump the handle the whole thing will flex. I want to reinforce that by laminating a sheet of plywood on the inside. I have plenty of 1/2" marine grade on hand but I think that is overkill.
- While I'm in that area I want to isolate my fuel locker from the rest of interior/cabin. Has anyone done this?
- The overall structure of the cockpit seating and seat/hatches is pretty flimsy. While I'm in the area messing about with all the sanding/new glass/paint in this area I figure I can reenforce these as well. In certain areas where I step I cringe when I feel the GRP flex under foot or worse hear cracking!
- Inside the cabin I have a ton of small glass/fairing filler/gel coat repairs. I'll post pics of these because I'm this problem is class wide. On several areas that are 90 degrees its obvious the factory didn't get the glass matt down into the mold, so there is nothing to back up the gelcoat and it caves.
So, generally, I have to consider taking on all of this now and get it knocked out or wait until after I paint the bottom. The best reason to skip all this and save it for later is that temps here in San Diego are still very favorable for paint, not too hot and not too cold with no rain. I am working indoors but temperature and relative humidity are still a factor.
On the other hand I can get this stuff in the Cabin/Cockpit knocked out while it is fresh in my mind. Also, I really don't need to buy anything by way of supplies at the moment. I pretty much have everything on hand to include a fresh gallon of WEST 105
I forgot to mention above... One of my biggest tasks that needs to be done no matter what I decide to do next (flip and paint bottom or fix all cabin/cockpit stuff) is a major cleaning of the interior, even the overheads in the compartments below. Besides dirt and grime everywhere I am finding mold spores... dried up now yes, but in many more places besides the non-draining and un-vented bow where the wet anchor rode and line was stored. So at some point I'll be stripping down to an old pair of surf trunks and grabbing my fav cleaning pail and big ol sponge and swabbing the entire interior with Simple Green/mild bleach to kill/clean everything. This means upside down in all of the compartments too, not just the visible areas of the cabin. Good thing I'm a kind of skinny guy...
Re: Keel Off
Congratulations on getting your keel off. I faired my keel two seasons ago. If you do a search by user (ancbob), you may find some helpful info/pics. For old compound removal, I purchased a cheap 4-1/2" angle grinder from harbor freight. It did a great job removing the old bedding compound. after removing all rust, I coated the keel with permatex before applying any bedding compound.
I also replaced the bronze fittings, keel pin, and added shims to the keel from CD to minimize slop. Good luck with your project.
Foiled again...
Progress is painfully slow. Every day I get home from work and I'm excited to get things done but one thing or another sets me back. I ordered some Fiberglass tubes so I can fill them with resin and use as plugs for the big motor mount holes. Well I got the padded envelope and it was obvious USPS had taped it back shut where there was a hole in the corner. The 5/8" tubes were gone, and the other tubes I ordered turned out to be the wrong size (that was my fault, I ordered .312 which is actually 5/16, I needed 3/8").
So I won't be filling the transom holes this weekend... which I need to do in order to bolt on the new stronger upper rudder gudgeon. I need that as a pivot point to flip my hull. I guess I will just work on the bow and fill all the vertical deck holes, just tape the backs and fill with resin.
Sorry about the lack of updates... I have been "fiddle farting' around with small projects (replace 'farting' around with another choice explicative if you will). I get lazy and don't download the pics from my phone often enough, but I did today to post updates on what exactly I have been 'farting' around with...
So with a the order of lost fiberglass tubes replaced I was able to plug the big holes in the transom left the piss poor P.O. job of bolting in the motor mount, 6 holes mind you, not 4 as you might imagine. It was originally mounted low then moved higher, the lower holes were plugged with bolts, washers, nuts and silicone...
For about $18 I got several short lengths of solid fiberglass tube in 5/16", 3/8", and 5/8" in hollow tube. Very cheap to cut about a dozen of each size into 1 inch plugs. I used the 5/8" tube to plug the oversized holes I drilled in the motor mount position. I had to use such a big drill bit because the poor job of mount holes was so bad I had to go that big to get a clean hole. I filled the 5/8" rod with epoxy resin and let cure over night, then sanded the outside of the rod with 80 grit before cutting the plugs to about 1.25 inch. I taped the holes off from the inside and glued the plugs in with epoxy slightly thickened with high density filler. The pic below shows the cured plugs before I sawed the protruding ends off with a fine tooth cabinet makers pull-saw. I will use a small drill bit to pilot lightly dead center on the upper four, using the motor mount to ensure placement is correct. I will leave it that way until after the hull is painted and then drill out to 3/8, leaving me with nice cured-epoxy lined mounting holes for the bolts. As I do everywhere, I'll counter sink the holes just a bit so the bedding compound makes a nice water tight gasket around the bolt.
BTW, the black you see on these plugs is carbon fiber, the outer layer... They were still cheap!
Last edited:
This is the bilge transom drain hole after removing the deteriorating thru-hull. I think there was about 3 pounds of silicone gumming up the inside nut on this one. As you can see the hole wasn't even bored very circular and I did clean it up a bit with a sanding drum on the dremmel.
So I did get the correct replacement for the from CD and it will only take a little filling and fairing to get that mounting hole squared away. Before I do that give me your take on placement. As you can see mine is sitting right on the water-line. The CD website says "To be used only when mounted well above the water line where the fitting will never be below water, even when heeled." I can just plug and fill this water-line hole and move it up a few inches to be safe, is that a good idea or not worth the trouble?
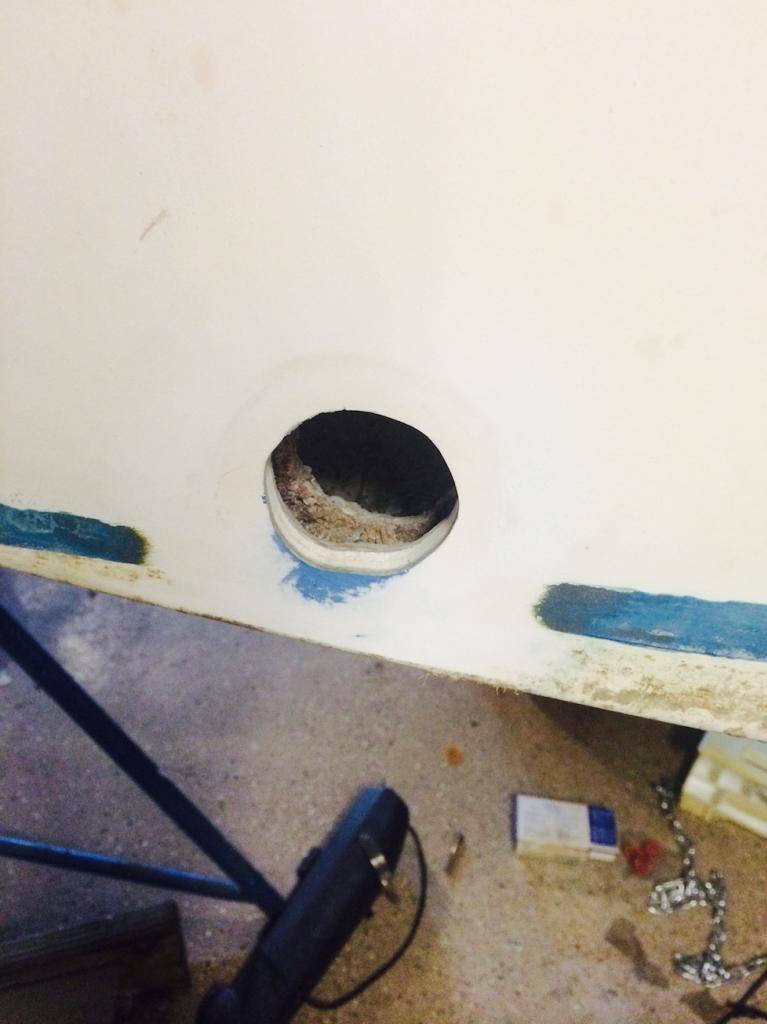
So I did get the correct replacement for the from CD and it will only take a little filling and fairing to get that mounting hole squared away. Before I do that give me your take on placement. As you can see mine is sitting right on the water-line. The CD website says "To be used only when mounted well above the water line where the fitting will never be below water, even when heeled." I can just plug and fill this water-line hole and move it up a few inches to be safe, is that a good idea or not worth the trouble?
Last edited:
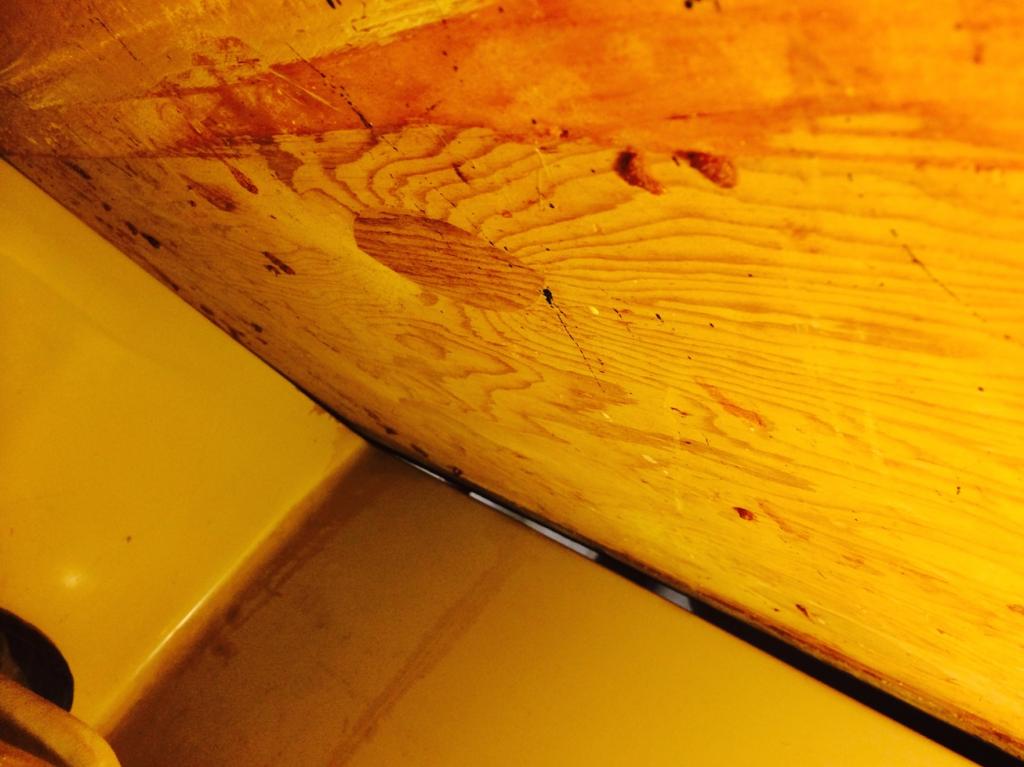
Raw plywood on the under-side of cockpit sole... Gonna have to prime and paint that or maybe just roll on some unthickened epoxy. I'll probably try to get that when the hull is inverted, it was a real contortionist act to squeeze there!
Last edited:
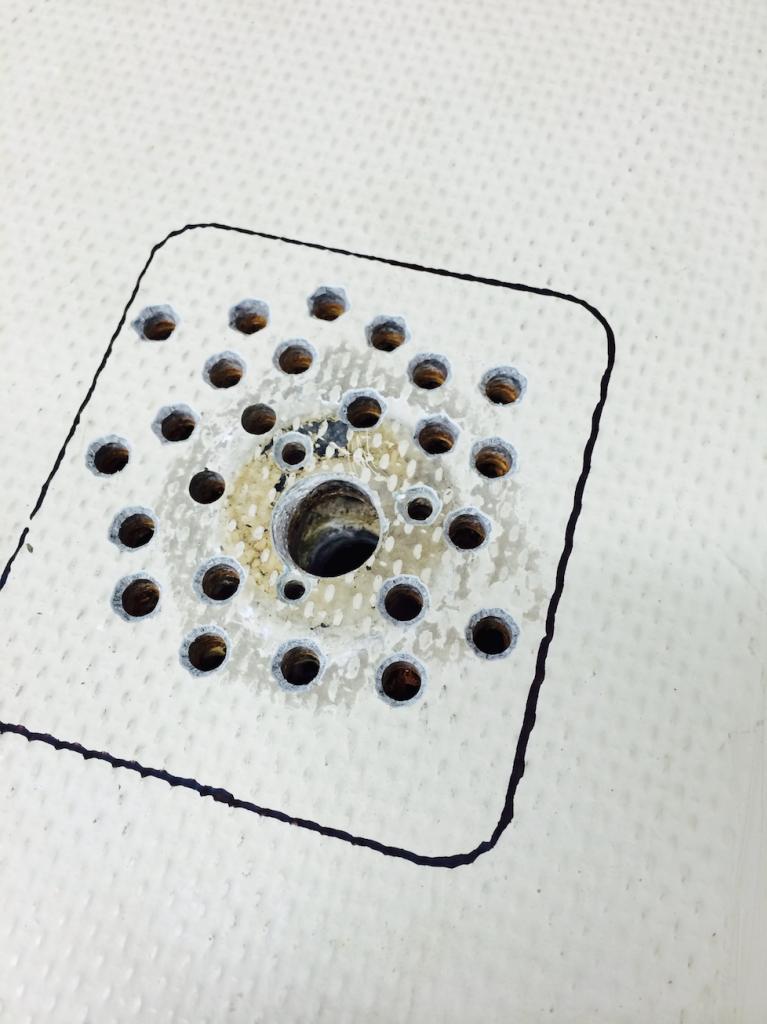
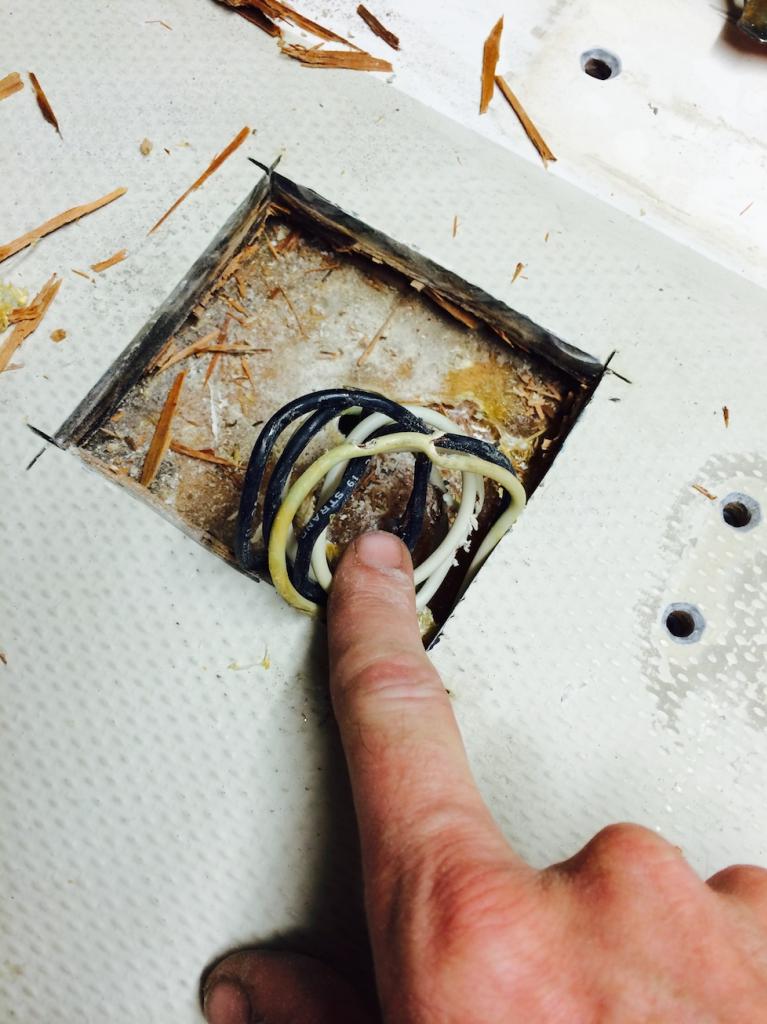
When I removed the 'waterproof' electrical connector for the mast lighting I found obvious signs of deck rot in the core. Great. So I proceeded to drill the various holes for the 'drying out' procedure. I noticed something weird in the saw dust... copper shavings? Sh!t, there were wires in there? So I used a fine cutting wheel to remove a 4 inch by 4 inch section of the deck.
Last edited:
Under the panel I just cut out look what I find, the abandoned factory mast light wires. Well, my mind got buzzing on how I could use there. I hated the crapy wires that were running up the compression post to the plug fitting, little did I know that they were no actually original. After checking the C-22 Nat Assoc. tech manual I see in the wiring diagram that the original mast-head light wire is run between the hull and liner like the cabin lights are. Although my drill bit made several cuts in the wire I clipped off the damage and there is still plenty left to wire to. Bad news the negative lead is a common with the others in the cabin, so I can't isolate it and use it as a hot. I wanted to use both wires as hots so I could have separate switches for an all-round anchor light and a 230 degree steaming light. I can still do that, but you will see that much later when I install a 3 way flush mount rocker switch. More on that in the future.
Last edited:
Asked and Answered
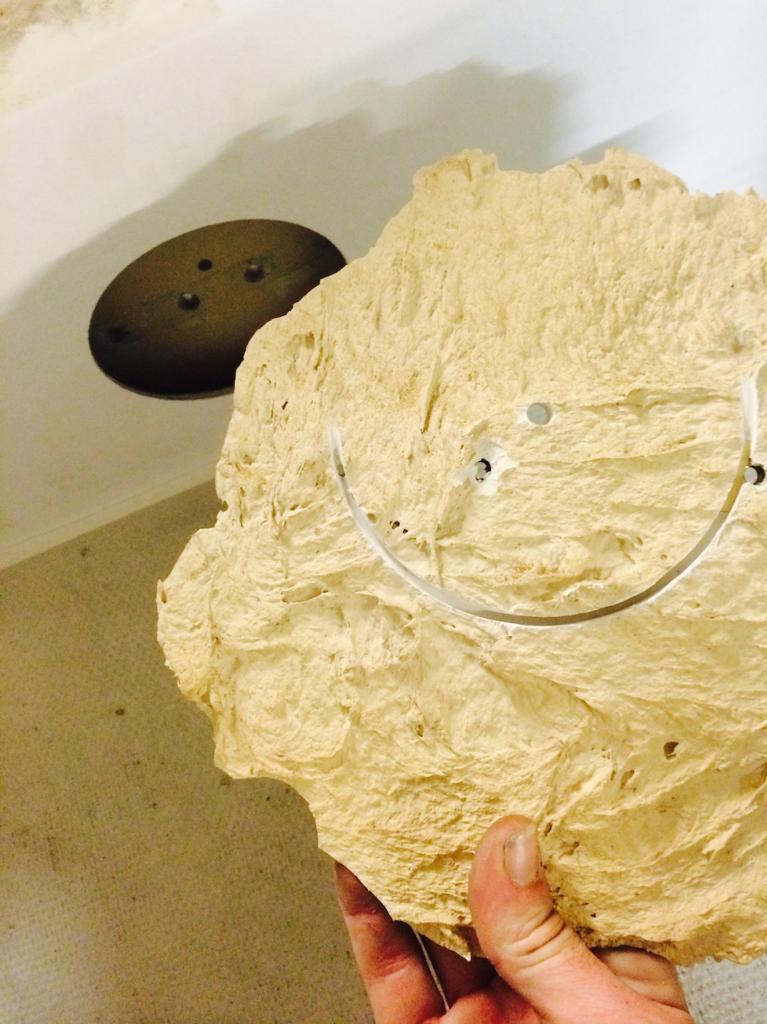
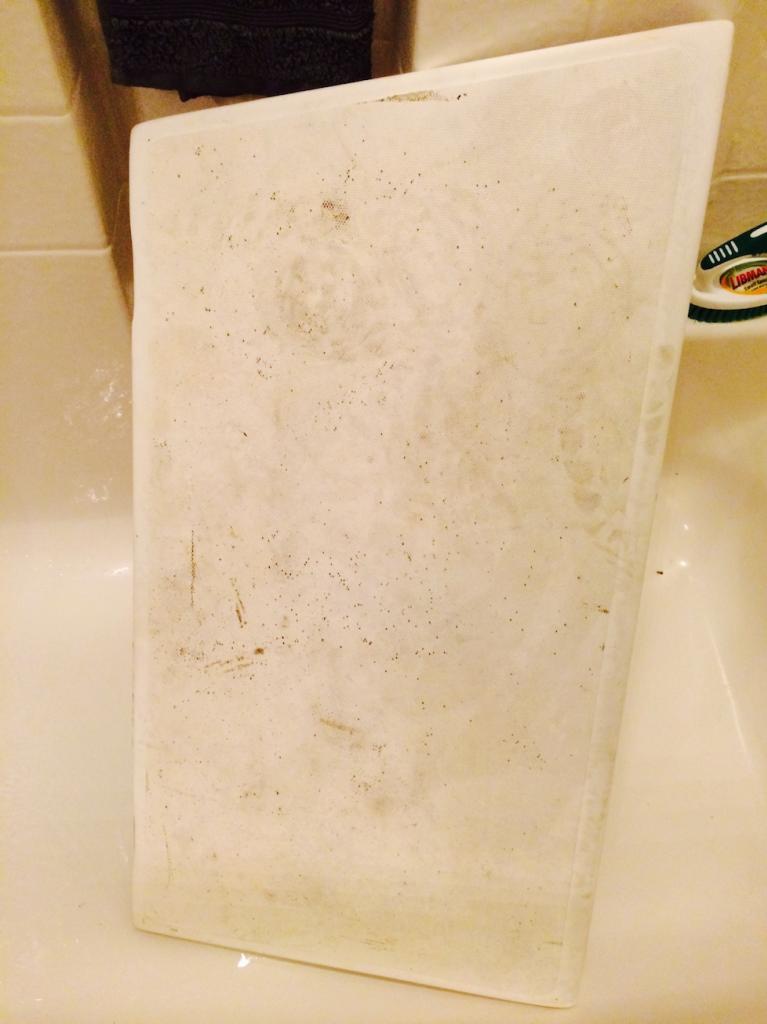
Remember this pic from earlier? Well I didn't have to use any chisels to remove that stuff, see below.
Remember this pic from earlier? Well I didn't have to use any chisels to remove that stuff, see below.
This where I drilled the hole for the inspection cover that will give me access to the rudder gudgeon hardware. What you see is that hard filler foam I was talking about. I think I'll have to go after this with sharp chisels. My new backing board will be one piece of 1/2" marine plywood that goes top to bottom on the transom.


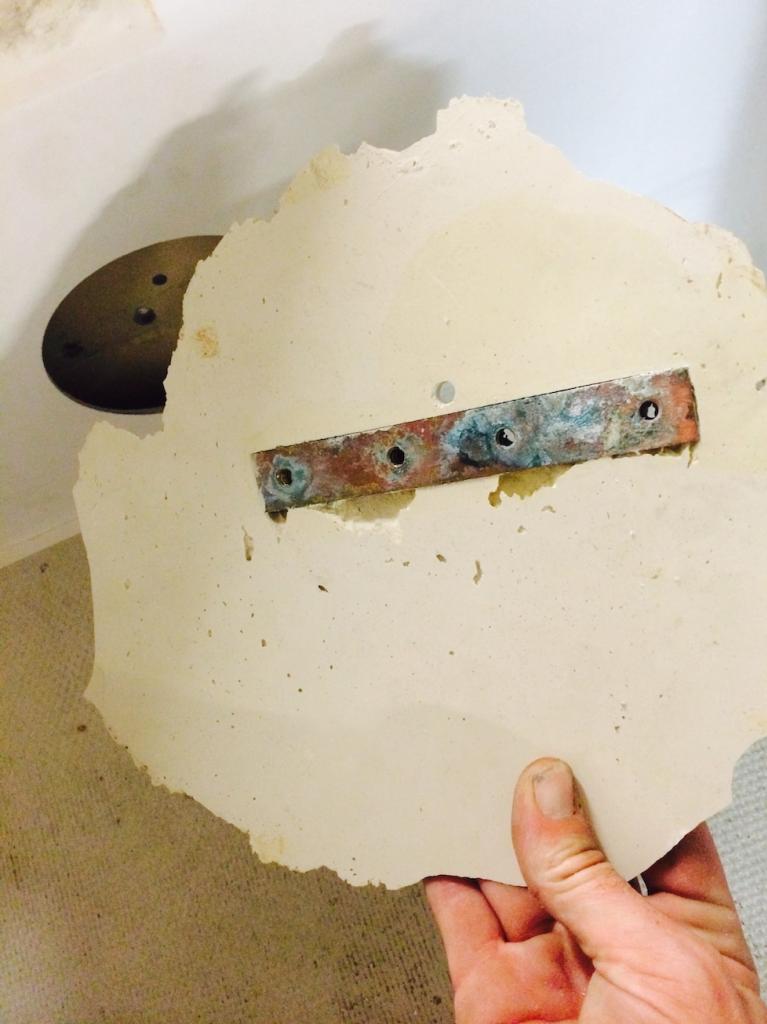
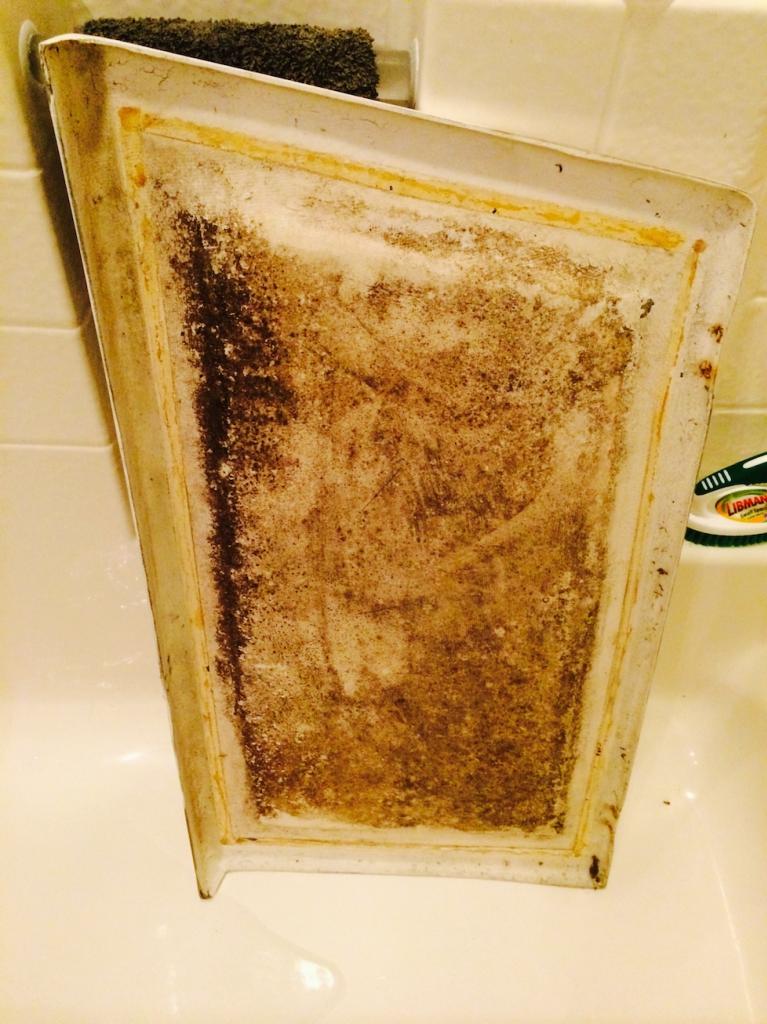
Once I backed the bolts out of the rudder gudgeon that 'thing' just popped off and fell into the inner liner. Its just a big blob of thickened polyester filler that was used to hold the brass backing strap which was tapped with threads. Since the liner is gelcoat on the inside this stuff would not stick. Turns out I don't need to cut a plywood backing board for the two rudder gudgeons. The transom is very thick to begin with, and a 1/8" thick SS strap drilled to the mount bolt pattern will be more than sufficient. Since I cut the inspection port hold I have access to tighten the nuts from the inside.
Last edited:
These are just a few pics of how dirty the cabin was when I was evacuating all the junk from inside. This was before I started creating any dust of my own...

Last edited:
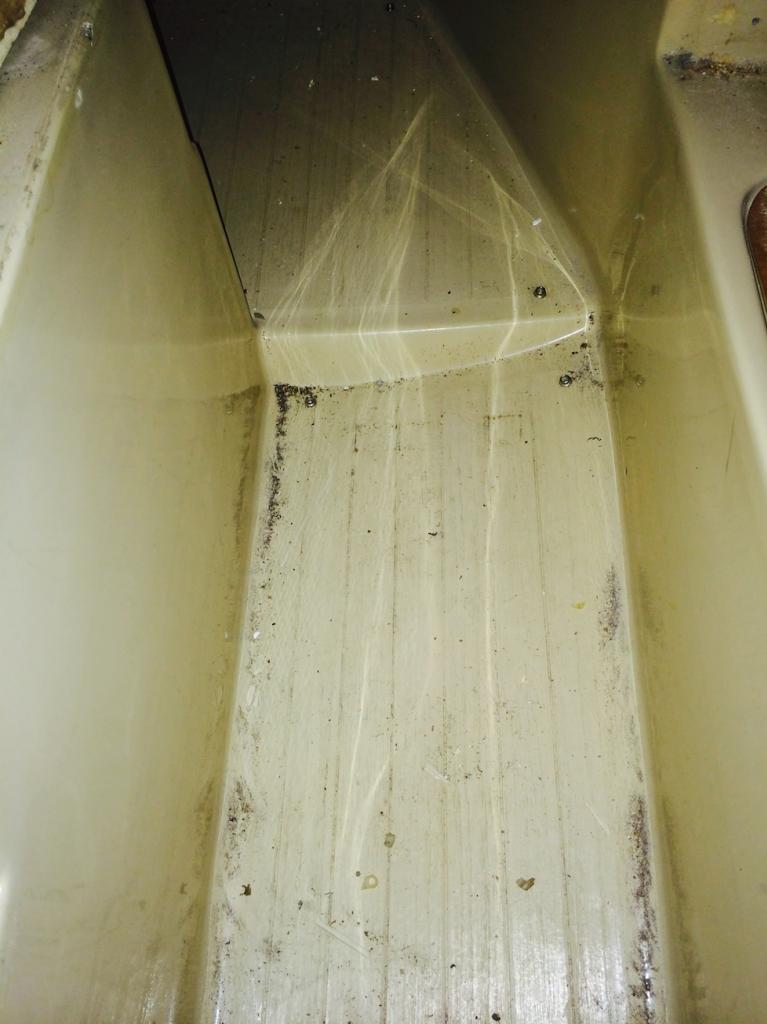
This is the mold and dirt on top and inside top of the port side lazarette hatch. I cleaned them both with just a brush and some Softscrub w/bleach but forgot to snap an after pic. These will end up getting some light fiberglass repair/reinforcement in preparation for changing to SS piano hinges, and then painted, so you'll be able to compare these before shots with the finished cockpit in the spring.
Last edited:
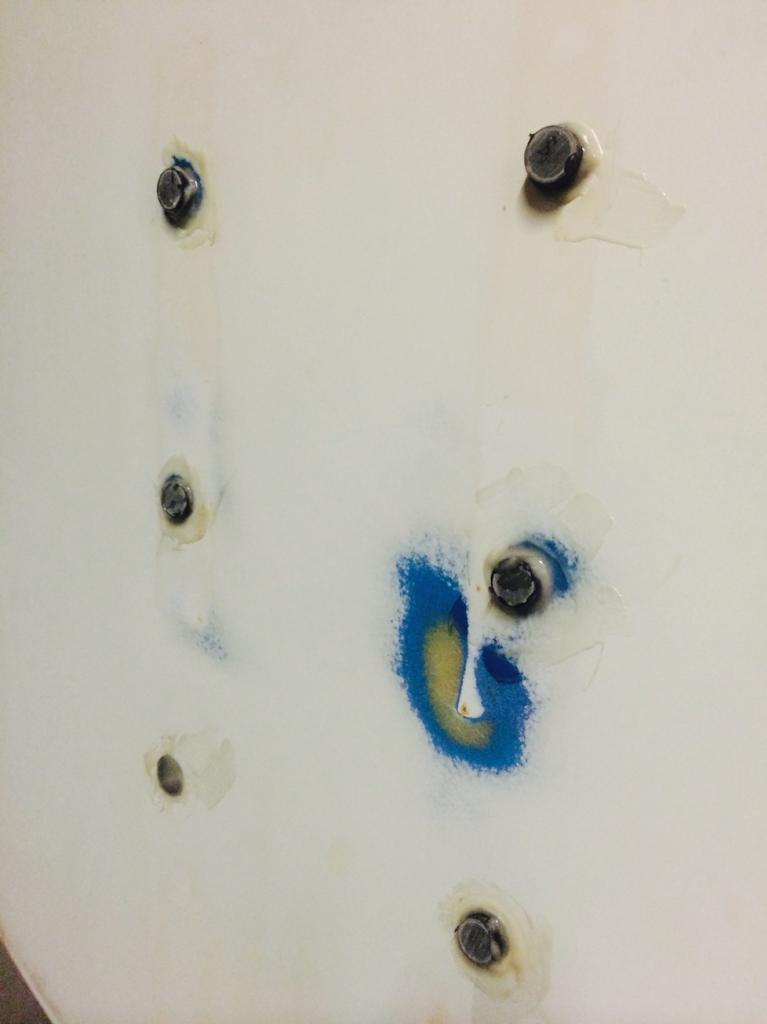
Keel 'Bleeding'
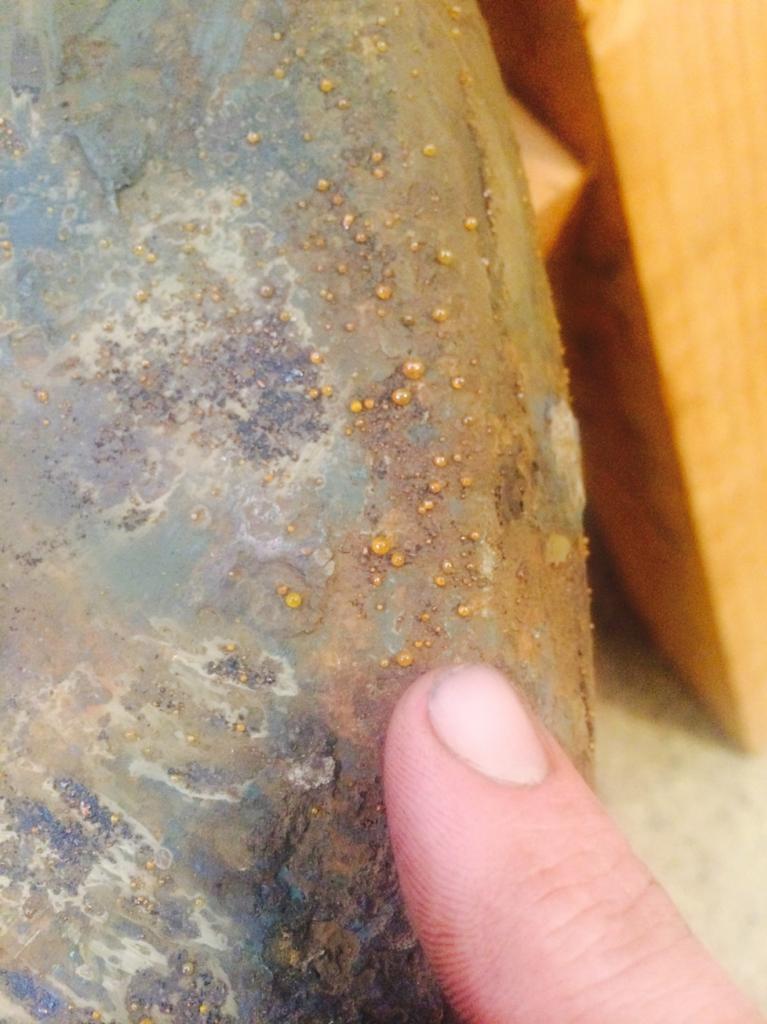
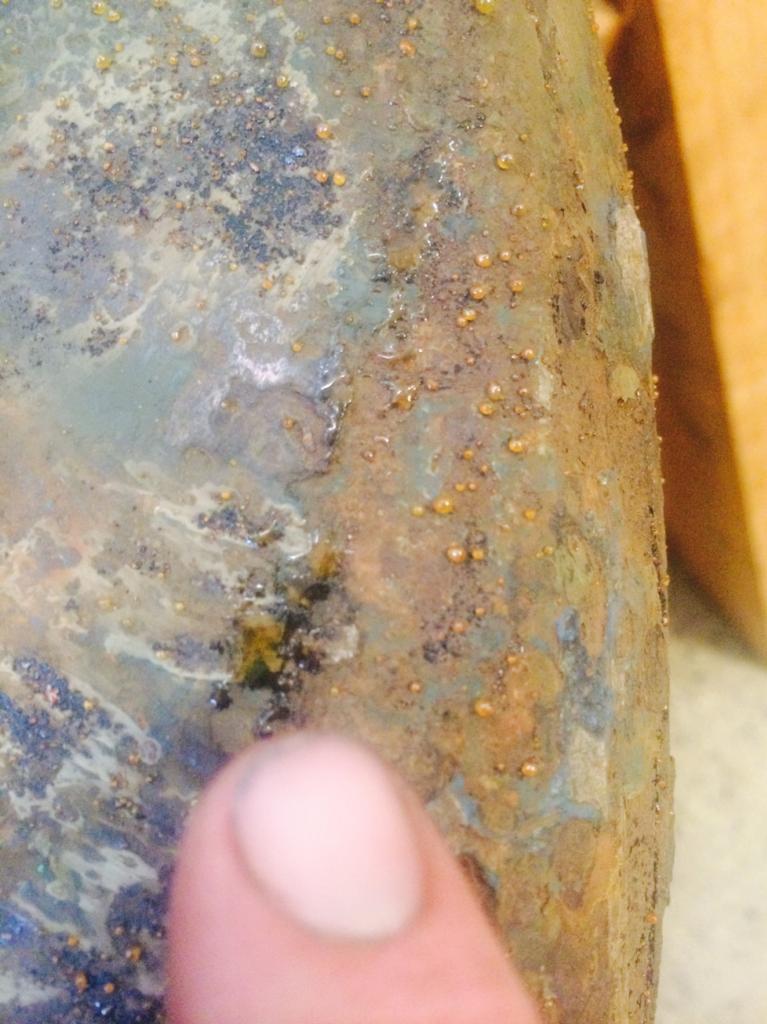
I posted a pic of this on page 1, but here are couple more shots that I think are more clear;
Moisture in the cast iron continued to 'bleed' out for about a week after I scraped/ground/sanded off the majority of the chunky growth and rust. My concern here is if this will continue more or not. My plan was to have the entire keel professionally sandblasted, but honestly the epoxy and fairing compound on the lower 2/3 of the keel is in mostly good shape. The upper 1/3 of the keel is where the most 'crap' is. I think its possible I can just sand the lower 2/3 with 60 grit and I can grind & wire wheel the upper 1/3, apply my new barrier coat, fair, prime, paint and done... save myself the $200 on sand blasting?
Last edited: