I started reading this thread 3 days ago, and I'm resisting the urge to skip ahead. But at this point I HAD to jump in. While that red C4 is a nice car, the '67 GTO is my dream car. This explanation completely makes sense regarding the boat restoration. My H26.5 needs some new floorboards soon in the galley area, and I'm paying particular attention to how you went about rebuilding the cabinetry. I'm piling up some information for next winter, when I hope to do a minor refit on her. Thanks for documenting, and I look forward to finishing up this thread over the summer. (I only read a page or two/day, 'cause I need to get Serenade on the water ASAP!)I'm not entirely sure you ARE wrong! Haha. Actually I have had fun doing the repairs (mostly), learned tons along the way and it has kept me out of the bar! That's a good thing.
I have come up with a relatively close analogy to what I'm doing - Imagine you went out and bought a '67 GTO. It's in pretty good shape (you think) and you go out and have fun with it for a few years, fixing it up a little here and there as time goes by. Then one day it gets creamed in an accident. On a cost basis it's totaled but it means a lot to you and can't be easily replaced. You decide to repair it and as you dig in you find some things under the skin that just aren't up to speed and really should be fixed right. Before you start repairs you figure out it really needs a frame-off restoration. While you're at it might as well throw in an LS9, 6-speed, etc. Is it worth it? In strict monetary terms, not a chance. But money can't be the only deciding factor in some cases, so you decide to go for it. That's where I'm at and in the end my (GTO) will be better than it ever could have been.
Cheers,
Mark
Repairing Hunter 40 damage from Hurricane Matthew
- Thread starter B757Captain
- Start date
Welcome aboard! What year is your Hunter? the only advice I can pass on when replacing the the floorboards is take heed that the cabinetry will probably sit on top of some of the boards and said cabinetry was probably installed as pre-assembled units prior to the deck being put on. Might make moving or disassembling the cabinets a bit tricky. Let us know how it goes.I started reading this thread 3 days ago, and I'm resisting the urge to skip ahead. But at this point I HAD to jump in. While that red C4 is a nice car, the '67 GTO is my dream car. This explanation completely makes sense regarding the boat restoration. My H26.5 needs some new floorboards soon in the galley area, and I'm paying particular attention to how you went about rebuilding the cabinetry. I'm piling up some information for next winter, when I hope to do a minor refit on her. Thanks for documenting, and I look forward to finishing up this thread over the summer. (I only read a page or two/day, 'cause I need to get Serenade on the water ASAP!)
Mark
May update #2 (or June, whatever!):
Now that summer has unofficially arrived here in the South, working below decks comes with an expectation of thrice daily shirt changes and sweat dripping onto freshly painted surfaces - oh, wait, dummy, you bought and partially installed an A/C unit last year! For the last few days while working in the cabin I honestly forgot all about it! Last year, after building the platform for the A/C I continued building the galley and covered it up and basically forgot about it since I couldn't use it on the hard. Well, we can fix that little oversight!
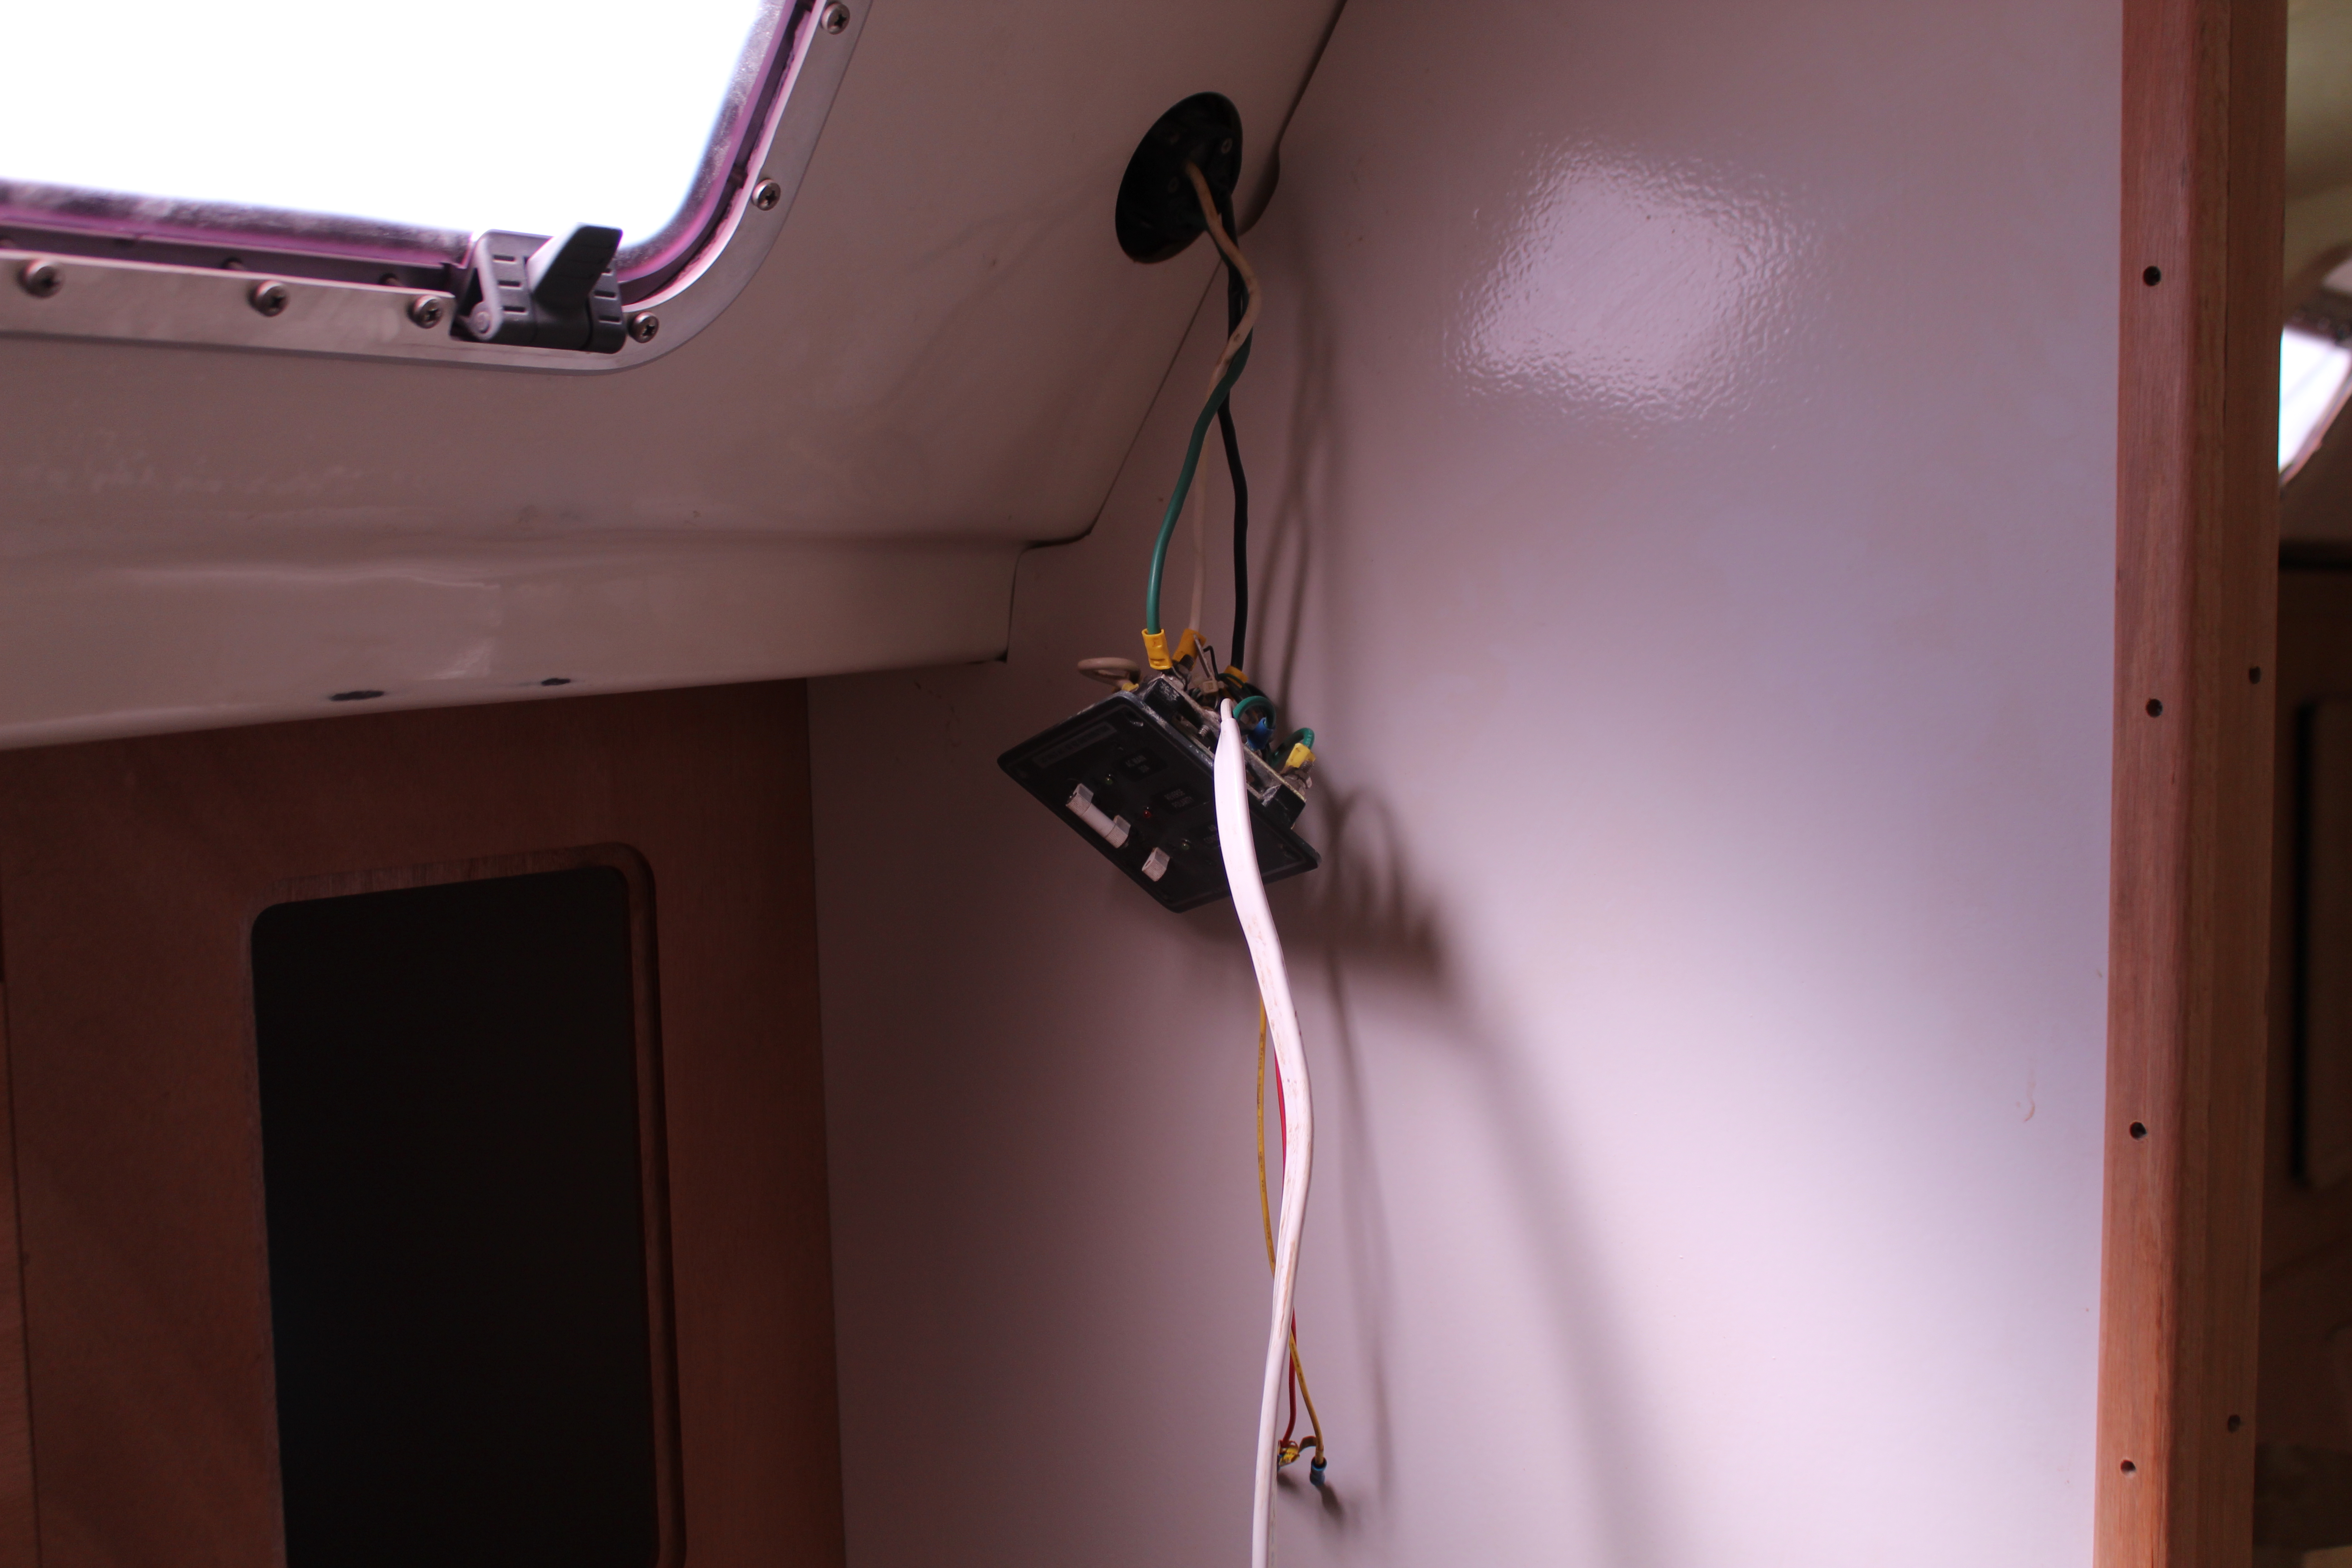
But there is a hitch - After planting the unit I continued with the cabinetry with the intention of locating and installing the ductwork before needing the A/C, so it literally was sitting there with no ducting, no plumbing and no wiring. And I didn't feel like working in the sweatbox to do all that before turning it on, so:
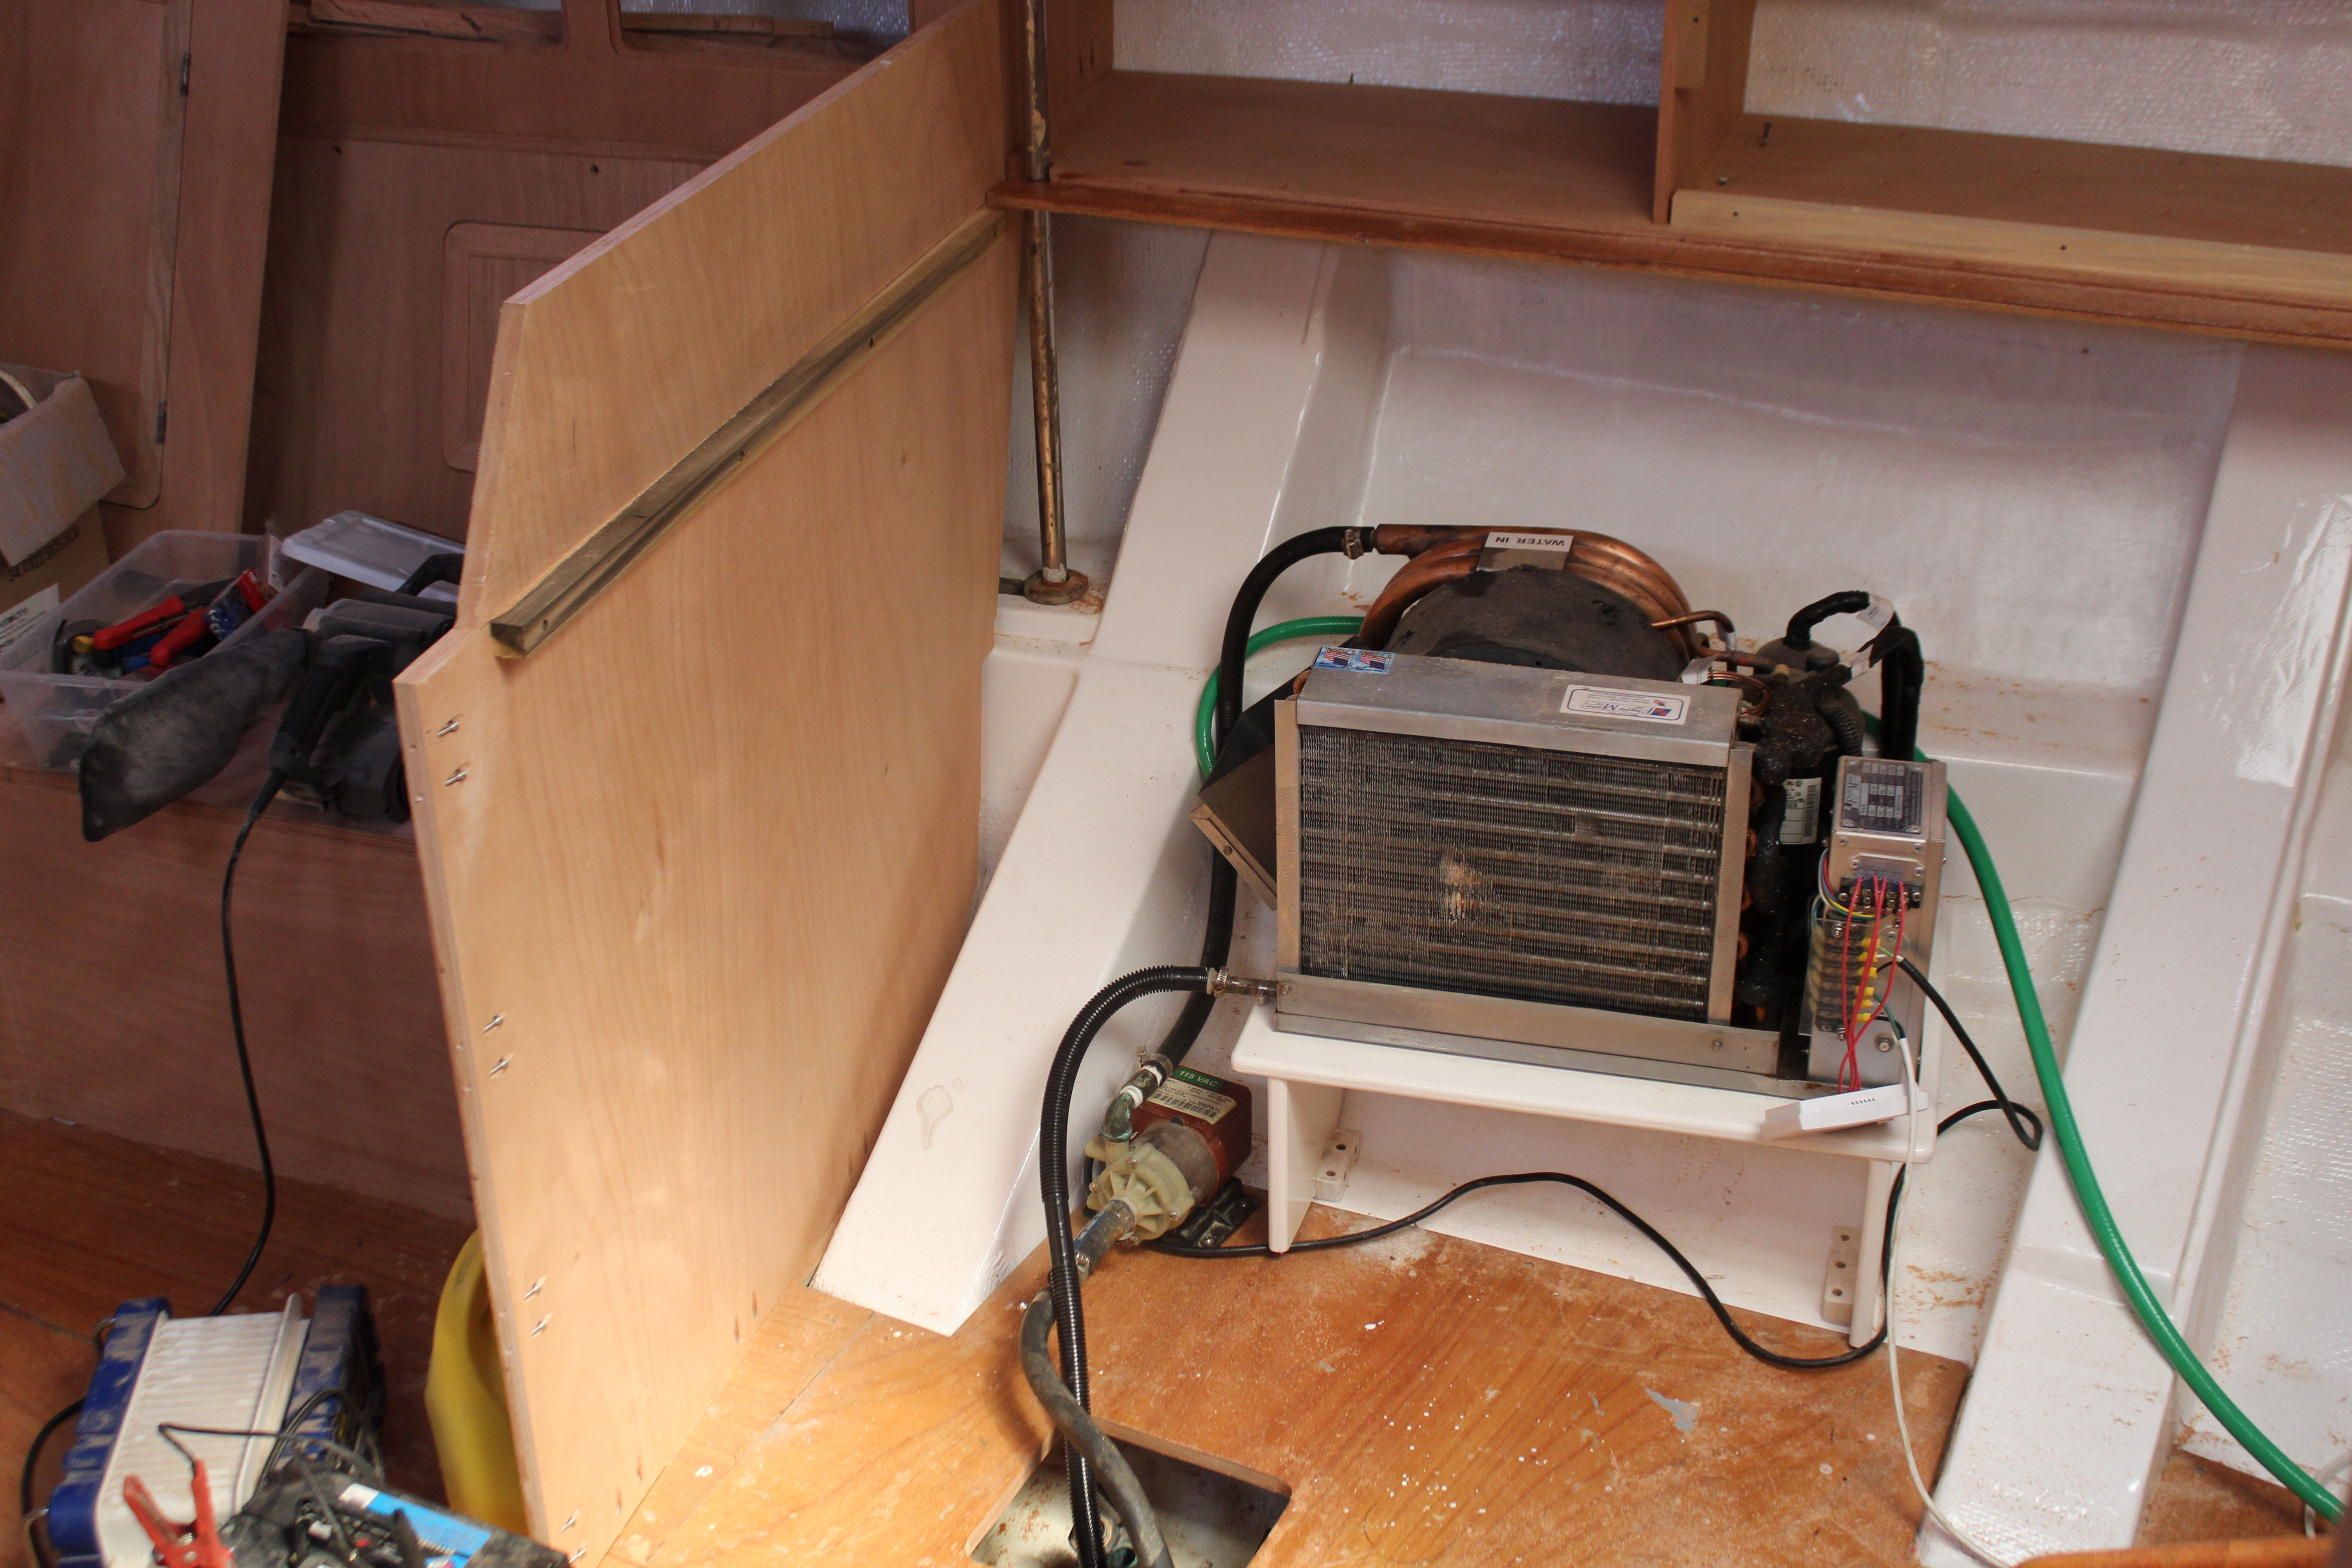
Let's get a temporary plumbing setup. Easy enough after digging through all the equipment in the attic (another sweatbox ) to find the pump and hoses - and figuring out that I didn't have enough 5/8ths hose for the discharge. No prob, garden hose to the rescue! (Temporary, remember ). All the plumbing is exposed for now so I have to step over and around it, but I can deal with that for now.
Need some lightning, so:
Not to worry, that is very temporary, it was just to verify that the A/C works! And it does. I basked in the glorious coolness of 18,500 BTUs of air conditioned bliss all afternoon yesterday. Beats the heck out of that wheezy little window unit I had to use while on the hard! All that remains is to find a good spot for the raw water strainer, and I will be working on making everything permanent over the next few days.
Fuel tank platform rebuild is progressing but no pics yet.
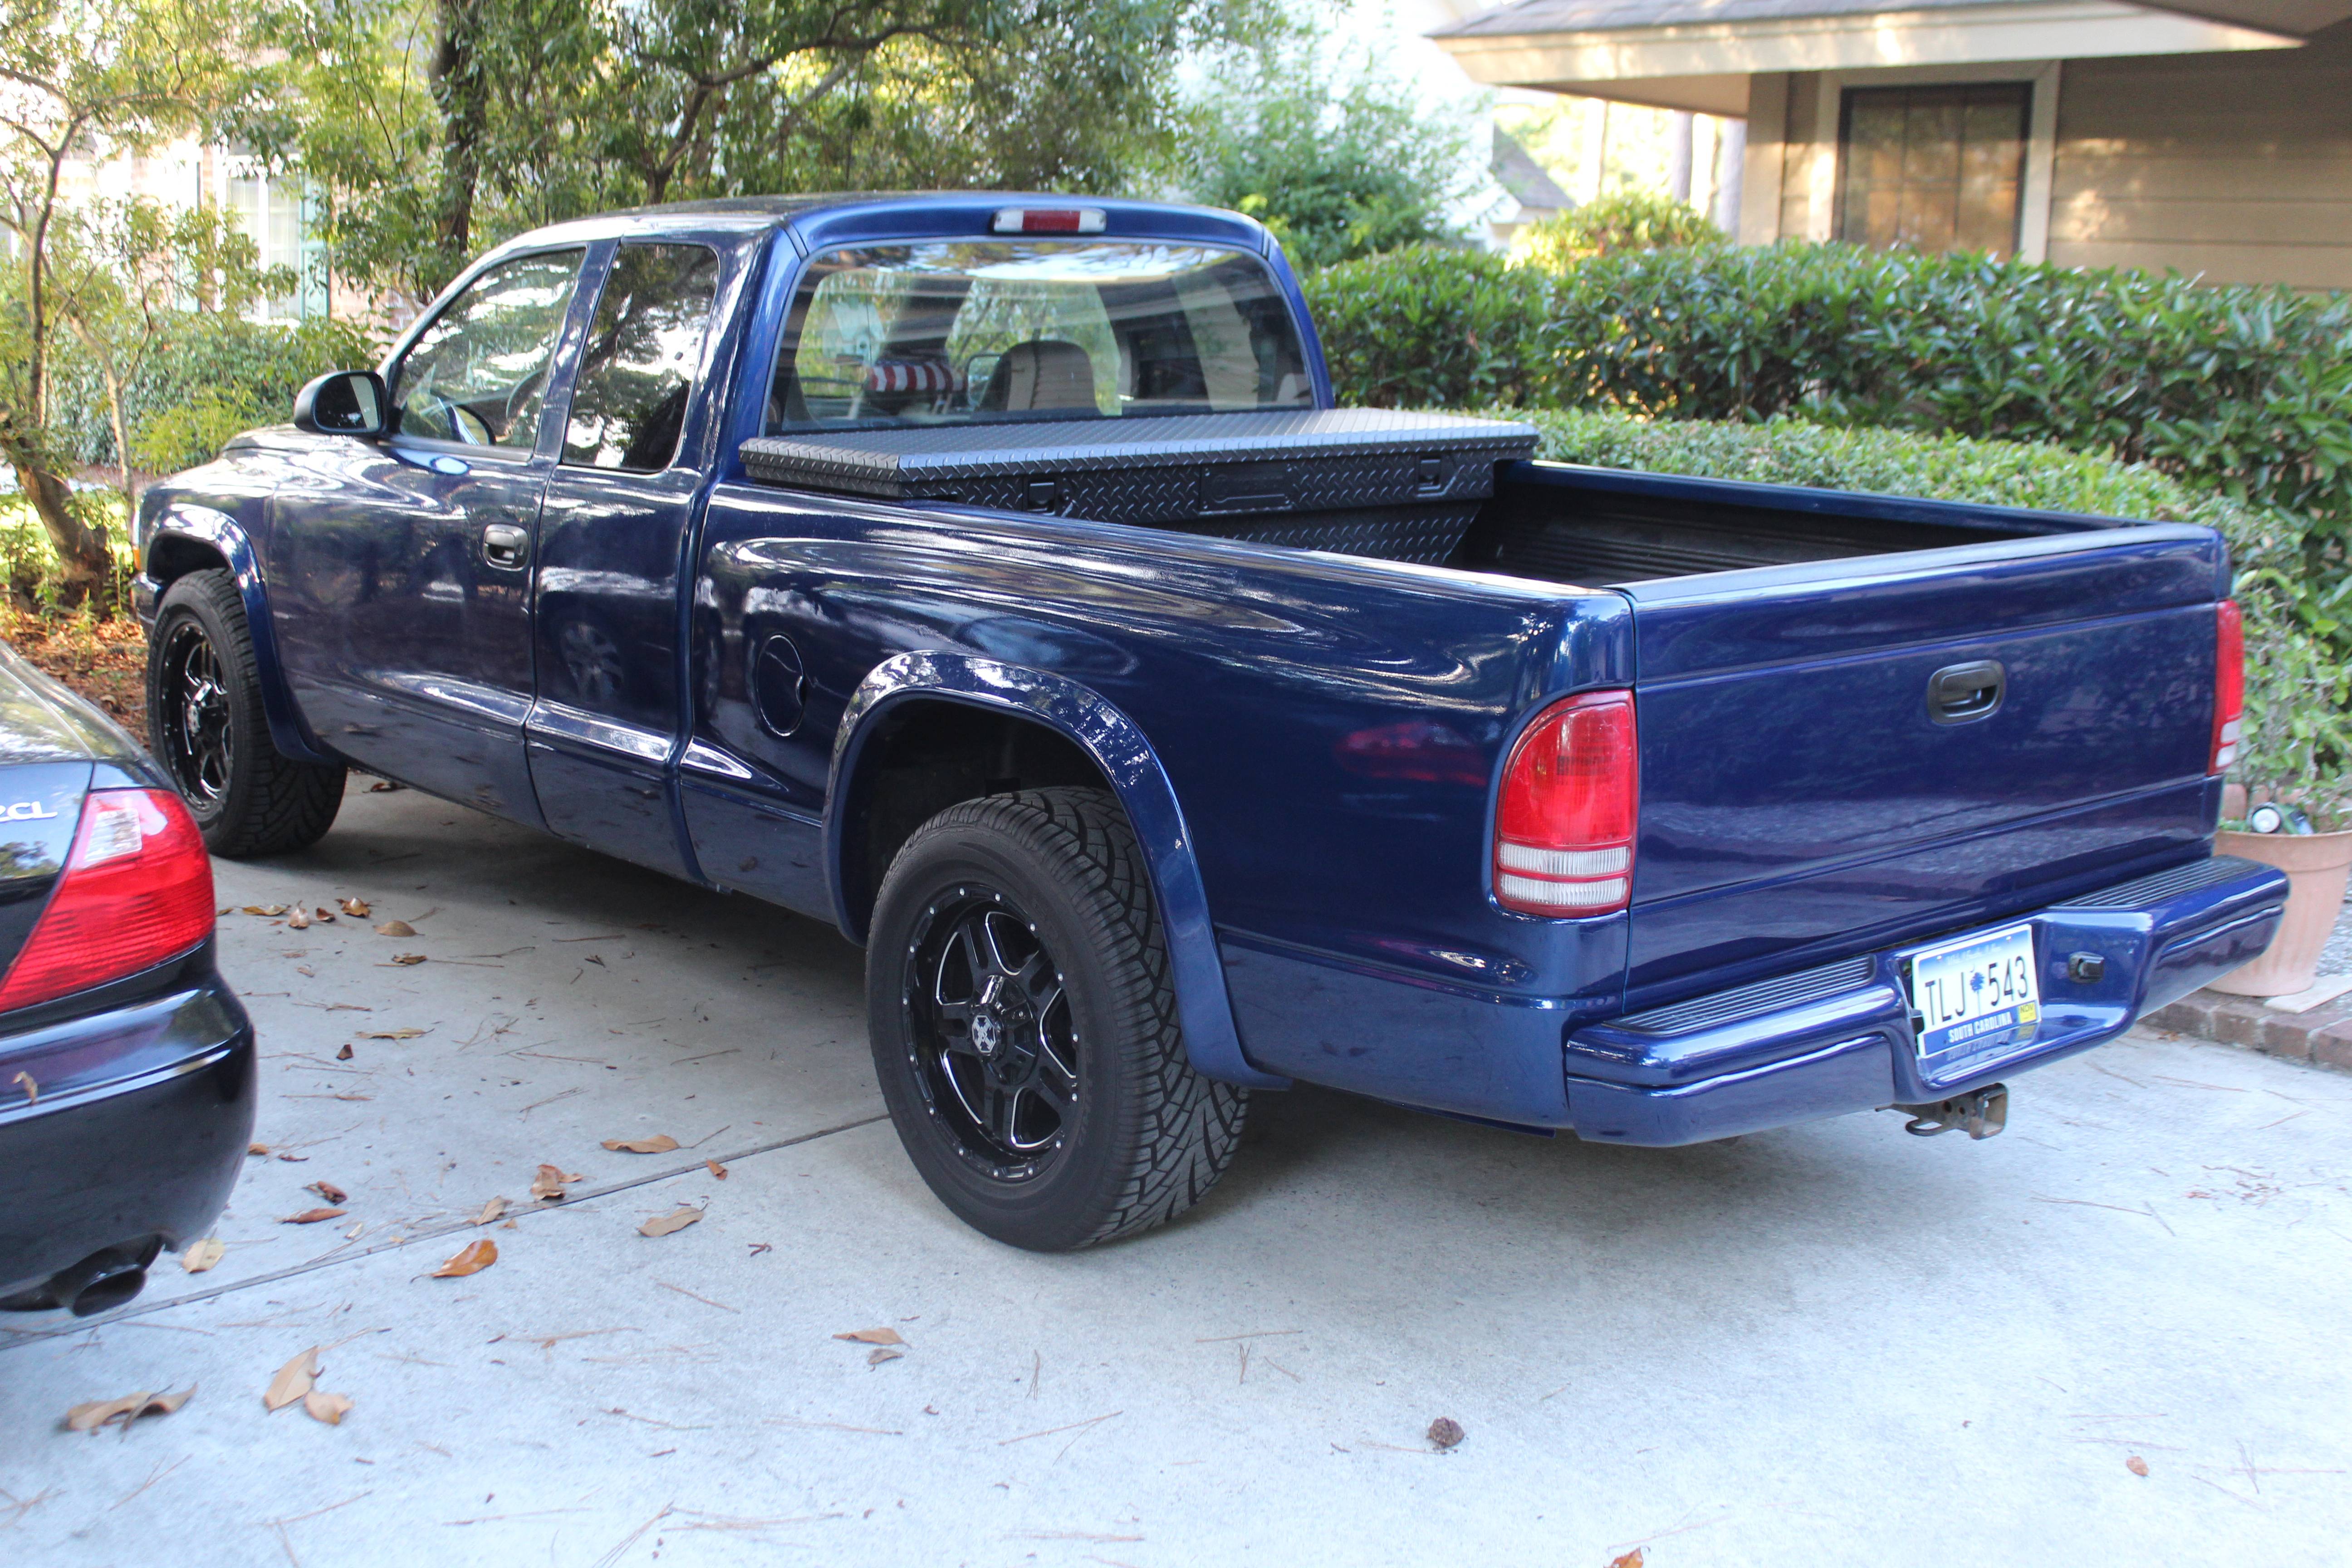
Oh, and for anyone curious, here's the Dakota painted:
Cheers,
Mark
Now that summer has unofficially arrived here in the South, working below decks comes with an expectation of thrice daily shirt changes and sweat dripping onto freshly painted surfaces - oh, wait, dummy, you bought and partially installed an A/C unit last year! For the last few days while working in the cabin I honestly forgot all about it! Last year, after building the platform for the A/C I continued building the galley and covered it up and basically forgot about it since I couldn't use it on the hard. Well, we can fix that little oversight!
But there is a hitch - After planting the unit I continued with the cabinetry with the intention of locating and installing the ductwork before needing the A/C, so it literally was sitting there with no ducting, no plumbing and no wiring. And I didn't feel like working in the sweatbox to do all that before turning it on, so:
Let's get a temporary plumbing setup. Easy enough after digging through all the equipment in the attic (another sweatbox
) to find the pump and hoses - and figuring out that I didn't have enough 5/8ths hose for the discharge. No prob, garden hose to the rescue! (Temporary, remember ). All the plumbing is exposed for now so I have to step over and around it, but I can deal with that for now.Need some lightning, so:
Not to worry, that is very temporary, it was just to verify that the A/C works! And it does
. I basked in the glorious coolness of 18,500 BTUs of air conditioned bliss all afternoon yesterday. Beats the heck out of that wheezy little window unit I had to use while on the hard! All that remains is to find a good spot for the raw water strainer, and I will be working on making everything permanent over the next few days.Fuel tank platform rebuild is progressing but no pics yet.
Oh, and for anyone curious, here's the Dakota painted:
Cheers,
Mark
Looks like a few good jobs all around.....A/C and a nice new-looking blue Dakota. Great color choice. Way to go!
It's an '87 26.5, and thankfully the floorboard edges are completely exposed. So, no cabinet removal required, only the companionway steps for one section of the floorboard.Welcome aboard! What year is your Hunter? the only advice I can pass on when replacing the the floorboards is take heed that the cabinetry will probably sit on top of some of the boards and said cabinetry was probably installed as pre-assembled units prior to the deck being put on. Might make moving or disassembling the cabinets a bit tricky. Let us know how it goes.
Mark
Minor repair leads to bigger repair leads to . . . :
Sound familiar?
While in the midst of rebuilding the fuel tank platform I decided to do some cleaning in the aft compartment. Lo and behold, what do I find? Water! Just to fill in the backstory a bit:
After splashing the boat I was pleased that all the outside water was staying - outside. Well, that lasted all of about a week when one fine morning I climbed on board and found some dirty brownish water (salt water) in the bilge. Not much, mind you, but any is too much! So after launching a few choice words towards the dummy who has been repairing the boatbiggrin I started searching for the source. And came up absolutely empty. Not a trace anywhere. So I monitored the inflow - this took several weeks - and determined that a: it was maybe 1 quart per week, and b: it was intermittent. The 1 quart per week I can deal with, but how can it be intermittent? Scratch head and determine that someday, somehow, it source would reveal itself. Which it has:
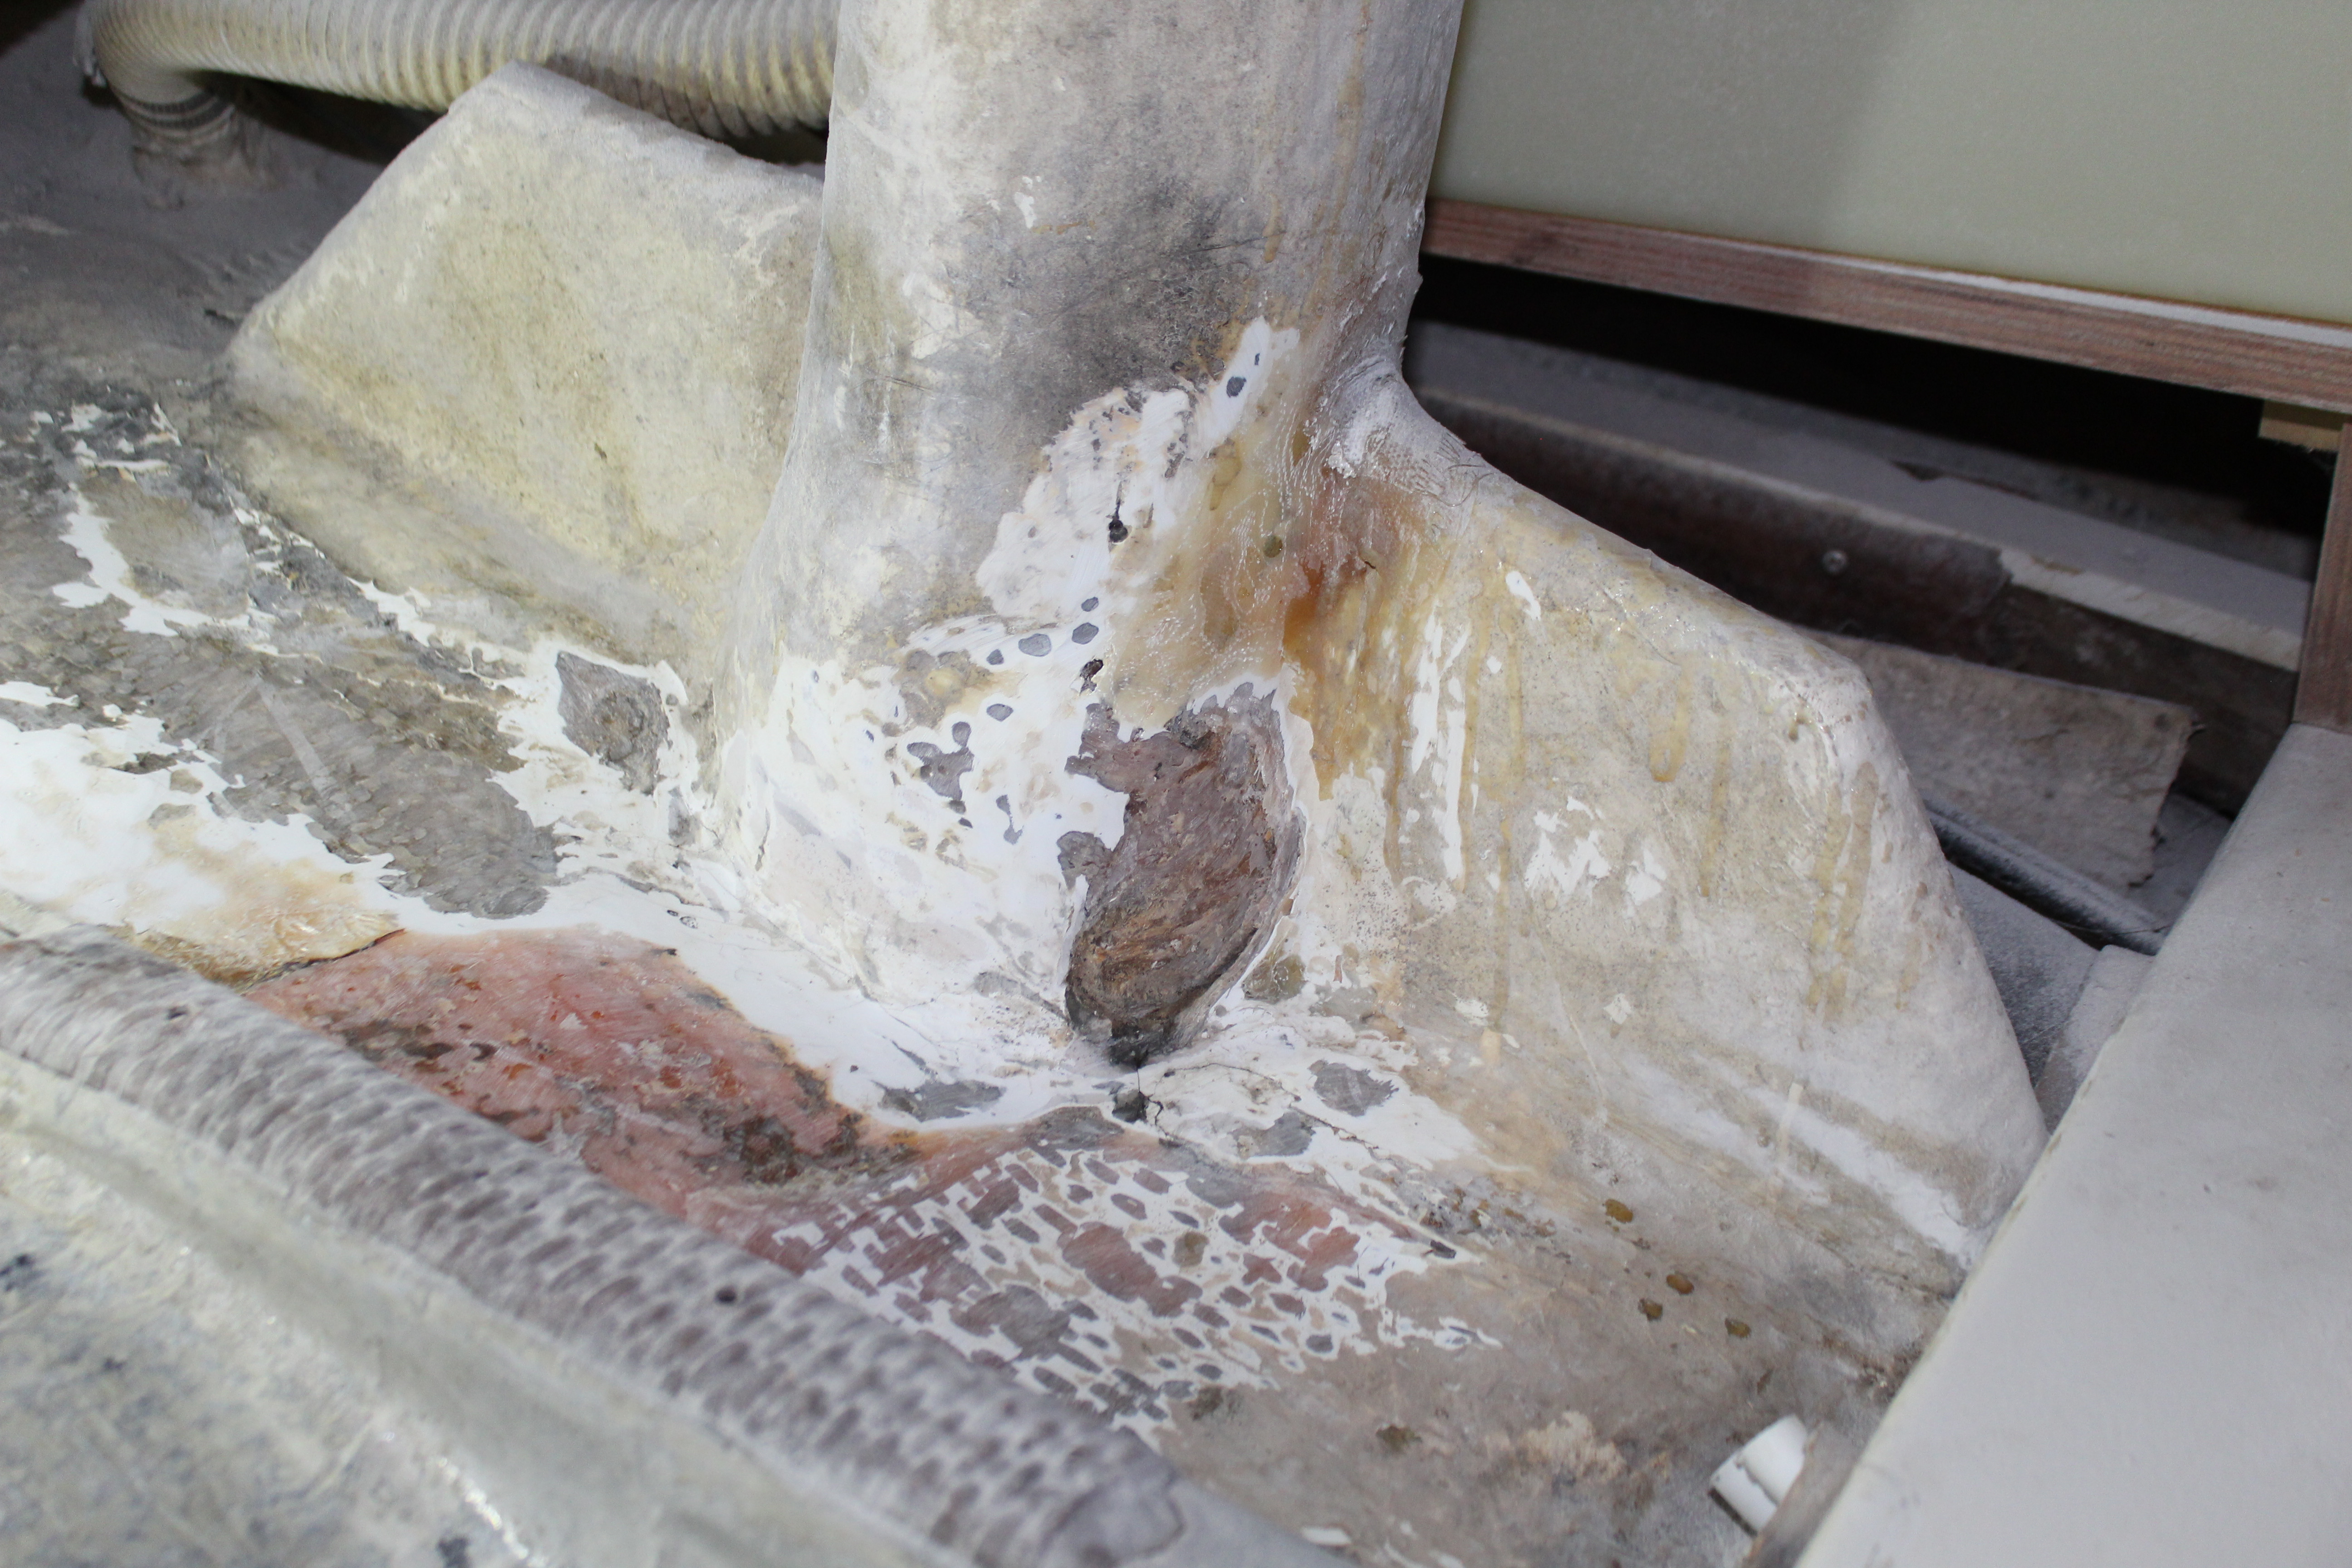
As I was vacuuming around the rudder post/column I happened to see some dirt/mud/watery mix. Not much, but I didn't put it there so I think - this is a clue! I vacuumed it up and within a minute or so more water weeps into the same area. Aha! I don't remember if I had mentioned this somewhere in the last 49 pages but a repair of the rudder post had been done at some point in the past. And (insert drumroll) it had been done badly - or at least sloppily. Not just one sloppy repair but by my forensic determination 3 repairs All in the same general area, leading me to believe this had been an ongoing problem. I seem to remember that the original survey said something about this but not sure. Anyway:
Since I'm in here, might as well see what's what. The bulk of the original repair consisted of a slab of woven roving (I hate this stuff with a passion!) slapped onto the closest flat area with a portion of it surrounding the base of the rudder post:
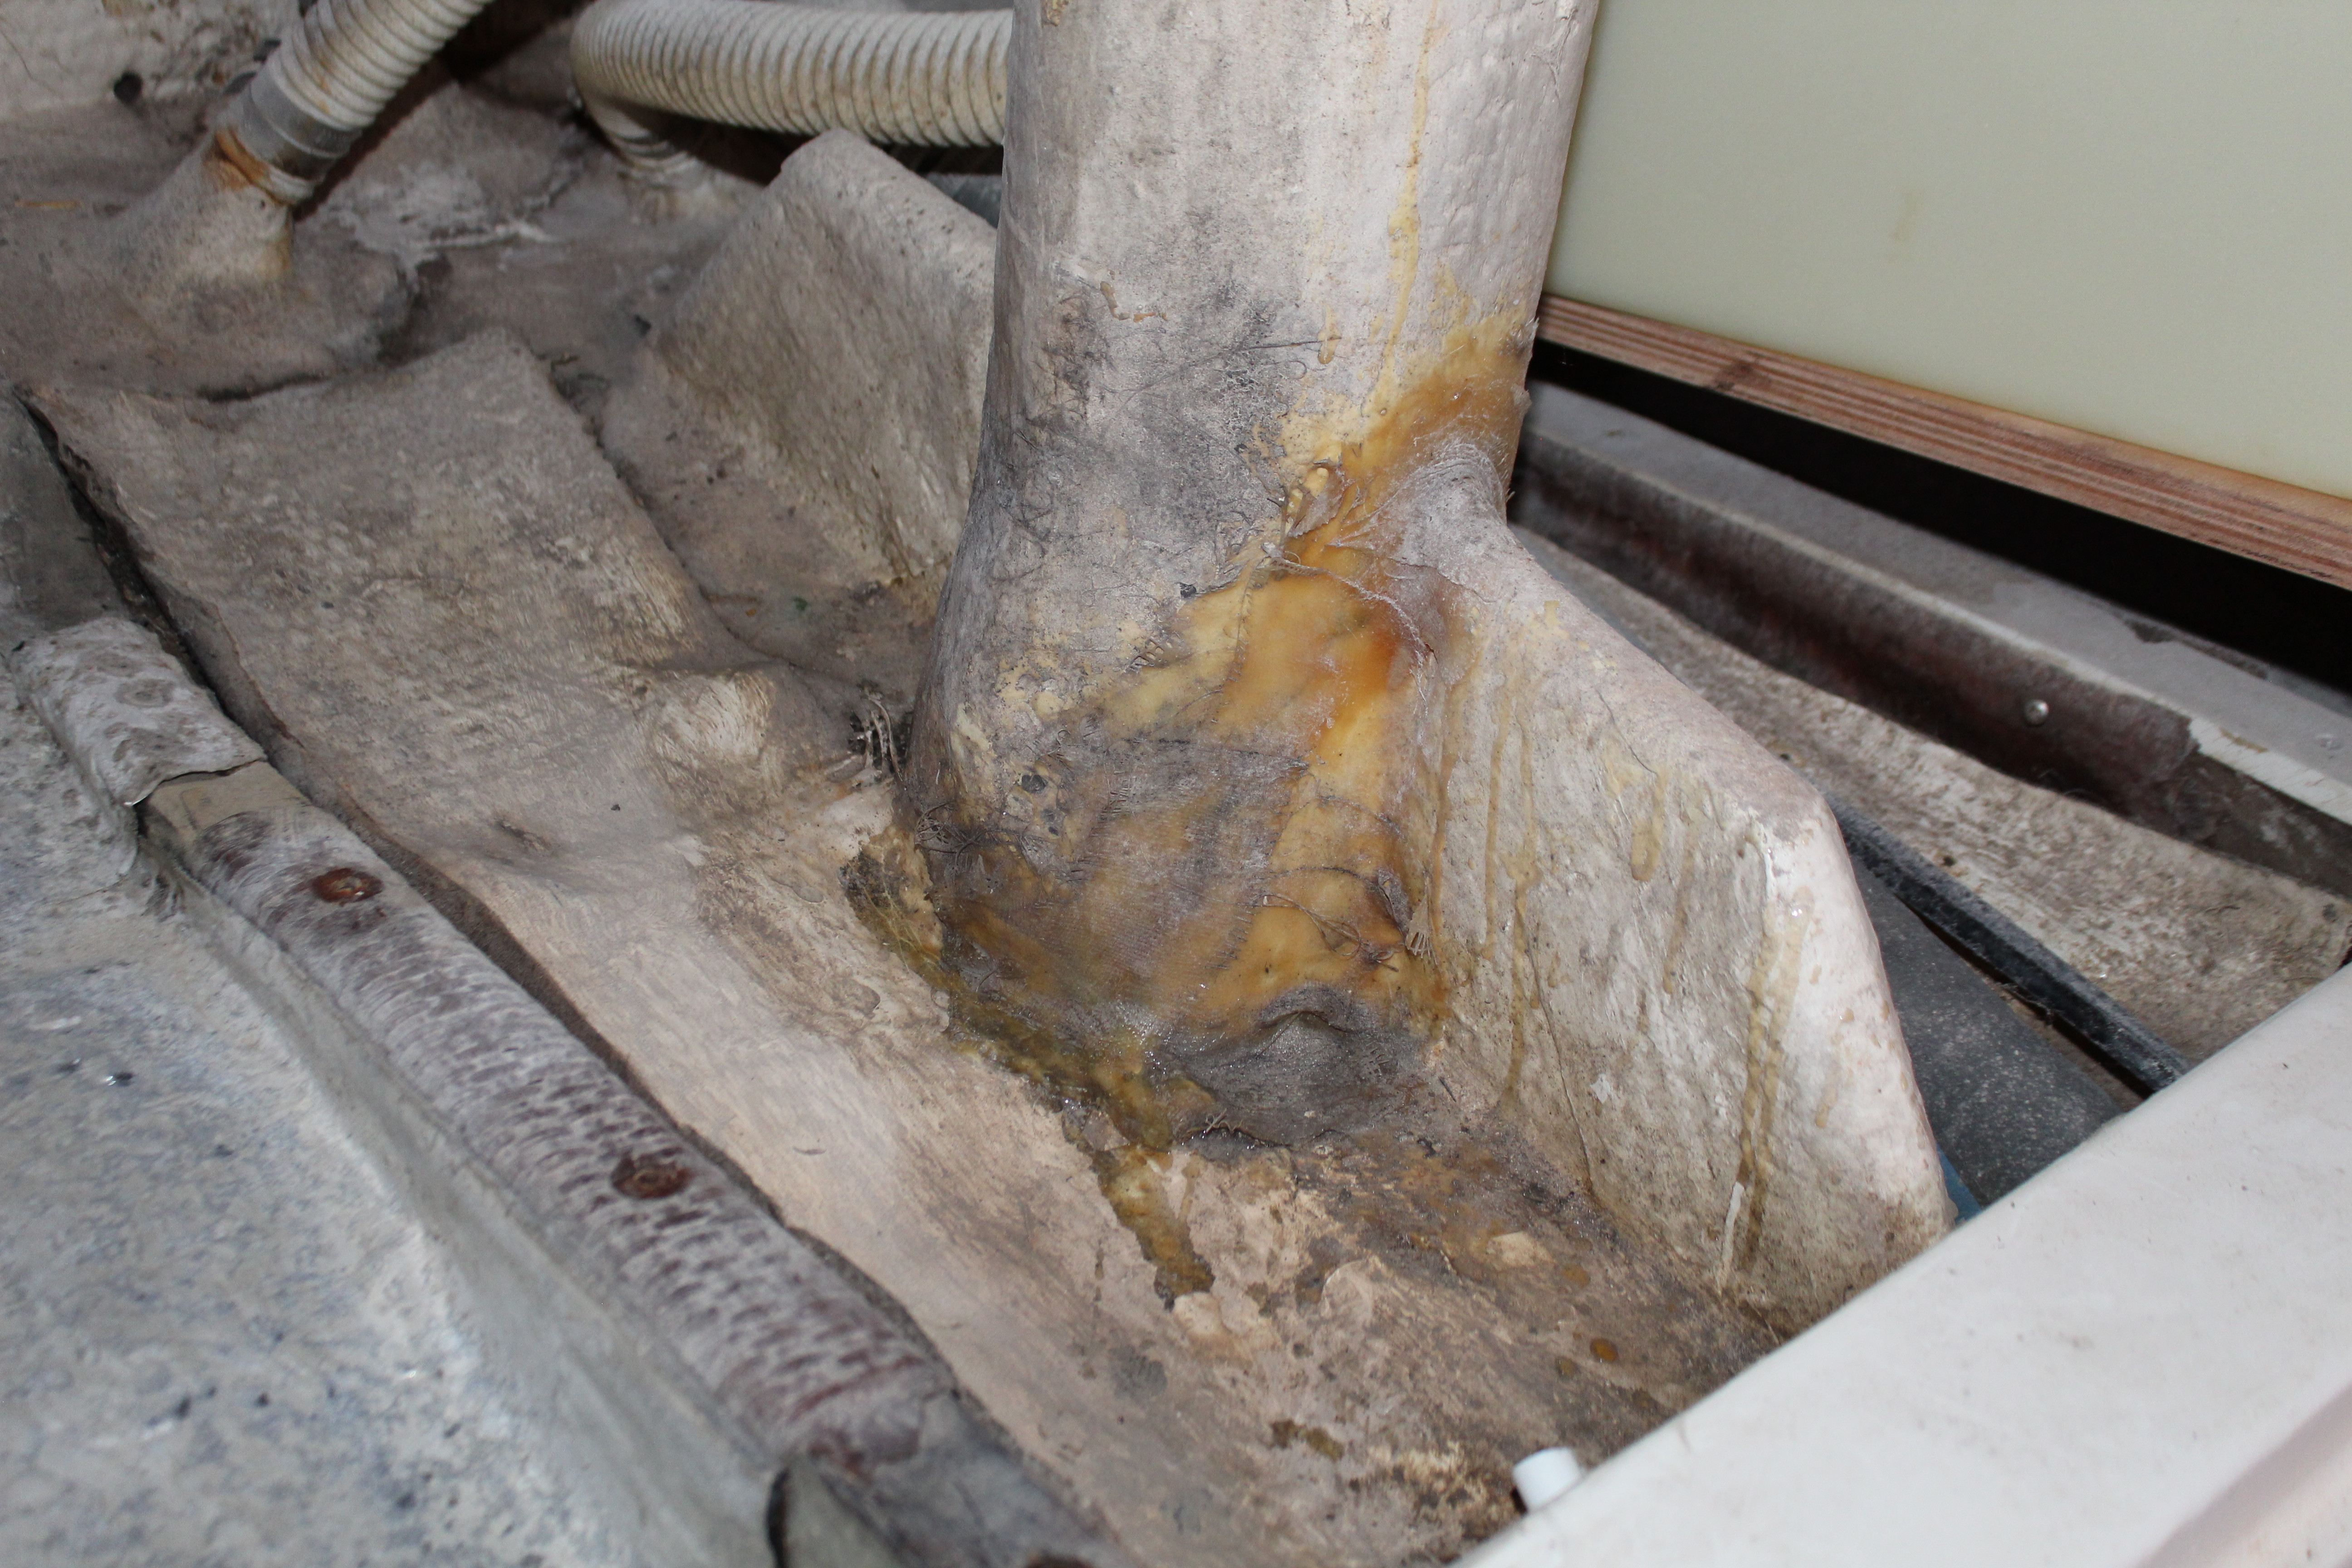
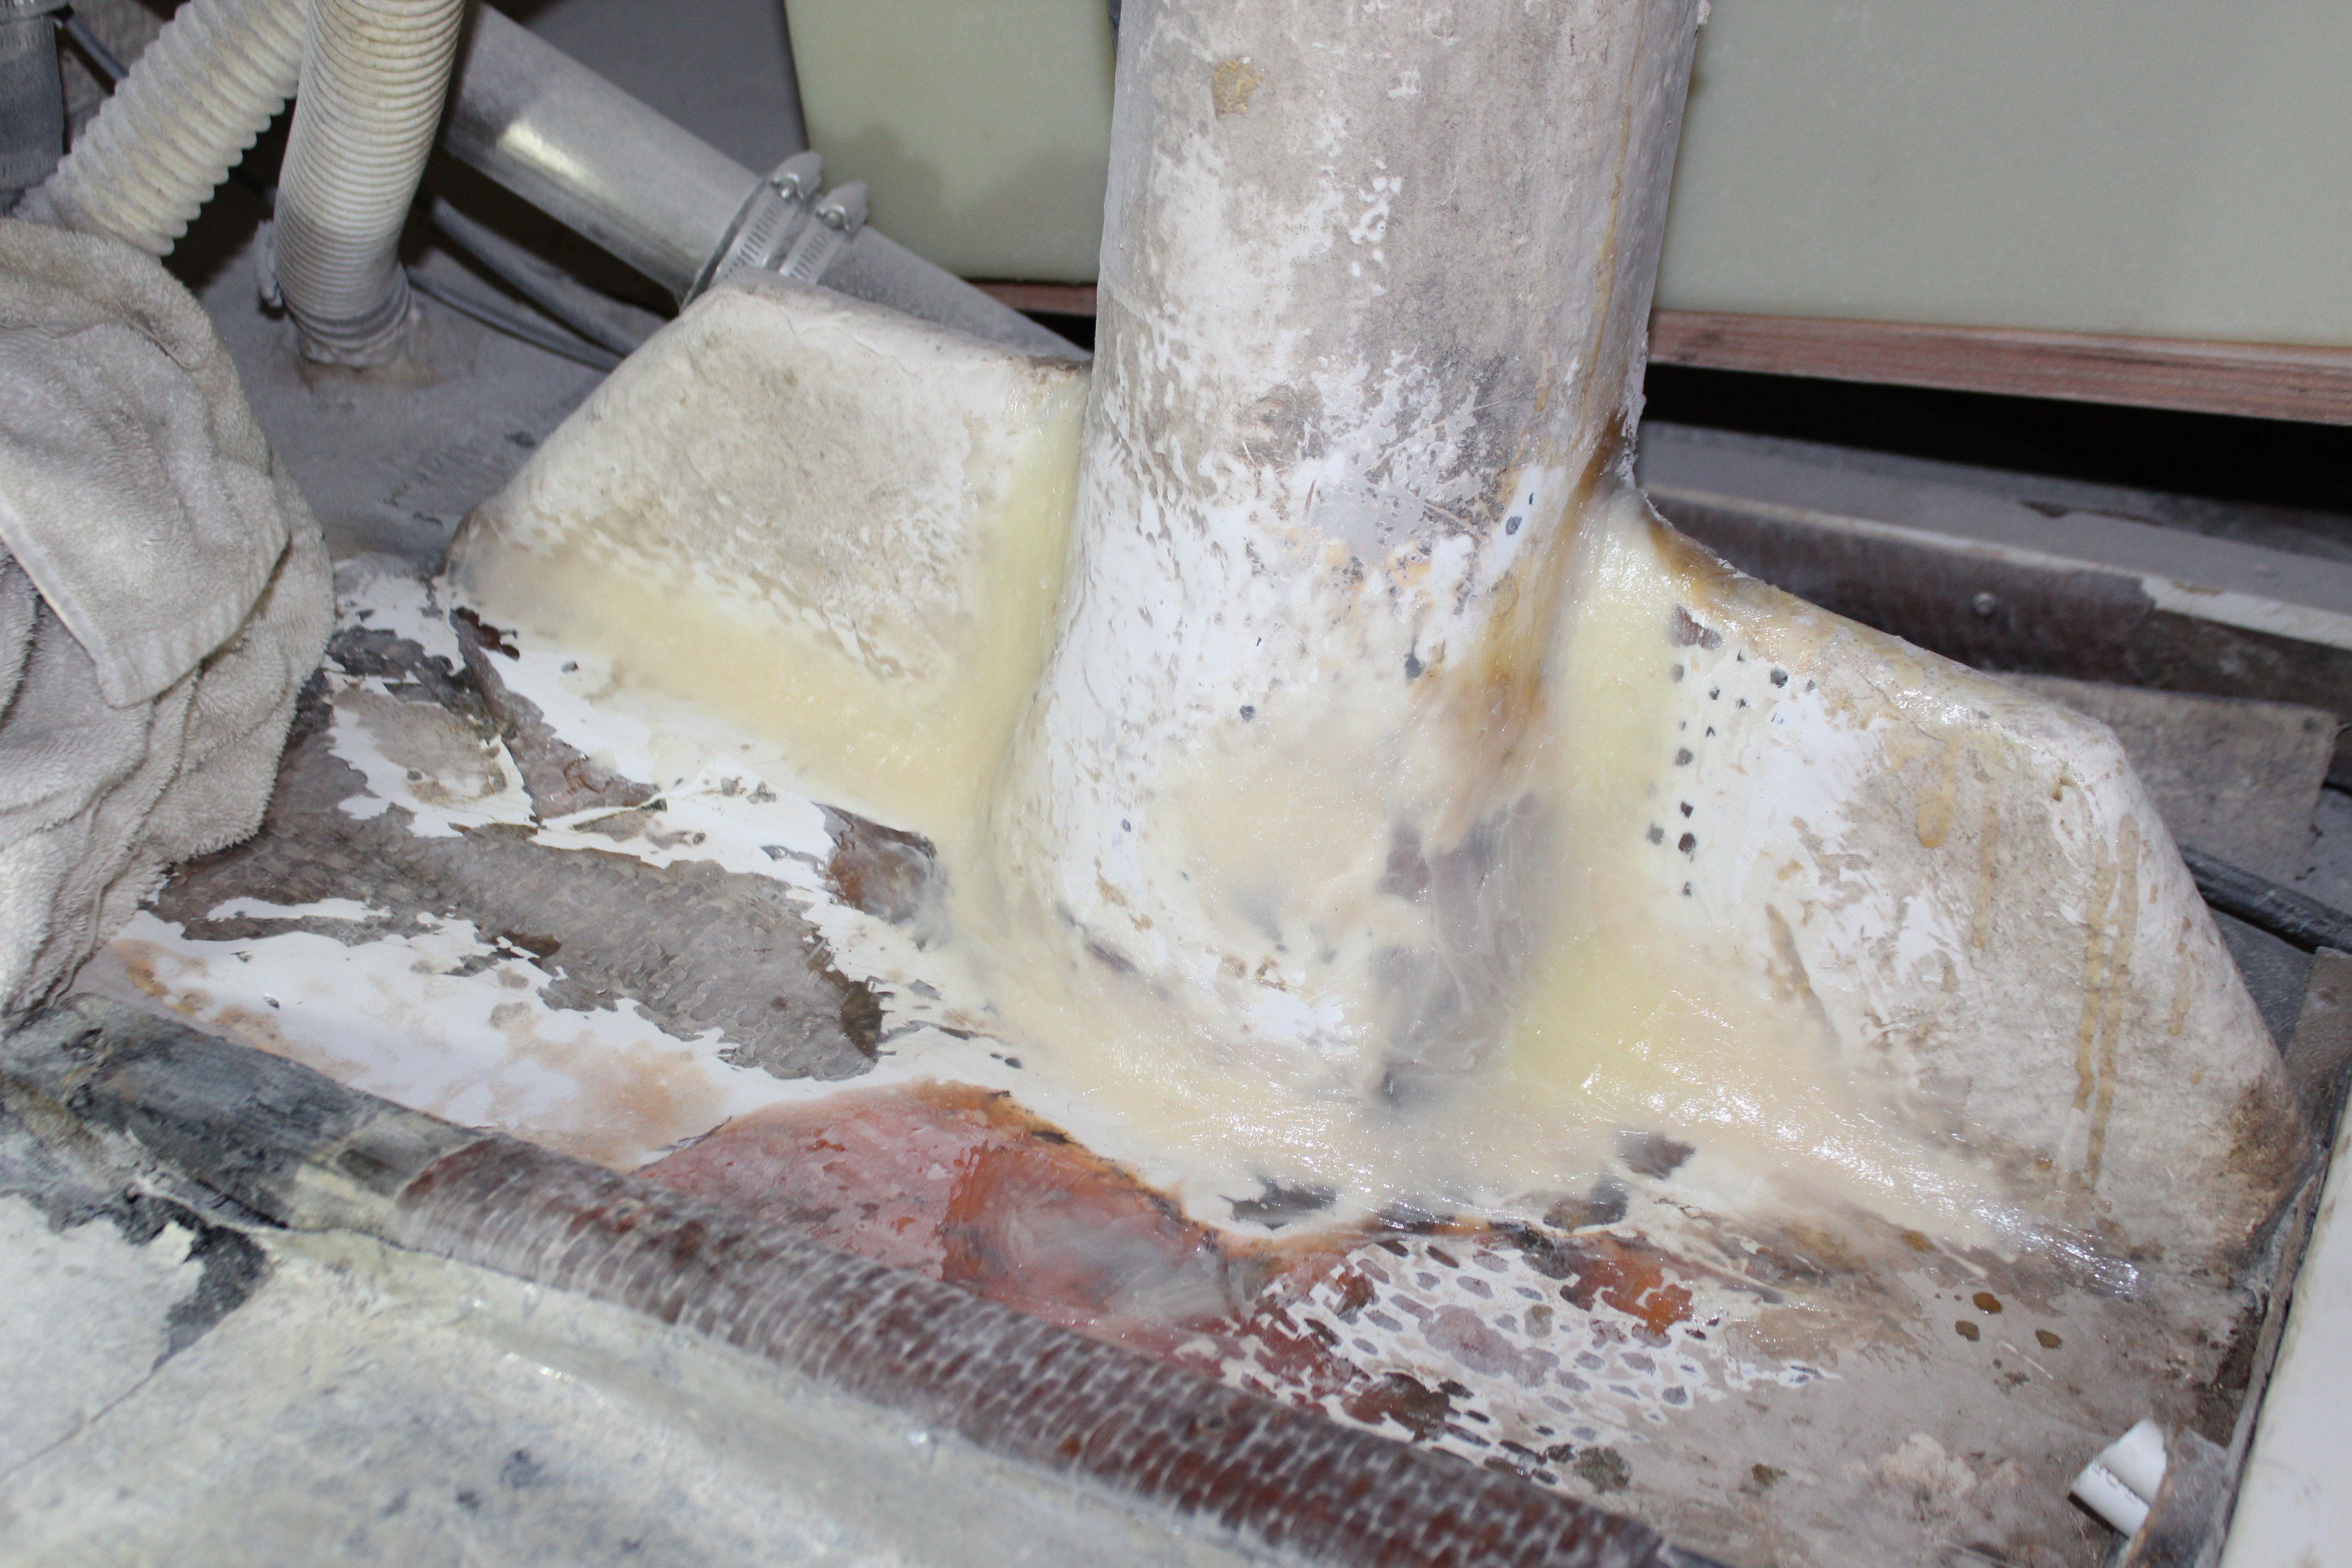
The 2nd and 3rd repairs kinda wrapped up and around the side and toward the base of the rudder post. I always knew this was there but it never leaked, and though ugly, didn't seem to be an issue so I left well enough alone. So I started by checking out the integrity of the slab of roving. Surprise, it's not adhering well at all so out come the destructo tools and a short time later it's gone. Underneath all I can see is some gelcoat cracking around the base of the post. A little more work with the grinder - and die grinder - and dremel - and we are here:
There's a but coming. But - with all the junk gone, no more water ingress . I figure let's give it some time, even though before water would start seeping out within a minute or so. So I left it alone, ate lunch, and checked it again. Bone dry! Scratch head some more! This is where the forensic investigation paid off, by digging deeper and pushing and wiggling on other stuff:

No#1 is the exhaust clamped to the hull outlet. It was not entirely solid to the hull - I could see a smidge of (wiggle?) when I pushed and pulled on it - not much but a smidge. No#2 is where a tiny gap would open up and a tiny bit of water would weep out. AHA! Now, why? The exhaust is (though in a horrible location) above the waterline. Then it dawned on me - earlier in the day the water was a bit rough with the boat rocking and bouncing a bit, so water was splashing up into the exhaust opening. Now it's calm, so no new water at the exhaust opening.
Forensic analysis complete: I can't say yes or no to the original rudder post repair. I can say it was bad but I can't say it was unnecessary. I can say that the original repair compounded the follow-on repairs because it was so bad that the water seepage from the actual ingress point pooled in and under the roving slab so badly that there was going to be water there pretty much permanently. So repair #2 (and probably #3) were done in the wrong spot, chasing a leak from somewhere else, and compounded by the horrible repair #1.
Got all that? Good, cuz now it's time to fix it - sort of. If I had known about this I could have done the whole aft area - rudder post, exhaust outlet (and cockpit drains since they're there anyway) all in one go. But now that I'm in the water it complicates things. I'm not too keen on digging too far and opening a can a worms. So repair plan B is in effect:
Part A of plan B is to grind back a bit of the delaminated part of the exhaust outlet/tube/cone, wait for a calm-ish time of day, vacuum the heck out of that spot to try to draw as much water out as I can (tried it already, not much water there) soak it with alcohol then acetone to get it as dry as possible, then slap on some G-Flex. This won't and can't be a permanent repair but it should help until the next haul-out where I can really dig into things back there.
Part B of plan B is to make the rudder post area pretty again by doing a good repair. Actually overdoing the repair because I suspect there is not much wrong to begin with. First up, making proper fillets:
This was not done in any of the previous repairs and is a big reason they failed. The fillets are curing now and I'll glass the area tomorrow.
Now, what happened with the exhaust outlet? Don't know. Since my boat has the add-on swim platform, maybe the original exhaust outlet was moved from the transom to it's current location. If so, that mod finally failed - or failed a long time ago and I just now found it. Ditto if it is the factory location. Long story short is I can live with the current seep/weep rate (if it continues at all) as long as it doesn't get worse. Time will tell but for now I should be able to get back to reinstalling the fuel tank and reassembling the aft cabin in a few days.
Oh, and just for grins, we got a gully-washer of a storm yesterday - 4.3 inches of rain in about and hour and a half - that hit just before I called it quits for the day so I got trapped down below during the worst of it! Found out the companionway hatch still leaks like a sieve, and bilge pump works.
Cheers,
Mark
Sound familiar?
While in the midst of rebuilding the fuel tank platform I decided to do some cleaning in the aft compartment. Lo and behold, what do I find? Water! Just to fill in the backstory a bit:
After splashing the boat I was pleased that all the outside water was staying - outside. Well, that lasted all of about a week when one fine morning I climbed on board and found some dirty brownish water (salt water) in the bilge. Not much, mind you, but any is too much! So after launching a few choice words towards the dummy who has been repairing the boat
biggrin I started searching for the source. And came up absolutely empty. Not a trace anywhere. So I monitored the inflow - this took several weeks - and determined that a: it was maybe 1 quart per week, and b: it was intermittent. The 1 quart per week I can deal with, but how can it be intermittent? Scratch head and determine that someday, somehow, it source would reveal itself. Which it has:As I was vacuuming around the rudder post/column I happened to see some dirt/mud/watery mix. Not much, but I didn't put it there so I think - this is a clue! I vacuumed it up and within a minute or so more water weeps into the same area. Aha! I don't remember if I had mentioned this somewhere in the last 49 pages but a repair of the rudder post had been done at some point in the past. And (insert drumroll) it had been done badly - or at least sloppily. Not just one sloppy repair but by my forensic determination 3 repairs
All in the same general area, leading me to believe this had been an ongoing problem. I seem to remember that the original survey said something about this but not sure. Anyway:Since I'm in here, might as well see what's what. The bulk of the original repair consisted of a slab of woven roving (I hate this stuff with a passion!) slapped onto the closest flat area with a portion of it surrounding the base of the rudder post:
The 2nd and 3rd repairs kinda wrapped up and around the side and toward the base of the rudder post. I always knew this was there but it never leaked, and though ugly, didn't seem to be an issue so I left well enough alone. So I started by checking out the integrity of the slab of roving. Surprise, it's not adhering well at all so out come the destructo tools and a short time later it's gone. Underneath all I can see is some gelcoat cracking around the base of the post. A little more work with the grinder - and die grinder - and dremel - and we are here:
There's a but coming. But - with all the junk gone, no more water ingress
. I figure let's give it some time, even though before water would start seeping out within a minute or so. So I left it alone, ate lunch, and checked it again. Bone dry! Scratch head some more! This is where the forensic investigation paid off, by digging deeper and pushing and wiggling on other stuff:
No#1 is the exhaust clamped to the hull outlet. It was not entirely solid to the hull - I could see a smidge of (wiggle?) when I pushed and pulled on it - not much but a smidge. No#2 is where a tiny gap would open up and a tiny bit of water would weep out. AHA! Now, why? The exhaust is (though in a horrible location) above the waterline. Then it dawned on me - earlier in the day the water was a bit rough with the boat rocking and bouncing a bit, so water was splashing up into the exhaust opening. Now it's calm, so no new water at the exhaust opening.
Forensic analysis complete: I can't say yes or no to the original rudder post repair. I can say it was bad but I can't say it was unnecessary. I can say that the original repair compounded the follow-on repairs because it was so bad that the water seepage from the actual ingress point pooled in and under the roving slab so badly that there was going to be water there pretty much permanently. So repair #2 (and probably #3) were done in the wrong spot, chasing a leak from somewhere else, and compounded by the horrible repair #1.
Got all that? Good, cuz now it's time to fix it - sort of. If I had known about this I could have done the whole aft area - rudder post, exhaust outlet (and cockpit drains since they're there anyway) all in one go. But now that I'm in the water it complicates things. I'm not too keen on digging too far and opening a can a worms. So repair plan B is in effect:
Part A of plan B is to grind back a bit of the delaminated part of the exhaust outlet/tube/cone, wait for a calm-ish time of day, vacuum the heck out of that spot to try to draw as much water out as I can (tried it already, not much water there) soak it with alcohol then acetone to get it as dry as possible, then slap on some G-Flex. This won't and can't be a permanent repair but it should help until the next haul-out where I can really dig into things back there.
Part B of plan B is to make the rudder post area pretty again by doing a good repair. Actually overdoing the repair because I suspect there is not much wrong to begin with. First up, making proper fillets:
This was not done in any of the previous repairs and is a big reason they failed. The fillets are curing now and I'll glass the area tomorrow.
Now, what happened with the exhaust outlet? Don't know
. Since my boat has the add-on swim platform, maybe the original exhaust outlet was moved from the transom to it's current location. If so, that mod finally failed - or failed a long time ago and I just now found it. Ditto if it is the factory location. Long story short is I can live with the current seep/weep rate (if it continues at all) as long as it doesn't get worse. Time will tell but for now I should be able to get back to reinstalling the fuel tank and reassembling the aft cabin in a few days.Oh, and just for grins, we got a gully-washer of a storm yesterday - 4.3 inches of rain in about and hour and a half - that hit just before I called it quits for the day so I got trapped down below during the worst of it! Found out the companionway hatch still leaks like a sieve, and bilge pump works
.Cheers,
Mark
Buttoning up the aft compartment:
After several attempts at chasing the weep around the cockpit drain/exhaust cluster I thought I finally got a handle on it so I proceeded to lay down some glass where the gorilla repair used to be:

While laying down primer on the newly glassed area I had a dribble, thus you can see an added area of G-flex! Maybe that got it, maybe not. Still not enough of a problem to fret over. So I pressed on but did some gazing at the cockpit drains and exhaust setup in general, since I will have to deal with it at the next haul-out. I'll detail my musings on that in the next post.
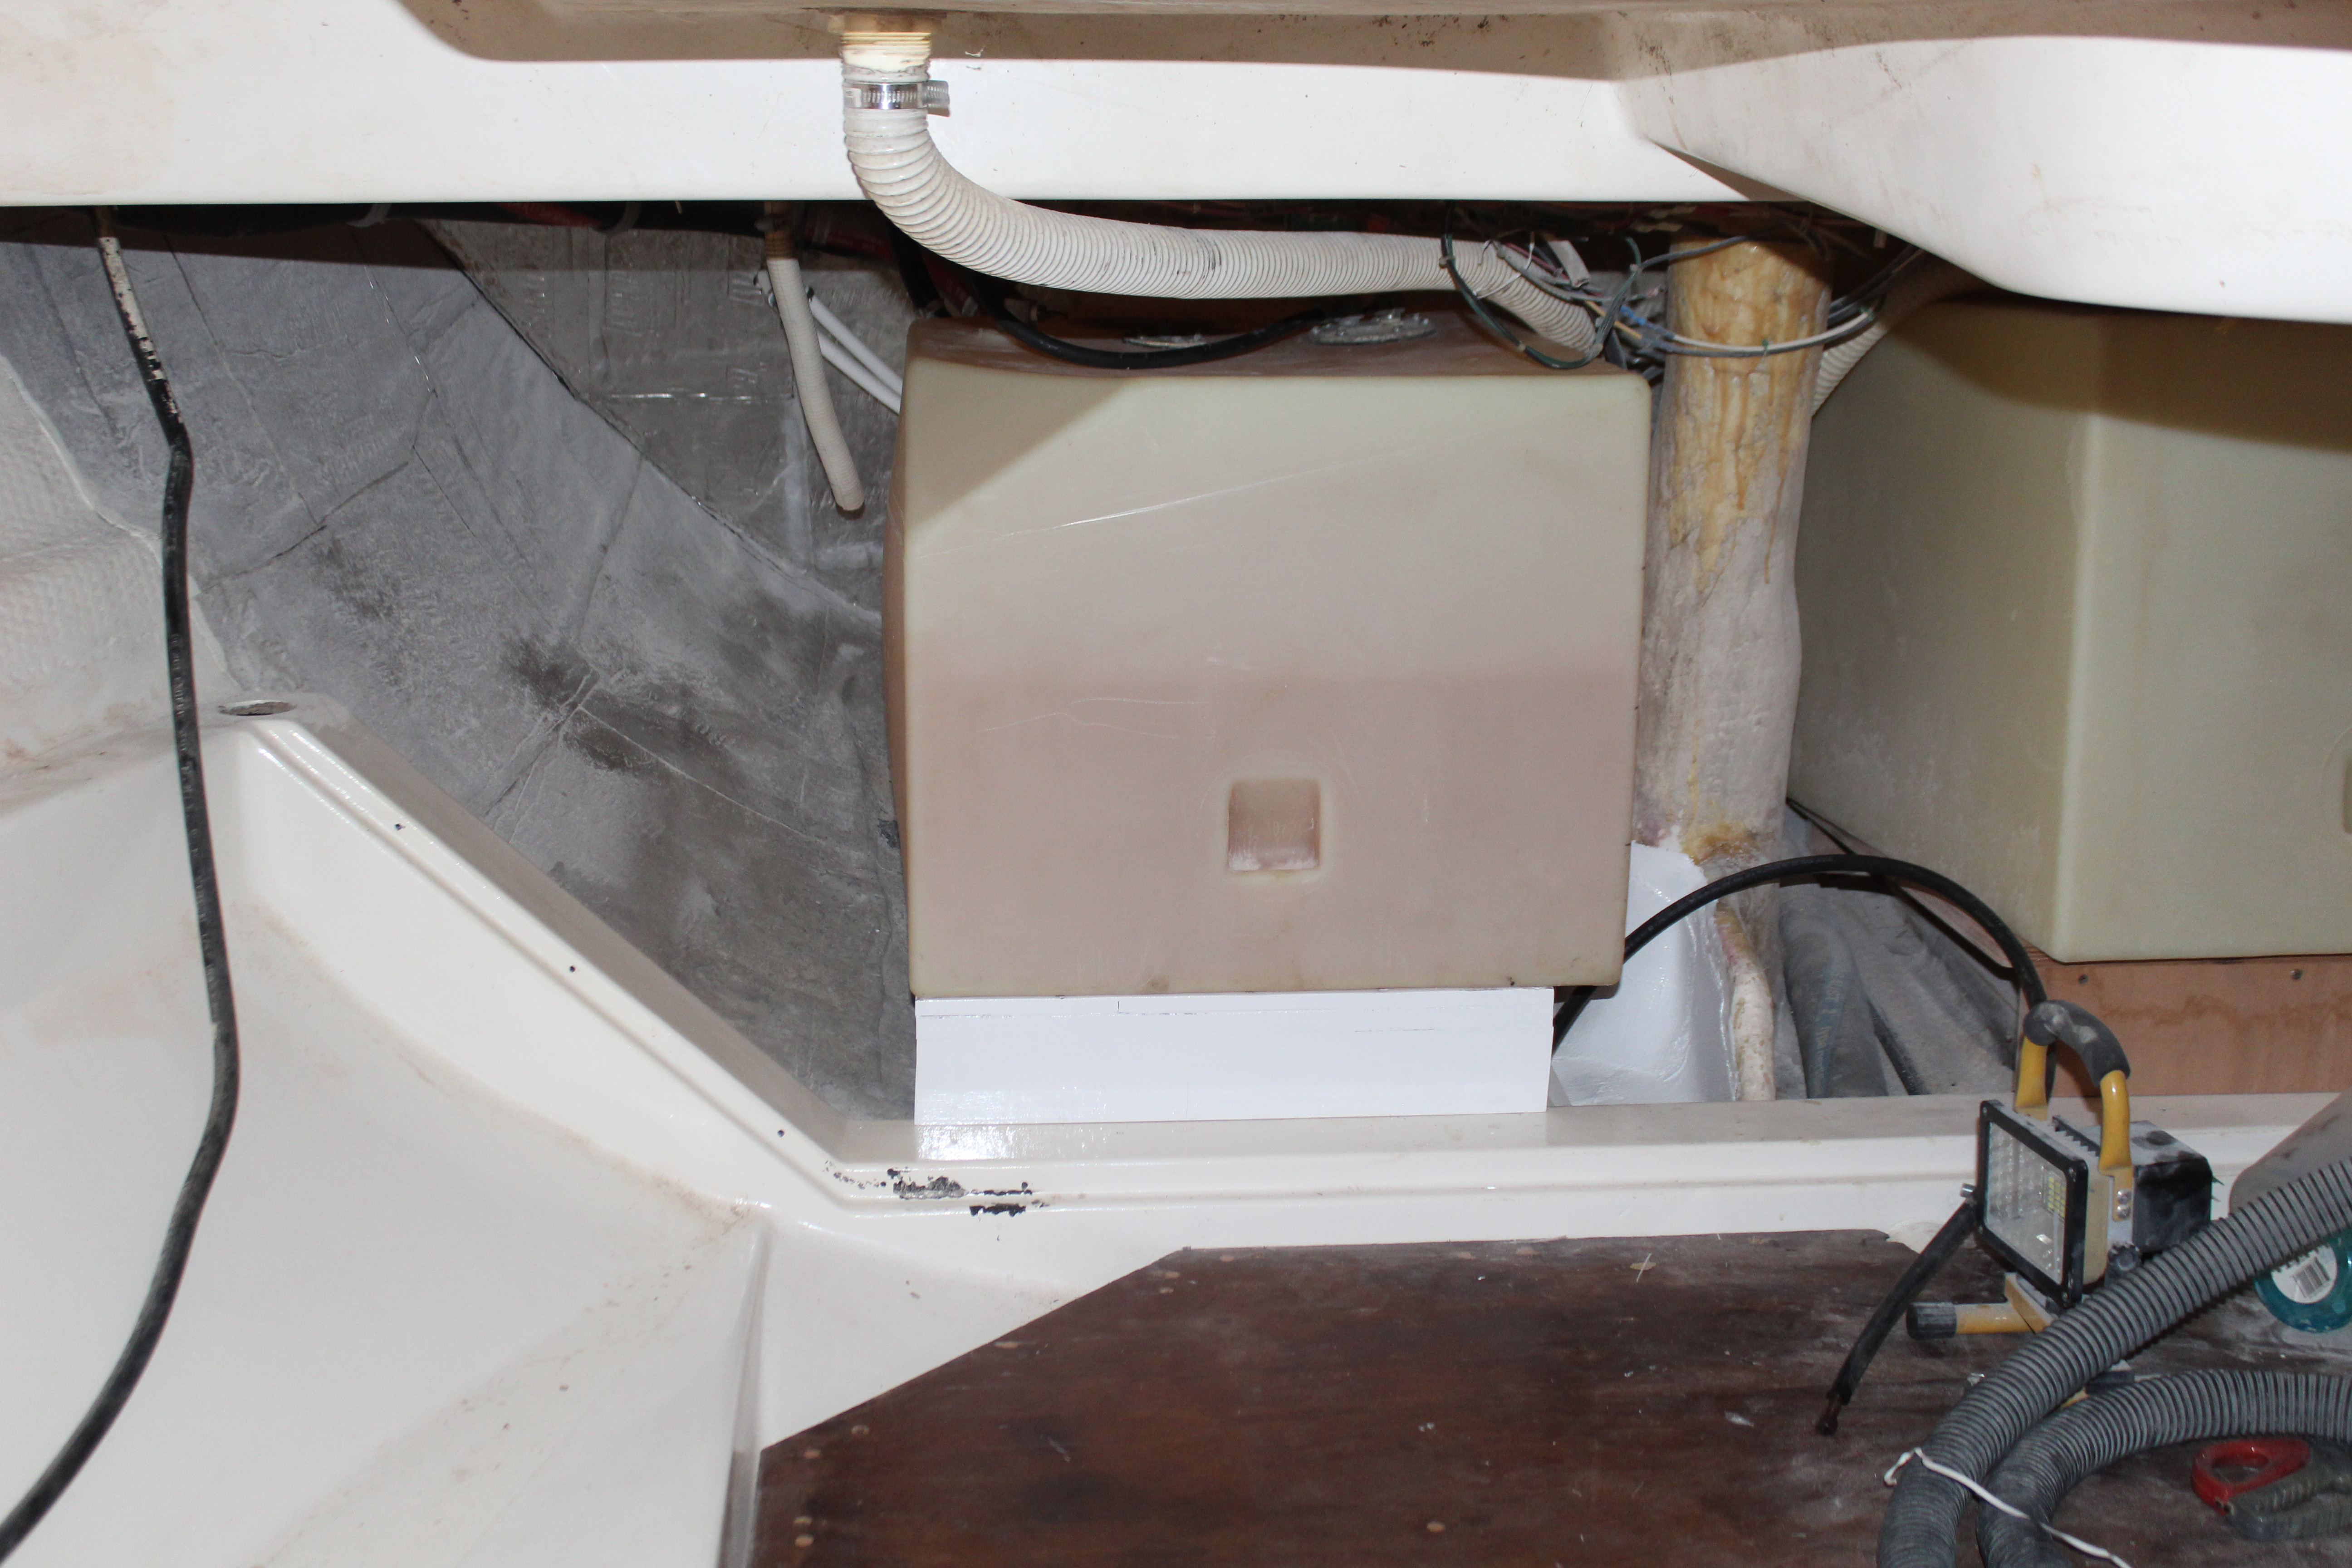
Got the fuel tank platform rebuilt, painted and re-installed:
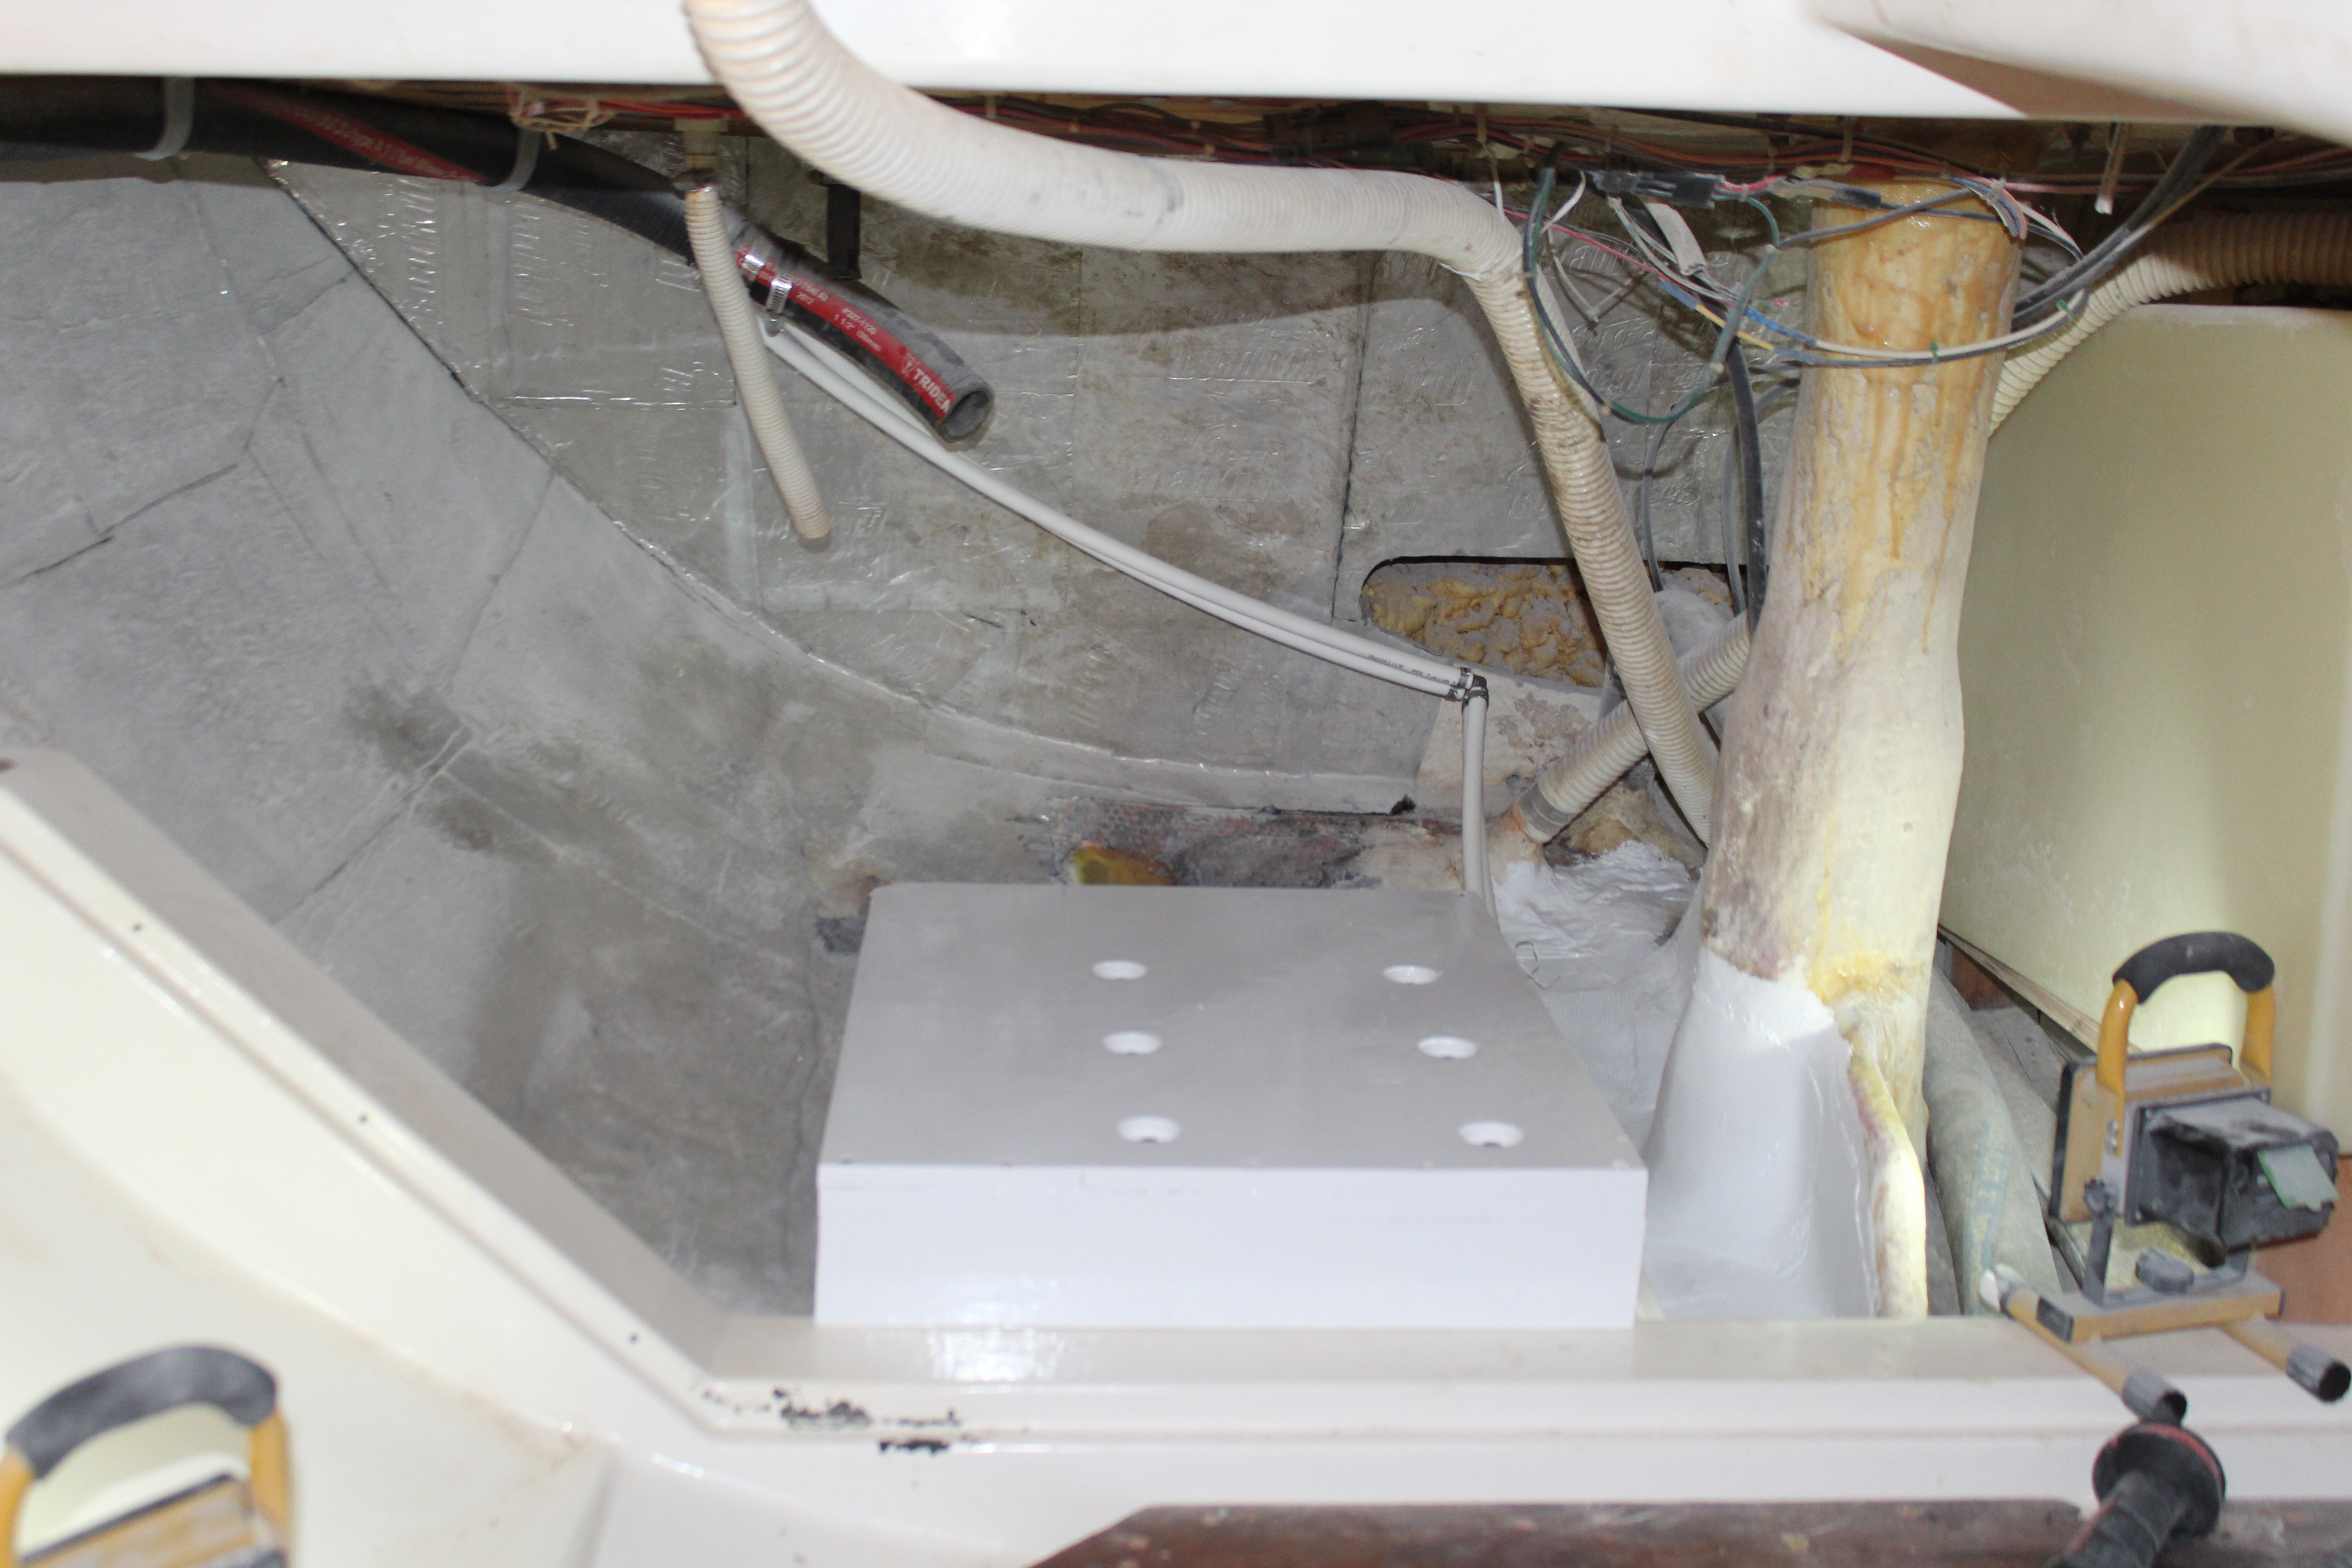
While I was there I added the PEX lines for the swim platform shower. Next up is re-installing the fuel tank and hooking up the various lines and hoses. Both the fill hose and vent hose were still in good shape but I did replace the fuel lines, just in case:
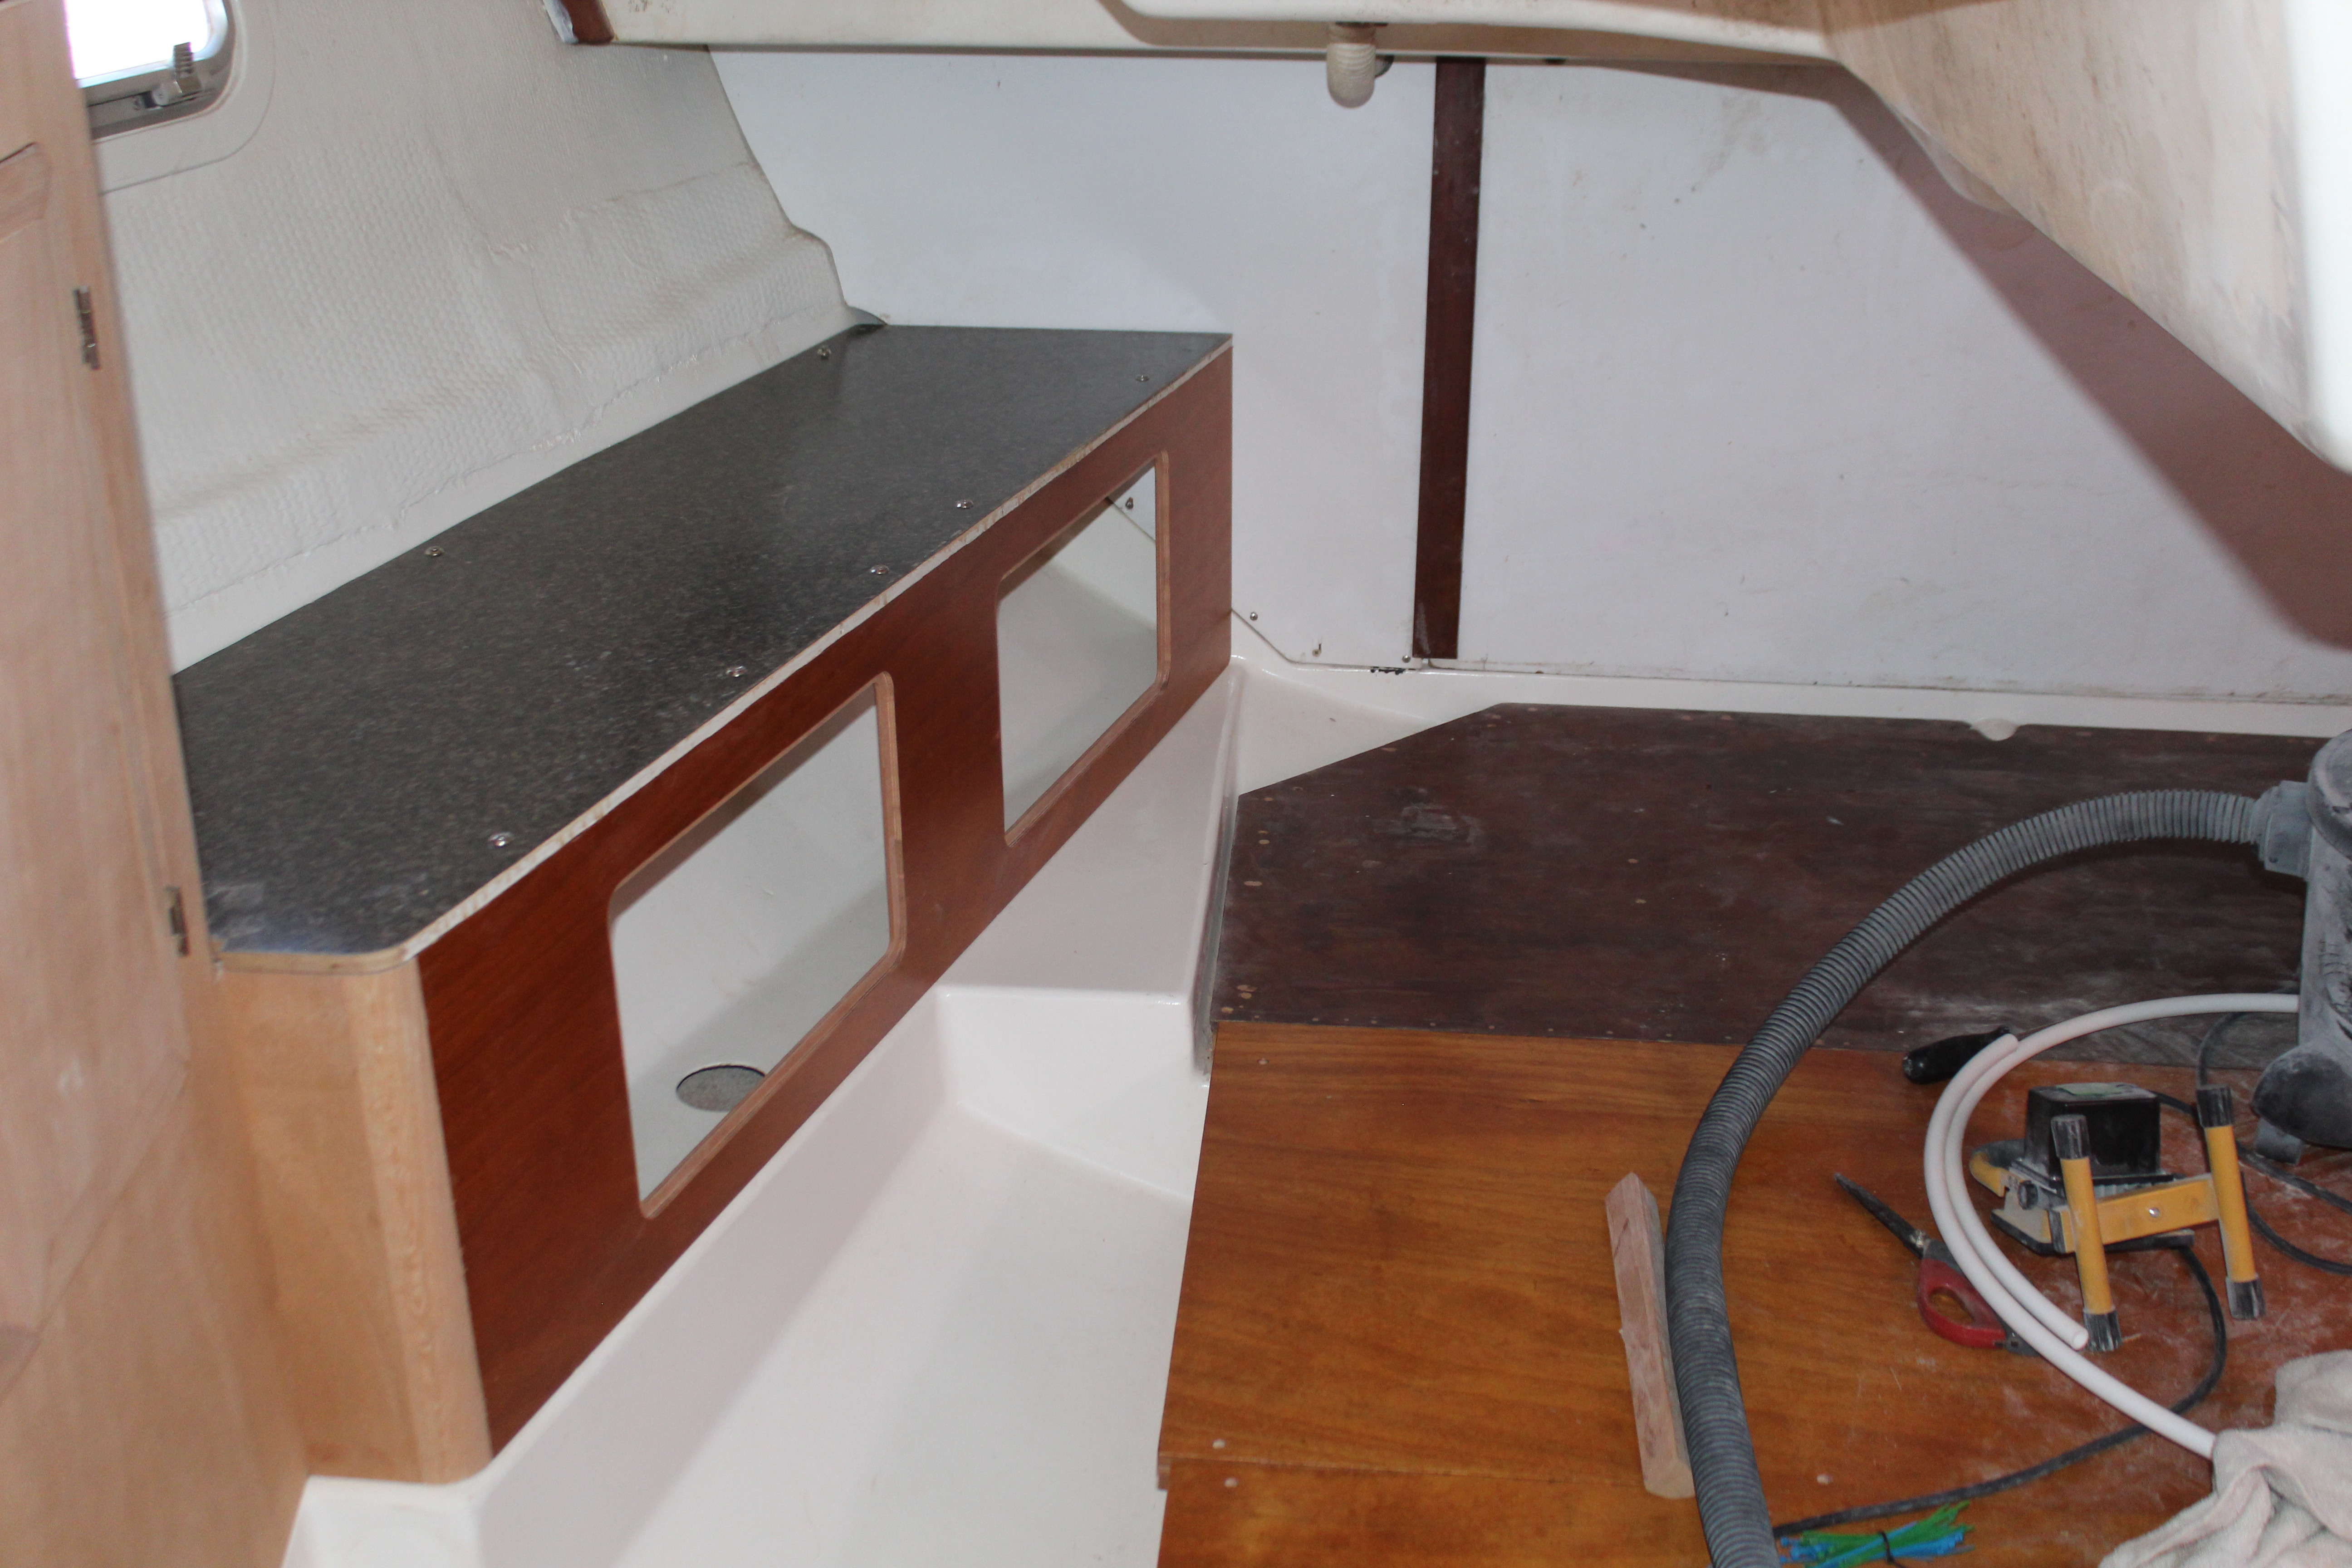
didn't take too long to put the aft cabin back together, but necessary. Since I have the galley apart for A/C work I have discovered that having that much of the boat in pieces at one time make things really cluttered!
Next up, finalizing the fuel system.
Cheers,
Mark
After several attempts at chasing the weep around the cockpit drain/exhaust cluster I thought I finally got a handle on it so I proceeded to lay down some glass where the gorilla repair used to be:
While laying down primer on the newly glassed area I had a dribble, thus you can see an added area of G-flex! Maybe that got it, maybe not. Still not enough of a problem to fret over. So I pressed on but did some gazing at the cockpit drains and exhaust setup in general, since I will have to deal with it at the next haul-out. I'll detail my musings on that in the next post
.Got the fuel tank platform rebuilt, painted and re-installed:
While I was there I added the PEX lines for the swim platform shower. Next up is re-installing the fuel tank and hooking up the various lines and hoses. Both the fill hose and vent hose were still in good shape but I did replace the fuel lines, just in case:
didn't take too long to put the aft cabin back together, but necessary. Since I have the galley apart for A/C work I have discovered that having that much of the boat in pieces at one time make things really cluttered!
Next up, finalizing the fuel system.
Cheers,
Mark

Cockpit drains & exhaust outlet:
So knowing now that I will have to eventually do a permanent repair for the cockpit drain/exhaust outlet area in the aft compartment, it got me to thinking (uh-oh, we KNOW what that means!).
To set the stage, I did some research on the interwebs and determined that the current drain/outlet setup is indeed factory - not a change for the swim platform addition. It looks like the factory created a drain assembly and grafted it to the hull. This is apparently what has started to delaminate. It might also have been glued in, hard to tell, but never-the-less, still failed and weeping water.
So I have one basic problem with the current location of the cockpit drains and two problems with the exhaust outlet. First up, cockpit drains:
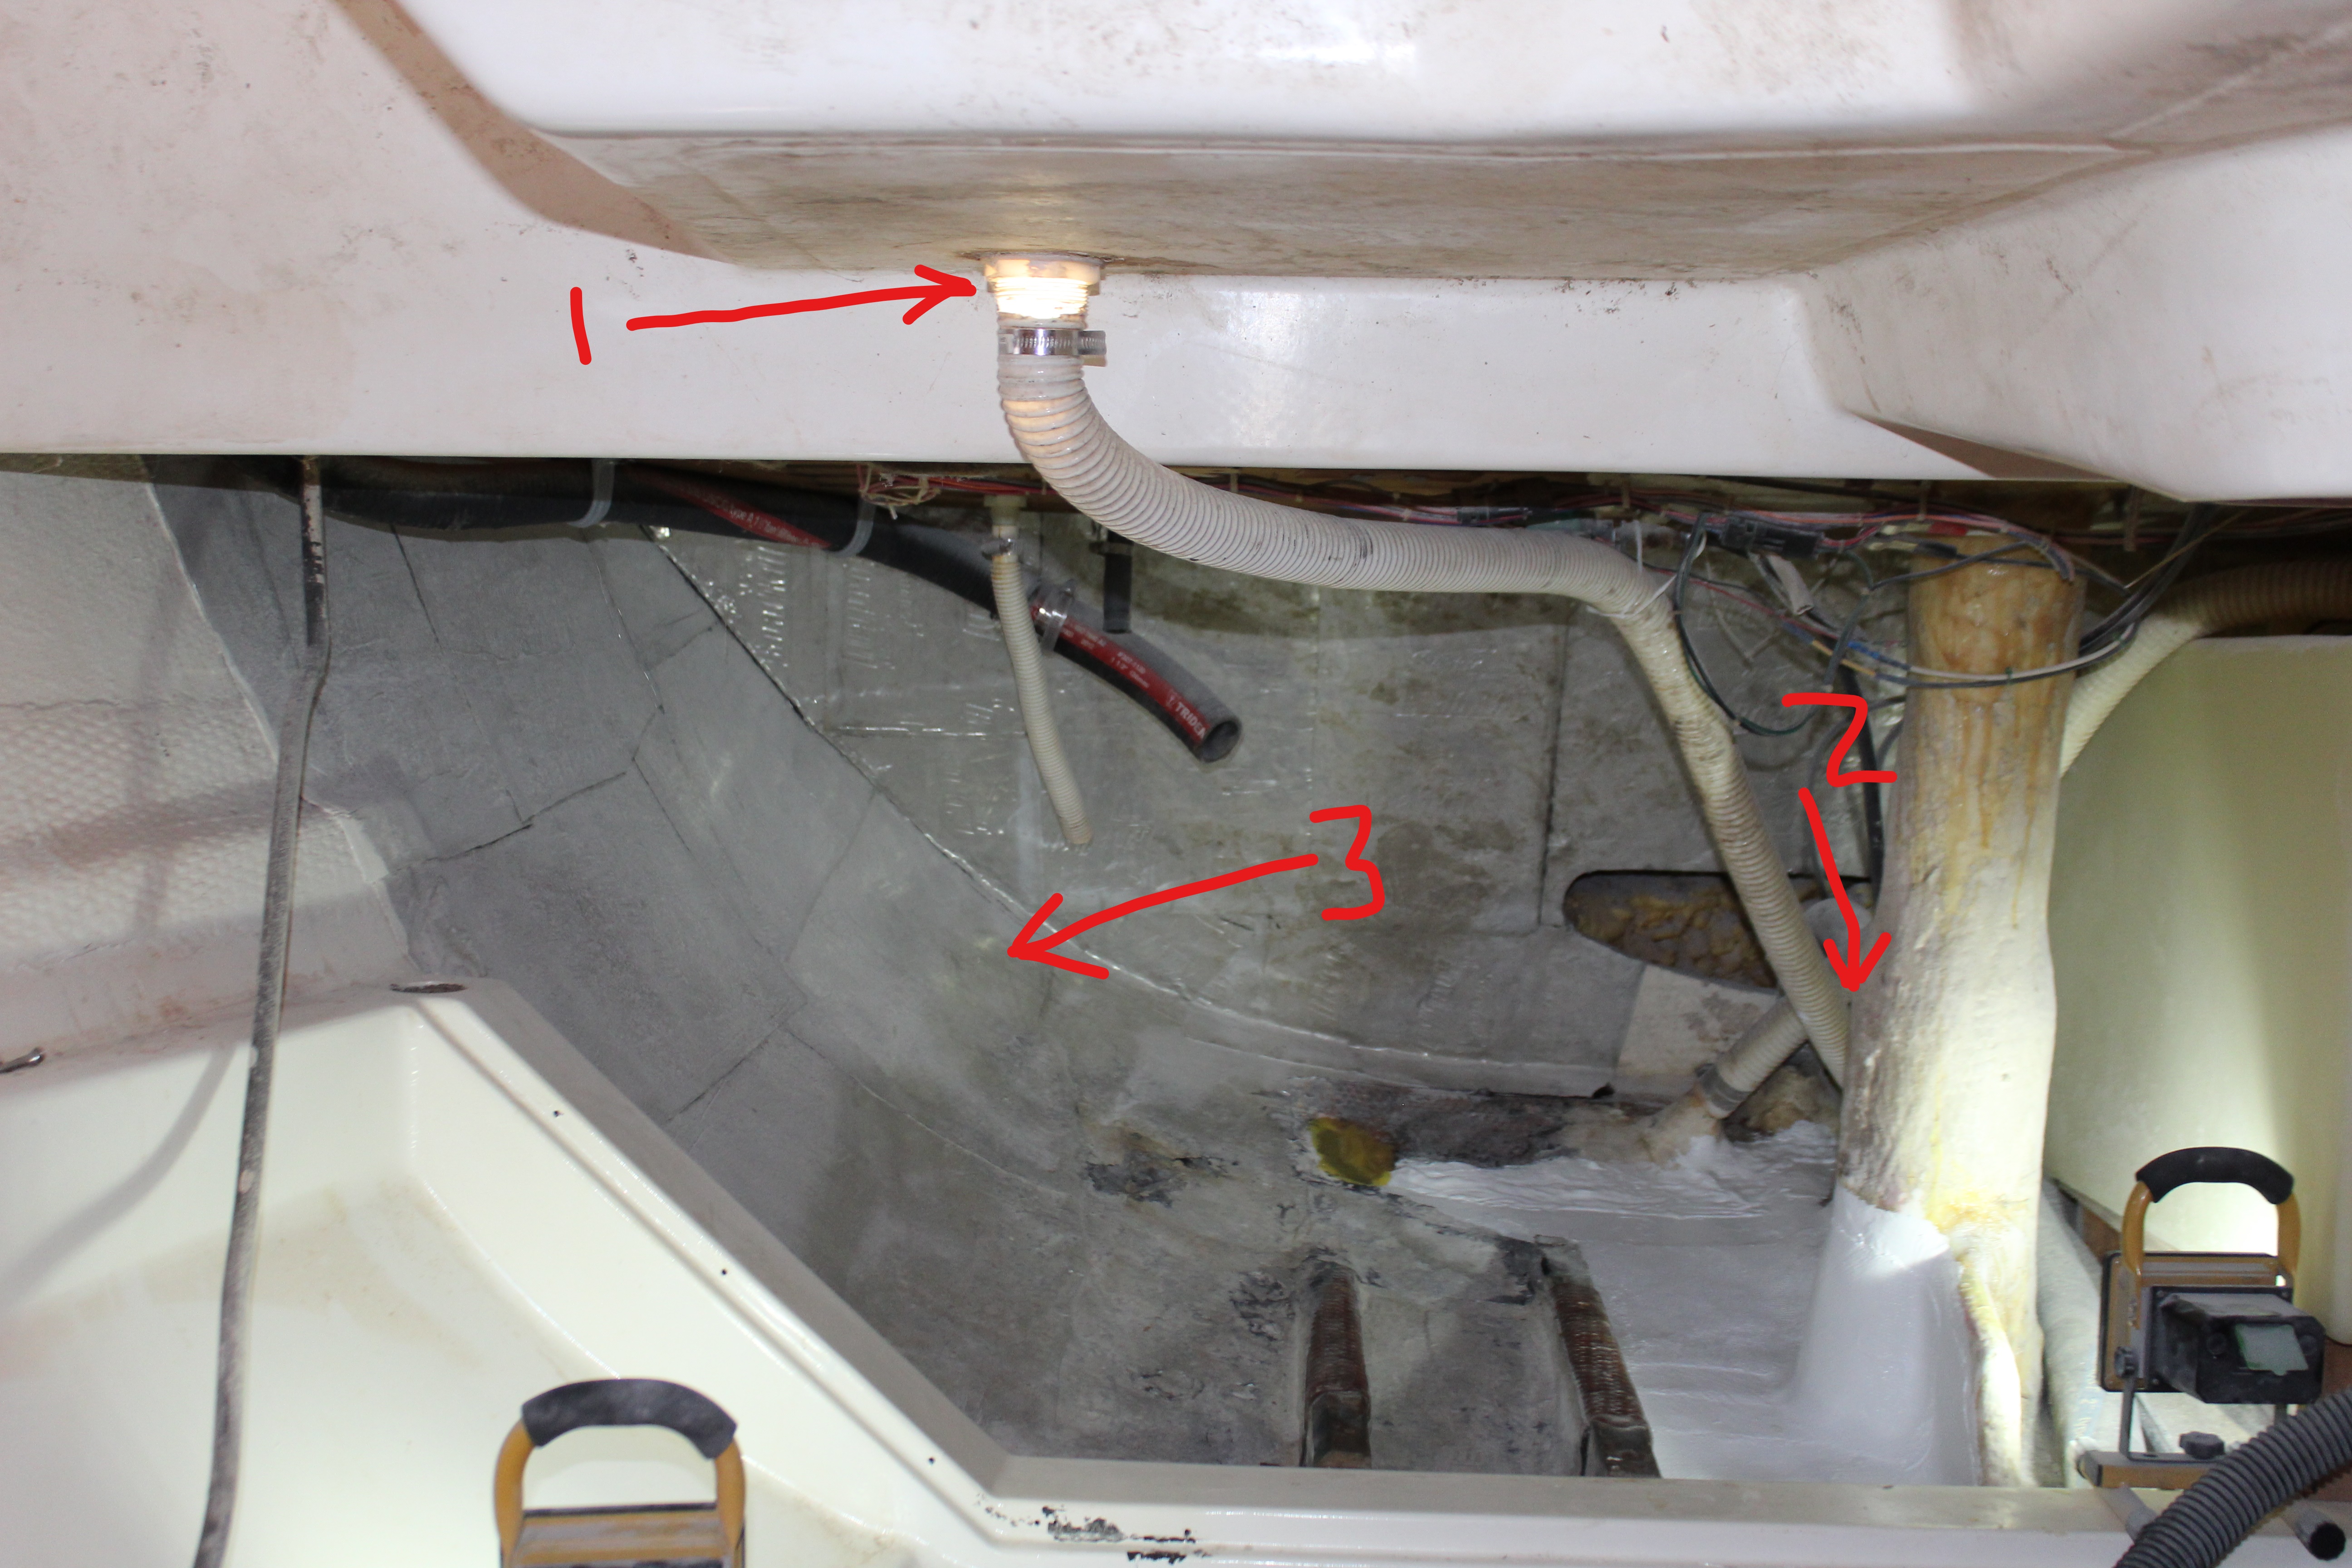
Arrow #1 points to the cockpit drain itself (showing starboard but port side is the same). It exits from the cockpit into the aft cabin where a flexible hose makes a 90 degree turn heading aft. So far so good but where I start scratching my head is that the outlet then angles toward the boat centerline and actually crosses over slightly to the other side (arrow #2). My thinking is that this is fine when the boat is level or at slight heel angles but the farther the boat heels the less effective the drain becomes. And it's the side that will need draining! Granted there will always be a positive drain angle but it does diminish as the boat heels.
So my thought is - why are the drains there? I can't think of any reason they have to drain to the boat centerline, so why not straighten them out a bit? When I dig into the repair why not relocate the drains outboard (arrow #3)? I've got plenty of space and working room to relocate the drain there, I'm not moving the drain to a location that will submerge when heeled (in fact moving the drains outboard moves them up slightly at any angle) and I've got more room to access the drain area (if necessary) vs. the current location. I'm open to comments, suggestions or other ideas here.
Next up is moving the exhaust. Complaint #1 with the exhaust is that in it's current location it is very difficult to determine cooling water flow. The only real way to tell if cooling water is (or isn't) flowing while under way is by listening to the exhaust note. Moving the exhaust to the hull side (can't go straight back due to the swim platform) would help tremendously. Complaint #2 is, as we all saw a while back, trying to engineer an effective exhaust system. A big failing in the original design was/is lack of a viable area for a good siphon loop rise. This caused all kinds of exhaust gymnastics with the original exhaust system and even caused a factory horsepower de-rate of the Yanmar 4JHE.
Then it dawned on me - the inside of the sides of the swim platform is a great big hollow area from the waterline up almost to the deck!
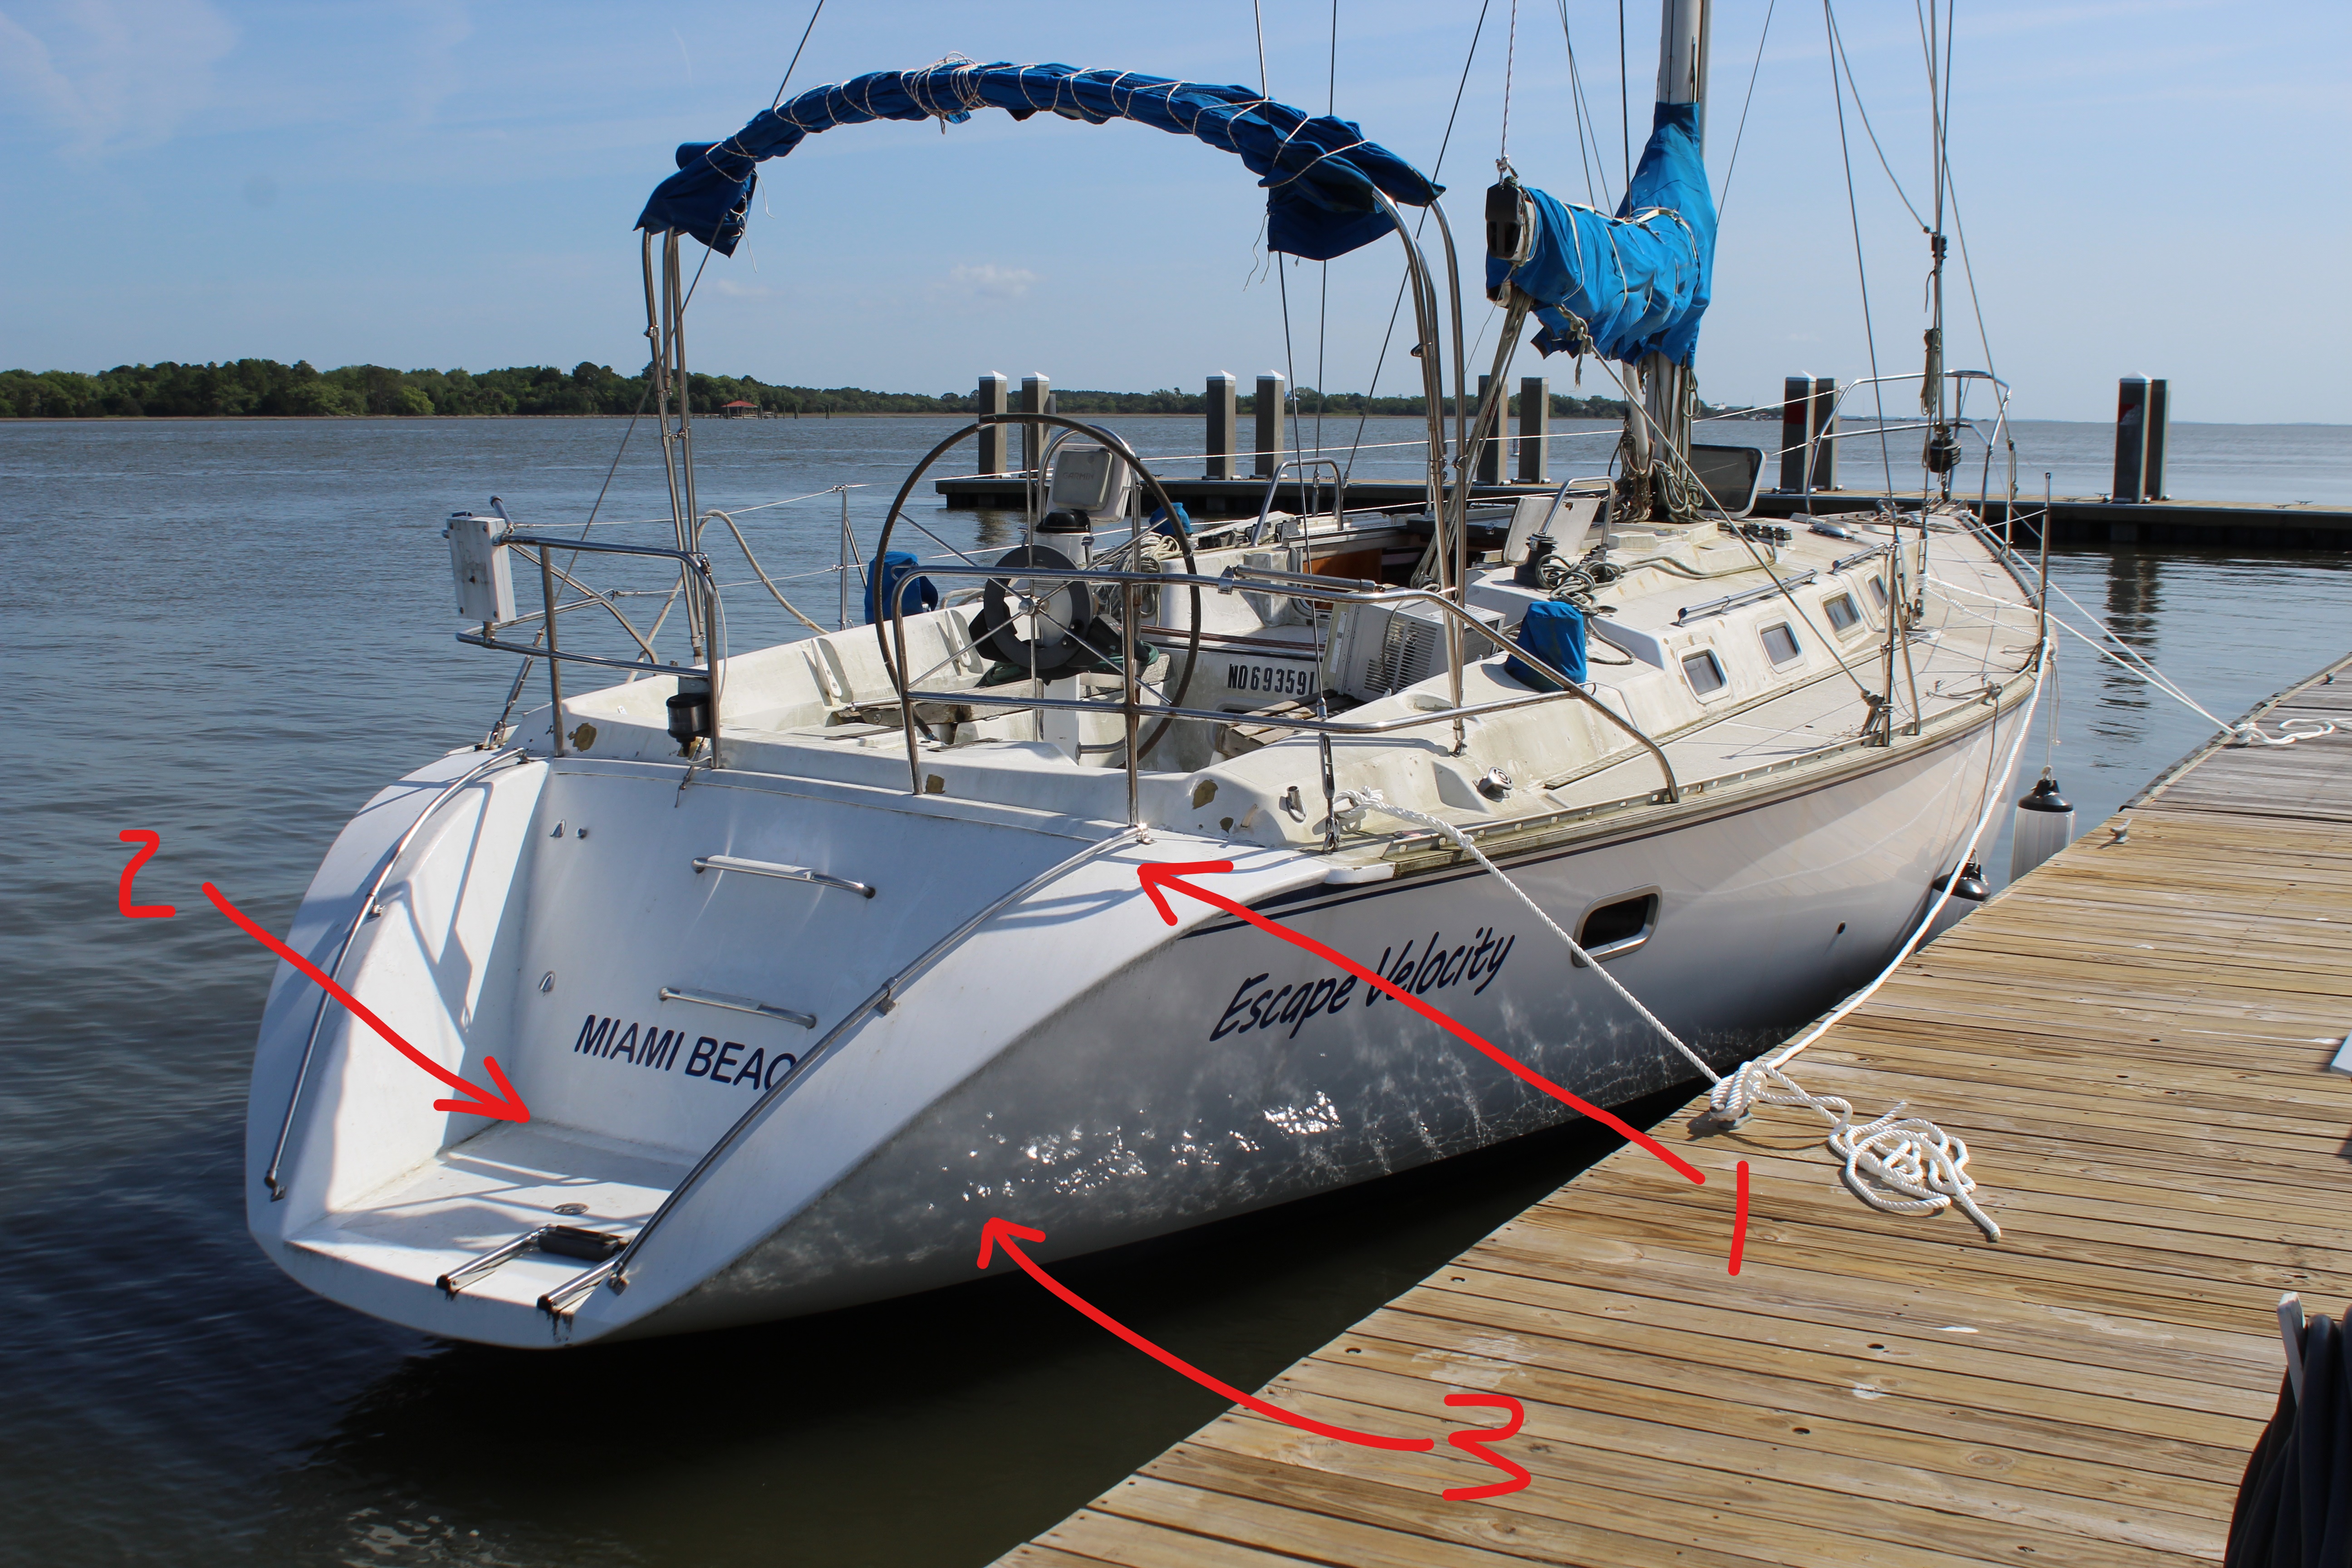
I still have to do some measuring but it looks to me like there is enough room for a vertical lift muffler (Vetus makes one with a siphon loop built in) and the exhaust could be routed out the side of the swim platform (all this behind the transom).
See what happens when I take a break during the day? Thoughts?
Cheers,
Mark
So knowing now that I will have to eventually do a permanent repair for the cockpit drain/exhaust outlet area in the aft compartment, it got me to thinking (uh-oh, we KNOW what that means!
).To set the stage, I did some research on the interwebs and determined that the current drain/outlet setup is indeed factory - not a change for the swim platform addition. It looks like the factory created a drain assembly and grafted it to the hull. This is apparently what has started to delaminate. It might also have been glued in, hard to tell, but never-the-less, still failed and weeping water.
So I have one basic problem with the current location of the cockpit drains and two problems with the exhaust outlet. First up, cockpit drains:
Arrow #1 points to the cockpit drain itself (showing starboard but port side is the same). It exits from the cockpit into the aft cabin where a flexible hose makes a 90 degree turn heading aft. So far so good but where I start scratching my head is that the outlet then angles toward the boat centerline and actually crosses over slightly to the other side (arrow #2). My thinking is that this is fine when the boat is level or at slight heel angles but the farther the boat heels the less effective the drain becomes. And it's the side that will need draining! Granted there will always be a positive drain angle but it does diminish as the boat heels.
So my thought is - why are the drains there? I can't think of any reason they have to drain to the boat centerline, so why not straighten them out a bit? When I dig into the repair why not relocate the drains outboard (arrow #3)? I've got plenty of space and working room to relocate the drain there, I'm not moving the drain to a location that will submerge when heeled (in fact moving the drains outboard moves them up slightly at any angle) and I've got more room to access the drain area (if necessary) vs. the current location. I'm open to comments, suggestions or other ideas here.
Next up is moving the exhaust. Complaint #1 with the exhaust is that in it's current location it is very difficult to determine cooling water flow. The only real way to tell if cooling water is (or isn't) flowing while under way is by listening to the exhaust note. Moving the exhaust to the hull side (can't go straight back due to the swim platform) would help tremendously. Complaint #2 is, as we all saw a while back, trying to engineer an effective exhaust system. A big failing in the original design was/is lack of a viable area for a good siphon loop rise. This caused all kinds of exhaust gymnastics with the original exhaust system and even caused a factory horsepower de-rate of the Yanmar 4JHE.
Then it dawned on me - the inside of the sides of the swim platform is a great big hollow area from the waterline up almost to the deck!
I still have to do some measuring but it looks to me like there is enough room for a vertical lift muffler (Vetus makes one with a siphon loop built in) and the exhaust could be routed out the side of the swim platform (all this behind the transom).
See what happens when I take a break during the day? Thoughts?
Cheers,
Mark
Cockpit drains are typically crossed to avoid flooding when healed but if you are certain this won't be a problem then sure, sounds good.
Do you have good access into the void in the swim platform?
Do you have good access into the void in the swim platform?
If you were to be swamped heavily, would your new drain setup be equal or better to what you have now for quickly dispersing the water? As far as exhaust, your proposed location is exactly where we have it on our Bavaria. I like being able to peer over the side to examine how much water is pumping out.
I agree about being able to see the exhaust being a good thing. Last Sunday there was very little wind so we were motoring back to the harbour. I heard something change but my exhaust is similar to yours, under the transom so I can't see it. Sure enough, the temperature started to creep up so I shut it down and when I checked the engine found the water pump belt had broken. I replaced it and we went on our way but it would have been nice to see the exhaust to shut down the engine before the temperature started to rise.
My Beneteau has all the overboard ports high on the starboard side. Can see the engine puking the water easily.
Attachments
-
 274.2 KB Views: 259
i have never been satisfied with the cockpit drains - if nothing else the 1 1/2" hoses are too restrictive so along with relocating them I will upgrade to bigger diameter drains and hoses.Cockpit drains are typically crossed to avoid flooding when healed but if you are certain this won't be a problem then sure, sounds good.
Do you have good access into the void in the swim platform?
As to access to the void in the swim platform, I will have to cut an access hatch. I do have semi-access on the starboard side from the opening for the shower controls. I can peer in there and have a good idea of what I'll be dealing with. I will locate the exhaust on the port side though.
Finishing the fuel system:
I have managed some quality boat time over the last few weeks, I promise! It's just the time to update the forum that is kicking my butt.
After getting the fuel tank reinstalled and secured and fuel lines replaced I worked forward with the refurb. The return line is a no-brainer but the feed line should have a fuel shutoff valve:
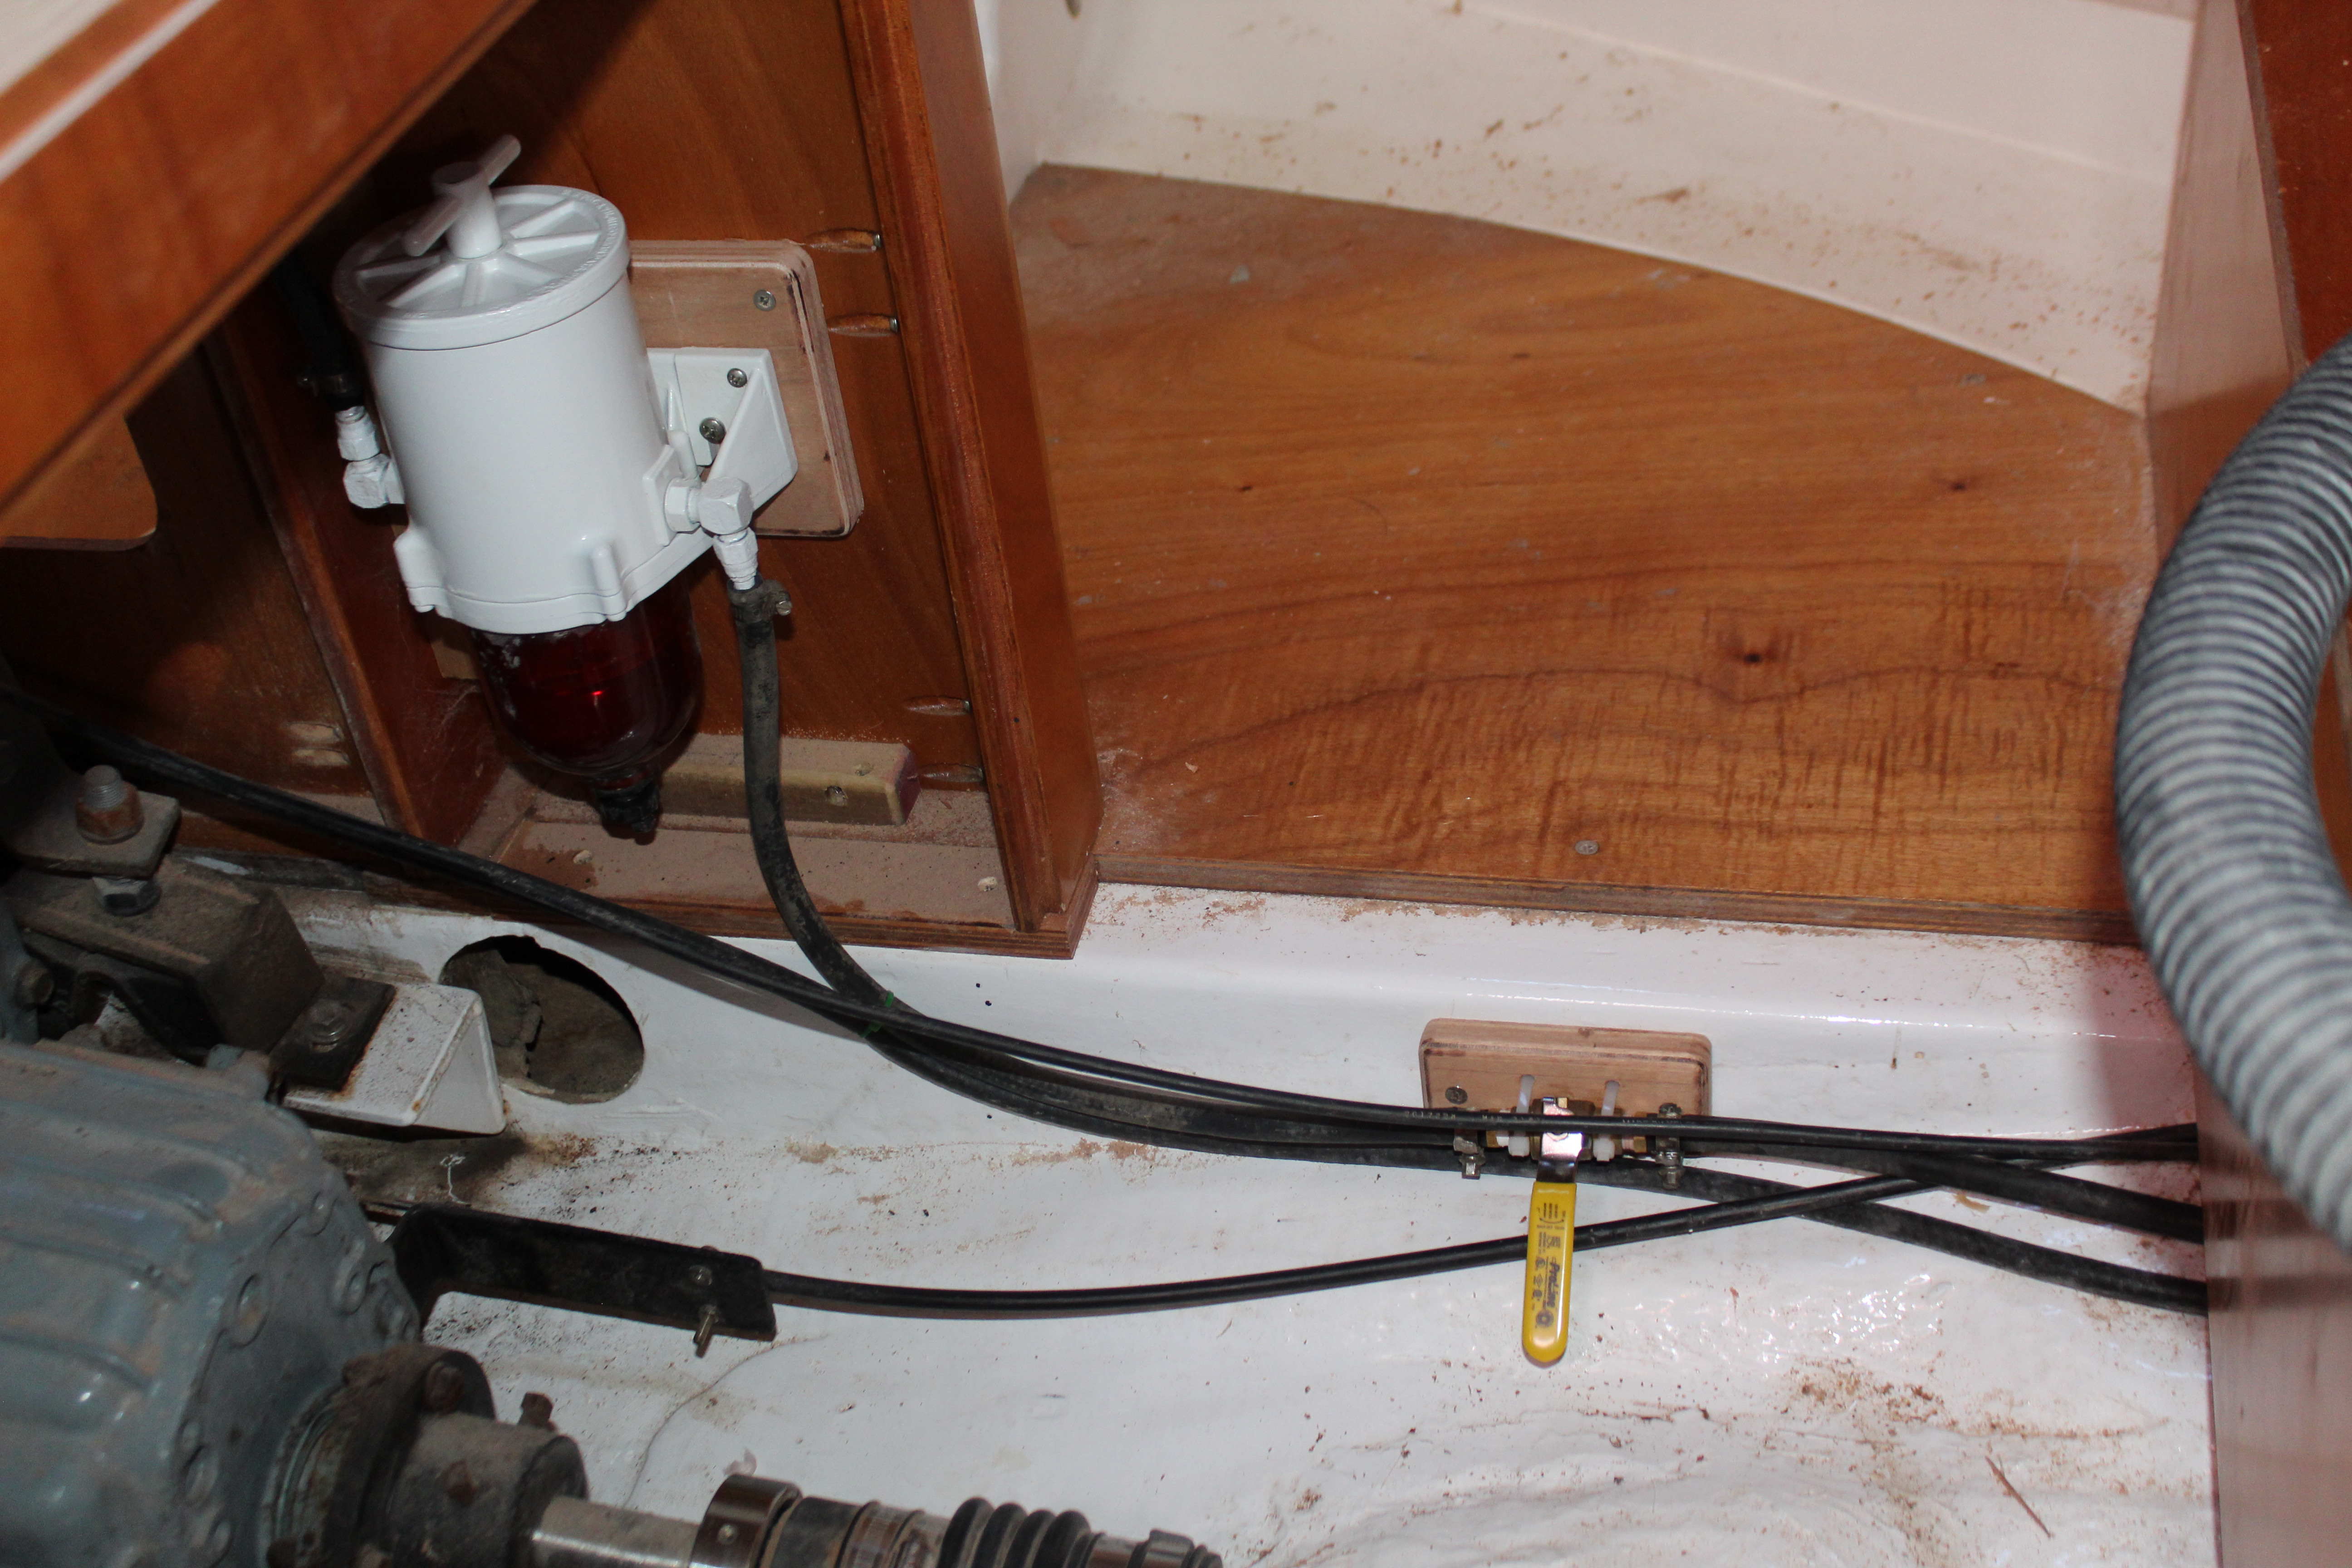
that is easy to access. The factory put one on the tank itself but it was anything but easy to get to! I fabbed a mount for the Raycor filter, mounted it and finished plumbing the fuel lines. After a frantic search for the box of filters I KNOW I have (somewhere) and a quick trip to WM for a new Raycor filter, it's time for the first engine start on internal systems. That went surprisingly well, right up to the point where the engine died from fuel starvation! Left too much air in the lines for the engine driven pump to catch up with. A quick bleed and running strong!
I do want to run at least 5 gallons or so of fuel through the engine while tied up at the dock (in gear with a good load on the engine) before venturing out for the (re) maiden voyage. Stay tuned
Next up, air conditioning!
Cheers,
Mark
I have managed some quality boat time over the last few weeks, I promise! It's just the time to update the forum that is kicking my butt
.After getting the fuel tank reinstalled and secured and fuel lines replaced I worked forward with the refurb. The return line is a no-brainer but the feed line should have a fuel shutoff valve:
that is easy to access. The factory put one on the tank itself but it was anything but easy to get to! I fabbed a mount for the Raycor filter, mounted it and finished plumbing the fuel lines. After a frantic search for the box of filters I KNOW I have (somewhere
) and a quick trip to WM for a new Raycor filter, it's time for the first engine start on internal systems. That went surprisingly well, right up to the point where the engine died from fuel starvation! Left too much air in the lines for the engine driven pump to catch up with. A quick bleed and running strong!I do want to run at least 5 gallons or so of fuel through the engine while tied up at the dock (in gear with a good load on the engine) before venturing out for the (re) maiden voyage. Stay tuned
Next up, air conditioning!
Cheers,
Mark
Finalizing the air conditioning, Part 1:
Having a/c is great (and essential for summers here!) but the temporary hookups should be - temporary! So time to cut some holes and make the ducting, plumbing and electrics more permanent.
I've had really good luck with the Flagship Marine A/C units but if I have one complaint, they are a bit noisy. So first thing is to build an enclosure:
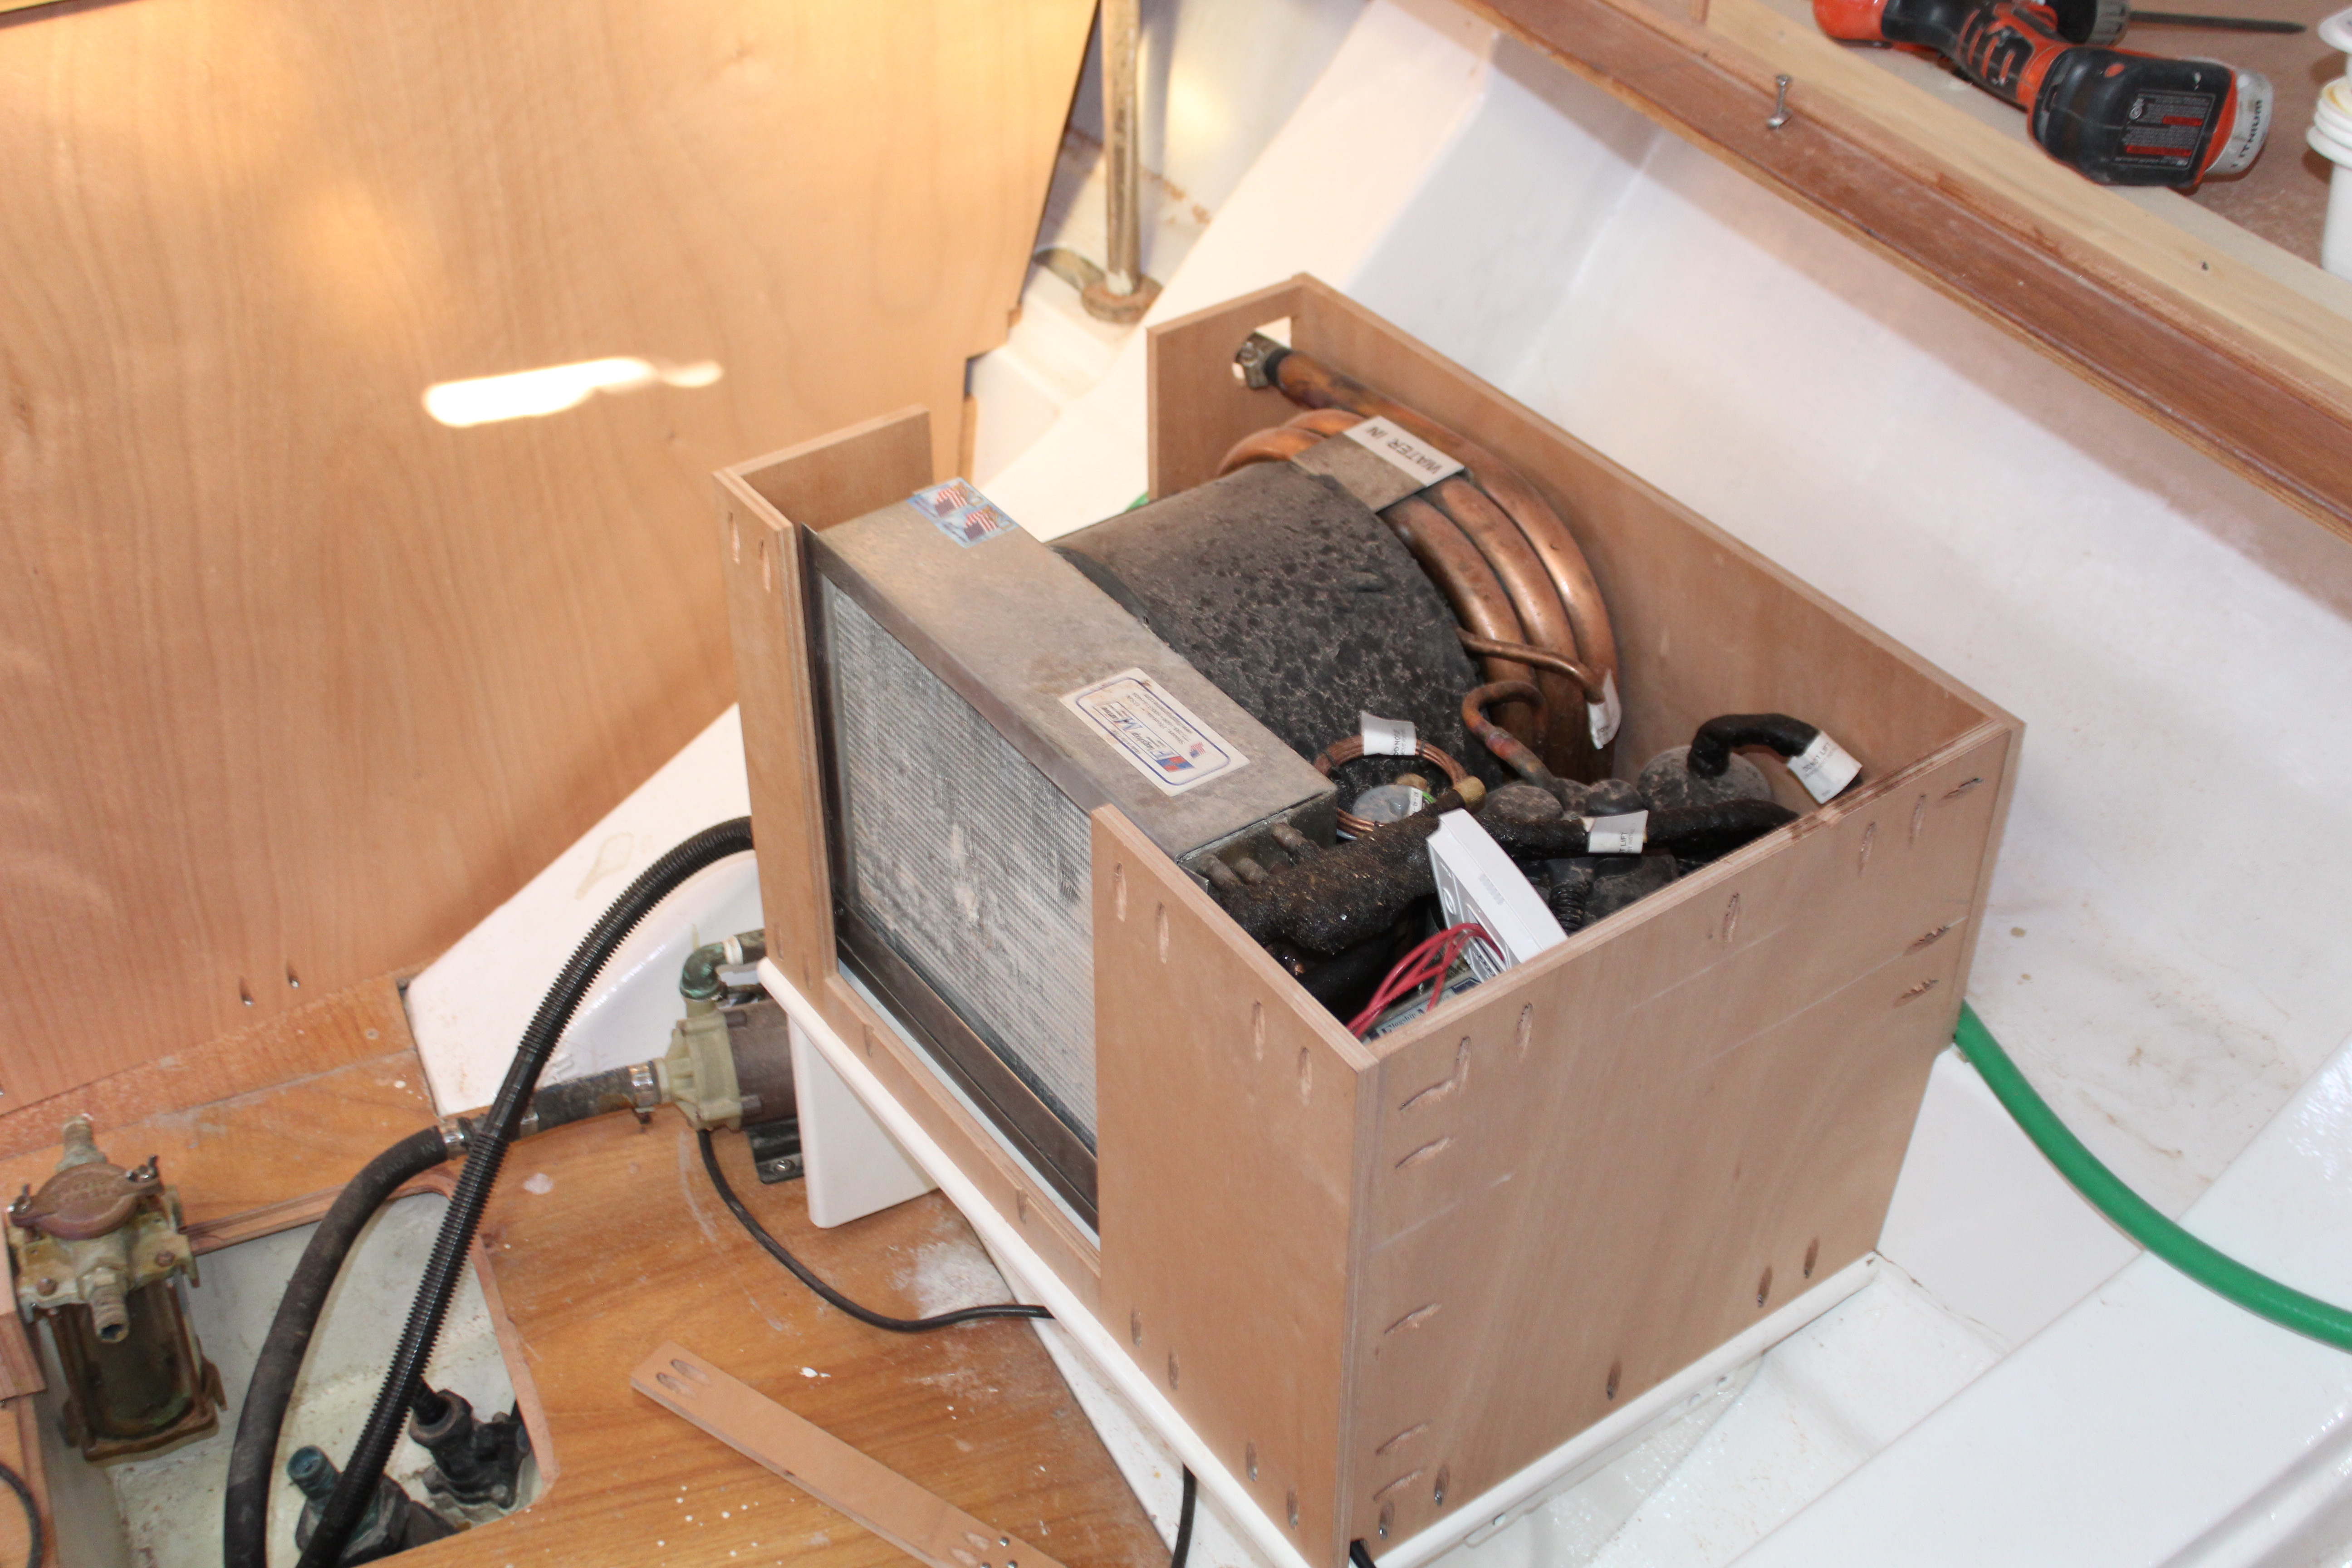
I took some measurements and rummaged through my scrap pile and found just about all I needed without having to cut up any of my precious few remaining full sheets of ply. After getting the sides fabbed up I had to engineer a transition piece for the air outlet (you can see two openings, the large one is for the inlet air and the smaller is for the outlet):
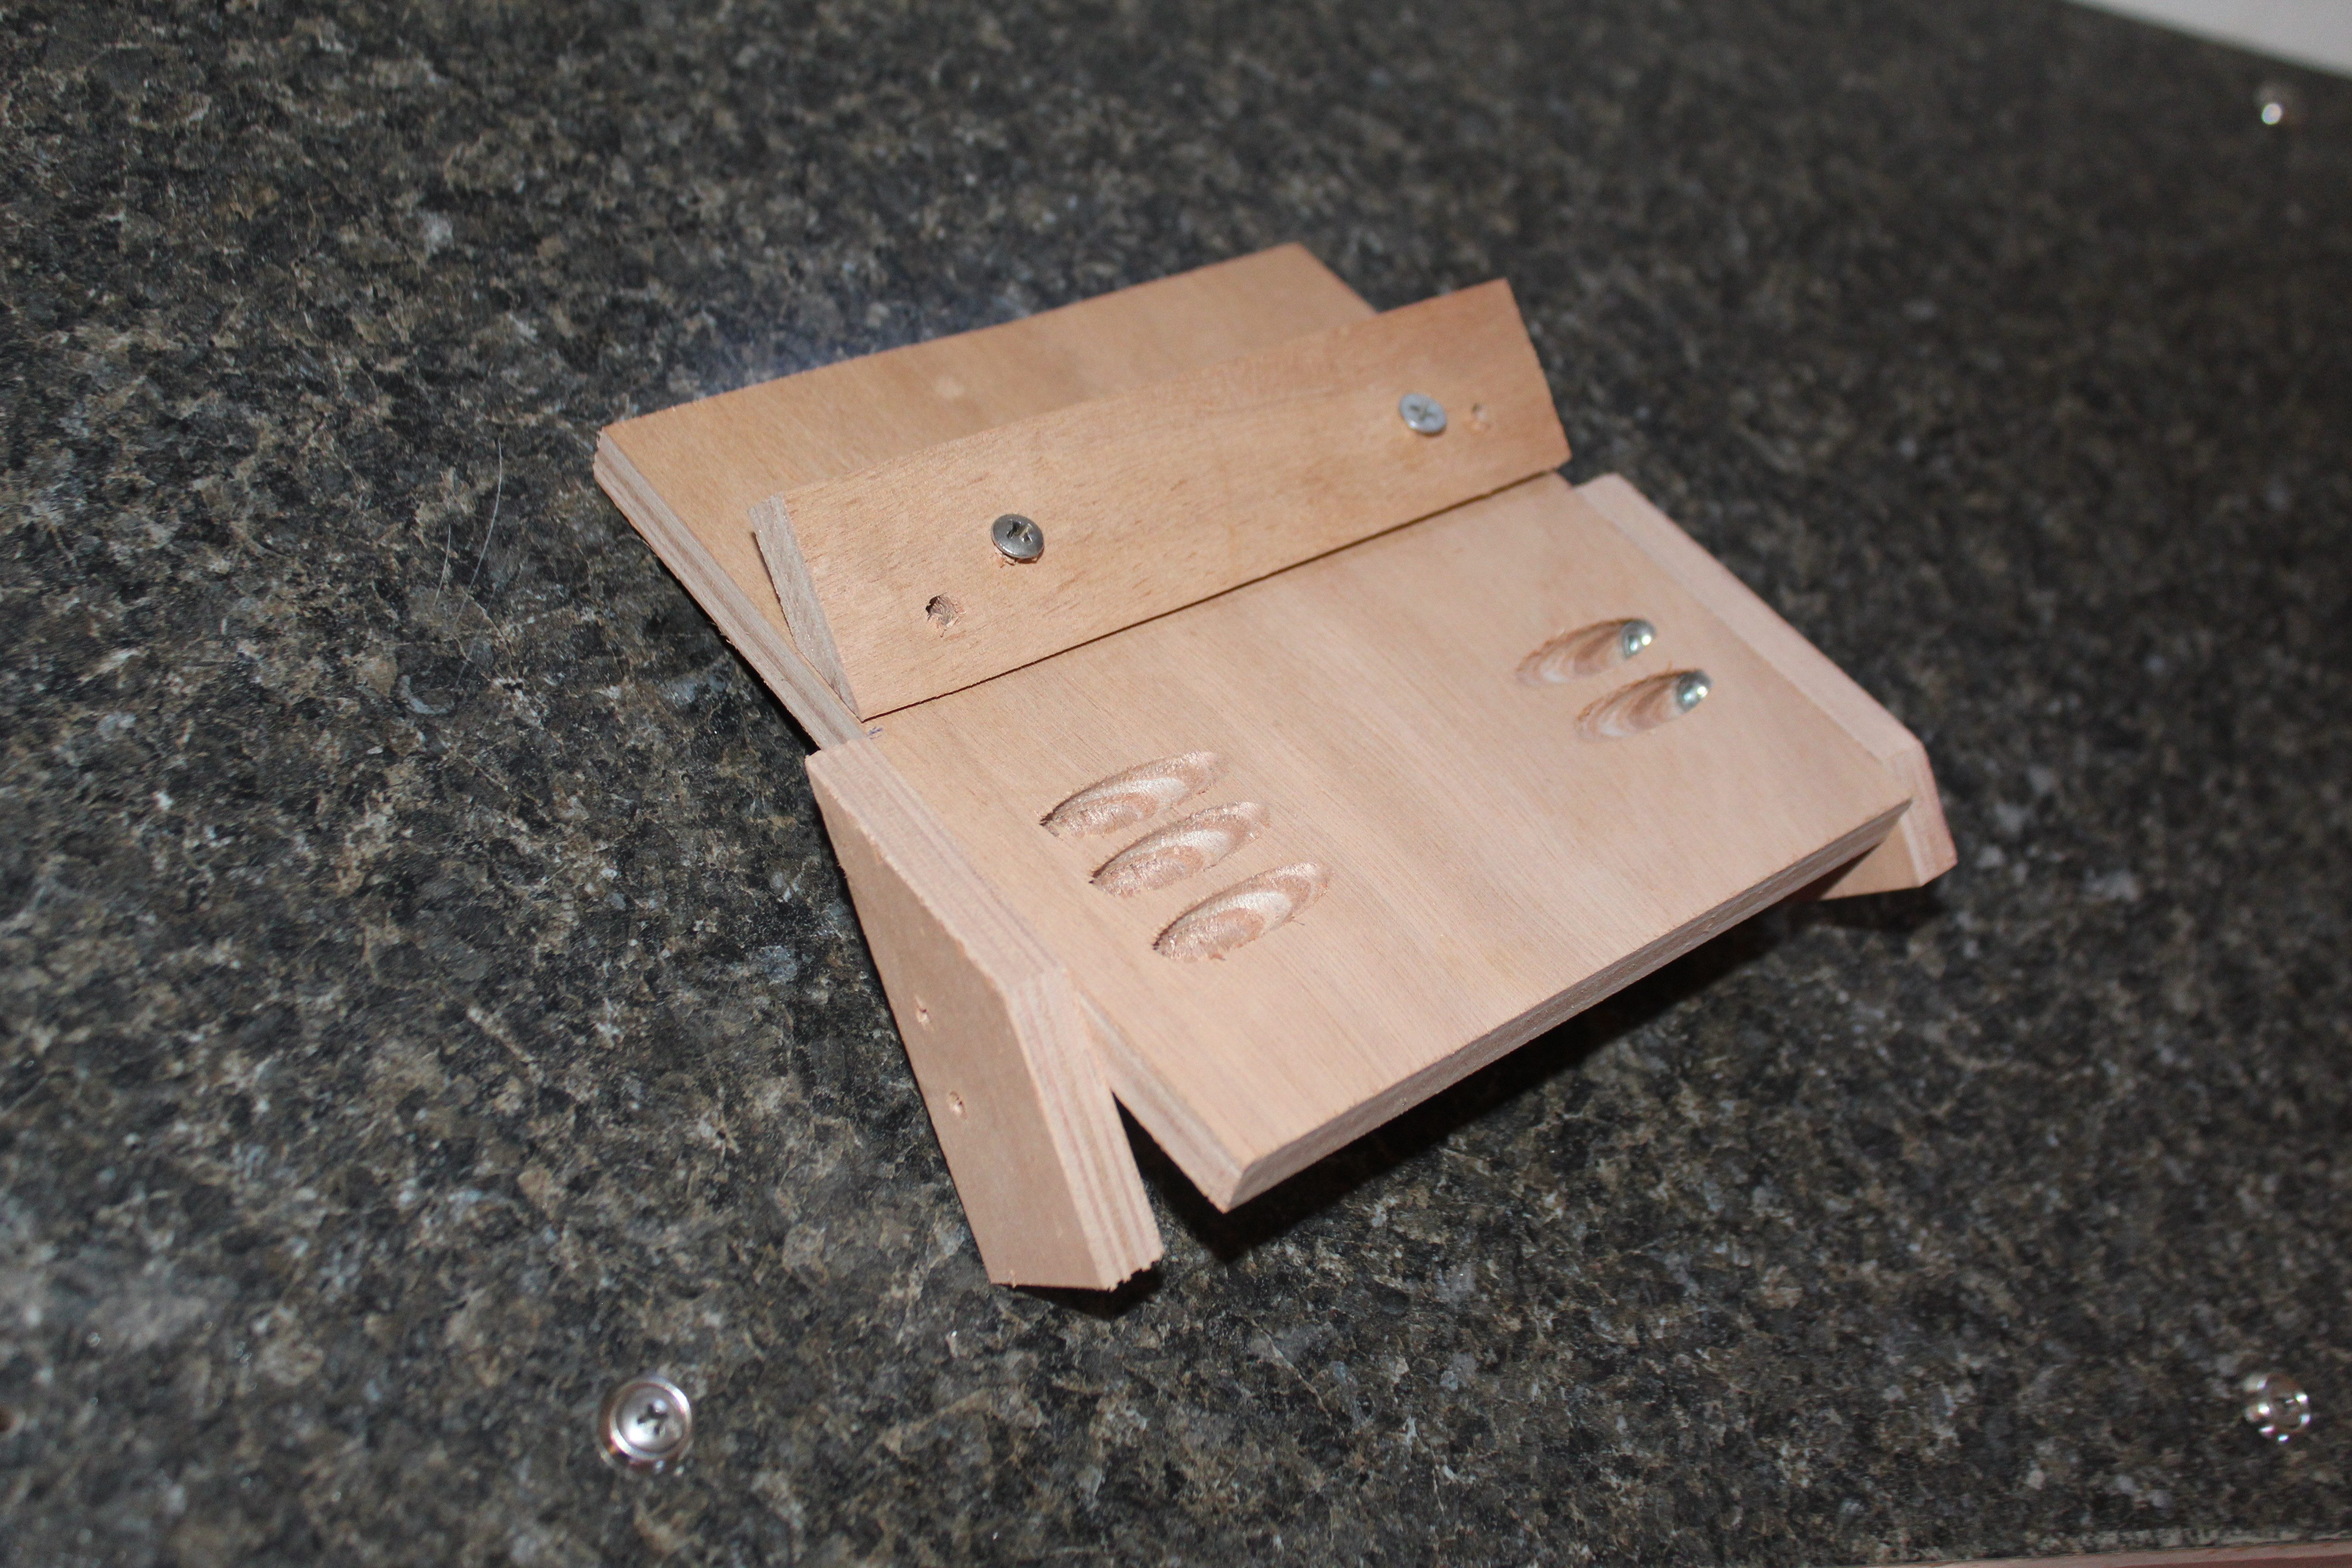
This piece slots in to fill in and seal the upper gap:
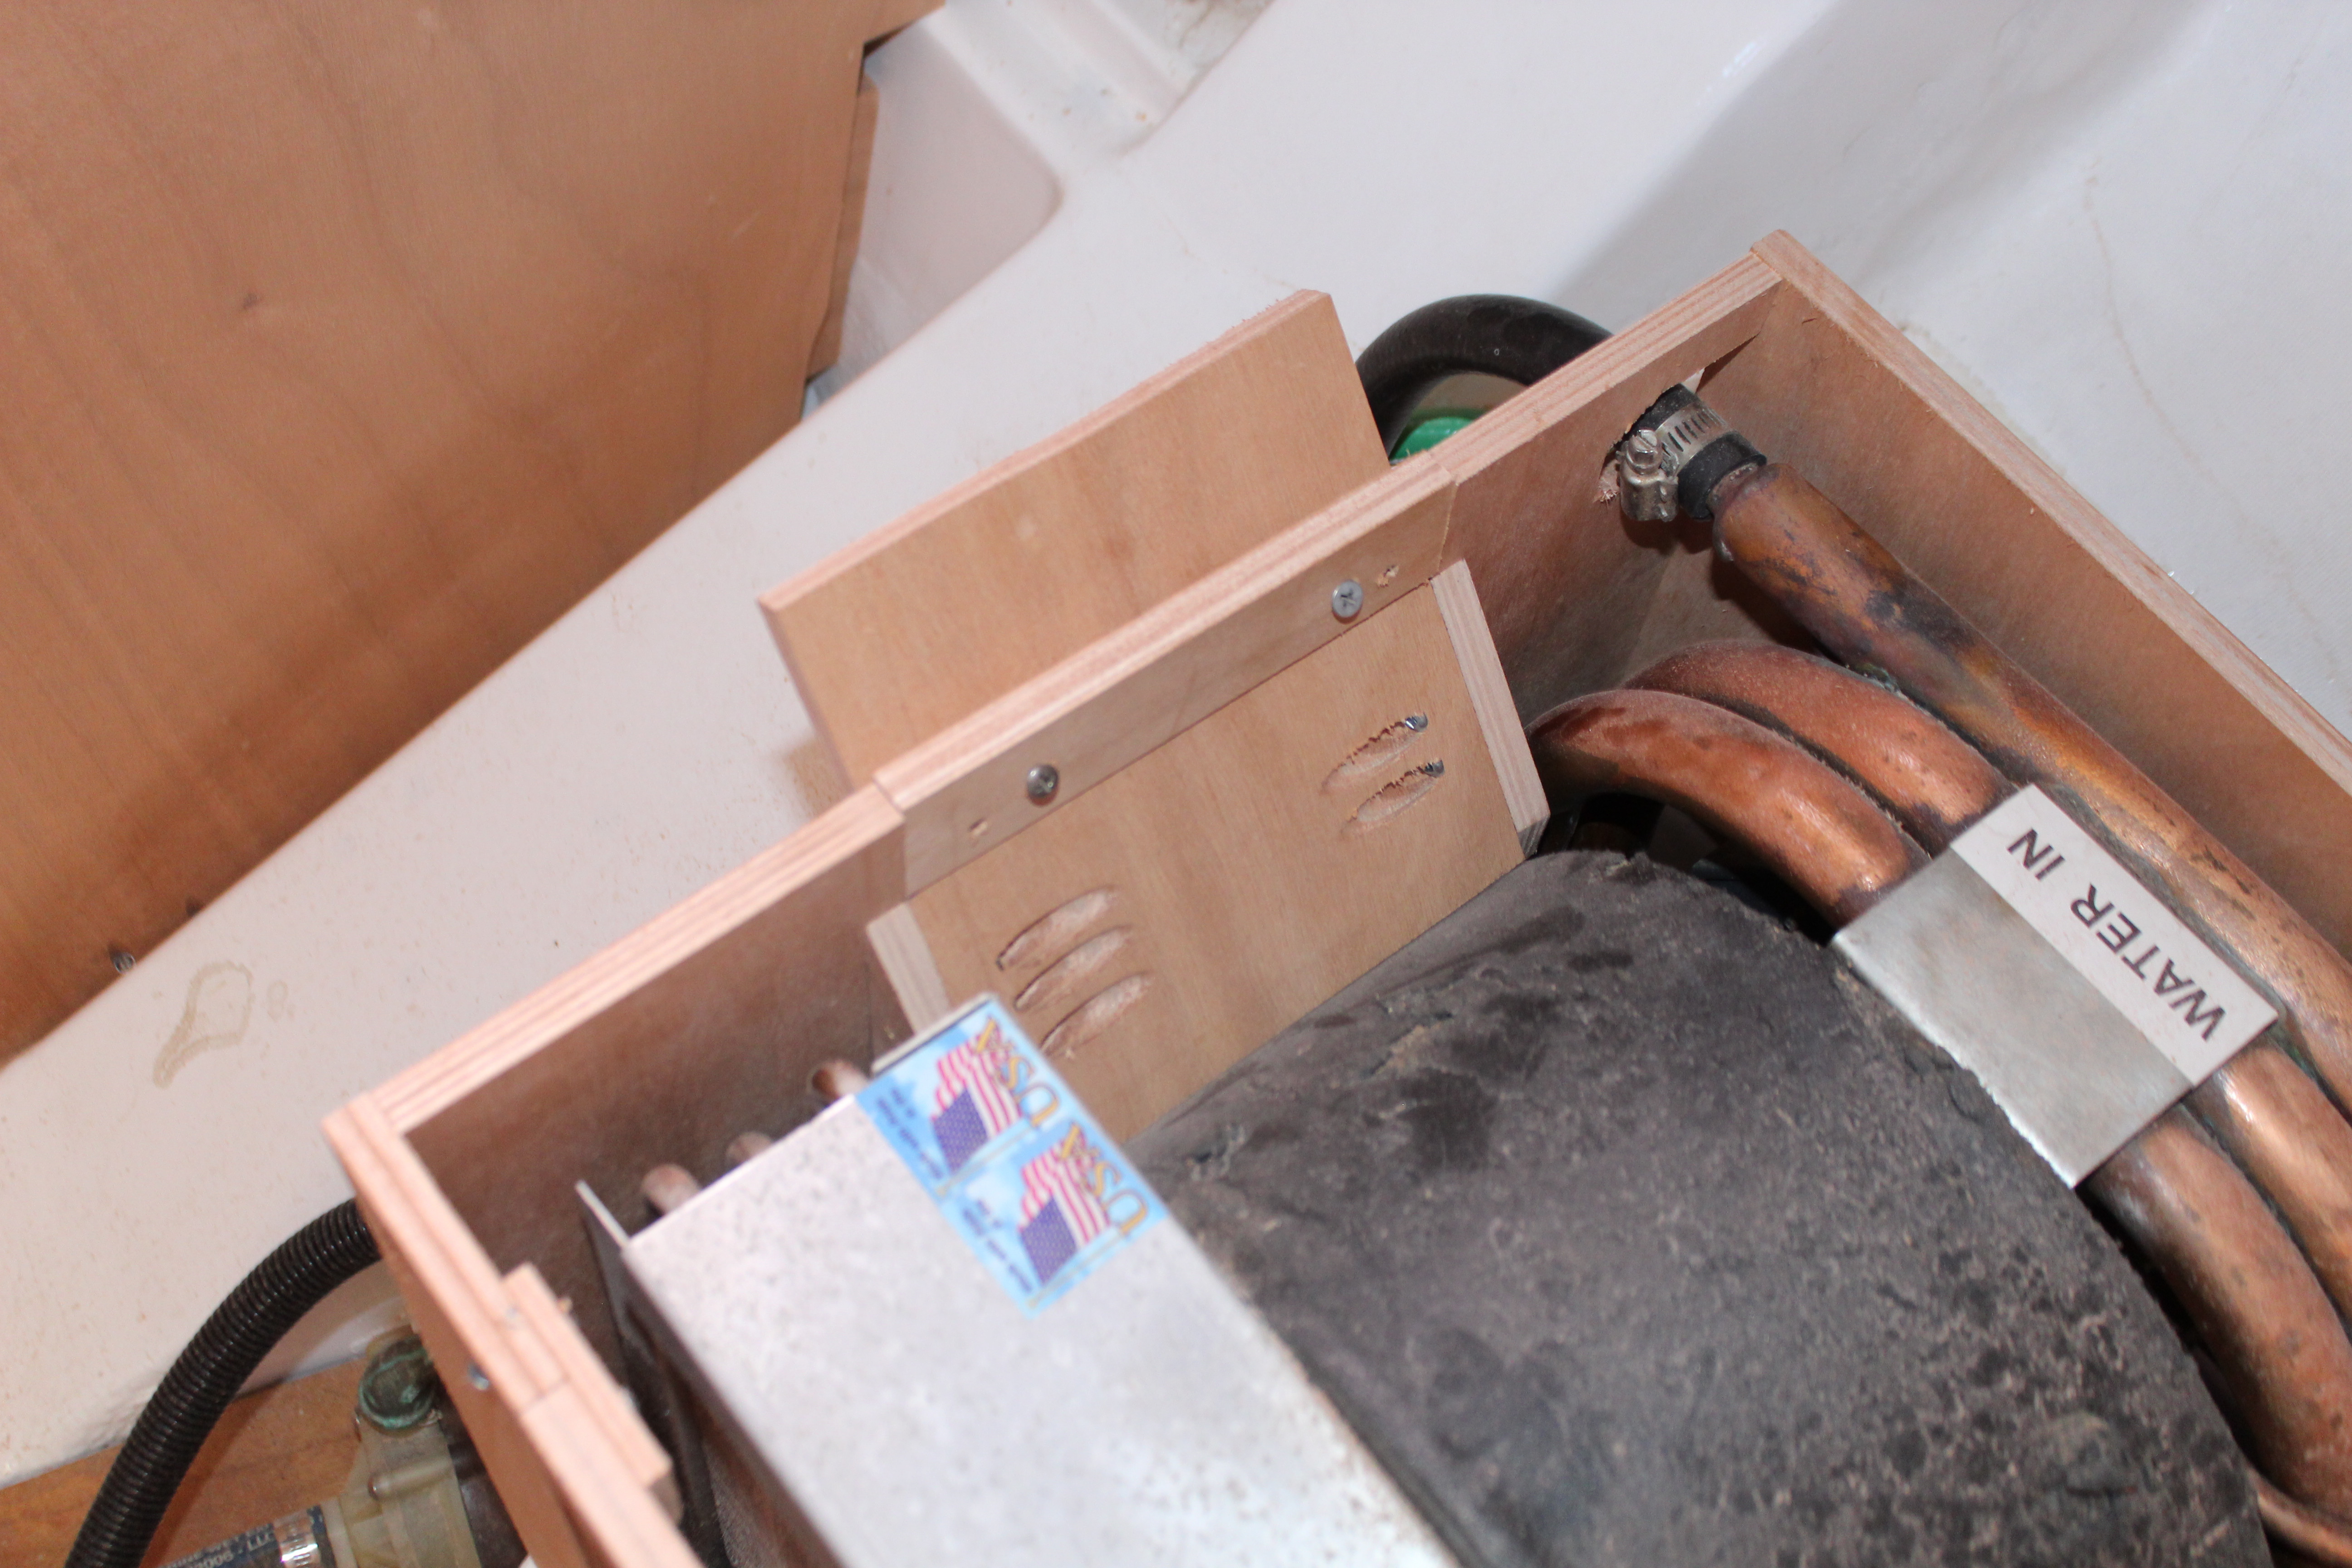
And fully enclosed:
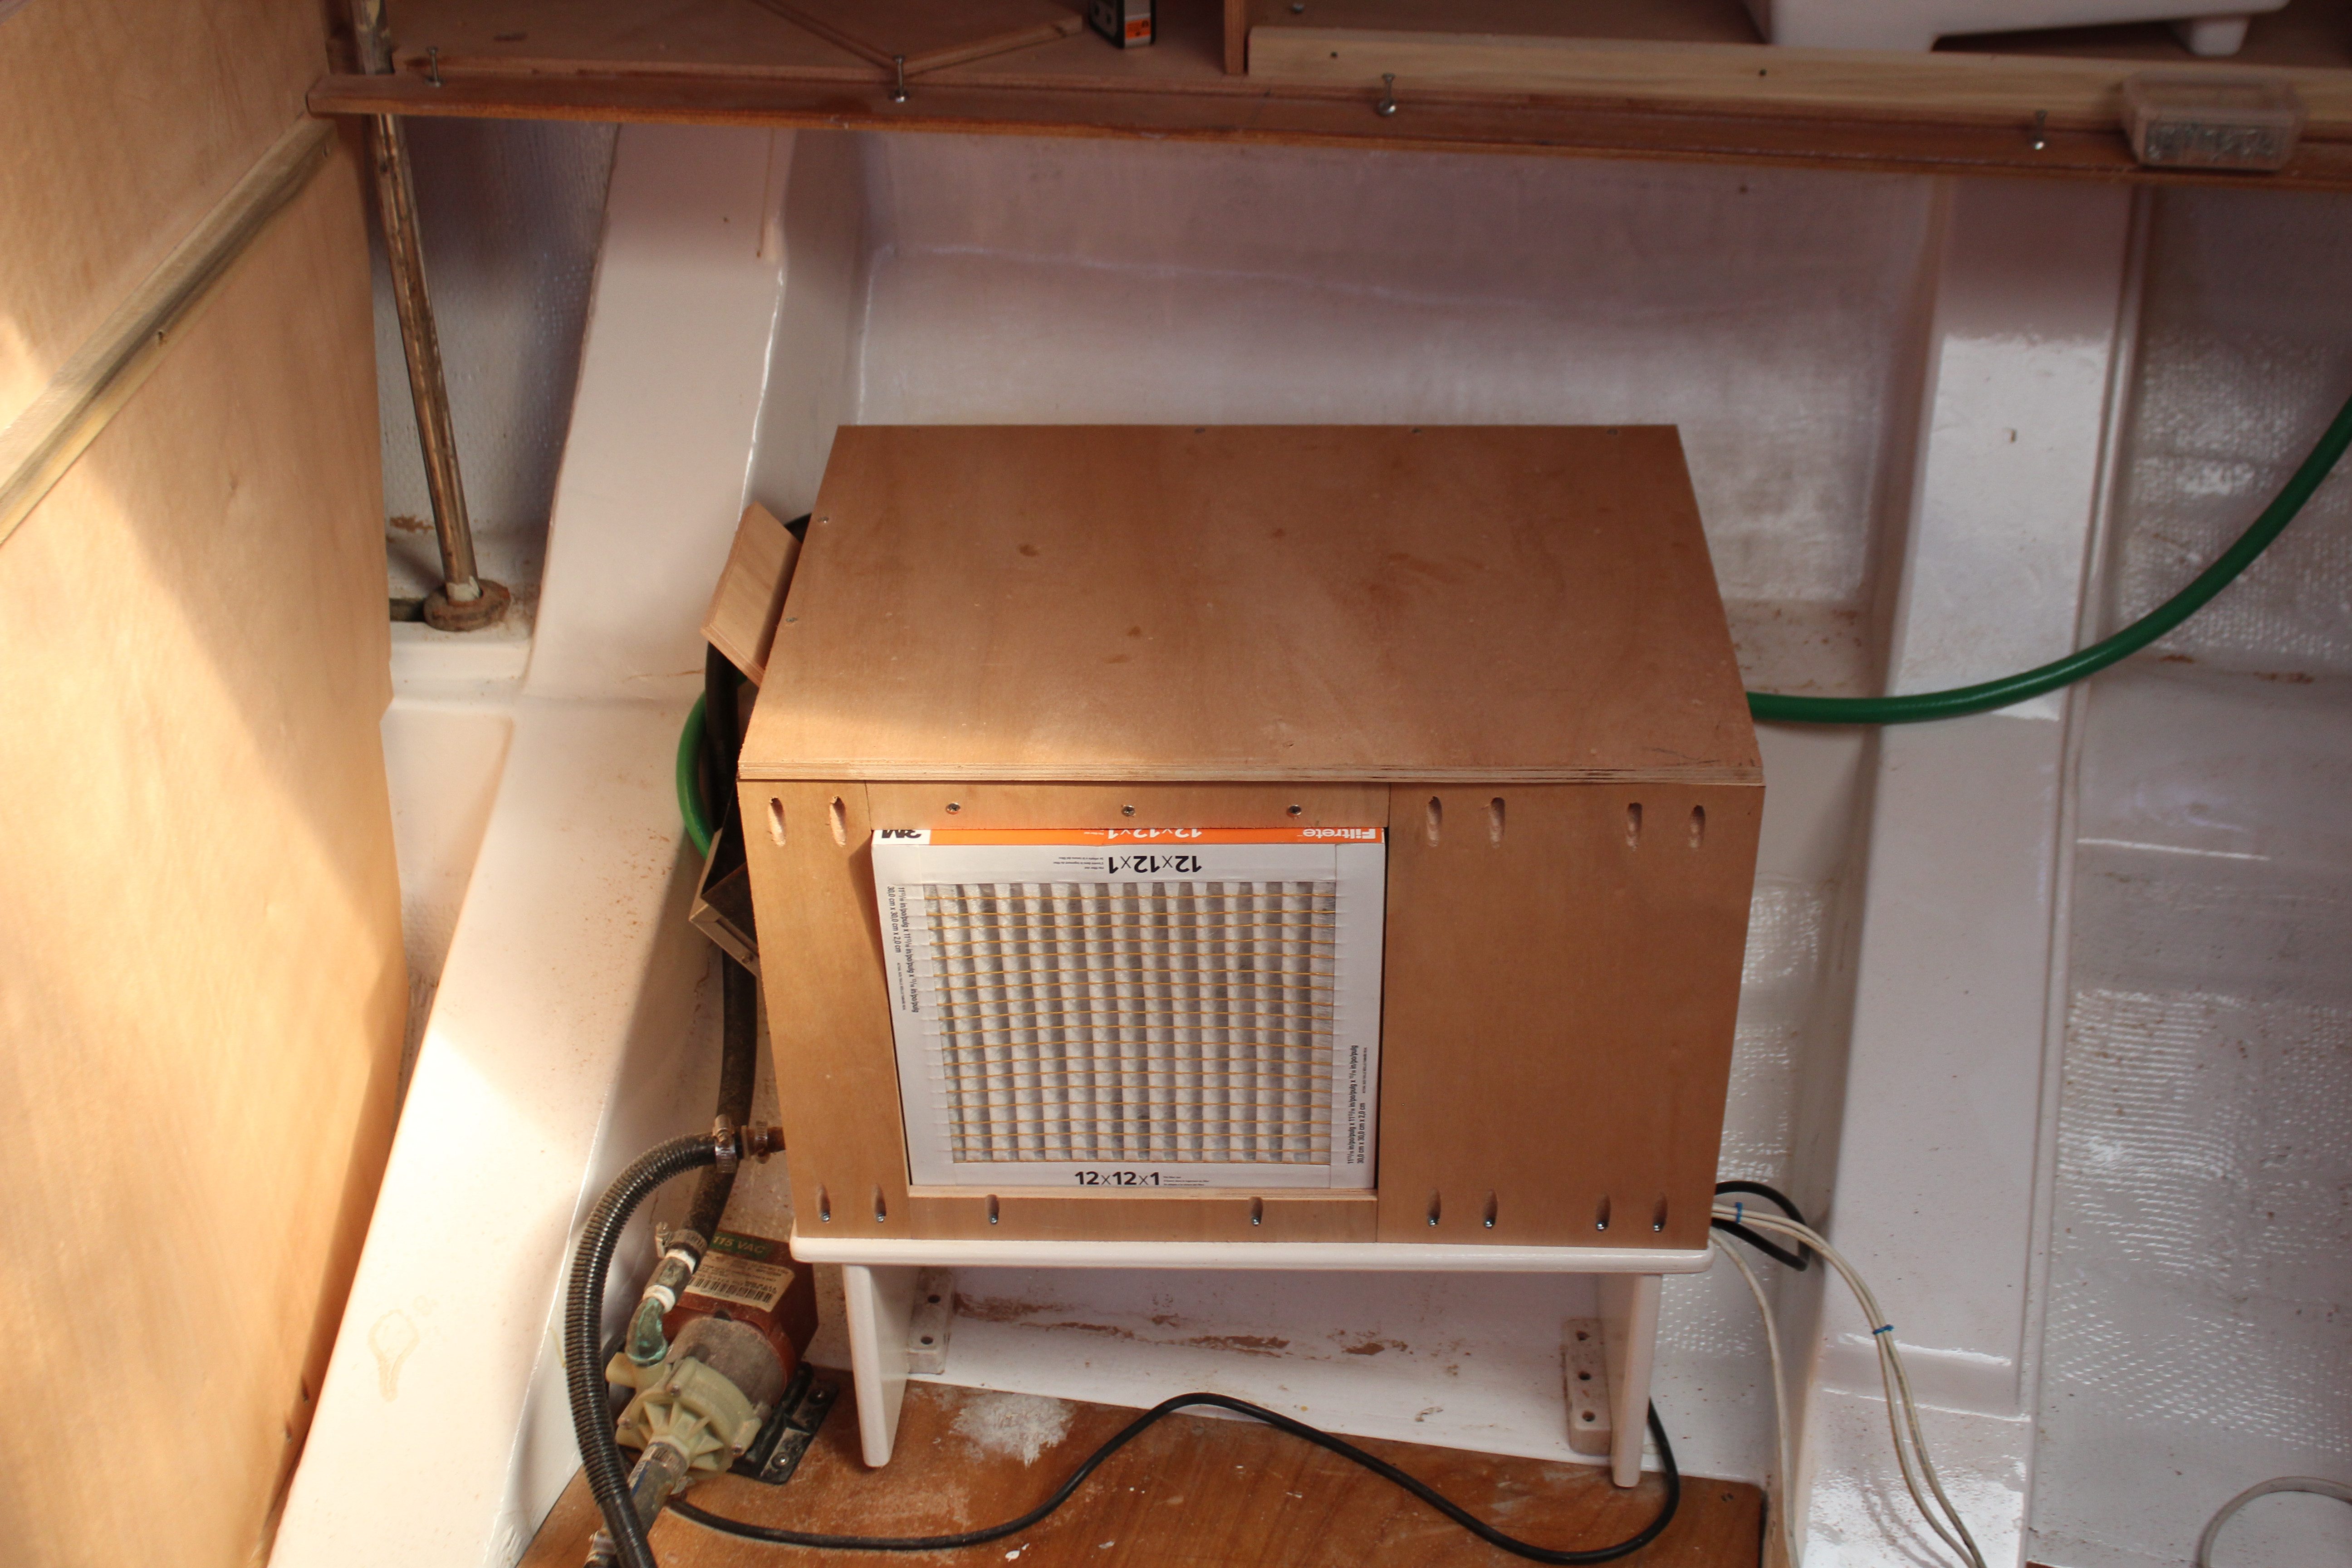
I tested the sound level before and after: with no enclosure, 71db, with the enclosure, 68db. Improved but not yet quiet enough.
Next up, the ducting and distribution manifold.
Cheers,
Mark
Having a/c is great (and essential for summers here!) but the temporary hookups should be - temporary! So time to cut some holes and make the ducting, plumbing and electrics more permanent.
I've had really good luck with the Flagship Marine A/C units but if I have one complaint, they are a bit noisy. So first thing is to build an enclosure:
I took some measurements and rummaged through my scrap pile and found just about all I needed without having to cut up any of my precious few remaining full sheets of ply. After getting the sides fabbed up I had to engineer a transition piece for the air outlet (you can see two openings, the large one is for the inlet air and the smaller is for the outlet):
This piece slots in to fill in and seal the upper gap:
And fully enclosed:
I tested the sound level before and after: with no enclosure, 71db, with the enclosure, 68db. Improved but not yet quiet enough.
Next up, the ducting and distribution manifold.
Cheers,
Mark
Can you put sound insulation around the outside of the box?I tested the sound level before and after: with no enclosure, 71db, with the enclosure, 68db. Improved but not yet quiet enough.
This is what I use.Can you put sound insulation around the outside of the box?
https://www.lowes.com/pd/SilveRboar...oard-Insulation-with-Sound-Barrier/1003011388
But I have a friend who is in the Air Conditioning business and he gives me one board free.
Jim...