Repairing Hunter 40 damage from Hurricane Matthew

May 8, 2013
629
Hunter 40 Dataw Island, SC
Aft head slowly becoming a head:

So the last few days have been lots of turning perfectly good wood into sawdust and at least one instance of "measure once, cut twice"! An inordinate amount of time was spent fitting the lower cabinet face to this spot:


I stuck with the factory cabinet base setting here because of the moulded areas. The actual cabinet face set at an angle to allow for enough room to enter and pass through the head. It took quite a bit of fitting, sanding, fitting, shaping, and fitting again to reach this:


And some more drama to fit the corner piece, but in the end I'm happy with the result:


You might notice I added a ply board to the toilet base location - the molded glass is just a little "springy" - not much but enough to notice so the ply will add support for the toilet. I added this support to the forward head a few years ago and it really helped, so now is the time to do it for the aft head as well.

Next up is working on the upper cabinet faces. No real drama here:


The toilet is there for measuring purposes only - it's not quite time yet to mount it. After the cabinet faces were trimmed and fit I pulled the counter tops to glue on some laminate:


I still have to add the shelves for the lockers but major pieces are finished in here, waiting for Stage II which will be paint and trim.

I got a little more done in the main cabin by adding to the shelf along the port side:


and cutting the locker opening here:


For the next few days while I have a good weather window I'll be working outside on the keel/hull joint and bottom sanding.

Stay tuned!

Cheers,

Mark
 
May 8, 2013
629
Hunter 40 Dataw Island, SC
The keel joint/barrier coat/bottom paint lalapalooza fiesta begins!:

For the first time in the last week I have some time to take a break and catch up on things, so here goes:

Due to some time pressure (the old maintenance guys at the yard are being replaced and the new ones are against DIY repairs) I have had to accelerate my timeline on finishing the bottom (and outside "obvious" repairs) added to a solid week or more of really good weather so the bottom is well on the way to being finished. Since I had spread out the descriptions of what I was facing with the bottom, here's a brief recap:

The keel joint originally didn't look too too bad, just some rust spots in 4 or 5 areas so I planned on just fixing those spots and calling it good. Upon further inspection (with a screwdriver and chisel!) I found this:


Lots more rust, bad multiple previous repairs covering even more previous bad repairs and more and more of the joint needing to be addressed led me to decide to sand blast the entire hull:


Exposing the remainder of the keel joint and more rust, plus a curious anomaly consisting of a 1 inch or more thick bit of fairing at the aft keel (the fairing had started failing :yikes:):


Which led to the discovery of a repair on the aft keel which I never knew about. It has been suggested that the repair was done due to chain chafe and I tend to think this is the best explanation. So time to repair the entire keel joint and do it right this time! Coming up will be several posts covering daily progress so strap in and grab some popcorn :biggrin:

Cheers,

Mark
 
May 8, 2013
629
Hunter 40 Dataw Island, SC
The keel joint/barrier coat/bottom paint lalapalooza fiesta, Day 1:

After sandblasting I got a good look at the remainder of the keel joint and could start formulating a plan. The sandblasting also left a really rough surface on the hull which would need sanding so I had been working a little bit at a time on that. It also left lots of random pits and mini-craters in the hull where the pressure from the sandblaster had exposed weak spots in the gelcoat. These are probably less normal in newer boats with better layups from the factory but I suspect all of us with older boats would see the same thing due to how gelcoat and glass layups were done "back in the day". I used a bull nose router bit chucked up in my drill to open up these pits and craters so I could add filler, so when you see lots of filler patches in photos, that's what they are. I kinda went nuts here, no defect too small :thumbup: and I addressed a few spider cracks in the gelcoat as well.

I also needed to clean up the keel joint, inspect it and fix the rust of the keel so in the previous weeks I had been grinding, gouging out the joint and treating the rust. What I found was that the actual seal at the joint was still good but poor repairs had exposed a lot of the keel to rust, spreading along the edges. I dug out the outer surface of the sealer and ground off all the old filler so I could have a clean baseline to start with.

Next up, the plan. Instead of 5200 to fill the joint I planned on using West Systems G-Flex. One of my neighbors did this to his Hylas 54 and that repair is still going strong (and is the only thing that has worked for him). I also needed to fill some areas along the joint with something, and an inch of filler was not going to be the answer! I marked areas that would have a glass layup to add bulk before filler so I patterned and cut the glass. And I needed to think through a longevity solution to (hopefully!) make future repairs easier to spot and fix - because face it, keels flex and eventually the joint will open up! On to Day 1:

With everything prepped and ready, first task was to fill the joint itself:


I started with a non-modified mix of G-Flex squirted into the joint to fill the gap. Then I added some 406 colloidal silica to the G-Flex and went over-top - not as a final filler but to "bridge the gap". There was one area of the joint that I had to treat a little differently though:


Forward of the sump you can see that the joint is really close to the hull so I left that area for now.

Next up was adding the glass. The first two areas needing the bulk were the nose and forward keel flanges:


The glass was not laid over the joint, only on the hull itself. Four layers of 1708 on the nose, two layers around the flange. Finally I glassed the aft keel area surrounding (but not covering) the repair plates:


Total of 8 layers here. I really really dislike any more than 1/4" of filler anywhere and prefer 1/8" or less. I did have to grind down some of this layup later to flatten it somewhat.

End of Day 1 :biggrin:

Cheers,

Mark
 
May 8, 2013
629
Hunter 40 Dataw Island, SC
The keel joint/barrier coat/bottom paint lalapalooza fiesta extravaganza, Day 2:

Glorious, glorious sanding! Lots of sanding. I had to stop twice to remove the filter in my vacuum and beat the dust out of it. The total bottom sanding has consumed over 200 40- and 60-grit discs and close to 100 80-grit discs - so far :eek:. If I had been thinking I might have tried to find an electric variable speed D/A sander - the single speed sanders tend to spin at an RPM too high for rougher grit sandpaper which wears the paper out prematurely, and my portable air compressor is too small to run an air-D/A. But I digress . . .

Lots of sanding continuing on the hull, the keel and all the resin drips from the previous days' layup. Wasn't thinking there - I should have wiped that up because these drips took way too long to sand down! :yikes:

Next up is the remaining part of the keel joint I had left from the day before:


Here I decided to treat it slightly different since it is so close to the corner. I mixed up some more G-Flex with 406 and created a fillet which blended and covered the joint and hull corner. With this done I could retire the G-Flex and shift to regular additive (407) for the first round of fairing:


On the sump there wasn't really a fillet so I added filler to increase and match the fillet forward of the sump and to blend into the keel flange(s).

I finished the day by grinding down the high spots in the aft fiberglass layup and adding filler, round 1:


as well as continuing on filling the repair spots on the hull. At this point I was in desperate need of a shower, a beer and a massage, in any order!

End of Day 2 :thumbup:

Cheers,

Mark
 

CYQK

.
Sep 11, 2009
576
beneteau first 42 kenora
Feel your pain
Even with full body gear still the bottom paint burned when i grinded it all off
What a relief it will be to you when it is all done
 
May 8, 2013
629
Hunter 40 Dataw Island, SC
Feel your pain
Even with full body gear still the bottom paint burned when i grinded it all off
What a relief it will be to you when it is all done
I was lucky that I had access to a sandblaster which removed most of the old bottom paint, saving me that agony!
 
  • Like
Likes: limbodog
May 8, 2013
629
Hunter 40 Dataw Island, SC
The keel joint/barrier coat/bottom paint lalapalooza fiesta extravaganza marathon, Days 3 & 4:

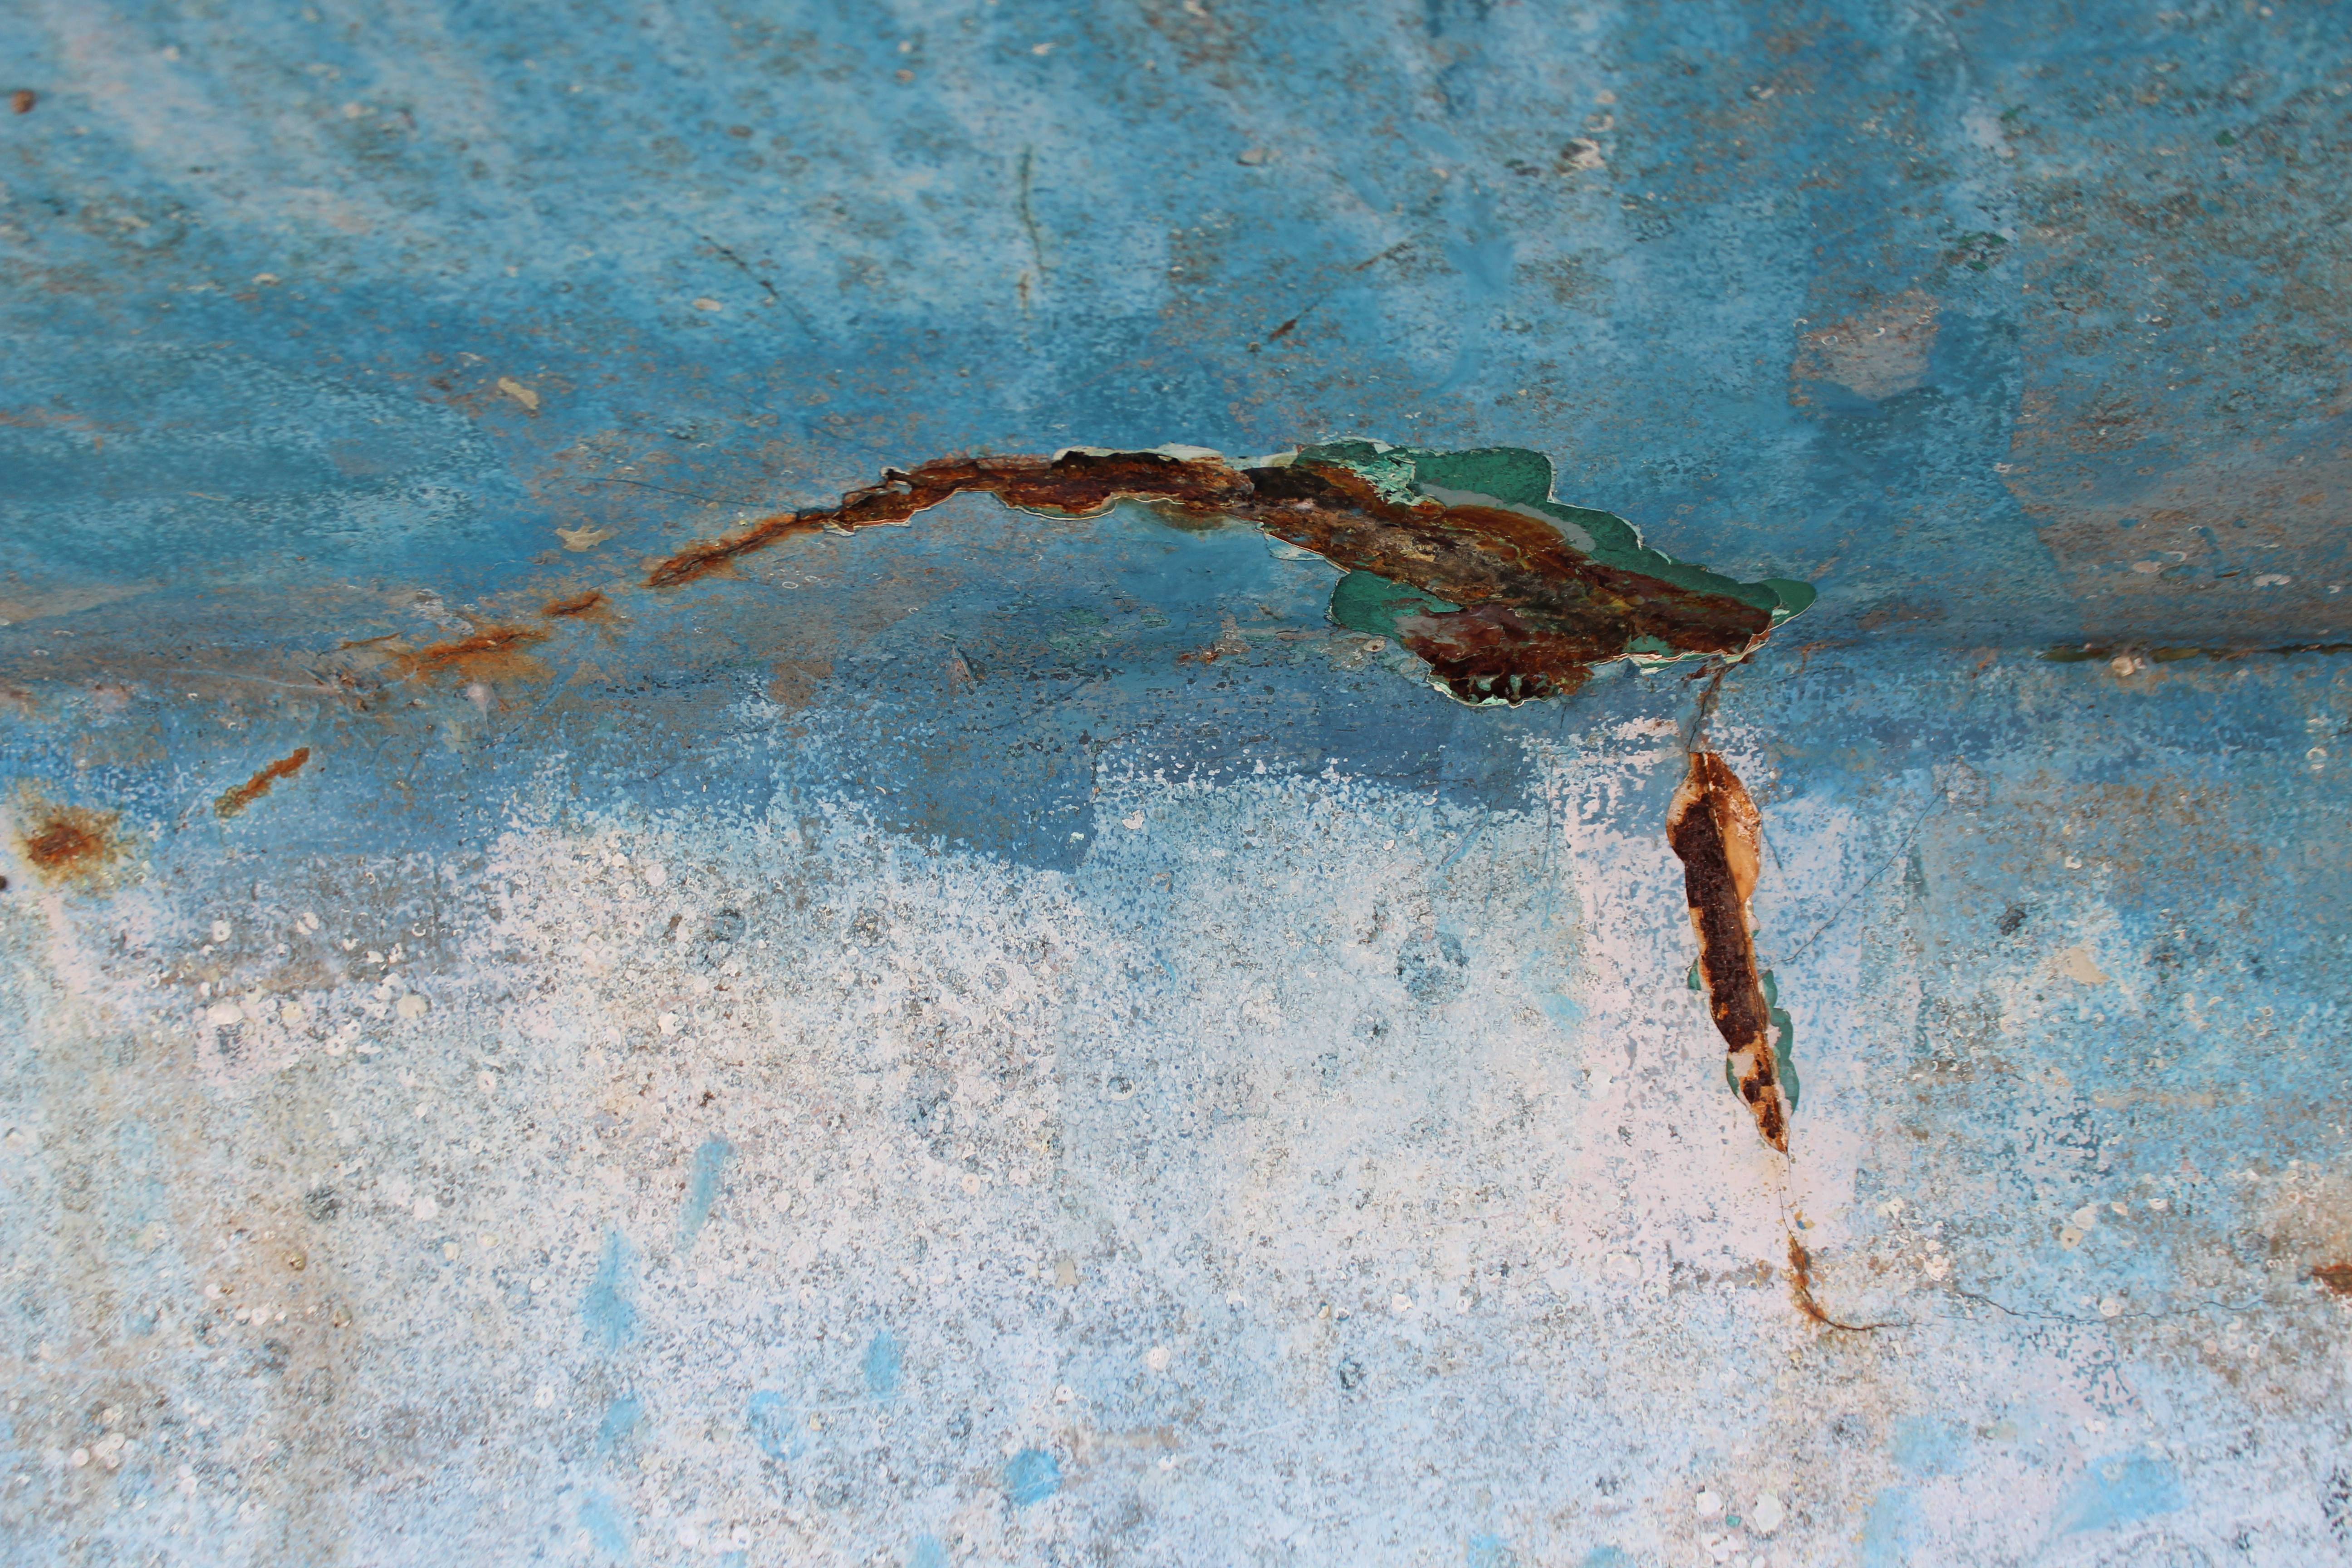
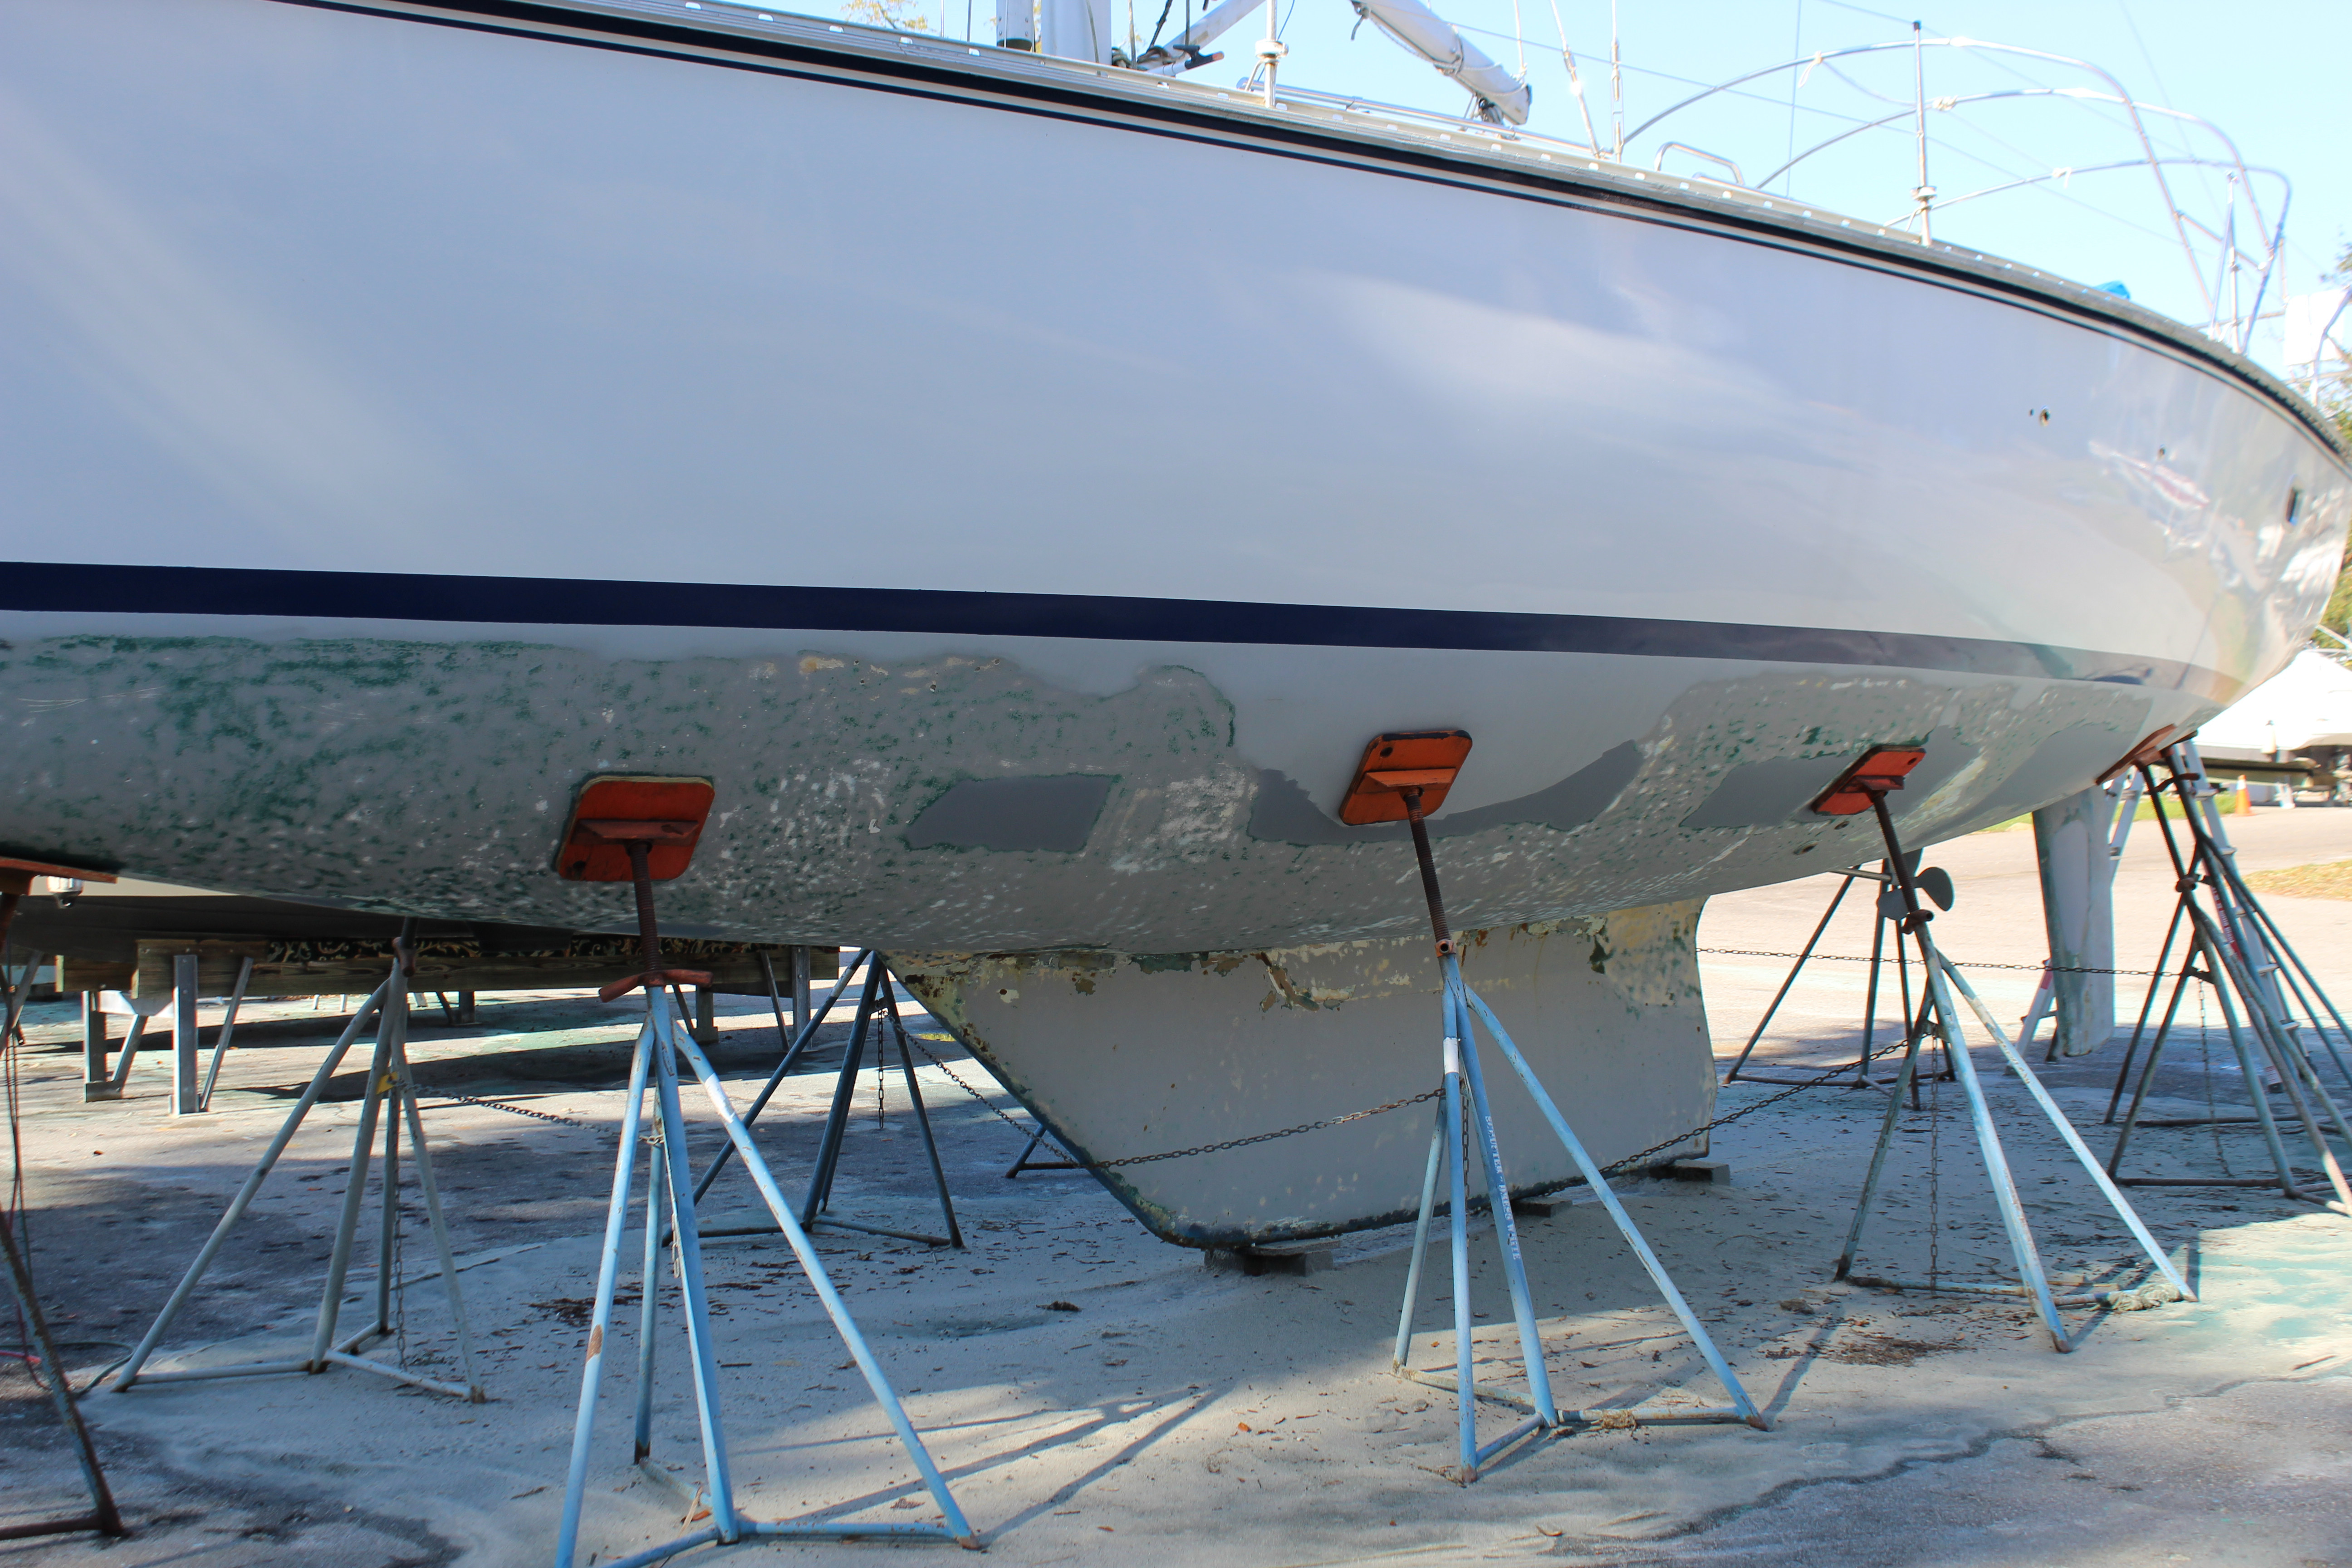
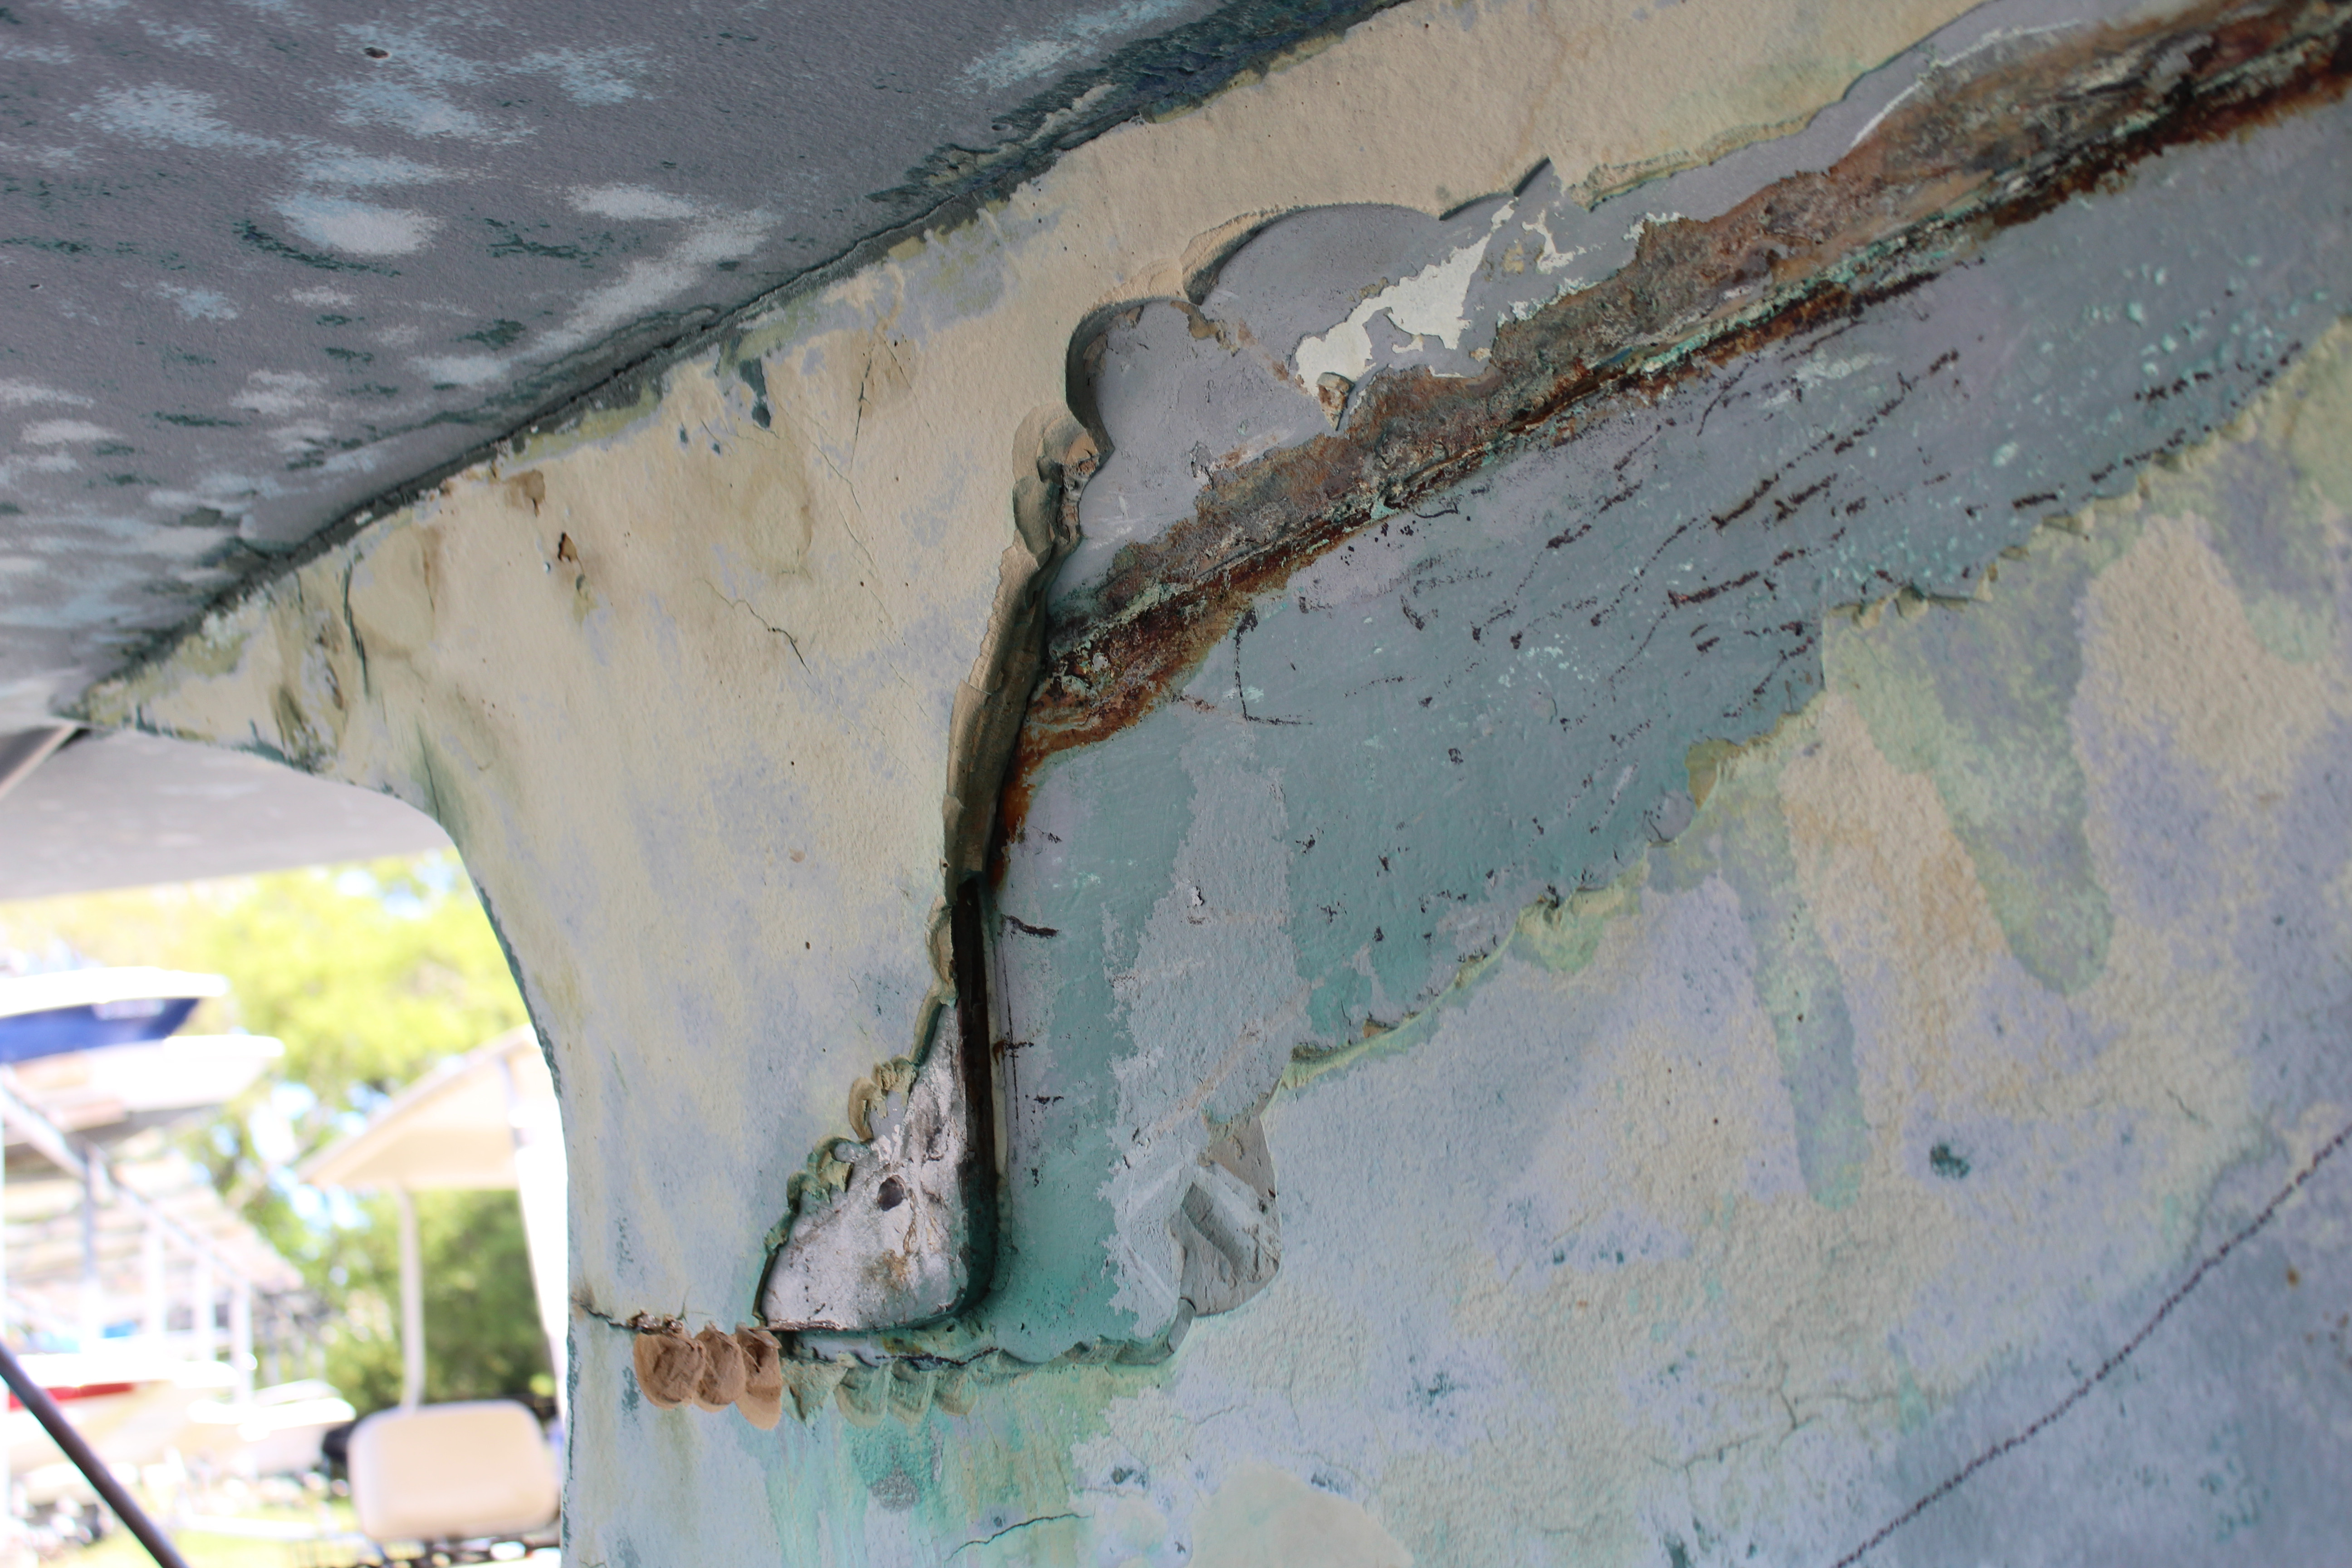
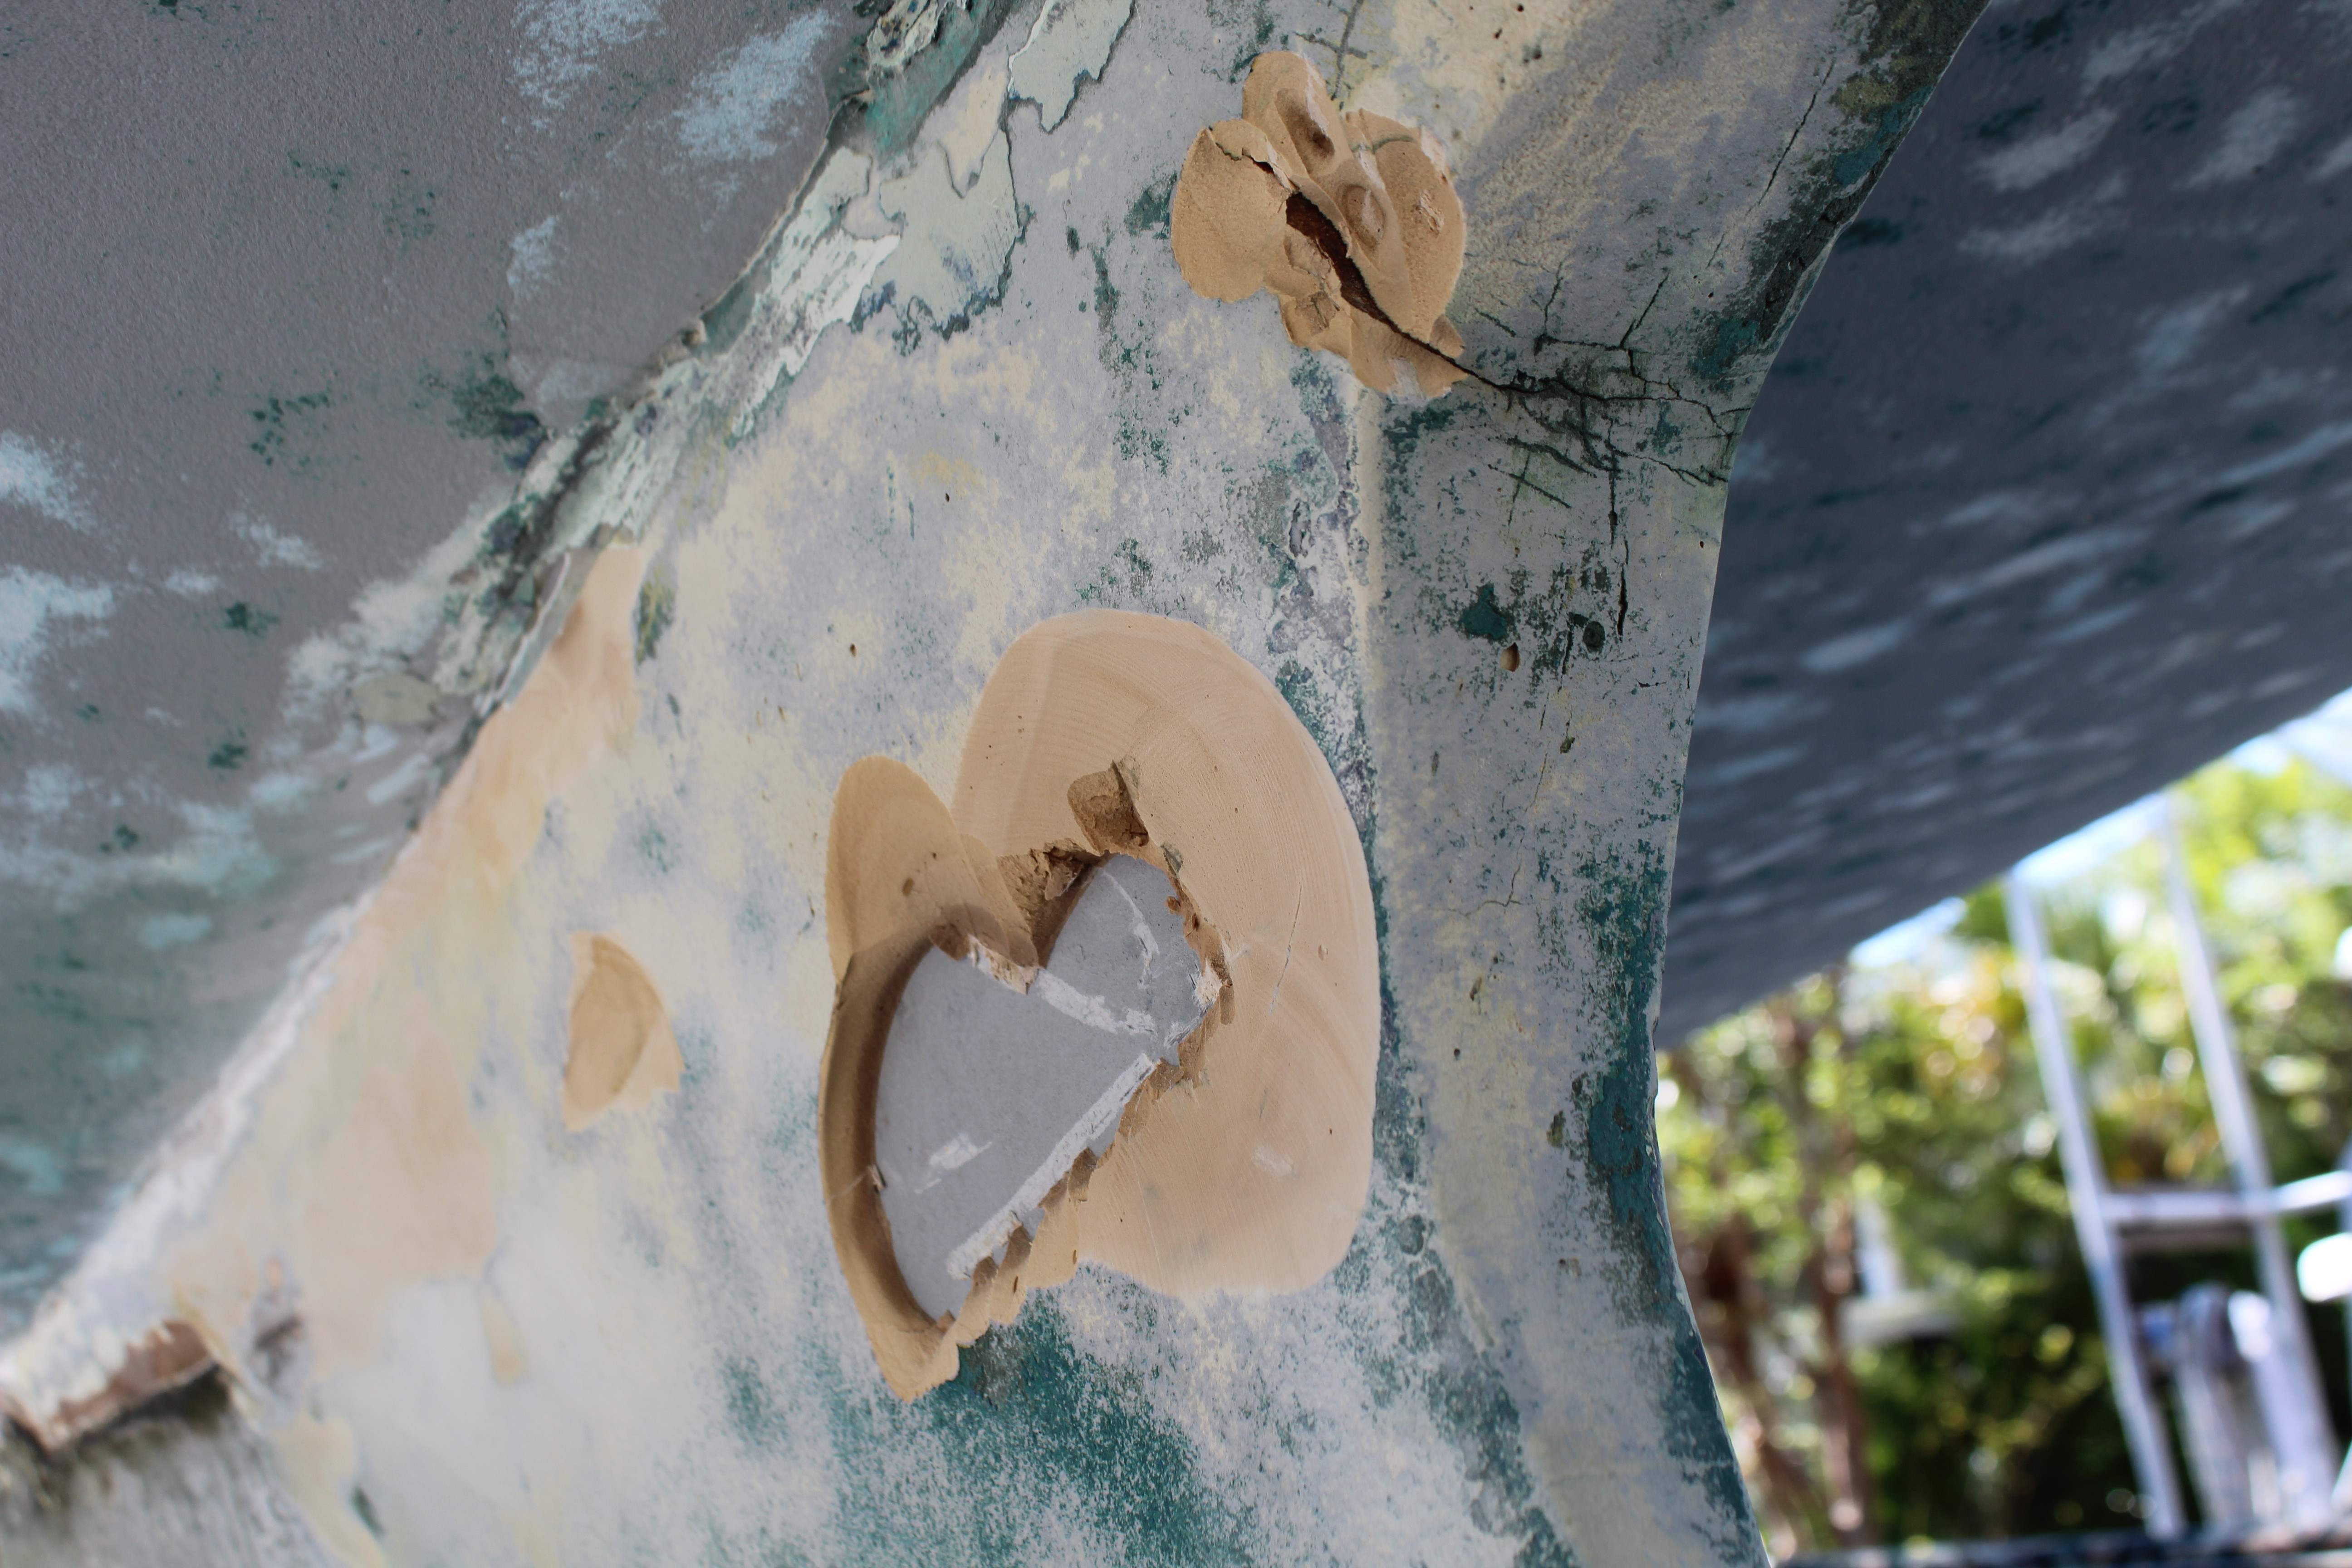
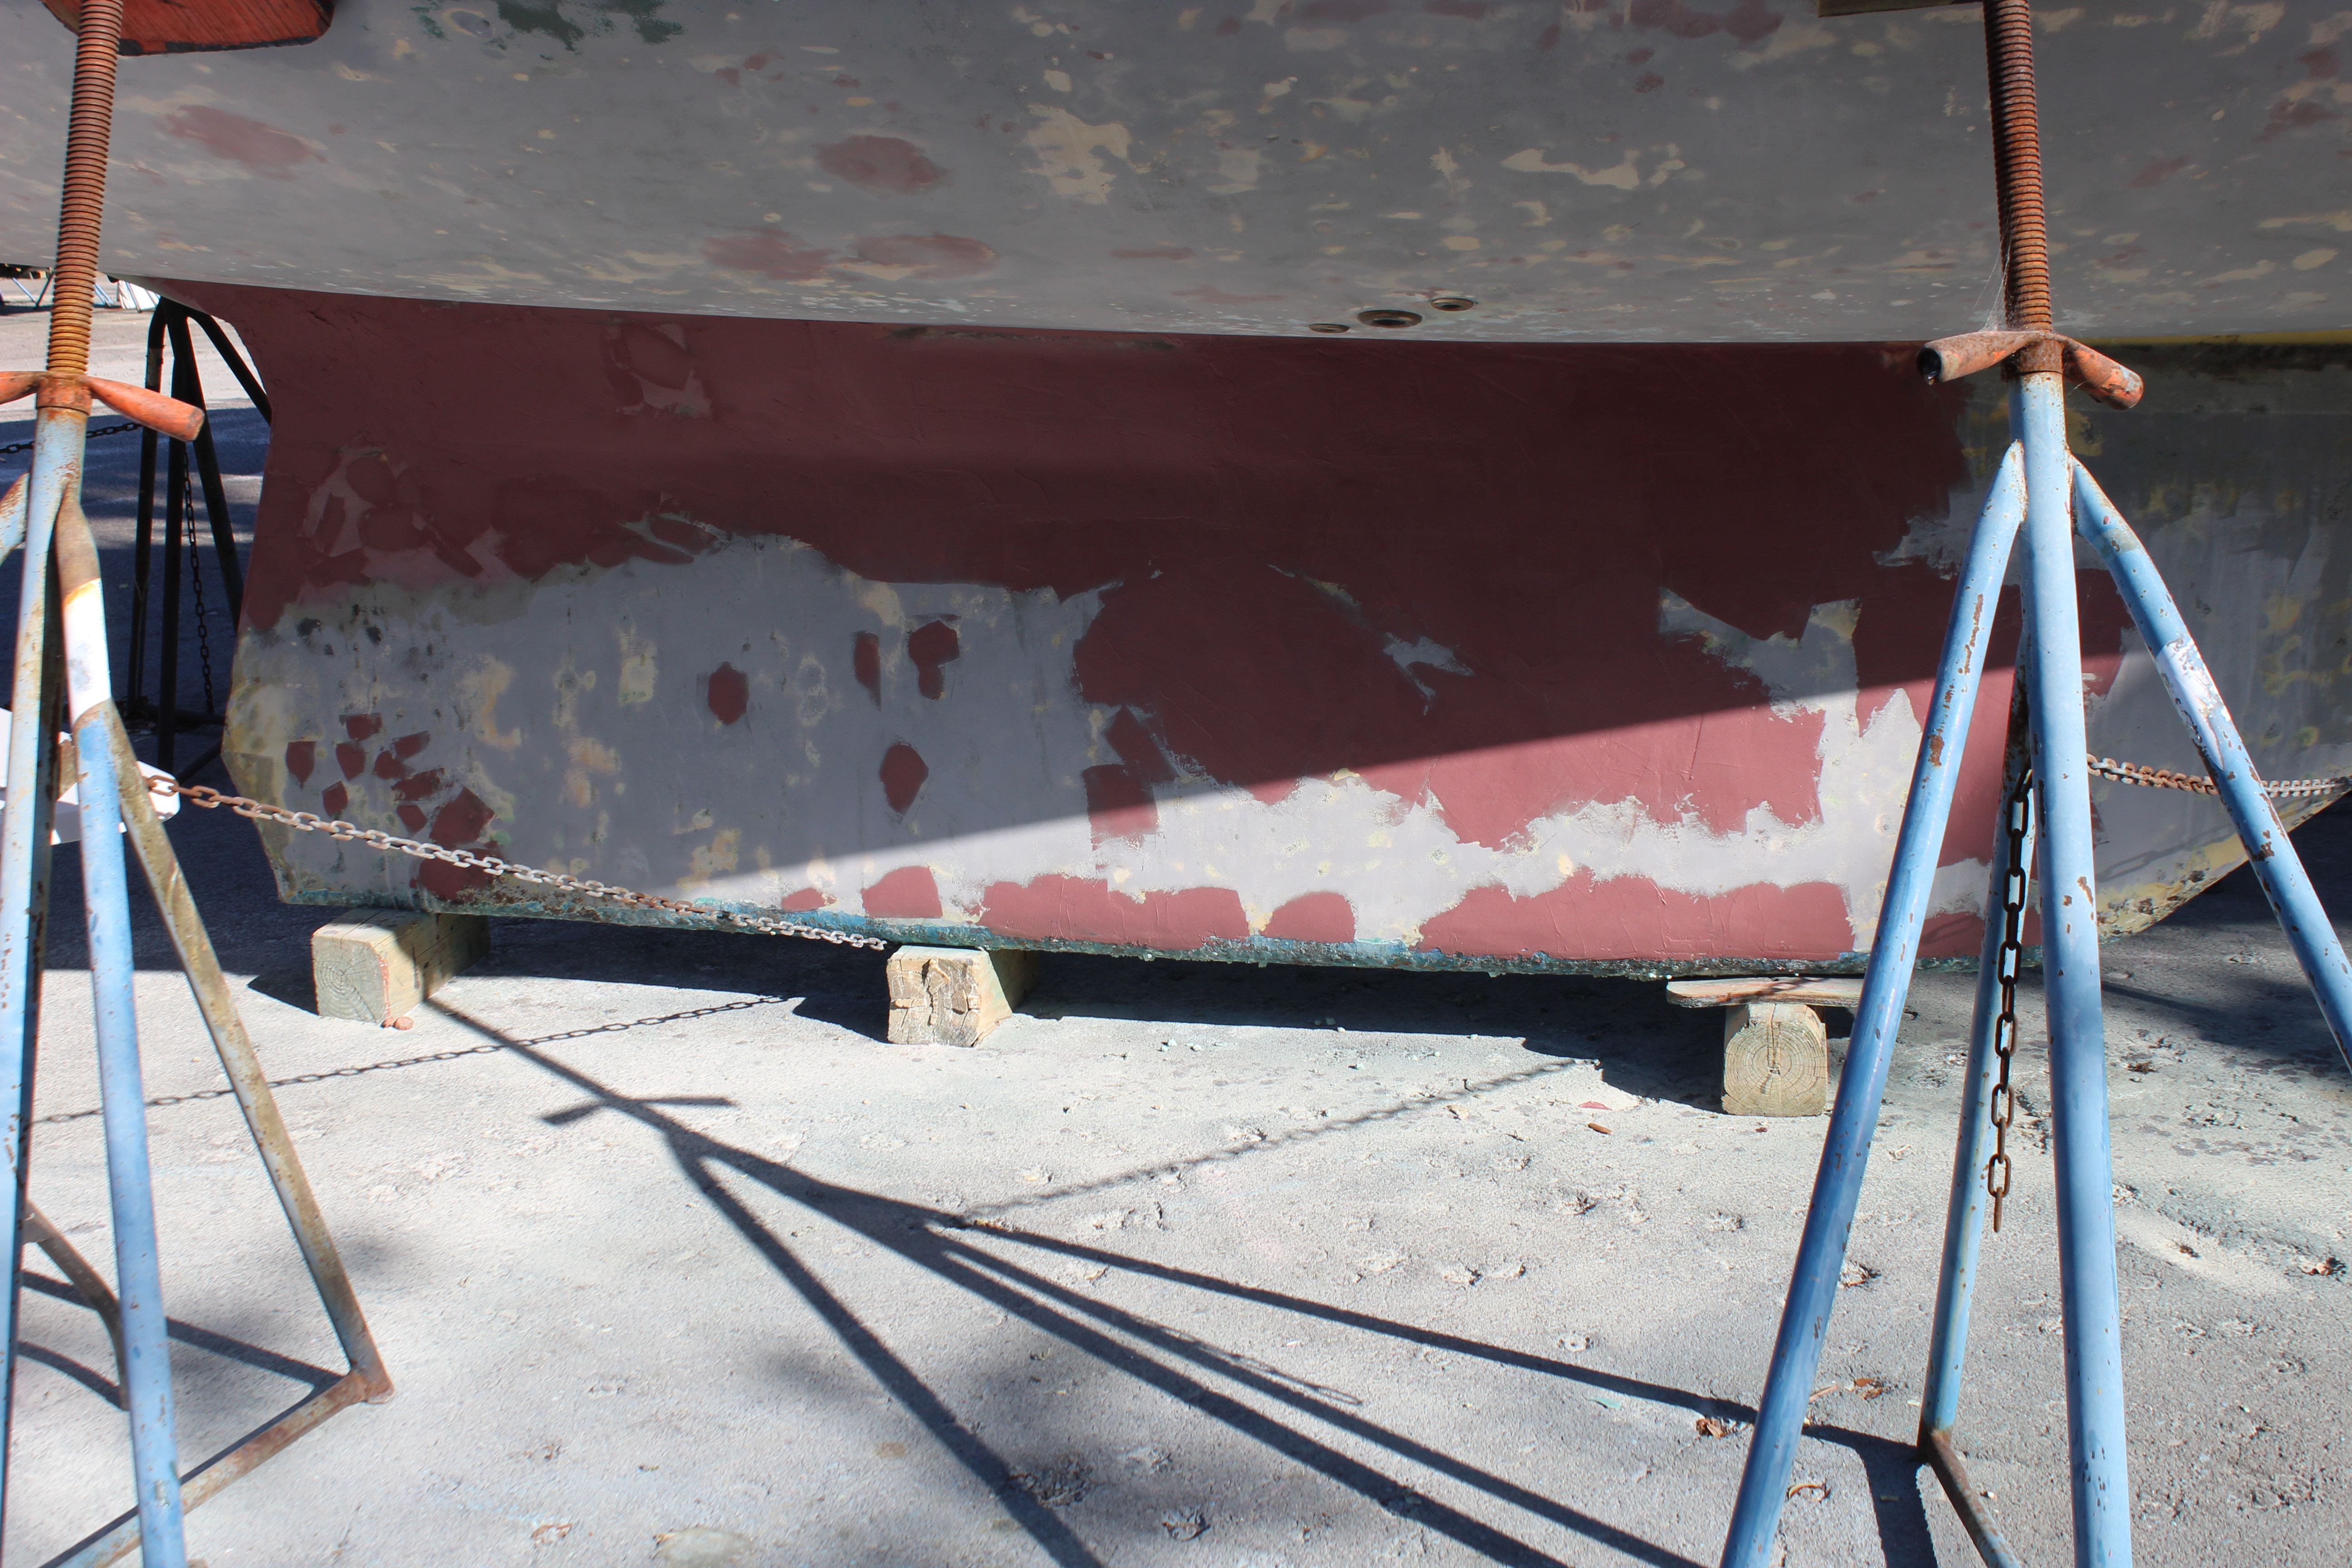
Another day, more glorious glorious sanding! Day 3 started with sanding and cleaning up the entire keel joint from the nose back to the aft flange. Aft of that I had already glassed and started fairing. In addition I finally got the balance of the hull sanded and the craters filled. In the middle of this I uncovered/discovered an actual blister! Went over a seemingly benign spot on the hull with the sander and - low and behold about 10 minutes later a small spot had brownish liquid oozing out of it :eek:. So, out with the grinder and a bit later, no more blister.

The balance of Day 3 was doing the following, which might elicit howls of anguish from some of you guys! First, what I did. Then, why ;)

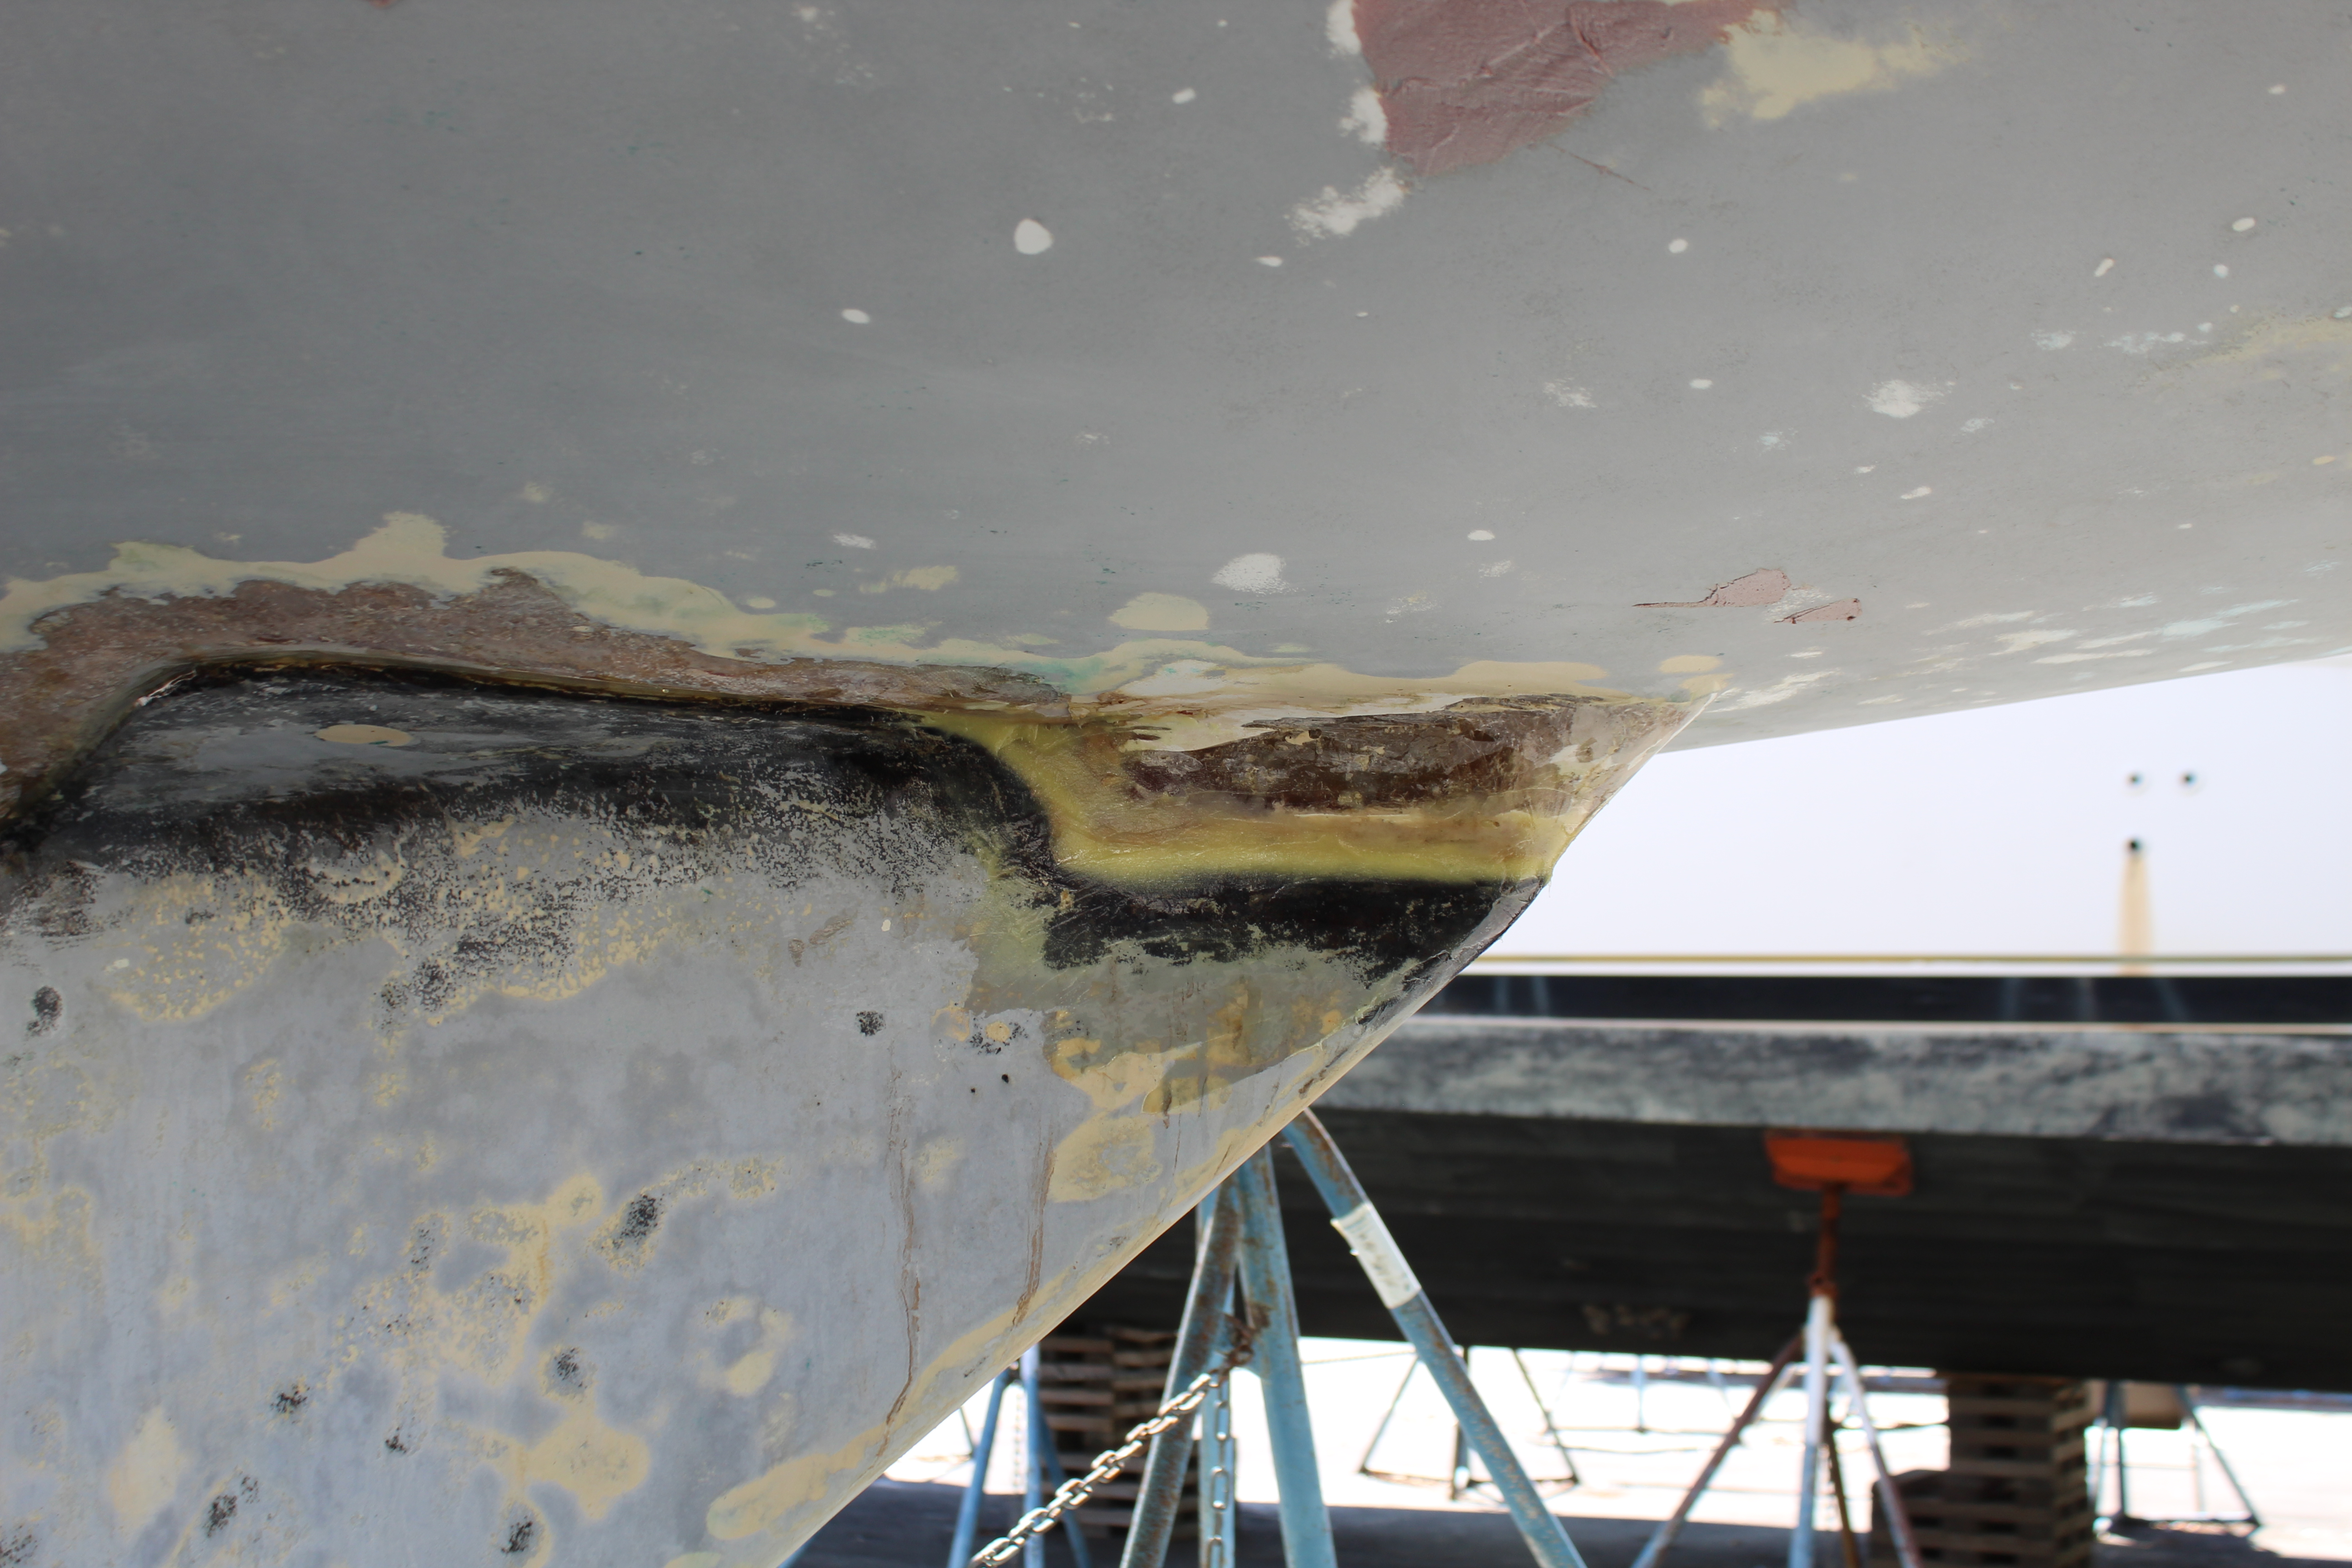
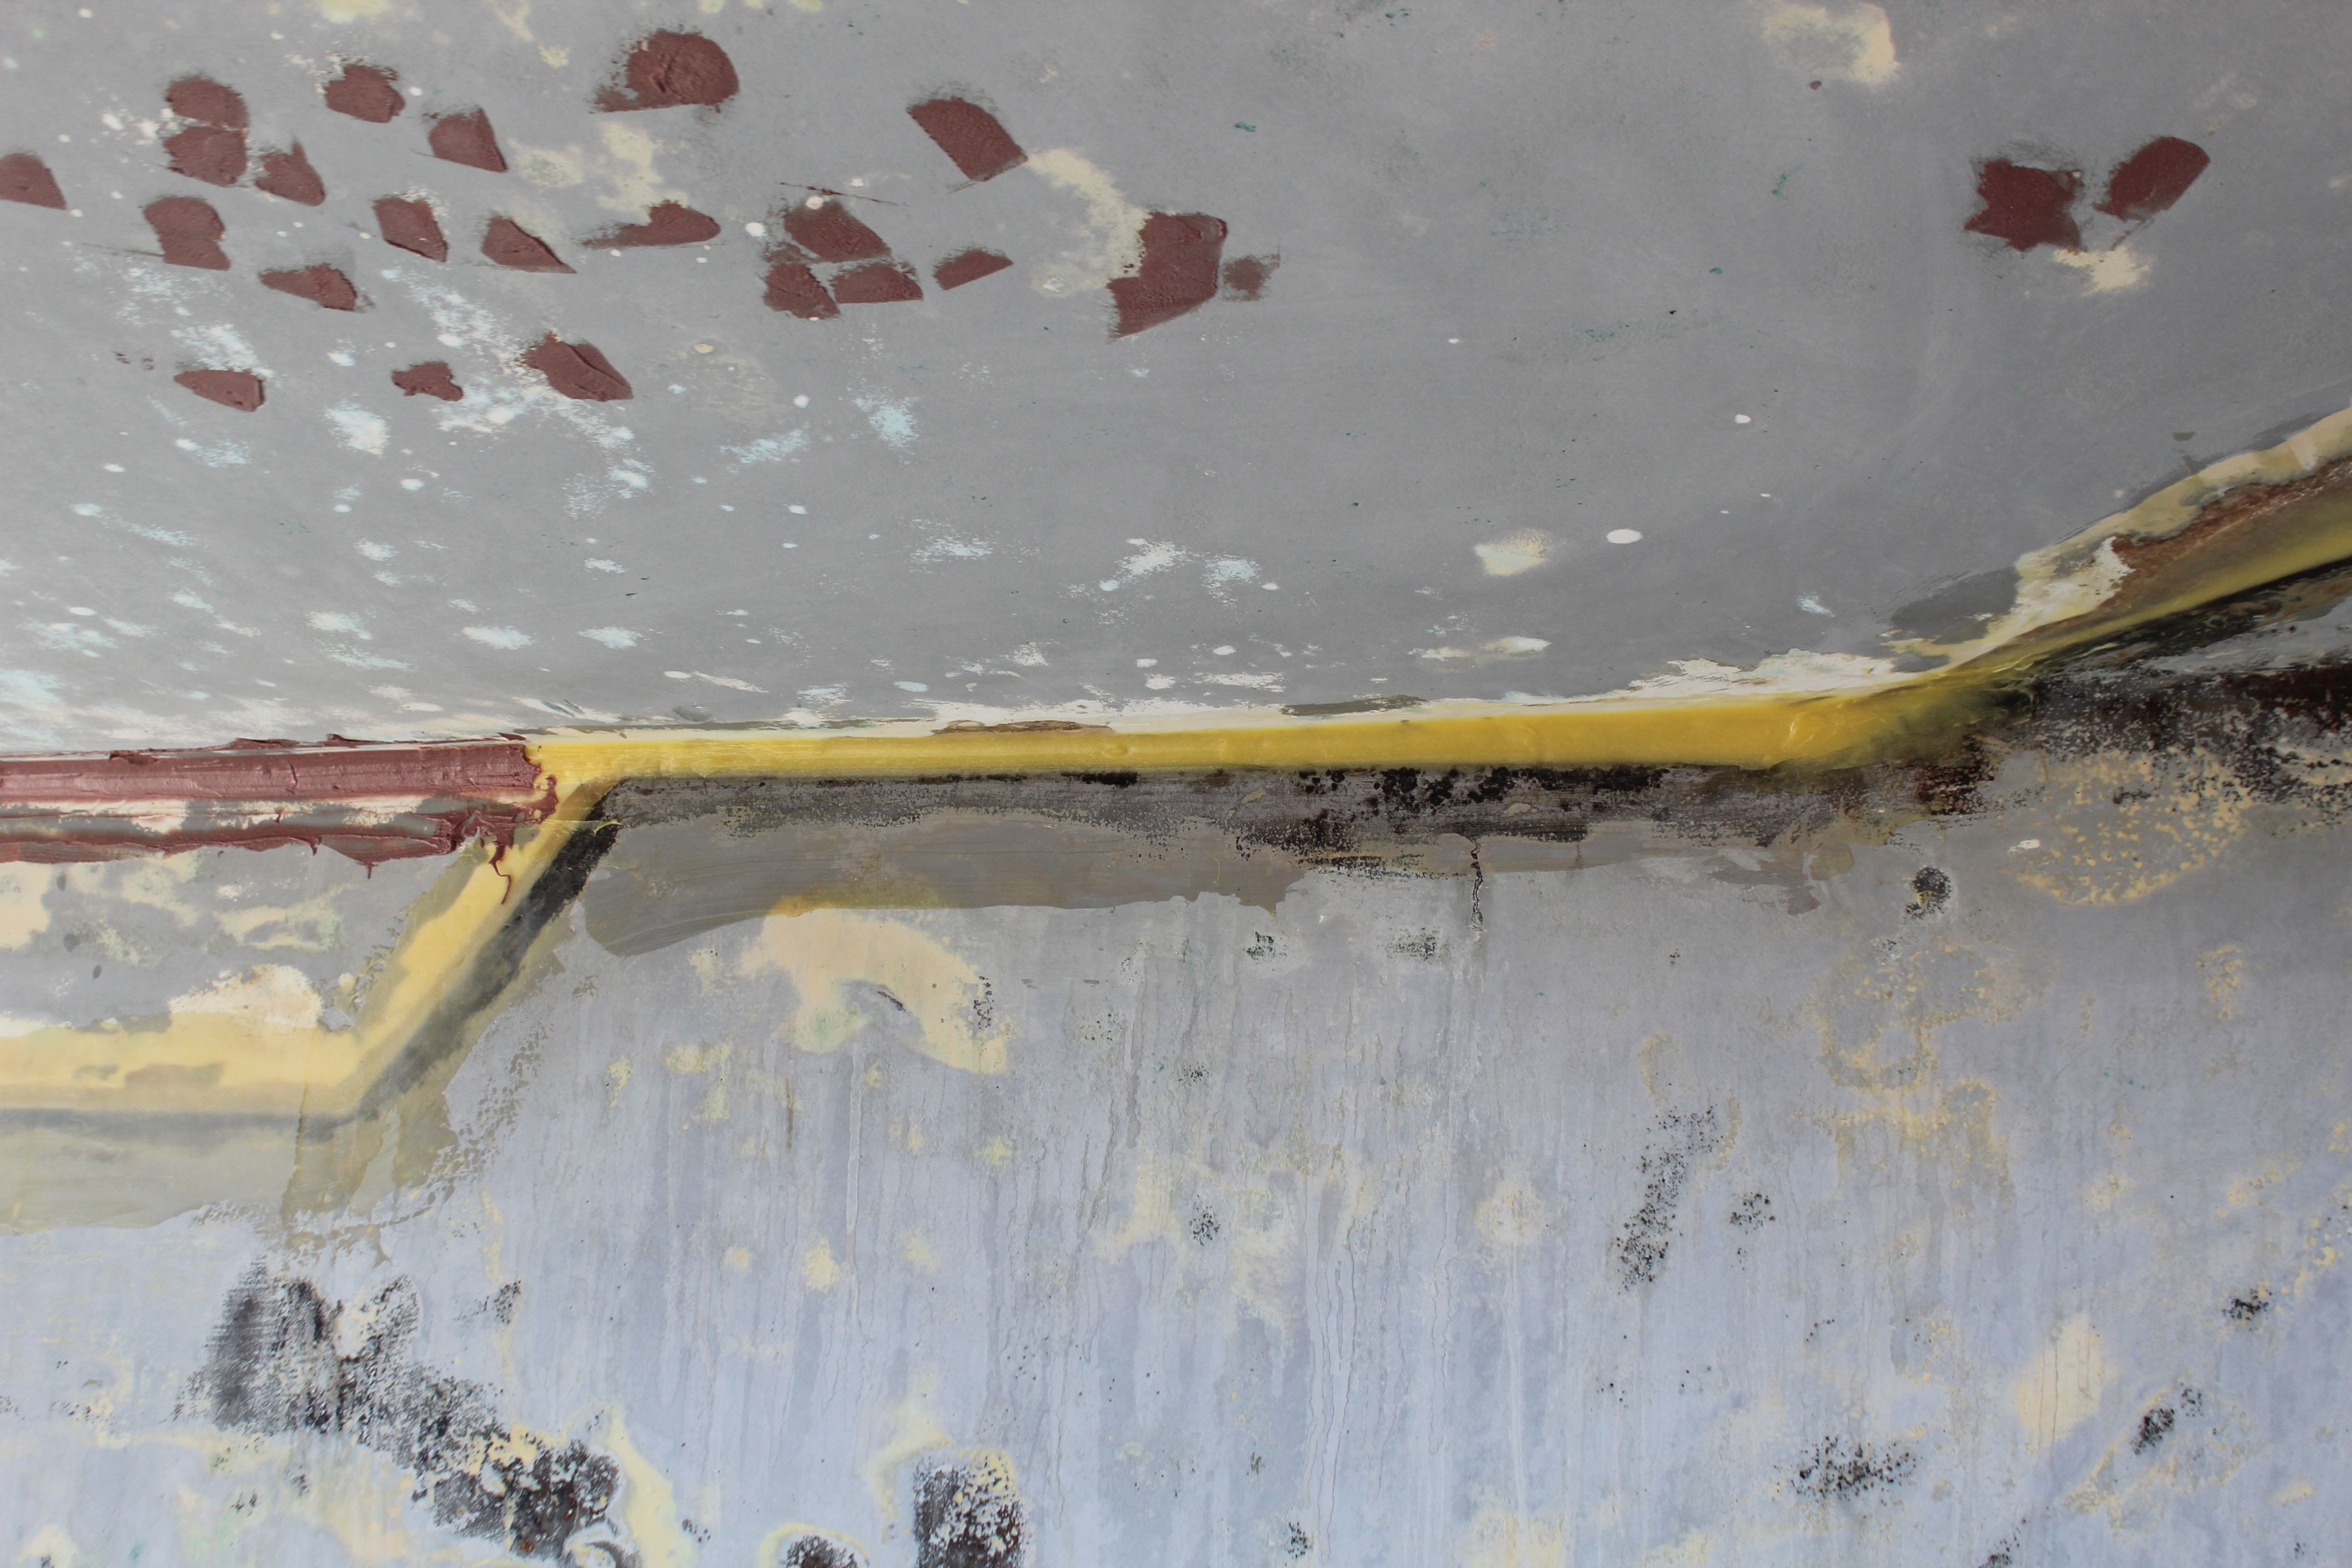
The sanding prep along the keel joint was so I could apply a single layer of 6 oz. chopped strand mat completely covering the keel joint :yikes:. The CSM extends about 3 inches above and below the keel joint, essentially encapsulating it entirely.

Insert protests/complaints/confused looks here.

Now, why did I do that?? My thinking is, and if you've ever just glassed a single layer of 6 oz. you'll know, is that a single layer of CSM is really flexible and it "should" have about the same "give" as the G-Flex does. So, instead of fairing overtop the G-Flex (and believe me, fairing compound has absolutely NO give!) I will have a layer of glass below the fairing compound that might not crack as the keel flexes, even though the fairing compound definitely will. So, in theory I will have a better gauge to judge the security of the keel joint. If the fairing compound is cracking the crack might not extend to or through the CSM layer. Time will tell but I am trying to not have to do this ever again!

No pics for Day 3 because the CSM is so thin you can see right through it :biggrin:and pics look like the day before.

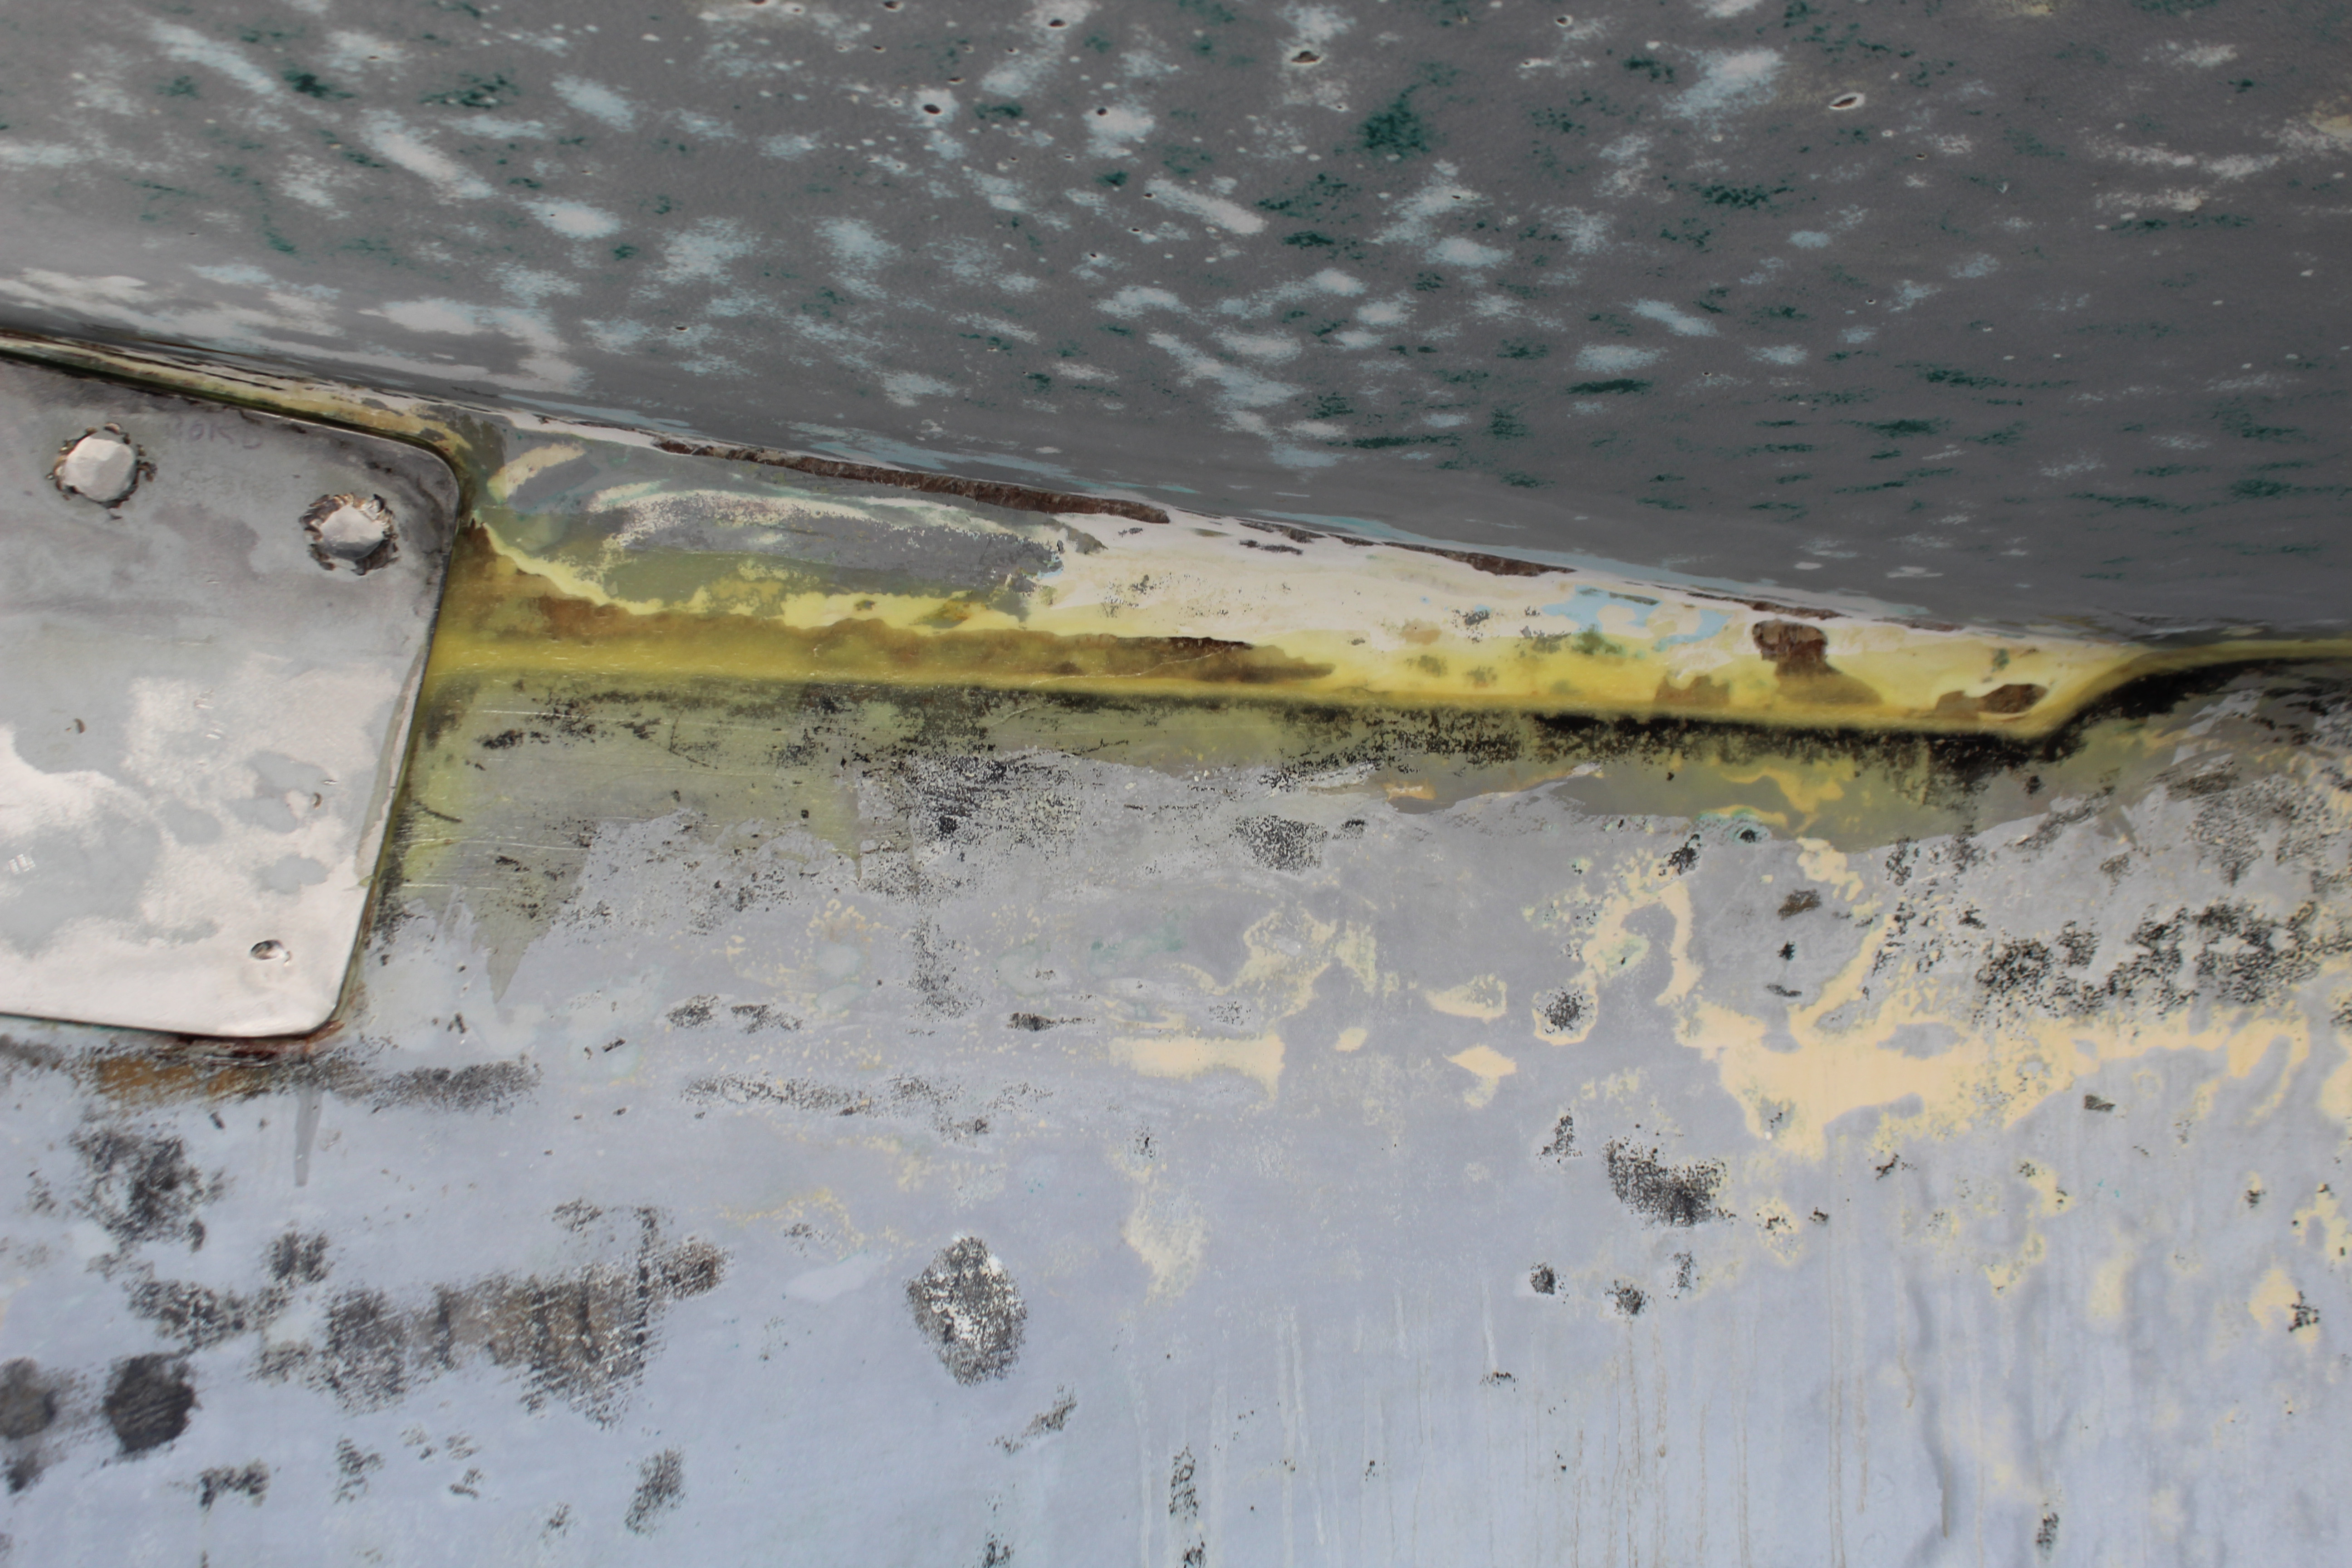
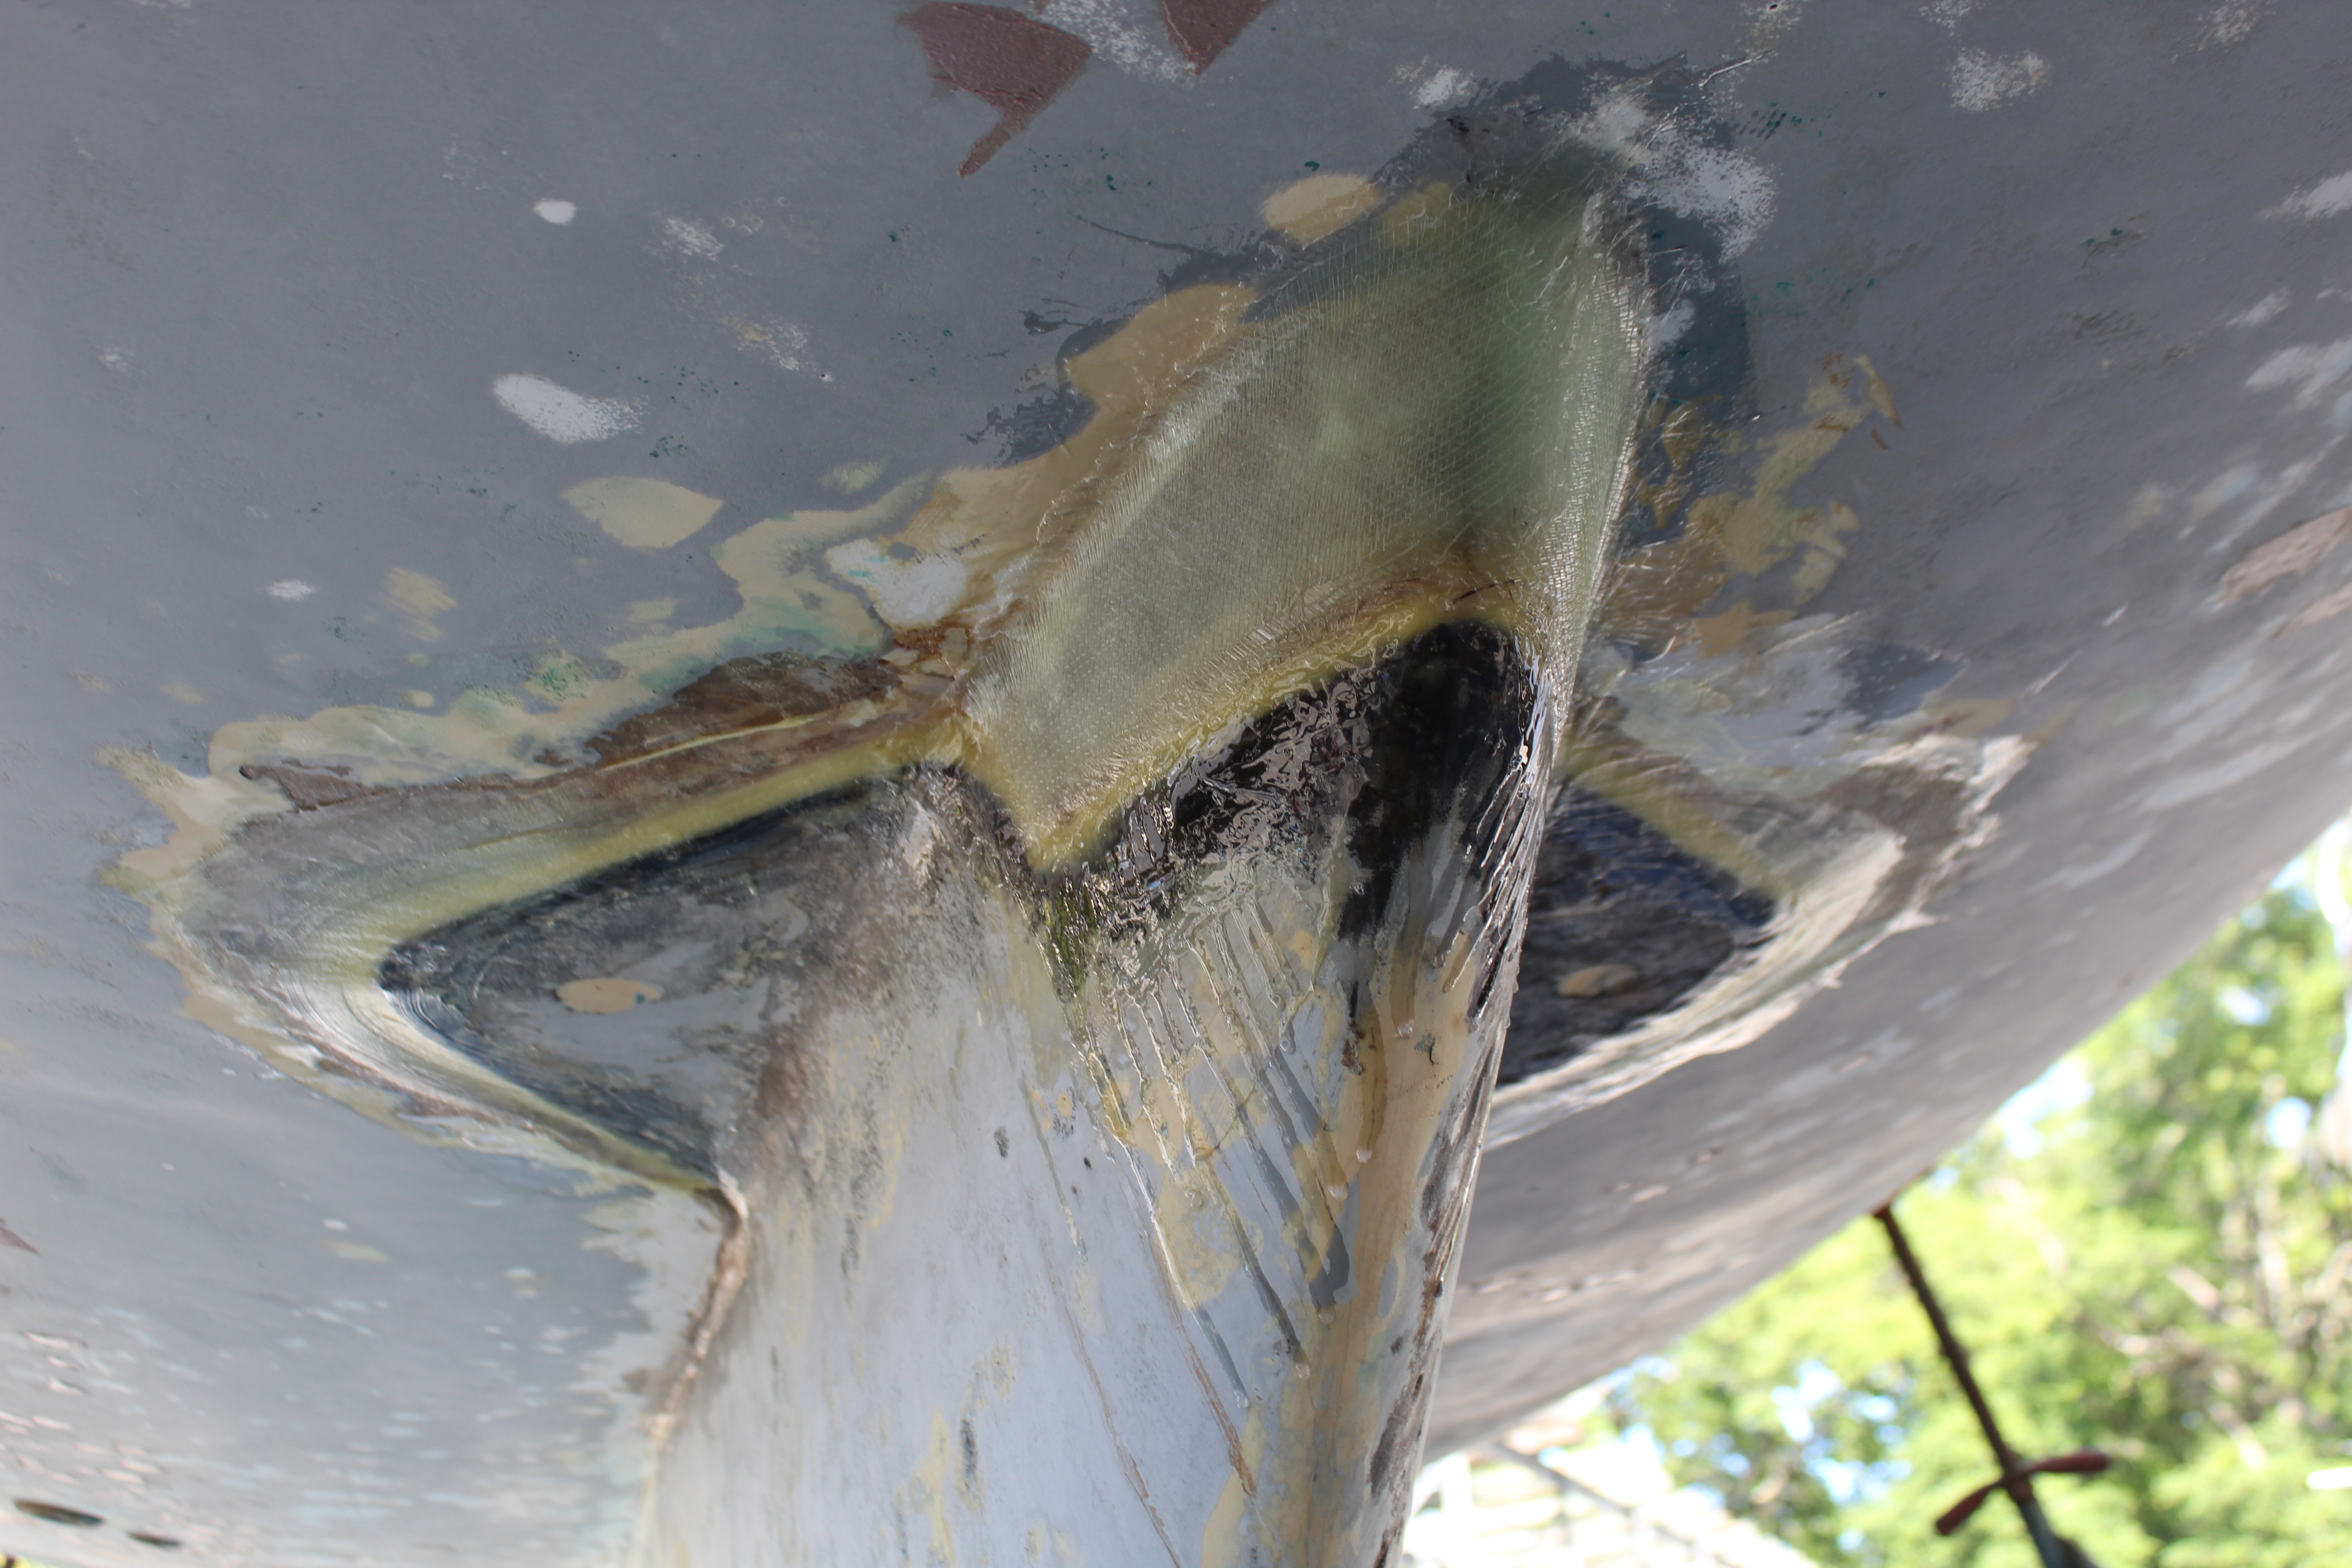
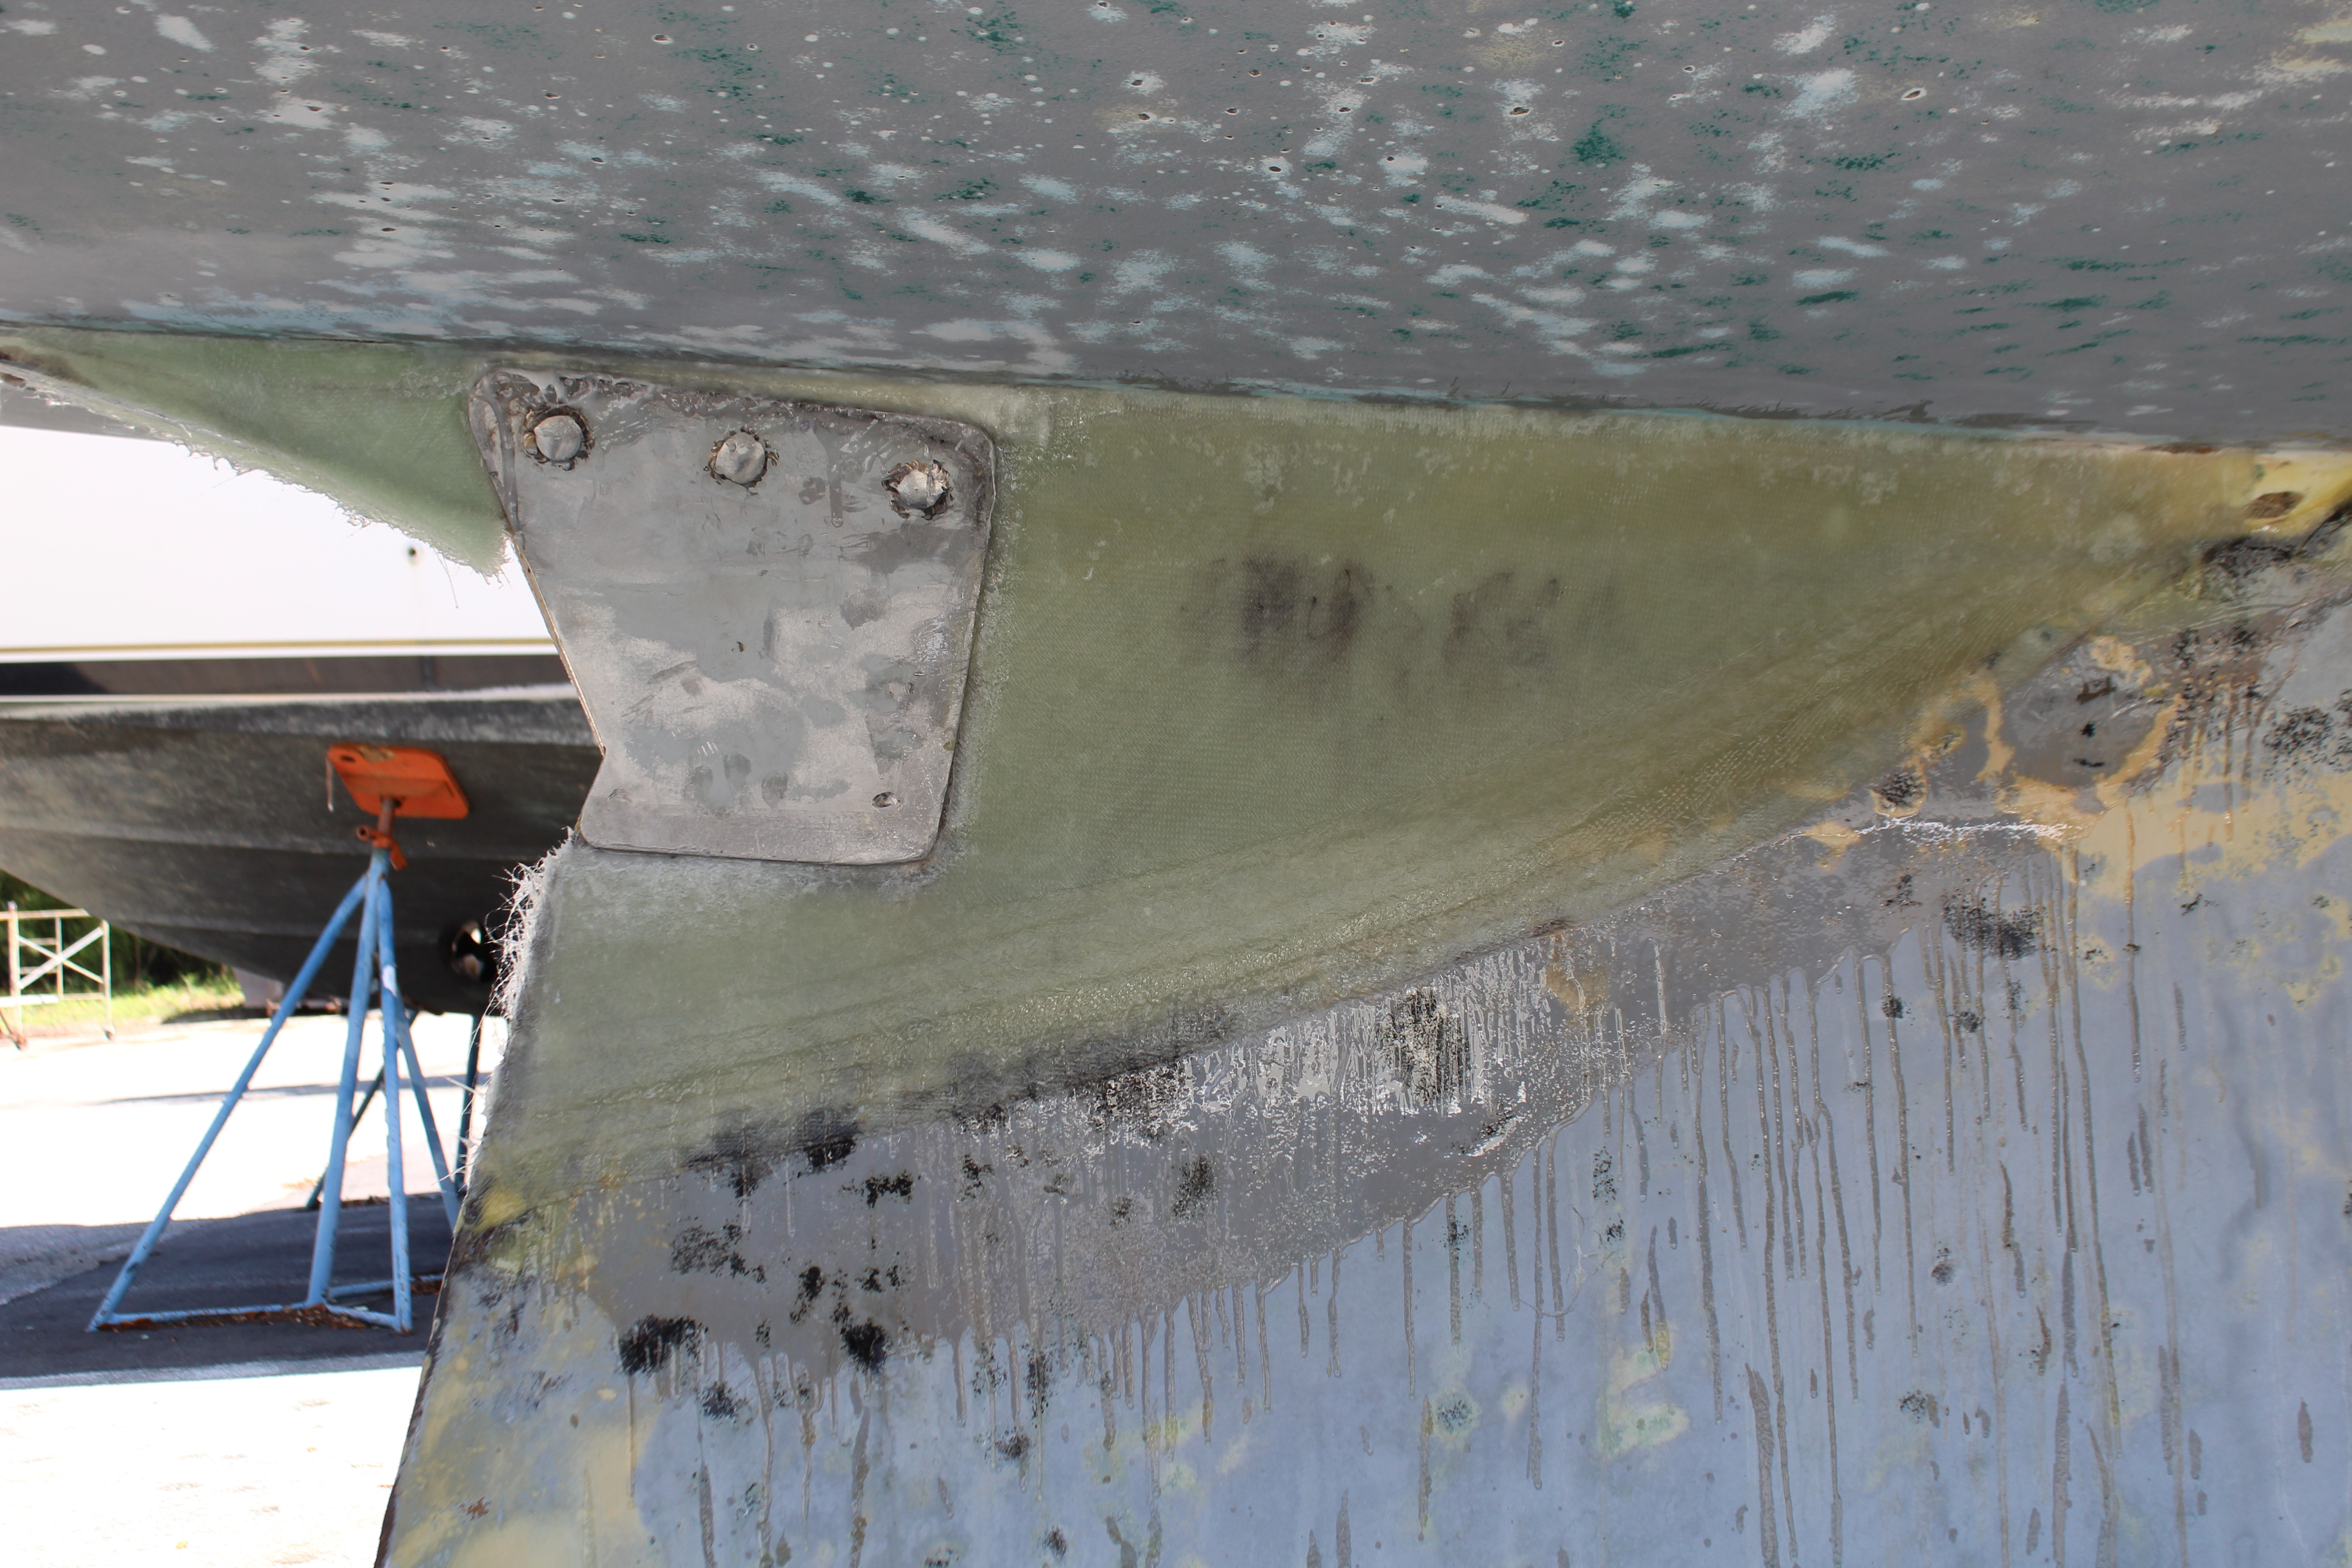
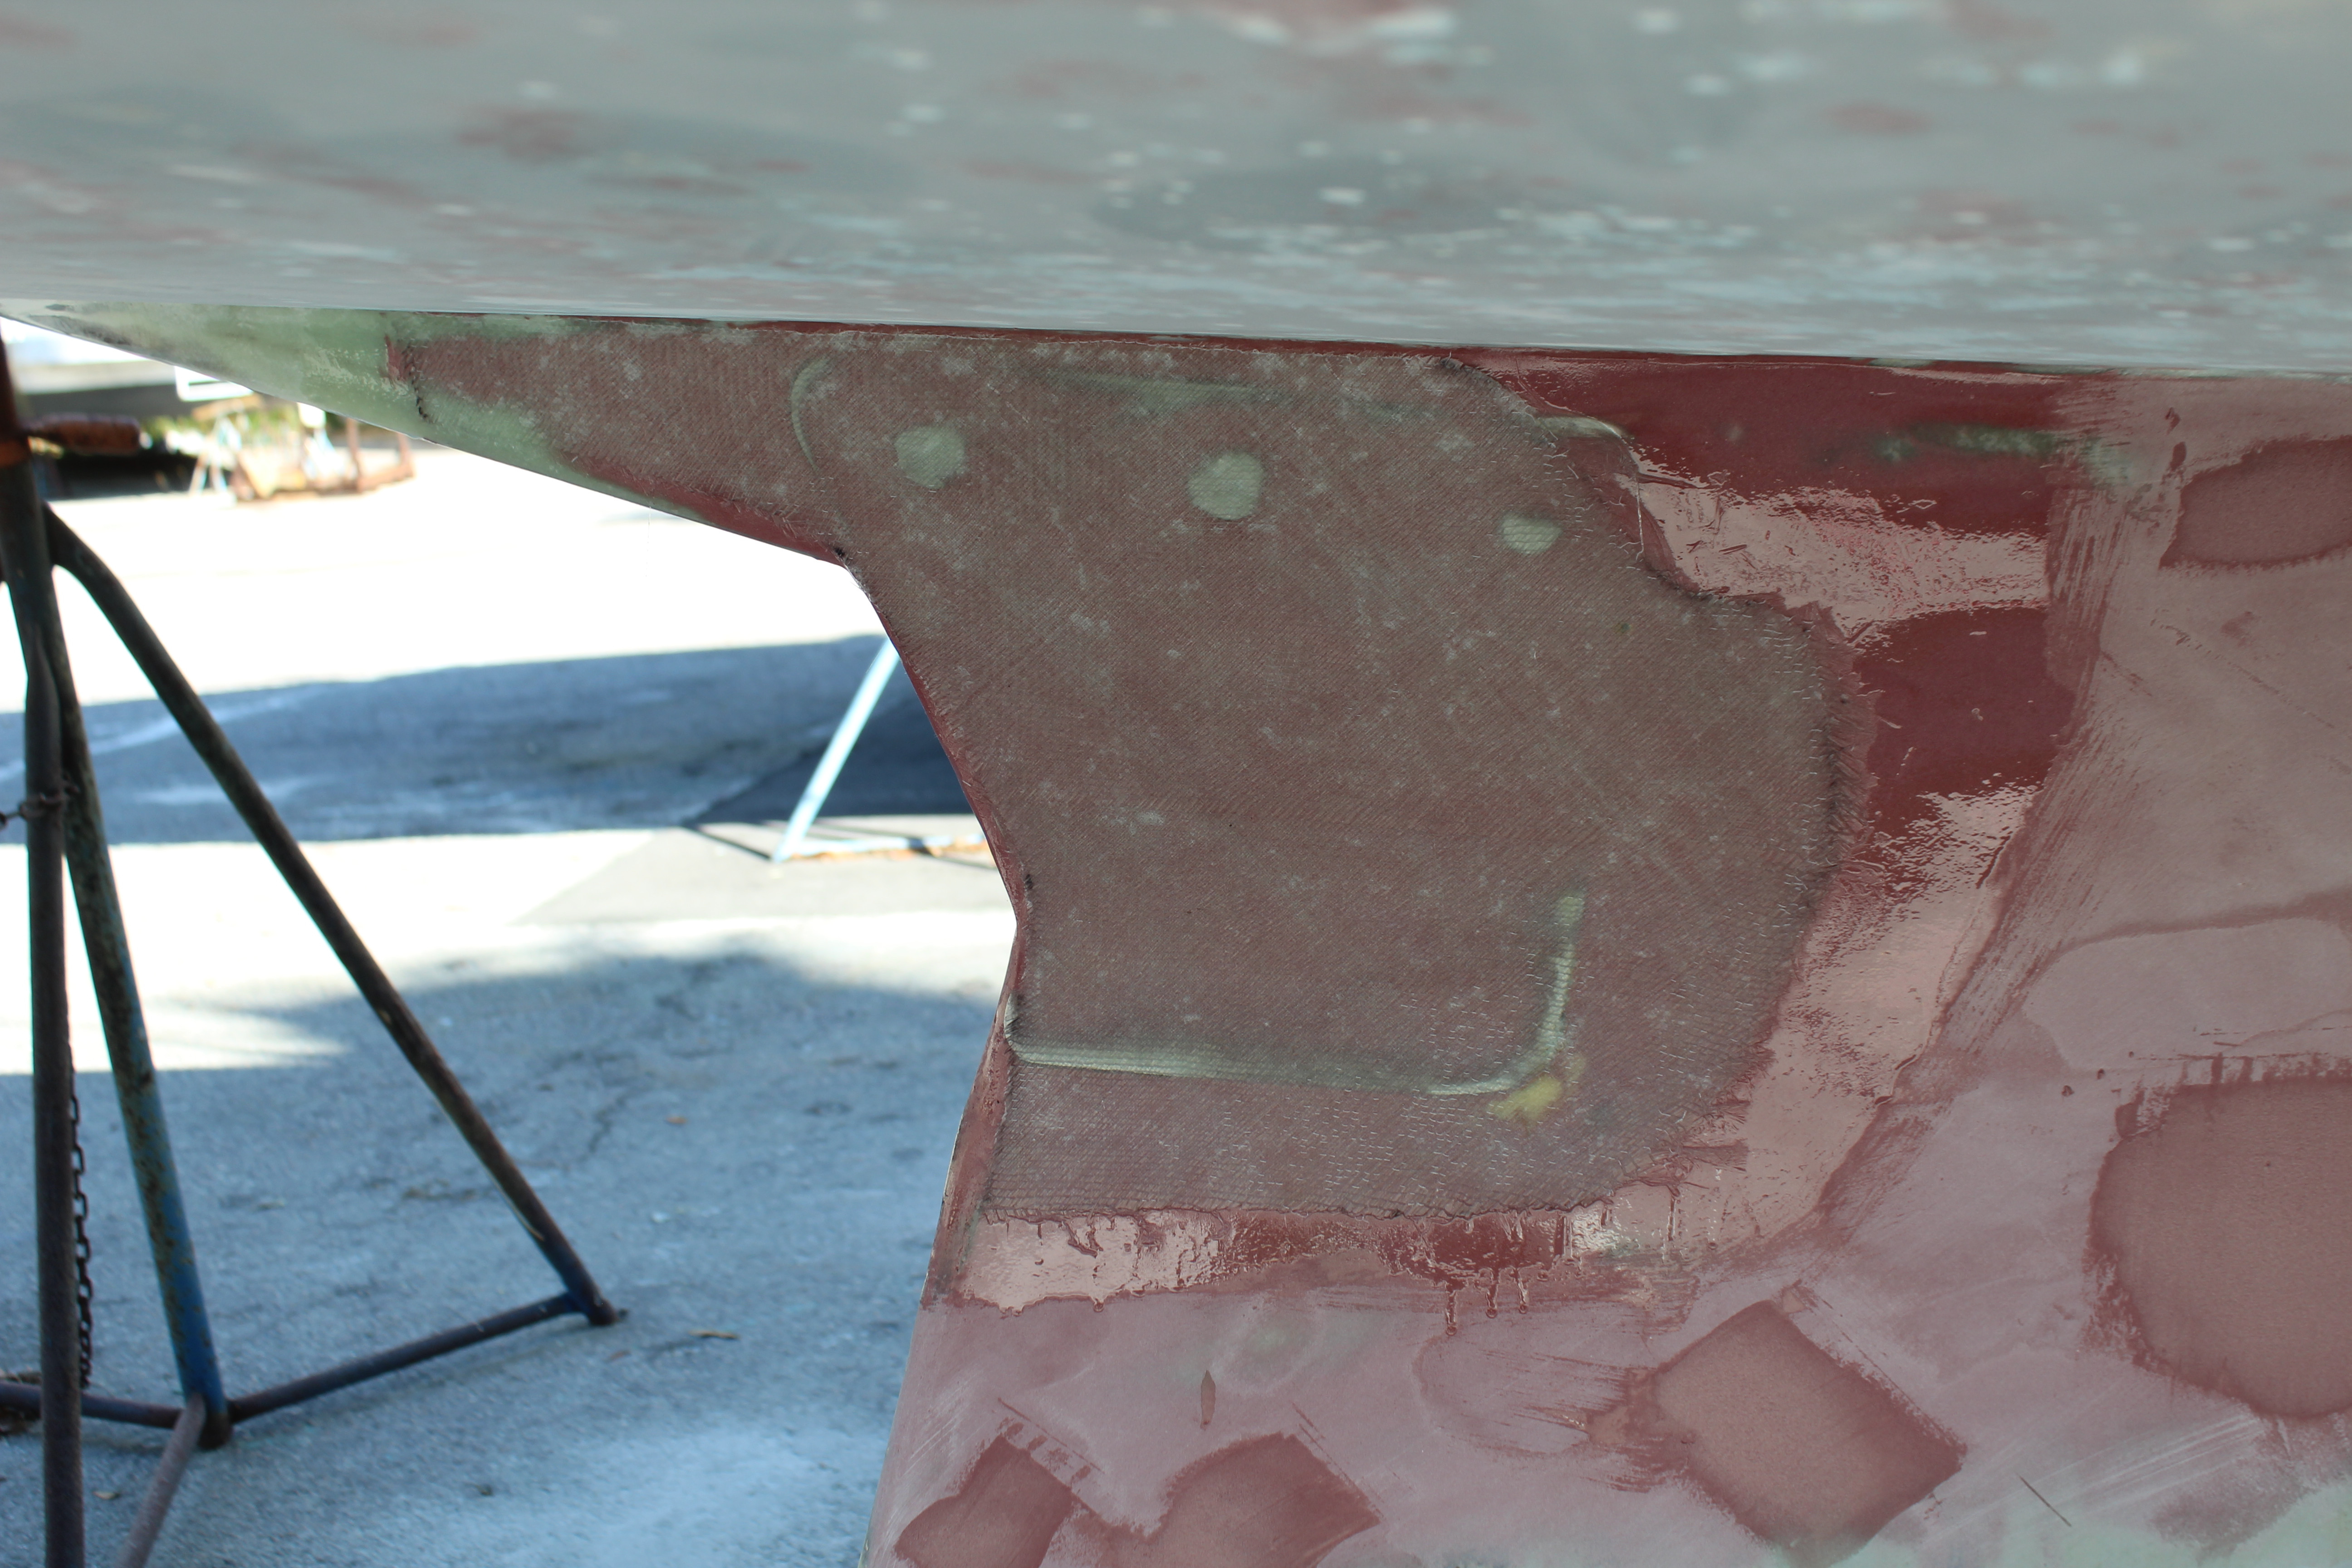
Day 4 consisted of working the aft keel and fairing the reinforcing plates. I wanted to avoid the mass of filler buildup on the plates like previously:


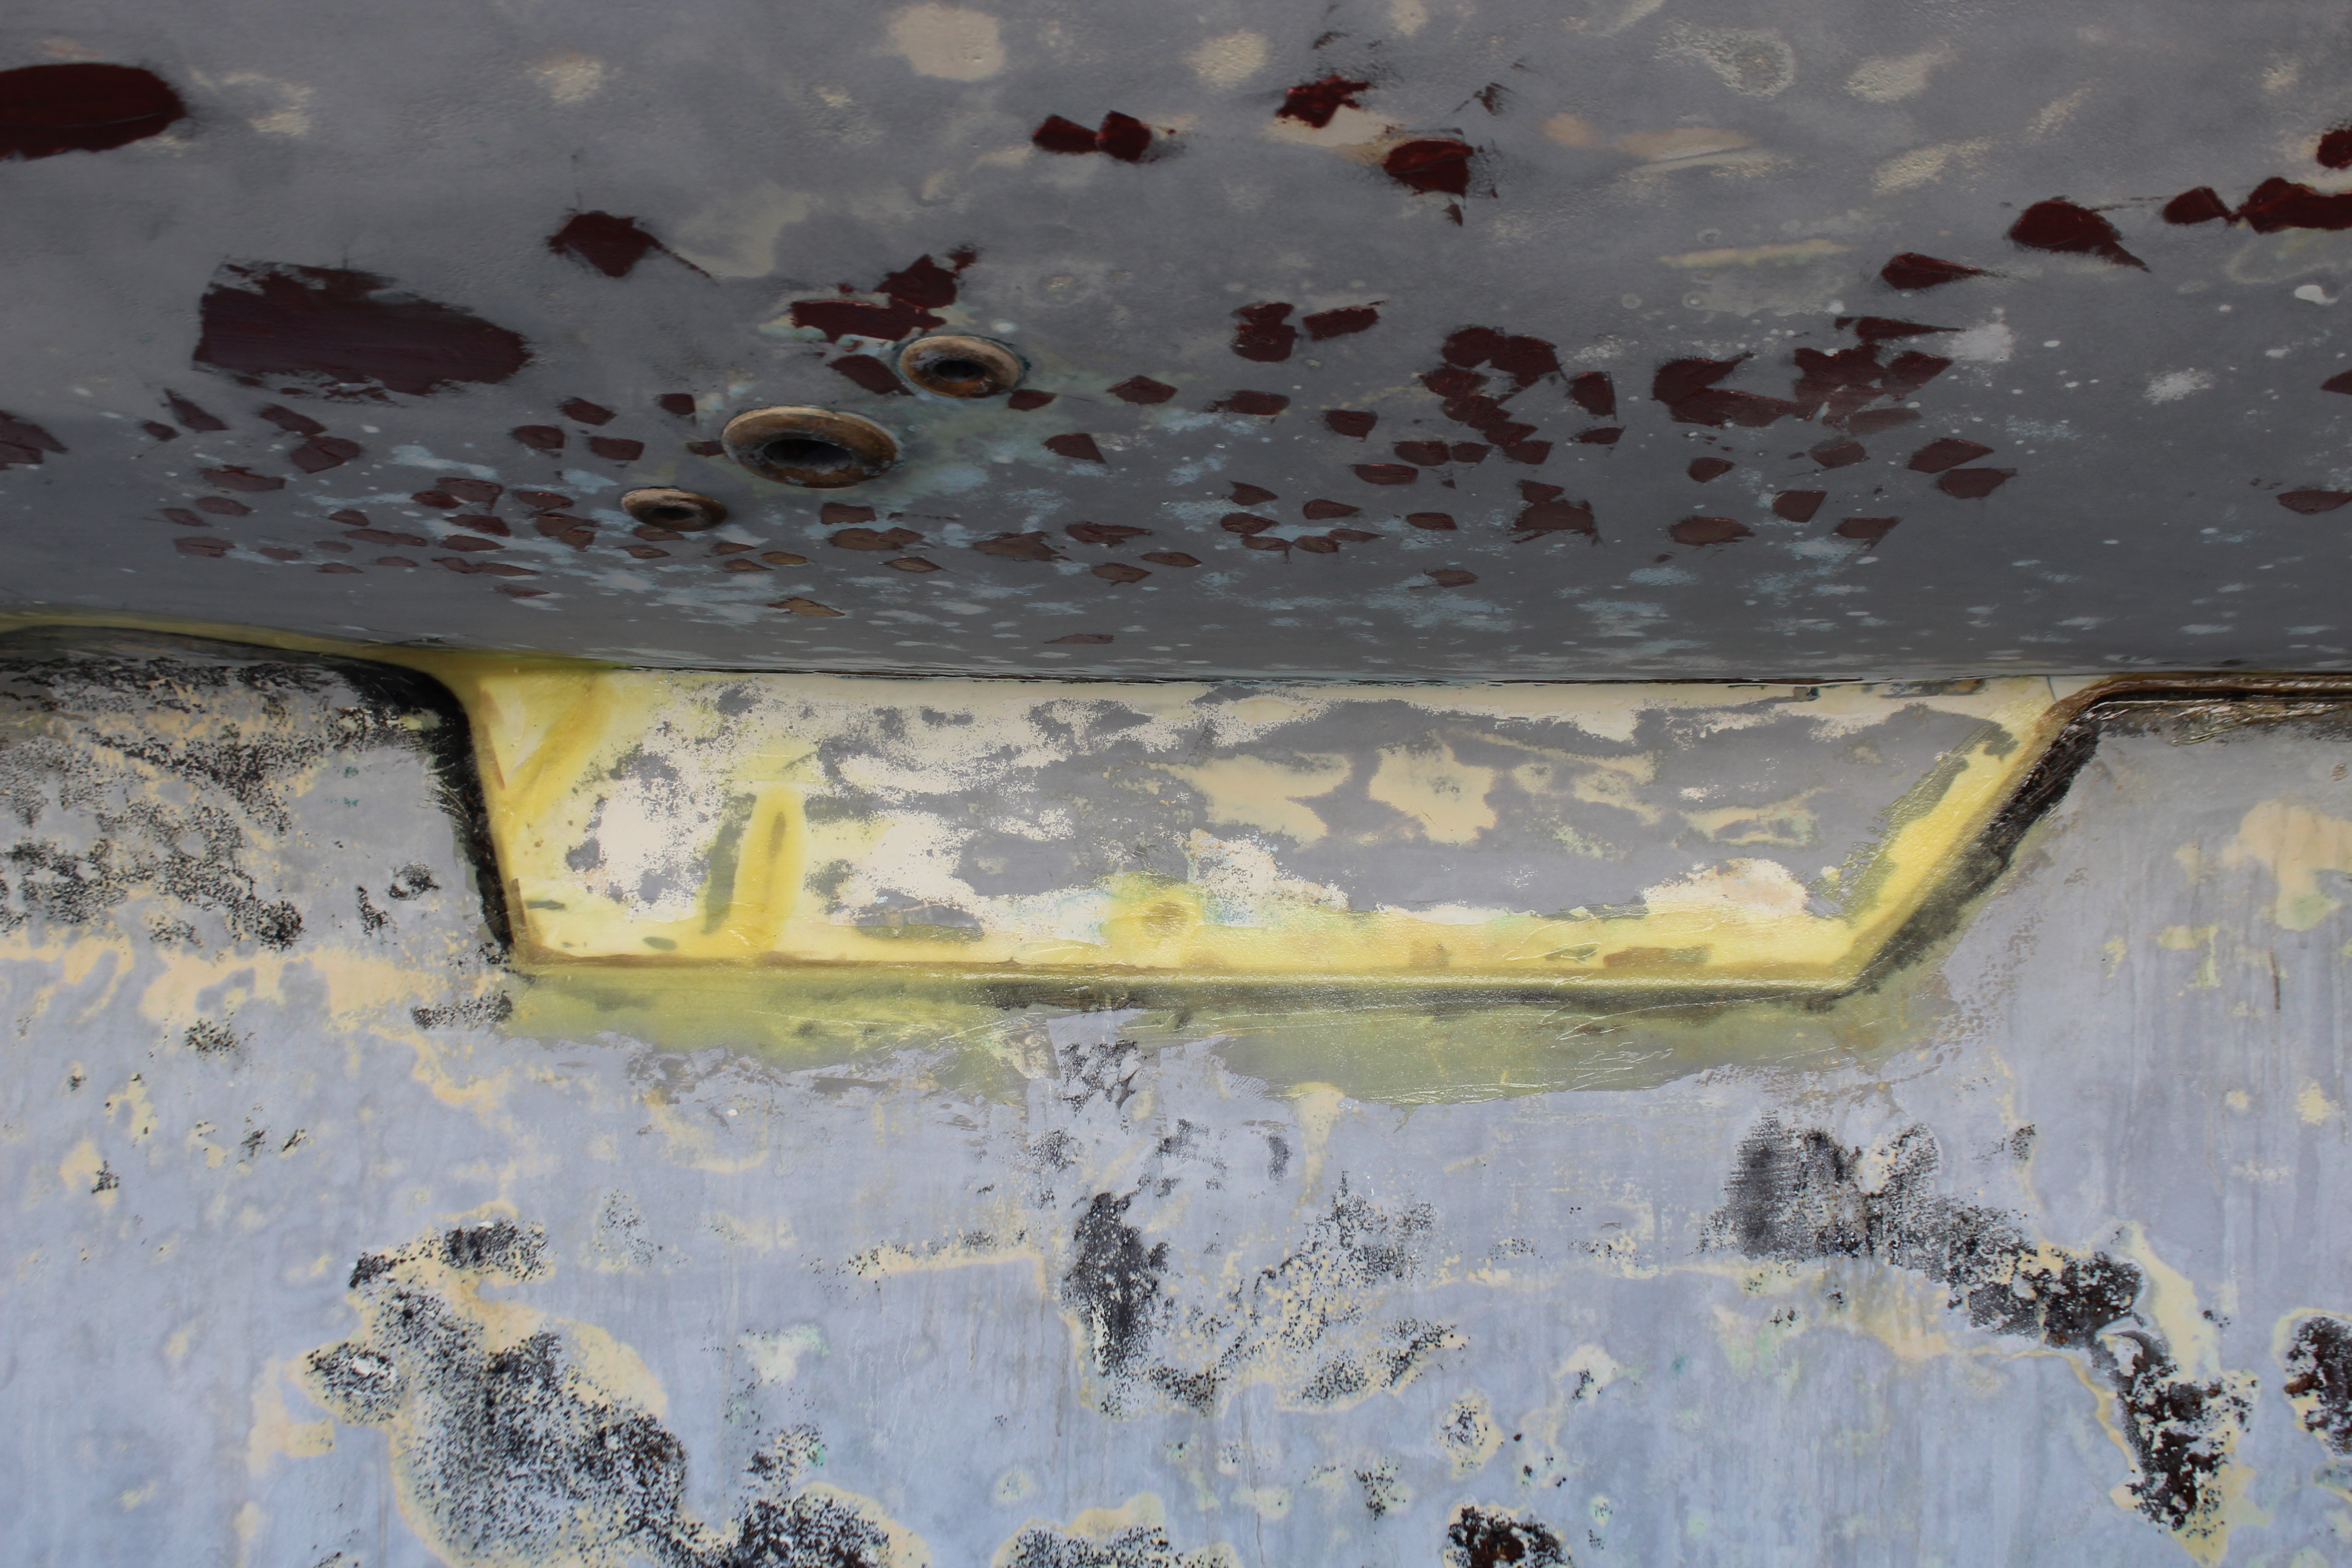
So I sanded the fairing compound flush to the edges, contoured the area around the exposed (bolts?) and added a layer of 1708 to cover the plates and surrounding edges:


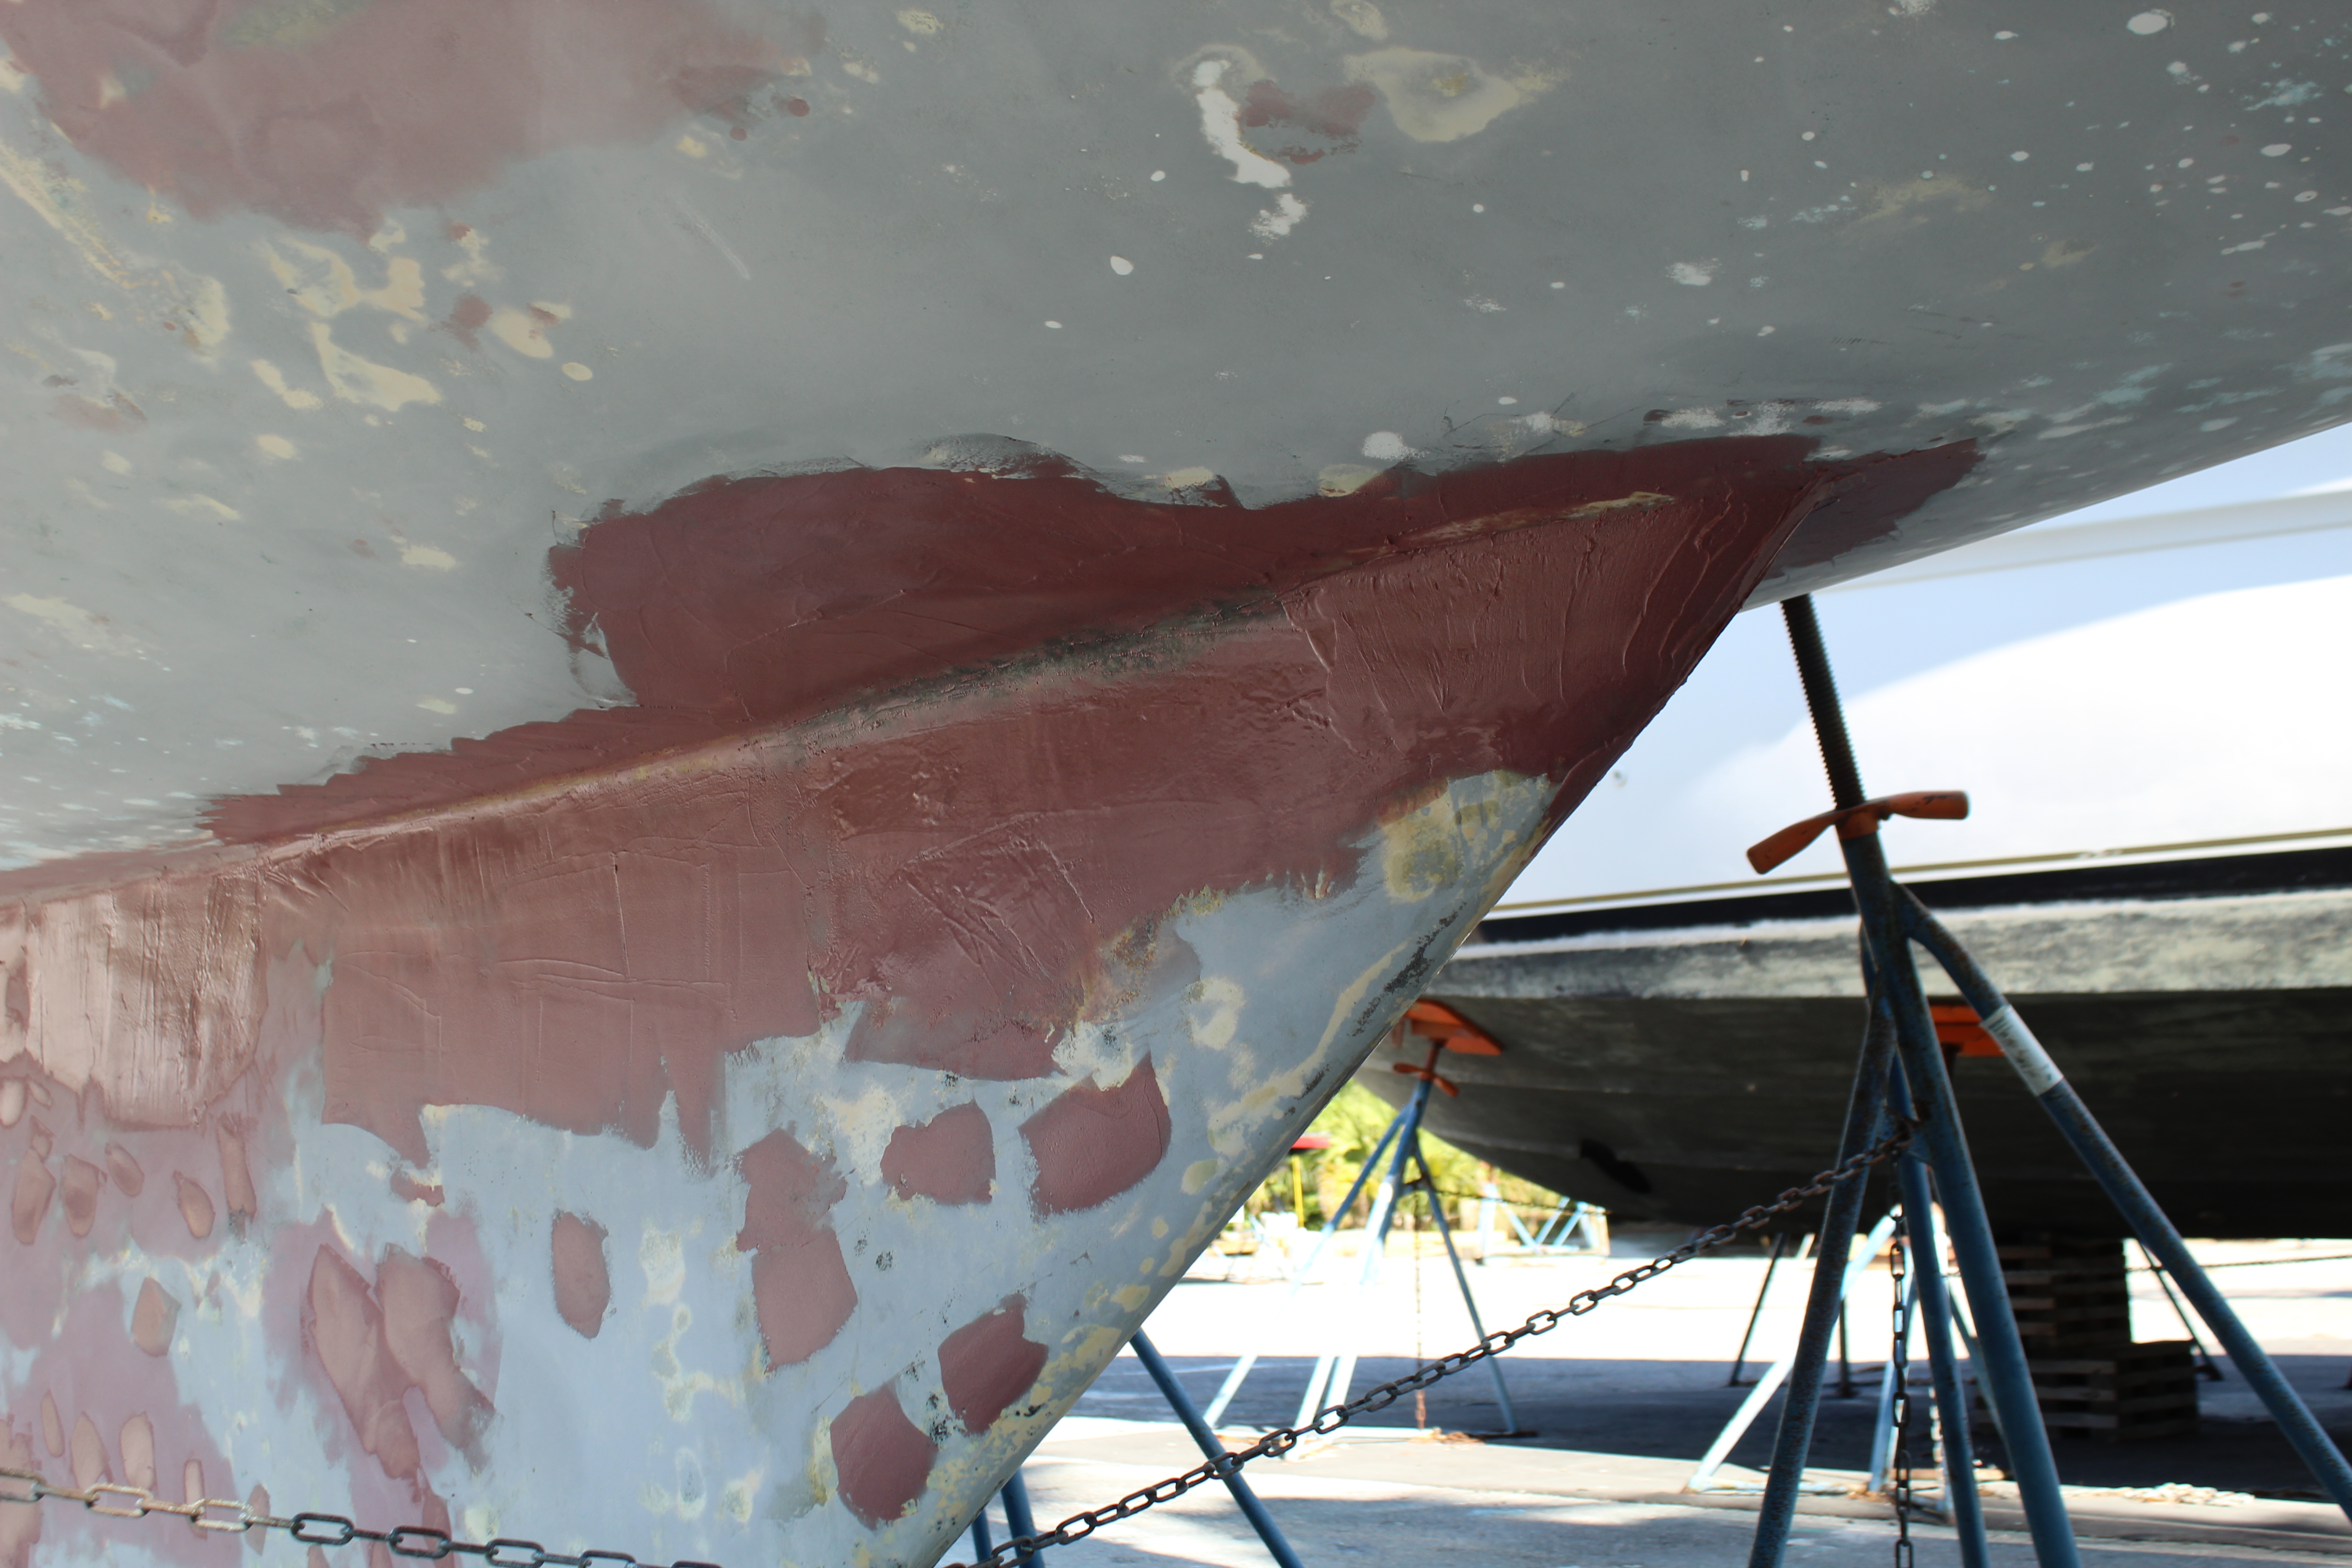
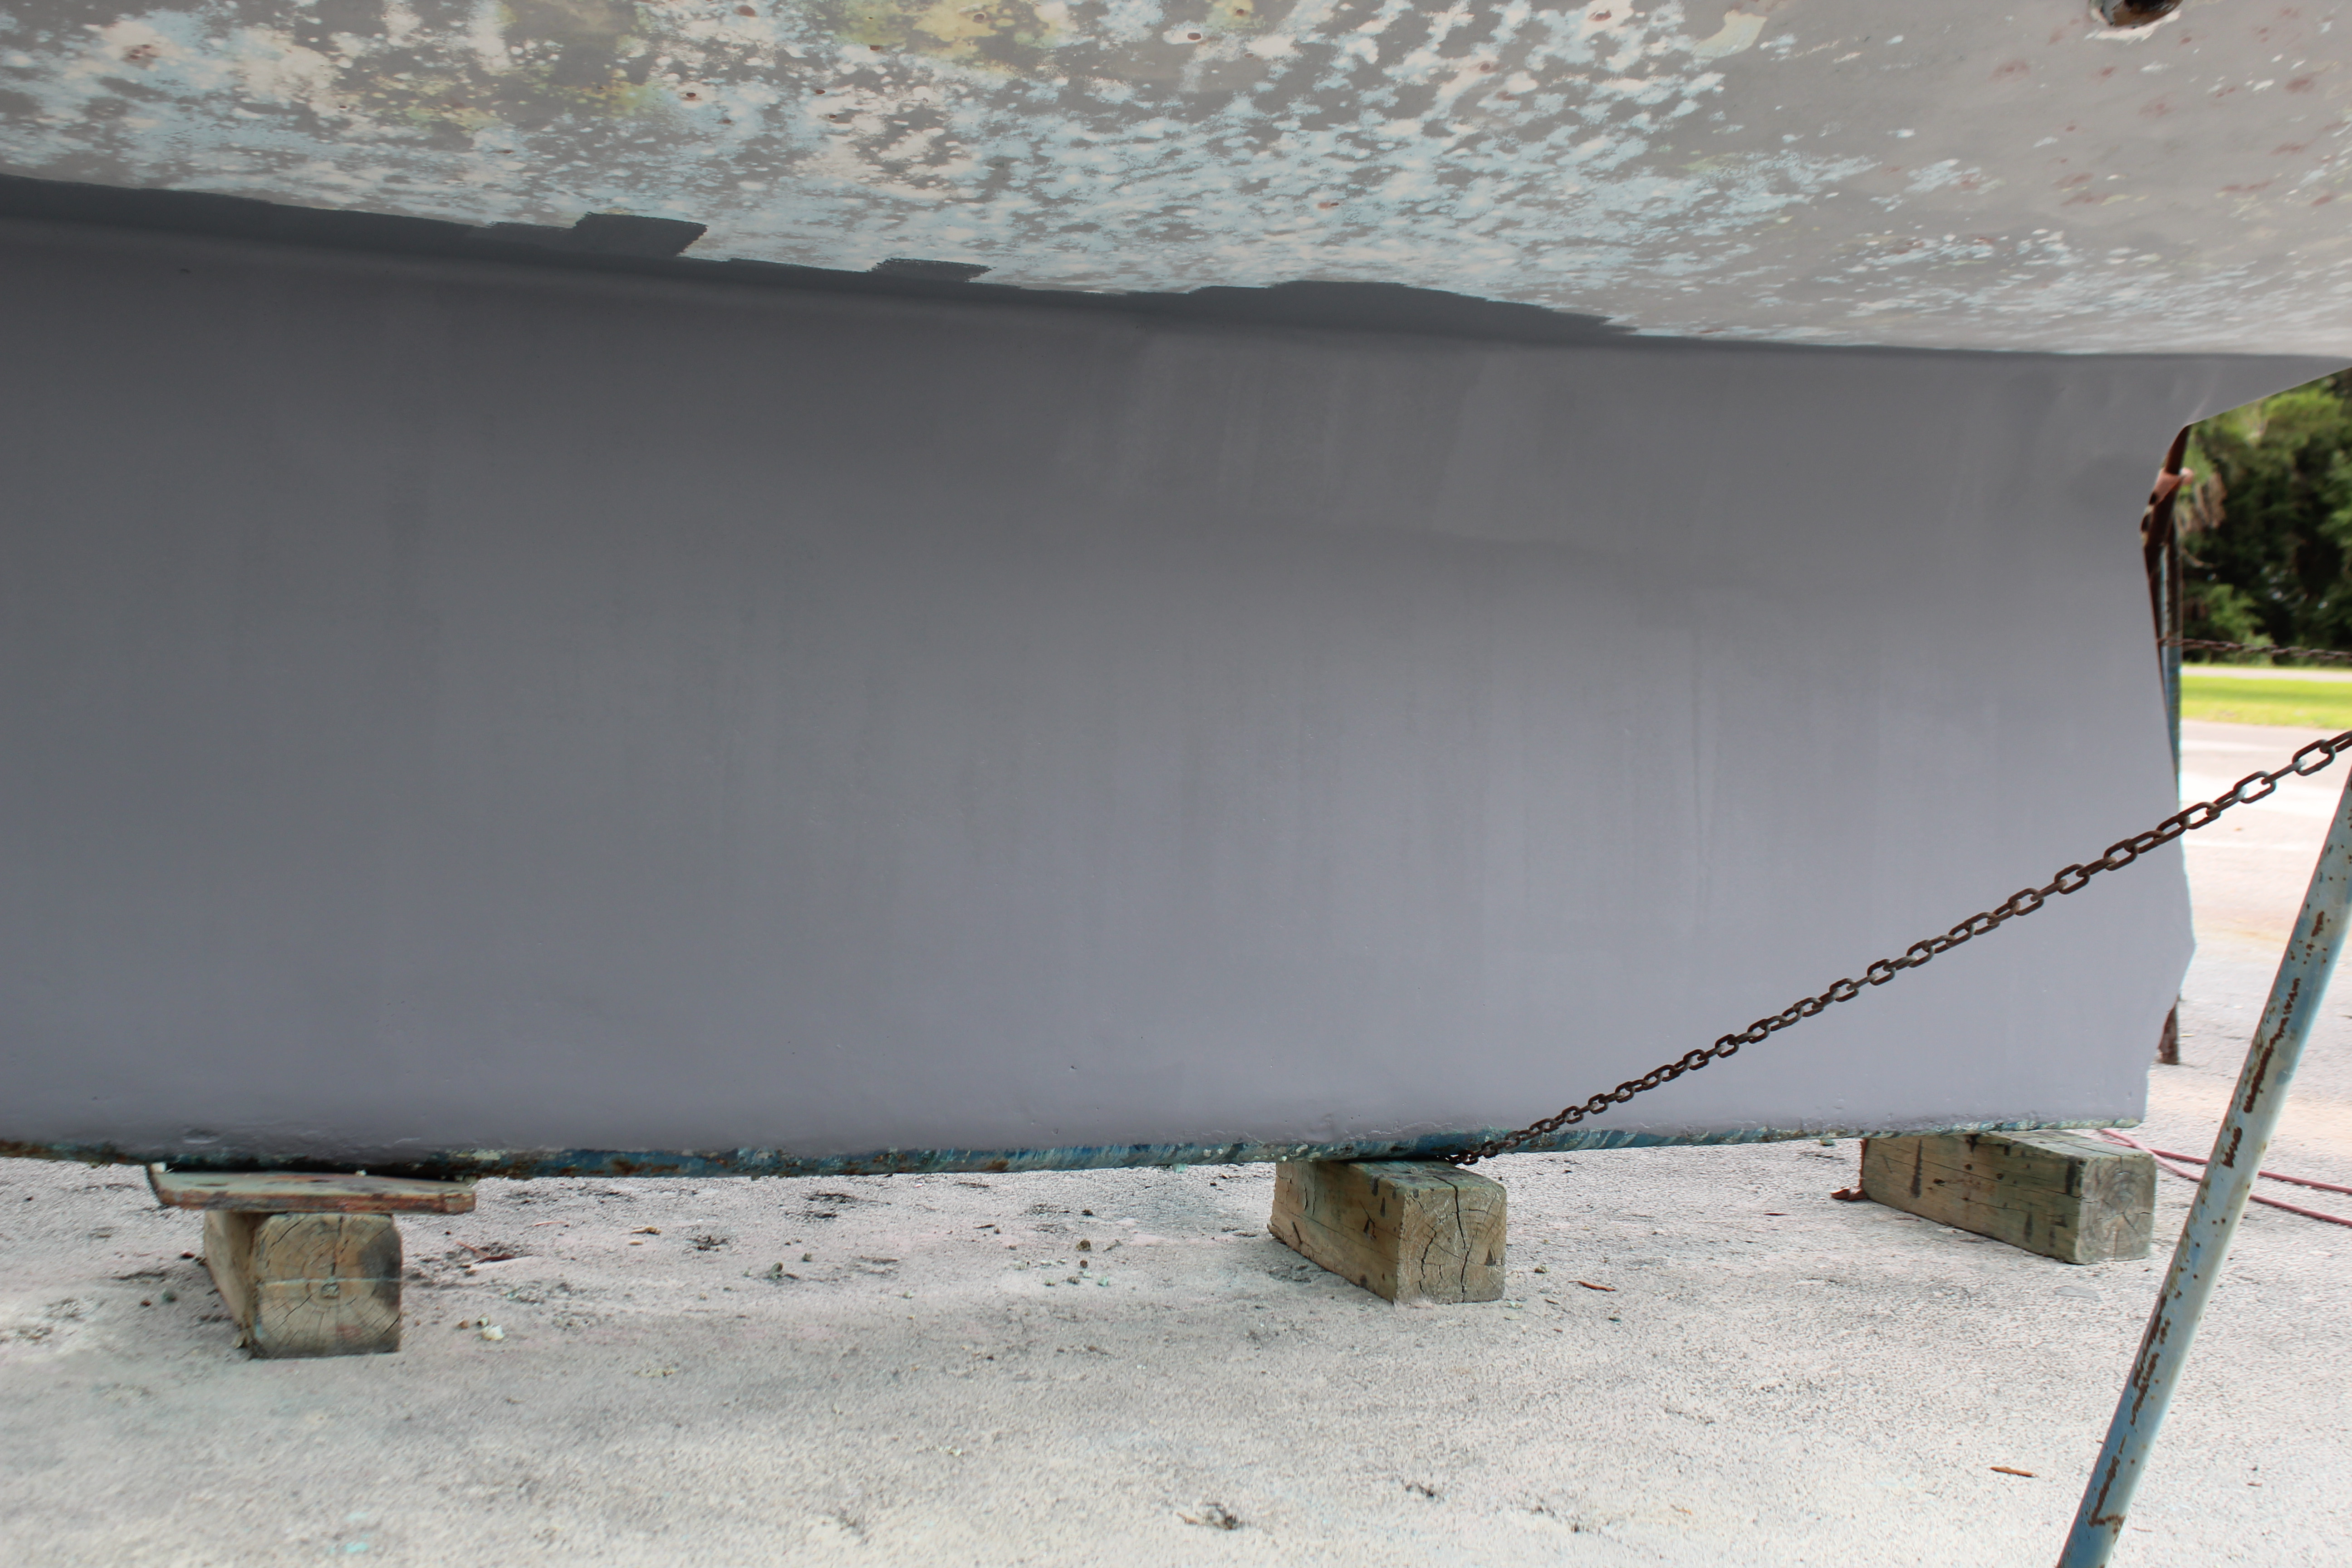
I also sanded and prepped the CSM layer for fairing compound and started fairing:


End of Day 4. Getting tireder and sorerer!

Cheers,

Mark
 
Oct 29, 2016
1,915
Hunter 41 DS Port Huron
My arms ache just reading about this...........
Nicely done Mark, is your next endeavor writing a book, "The Days That Followed Matthew" or was that Years........ everyone that happens to come across this write up has got to admire you for your unrelenting focus, my goodness you certainly have a gift to analyze, create and implement I am in awe.........:clap: maybe that should be the title.
 
Oct 19, 2017
7,732
O'Day 19 Littleton, NH
:plus:


Everyone ... has got to admire you for your unrelenting focus, my goodness you certainly have a gift to analyze, create and implement I am in awe.........:clap: maybe that should be the title.
Which? "Unrelenting Focus" or "I am in Awe"?

-Will (Dragonfly)
 
May 8, 2013
629
Hunter 40 Dataw Island, SC
My arms ache just reading about this...........
Nicely done Mark, is your next endeavor writing a book, "The Days That Followed Matthew" or was that Years........ everyone that happens to come across this write up has got to admire you for your unrelenting focus, my goodness you certainly have a gift to analyze, create and implement I am in awe.........:clap: maybe that should be the title.
I'll trade you arms because I think mine fell off! Along with my shoulders, neck and feet! Looking forward to a few days of recuperation :)

Thanks for the kind words - I've been toying with the idea of writing but I think the boat and Matthew would be only a part. Somehow I would like to weave in some of the other stuff I've done over the years. That might bore people though ;)
 
  • Like
Likes: limbodog
May 8, 2013
629
Hunter 40 Dataw Island, SC
The keel joint/barrier coat/bottom paint lalapalooza fiesta extravaganza marathon soiree, Day 5 and 6:

Day 5 started just like all the rest, glorious glorious sanding! I got the first layer of fairing compound leveled and the balance of the hull divots sanded and smoothed. Next was applying a few more layers of fairing compound - pretty normal, I usually figure at least three passes before an area is really paint-ready. So, sand, fair, wait, sand, fair, wait, sand, and then Day 6:


I made a really (in retrospect!) dumb comment to one of the guys passing by that the 30 minutes it took to primer the keel seemed like a letdown after the days and days of prep work it took to get there. Famous last words because I must have blocked the thought of what was coming next:

Barrier coat and bottom paint! Stay tuned.

Cheers,

Mark
 
Mar 31, 2013
234
O'day 23 Pa
that's a steel keel right?
what are you using to protect it? reason I ask is the Oday I looked at a while back, the iron keel was in amazing shape due to the , what I can only describe as road tar, that had been applied and not touched in years.
Hopefully the old owner still frequents this forum and can chime in.
 

JRacer

.
Aug 9, 2011
1,331
Beneteau 310 Cheney KS (Wichita)
Mark:
FWIW, the Electric D/A I use for doing sanding and compounding is a Porter Cable 7424XP Model - variable speed and I use a 5 inch pad that has hook and loop on it so I can easily change my paper and pads. For pads, I love the Lake Country "Smart Pads", they come in various levels of aggressiveness. For my buffer, I use a Makita 9227 variable speed, with a 7 inch hook and loop plate and use the Smart Pads and the same hook and loop type buffer (wool like) pads for that as well. My go to place for all things related to sand/compound/buff is www.autogeek.net

The great thing about the PC 7424Xp is that it is small and light enough that it can be handled with one hand, not like the big heavy tourqy buffers. And the Makita is powerful but not near as heavy as my old Craftsman buffer/grinder.


Also, I use their "pad cleaner" powder. And the "Pinnacle" liquid pad Cleaner and pad conditioner. The powder you mix in a 5 gal bucket and as your pads and bonnets get clogged up you just toss the dirty one in the bucket and put on a clean one, 15 minutes in the soup and I use their pad cleaning brush to clean the pad/bonnet, a quick rinse and a spin dry on the Makita and set them in the sun to dry. Generally by the time I clog up the next one the first ones I used are clean and dry. So rinse and repeat. The Pinnacle pad cleaner is like magic, a few sprays on the pad and all the dirty wax/compound just dissolves.
 
Last edited:
  • Helpful
Likes: Will Gilmore
May 8, 2013
629
Hunter 40 Dataw Island, SC
that's a steel keel right?
what are you using to protect it? reason I ask is the Oday I looked at a while back, the iron keel was in amazing shape due to the , what I can only describe as road tar, that had been applied and not touched in years.
Hopefully the old owner still frequents this forum and can chime in.
Yep, steel keel. The majority of the keel is in good shape except for the areas around the keel/hull joint where there was water intrusion. In addition I had a few spots of rust where the keel had rough spots from the casting that had improper fairing (looked factory except for a few spots where the repair was done wrong too!). I did multiple treatments with OSPHO and several grinding sessions to remove and neutralize the rust and the barrier coat will be the protection. Time will tell.
 
Last edited:
  • Like
Likes: limbodog