Repairing Hunter 40 damage from Hurricane Matthew

May 8, 2013
629
Hunter 40 Dataw Island, SC
Perhaps a stab in a very dark place, but the plates were added to the keel to assist in relocating it. The plates were added the bolts were loosened and the keel was separated from the stub for resealing the plates acted as guides to help support the keel while the Keel to hull joint was being cleaned and new sealant applied. Just my guess.
Anything is possible but it looks like the keel has been welded to the plates - it's weird but looks like spot-welds (?) - so the only way to drop the keel now is to cut the plates. I think I will follow up on Captamyhem's idea and give Hunter a shout to see if they have any records of this or if anyone there can shed some light. At this point it's only to satisfy curiosity though ;).
 
May 8, 2013
629
Hunter 40 Dataw Island, SC
V-berth and forward head:

After failing miserably at making cabinet opening templates - my first two templates came out good but the next two were disasters :yikes: - I found a better way! With templates made I cut the openings for the cabinets in the forward head, got the laminate on the countertop and cut the opening for the sink:


Disregard what may look like a plumbing installation in the second pic - the smaller opening on the left will be a medicine cabinet and I needed to know how deep to make it while leaving enough room behind so I placed the loop for the head in place to measure the spacing I need. I'm not yet ready to start the plumbing but that will come soon enough. All the carpentry that remains to be done is the mid-shelf in the locker.

Next up is finishing up the removable section of the bunk. I cut some ply inserts and mounted them underneath as supports:


and it is (will be) a functional bunk now!


I'm brain-storming about how to create a fold-able step for bunk access - it's just a smidge too high for comfortable entry as it is now. That will bubble and simmer in the back of my pea-brain for now, plenty of other things to keep me busy :).

I'll work up some pics for illustration purposes to outline the keel/hull joint repair soon. I'm still working the rust removal/repair on the keel right now.

Cheers,

Mark
 
Sep 20, 2014
1,320
Rob Legg RL24 Chain O'Lakes
I don't know if the port side wall is, but if you built a drawer like device that goes back inside the wall when not in use.

For the step itself, Use vertical board that slides into a slot. Make it L shaped, as if it has the it has a 1/2 drawer front. On the board the slides out, put a piano hinge along the top. Attach another board to the piano hinge so you pull it out and flip the board down. The board rests on L portion when its down, which gives you a step. In addition, when its down, it locks the "drawer" as it can only be put in when its flipped up.
 
Mar 31, 2013
234
O'day 23 Pa
Looking at the routing of the openings, I can see burn marks telling me your bit is getting a little blunt! let me know what type/size you are using, I can probable spare one of the many hundred I have ;)
 
May 8, 2013
629
Hunter 40 Dataw Island, SC
Looking at the routing of the openings, I can see burn marks telling me your bit is getting a little blunt! let me know what type/size you are using, I can probable spare one of the many hundred I have ;)
I do have quite a few bits that have seen some abuse the last few years but strangely, the one I used for this cut is almost brand new - I'm thinking operator error? :biggrin:
 
  • Like
Likes: limbodog
Apr 5, 2009
2,774
Catalina '88 C30 tr/bs Oak Harbor, WA
I do have quite a few bits that have seen some abuse the last few years but strangely, the one I used for this cut is almost brand new - I'm thinking operator error? :biggrin:
Too slow travel speed will cause that burning and it gets worse with time because it rounds the very tip edge of the bit.
 
May 8, 2013
629
Hunter 40 Dataw Island, SC
The Plan:

Ran into a small delay this week - I needed to refortify my stock of filler (West Systems 406 and 407) before starting on the joint repair. Ordered but when the box arrived I clearly received someone else's order! :yikes: 
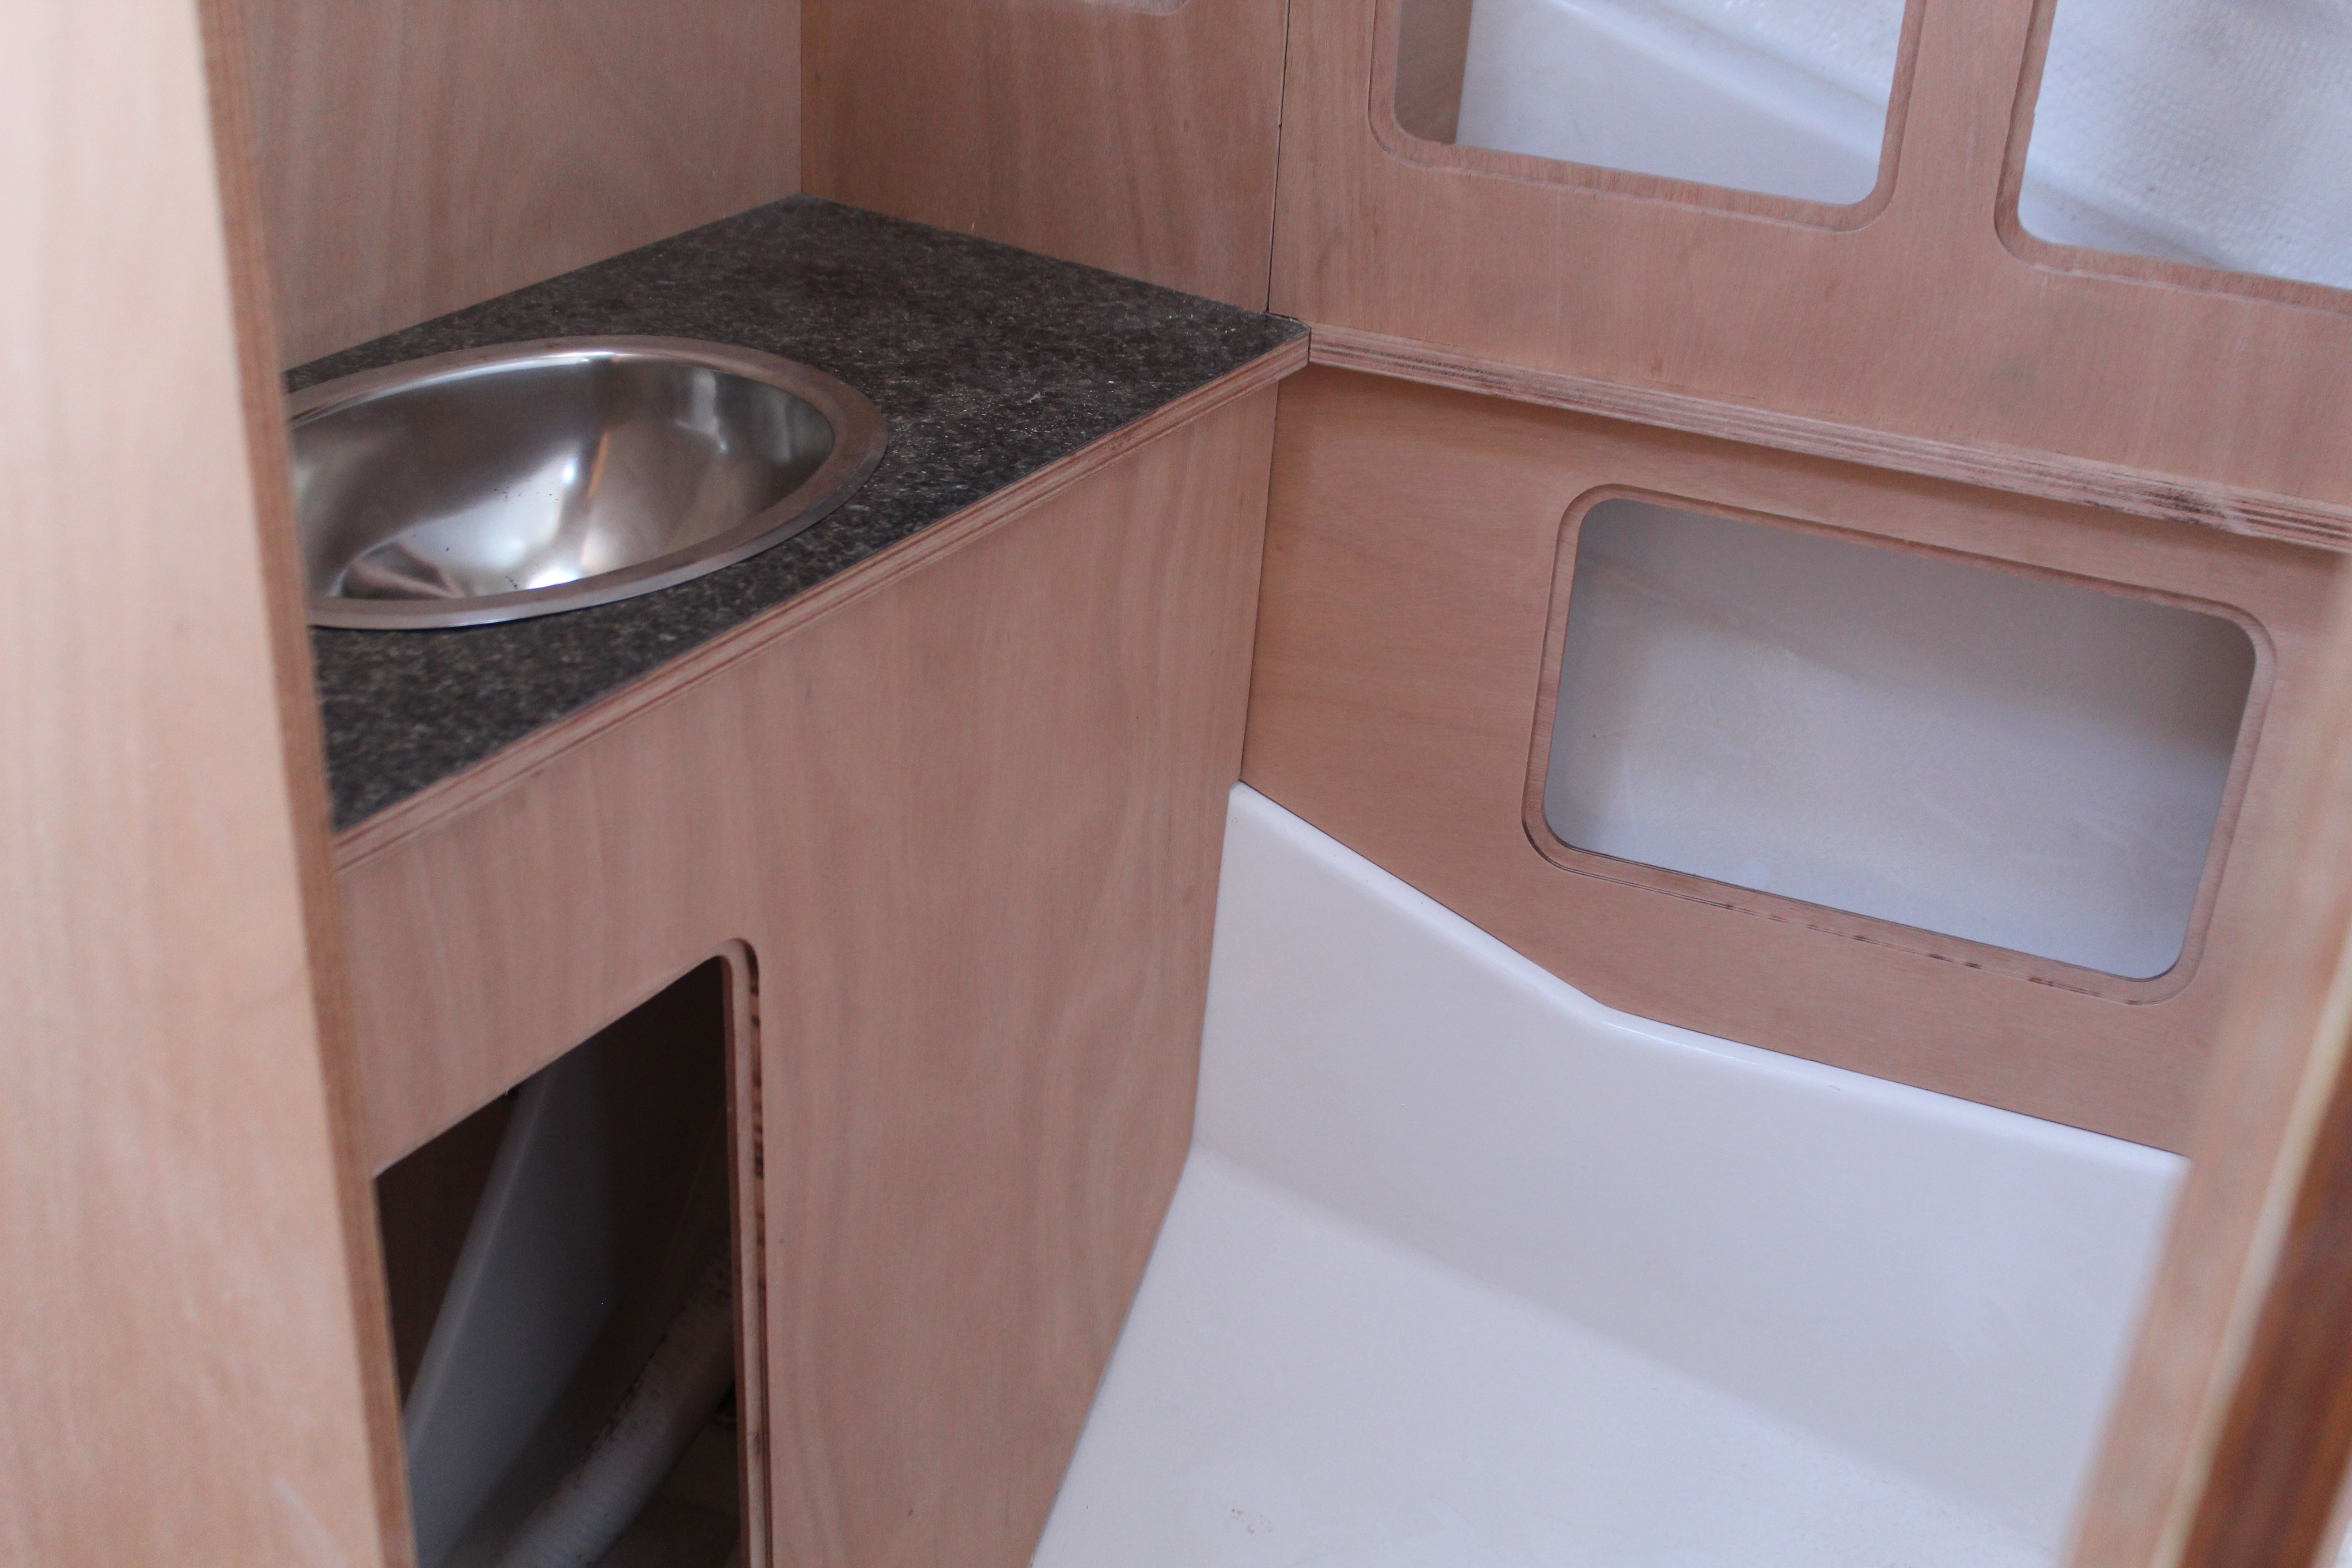
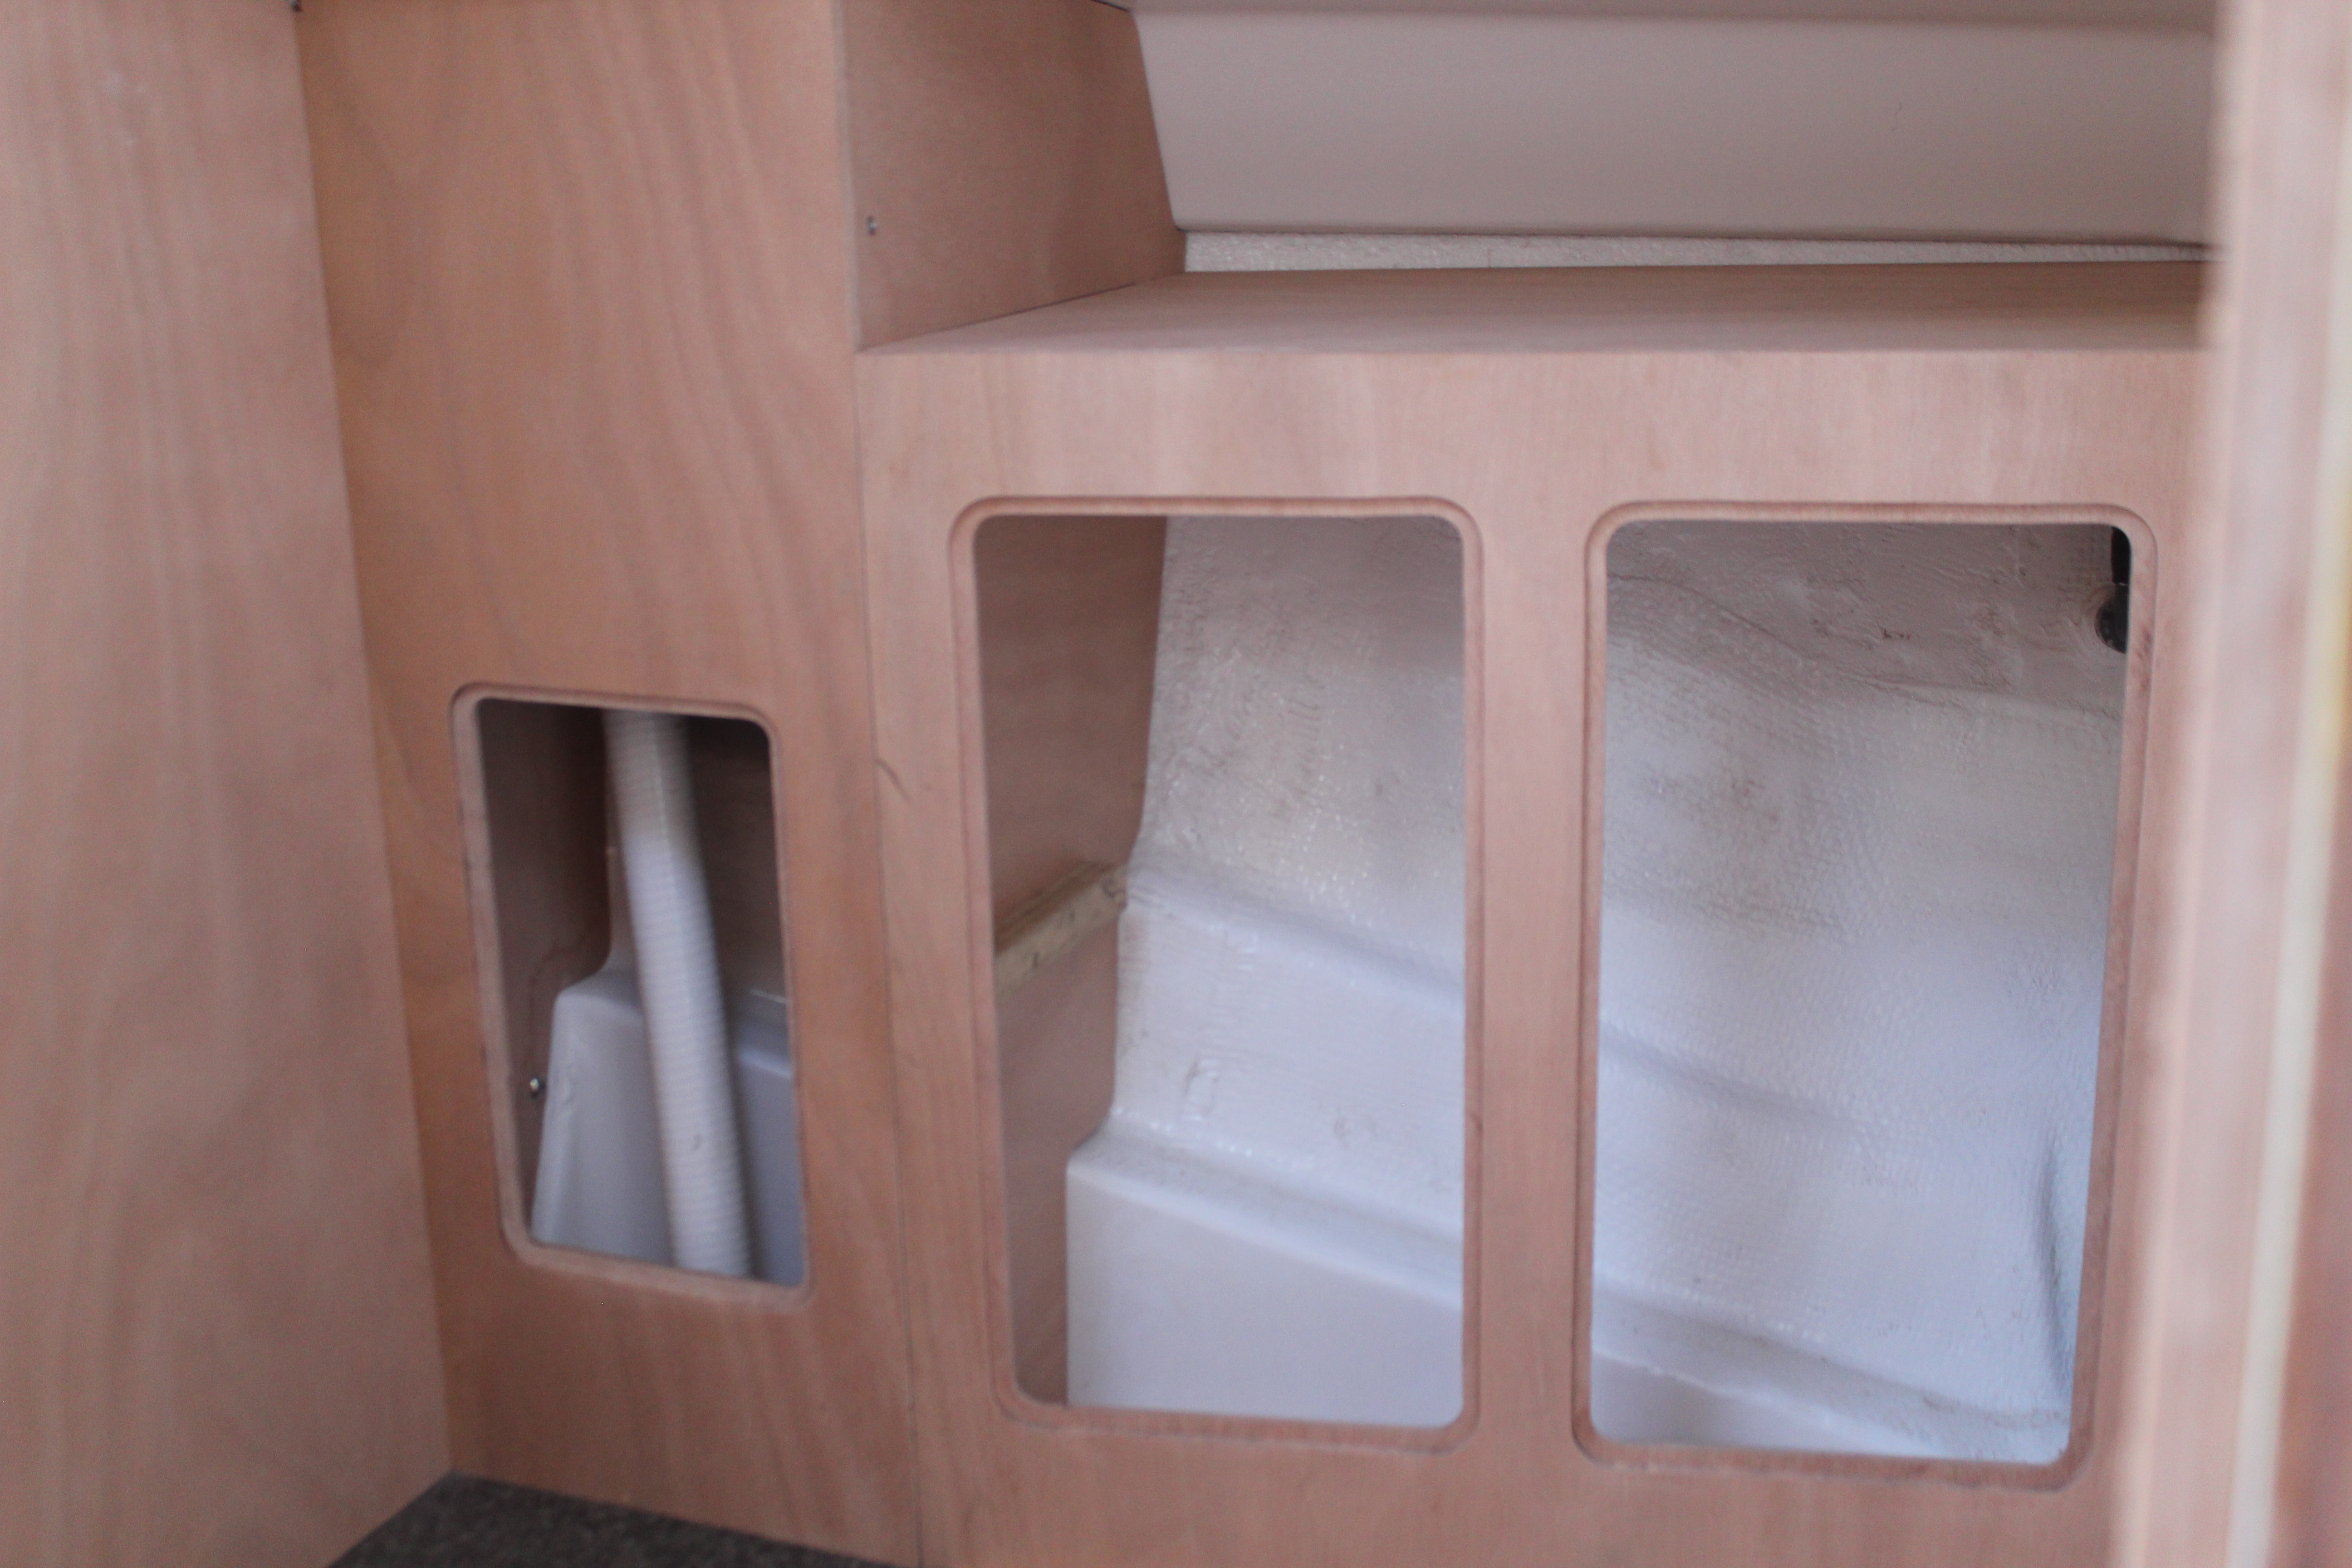
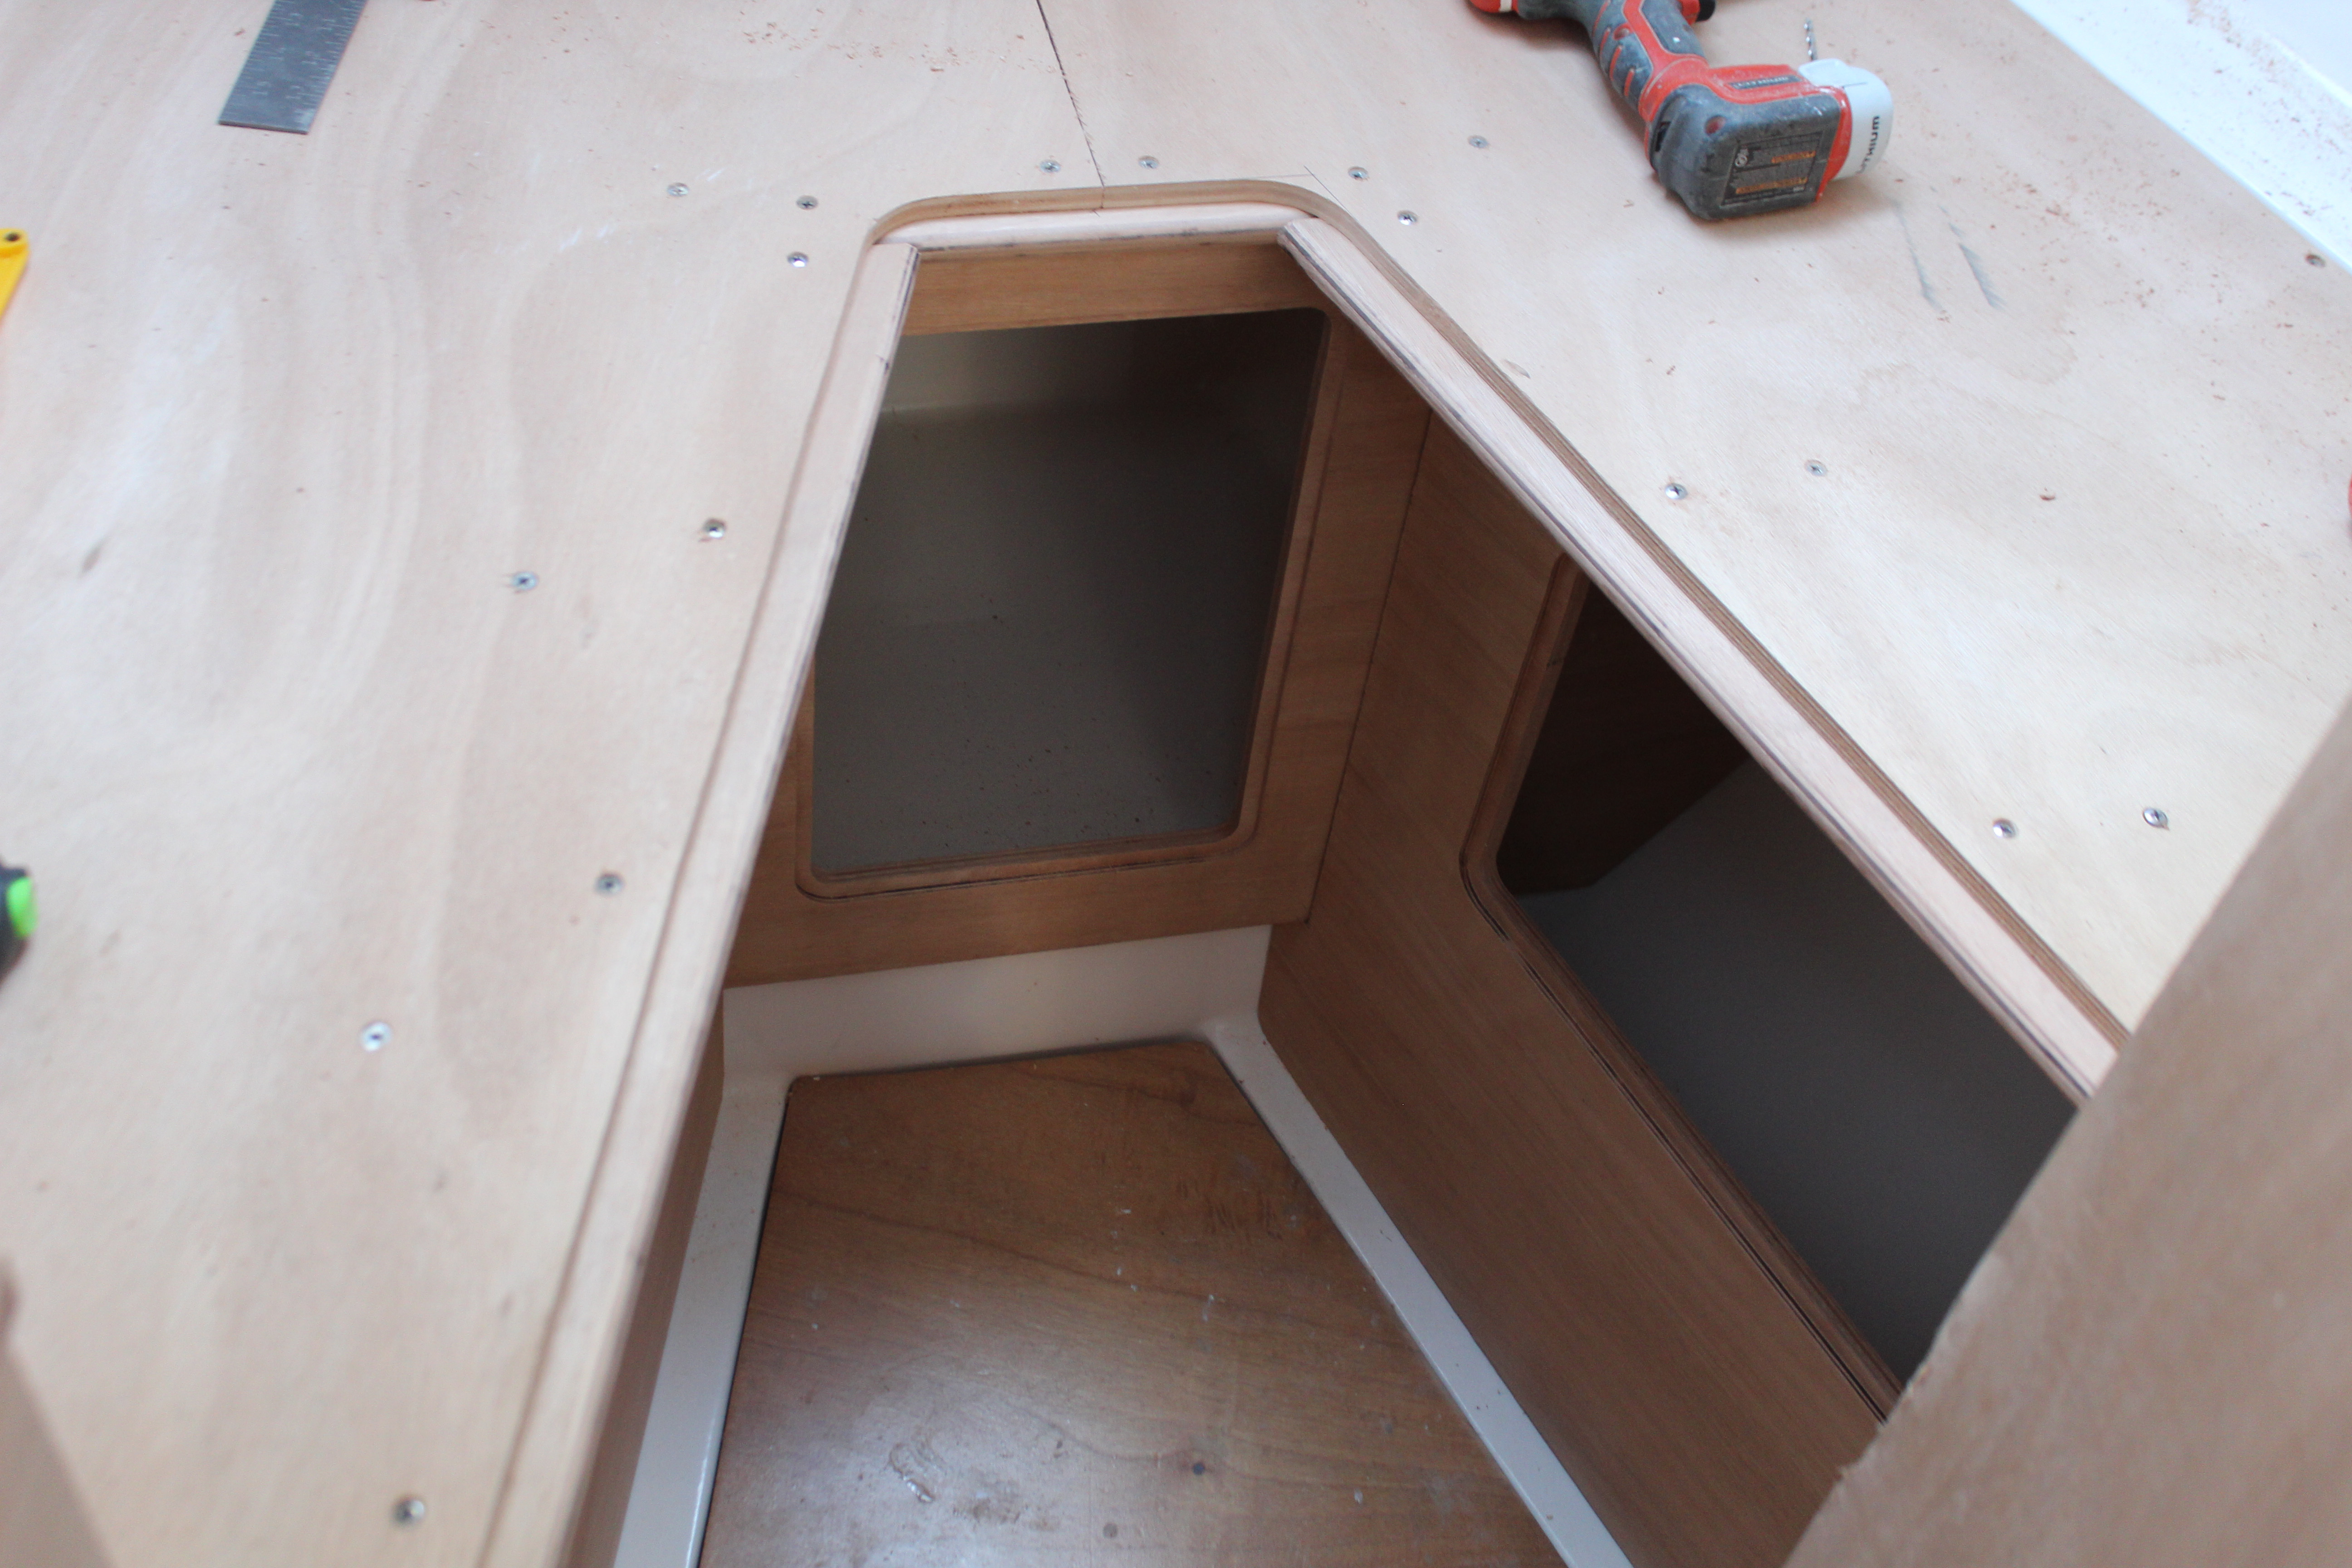
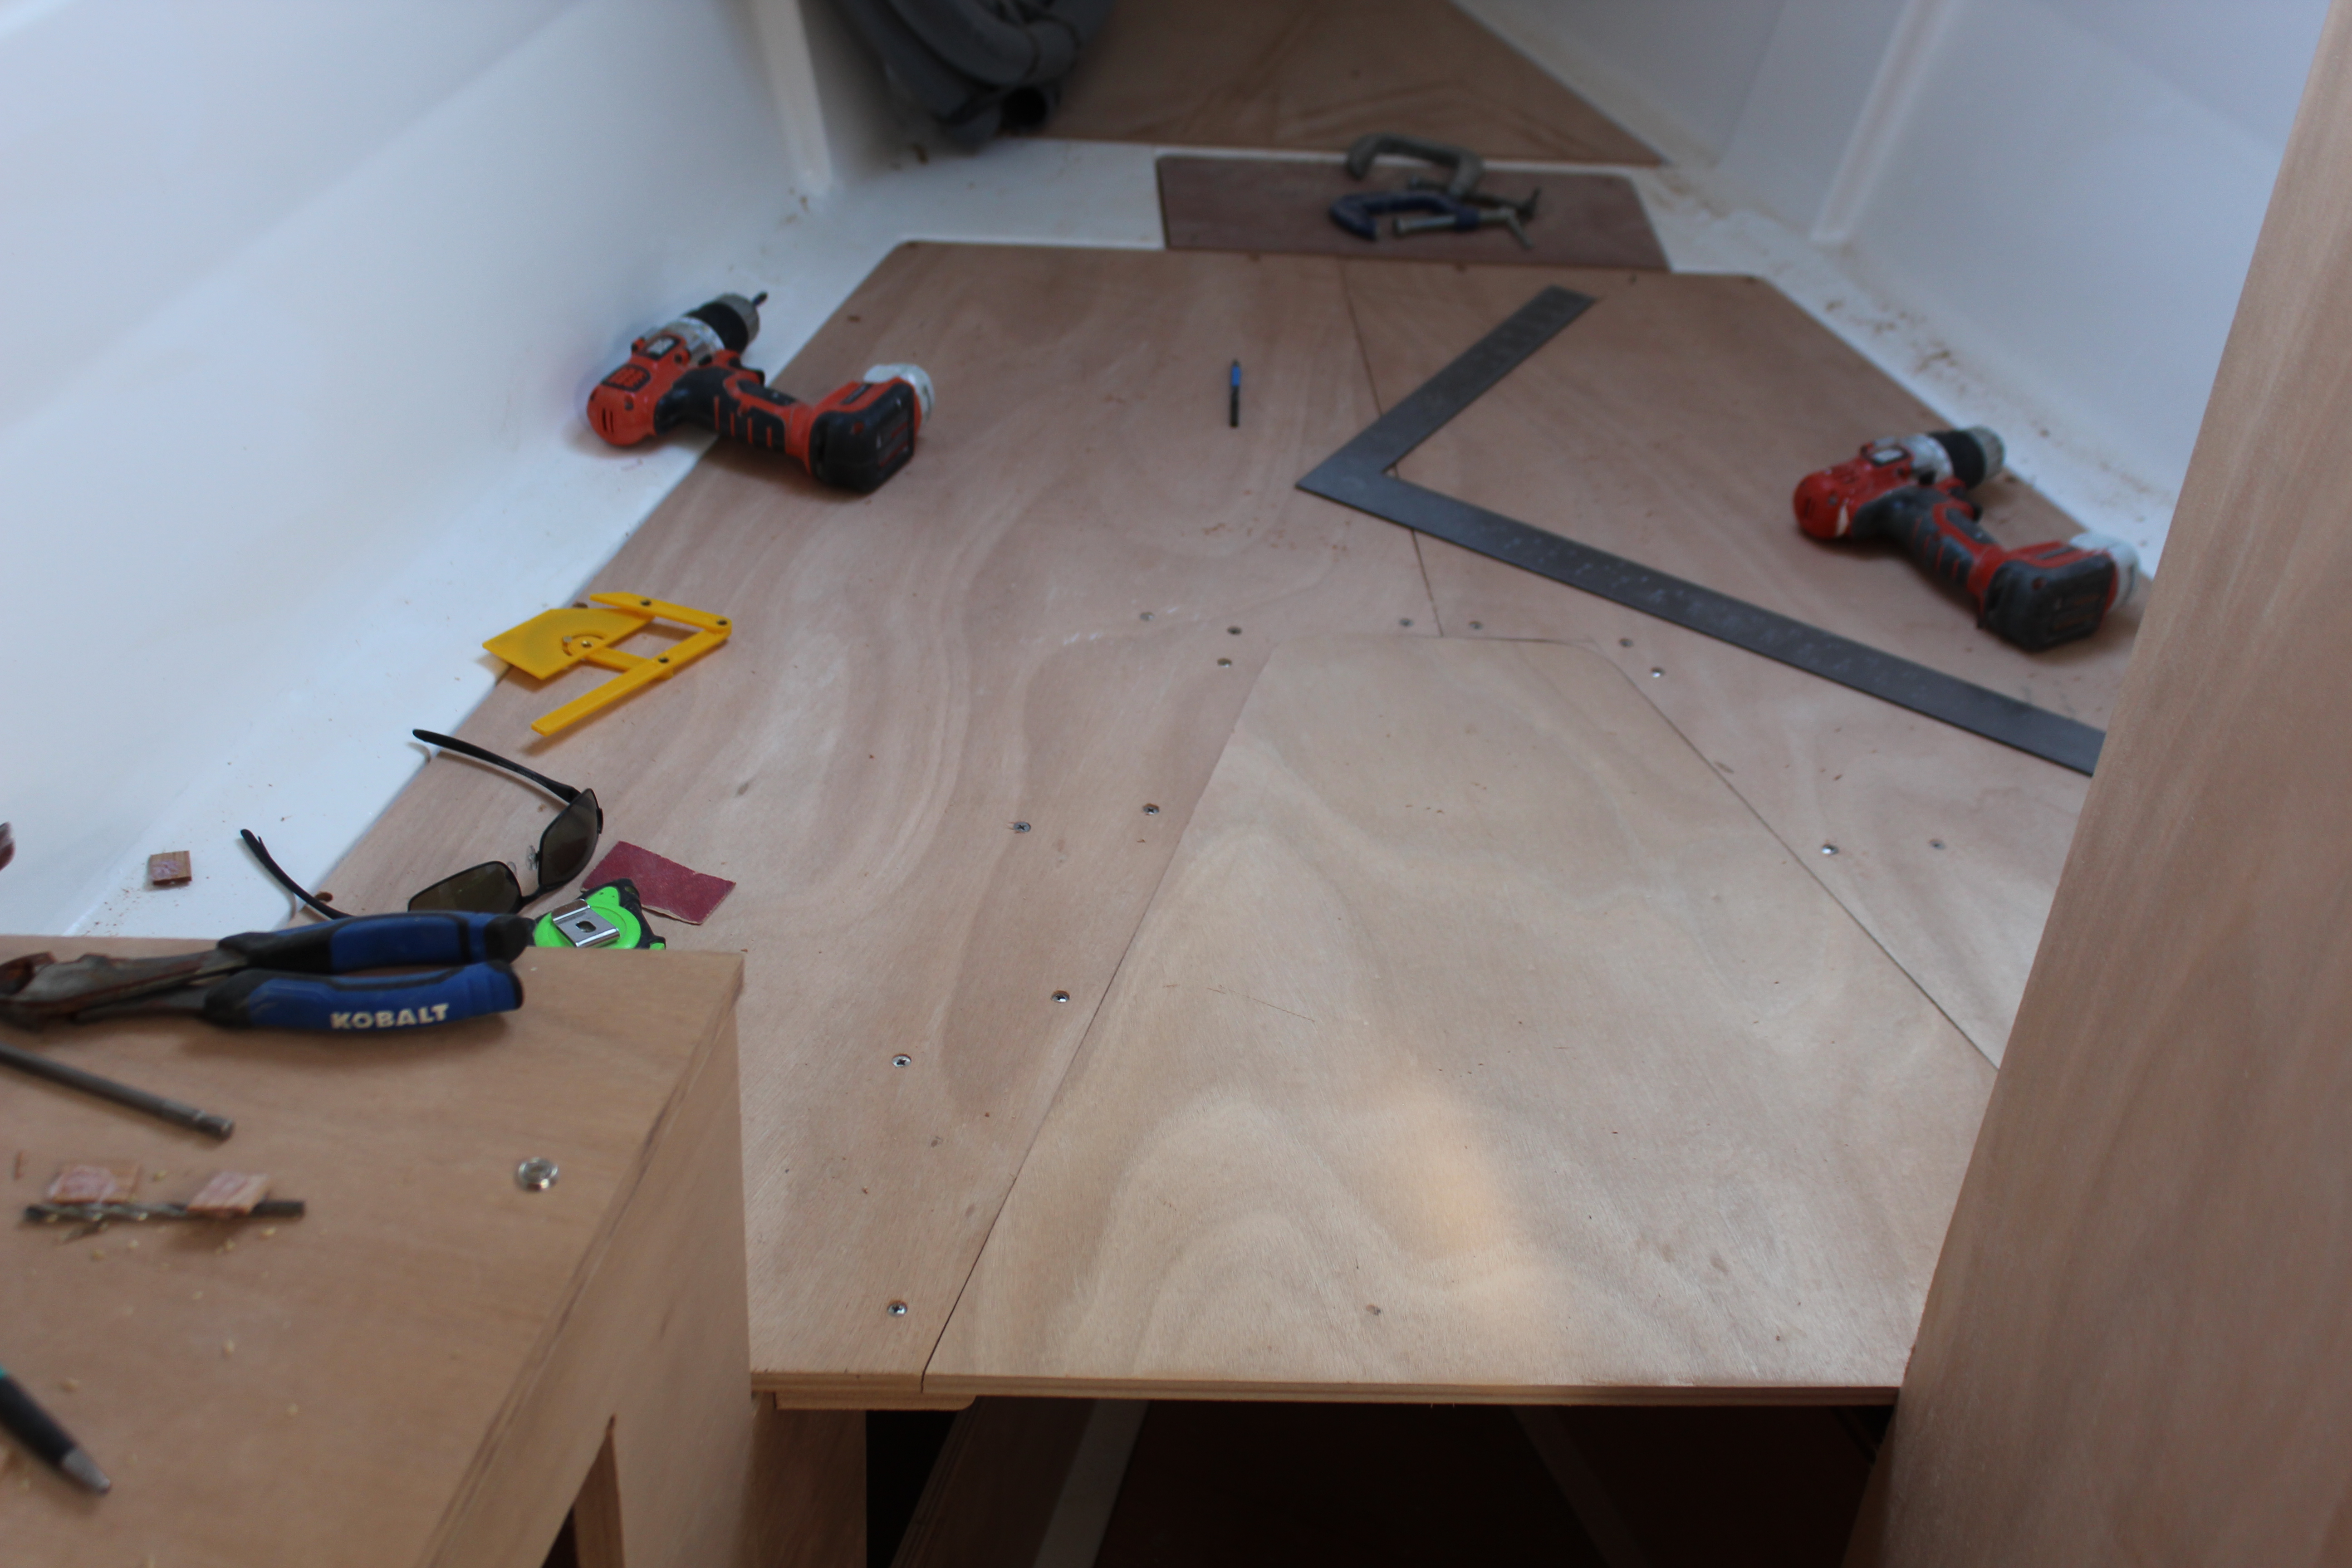
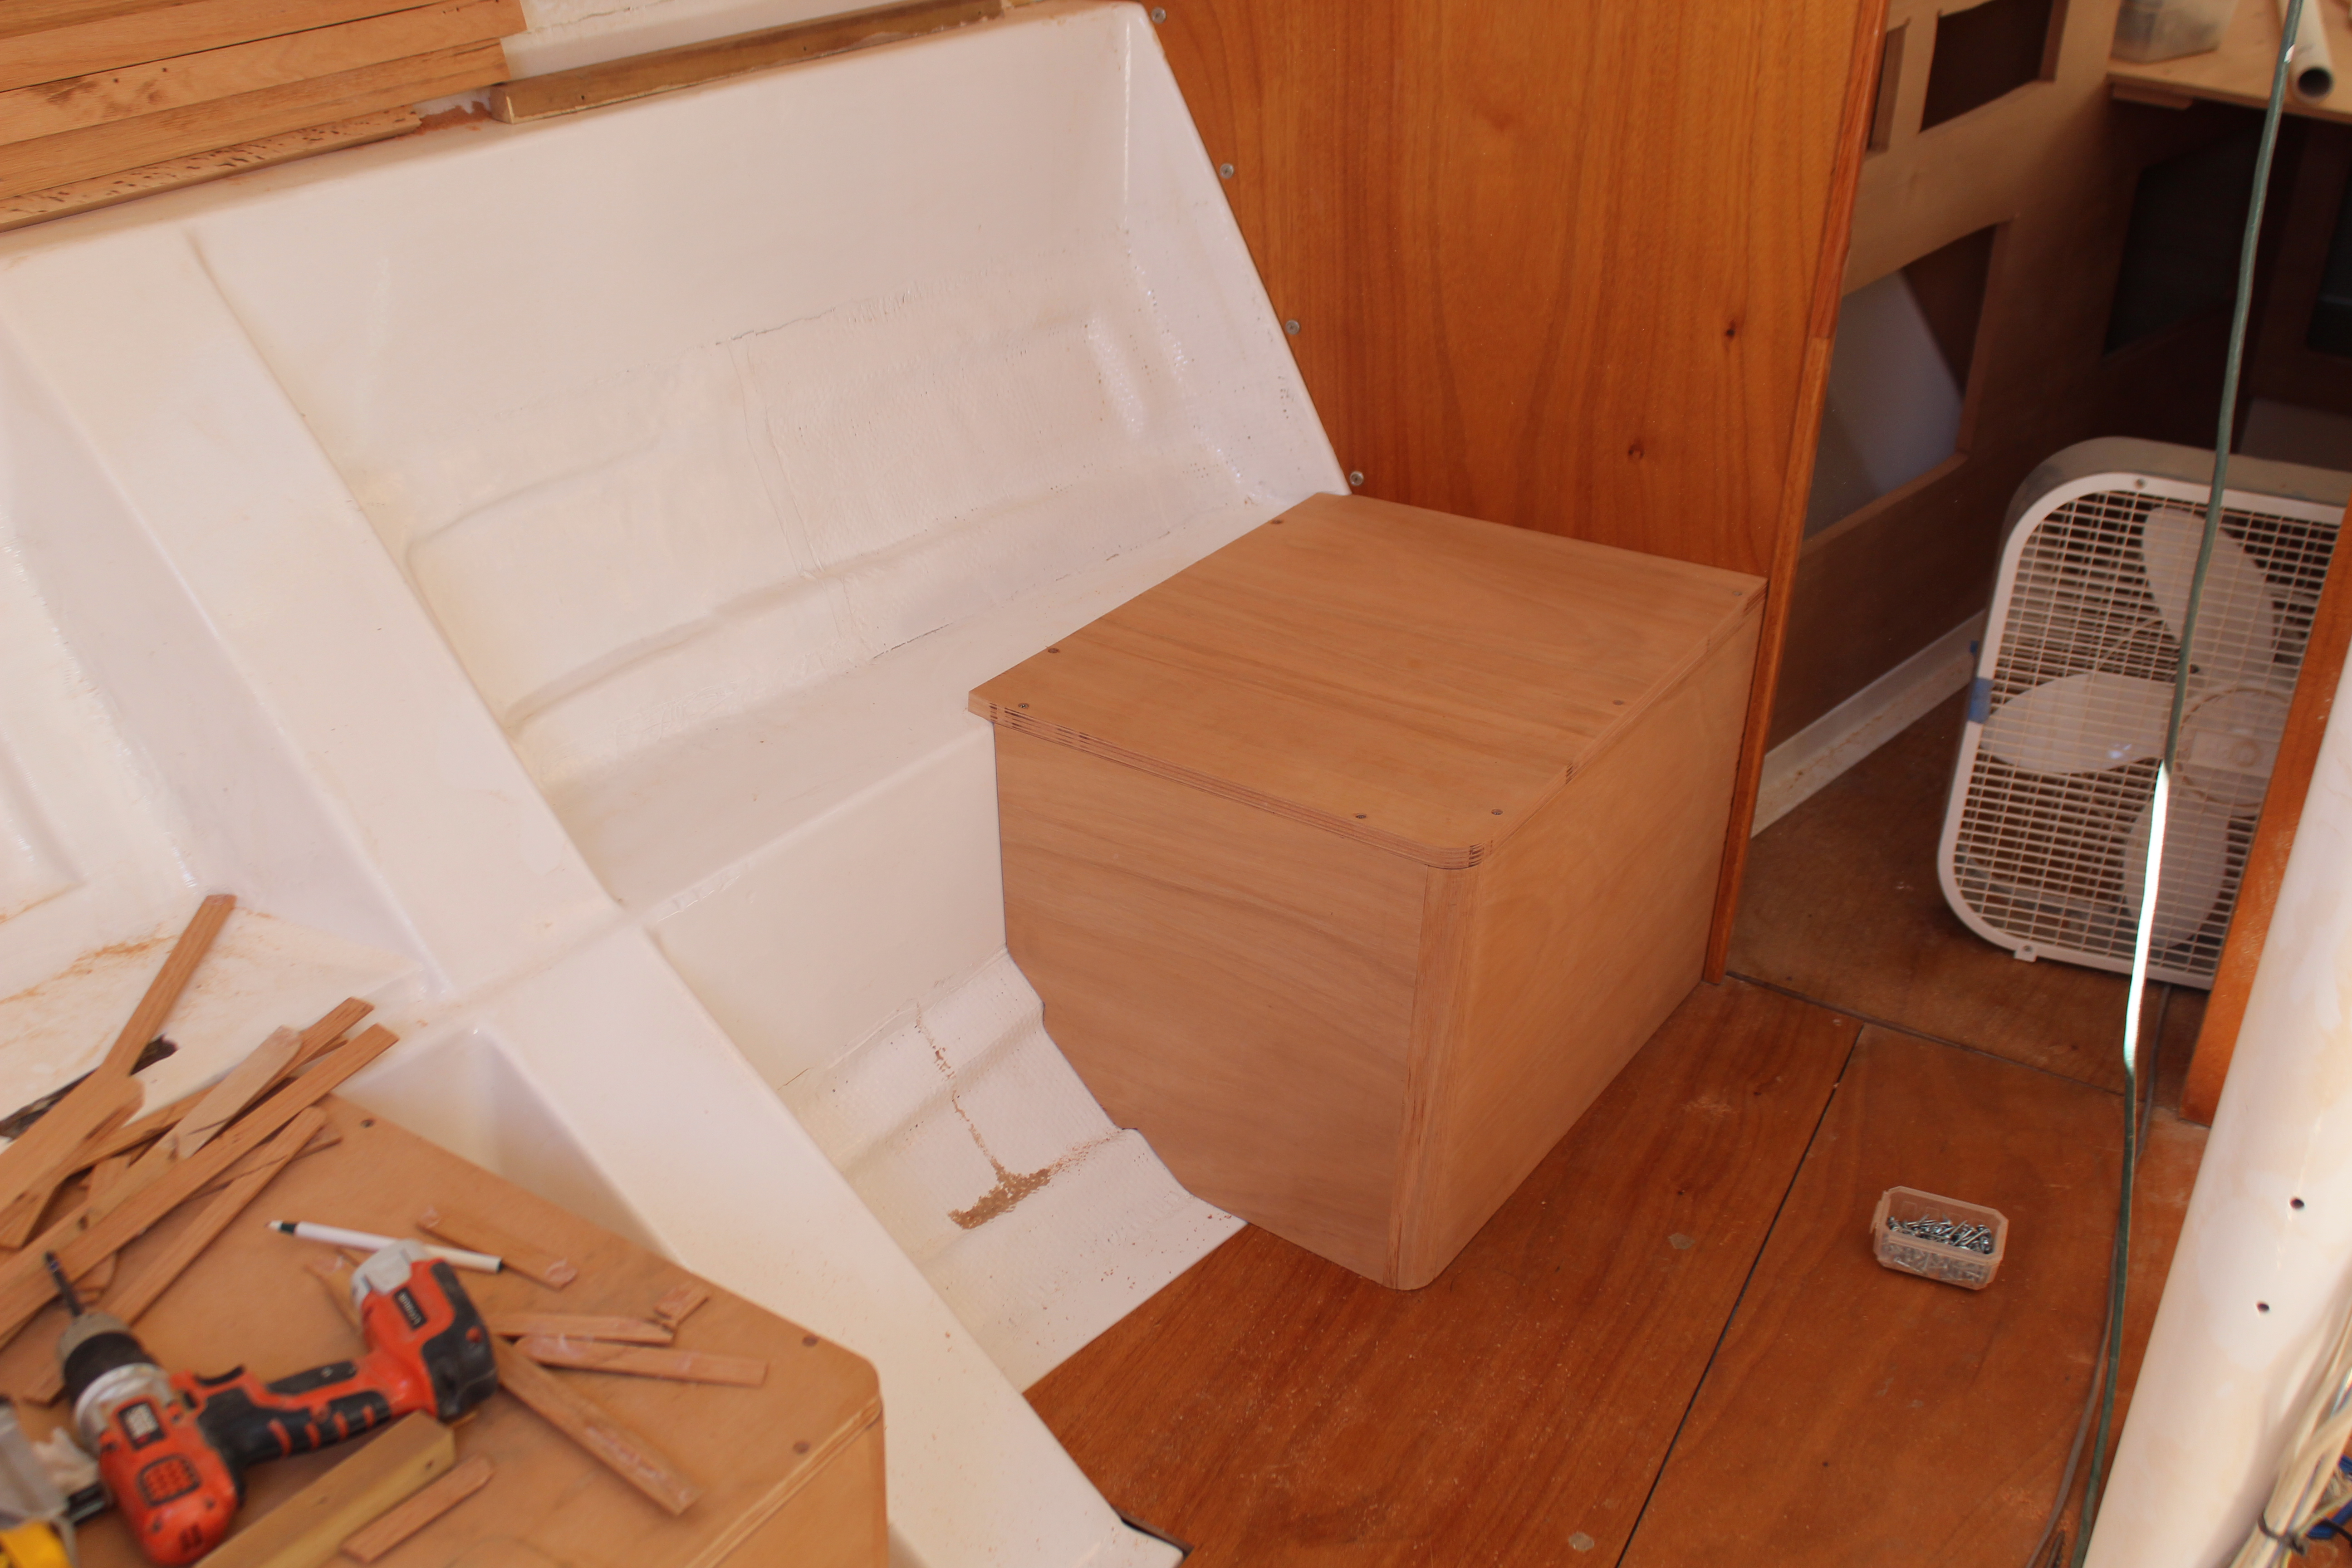
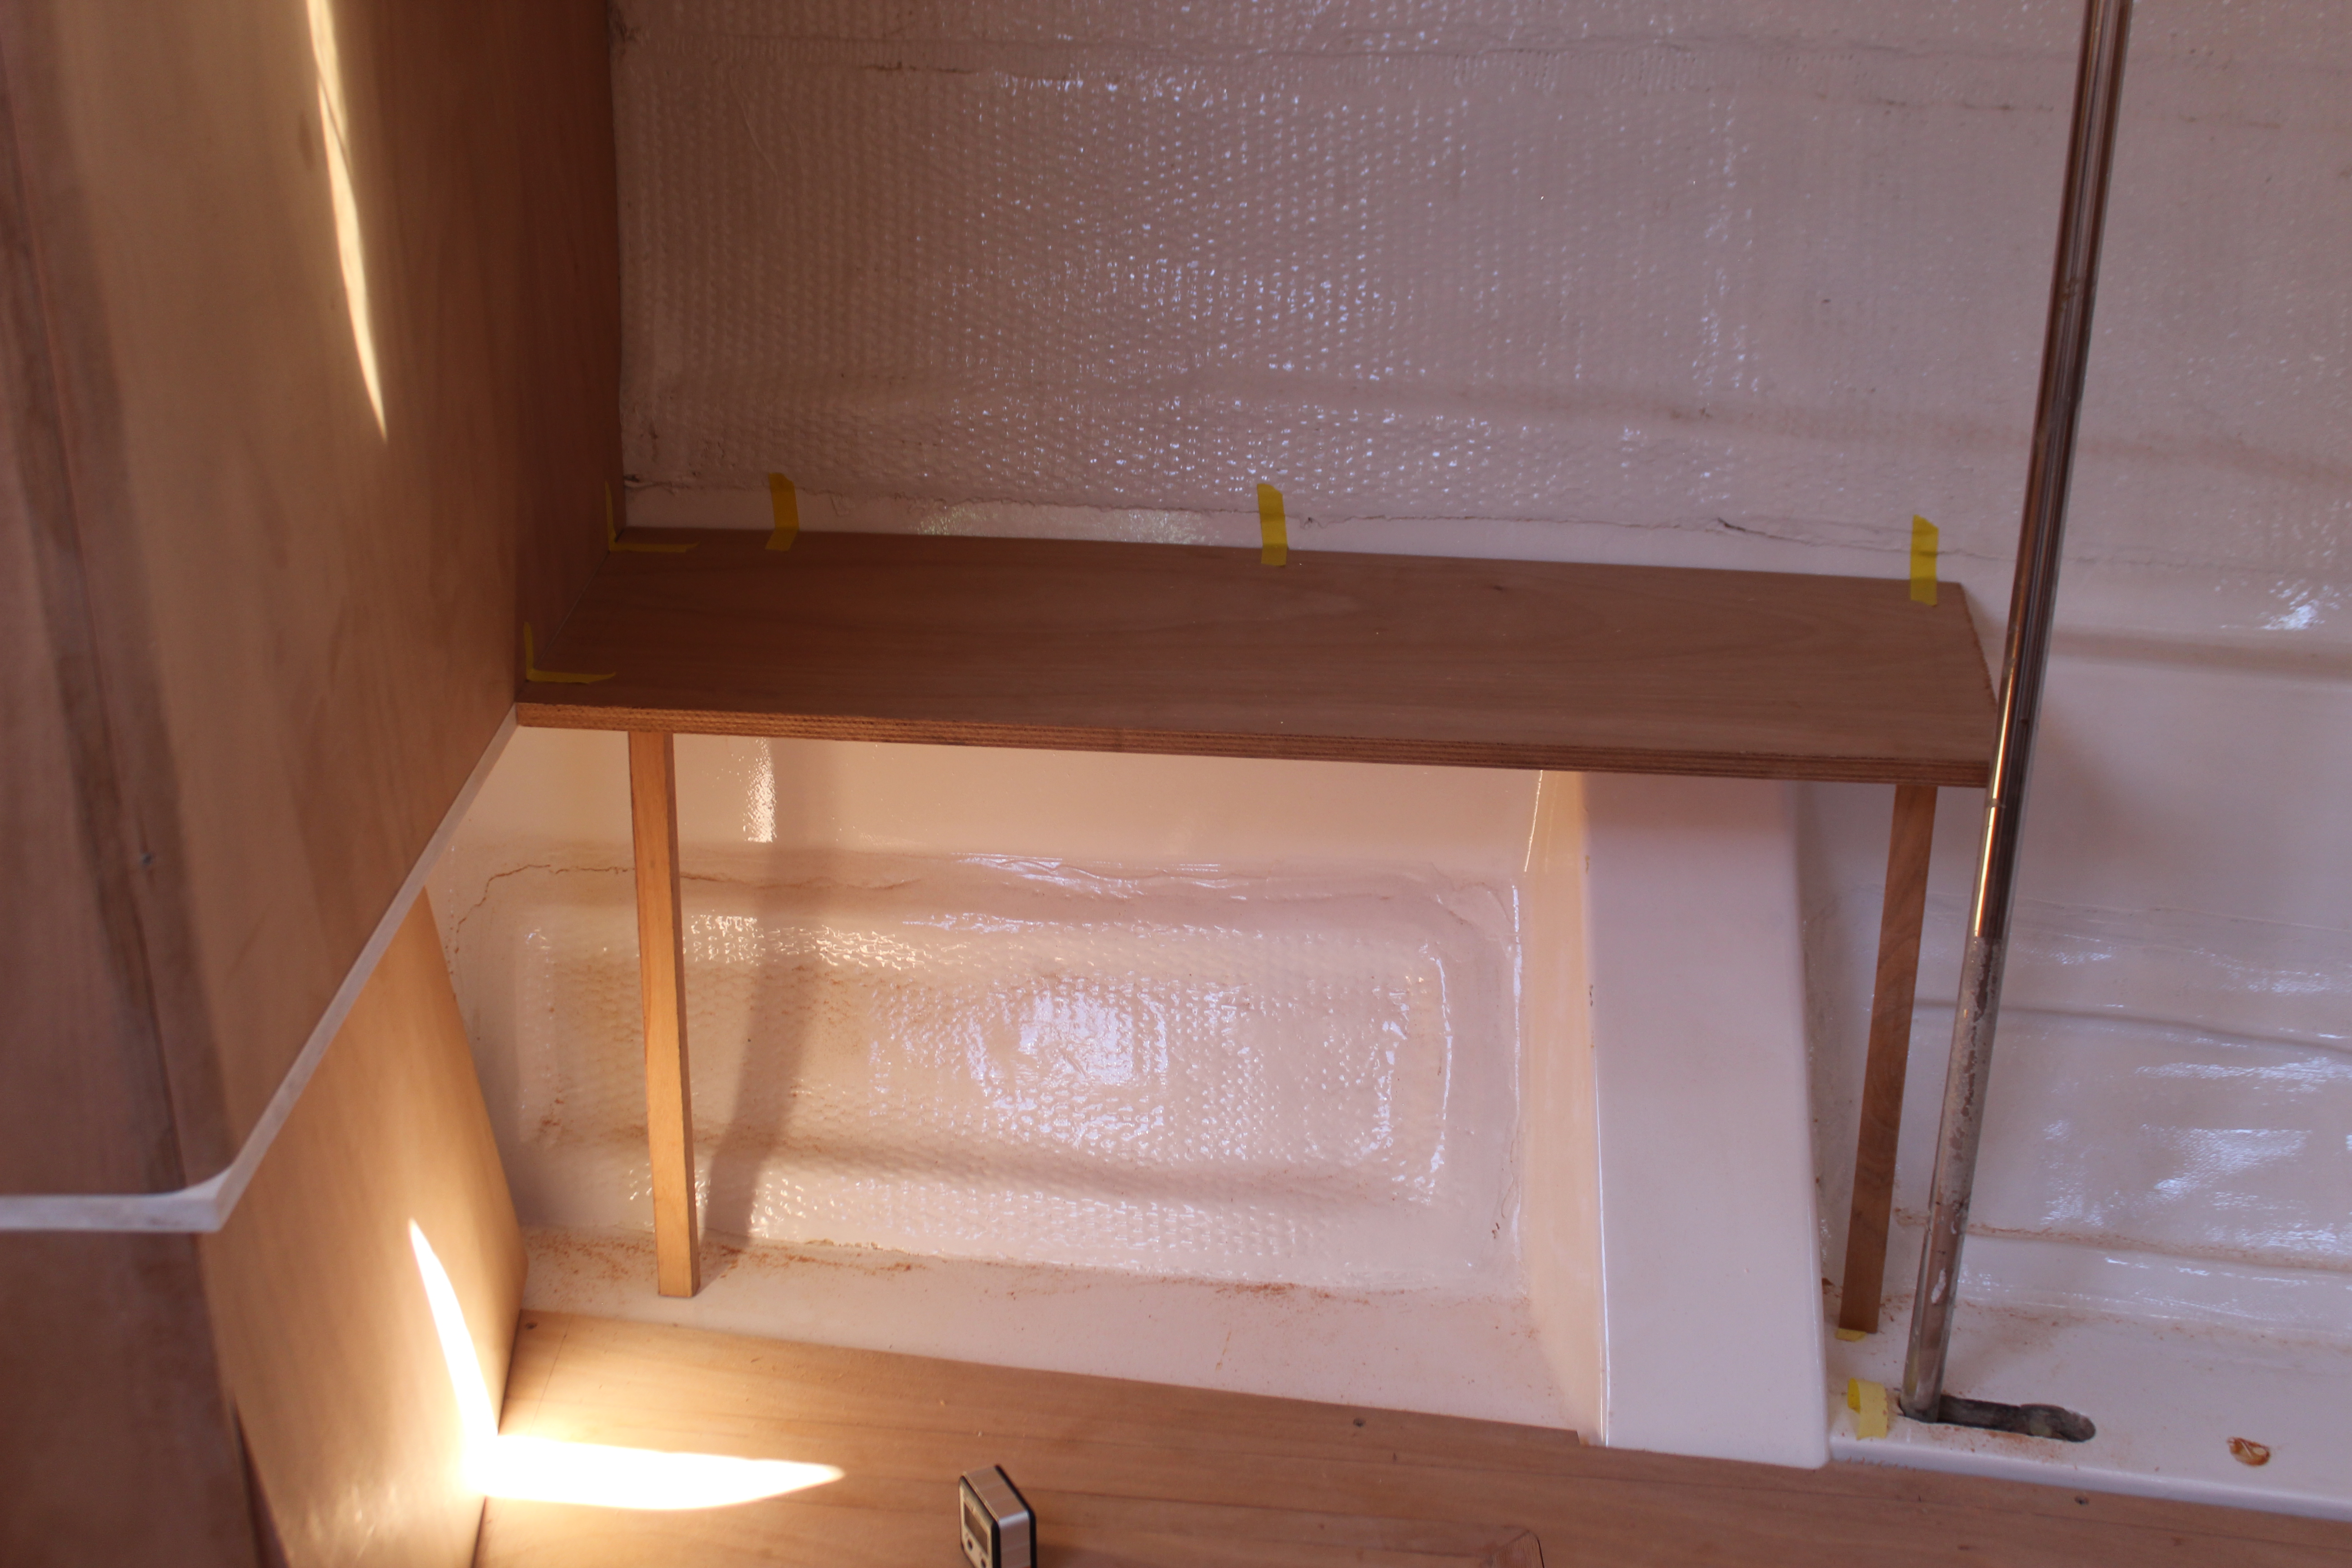
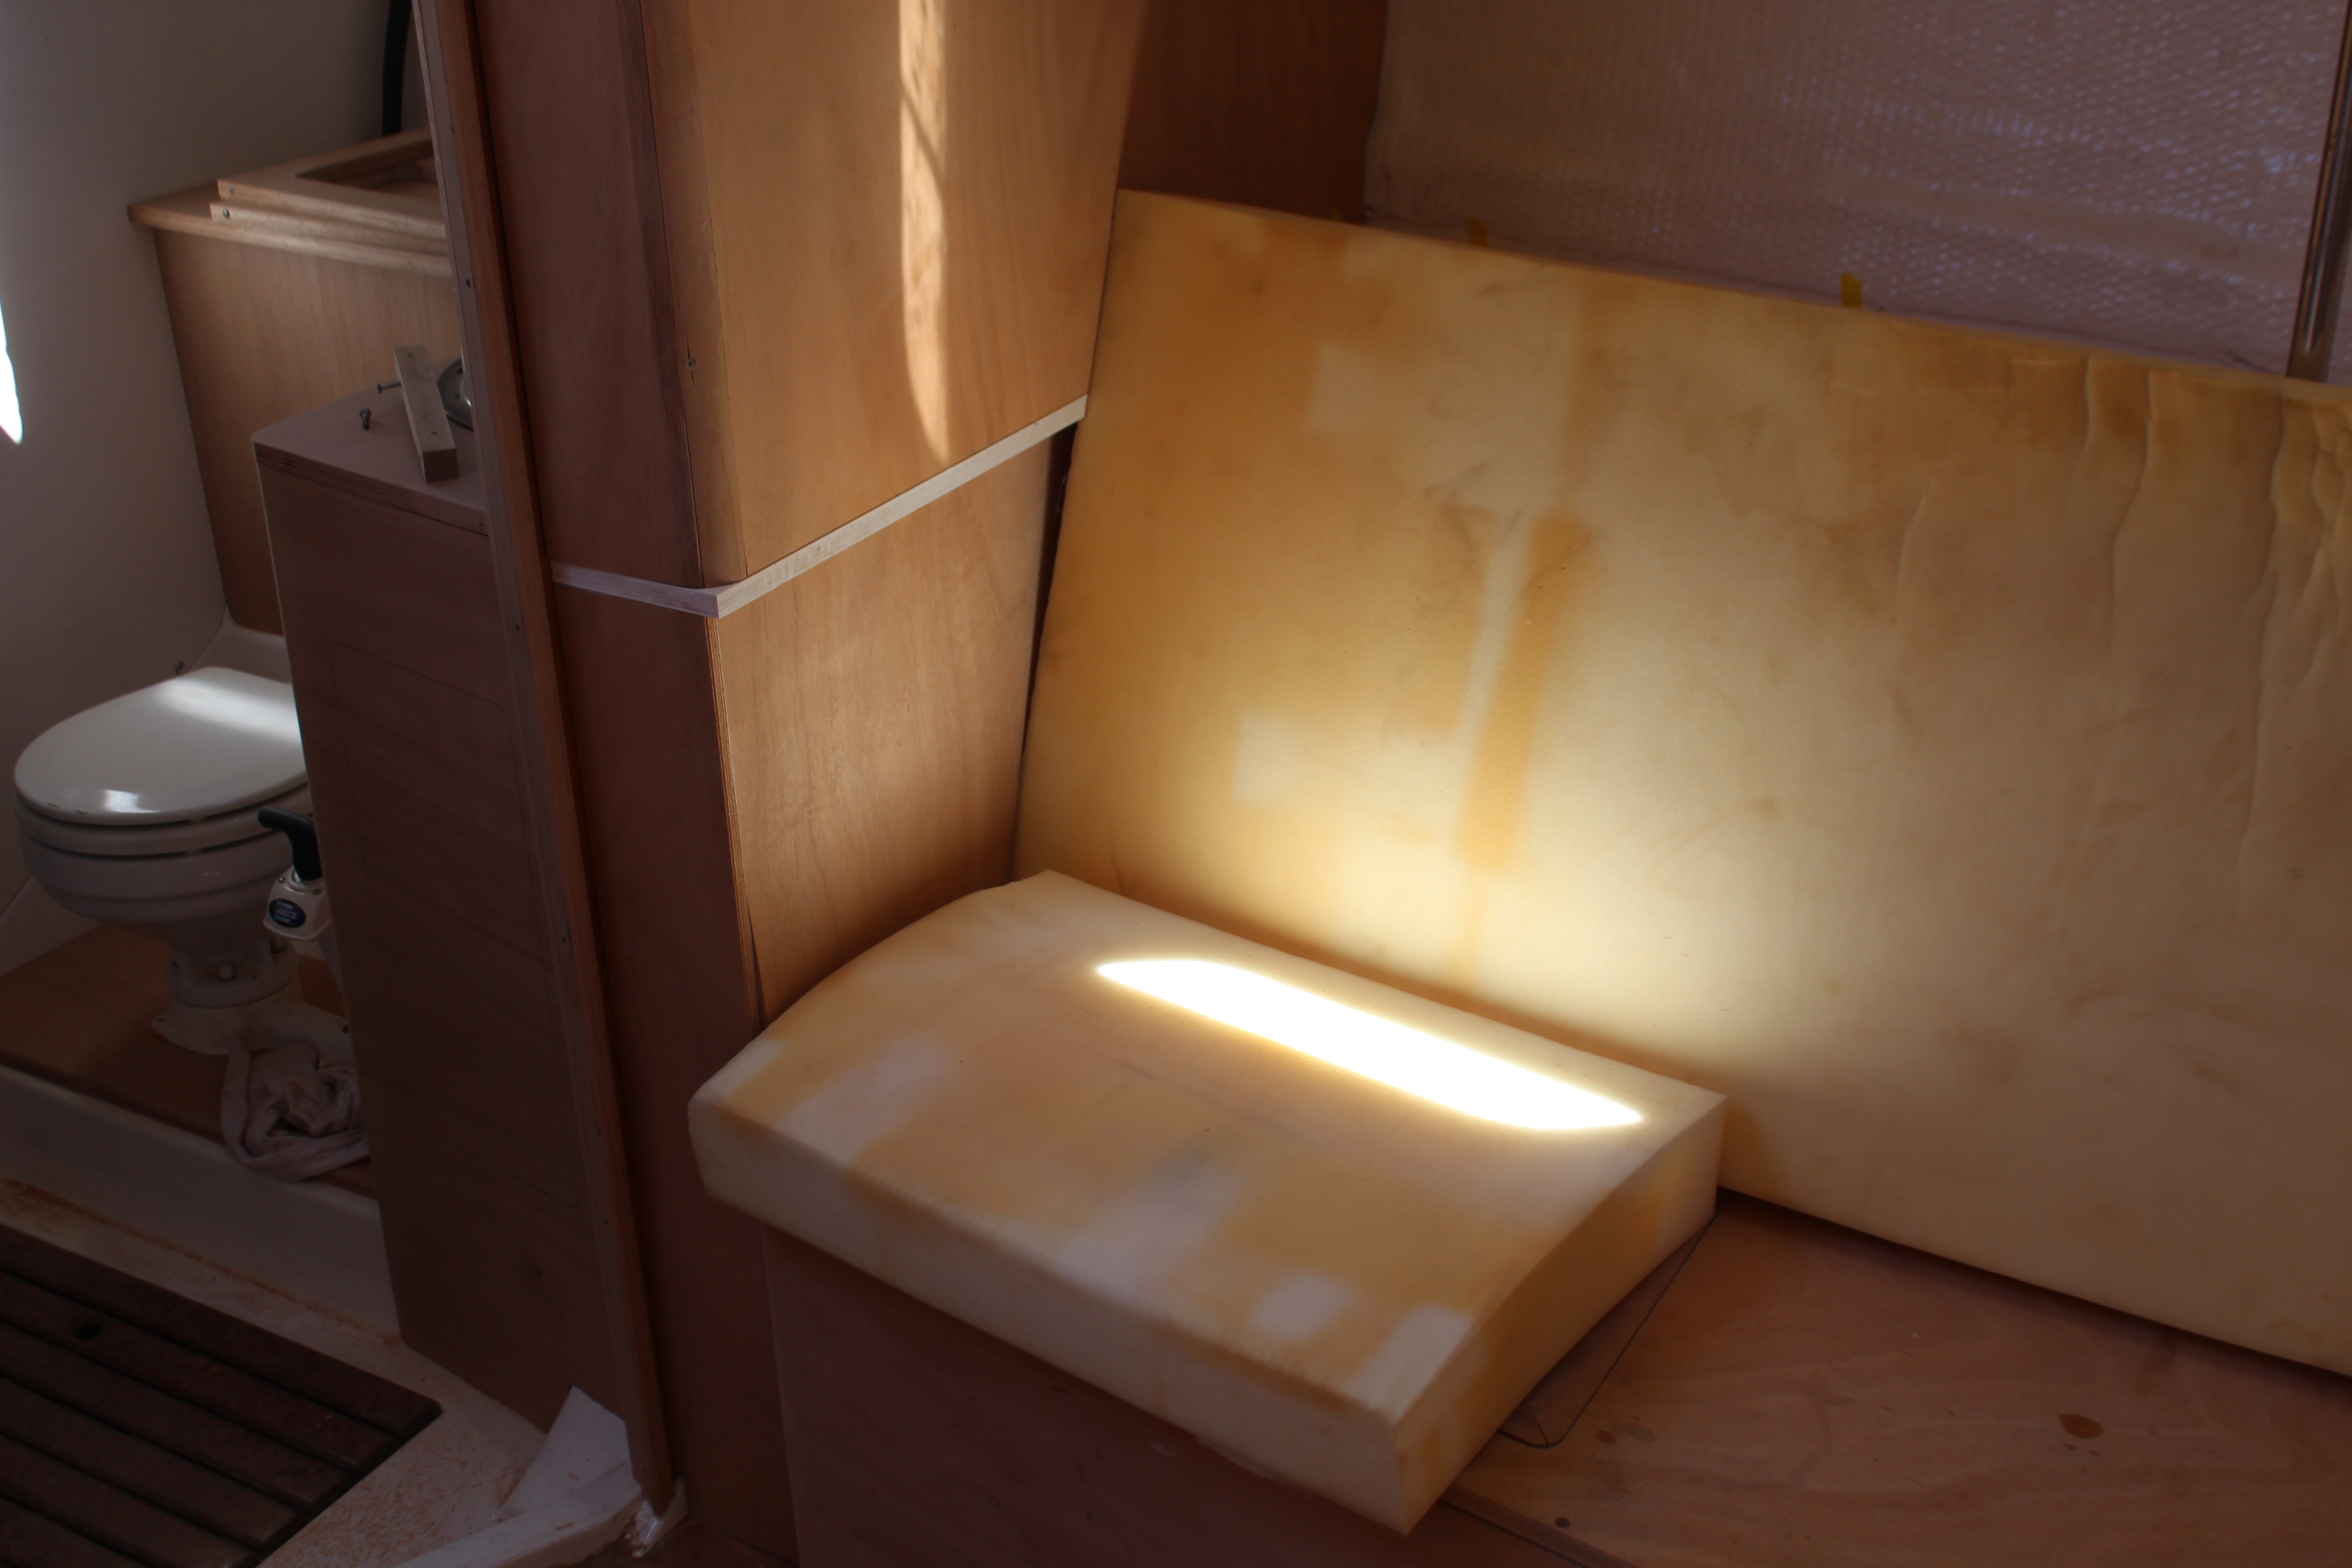
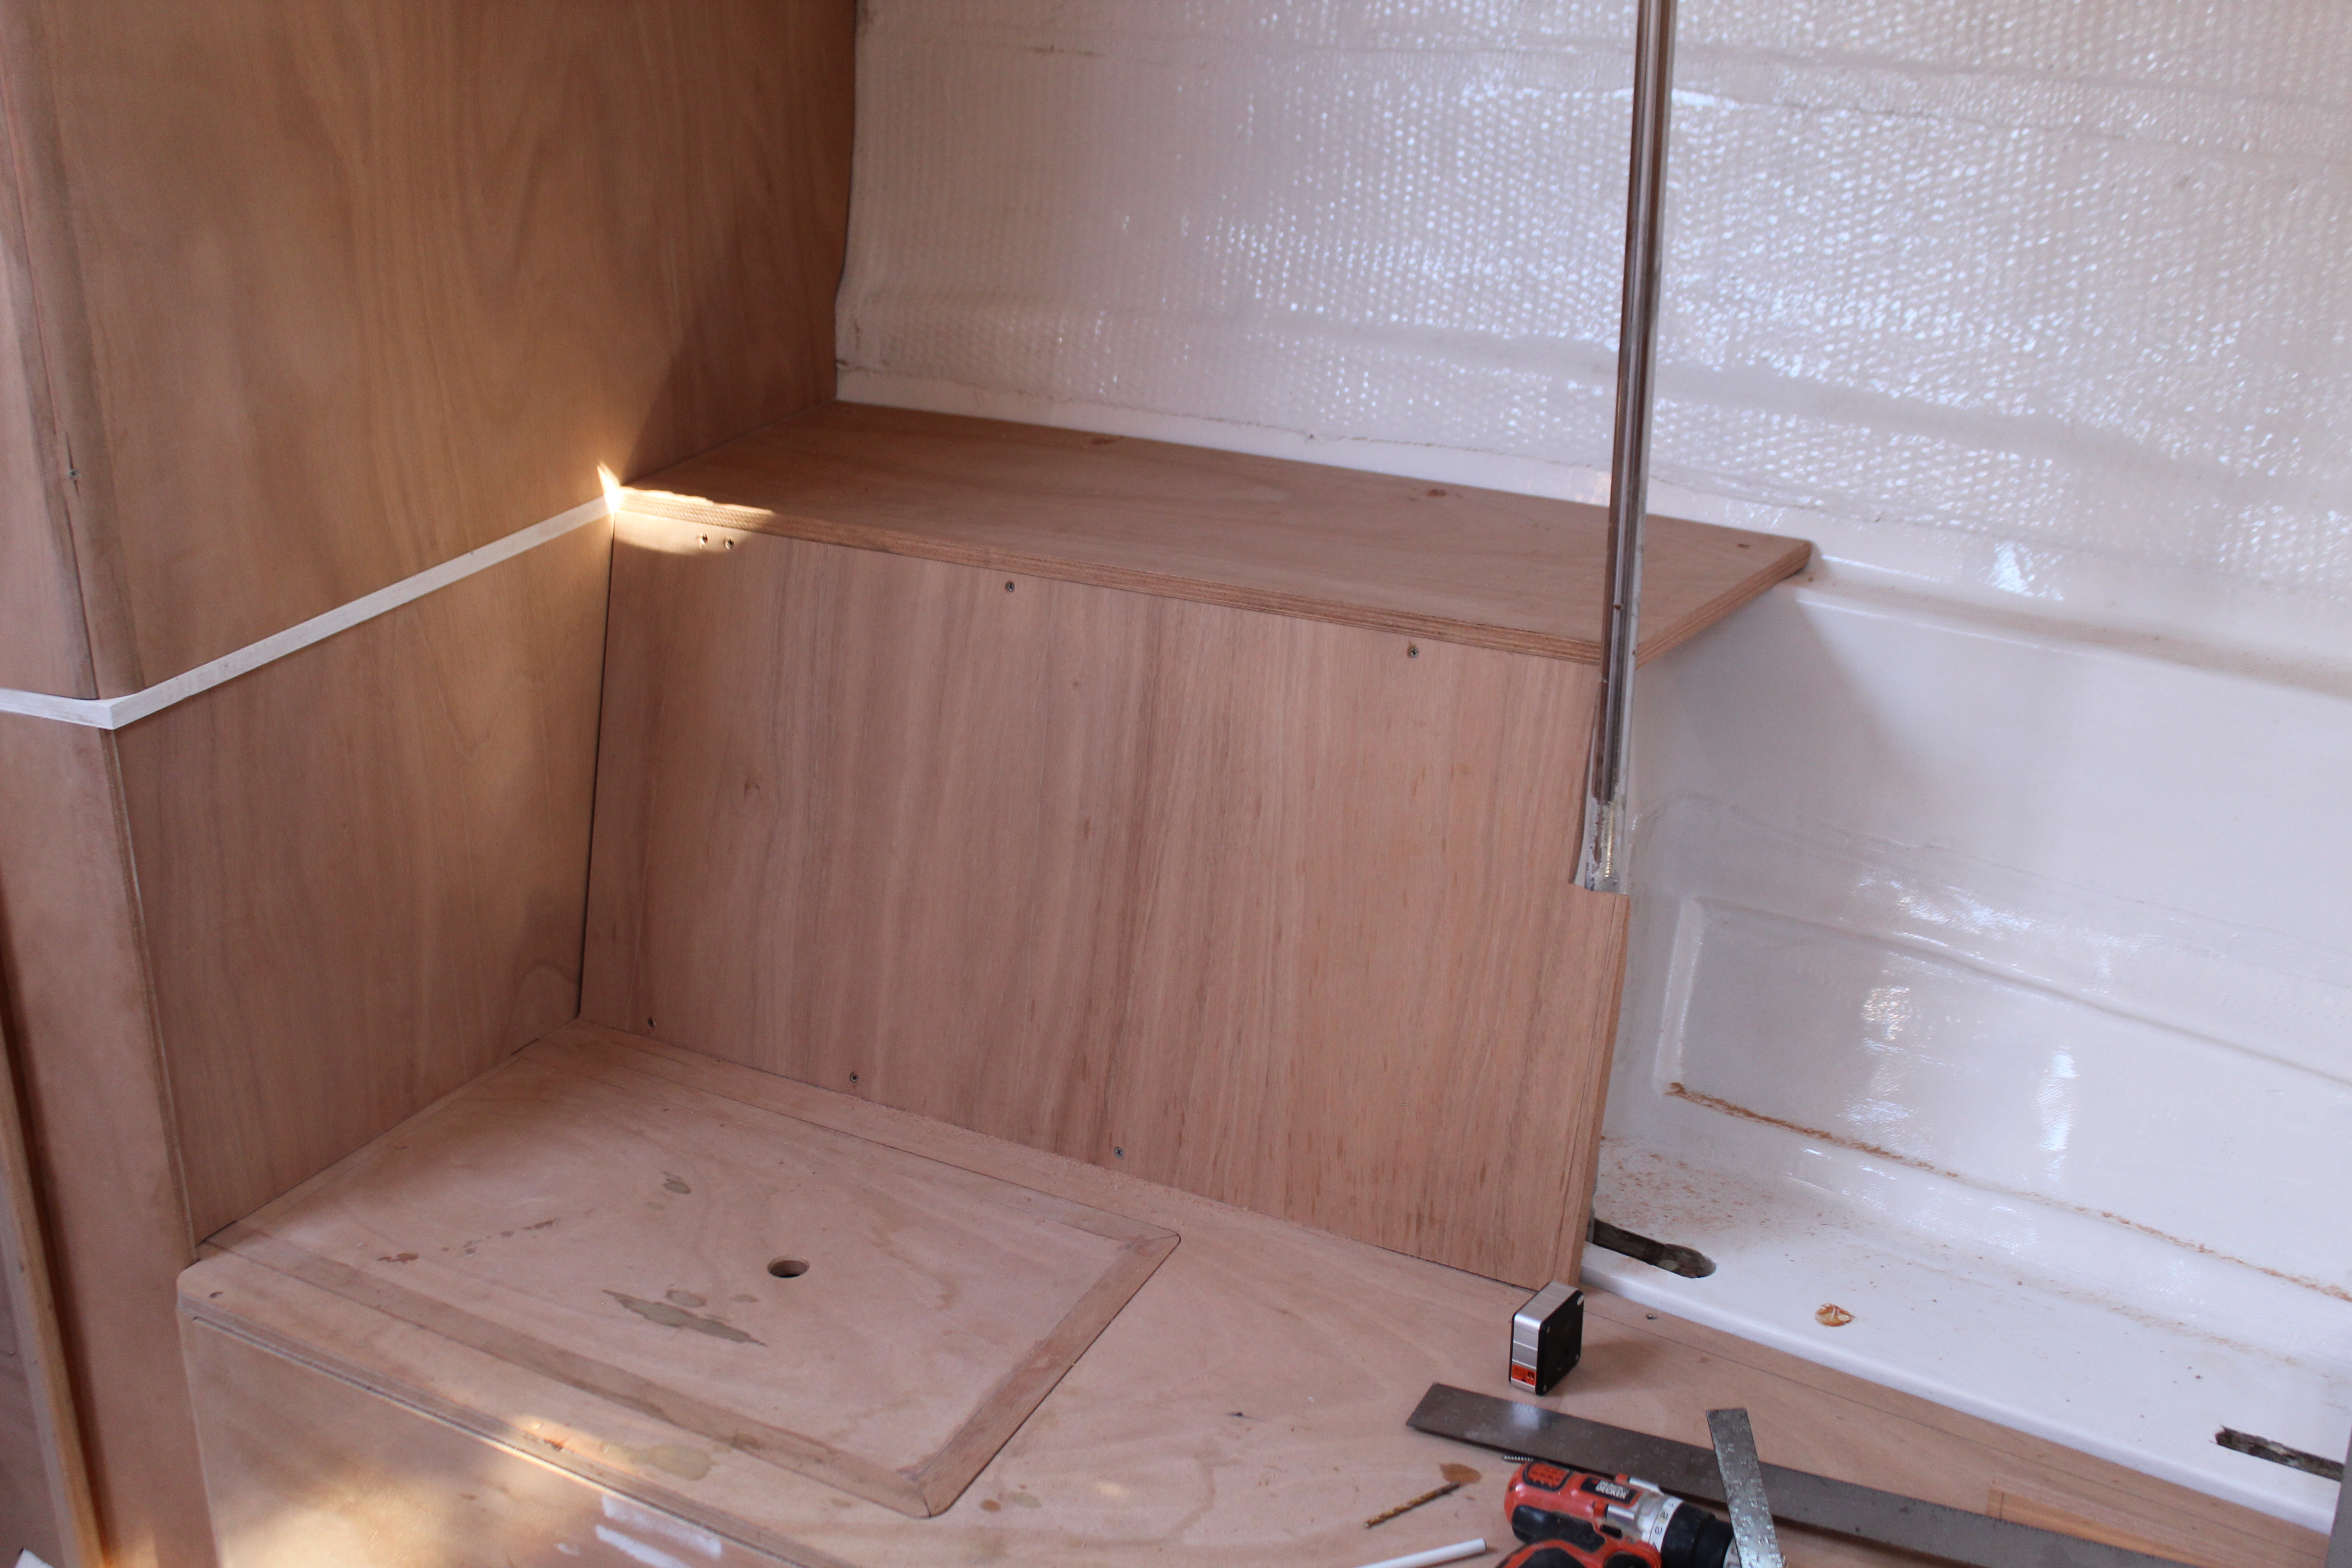
Error resolved but still waiting on filler. I filled the time this week by doing some cabinetry - pics will be up soon on that.

So while I'm waiting, here's the plan for the keel/hull joint. First let me say that I am not a fan of slathering gobs of filler to build up low spots/areas. I come from the old school (auto body) thinking that there should never be more than 1/8th inch of filler - if you need that much then go back and straighten the sheet metal a little better! I will make allowances when working with fiberglass and epoxies but I still want to limit the buildup of filler. My personal limit is about 1/4". Any more than that and I would rather use glass layers for fill. A big problem with thick layers of filler is shrinkage - as I saw with the area on the aft end of the keel - any filler will shrink as it cures and if too heavy you'll get cracks as it shrinks. Another issue is heat buildup during drying - I saw evidence of that too. So, what's the plan?

First thing is to make some assumptions. Based on the condition of the joint and surrounding filler it looks to me like the cracking and rusting was not caused by the keel moving, rather by the filler failing. Sure, there's going to be a little movement but in the grand scheme of things not enough to have caused an issue by itself. Most of the actual seal (5200) was and is intact and plyable, as I found when trying to dig it out! What I did find was a too-generous application of the wrong type (my opinion here!;)) of filler which as it aged started cracking and letting water seep in and attack the keel.That started the rust, which degraded the surrounding sealer and filler.Then unnamed yard apes tried to fix it. Lather, rinse, repeat! Another assumption is the design of the keel attach points - can't get much more solid than what's there. The only wild card is the repair (?) on the aft section of the keel - I still can't conceive of what happened, but whatever it was, the keel is stronger now than before, so I can work with that.

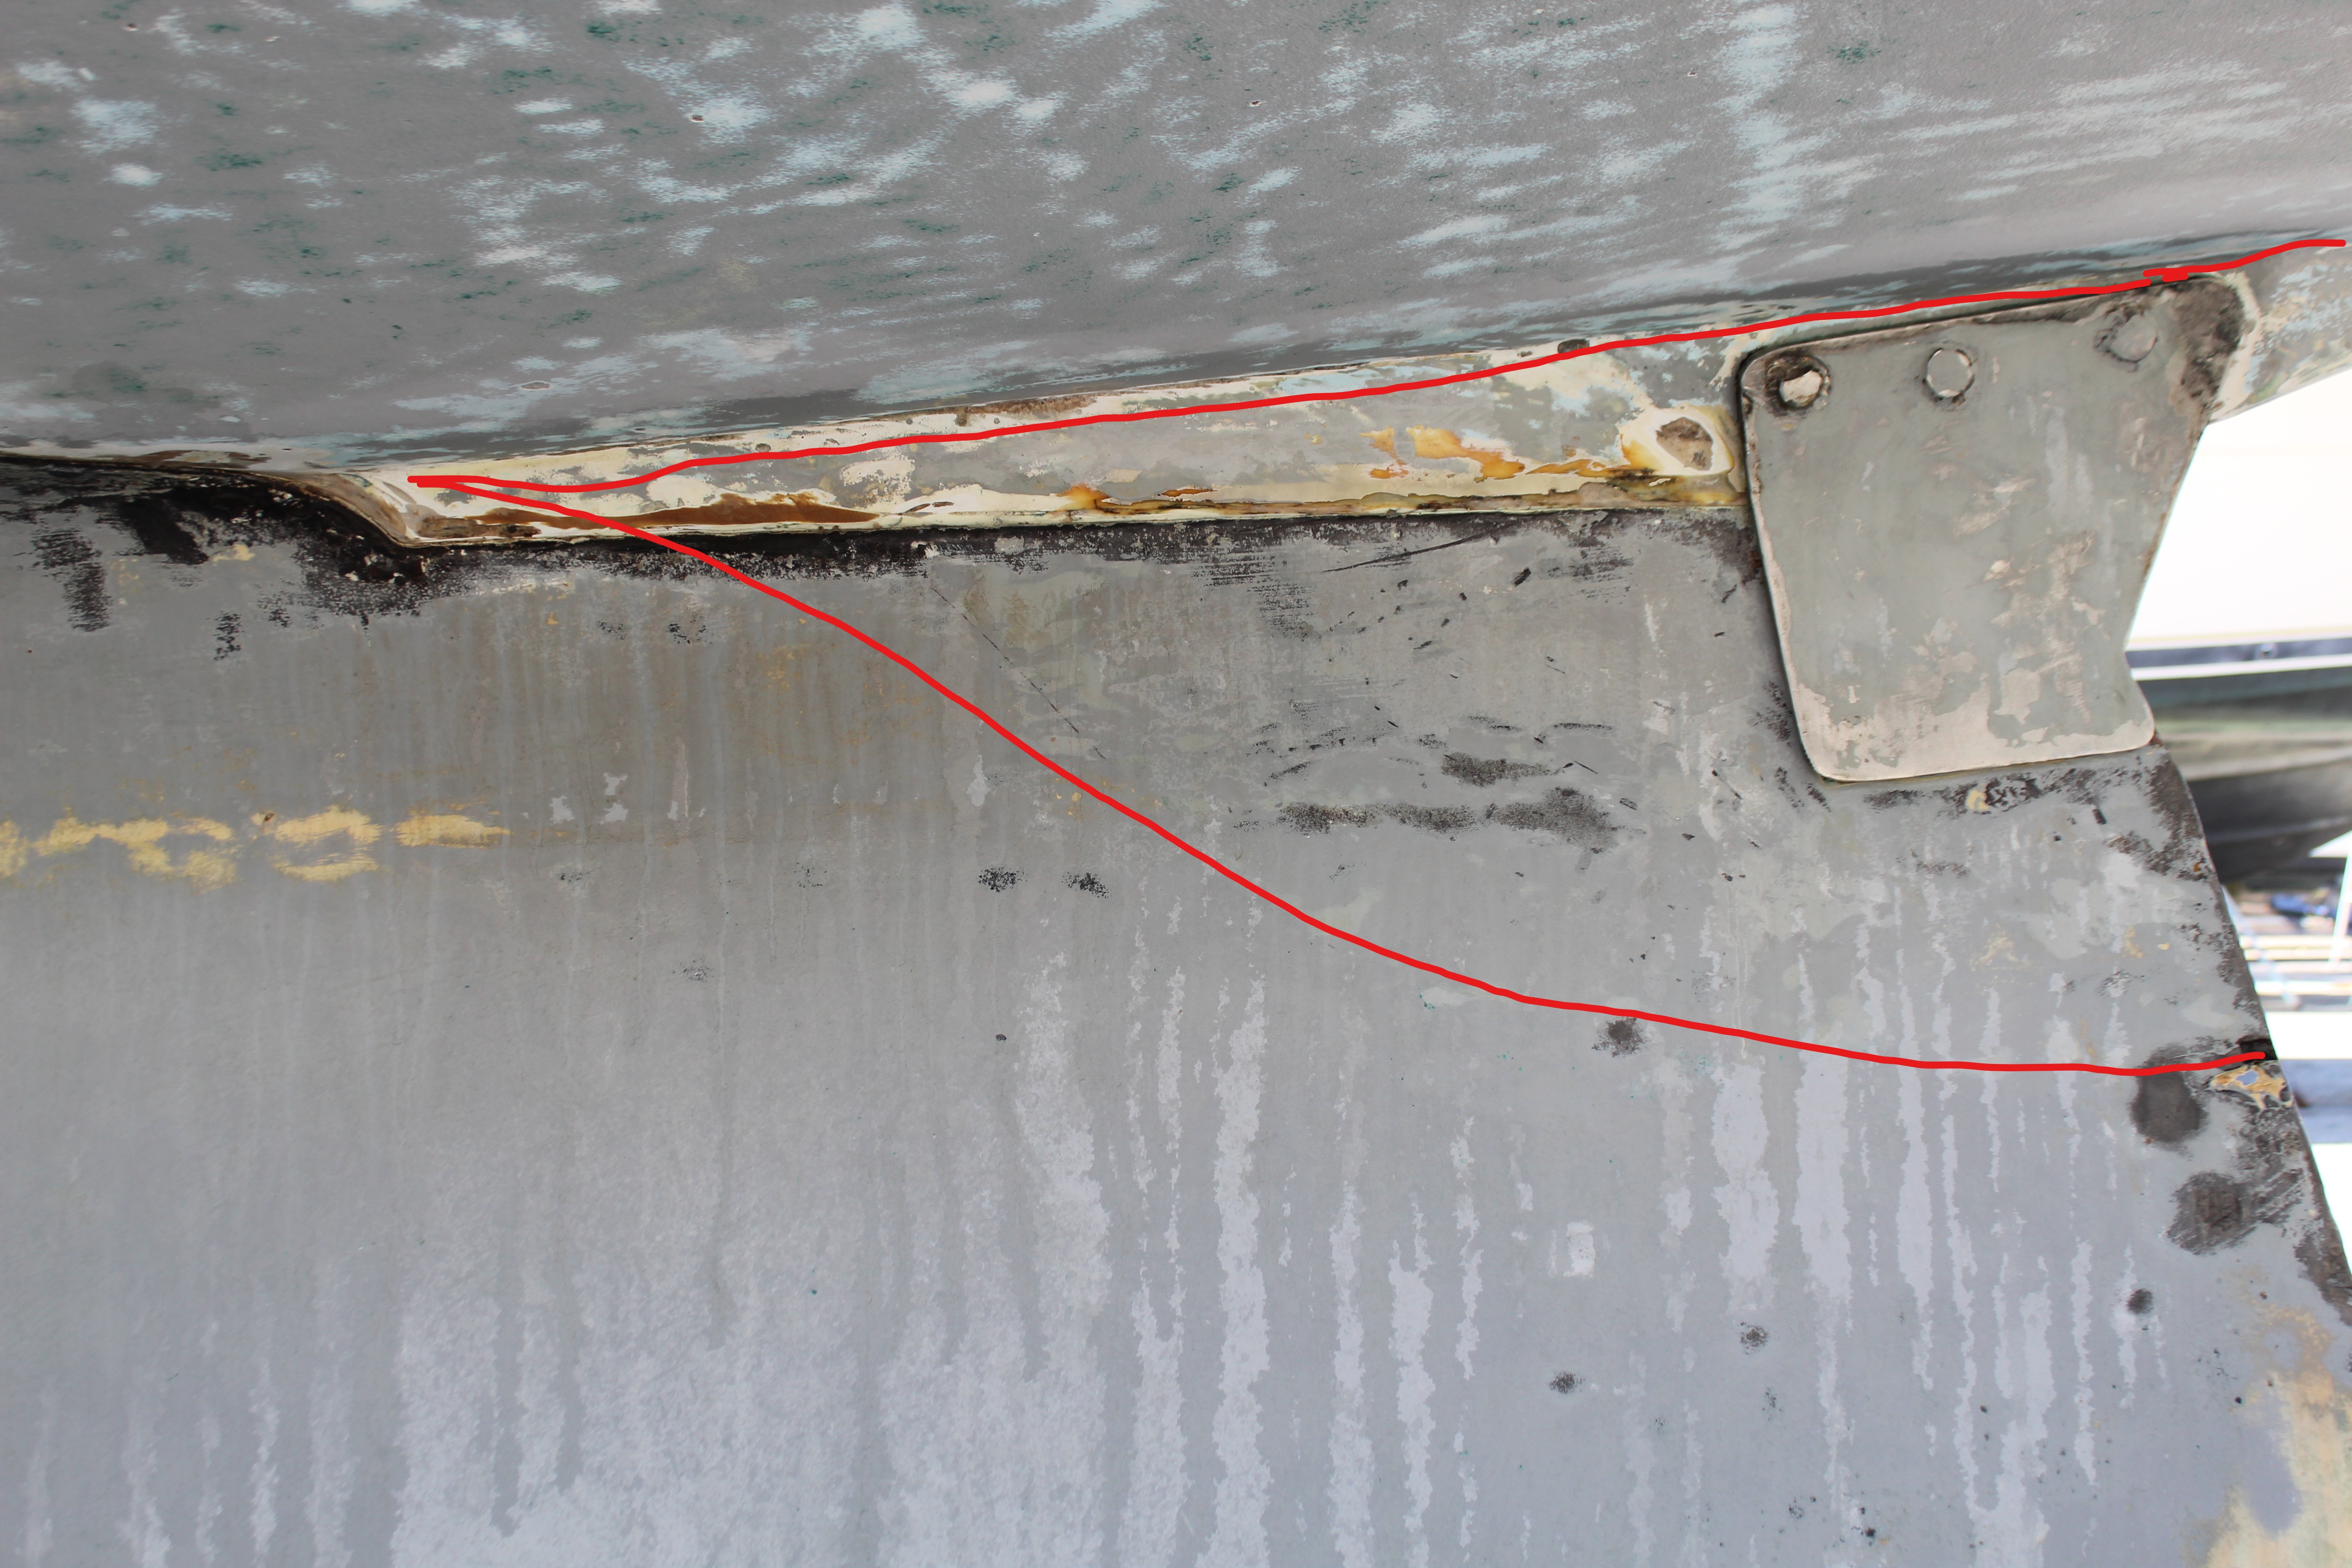
So with this in mind, I will be doing the repair in four stages. First is to re-fill and fair the aft end of the keel up to the rear flange:


The area outlined in red was all filler before, completely covering the actual joint. I will first fill the joint (now clean and properly prepped and rust fixed!) with G-Flex, then build up alternating layers of 1708 and chopped strand mat to fill until close, then final fairing for good looks.

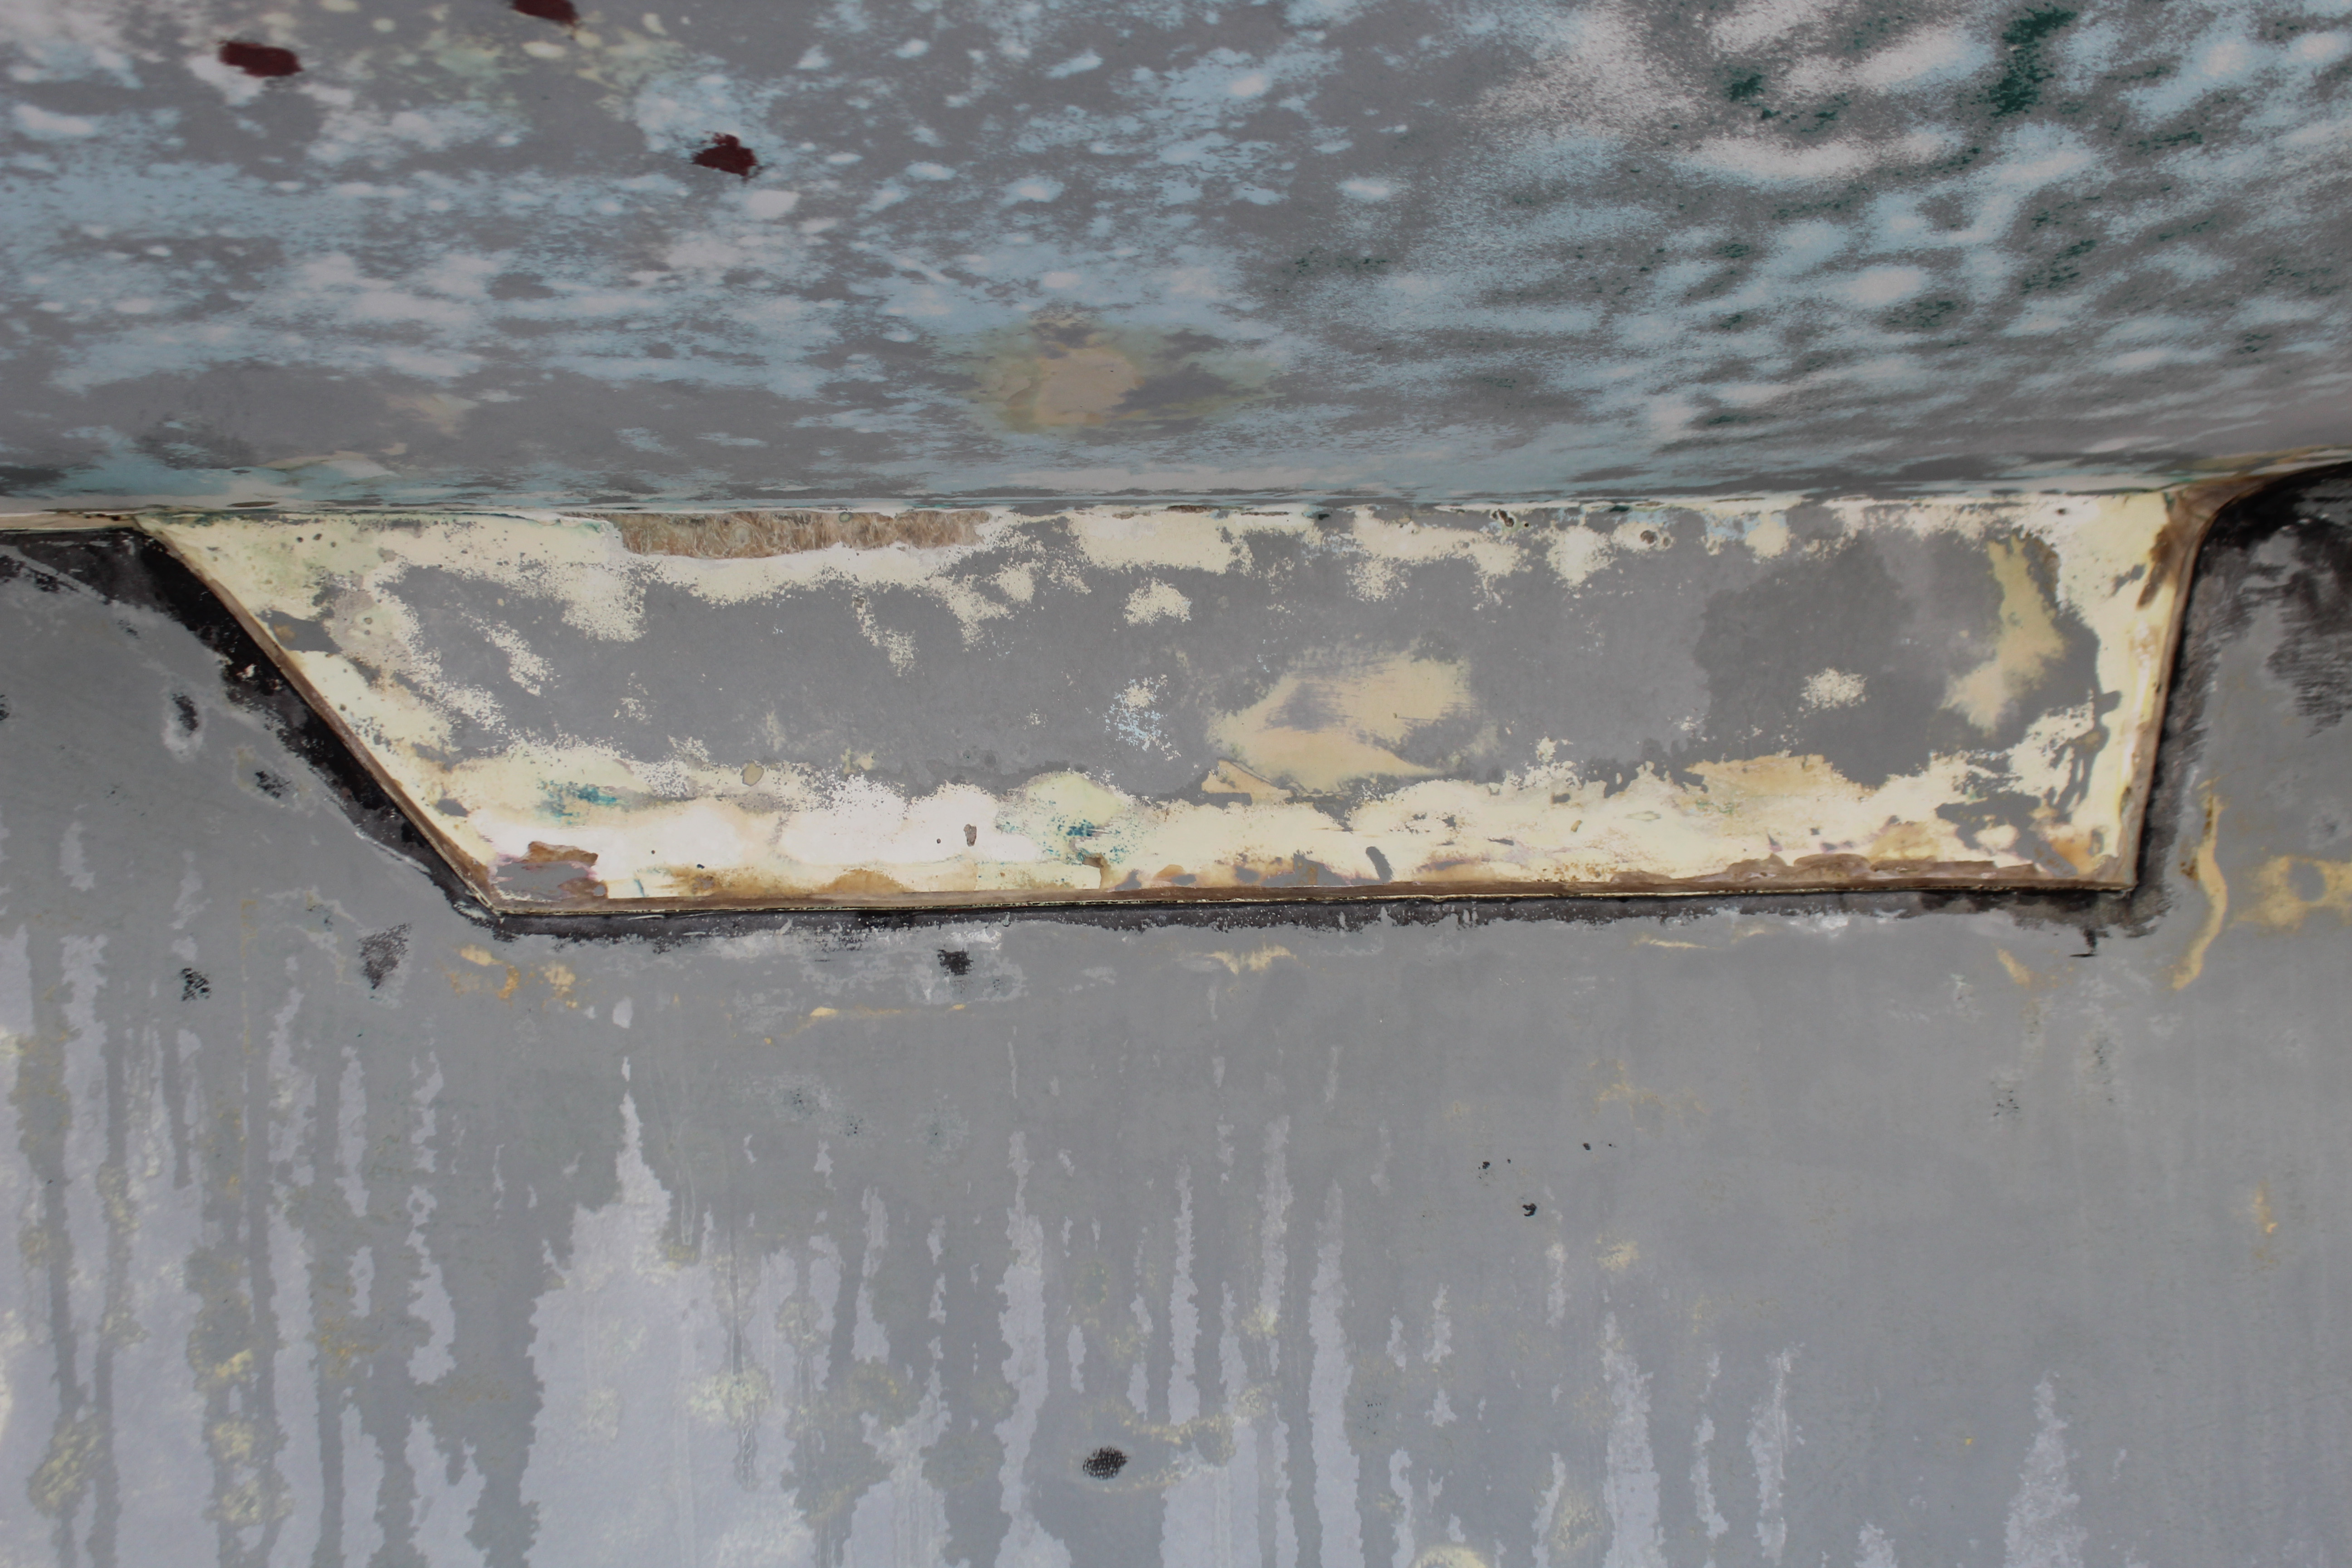
second is to properly fair in the flanges. The problem here with all four of the flanges is they are not flush - the flange sits a little proud of the hull:


Same treatment here, first fill the joint with G-Flex, then 1708 on the hull only for buildup. When it's flush I plan to overlay two layers of 1708 over the hull and flange to cover the joint. My thinking here is a thin layer of glass will have some flex to allow a slight amount of movement of the keel, but if the keel sees a hard jolt, say from a grounding, the thin glass will crack and can be seen during an inspection.

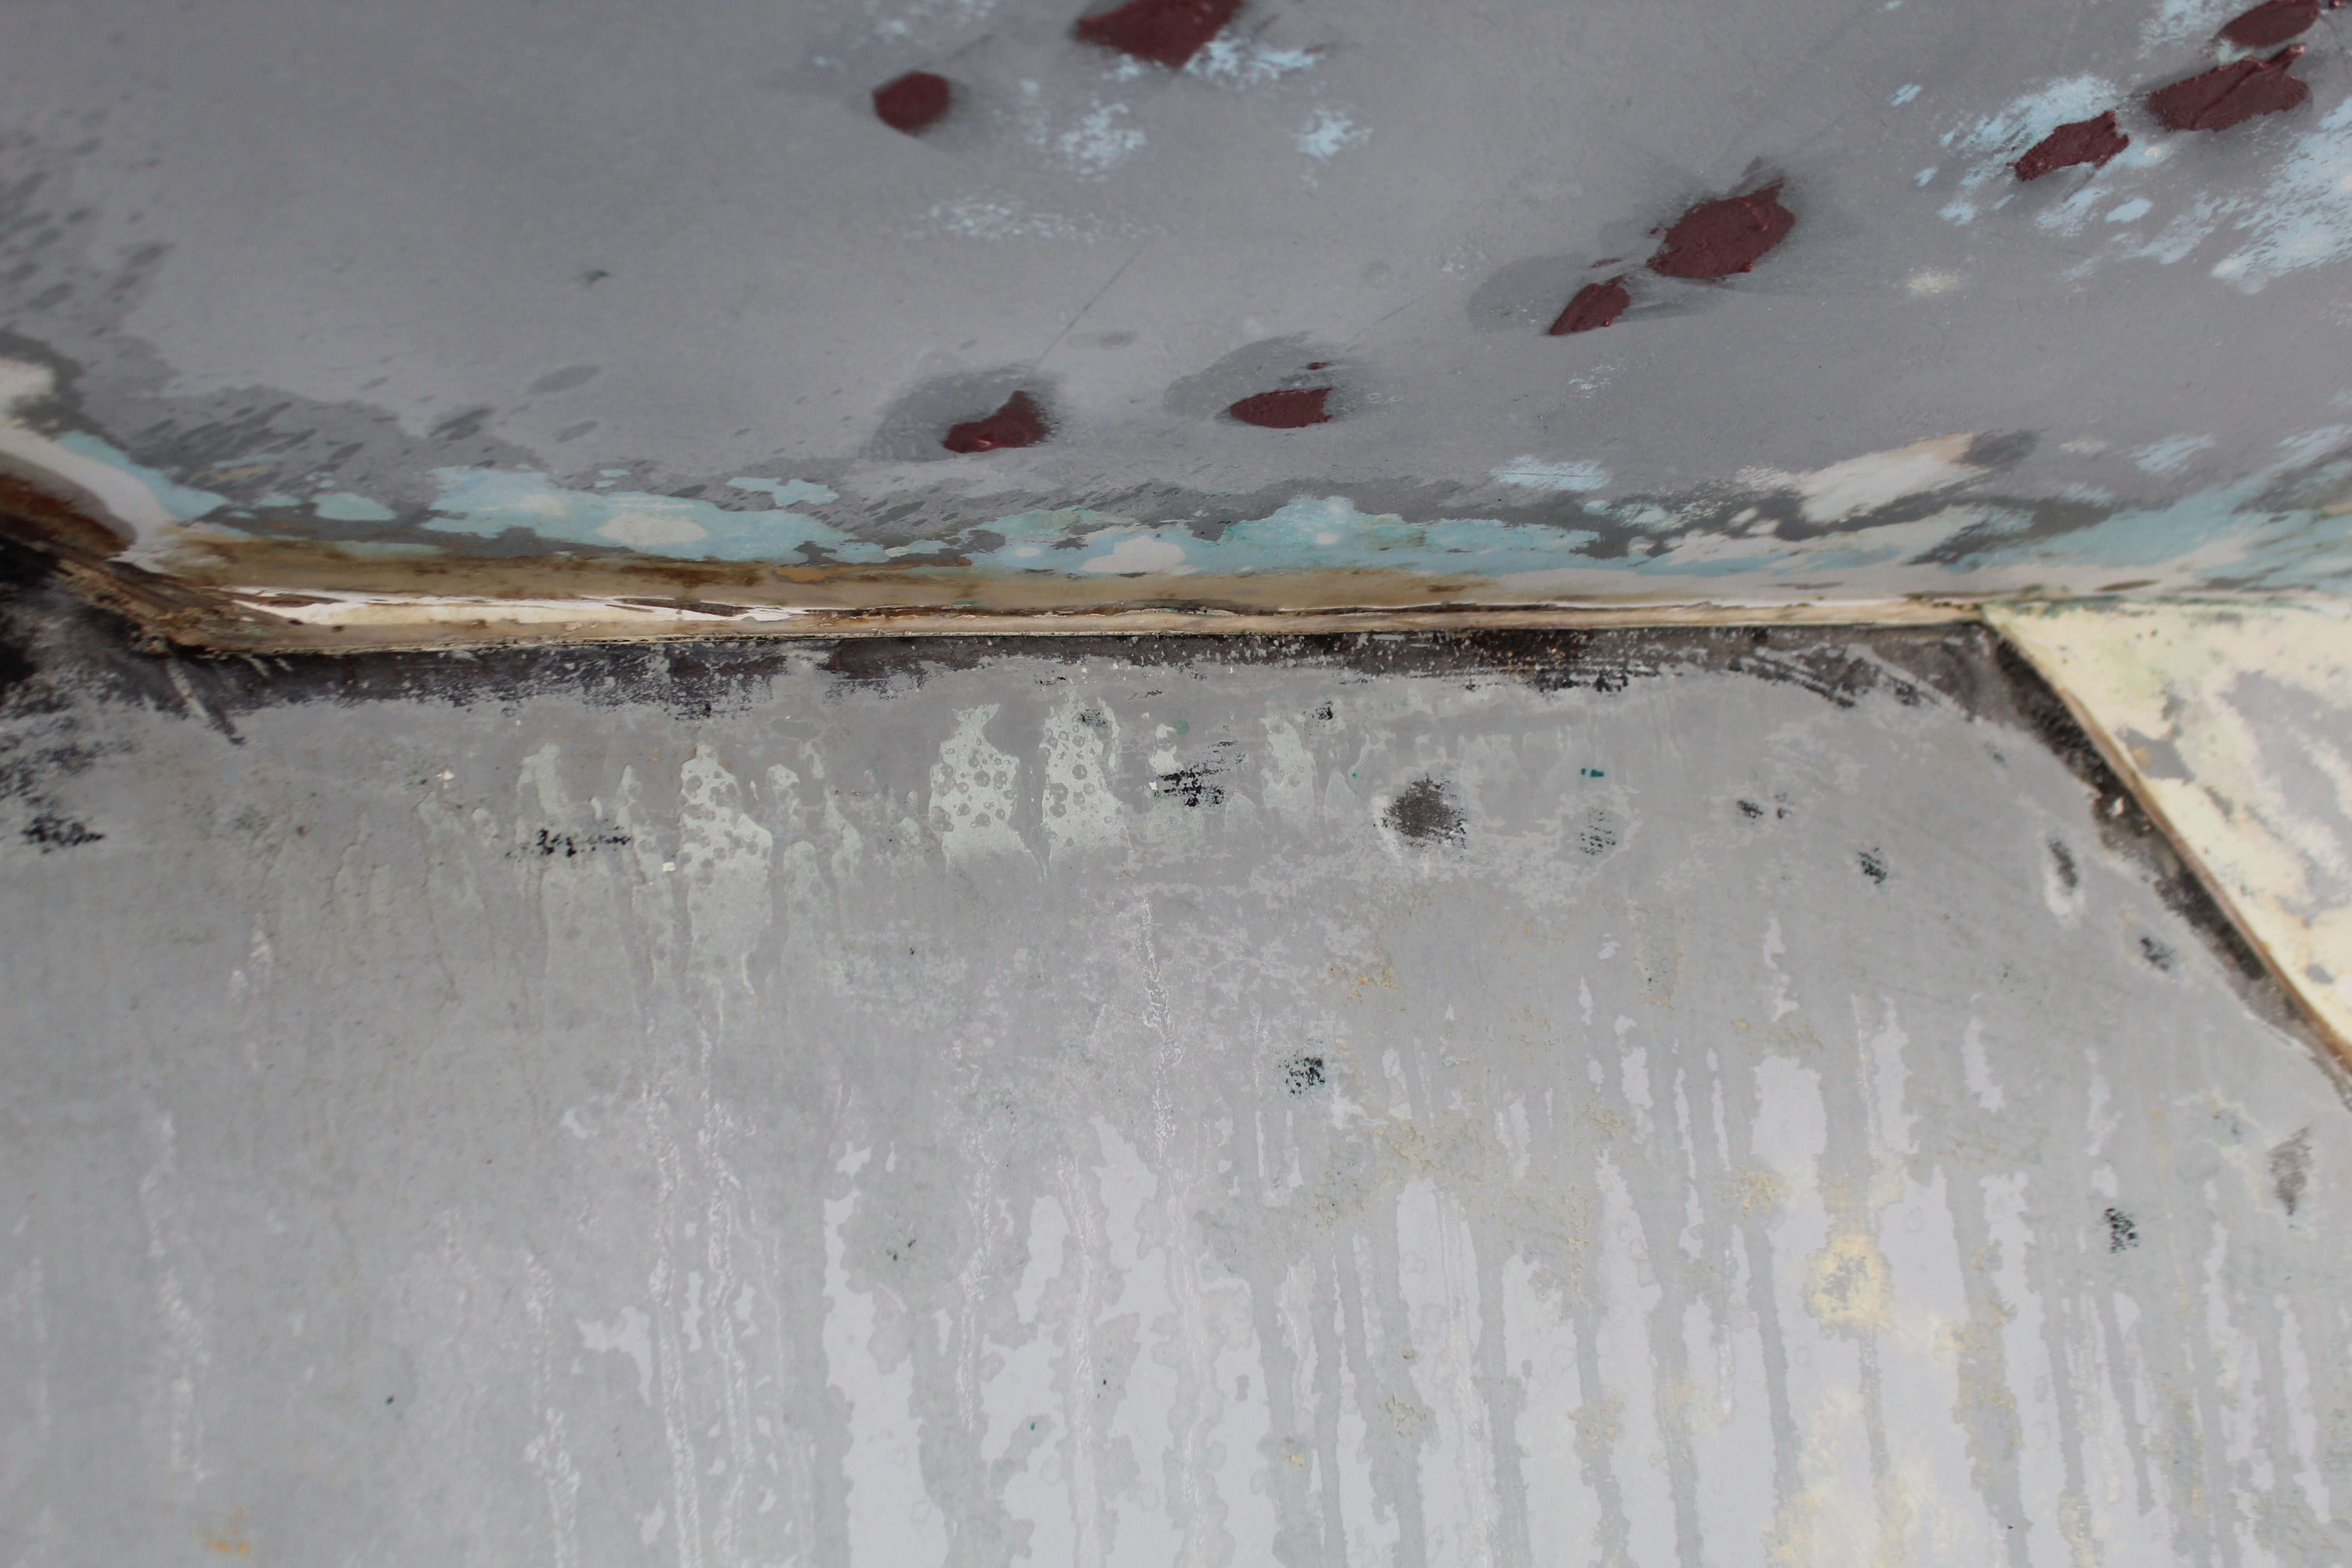
Next is the sump area:


No real issues here, fill the joint with G-Flex, two layers of glass and fair to smooth. This area forward of the sump:


I'll have to treat a little differently since the joint is so close to the hull. Here I'll fill and fillet with G-Flex, then glass over.

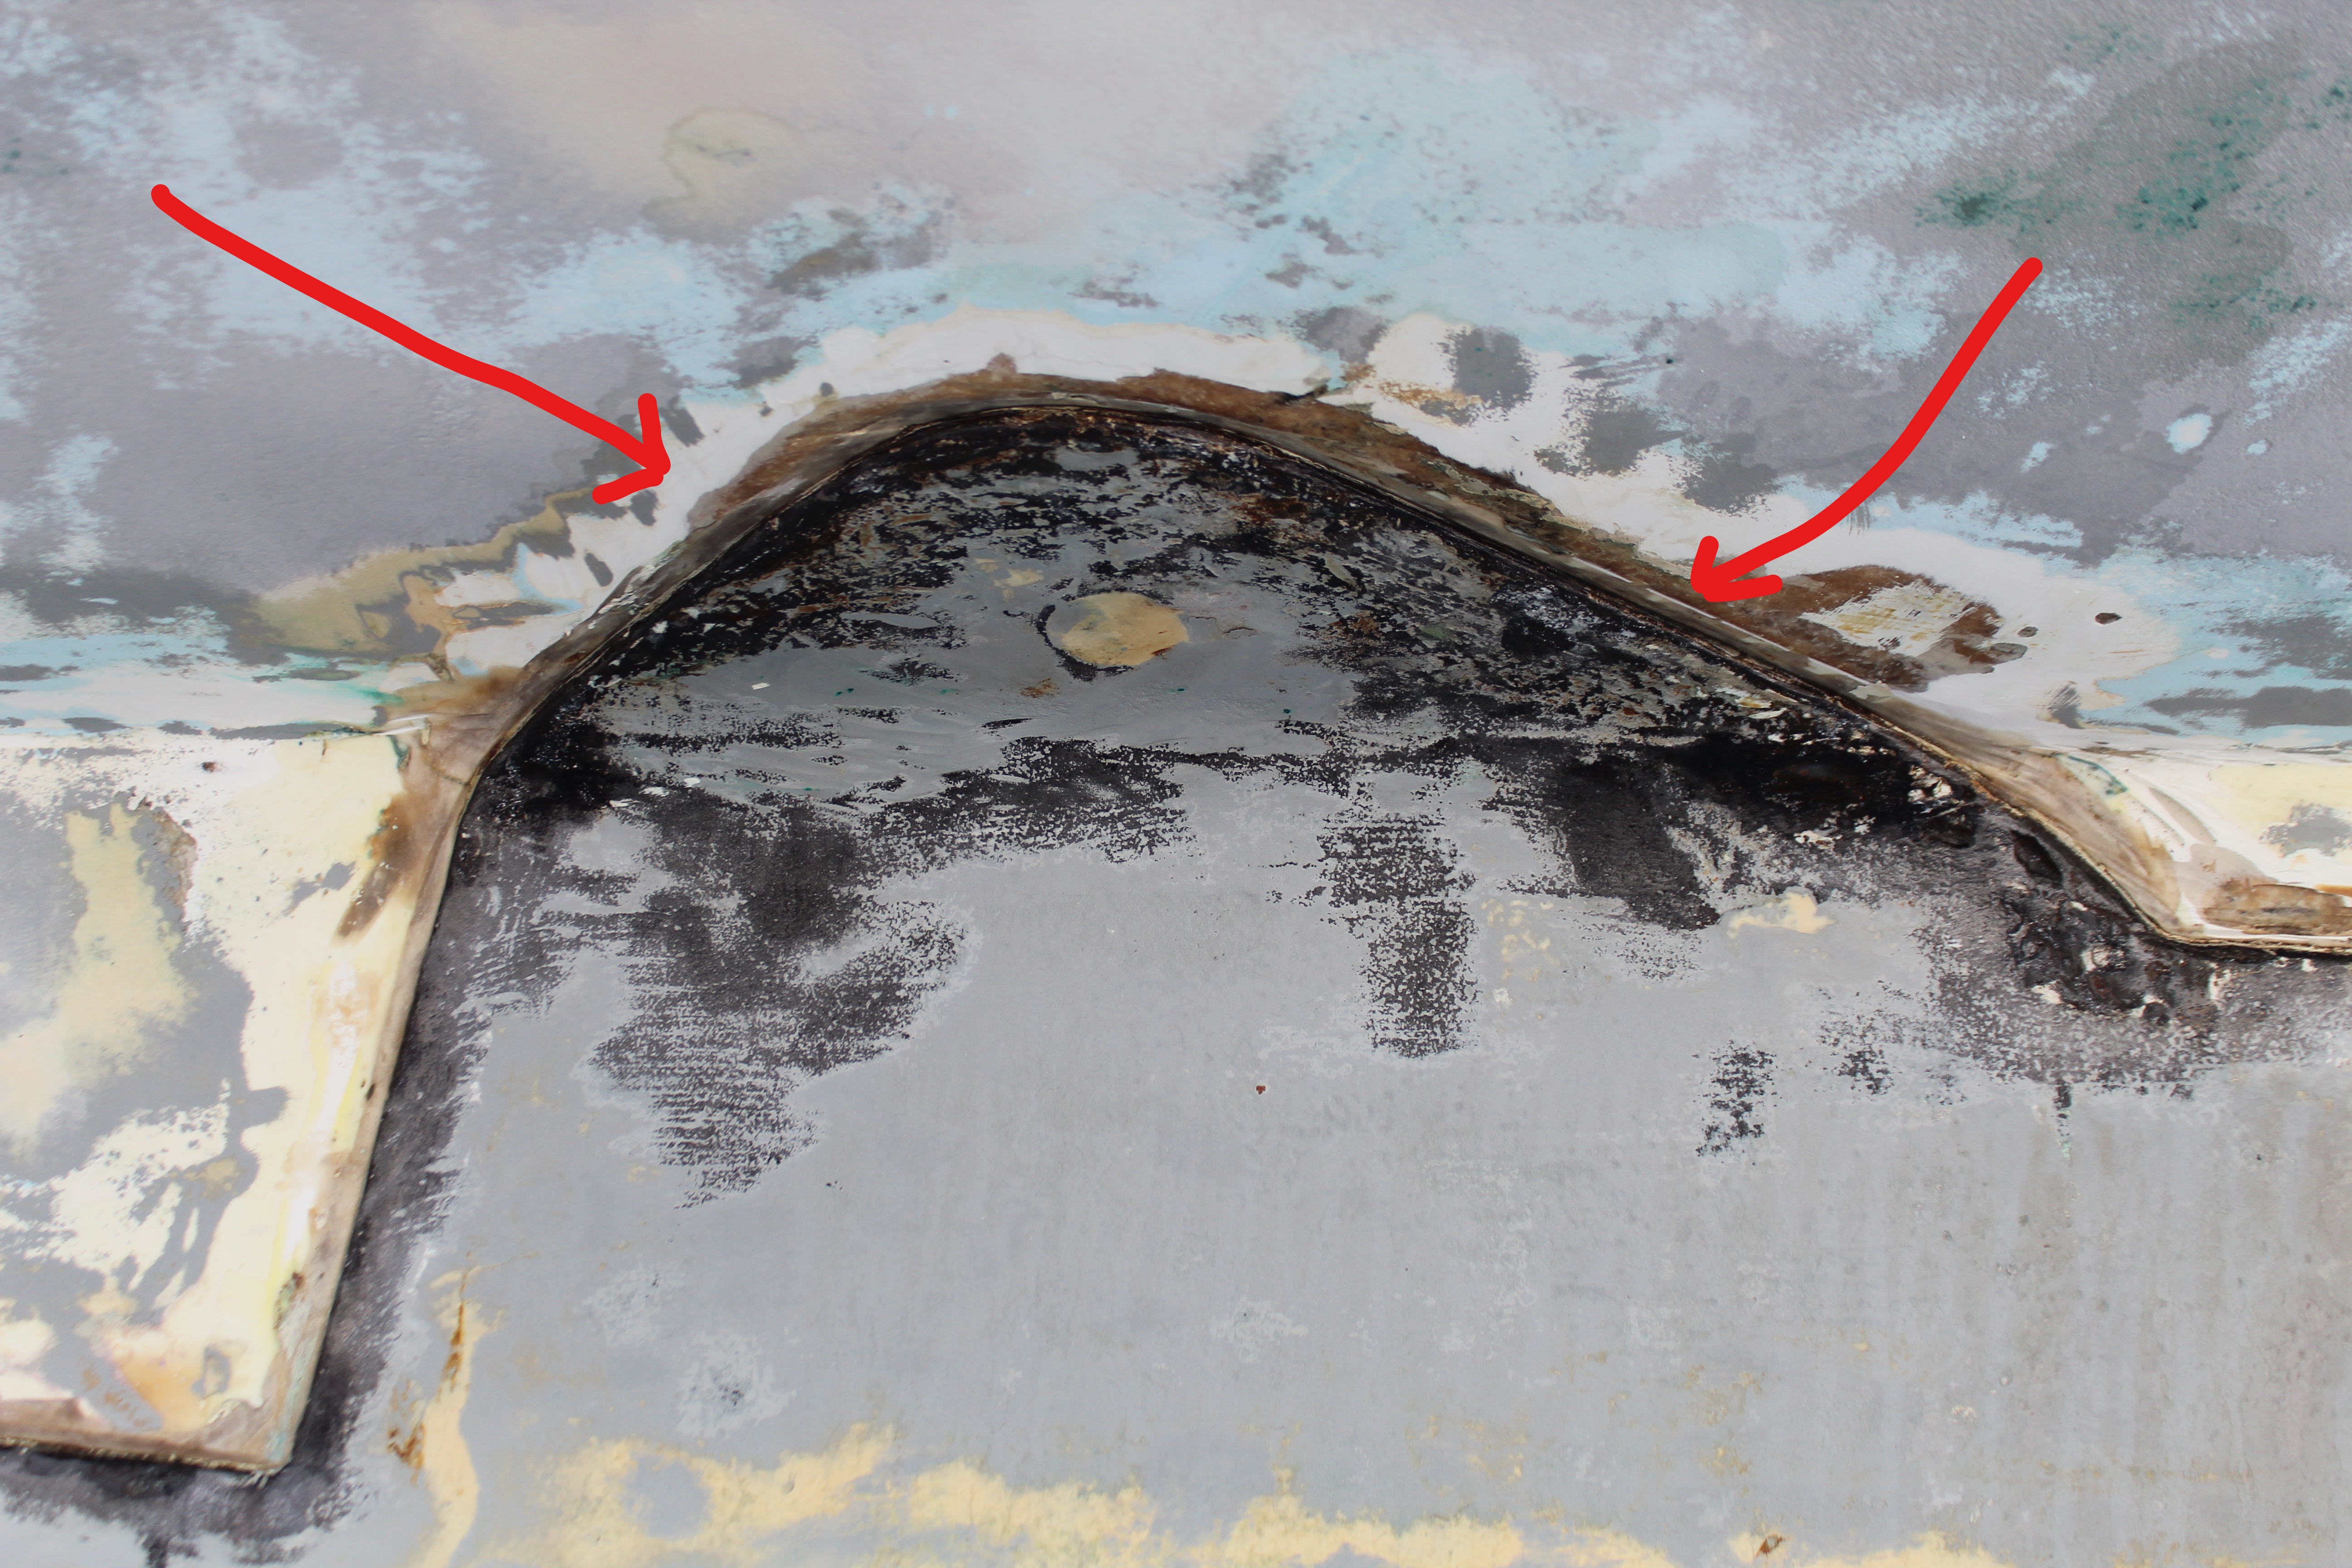
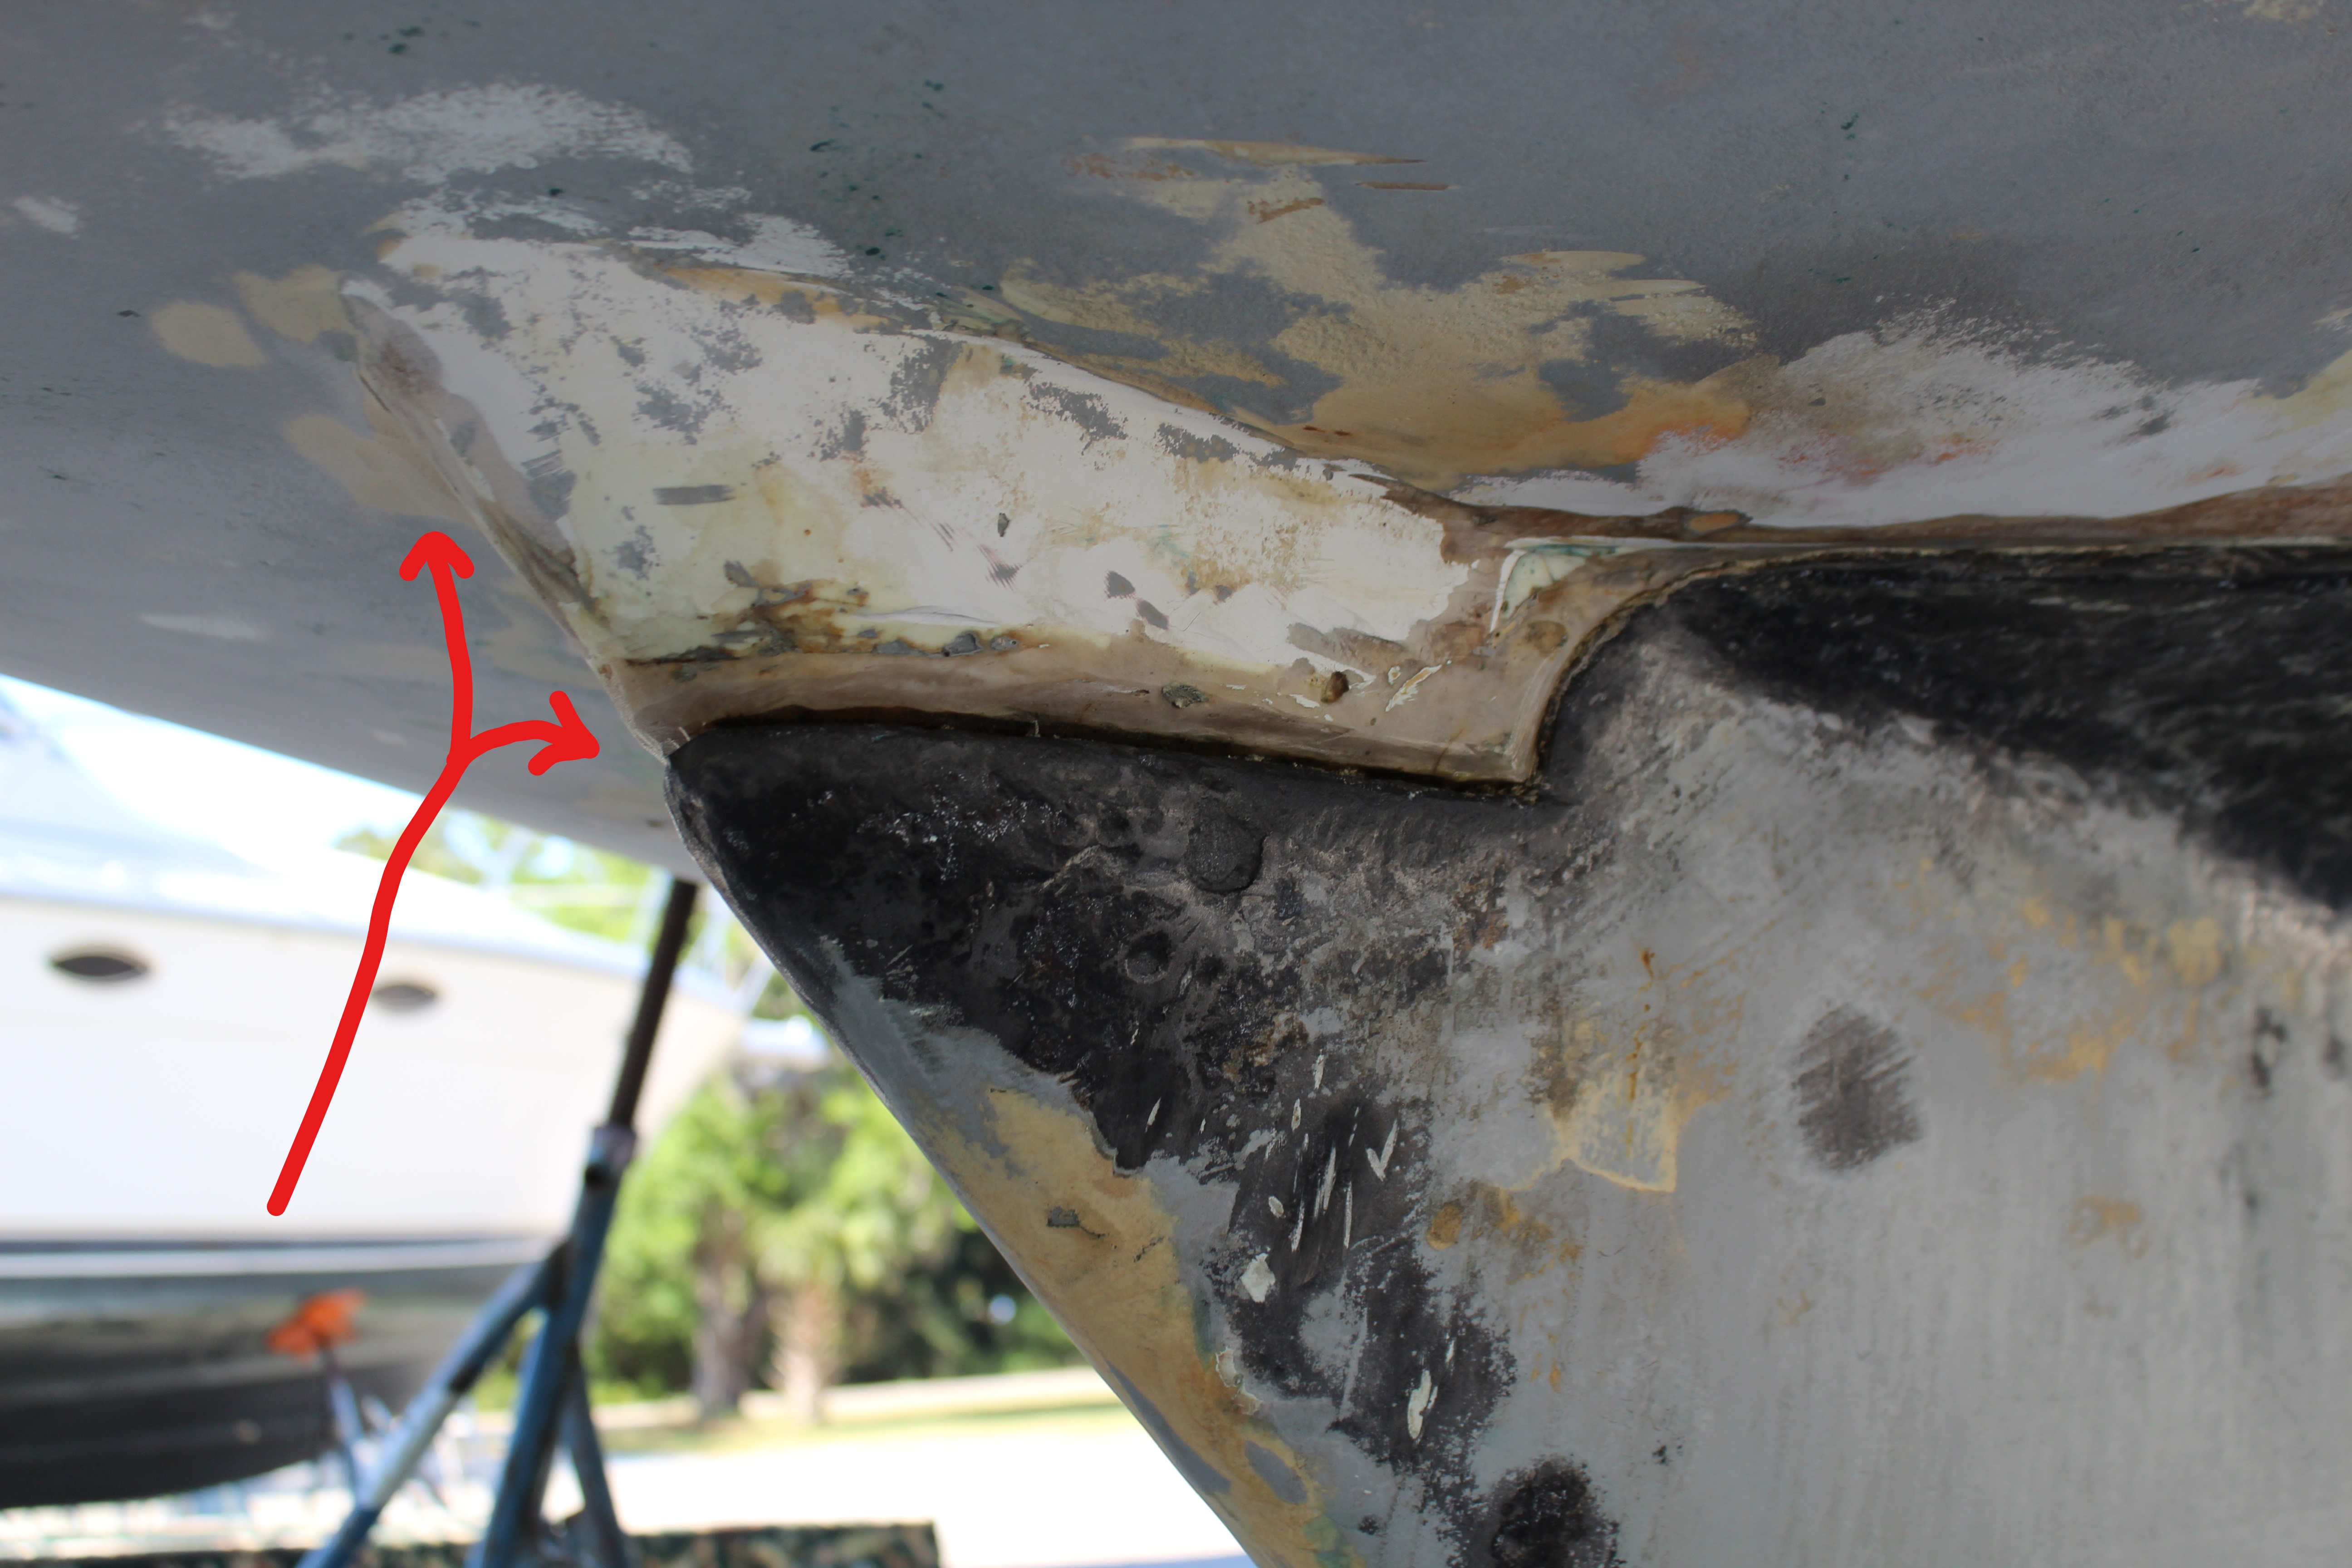
Fourth is to address the nose:


As the arrows point to, the keel and hull fairing don't line up too well, so I'll first build up the hull with glass, then address the joint with G-Flex, then a final two layers of 1708 and fairing compound.

In the end, most of this is cosmetic - I could just slap some 5200 all around and call it good, but that's not my style :biggrin:!

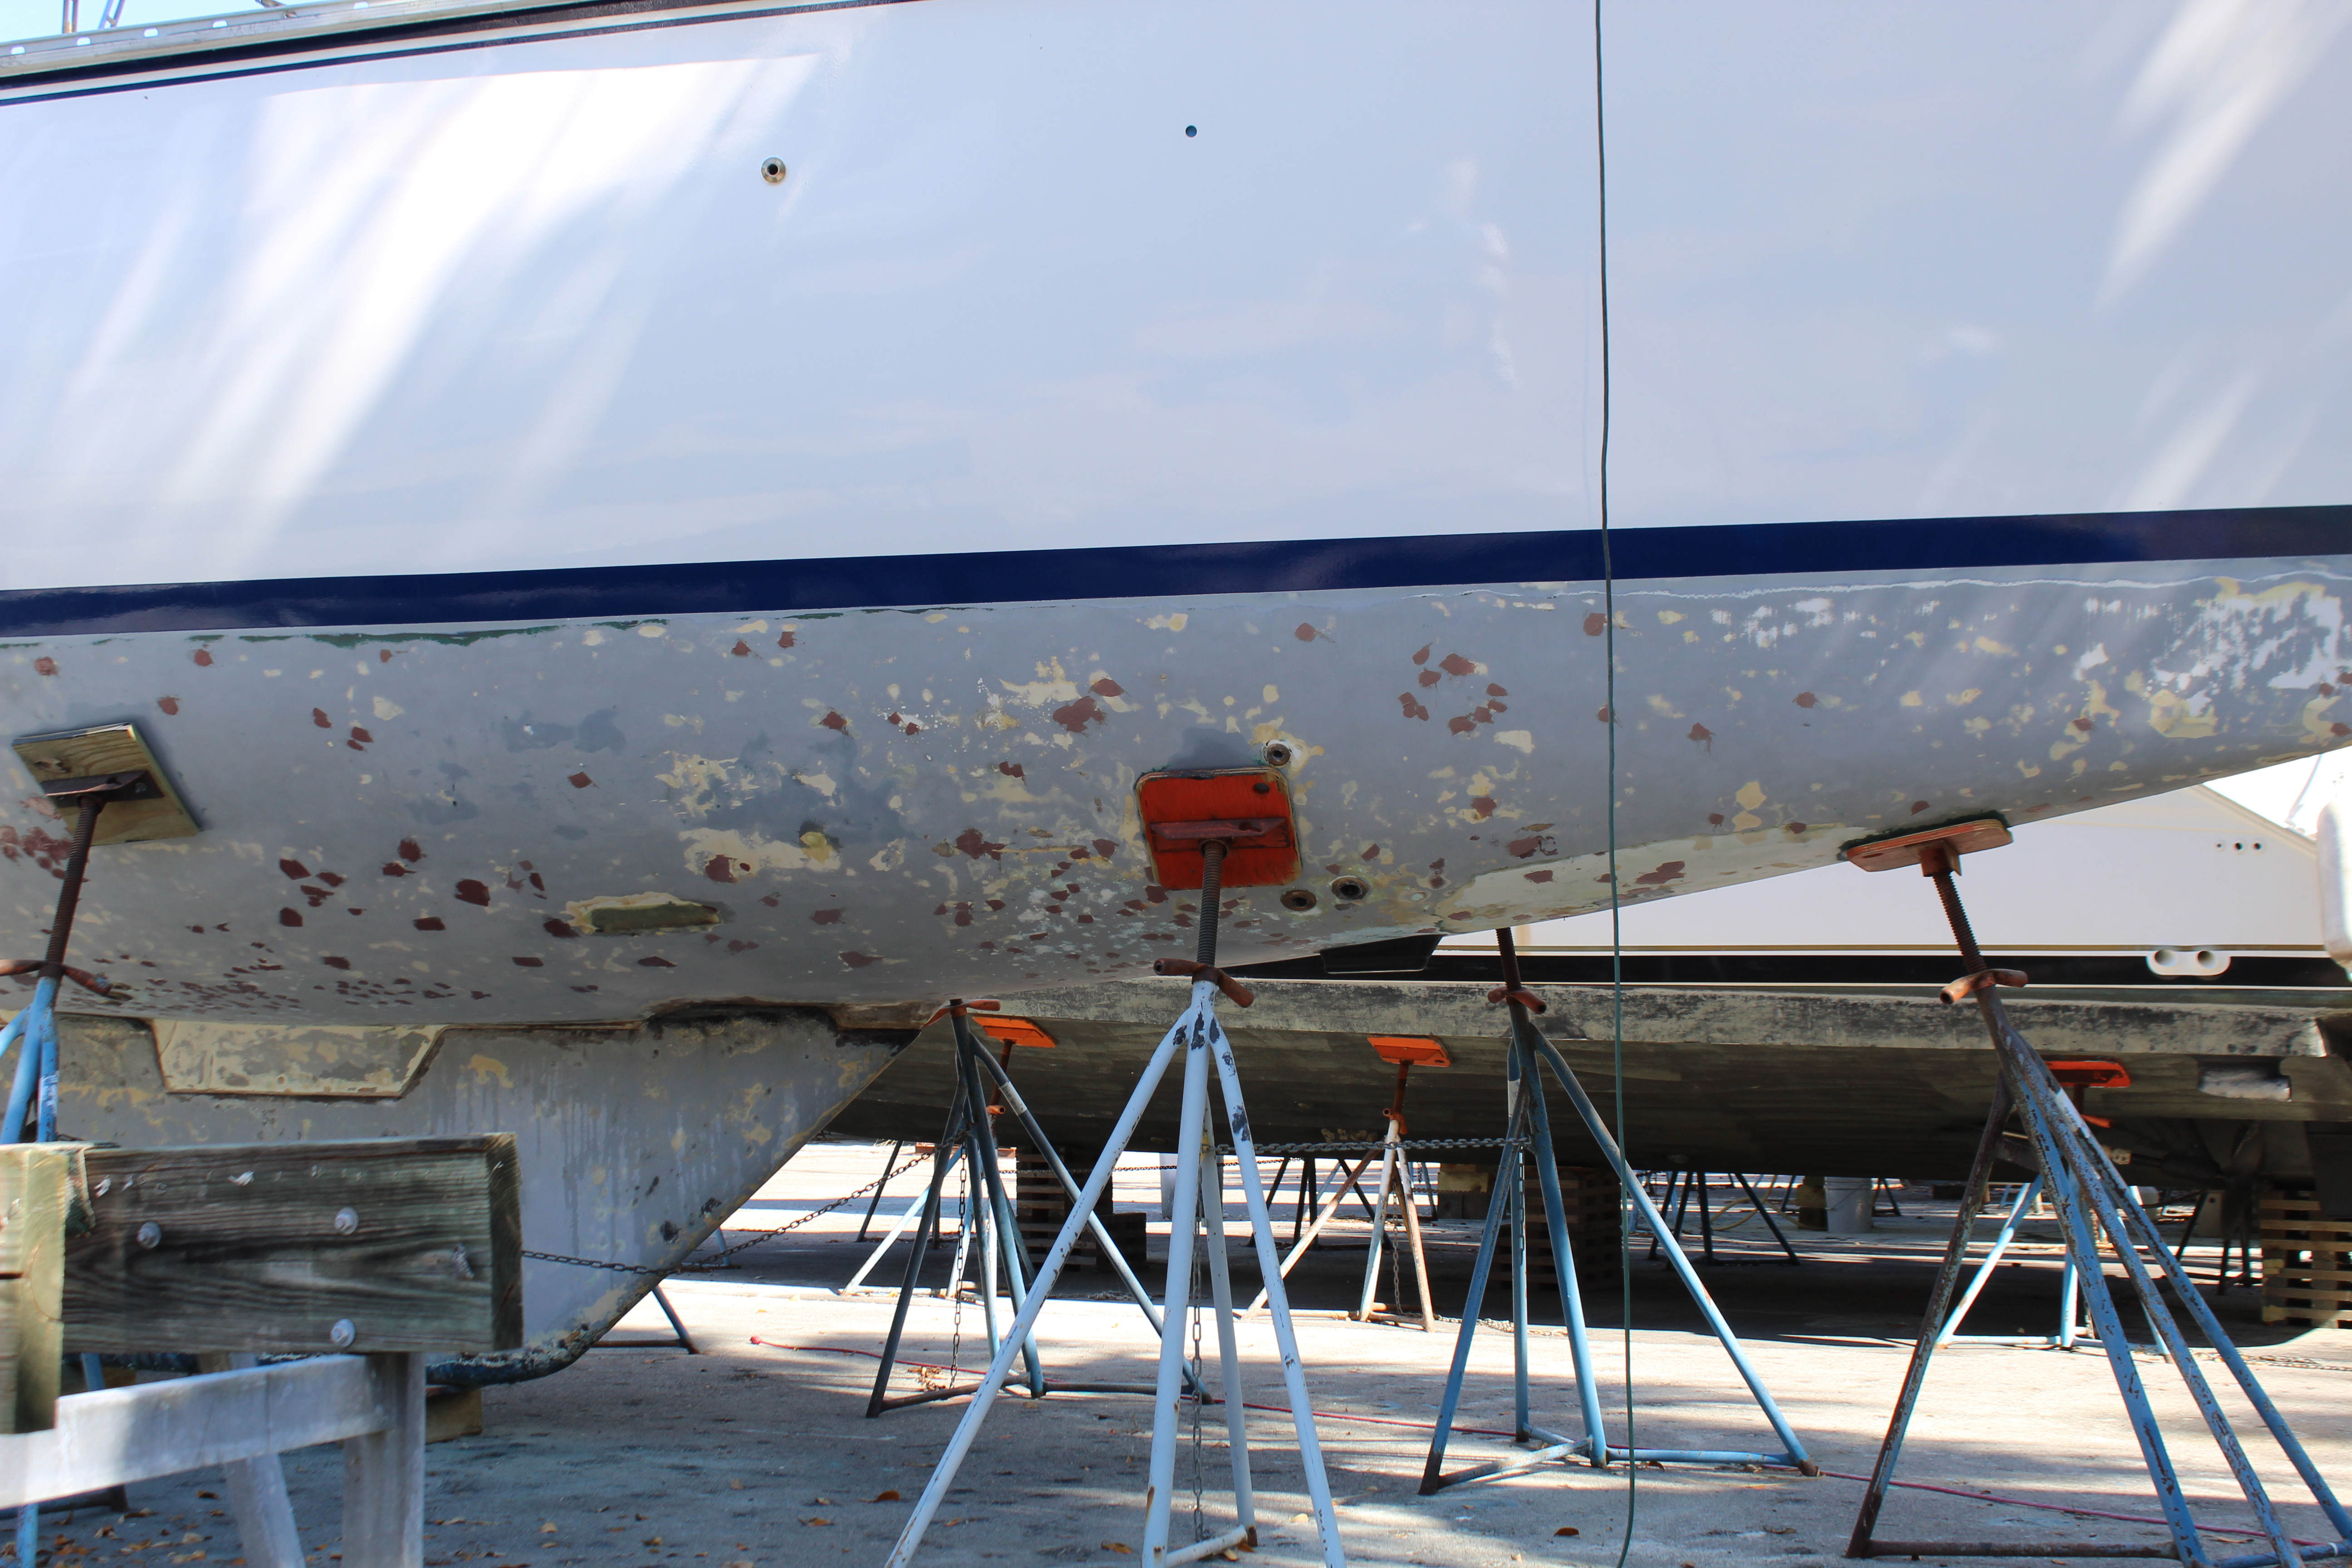
And for those wondering how the hull prep from sandblasting is going:


getting there. I'm about 2/3rds to 3/4ths done working over the hull, sanding and filling a little at a time, giving my shoulders a break between sanding sessions.

Next up, more carpentry!

Cheers,

Mark
 
May 24, 2017
3
hunter Elvstrom 1/2 ton toronto
Hello ,
I think your aft keel/haul joint repair was due to chain chafe. If you think the original repair was faulty, you should have a gander at whats behind the plates. A 3/8 " chain can eat low carbon steel, fibreglass quickly.
When you mention the "flanges", are you referring to your earlier post, re-wings.
These wings/flanges, pods, were set in 1/2" into the hull, then faired, they where not "proud" of the haul
Yes 5200 would be ok, if you don't want to take a gander
 
May 8, 2013
629
Hunter 40 Dataw Island, SC
Hello ,
I think your aft keel/haul joint repair was due to chain chafe. If you think the original repair was faulty, you should have a gander at whats behind the plates. A 3/8 " chain can eat low carbon steel, fibreglass quickly.
When you mention the "flanges", are you referring to your earlier post, re-wings.
These wings/flanges, pods, were set in 1/2" into the hull, then faired, they where not "proud" of the haul
Yes 5200 would be ok, if you don't want to take a gander
Sounds as good as anything I have come up with. The repair is solid and the keel joint is good so I have no intention of digging any farther. No 5200 though, going with G-Flex.
 
May 8, 2013
629
Hunter 40 Dataw Island, SC
Things I do while waiting for a delivery:

The mis-delivered WS 407 filler finally arrived but too late to do anything. And still waiting for the 406 so while I'm waiting to continue on the keel I did some carpentry:


I started framing up the aft head cabinets. No drama here though it did take most of a day to get the corner fit to my liking. It was a weird spot and took some finesse to get it right.

I'm also pushing forward on the main cabin - might as well! First up is the Admiral's seat, port side:


This seat is her fave for surfing the interwebs - there will be a removable table between this seat and the aft settee. I plan to put a water tank inside the seat for a total of three connected tanks portside, this one and two under the floor.

Next is starting on the port side side panels/storage lockers. I managed to not save any of the old pieces here so it took some test fitting (and sitting) to get the seat back angle correct. I'm learning that good ergonomics makes a huge difference in comfort so getting this angle right is paramount. First is to cut and place the shelf:


held in place with tape and spitballs for now! Next I placed the side panel and got out some cushions:


We then took turns sitting while I adjusted the angle of the side panel. It turns out that 15.3 degrees is perfect (for us!). 14 makes you feel perched, 16 or more makes you feel like you're slouching. Who woulda thunk it?

With the angle set, a little trimming and the side panel is secure:


More cabinetry tomorrow, same Bat time, same Bat channel.

Cheers,

Mark
 
Mar 20, 2011
623
Hunter 31_83-87 New Orleans
Looking at your last cabinet pics near the chain plate rod, out of curiosity have you cut into the liner to inspect the chain plate rod to hull tie-in? Reason I ask is i had a rig failure at that point and since you have the boat opened up, it would be a convenient time to inspect this connection. Afterwards, I cut a lengthy opening to remove the old carbon steel angle iron and reinserted stainless steel angle plate with new rods.
 

JRacer

.
Aug 9, 2011
1,331
Beneteau 310 Cheney KS (Wichita)
In retrospect, perhaps jacking up the windex and driving a new boat under it might have been a good alternative. :biggrin:Don't get me wrong, I get it! "The Journey..."
 
May 8, 2013
629
Hunter 40 Dataw Island, SC
If that's the bosses favorite seat for surfing the ether, I'd think about dropping a couple of USB charging ports around it somewhere for her!
And a 12V outlet for charging a computer.
Most definitely! I'm also looking for a 12V computer charger - no sense in plugging in the AC adapter powering through the inverter from the batteries. Better to go direct to 12V but each computer charging requirements are different so it's a little tougher. Still searching.
 
  • Like
Likes: limbodog
May 8, 2013
629
Hunter 40 Dataw Island, SC
Looking at your last cabinet pics near the chain plate rod, out of curiosity have you cut into the liner to inspect the chain plate rod to hull tie-in? Reason I ask is i had a rig failure at that point and since you have the boat opened up, it would be a convenient time to inspect this connection. Afterwards, I cut a lengthy opening to remove the old carbon steel angle iron and reinserted stainless steel angle plate with new rods.
I didn't have to cut into the liner on the port side - the chainplate rod mount was exposed by the hull and liner repair so I got a good close-up inspection of it. The starboard side got a visit from my endoscope. It looked the same so I hit the areas I could get to with rust inhibitor and called it good. I inspected the rod at the upper chainplate also and it looked ok.
 
  • Like
Likes: limbodog
May 8, 2013
629
Hunter 40 Dataw Island, SC
In retrospect, perhaps jacking up the windex and driving a new boat under it might have been a good alternative. :biggrin:Don't get me wrong, I get it! "The Journey..."
Haha, the windex was blown off by the storm, so - gotcha! :biggrin:

On a related note, this rebuild has actually worked for reasons beyond "the journey". If I had succumbed and bought a new(er) boat I would have either depleted my savings and/or had to finance the new acquisition. With current events basically destroying my profession I likely would have found myself not only out of work but unable to find a new job and saddled with payments I eventually might not be able to make, and a smaller bank account. An unfortunate situation that might be affecting many people soon :(. As it is I'm still close to the original budget for the repairs - with some additions for repairs I didn't anticipate (the bilge for example) and I'm ahead so far on the budget for improvements and upgrades so in the end I'm sitting a lot prettier than I might have been.

Another bonus is I'm busier after retirement than before. If I didn't have the boat to occupy 4 or 5 hours a day I'd probably have another toy like a race car in the garage or - heaven forbid! - an airplane. I can't sit still for very long, gotta have toys and projects!