Repairing Hunter 40 damage from Hurricane Matthew
- Thread starter B757Captain
- Start date
+1. I was about to say the same thing. I hope things are coming along nicely.Have not heard anything since December regarding the state of repairs. Just wondering how the project is coming along?
Hi guys,+1. I was about to say the same thing. I hope things are coming along nicely.
Sorry for not posting for a while, I have been making progress but not much has been photo-worthy until a few days ago. Mostly I've been working on cosmetic repairs to the insides which is dull and tedious. Sand and fill (or fill and sand!) as I work my way around the liner. I did finally settle on the wood choice for the floors, bulkheads and cabinetry and got the first shipment of plywood last week. I spent the last few days cutting and fitting floor pieces (pics to follow), sealing them with epoxy, and got the first bulkhead removed, patterned and new piece cut. Right now I'm sanding the liner for primer and paint which I hope to start applying (in sections) day after tomorrow.
I did have to take a few days here and there away from the project for sanity purposes as well.
Question for the painters out there - most of my painting experience has been automotive, though I have dabbled a little here and there with roller and brush painting epoxies and single stage polyurethanes. I will be laying down epoxy primer (Interlux) on the liner via roller and brush followed up with Perfection 2 stage polyurethane. The instructions for the epoxy give overcoat guidelines for additional coats of primer, but I can't find anything that talks about whether I can get a chemical bond with the poly to the primer coats. So, do I have to sand the primer after application prior to applying the polyurethane, or can I go directly over the primer with the top coat, assuming I stay within the overcoat timeline?
Note that I'm not too worried about looks here, most of this work will be covered up by the interior. I'm doing it mainly to establish a baseline for future reference, plus I just don't like leaving the repaired areas untouched.
Cheers,
Mark
Mark, I painted my entire deck, and topsides with Interlux Brightside Single Part Polyurethane. I did sand my primer coat prior to the second primer coat and then after each coat of paint. My research and experience is that if you stay within the brand, i.e. use only interlux thinner, dewaxer, primer and paint it's pretty foolproof. There is a leaning curve to the roll and tip method. It's a good idea to practice on an area that is not visible first. FWIW, Don Casey's book "This Old Boat" has a great chapter about painting and varnishing. When you get to areas that are visible I have found that a quality natural britsle brush gives the best finish.
I have to say sir, You 'da man! Keep the updates coming!
I have to say sir, You 'da man! Keep the updates coming!
I'm gonna take this opportunity to say something that's been on my mind about this thread. Jackdaw stated that this thread is a public thread that any potential buyer could read. He seemed to think that's a bad thing. Personally, I think you should print this entire thread for future reference. And if you do ever decide to sell, give the buyer a copy of the thread complete with all before and after photographs and answers to our questions.
What a great sales tool it could be. If I were considering this boat I would marvel at what issues were found and corrected that would have been missed in a normal survey. Sure there was substantial storm damage but every last issue is being documented and corrected. I'm serious about this. You are doing yourself and any future owner a great favor by documenting your work. And in the meantime you're giving the rest of us an education we probably couldn't get anywhere else.
Great job and thank you.
When I took a boat building class at Mystic the instructor, the late great John Gardner, told us that the old yankees didn't paint where no one could see. The ethic was that it was wasteful of materials and labor. "Your boat ..."...Note that I'm not too worried about looks here, most of this work will be covered up by the interior. I'm doing it mainly to establish a baseline for future reference, plus I just don't like leaving the repaired areas untouched.
Not me but the boat I was racing, I was lucky to get this shot he was really moving fast

I didn't see you taking the picture. Thank you!Not me but the boat I was racing, I was lucky to get this shot he was really moving fast
View attachment 132043
I'm not sure that's a good idea for several reasons:you could always just back fill it with spray foam. There should be enough surface area that the bond strength would exceed factory anyway. If it is completely filled, it should discourage water ingress.
I need the voids in the grid to run bilge tubing, water lines and electrical wire conduits. I wouldn't want to cement them in and hamper any future mods, repairs or upgrades.
One of the worst things about the foam that was there from the factory was the mold caused by trapped water. I doubt it would be possible to get a void-free injection of foam.
Lastly, I don't know too much about the foam products, but don't they expand to fill empty areas? So if you add too much foam, could it expand enough to actually break the existing grid to hull bonds? I have heard of other applications where that happened.
Mark
I talked to the guys in the yard and they said hot-coating the primer and top coat should be possible, so primer went on this morning (midsection port side) and top coat this afternoon. All good so far, second coat should go on tomorrow morning. I did run into a slight snag - there are areas that have existing paint that I can't sand completely off and the top coat lifted and bubbled a few areas. Most of the existing paint is in the v-berth so I will probably have to use a single stage polyurethane in those areas. Not a problem, cheaper anyway.Mark, I painted my entire deck, and topsides with Interlux Brightside Single Part Polyurethane. I did sand my primer coat prior to the second primer coat and then after each coat of paint. My research and experience is that if you stay within the brand, i.e. use only interlux thinner, dewaxer, primer and paint it's pretty foolproof. There is a leaning curve to the roll and tip method. It's a good idea to practice on an area that is not visible first. FWIW, Don Casey's book "This Old Boat" has a great chapter about painting and varnishing. When you get to areas that are visible I have found that a quality natural britsle brush gives the best finish.
I have to say sir, You 'da man! Keep the updates coming!
One tip I did discover, though: if you are rolling on a two-part polyurethane, make sure your roller handle is clean and free of old paint! The new paint actually reacted with the old paint on the roller and gummed it up so it stopped rolling!
My thought on painting the inner areas is that most of these areas can be seen as storage areas and I like nice, clean storage compartmentsWhen I took a boat building class at Mystic the instructor, the late great John Gardner, told us that the old yankees didn't paint where no one could see. The ethic was that it was wasteful of materials and labor. "Your boat ..."
")
Also, I think it gives me a baseline, a starting point so to speak. It is a lot of work, true - my sore muscles at the end of the day can attest to that!
I agree, Kermit! As it turns out in my case, there was previous damage before me that multiple surveyors missed. I have also learned the hard way that some repair yards don't do good work, but you might not find out about it until it's too late. I can fall back on my days repairing, rebuilding and restoring cars. Seen lots of really sloppy work that was covered up by a pretty paint job, but I have seen some stellar repairs as well.I'm gonna take this opportunity to say something that's been on my mind about this thread. Jackdaw stated that this thread is a public thread that any potential buyer could read. He seemed to think that's a bad thing. Personally, I think you should print this entire thread for future reference. And if you do ever decide to sell, give the buyer a copy of the thread complete with all before and after photographs and answers to our questions.
What a great sales tool it could be. If I were considering this boat I would marvel at what issues were found and corrected that would have been missed in a normal survey. Sure there was substantial storm damage but every last issue is being documented and corrected. I'm serious about this. You are doing yourself and any future owner a great favor by documenting your work. And in the meantime you're giving the rest of us an education we probably couldn't get anywhere else.
Great job and thank you.
Even though I do not intend to sell the boat, circumstances could change. I want to be that guy who did it right. And I suspect that there are a lot more damaged boats that are repaired on the market than we realize. One of the boats here is going to auction - it's being cleaned up for possible salvage, repair and resale. That boat sat on the bottom for a month and makes my project look easy!
Nice sailing pic!
Mark
Always look under all the duct tape!.... Seen lots of really sloppy work that was covered up by a pretty paint job,..
I have been there and done that. I have a 1983 Hunter 34 that is a superstorm hurricane Sandy survivor. You might want to contact insurance companies in the area and see if any other 40 legends that are total losses, you may be able to purchase them back cheep as a salvaged boat and use it as a donor boat for parts. This could have save me a lot of time and money. I know someone that did this and then scraped the donor boat and made back most of the money he bought the donor for.
It takes a lot of time, patience, and self motivation to do it. If it makes you feel any better I had to start from scratch 3 times.
1st) was started repairs right after claim was approved, form Sandy damage.
2nd) Six weeks after Sandy a nor'easter came thru and tore what was left of my winter cover off and blew the boat off the stands and damaged everything I just fixed.
3rd) the boat was struck by lightning on the hard two weeks before a test launch cause damage to 90% of all the wiring and electronics I just finished repairing/replacing.
The only thing that get you thru stuff like this is you just have to laugh because sometimes you just can't make this stuff up!
I was going to rename the boat "Thee strikes your out"
@Capt Robbie, my goodness talk about luck I don't know that I could have carried on with the plan had that happened to me.
Born under a bad sign.
I've been down since I began to crawl.
If it wasn't for bad luck,
I wouldn't have no luck.
If it wasn't for real bad luck,
I wouldn't have no luck at all.
Born under a bad sign.
I've been down since I began to crawl.
If it wasn't for bad luck,
I wouldn't have no luck.
If it wasn't for real bad luck,
I wouldn't have no luck at all.
Ya, you right. One of the guys in the yard made me a hat that said
"Sh*t happens ! & sometimes Sh*t happens a lot!!"
I try to wear it whenever I work on the boat. It helps me get by.
I'm having t-shirts made this spring to give out at our marina that say.
The only thing that works on this old boat is the captain!!
"Sh*t happens ! & sometimes Sh*t happens a lot!!"
I try to wear it whenever I work on the boat. It helps me get by.
I'm having t-shirts made this spring to give out at our marina that say.
The only thing that works on this old boat is the captain!!
I might want one of those shirts!Ya, you right. One of the guys in the yard made me a hat that said
"Sh*t happens ! & sometimes Sh*t happens a lot!!"
I try to wear it whenever I work on the boat. It helps me get by.
I'm having t-shirts made this spring to give out at our marina that say.
The only thing that works on this old boat is the captain!!
Ok, back to repairs! This episode, filling and sanding.
After taking care of familial duties over the holidays, I was able to return to the boat. I had all the structural repairs to the grid done but there was lots of cleanup/filling to do. Most of this isn't really photo-worthy but here's a few shots:
Patching the area I cut out in the aft cabin to access the damage spot on the hull:
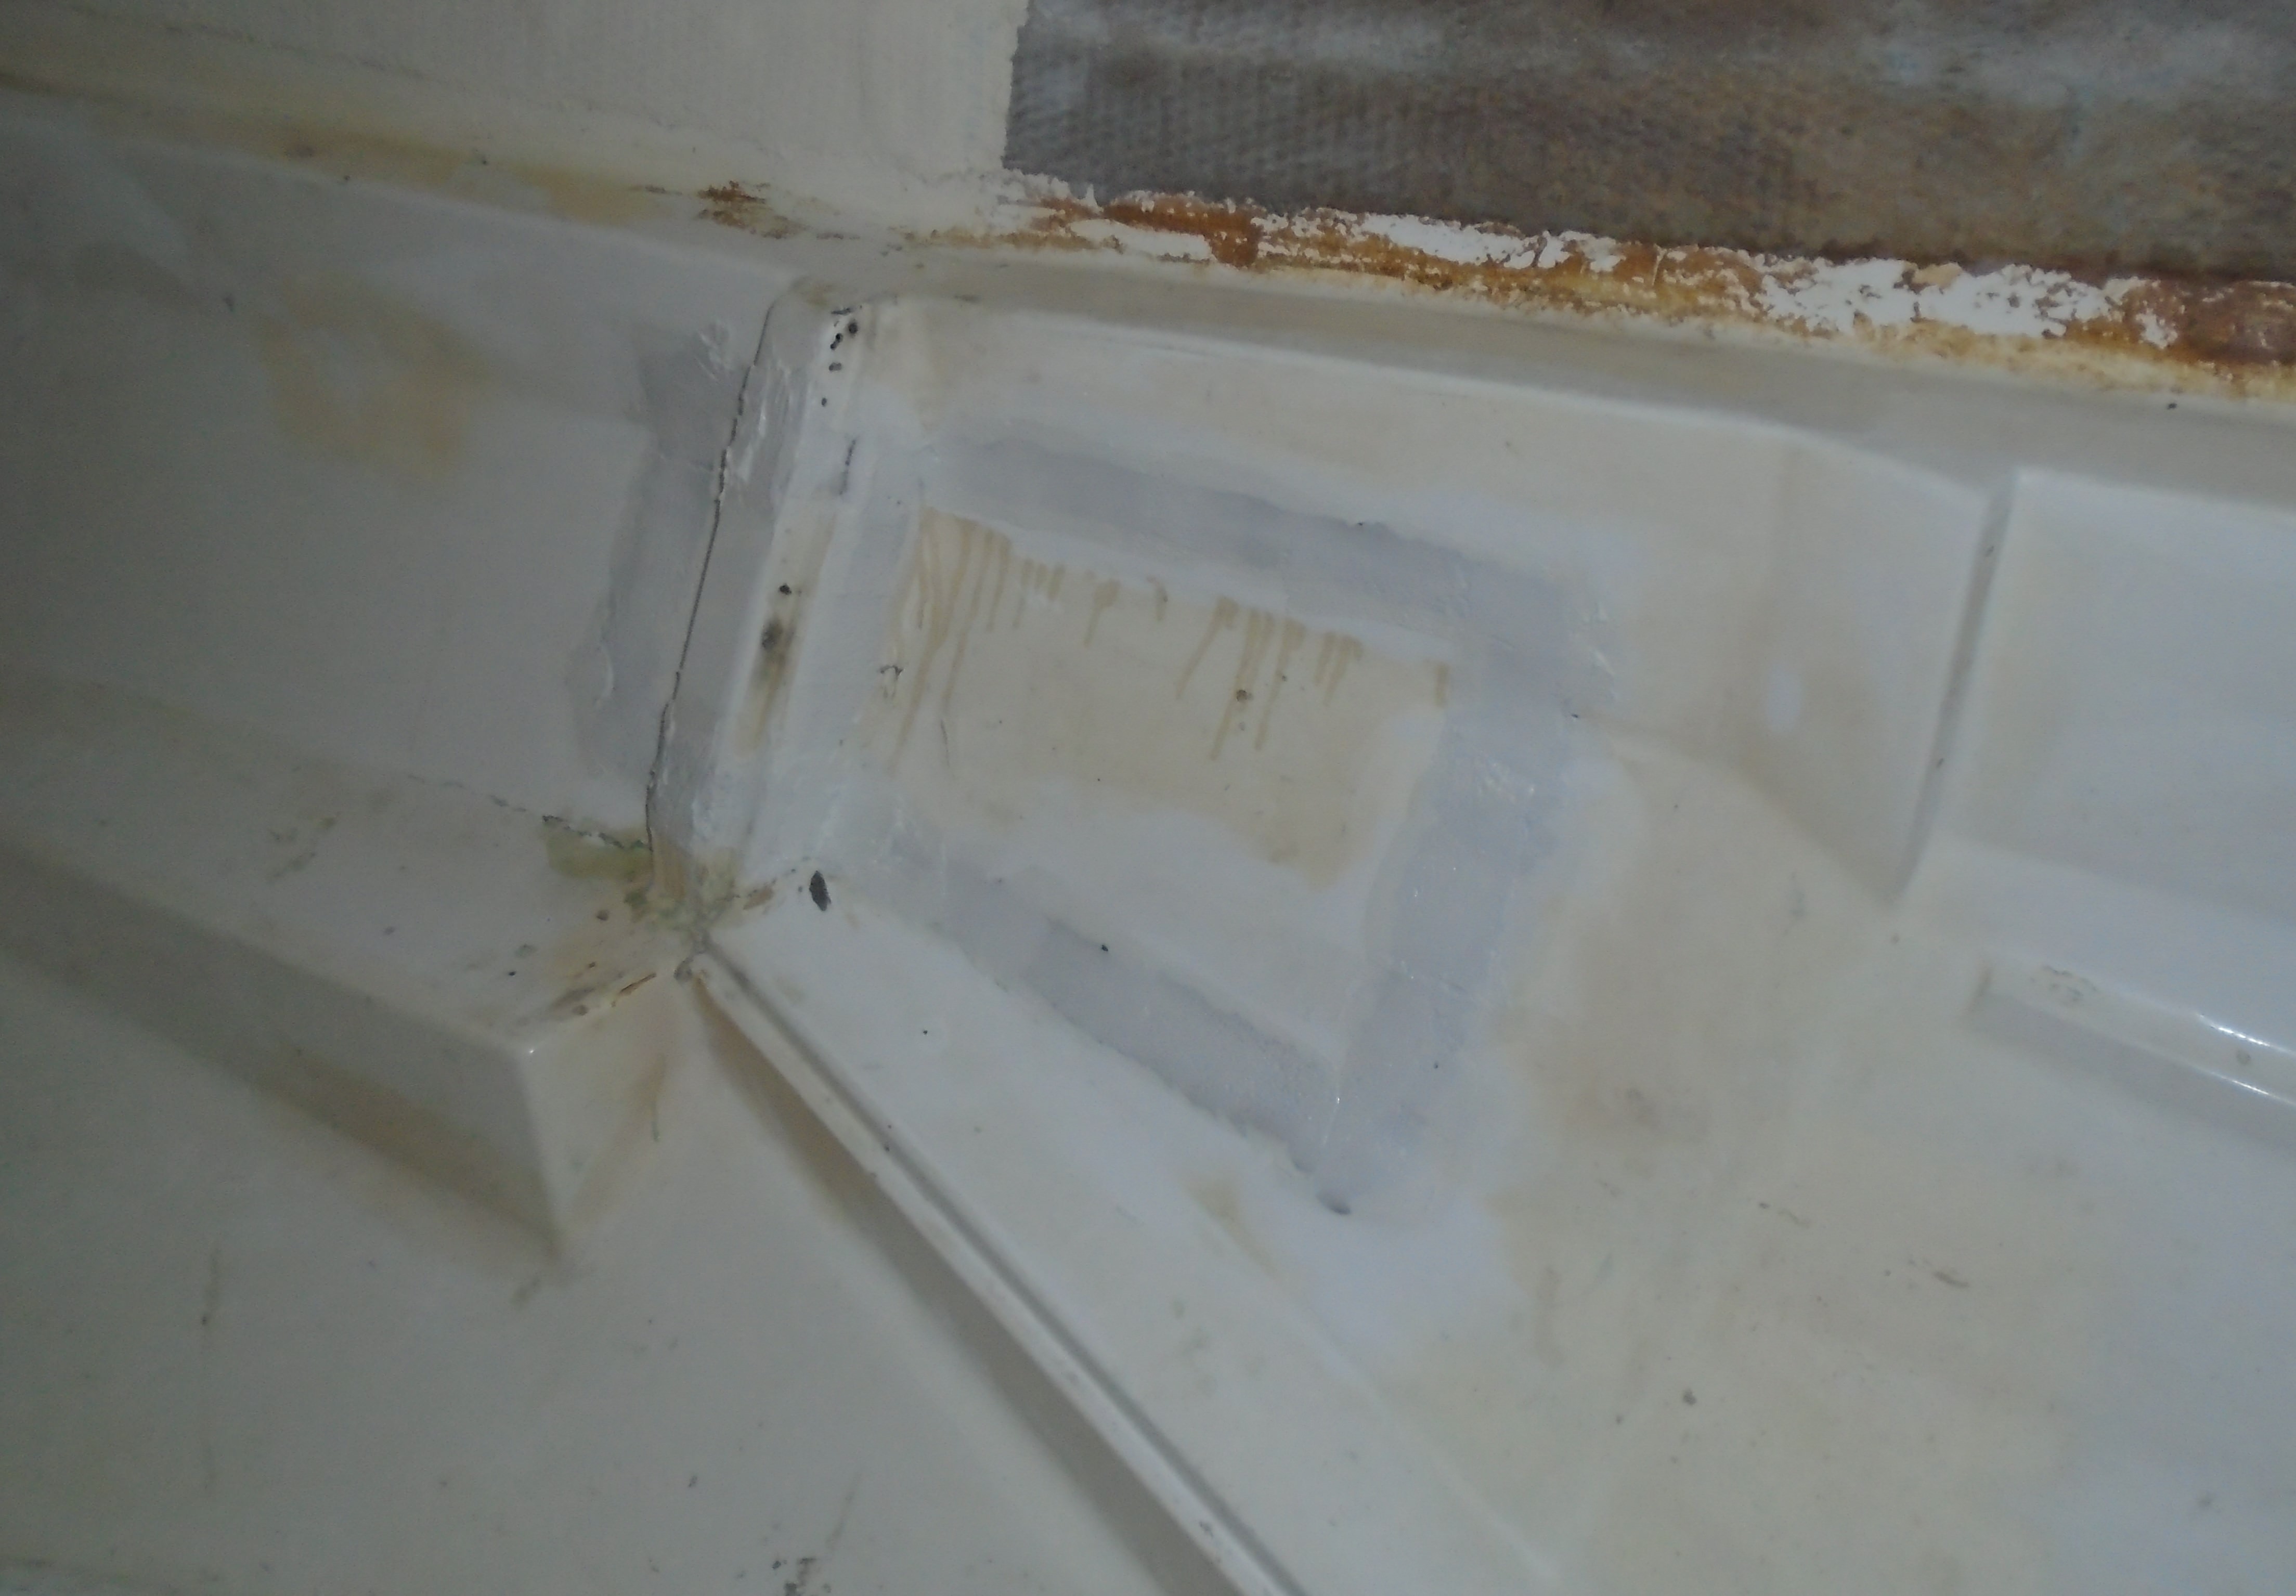
Mid cabin where I fabricated the patch panel needed some filler. Not too much, just enough to smooth things out a little:

Filling repair spots in the v-berth:

I also ordered the first batch of ply for the floors and bulkheads. While this was enroute I mixed up several batches of epoxy and cabosil to fill all the screw holes in the grid. There were lots of them! My thoughts here were that since I couldn't reuse the holes, why not start fresh? Took a while to fill and sand them all but it looks much better!
Next up: Cutting plywood!
Mark
After taking care of familial duties over the holidays, I was able to return to the boat. I had all the structural repairs to the grid done but there was lots of cleanup/filling to do. Most of this isn't really photo-worthy but here's a few shots:
Patching the area I cut out in the aft cabin to access the damage spot on the hull:
Mid cabin where I fabricated the patch panel needed some filler. Not too much, just enough to smooth things out a little:
Filling repair spots in the v-berth:
I also ordered the first batch of ply for the floors and bulkheads. While this was enroute I mixed up several batches of epoxy and cabosil to fill all the screw holes in the grid. There were lots of them! My thoughts here were that since I couldn't reuse the holes, why not start fresh? Took a while to fill and sand them all but it looks much better!
Next up: Cutting plywood!
Mark
Last edited: