Thats totally what I expect you might say. While thats not me, I totally admire the mindset. Carry on.I guess it's time I jumped into this conversation:
The way I see it, every one of you is right. Each of us has our own definition of sailing as a sport, a hobby, a lifestyle and/or a passion. And each of us enjoys sailing the way we have defined it.
As I have explained in the past, I started Escape Velocity's rebuild maybe partly out of necessity but mostly because I thought the investment of time (moreso than money) would net a boat that would greatly exceed the sum of her parts. It would be uniquely and quintessentially mine from stem to stern, from keel to masthead. That's my goal.
Do I miss time on the water? Sure. But when I had a fully functional boat (pre-Matthew) I never was able to get out as often as I liked. Life interfered. I also have a rather unique career where time off allocation is much different than most people and I currently live a lifestyle that on one hand restricts my time at home but on the other hand gives me blocks of time to make real progress on projects that can't be completed in a day or two. There's a real sense of accomplishment, for example, when I was able start and finish painting the hull in one go, rather than having to do a small piece one or two days at a time.
Another consideration is my somewhat unique status re: the marina. Although the marina has now changed hands and will be rebuilt, we are over two years into not having a functioning marina. It has been a real hardship here for the people who want access to the water. Available slips have been hard to come by, and the remaining local marinas all have their ups & downs. For us on this island it has always been about close access. For me the marina is a 3 minute trip in the golf cart! That was nice before (and will be again soon!) but after Matthew there was a severe shortage of available slips locally. Some guys had to move their boats as far as Charleston. A 4 or 5 hour roundtrip just to get to your boat really takes the wind out of a day sail! For me, however, it has worked out well. I have even declined a slip in the first rebuild phase - we'll get around 20 wet slips to start - because a. even though I could put the boat back in the water now if I wanted to it really doesn't do me any good, and b. I would rather see the first set of wet slips go to the people who can use them now. Our local boating community has taken a hard hit and I want to see my fellow boaters come back so we can start rebuilding our sailing community.
Finally the time vs. money issue: I get it. I really do, but: My goal has always been long-term, to have a boat ready and capable of cruising (remember, I'm planning central and south Pacific). I have always planned an early retirement so I can go and enjoy my cruising time while I am still (relatively) young and healthy. I'm trading time on the water now for a (yes) lengthy rebuild, but the alternative, to me, doesn't work. If I had just gone out and bought a replacement boat I would have to work at least 3 or 4 years longer to pay for it. As it is now (barring any world-wide crisis) my timing is working out that the rebuild will be complete just about the same time I hit my financial goals and can sail over the horizon sipping a rum & coke. And when I go I'm not planning to come back! A replacement boat blows that plan out of the water (so to speak!).
I conclusion, thanks for all the support, advise, tips and encouragement. I deeply appreciate everything you guys say. Now it's time for bed! Hopefully tomorrow I can finish up the first of several updates to my activities the last few months.
Cheers,
Mark
Repairing Hunter 40 damage from Hurricane Matthew
- Thread starter B757Captain
- Start date
Probably doing as much work on my boat as Mark
Every single time i am removing itching fiberglass dust from my skin i am sailing
A pussers painkiller i am sailing
Making a wire connection i am sailing
My boat is right here at my shop so its six step and i am sailing
Every single time that i forgot to bring something along and its another round of thirteen steps up to the boat i am sailing
When i see another project on Marks boat finished i am sailing
Works just fine for me!!!!!!!!!!!!!!
We all know what we enjoy. We may understand why we enjoy it. But do we understand what basic human need is fulfilled that is the underlying cause of why we enjoy it?
I think for many, sailing is getting isolated from the hectic life they live on shore. It is a forced change in pace. For others, it may be the success of making the boat work and work well. For racers, even more so. The reward of successful performance builds self esteem. On the other hand, those who enjoy fixing stuff get the reward of being able to look at their handy work, and being proud of it. Our personalities and life perspective tend to determine which reward is a higher priority.
I think for many, sailing is getting isolated from the hectic life they live on shore. It is a forced change in pace. For others, it may be the success of making the boat work and work well. For racers, even more so. The reward of successful performance builds self esteem. On the other hand, those who enjoy fixing stuff get the reward of being able to look at their handy work, and being proud of it. Our personalities and life perspective tend to determine which reward is a higher priority.
A long awaited update, Part 1:
I didn't get nearly as much done over the last few months as I would have liked, for reasons to be explained. So, jumping back to January:
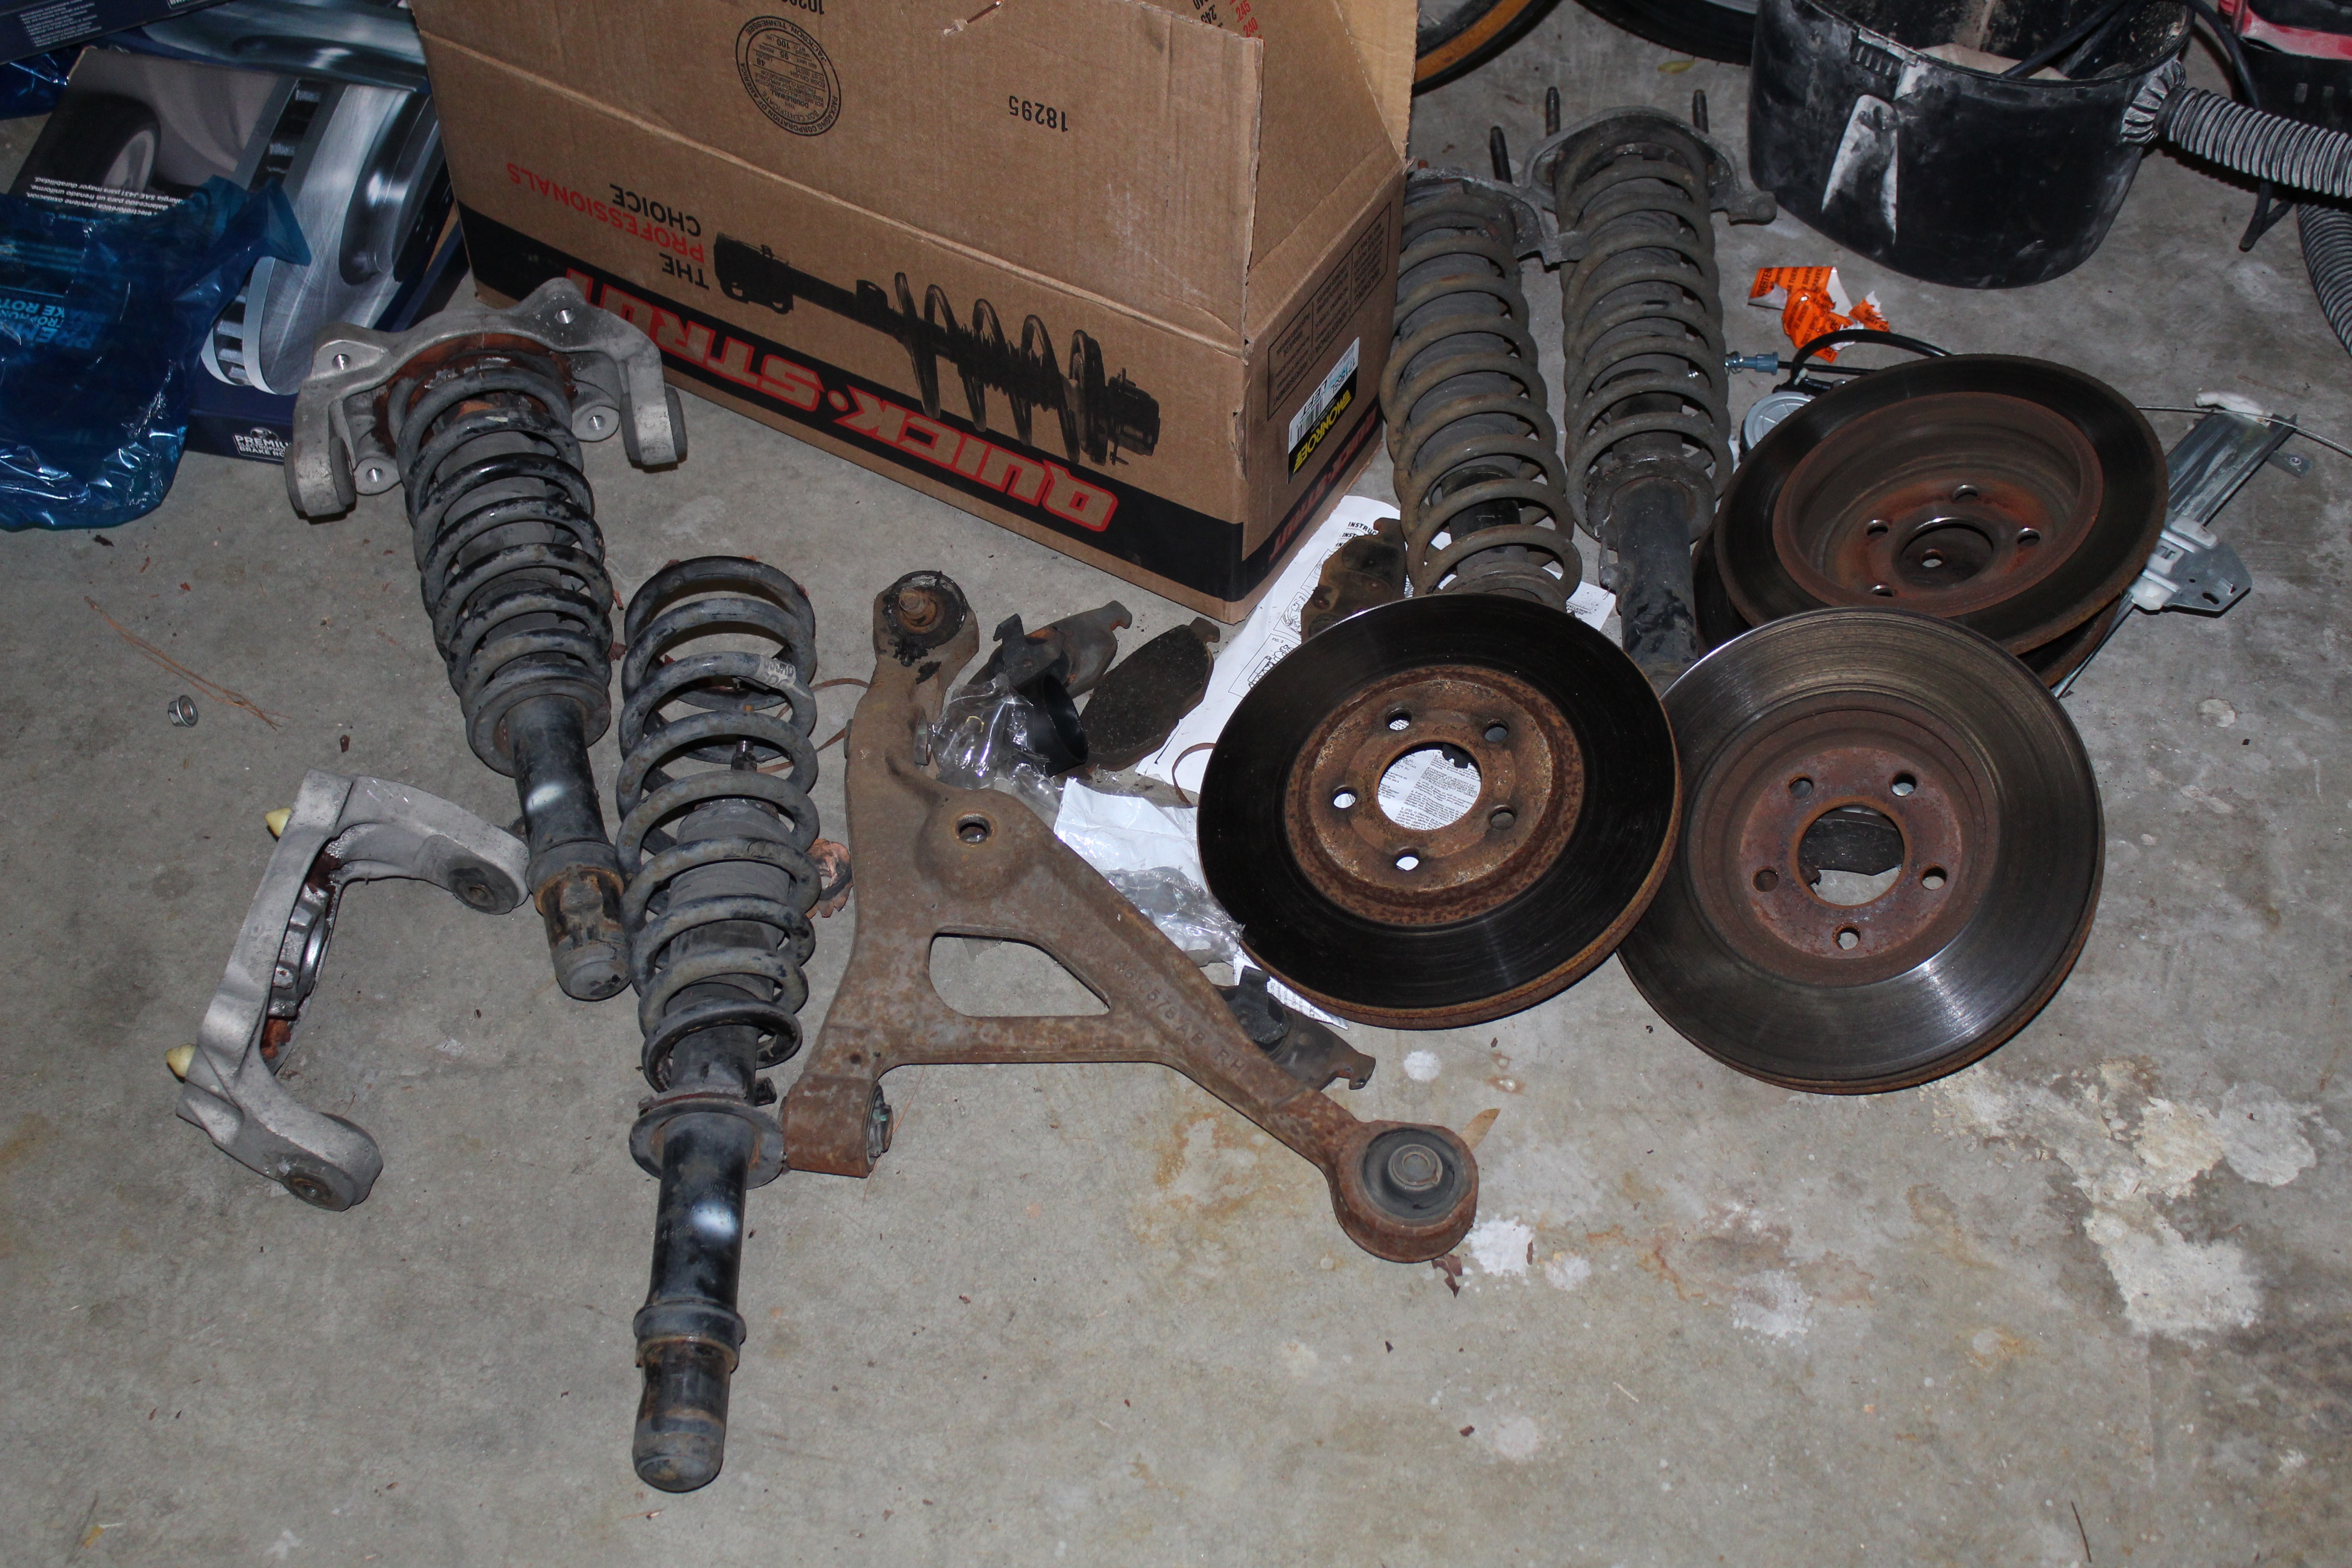
With my January leave coming up I had eagerly watched the weather - SC can have some really good winter weather and the few weeks leading up to my time home was looking good. Temps in the 60s to low 70s, I'm digging it! Wouldn't you know it, the day I arrive it's in the 30s. Bummer. Oh well, first day is usually playing catch-up on home chores, etc., and a big pile of parts was waiting for me for the Sebring. After all was installed, here's the pile of old parts:
So with that done it's time to concentrate on the boat. First project was to disassemble the port settee, paint and clear coat the pieces and start building the under-floor water tanks. Now remember, it's friggin COLD outside (I know, you guys up north will think I'm a wimp - you're right! But remember, I lived in Dubai for 5 years, so there! ) Halfway through the disassembly process, I FEEL IT! You know, that moment when things are about to go spectacularly bad. Bent over slightly, twist just the wrong way for just a second, pulled muscle in my back! Didn't hurt too bad right then but I knew it was only going to get worse.
I was right. For the rest of the day I tried to nurse it but the next morning, agony! So, flat on my back for a few days, sipping Capt Morgan and feeling sorry for myself.
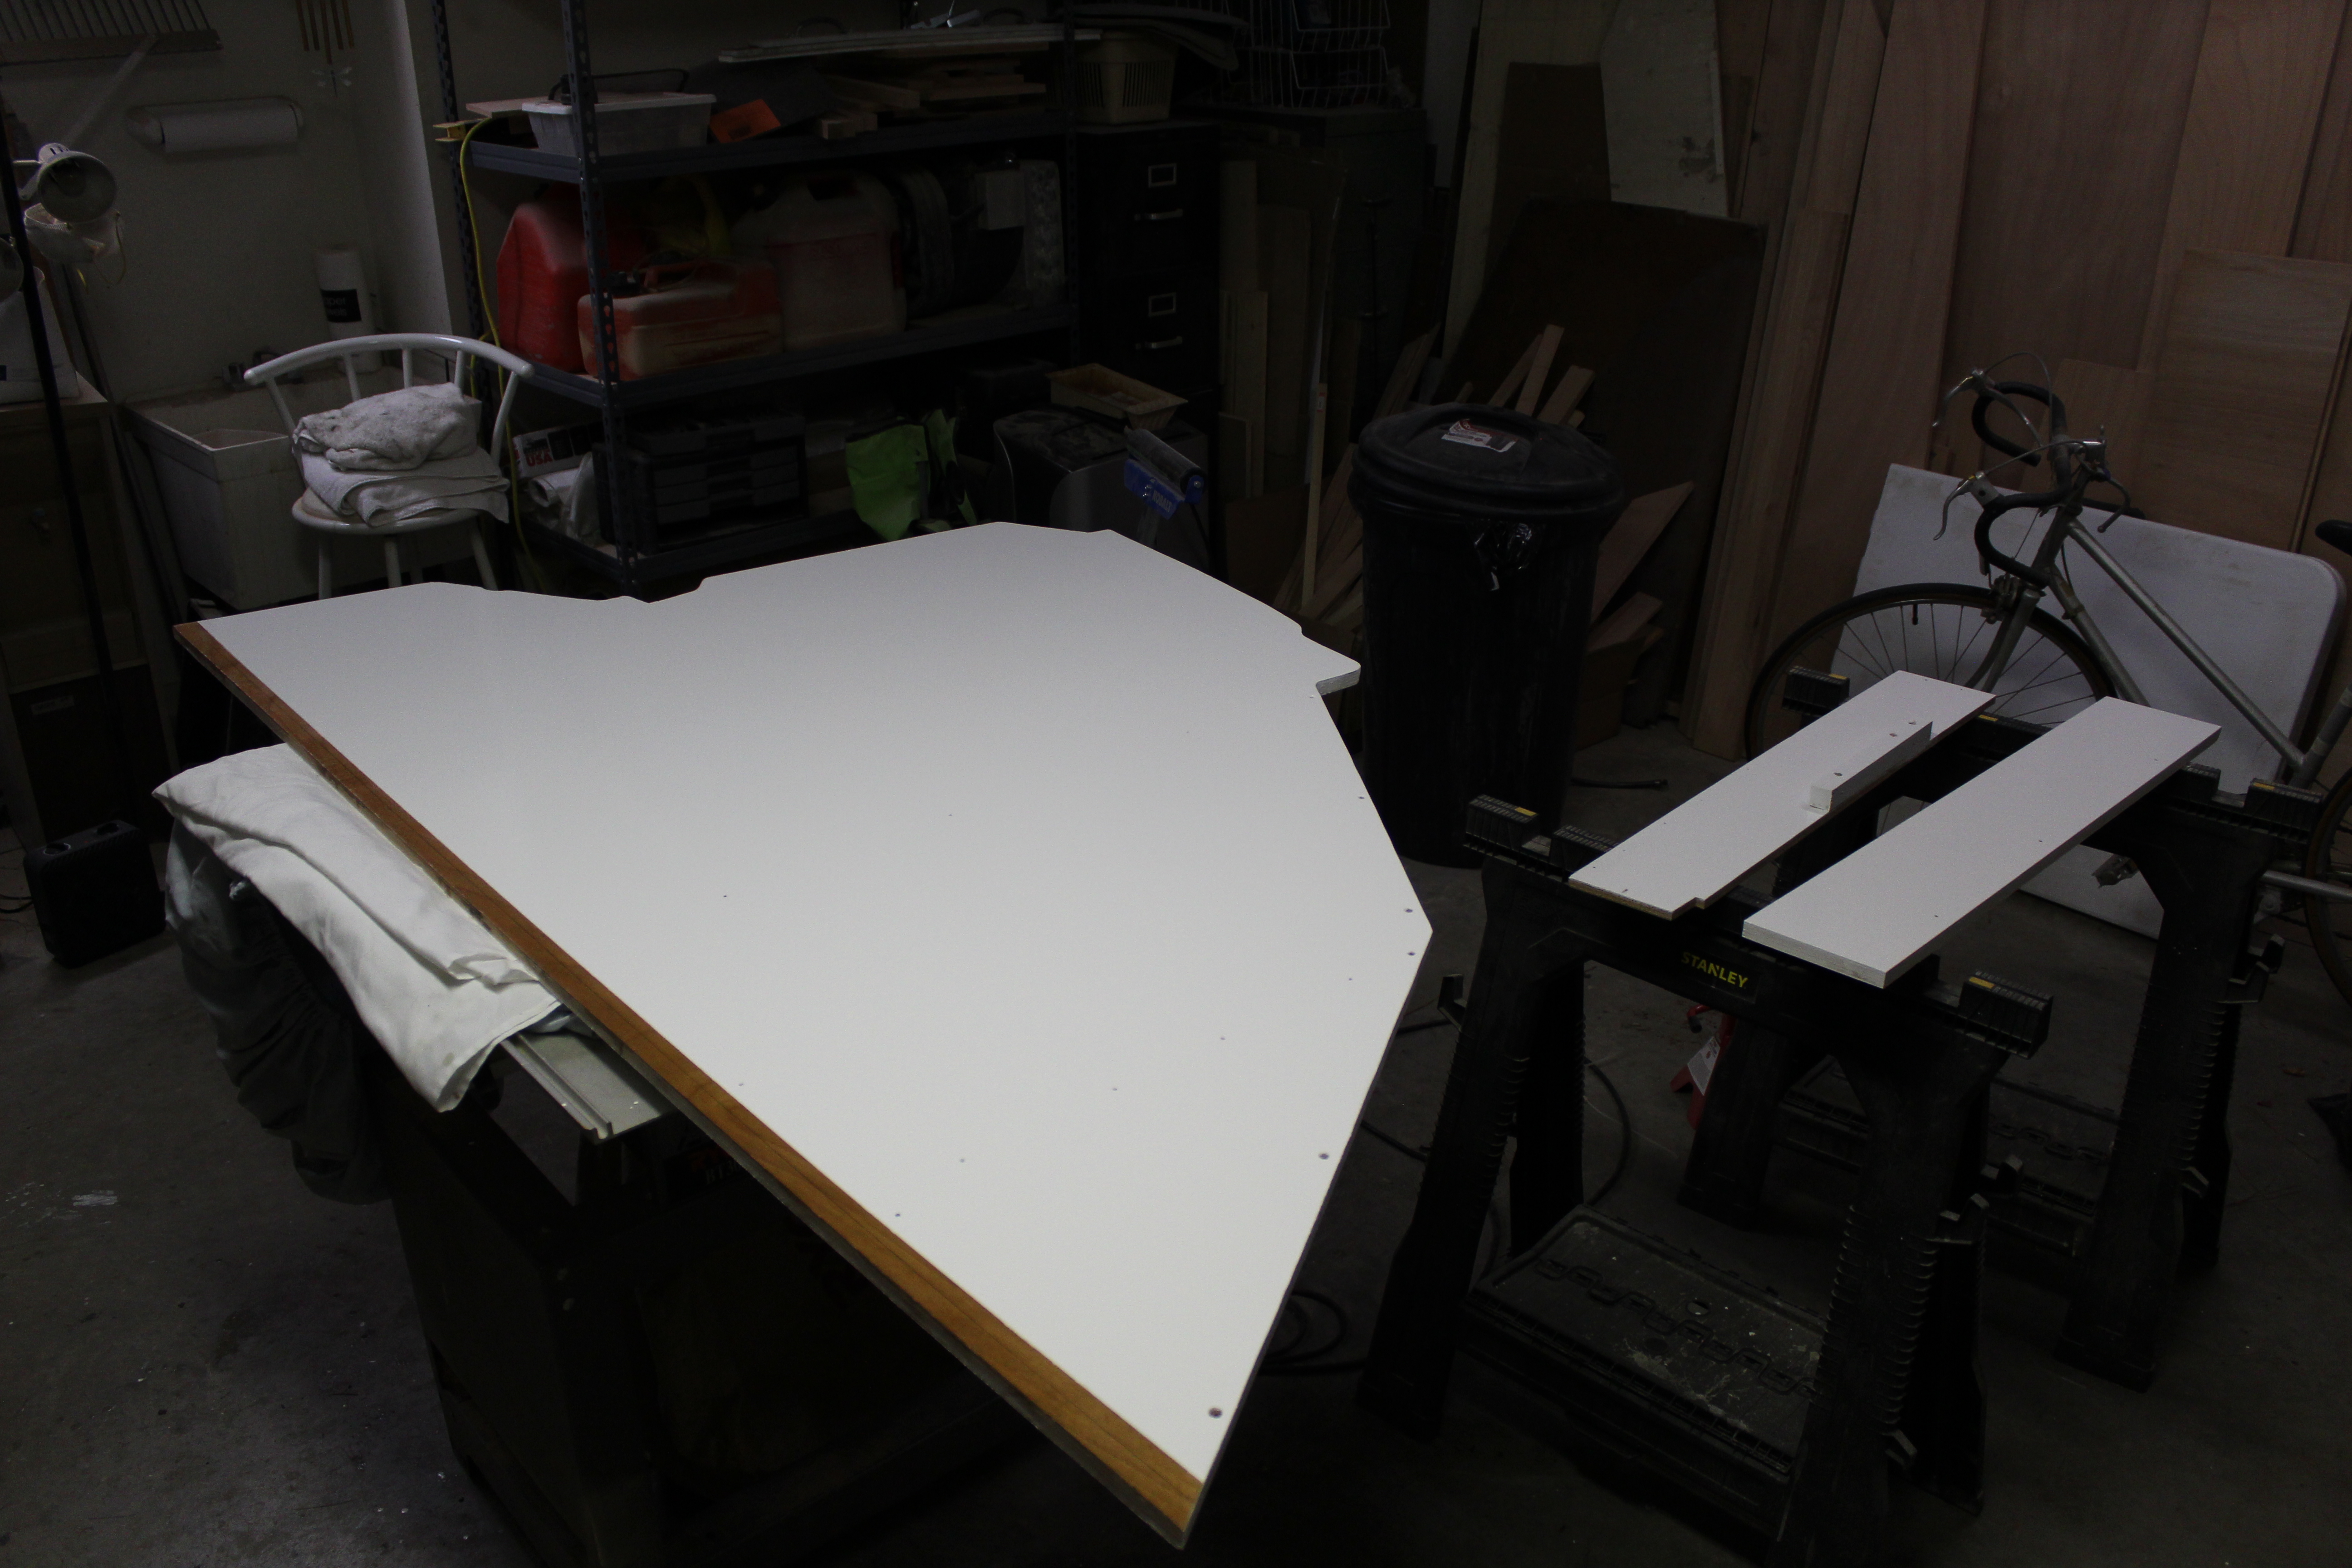
As time marches on, my back improved (well, sorta. I just got tired of laying around) and I did get some work done. Parts & pieces painted:
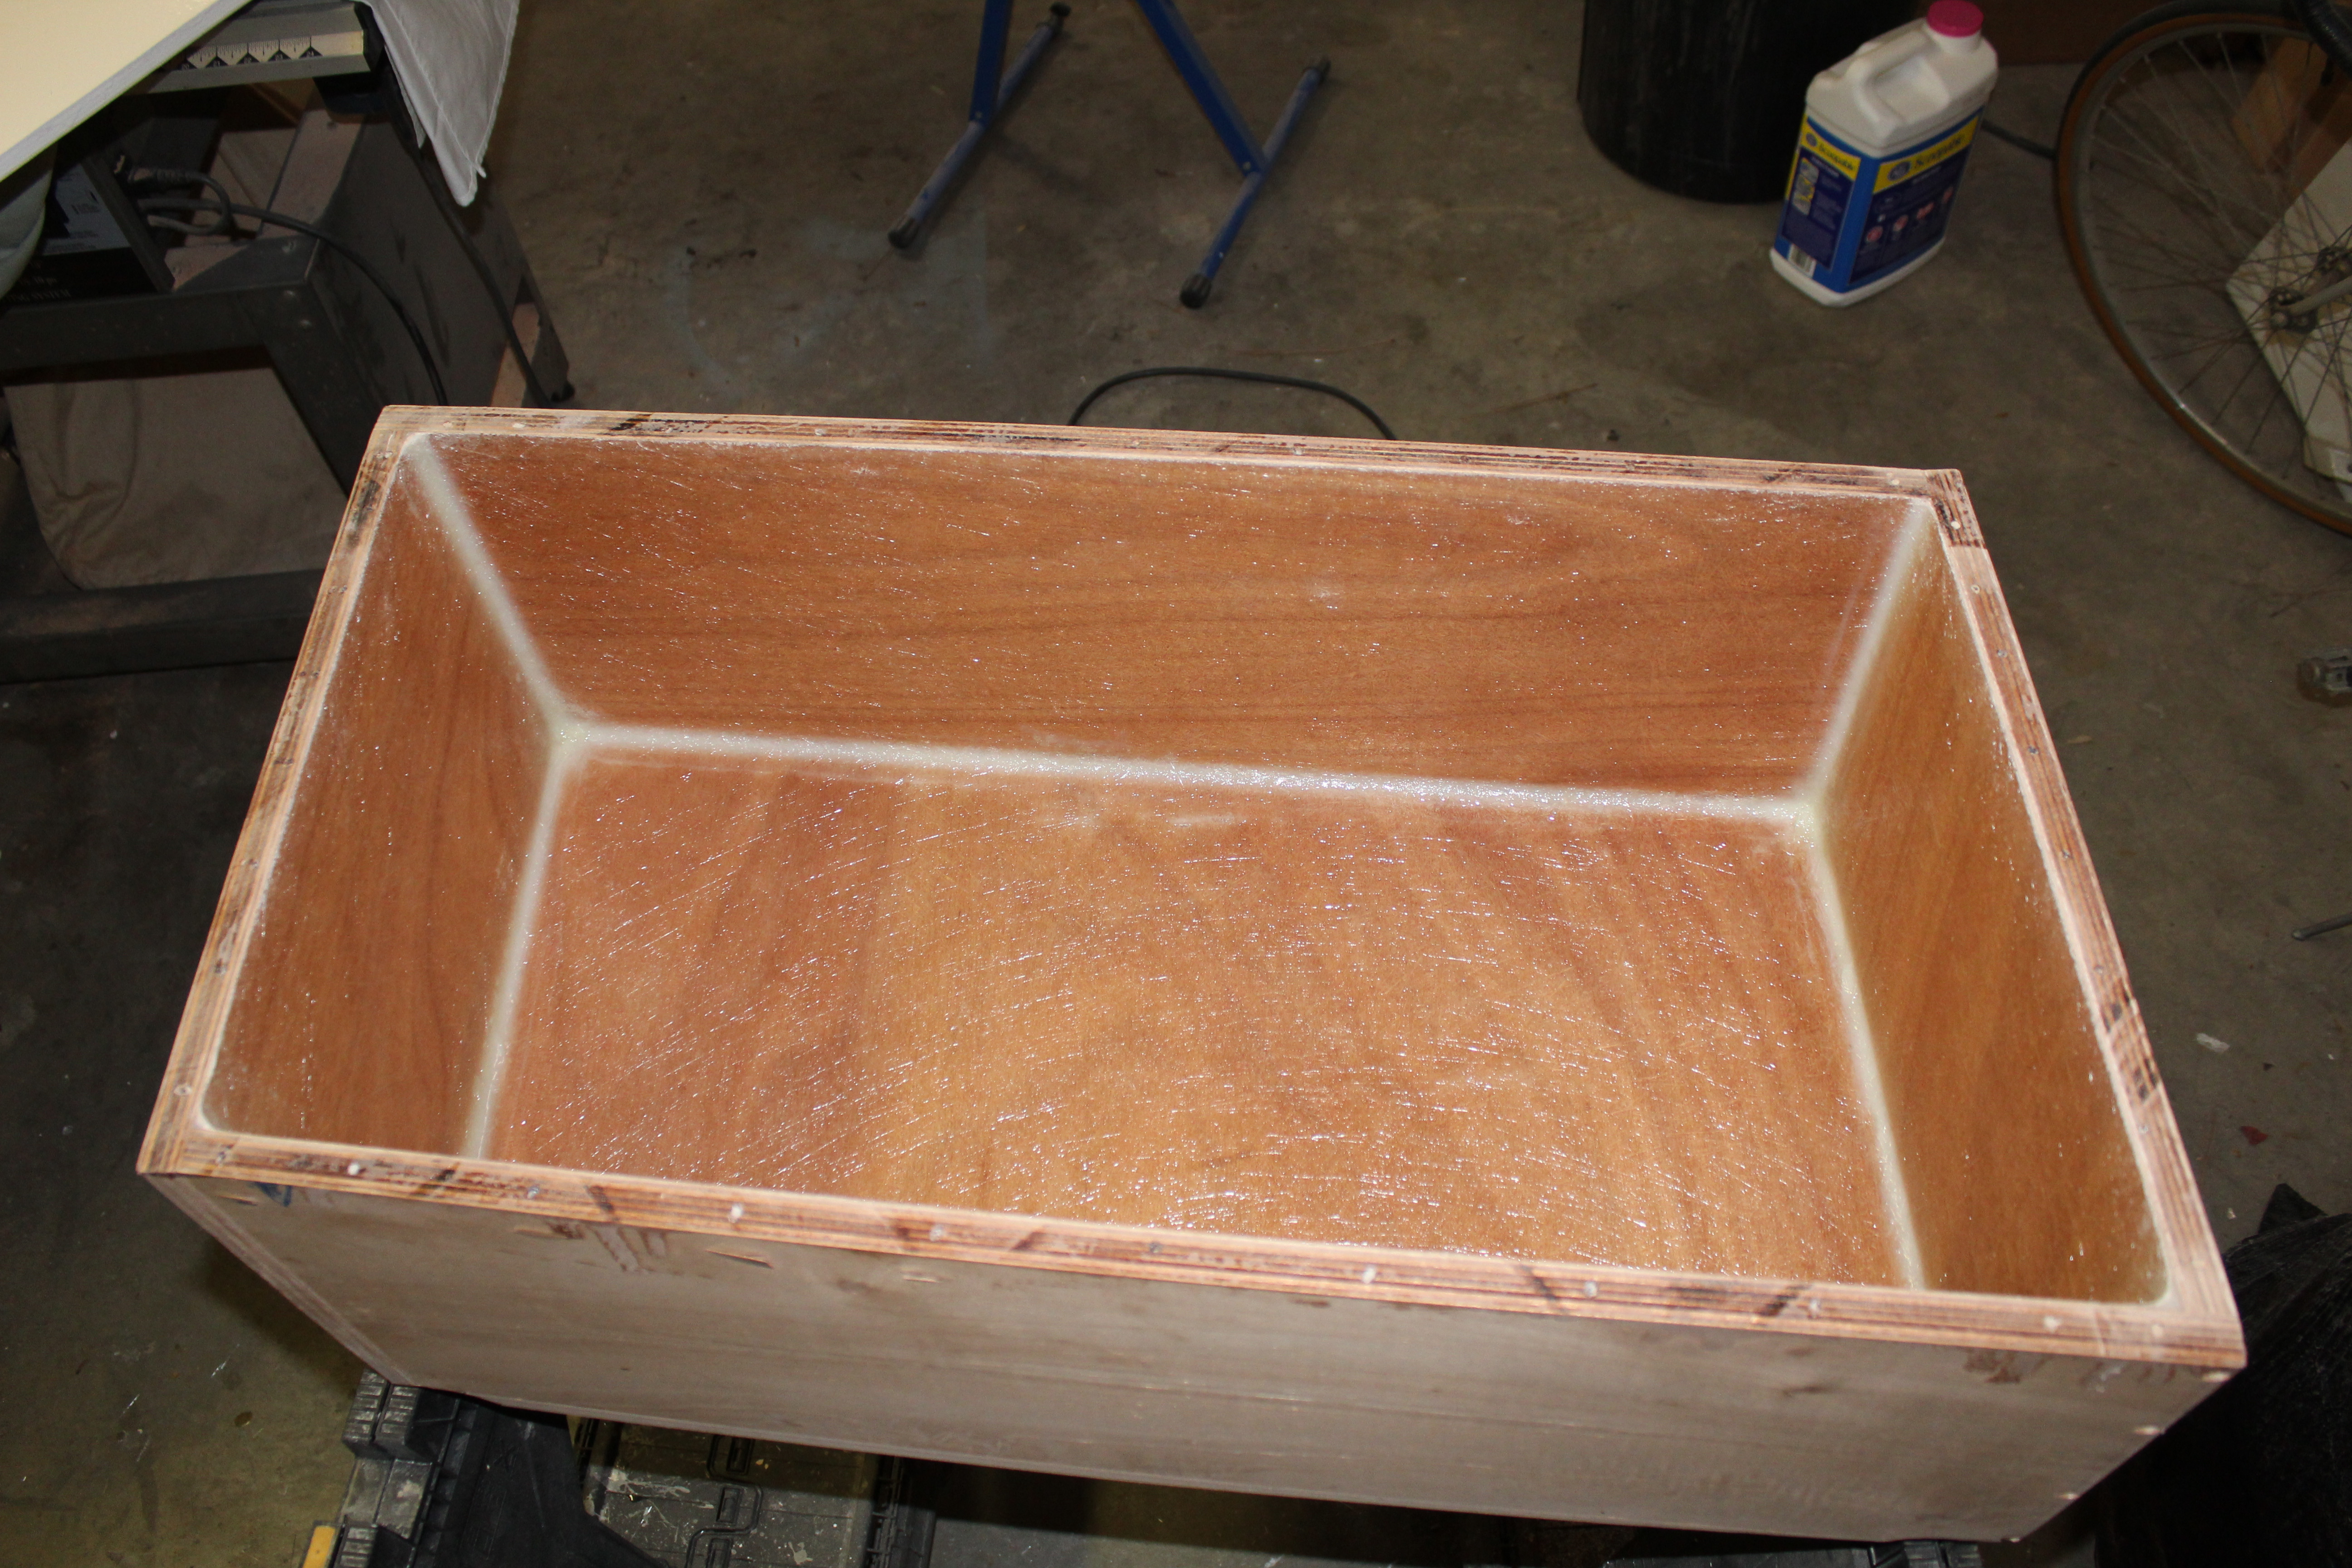
I lined the battery box with fiberglass - first up some fillets in the corners:
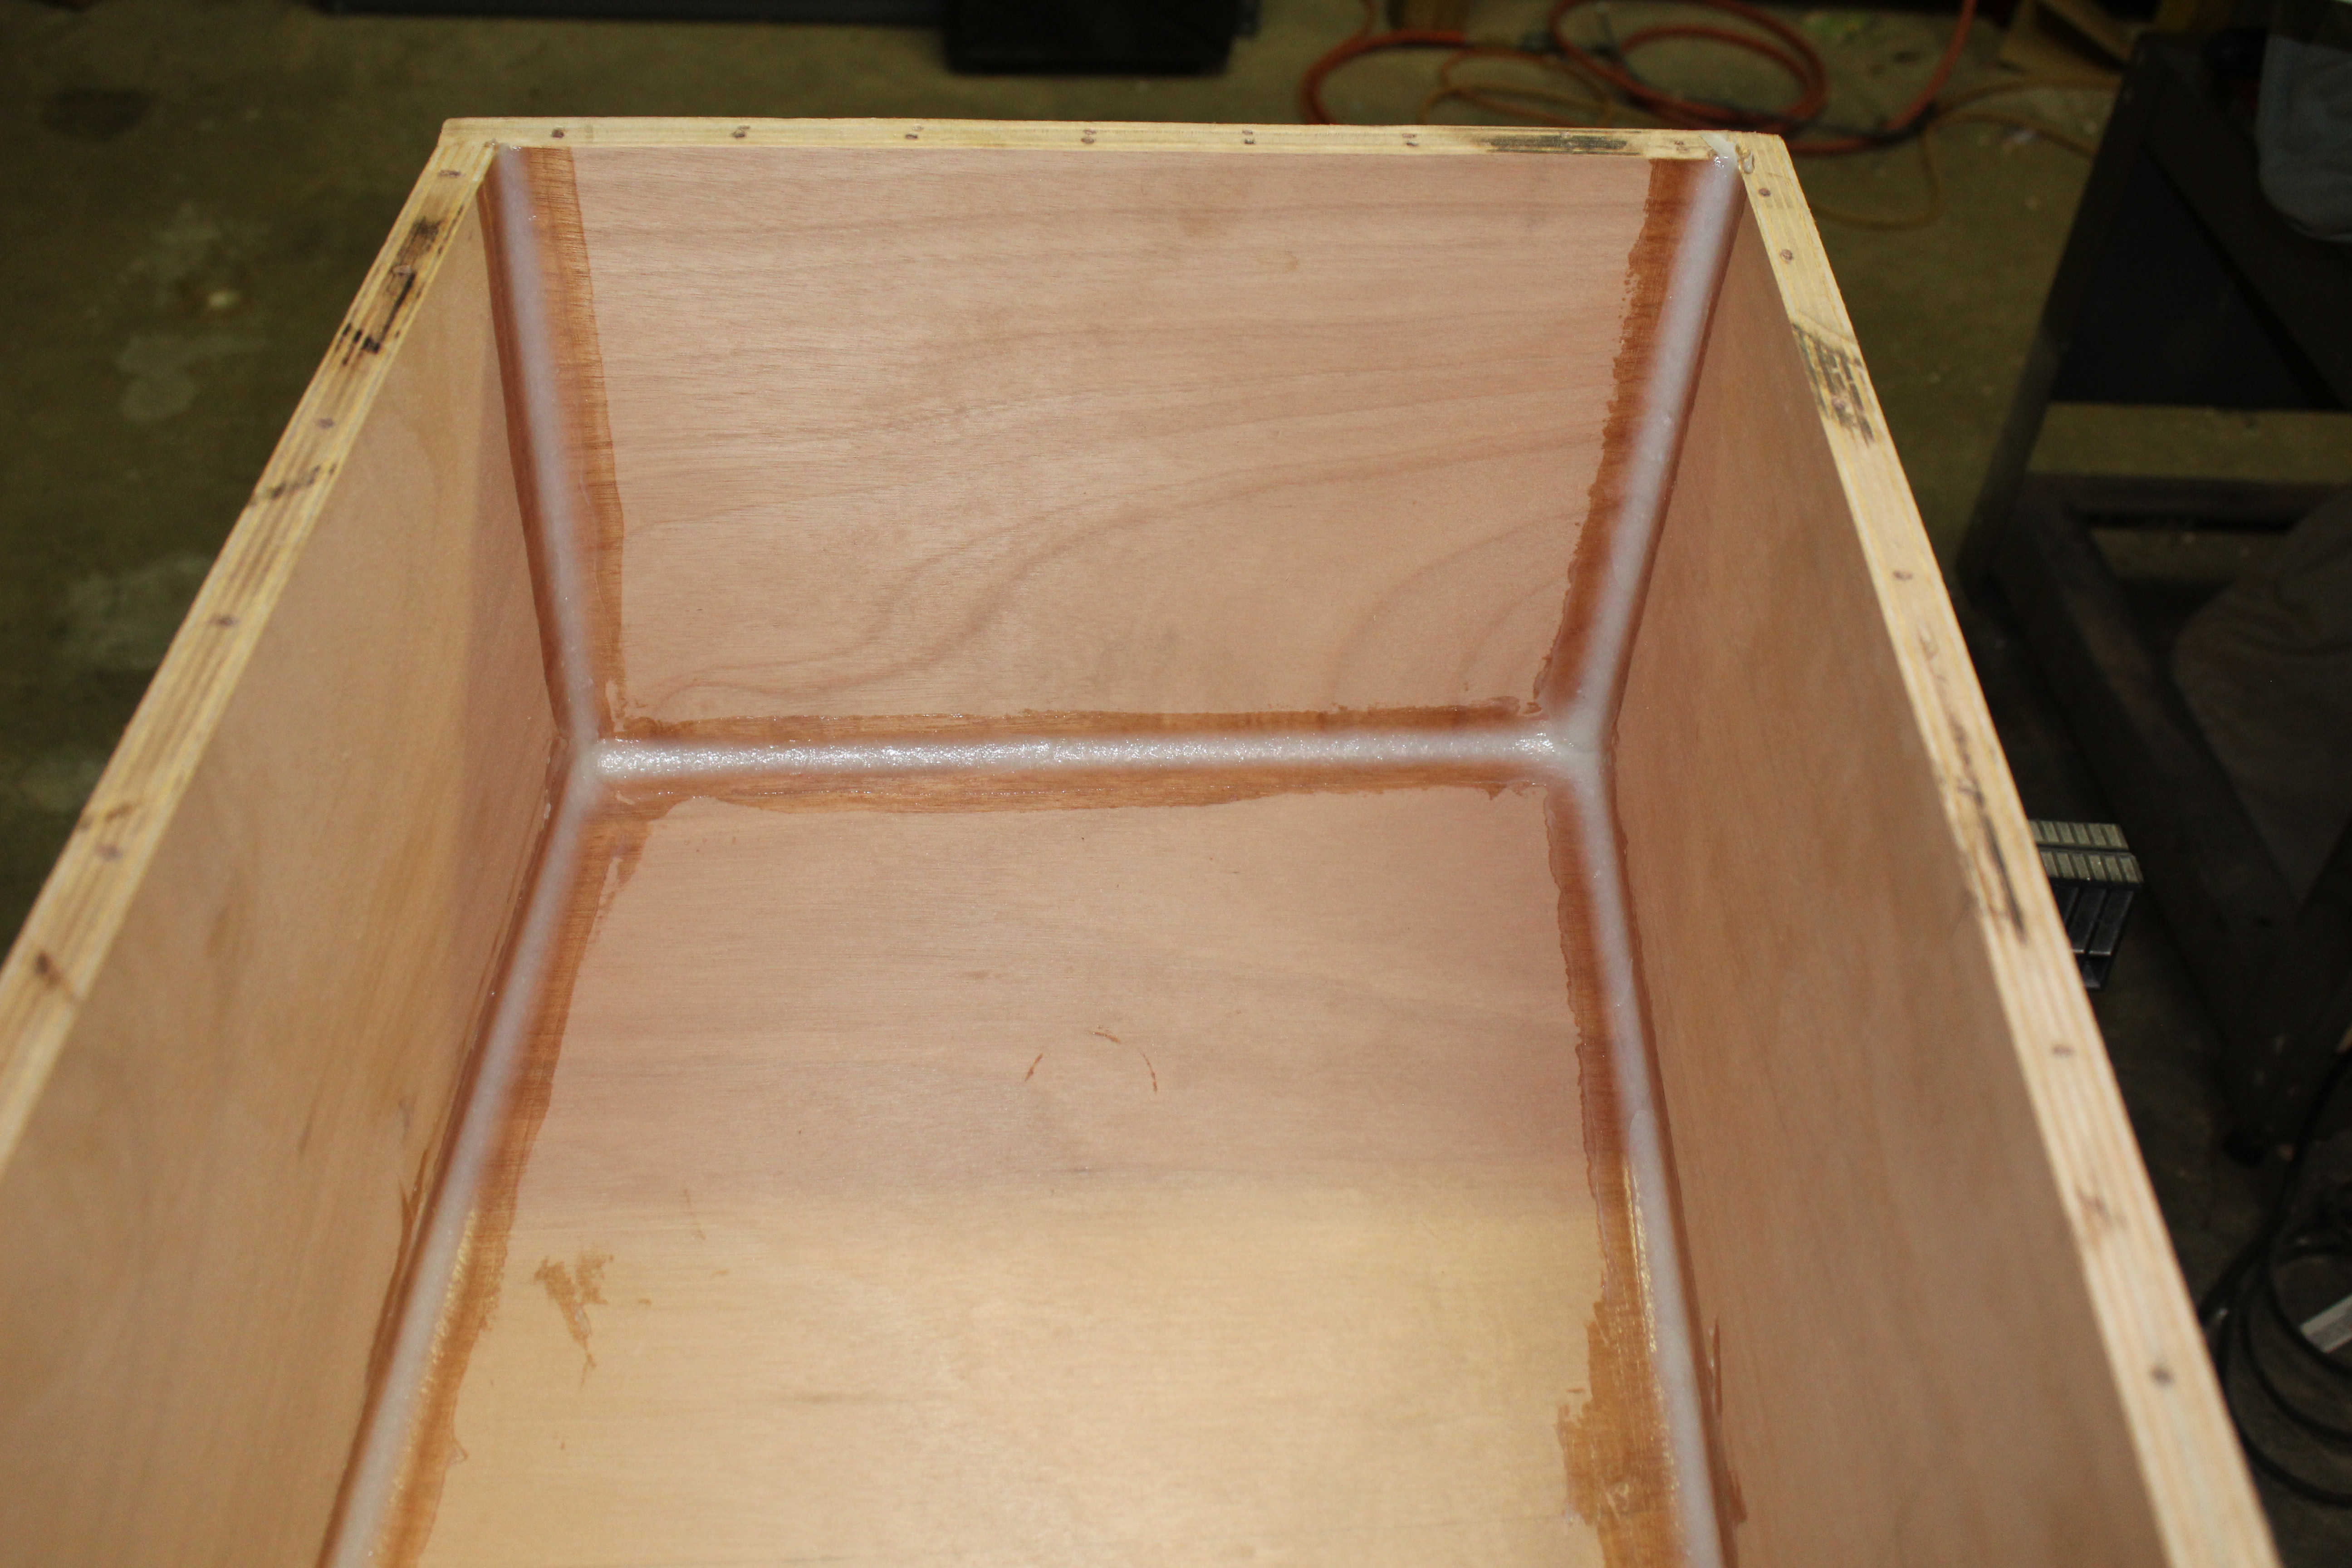
then some glass - chopped strand mat here, no real need for added strength:
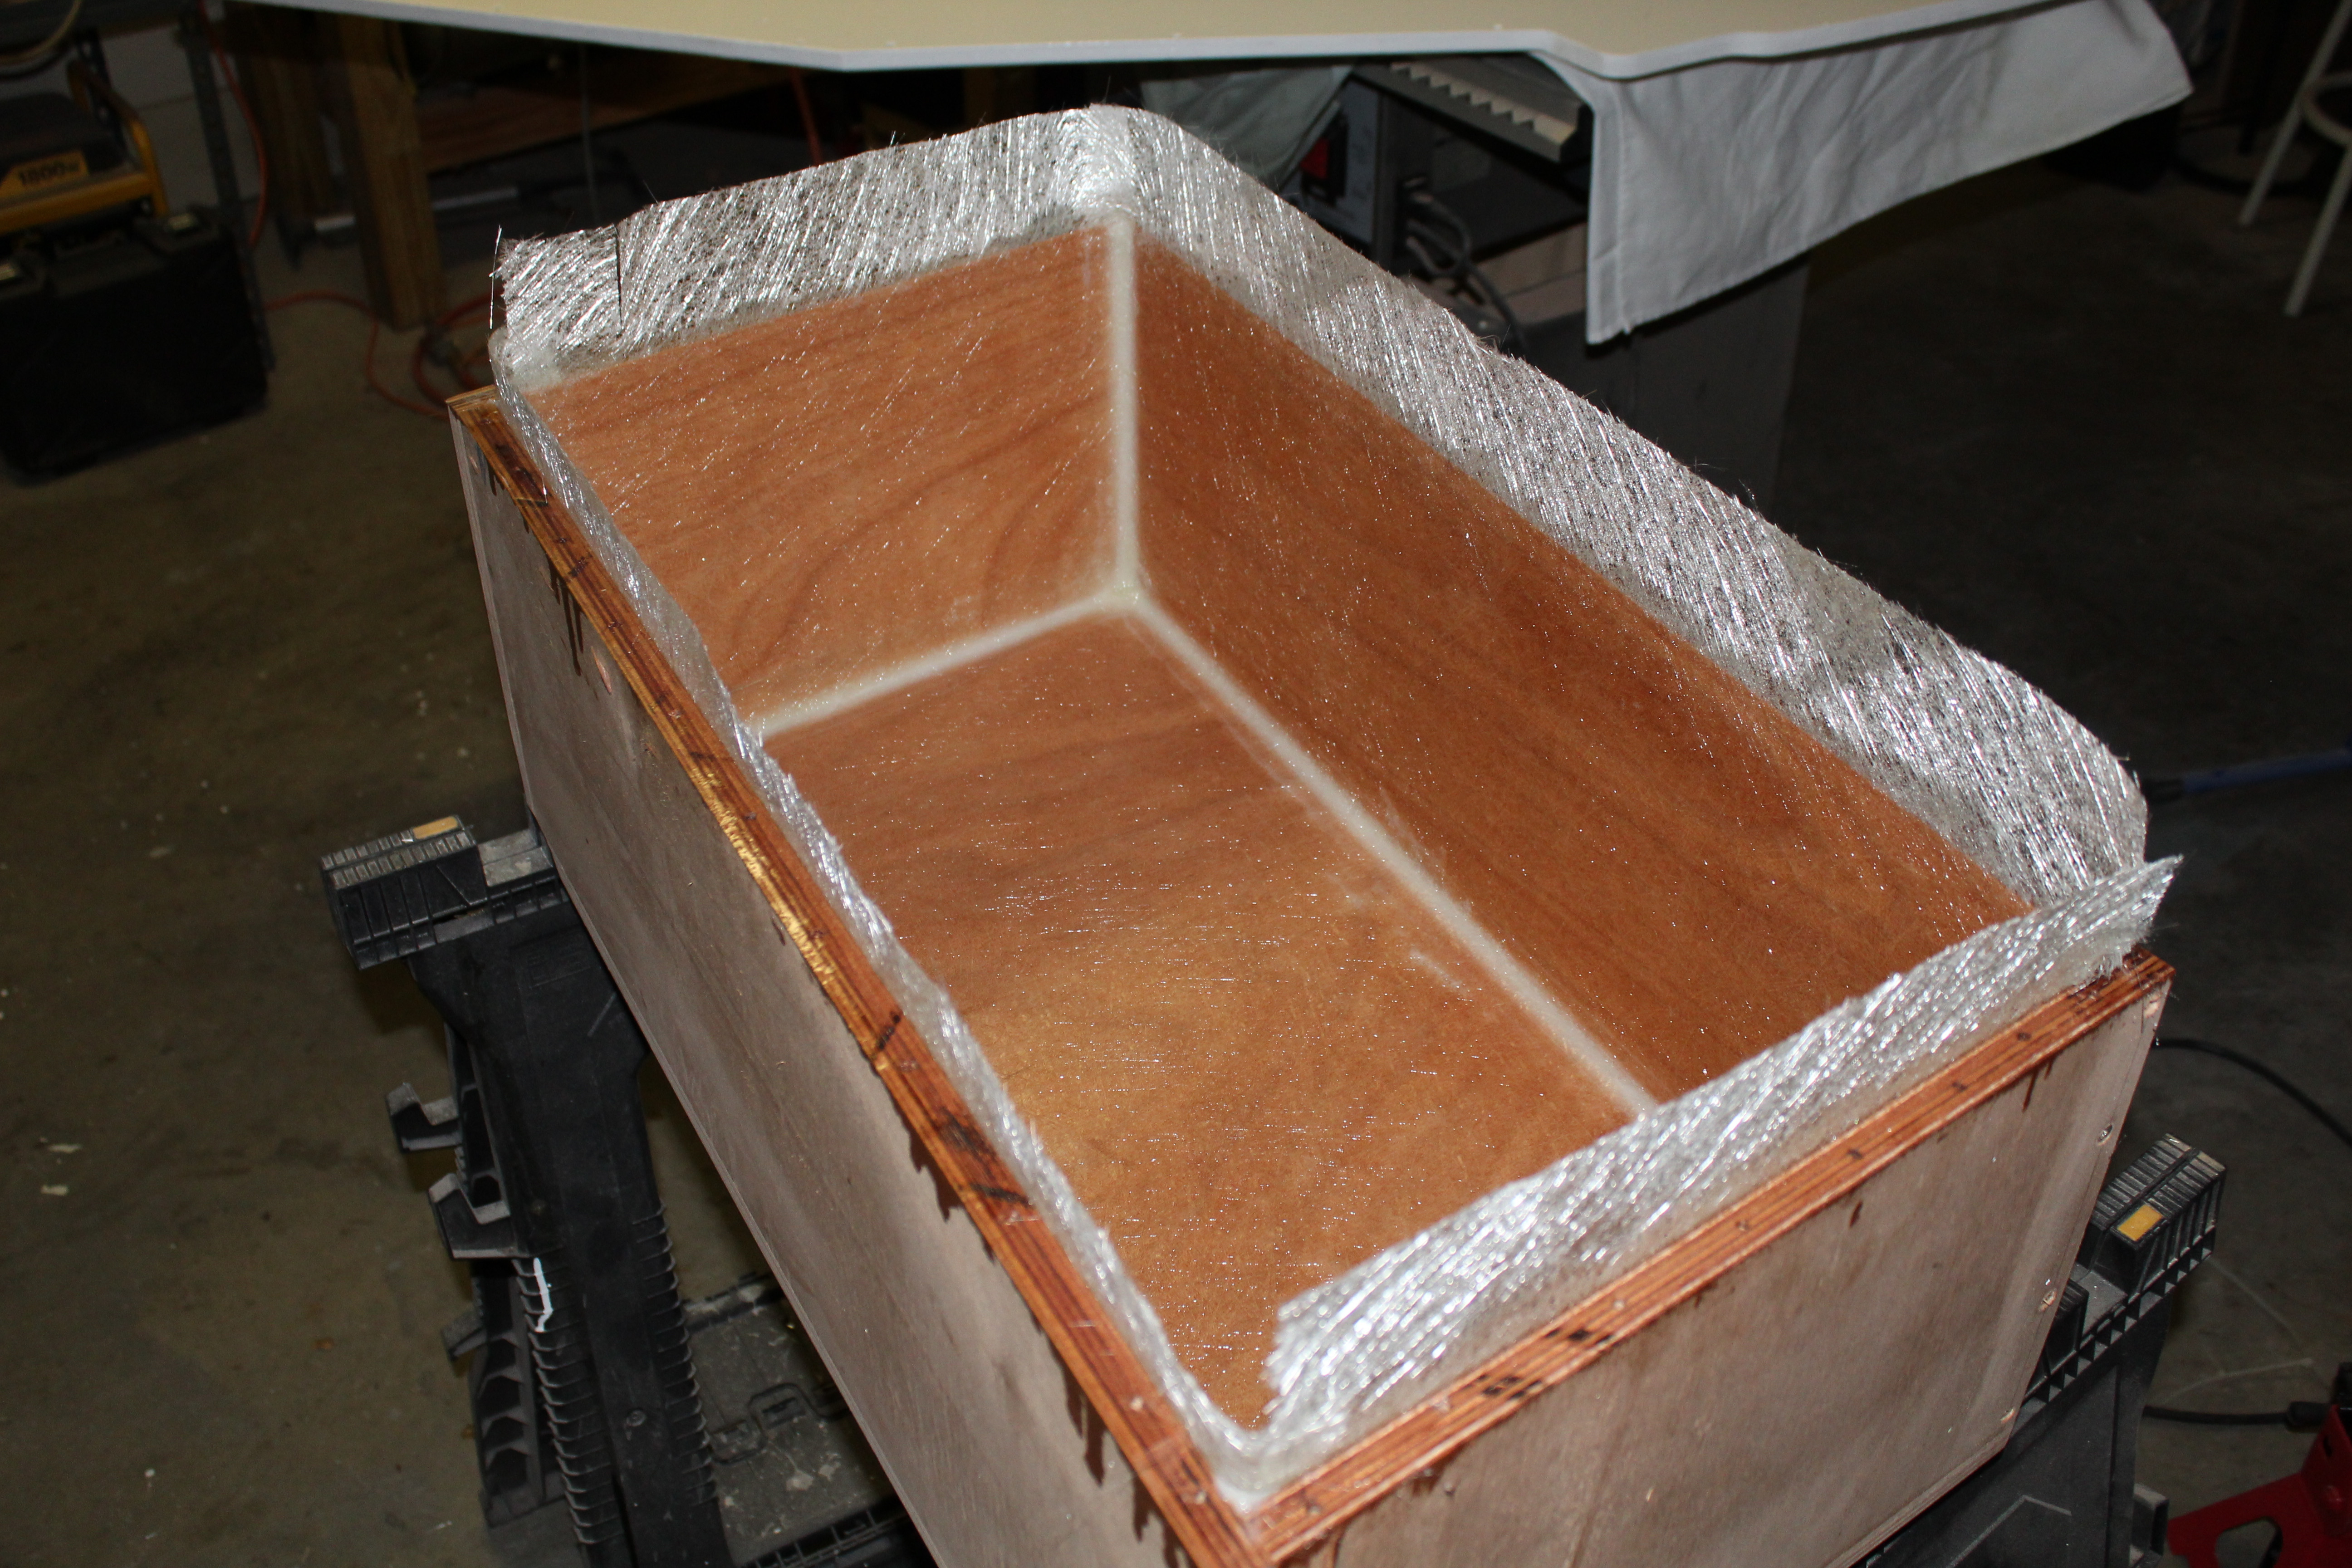
And finished and ready for paint:
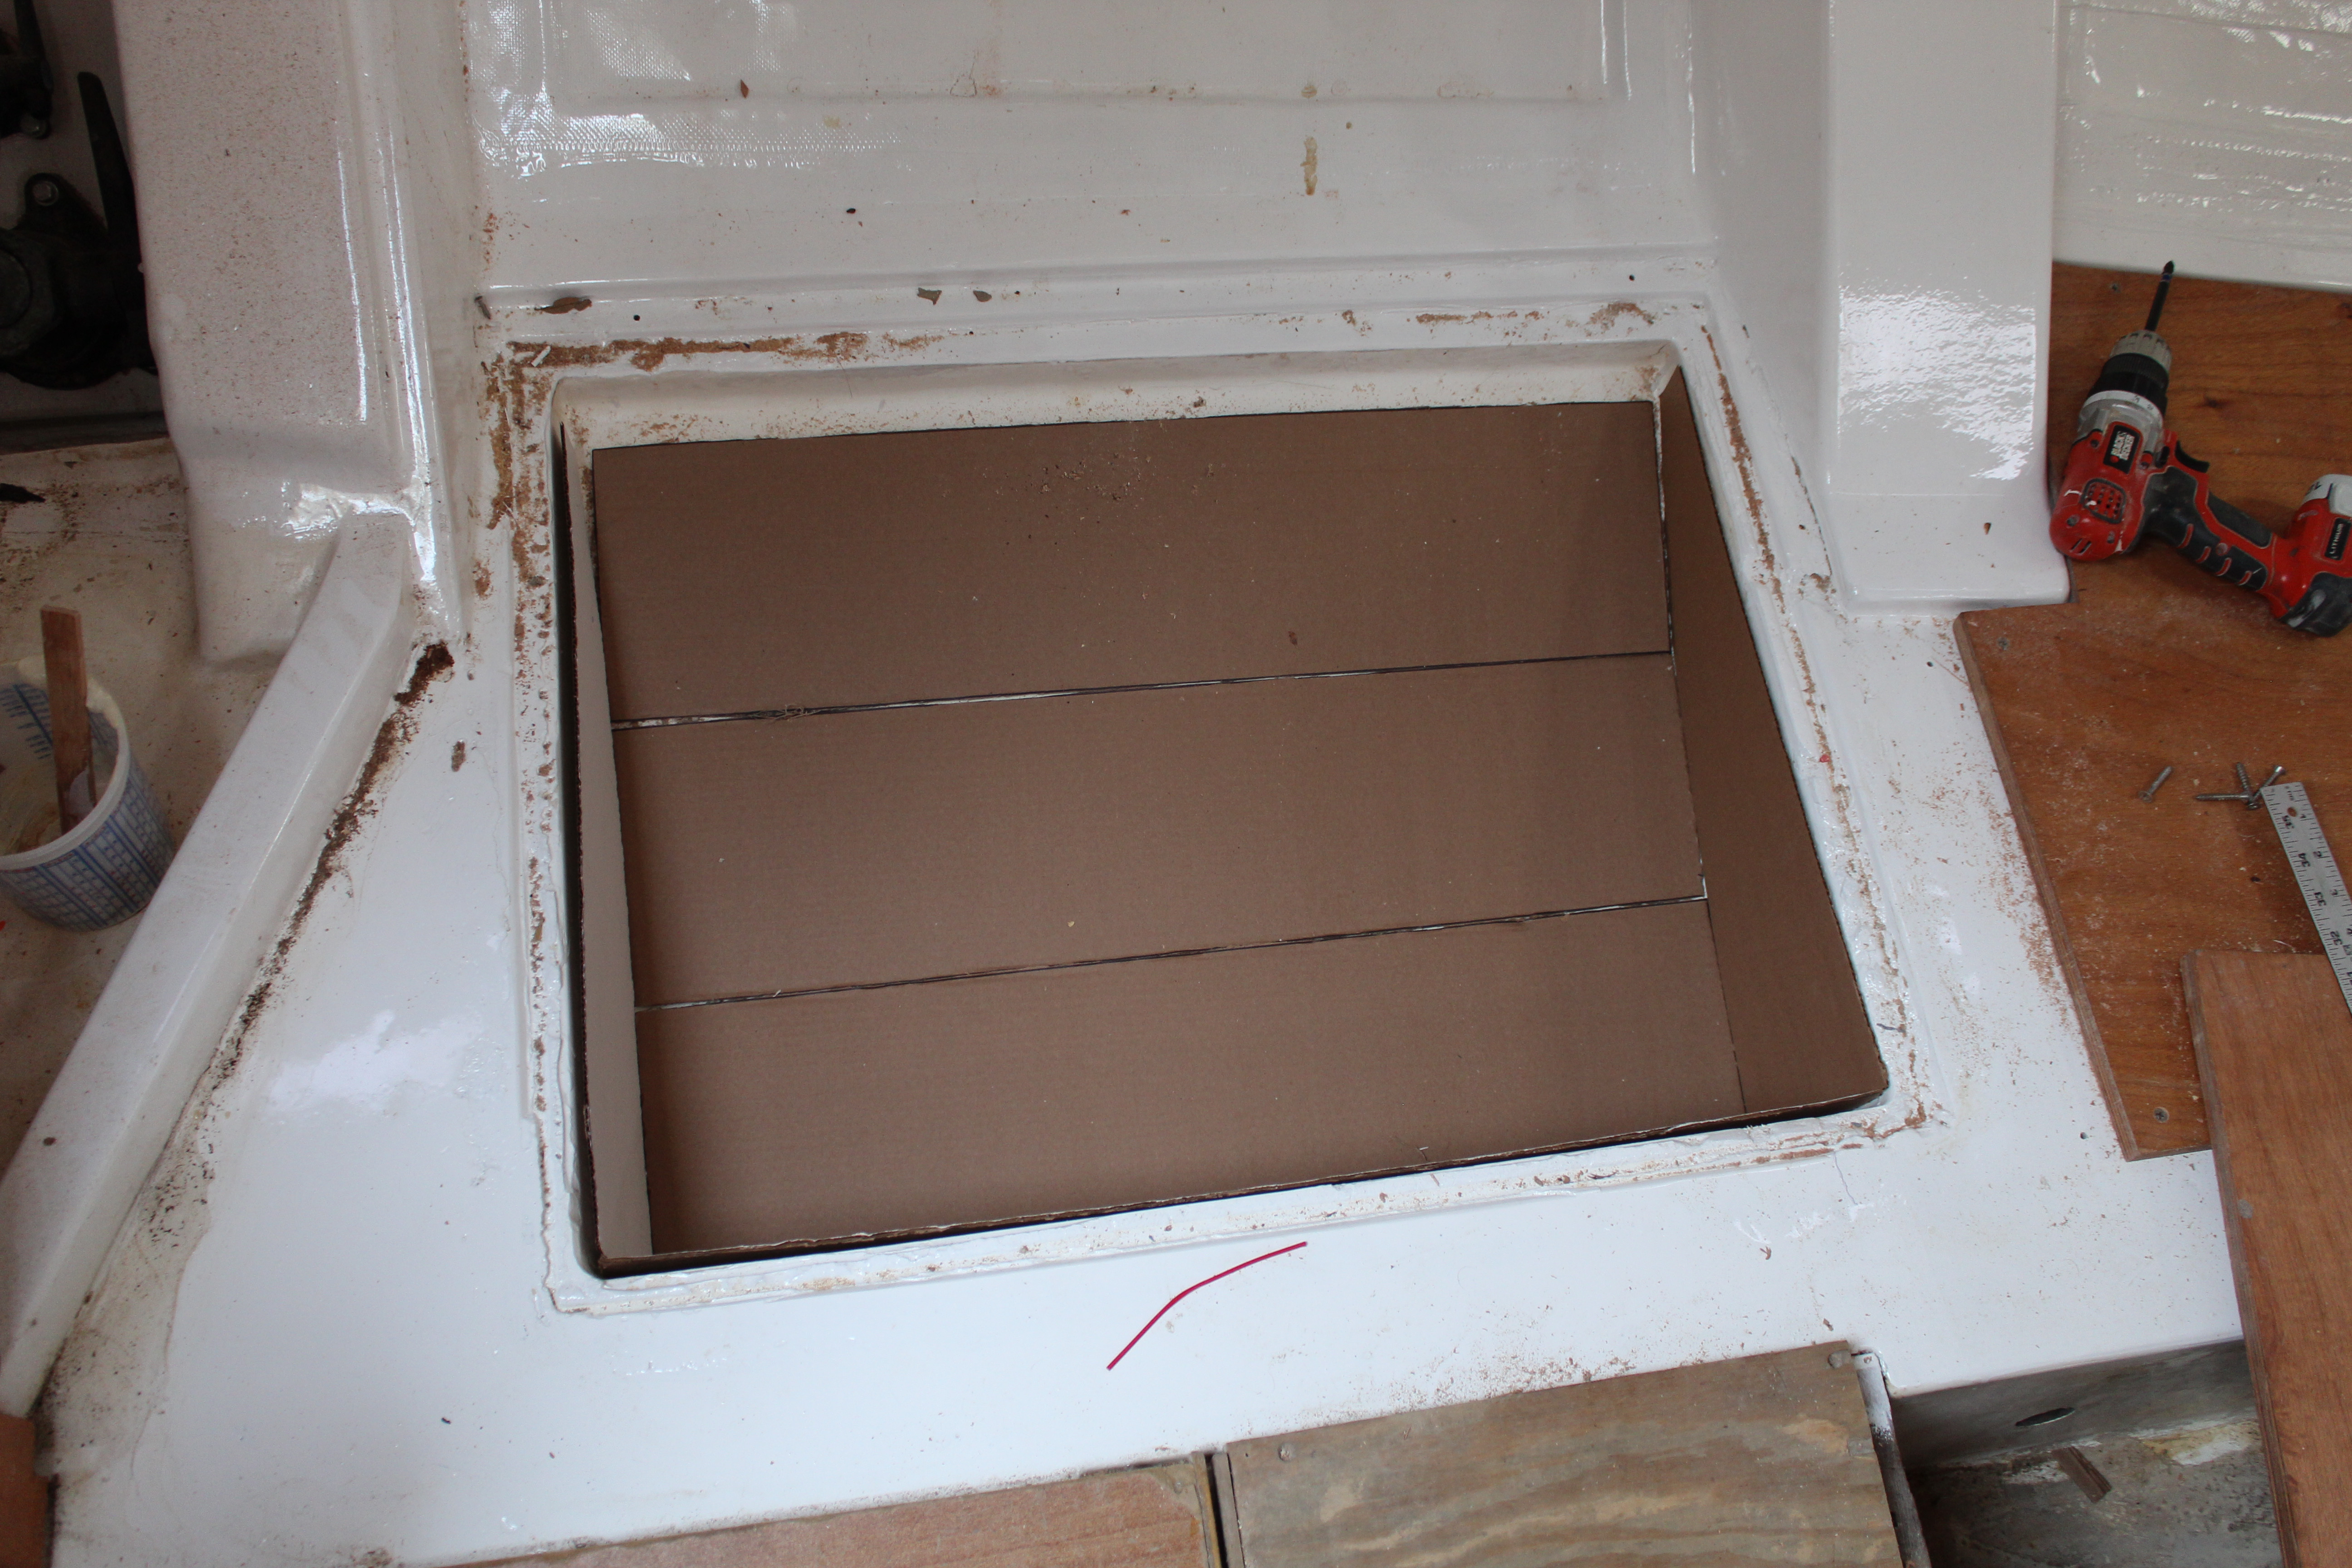
Finally for this time home, I patterned the water tank. Here's the cardboard pieces cut:
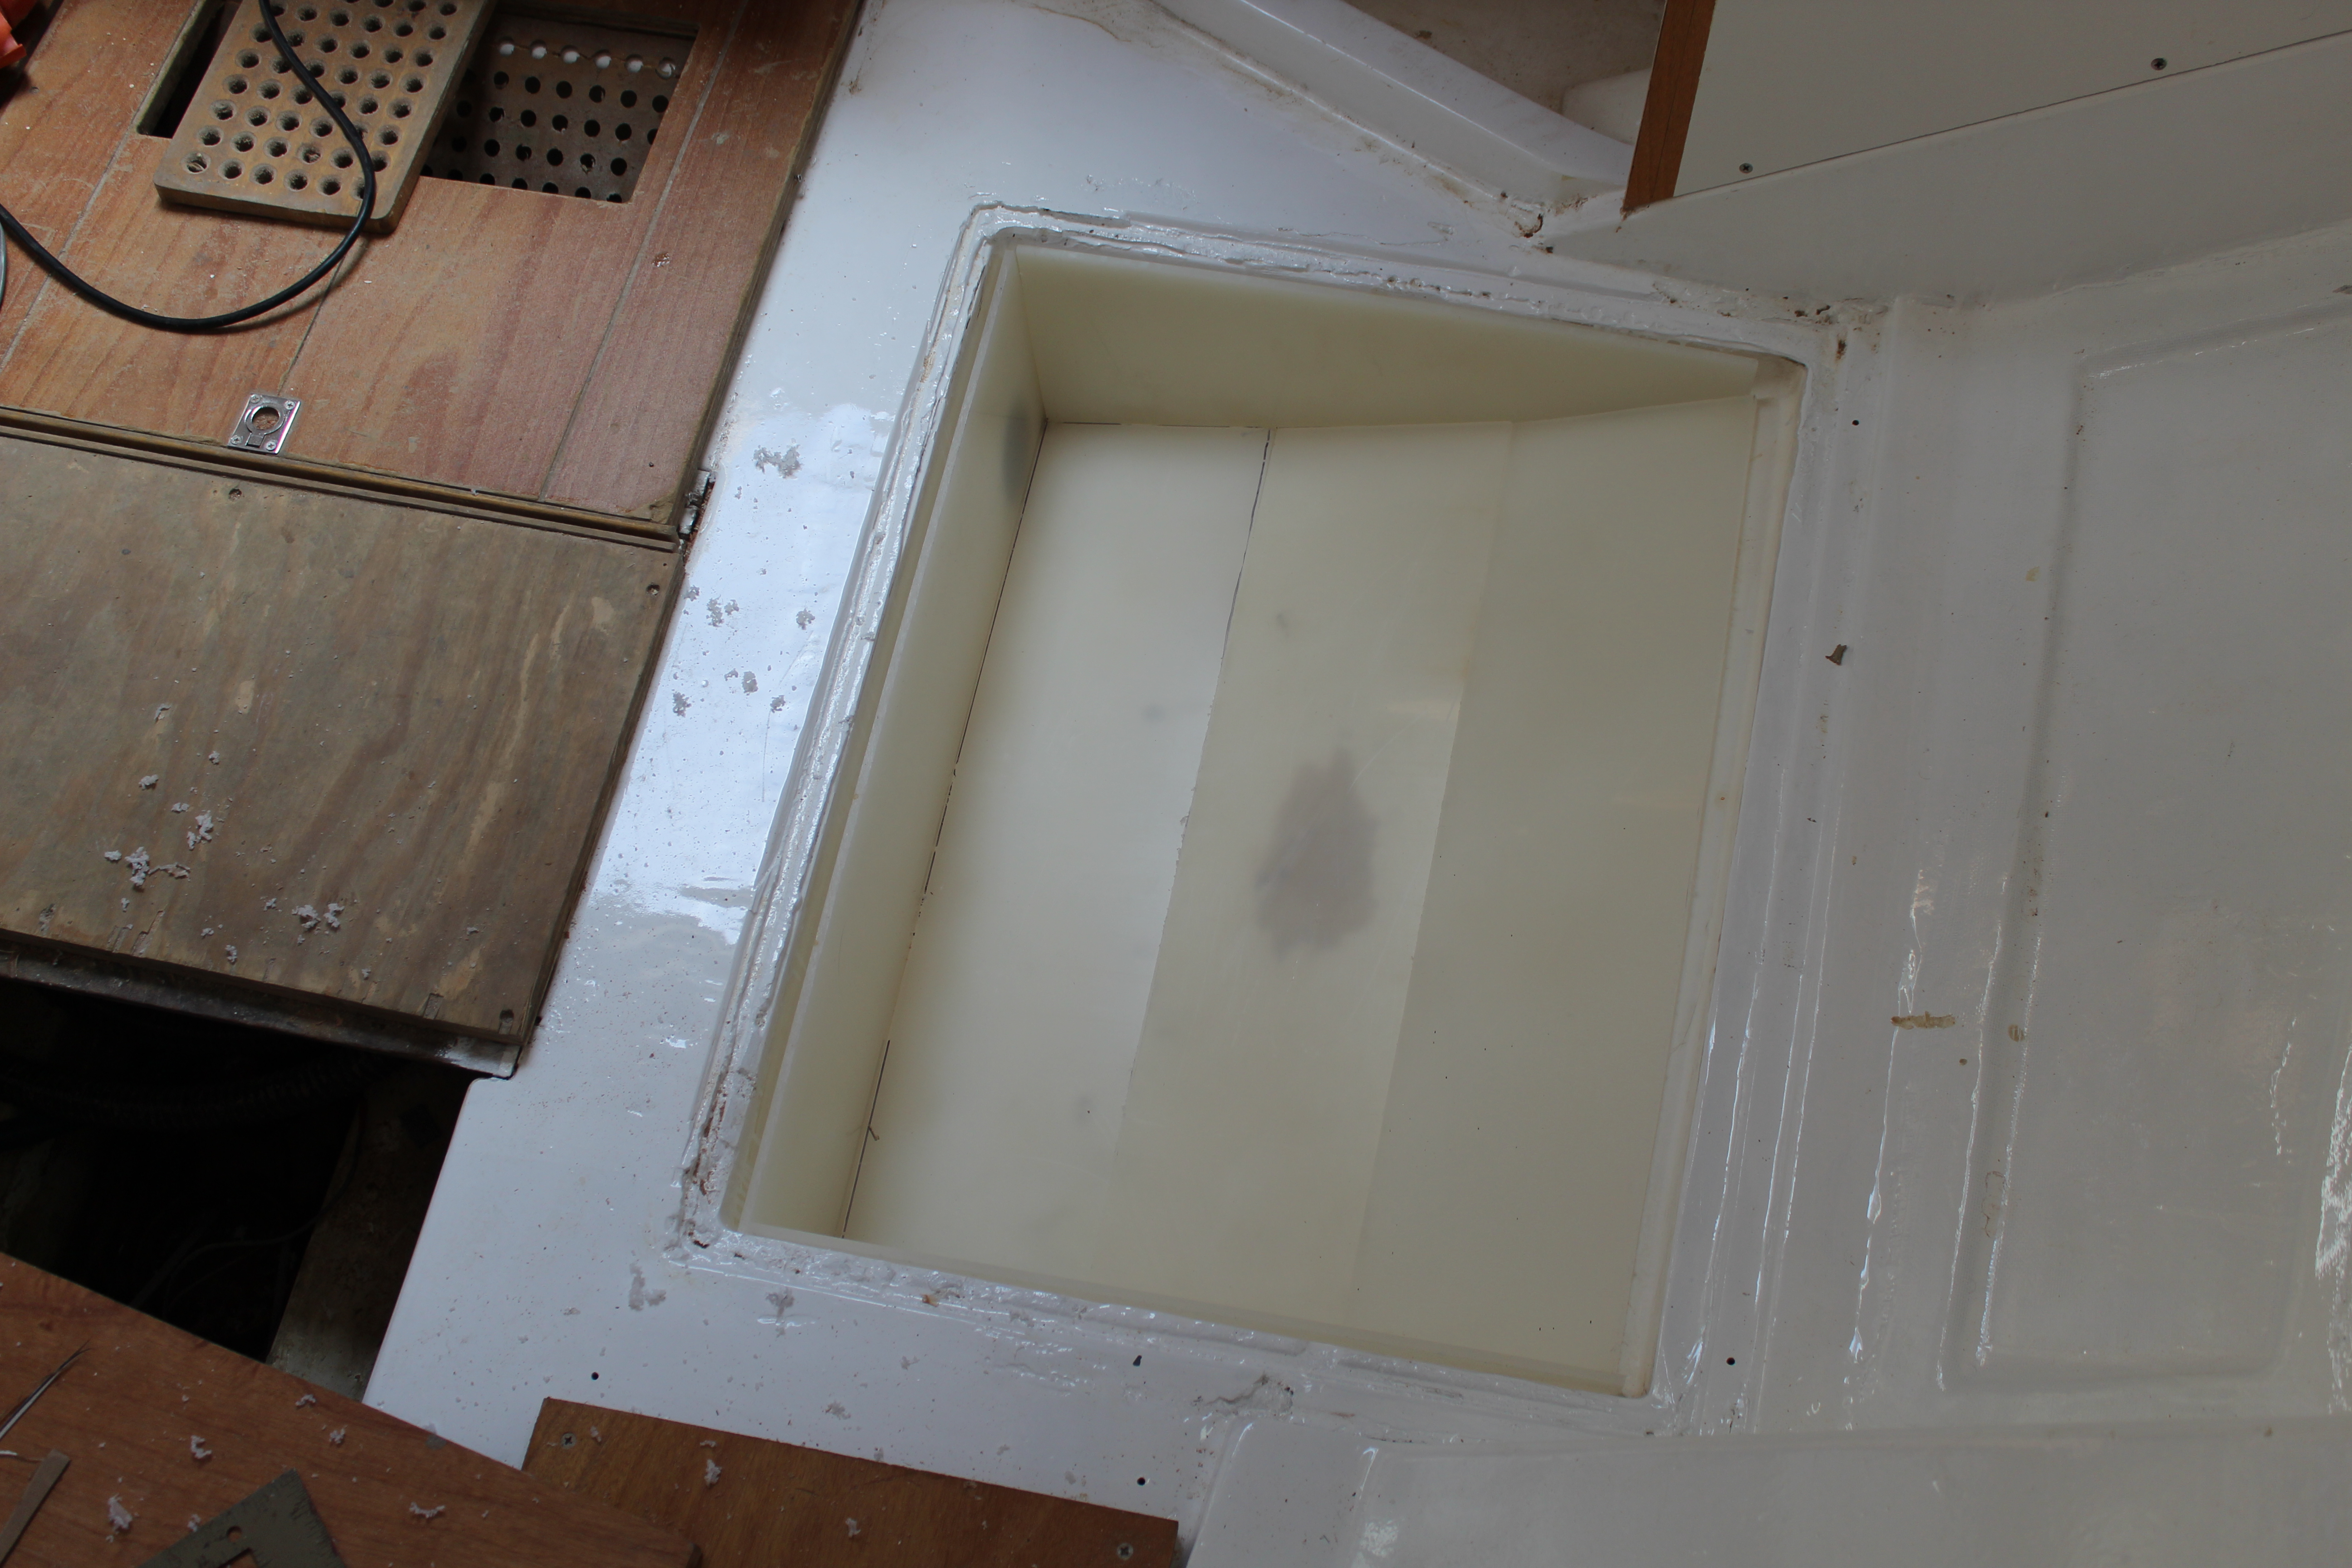
And the plastic cut, fit and ready for welding:
That pretty much summed up my trip home in January. It never did warm up (until the day I left. I want to know who's in charge, I have a few words!) The good news is my back finally got better - about a week after I got back to Japan!
Next up, March!
Cheers,
Mark
I didn't get nearly as much done over the last few months as I would have liked, for reasons to be explained. So, jumping back to January:
With my January leave coming up I had eagerly watched the weather - SC can have some really good winter weather and the few weeks leading up to my time home was looking good. Temps in the 60s to low 70s, I'm digging it! Wouldn't you know it, the day I arrive it's in the 30s. Bummer. Oh well, first day is usually playing catch-up on home chores, etc., and a big pile of parts was waiting for me for the Sebring. After all was installed, here's the pile of old parts:

So with that done it's time to concentrate on the boat. First project was to disassemble the port settee, paint and clear coat the pieces and start building the under-floor water tanks. Now remember, it's friggin COLD outside (I know, you guys up north will think I'm a wimp - you're right! But remember, I lived in Dubai for 5 years, so there!
I was right. For the rest of the day I tried to nurse it but the next morning, agony! So, flat on my back for a few days, sipping Capt Morgan and feeling sorry for myself.
As time marches on, my back improved (well, sorta. I just got tired of laying around) and I did get some work done. Parts & pieces painted:

I lined the battery box with fiberglass - first up some fillets in the corners:

then some glass - chopped strand mat here, no real need for added strength:

And finished and ready for paint:

Finally for this time home, I patterned the water tank. Here's the cardboard pieces cut:

And the plastic cut, fit and ready for welding:

That pretty much summed up my trip home in January. It never did warm up (until the day I left. I want to know who's in charge, I have a few words!) The good news is my back finally got better - about a week after I got back to Japan!
Next up, March!
Cheers,
Mark
A long awaited update, Part 2:
Okay, so January pretty much sucked, but Now it's time to come home in March. Things will be all better, right?
Umm, nope!
As can happen all too often it seems coming from Asia, I managed to sit next to someone who was full-blown contagious with one of the nasty Asian varieties of the cold/flu. And yes, pretty much as I got off the airplane here, I'm down for the count! So, again, flat on my back for much of my time home. Sigh.
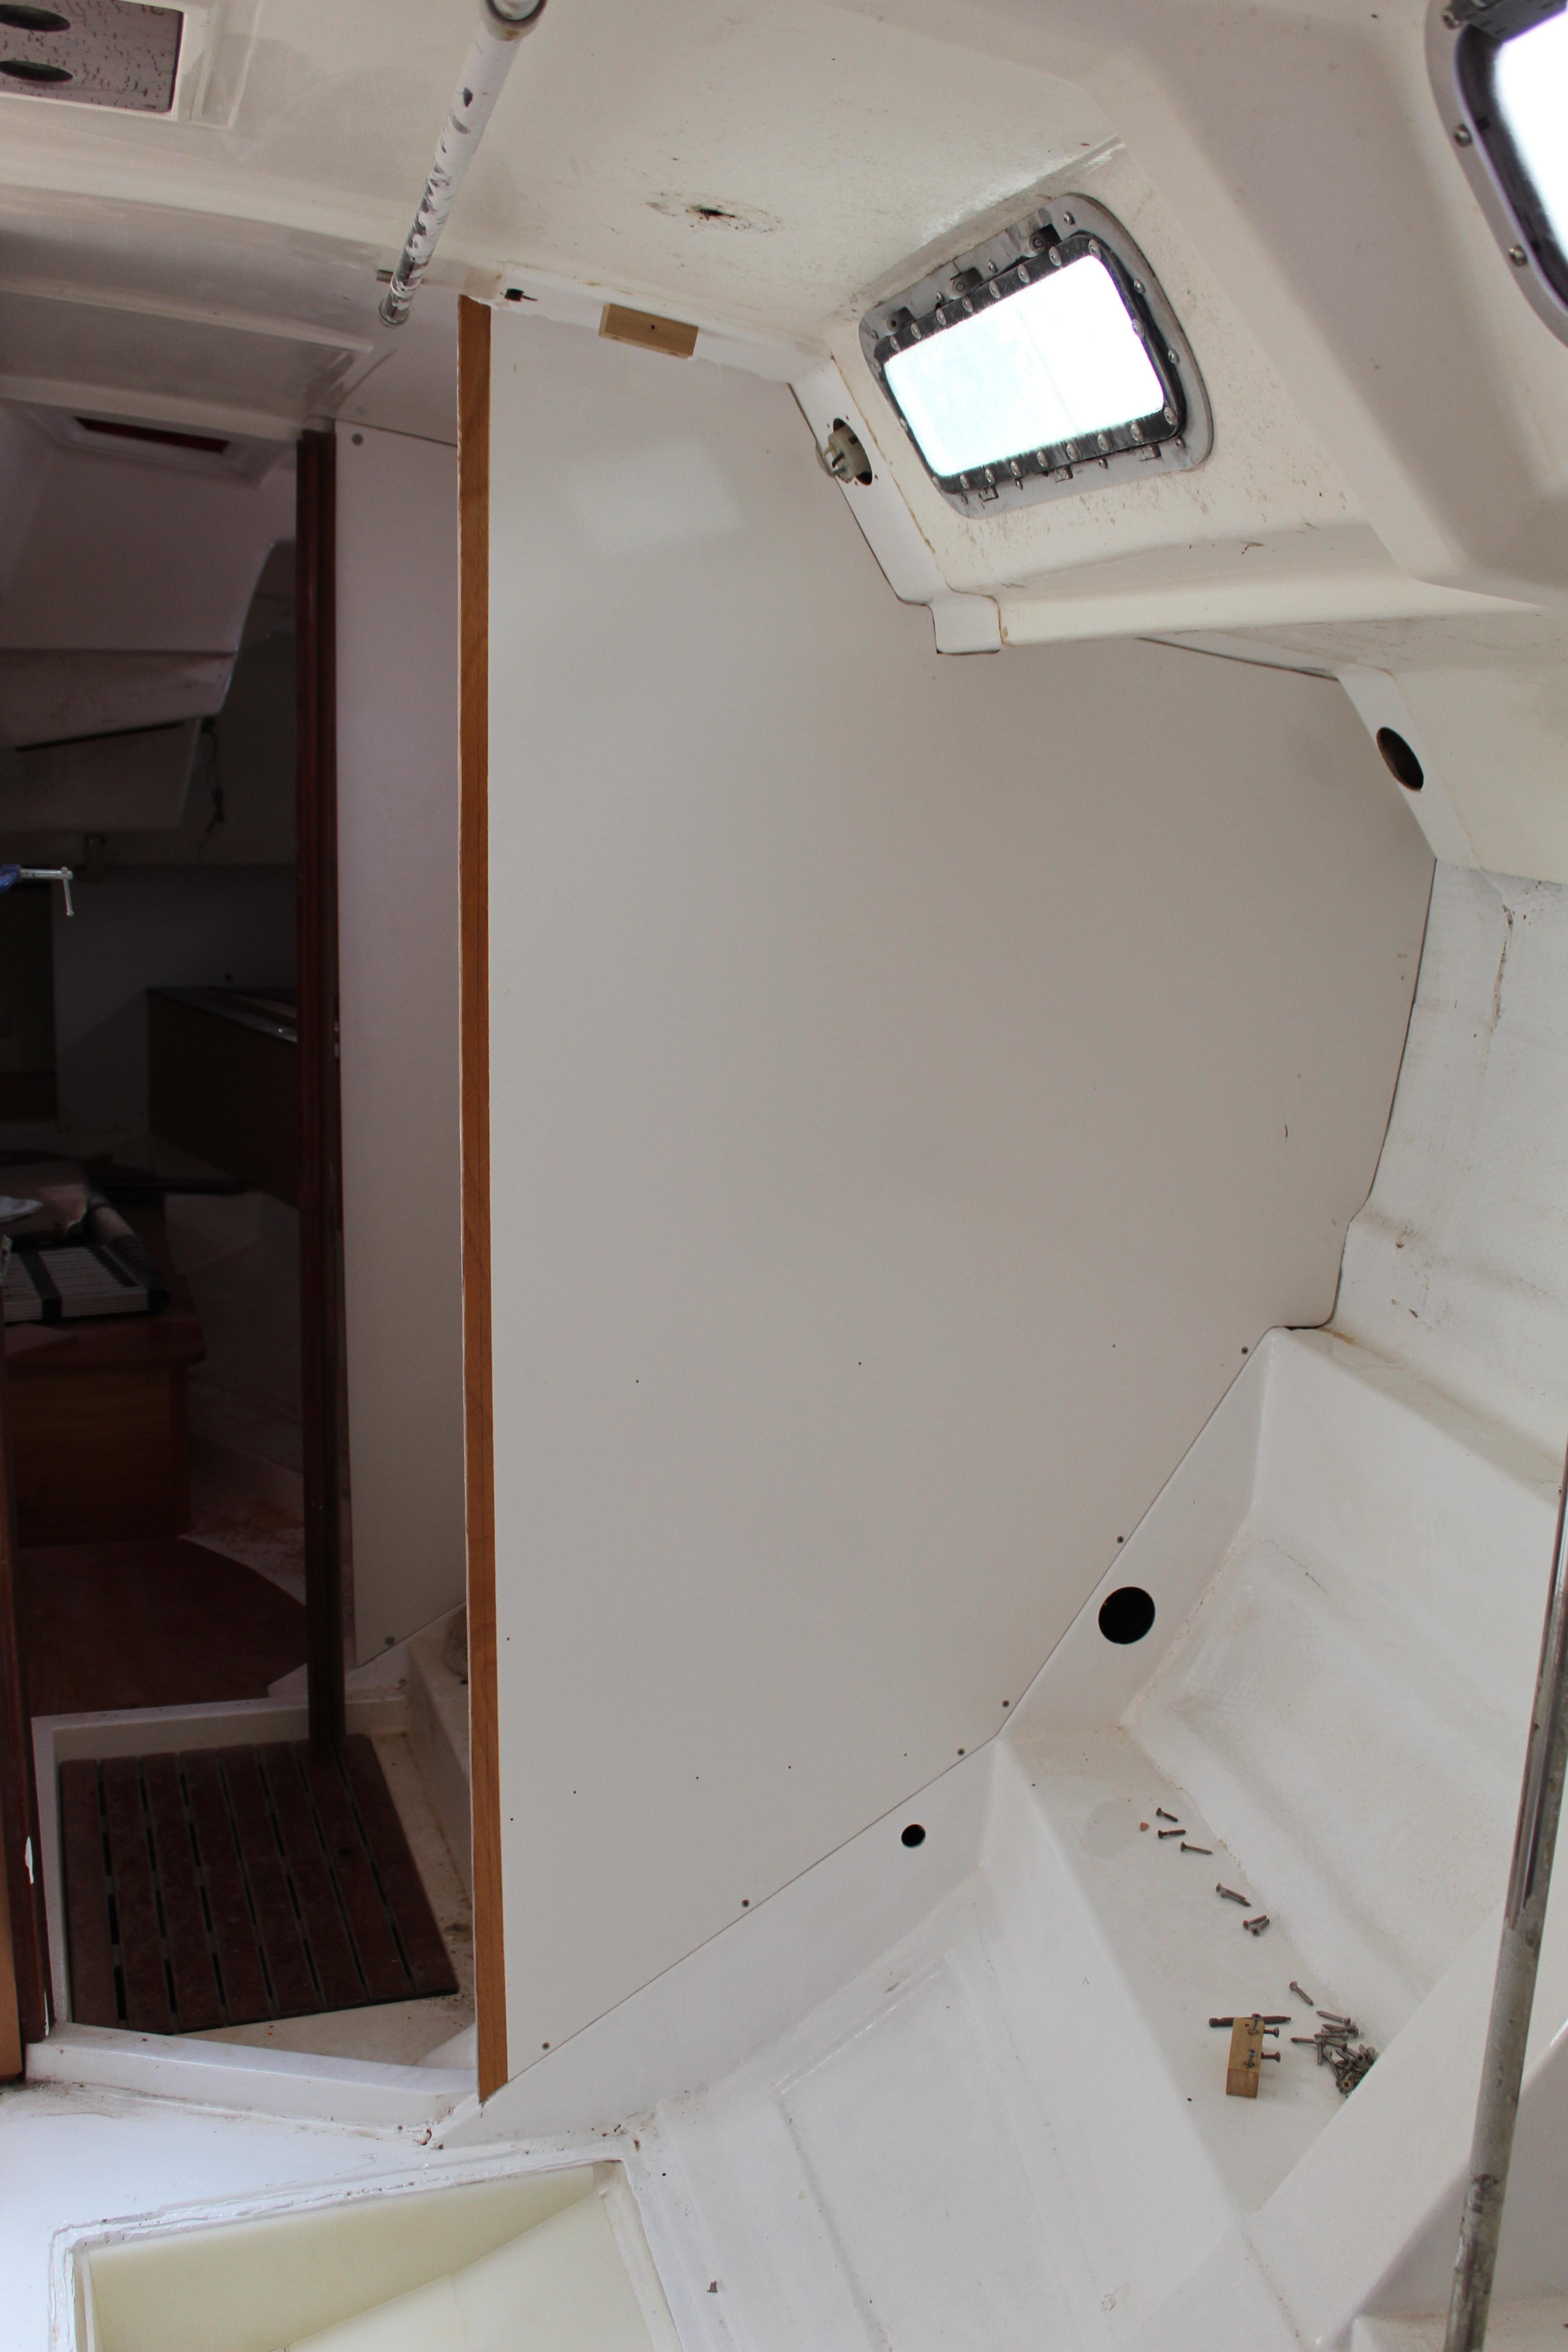
I did manage to get a little done though. Installed and tabbed in the bulkhead I painted:
And I finally got all the parts and pieces together to install the handrails on the cabin top:
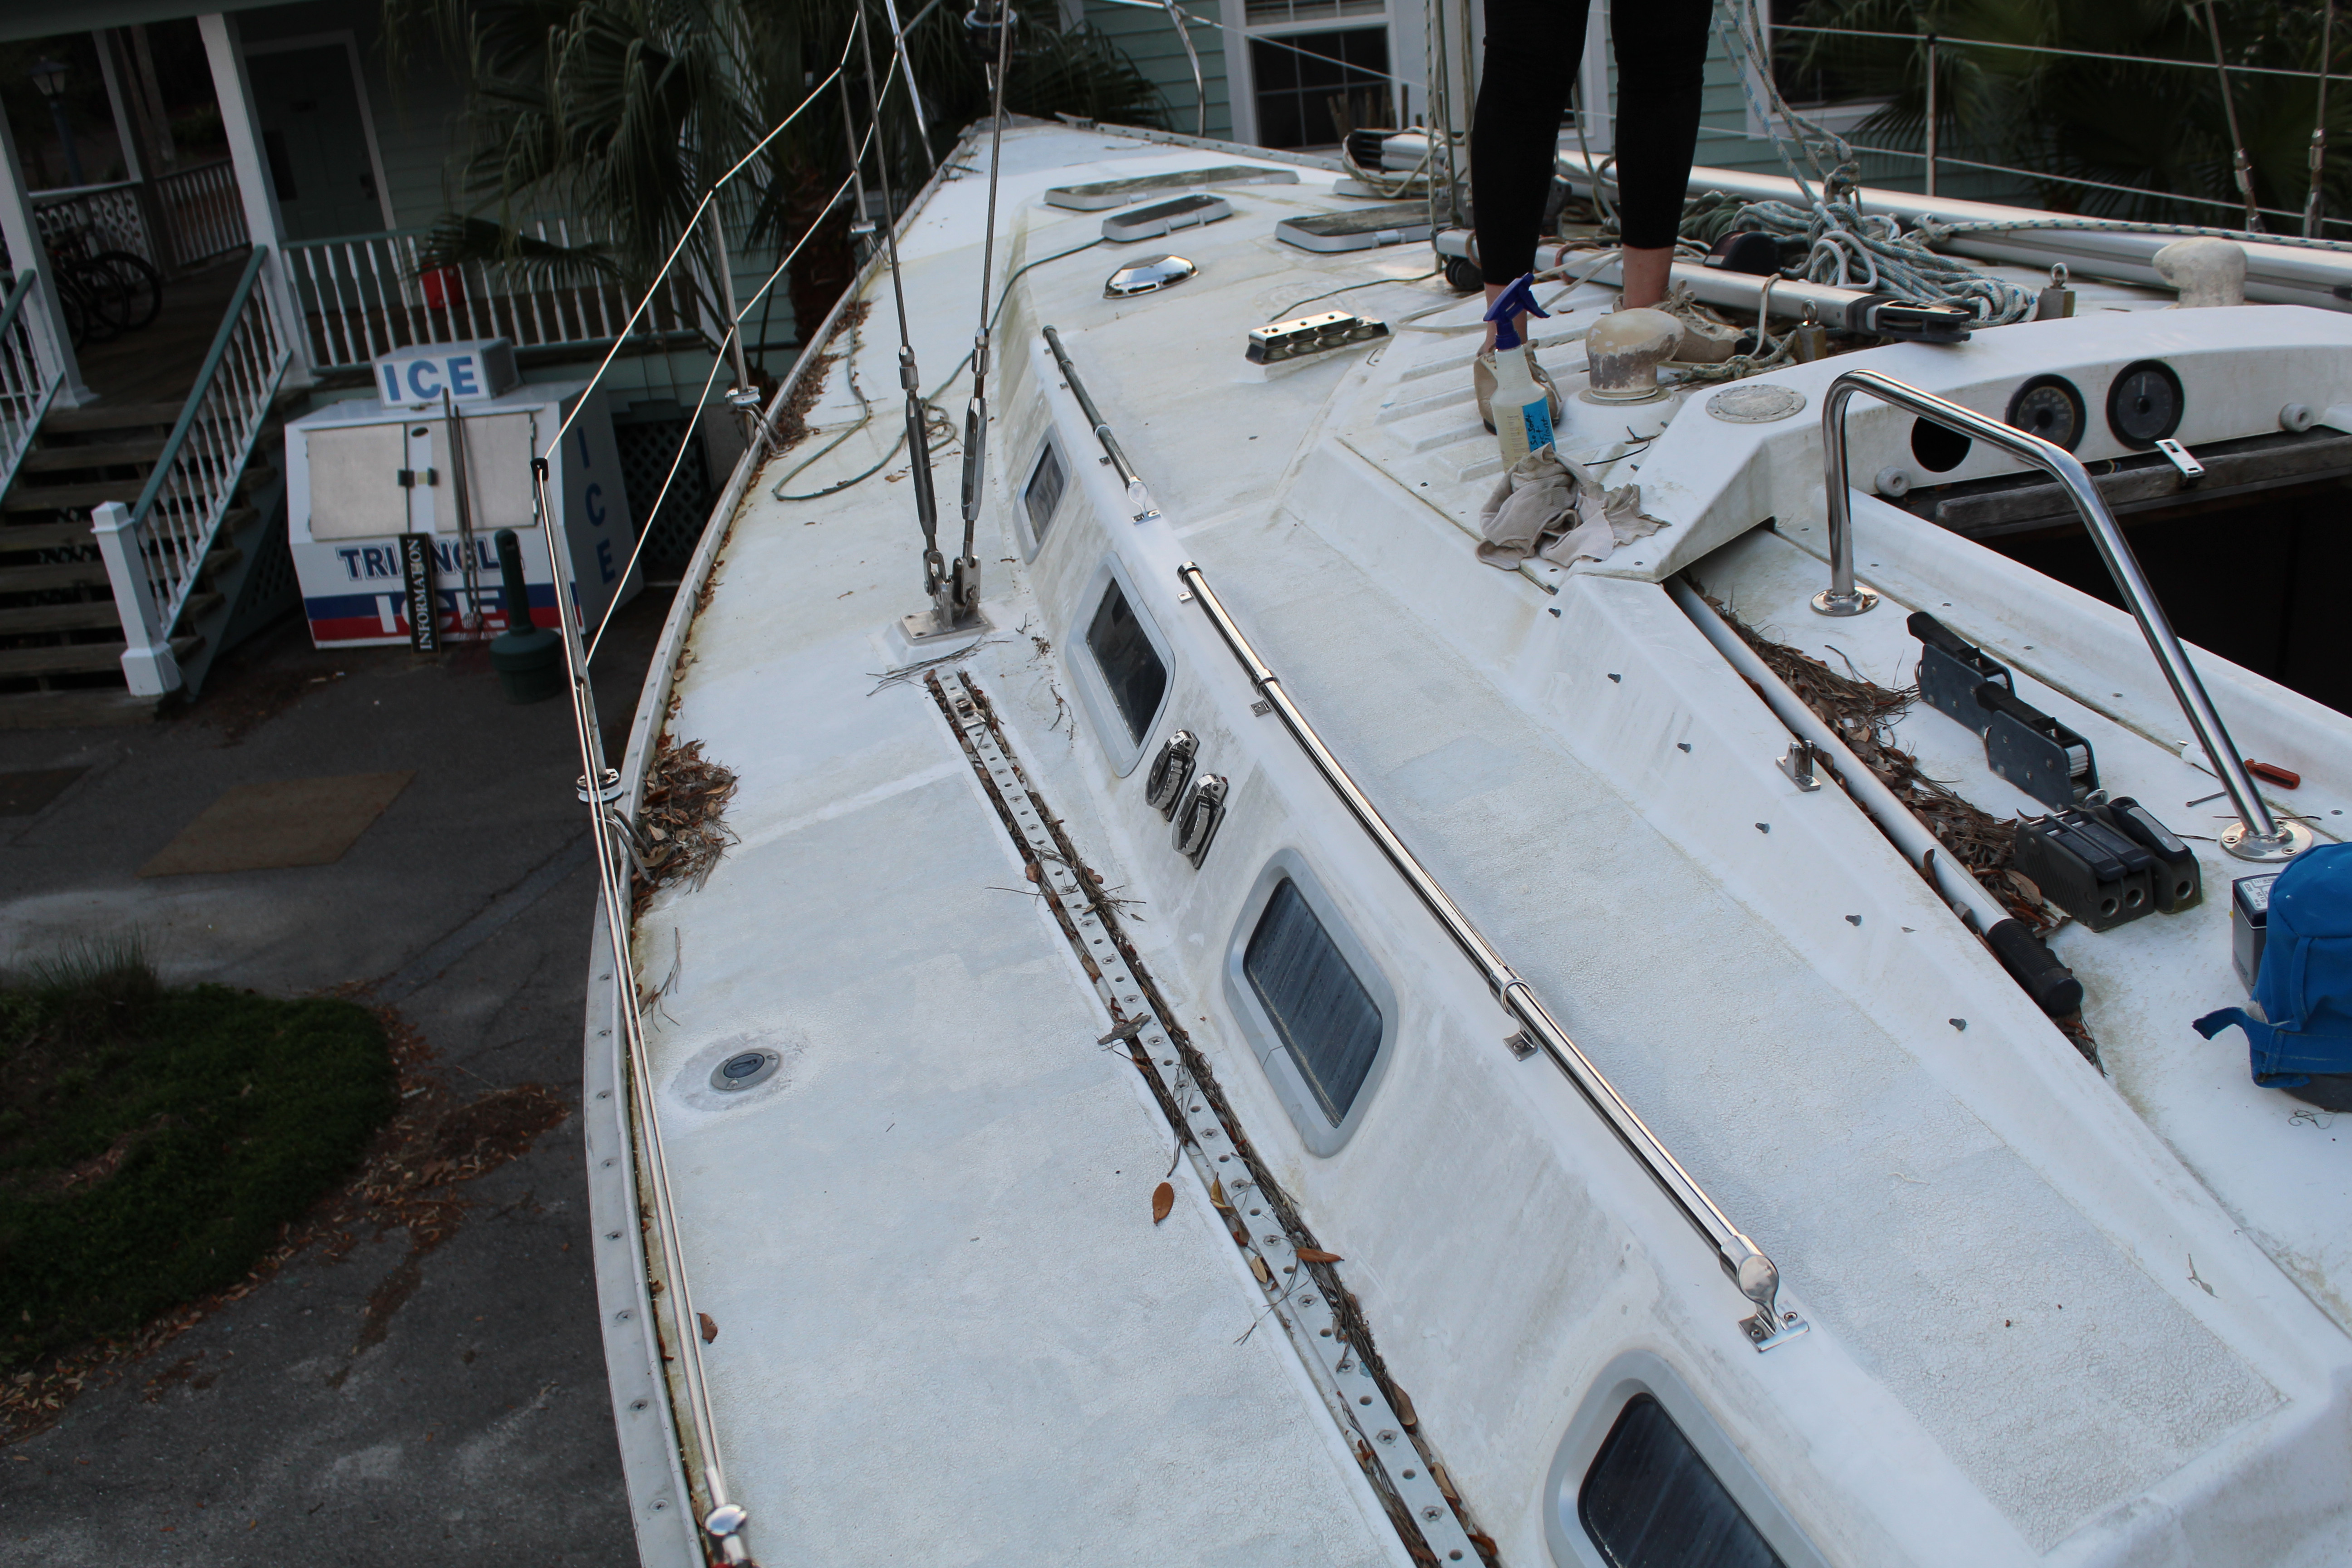
The sharp-eyed will notice how dirty the deck is. I can't stand this but just wasn't in any condition to wash the boat then. I have since rectified this eyesore, deck and boat clean again!
The weather in March had improved since January, enough for the gators to emerge:
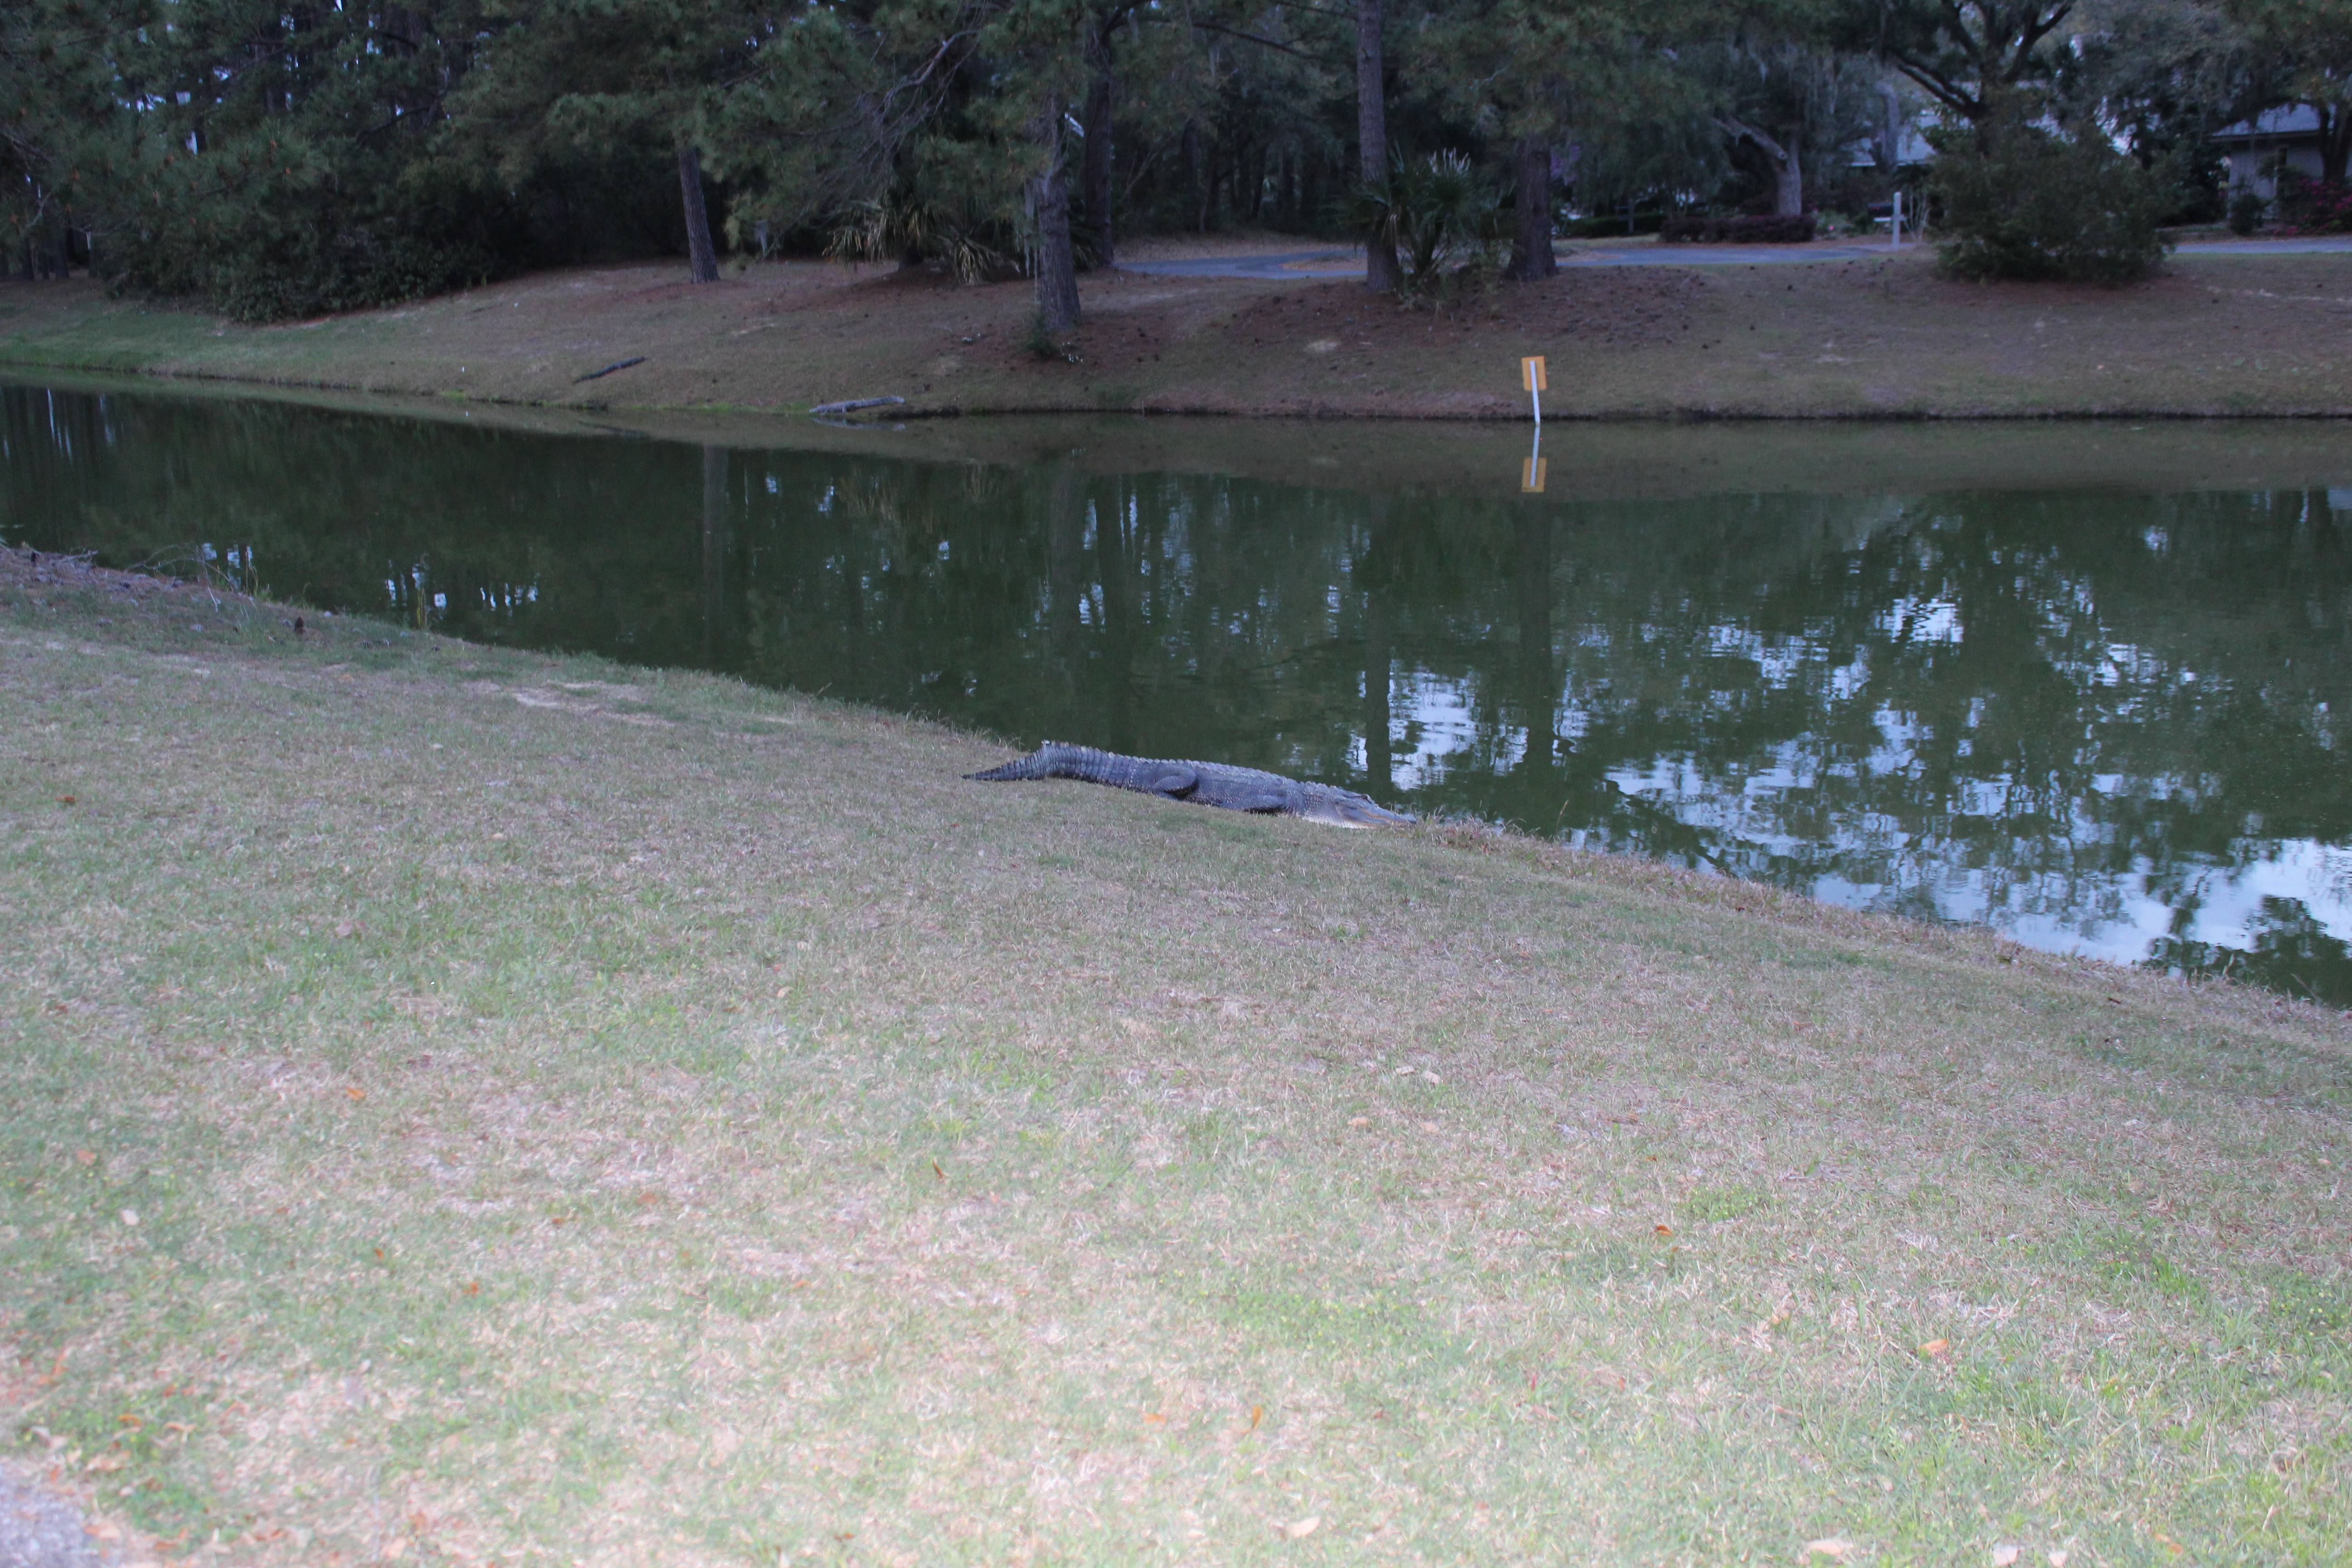
We did get some really fantastic news during this period though - our marina, which I have stated previously has been under a cloud for some time, to the point that I would not have been surprised that one day we would come in and find locks on the doors. Well, the marina finally sold! The island community purchased it and it will eventually be a marina again! Yay!! The first thing done was a massive clean-up (sorely needed) and plans are in place to restore the waterside. First phase will be about 20 wet slips to be completed around October of this year. Phase 2 will add more, though there is no timeline for that yet. I'm just happy I still have a place to work on the boat! The construction company doing the slips moved a barge in place to survey the bottom and do some cleanup:
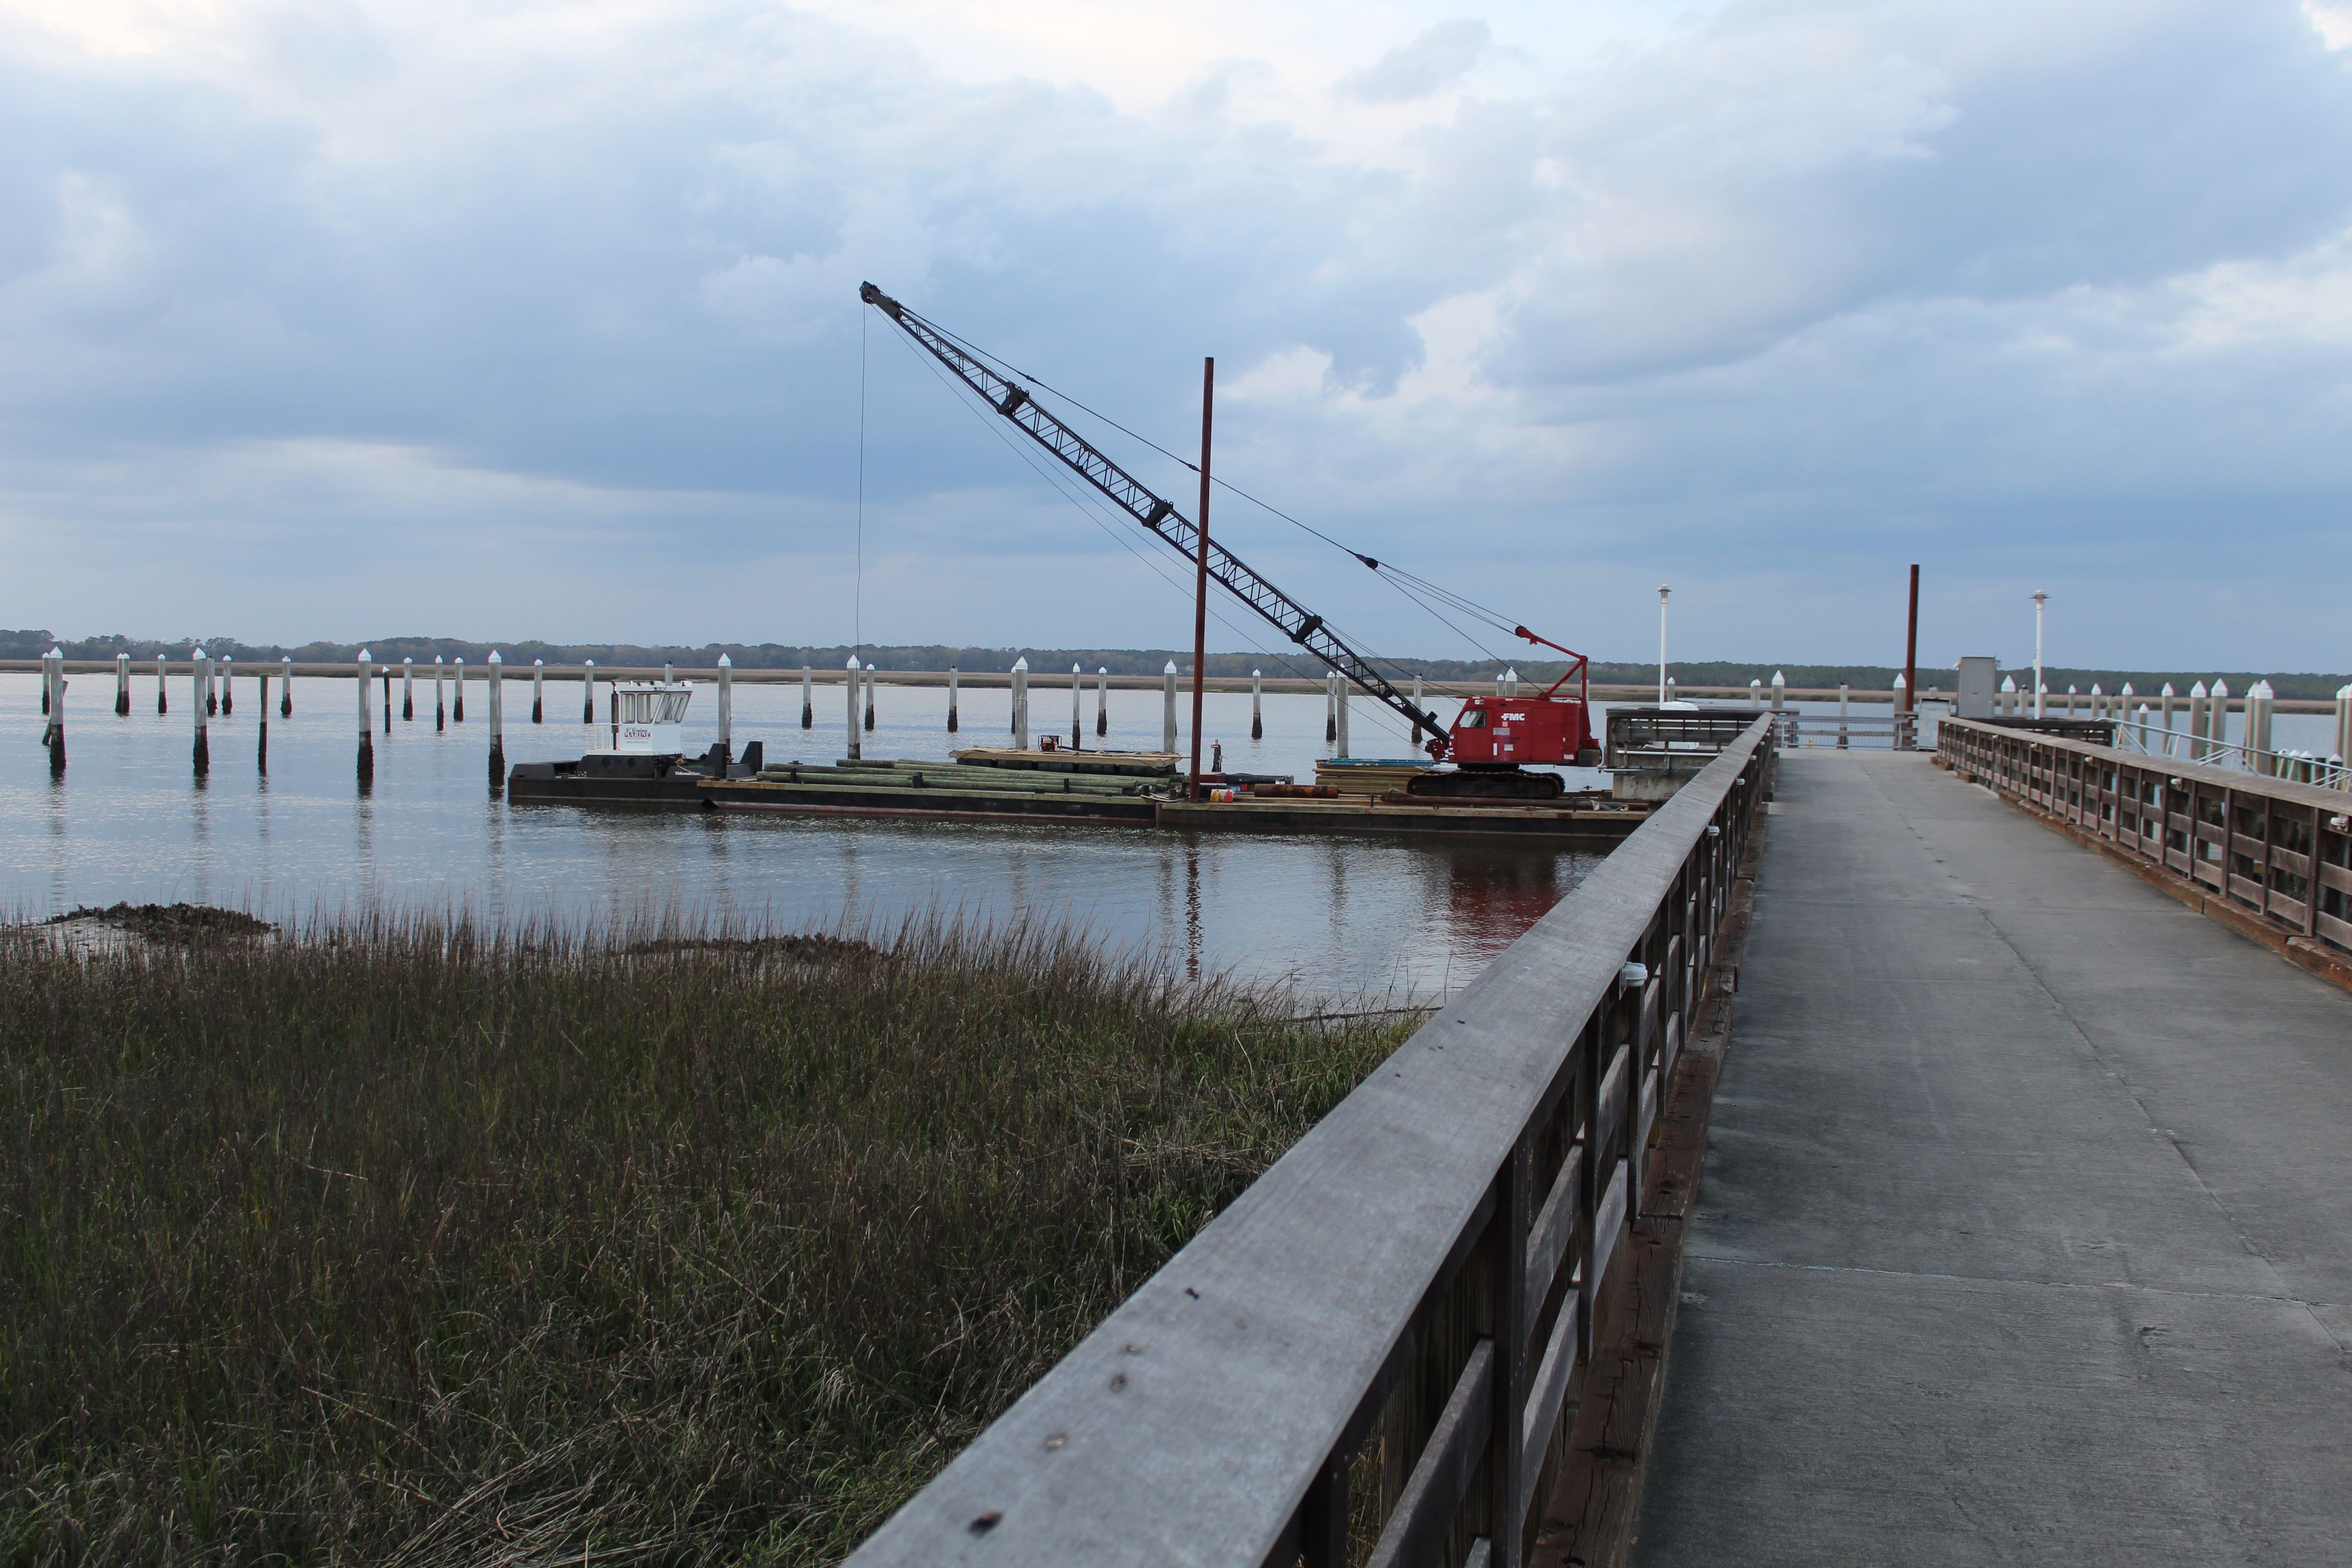
They didn't get all the debris off the bottom - there is still 2 (maybe 3) boats on the bottom here, but they did get a bunch of the old pilings off the bottom. I'm just glad to see some progress.
The final thing I got done will lead to the final update yet to come (time off in May). I cut away the cover (inner liner?) in the v-berth to uncover the anchor locker:
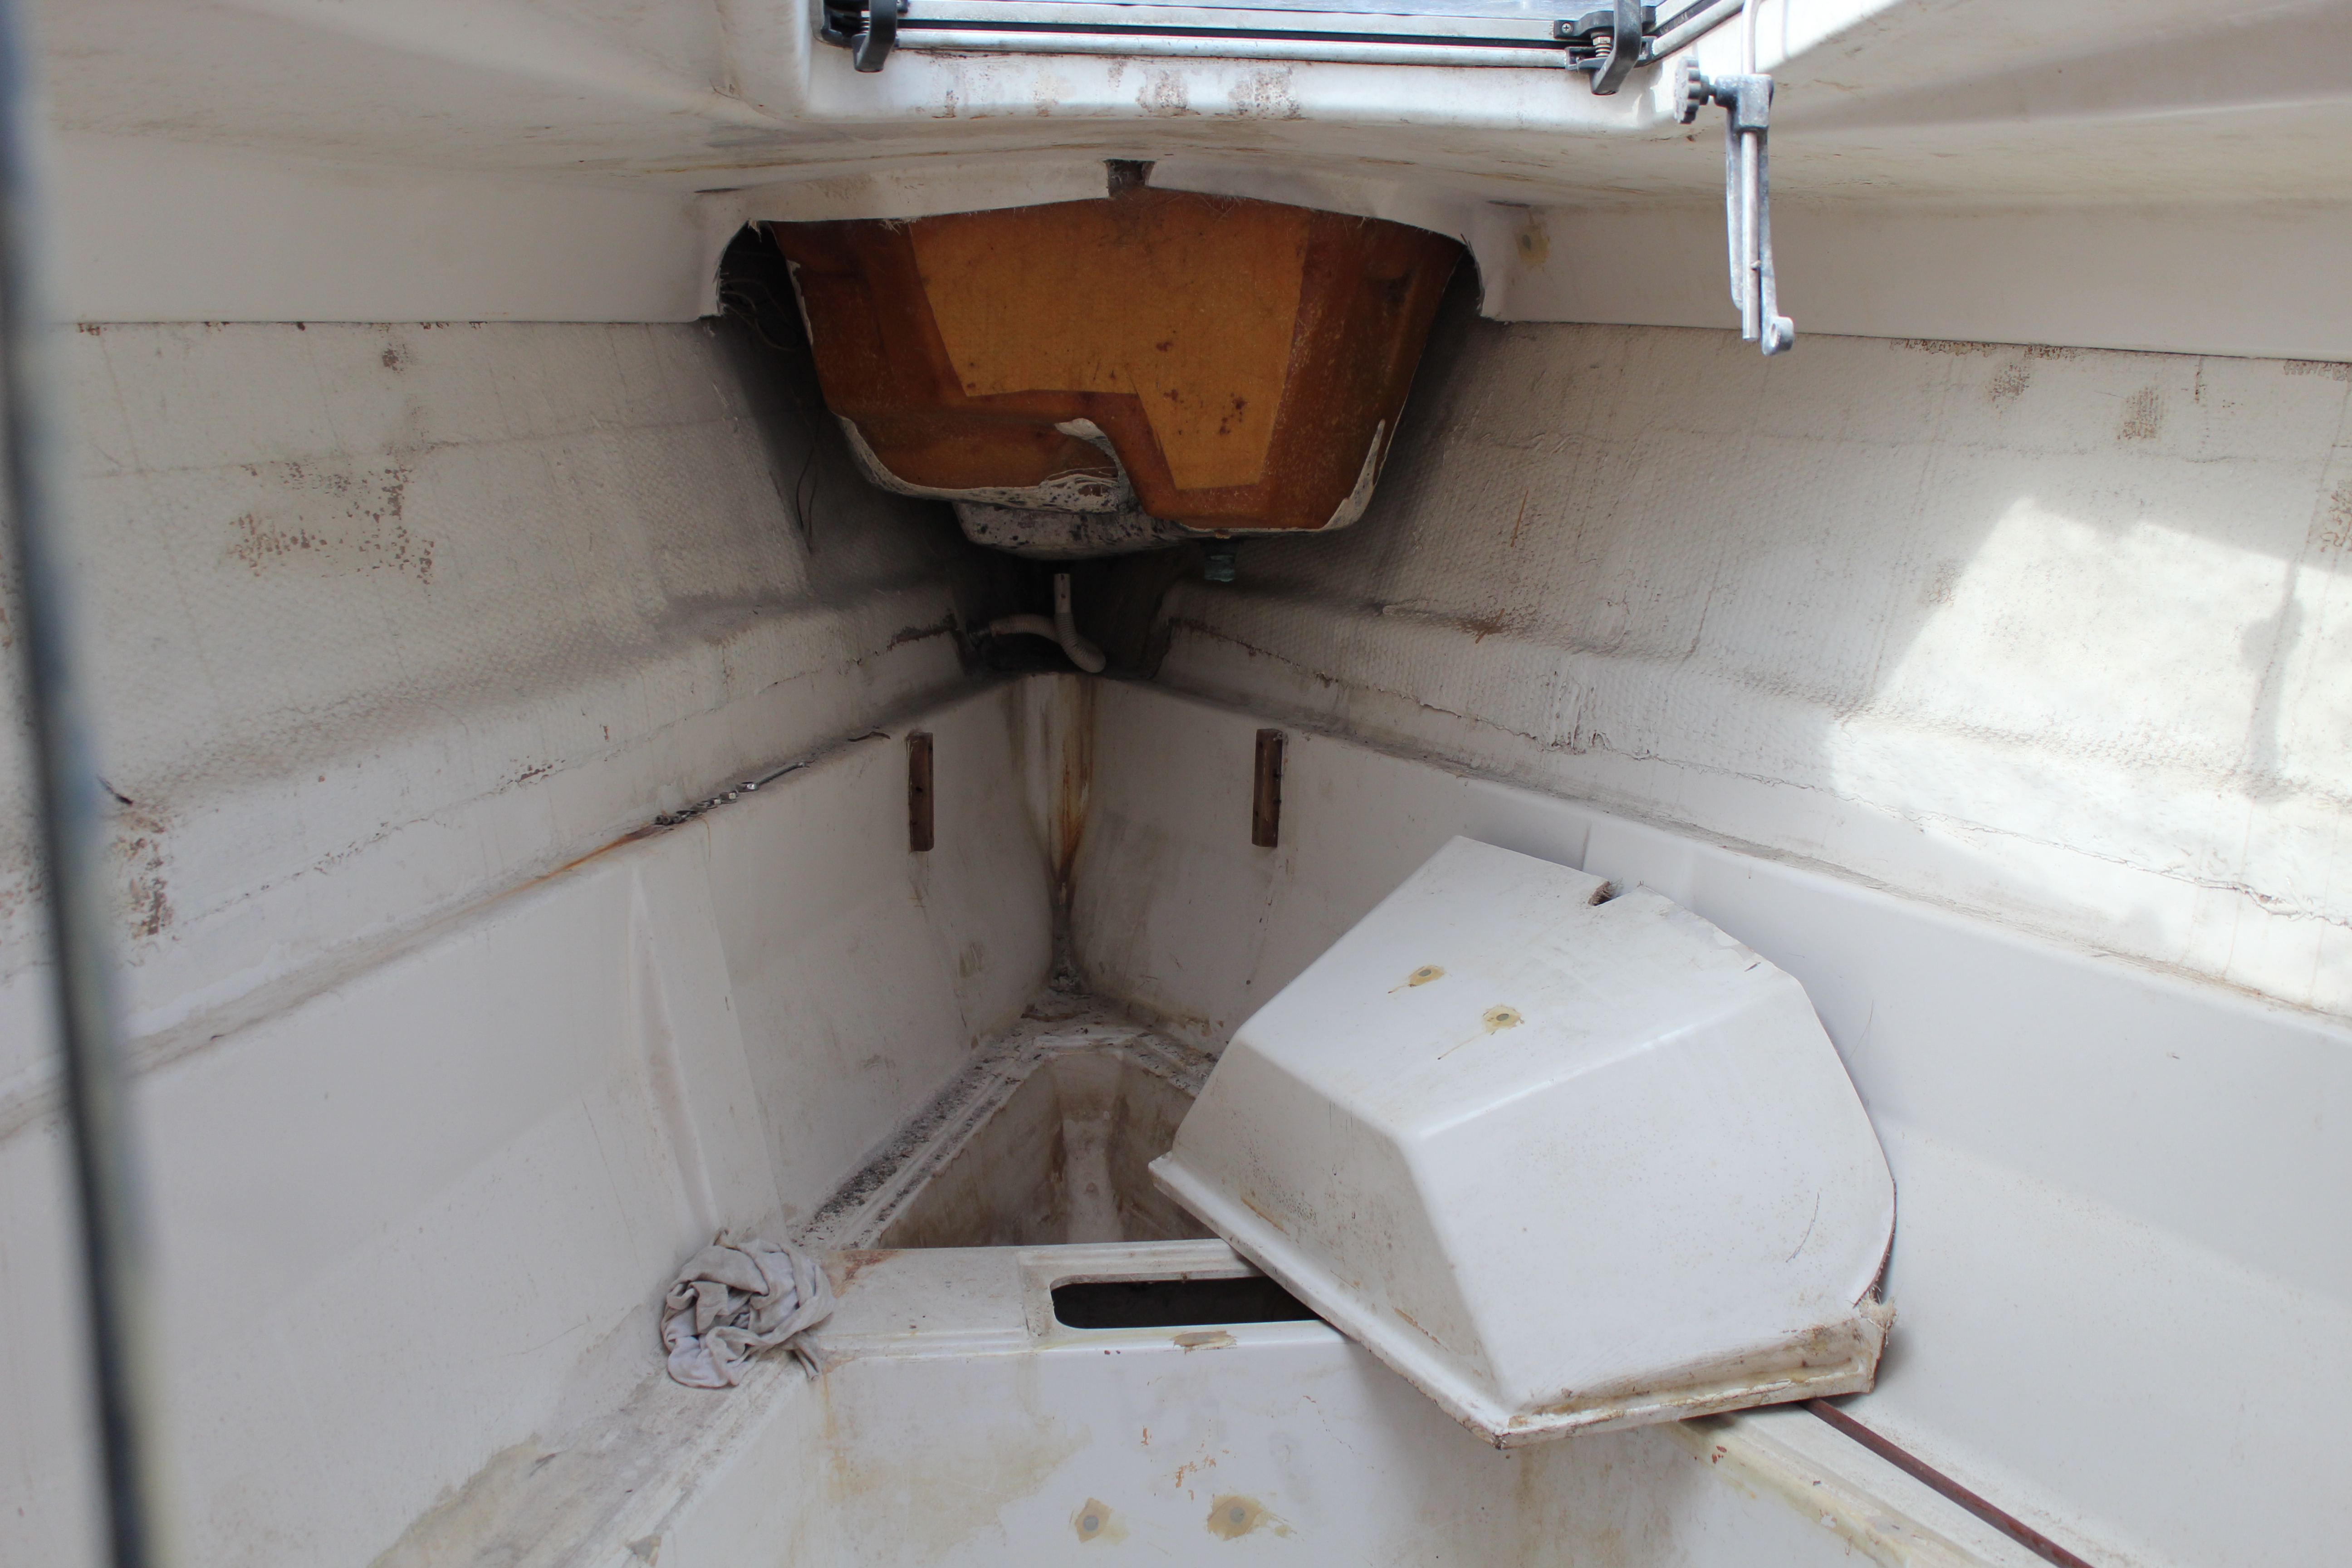
Just to see what I might be dealing with
Cheers,
Mark
Okay, so January pretty much sucked, but Now it's time to come home in March. Things will be all better, right?
Umm, nope!
As can happen all too often it seems coming from Asia, I managed to sit next to someone who was full-blown contagious with one of the nasty Asian varieties of the cold/flu. And yes, pretty much as I got off the airplane here, I'm down for the count! So, again, flat on my back for much of my time home. Sigh.
I did manage to get a little done though. Installed and tabbed in the bulkhead I painted:

And I finally got all the parts and pieces together to install the handrails on the cabin top:

The sharp-eyed will notice how dirty the deck is. I can't stand this but just wasn't in any condition to wash the boat then. I have since rectified this eyesore, deck and boat clean again!
The weather in March had improved since January, enough for the gators to emerge:

We did get some really fantastic news during this period though - our marina, which I have stated previously has been under a cloud for some time, to the point that I would not have been surprised that one day we would come in and find locks on the doors. Well, the marina finally sold! The island community purchased it and it will eventually be a marina again! Yay!! The first thing done was a massive clean-up (sorely needed) and plans are in place to restore the waterside. First phase will be about 20 wet slips to be completed around October of this year. Phase 2 will add more, though there is no timeline for that yet. I'm just happy I still have a place to work on the boat! The construction company doing the slips moved a barge in place to survey the bottom and do some cleanup:

They didn't get all the debris off the bottom - there is still 2 (maybe 3) boats on the bottom here, but they did get a bunch of the old pilings off the bottom. I'm just glad to see some progress.
The final thing I got done will lead to the final update yet to come (time off in May). I cut away the cover (inner liner?) in the v-berth to uncover the anchor locker:

Just to see what I might be dealing with
Cheers,
Mark
Thanks Big!Keep it going Mark. Reading your posts is like watching Norm Abrams (sp?) from the former “New Yankee Workshop!” Amazing.
A long awaited update, final chapter (part 1):
After 2 consecutive failed leave periods - at least as far as boat time goes - there was no way I was going to let trivial stuff like health, etc., get in my way this time! So upon arrival in May I got to work!
If anyone has been keeping score, I have up to this point kinda ignored the v-berth. This was by design, simply because I have always wanted to increase the size and capacity of the anchor well. I just needed time to sort out exactly how to do it, and fixing/changing the anchor well is a big part of the v-berth prep work. I have lots of plans for the v-berth but the anchor well has to be done before any of it can be done. This closer image of inside the v-berth looking at the actual anchor well highlights the issues and what I want to accomplish:
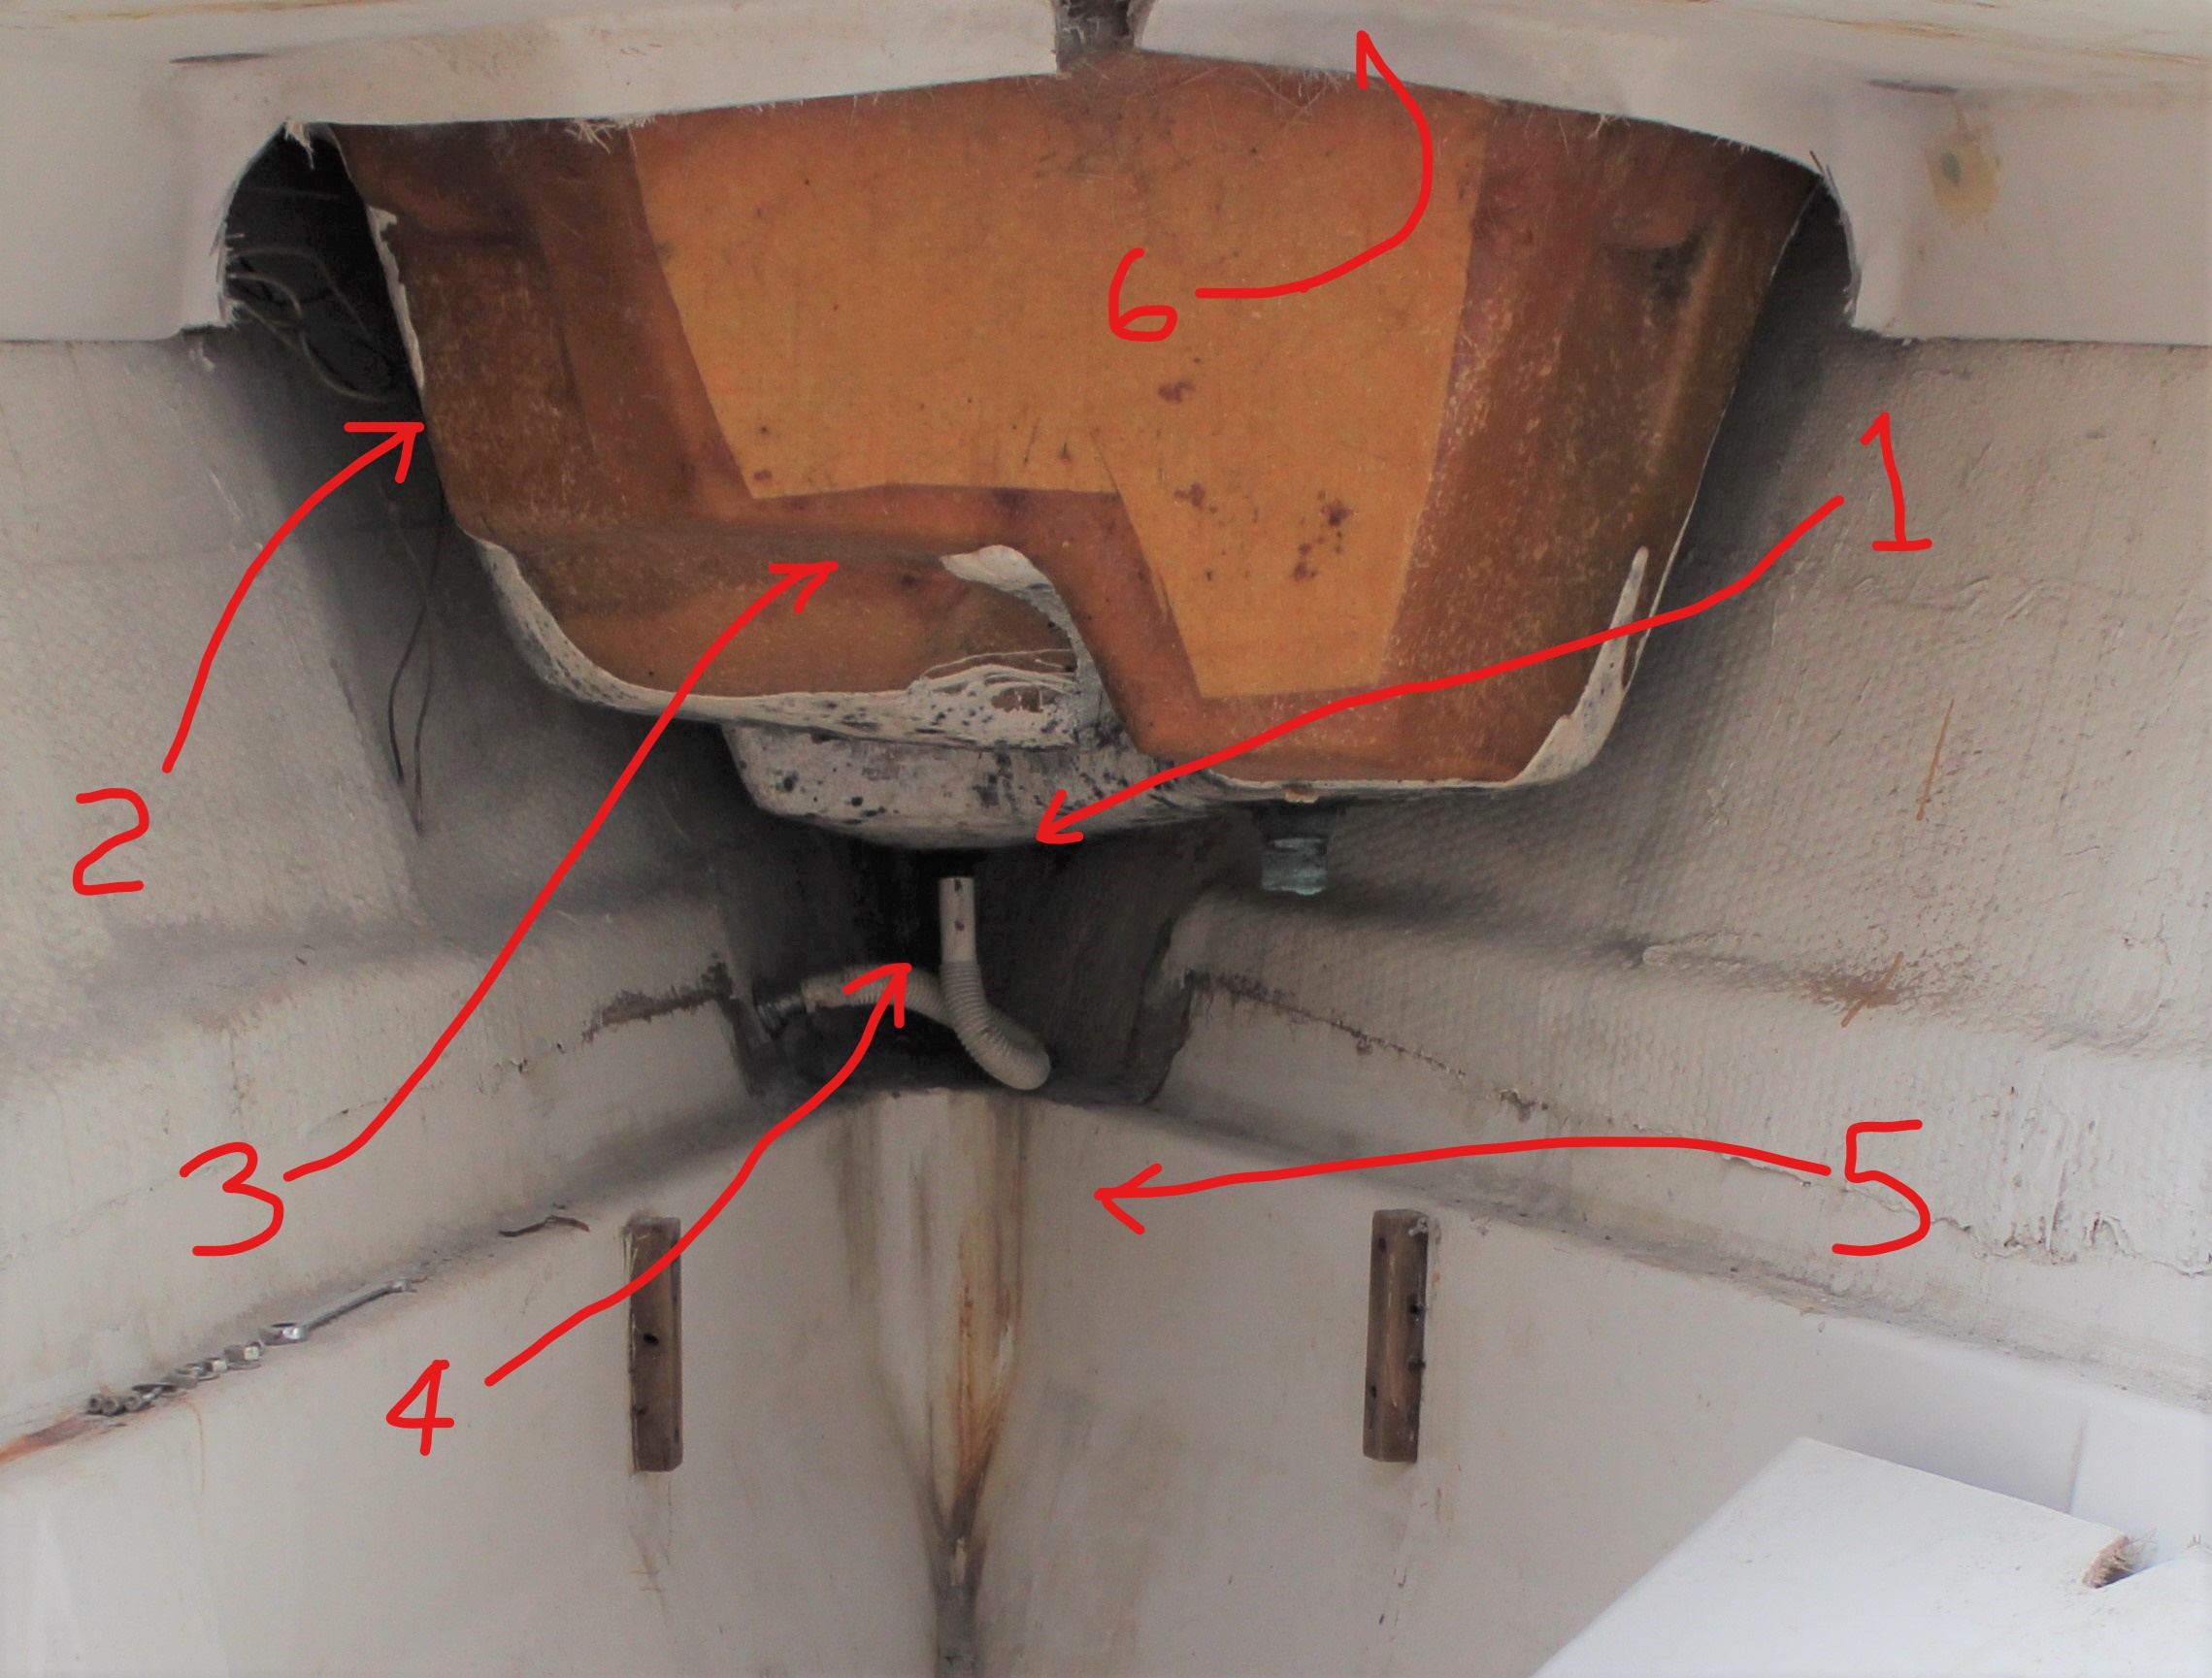
1: I can deepen the well quite a bit. But just how deep can I or should I go?
2: The original well is a molded piece of the deck and leaves a significant gap between it and the hull sides. There is nothing in the gap, just empty space. Another problem is towards the front of the well - it's almost impossible to get to the bow roller bolts. I had to grind off the bolt heads to remove the mangled bow rollers and couldn't even remove the old bolts.
3: The original well had a molded portion with a relief molded in for anchor stowage. Problem is, I don't nor will I use that type anchor and it just takes up space that could be used for more anchor chain.
4: The drain. This is the factory drain - not kidding! I can do better, but one potential issue is if I go too deep I will have to glass over this drain and make one for a deeper well and I really don't want to mess up my shiny new paint!
5: The hull liner/inner structural grid member. If I dropped a bulkhead straight down to meet the hull I would have to either build around this structure or cut it away and reinforce this area.
6: Tying the cabin top into a new anchor well structure.
So after lots of head scratching, providing beers to the guys in the yard for advice and much teeth gnashing, here's what I decided to do:
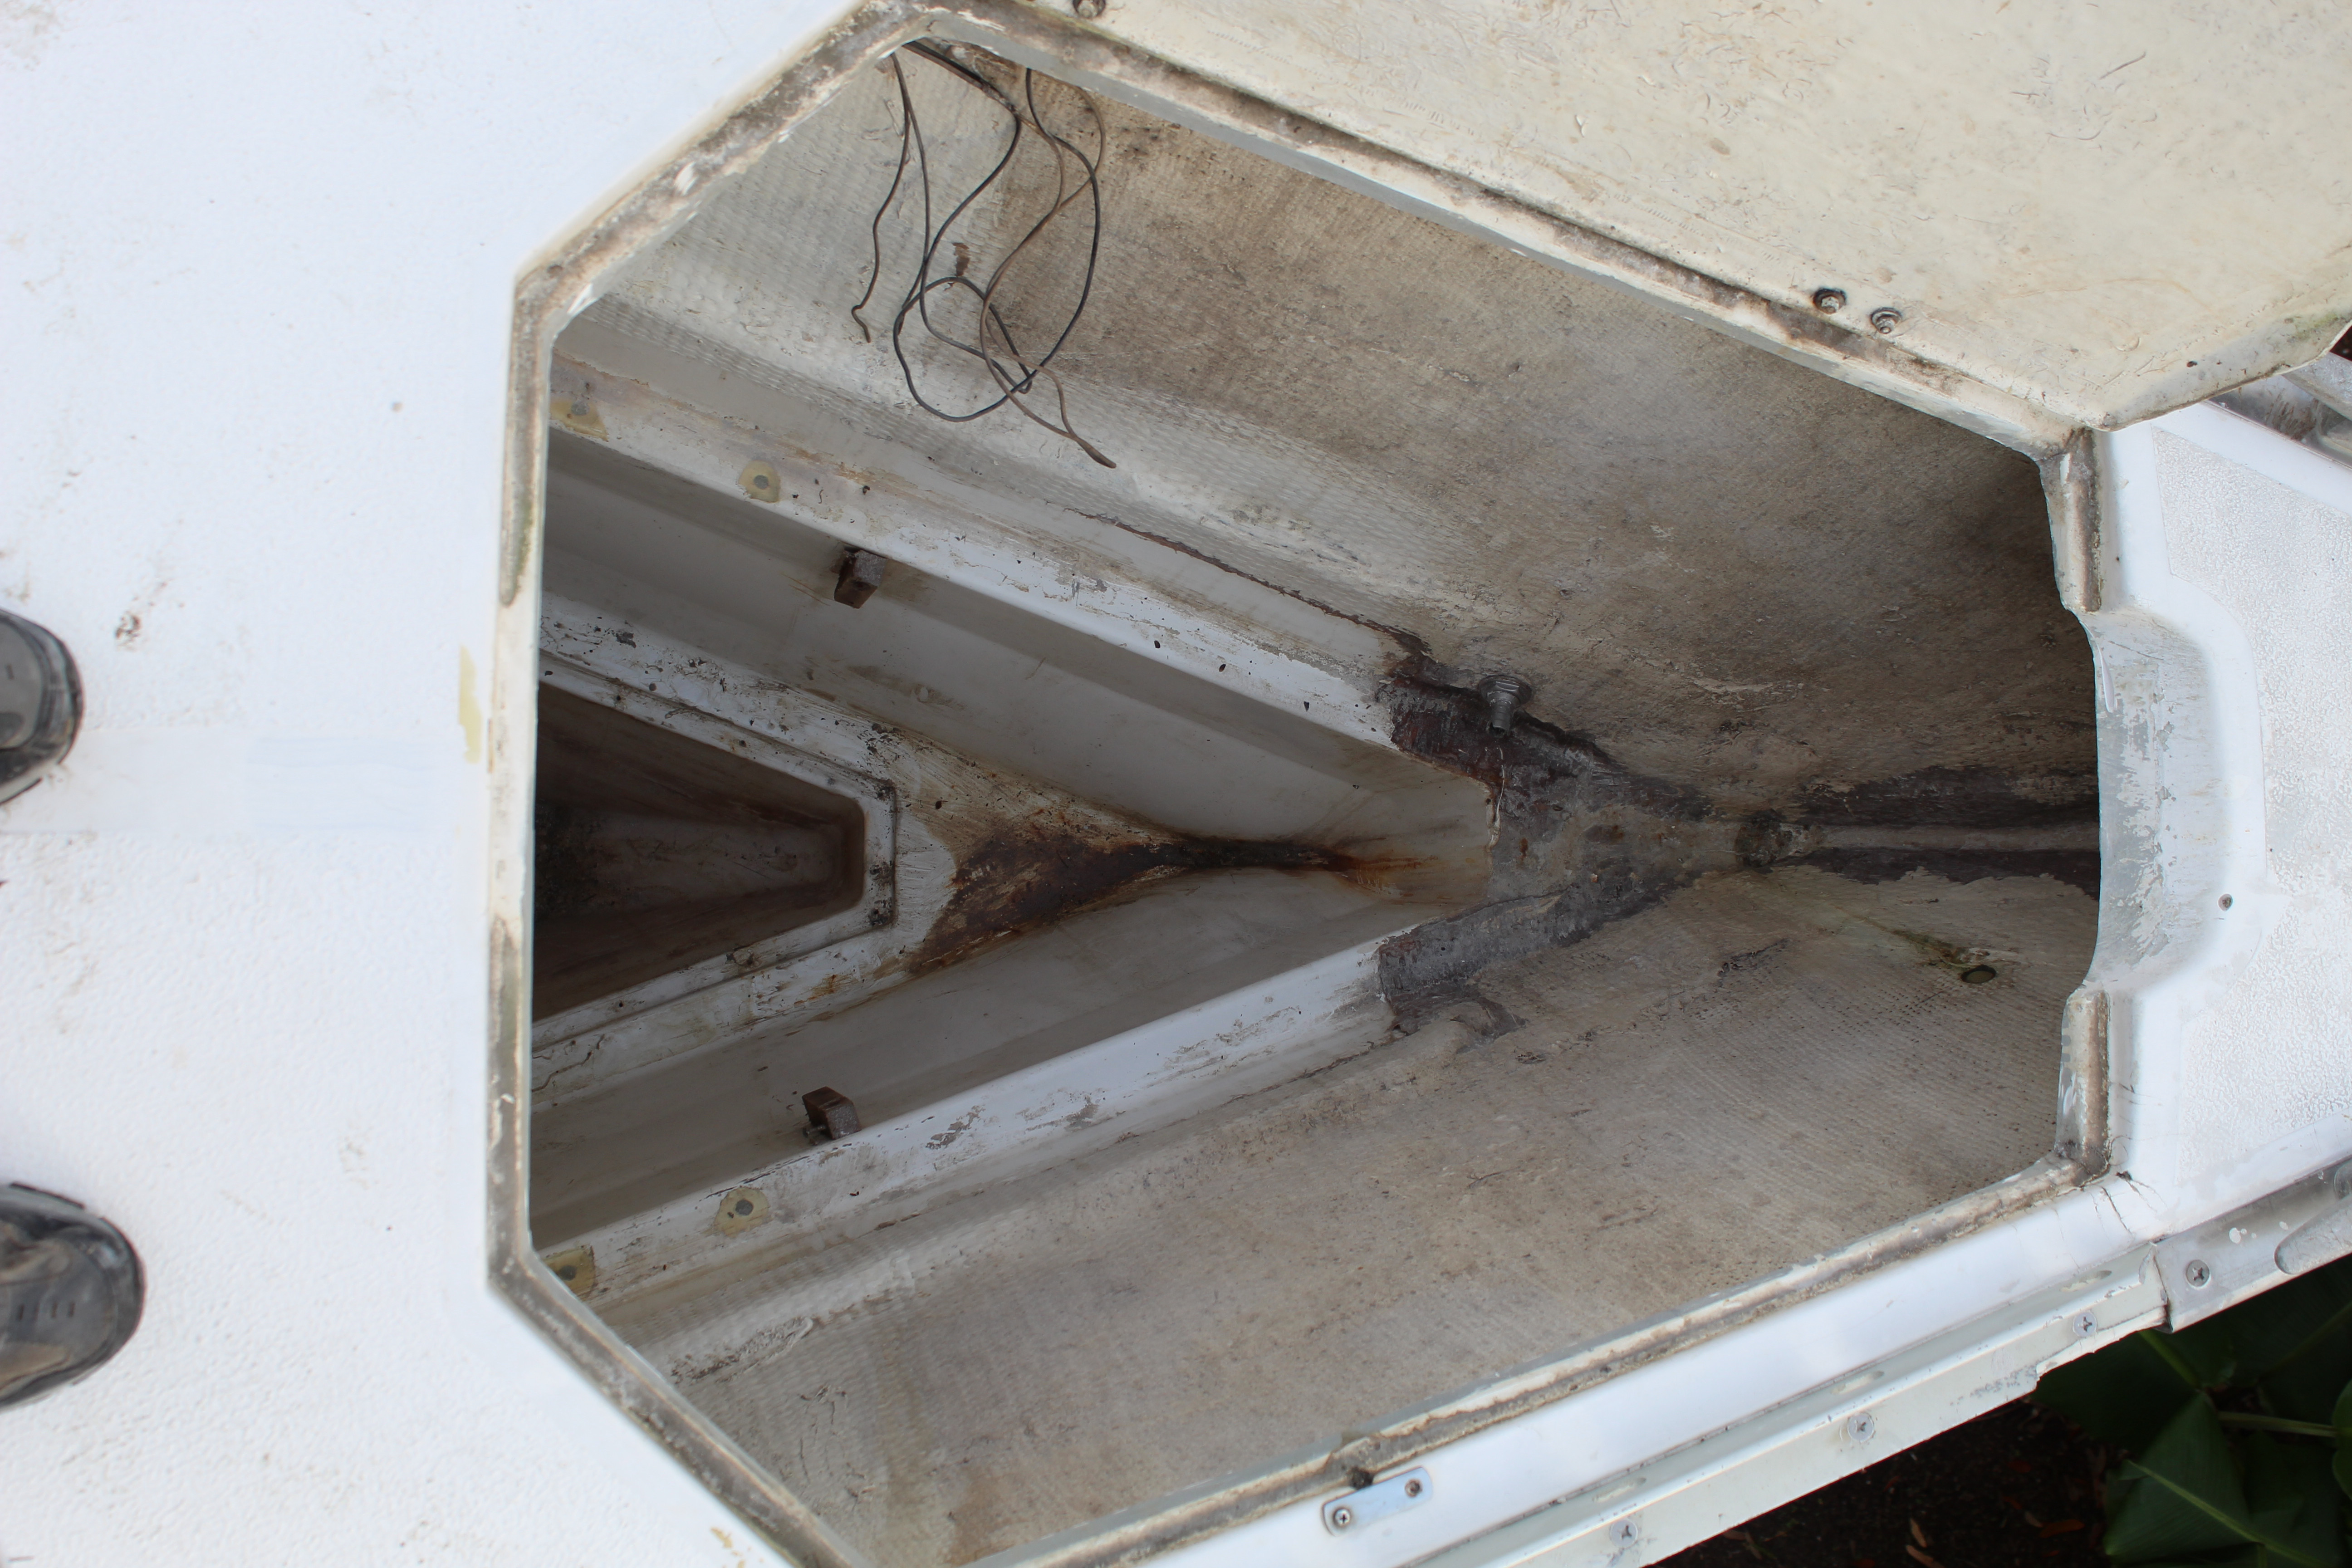
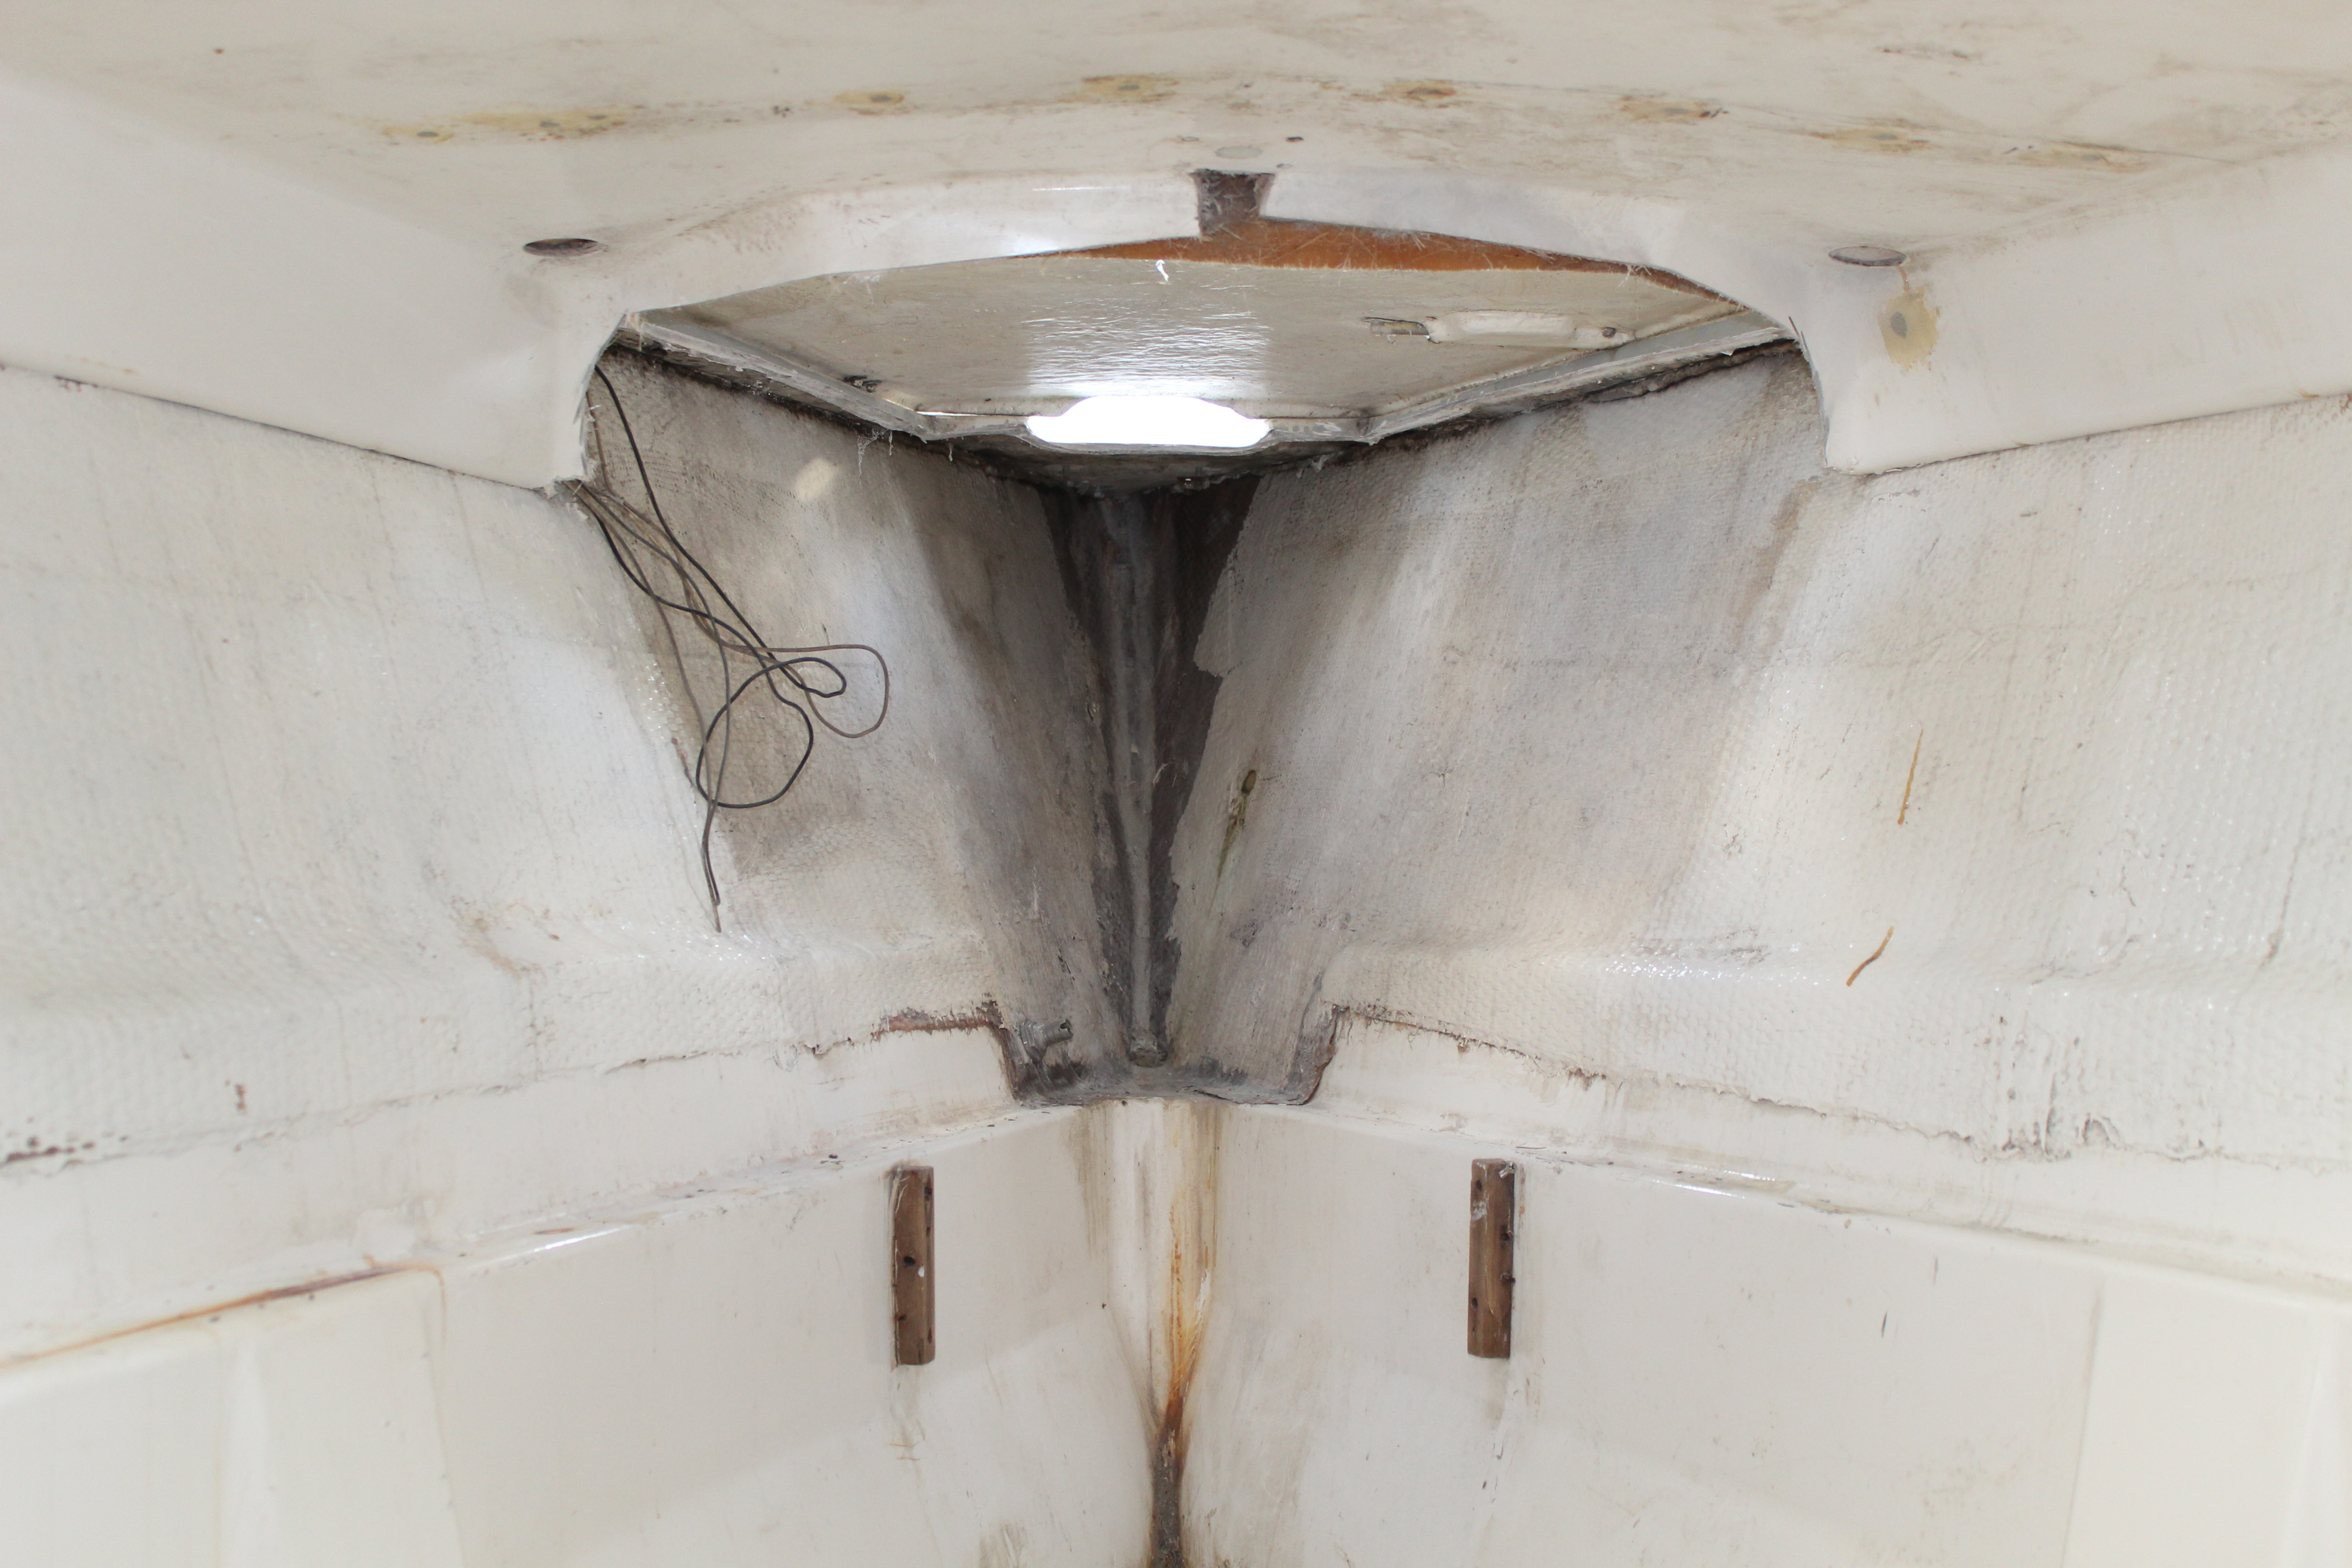
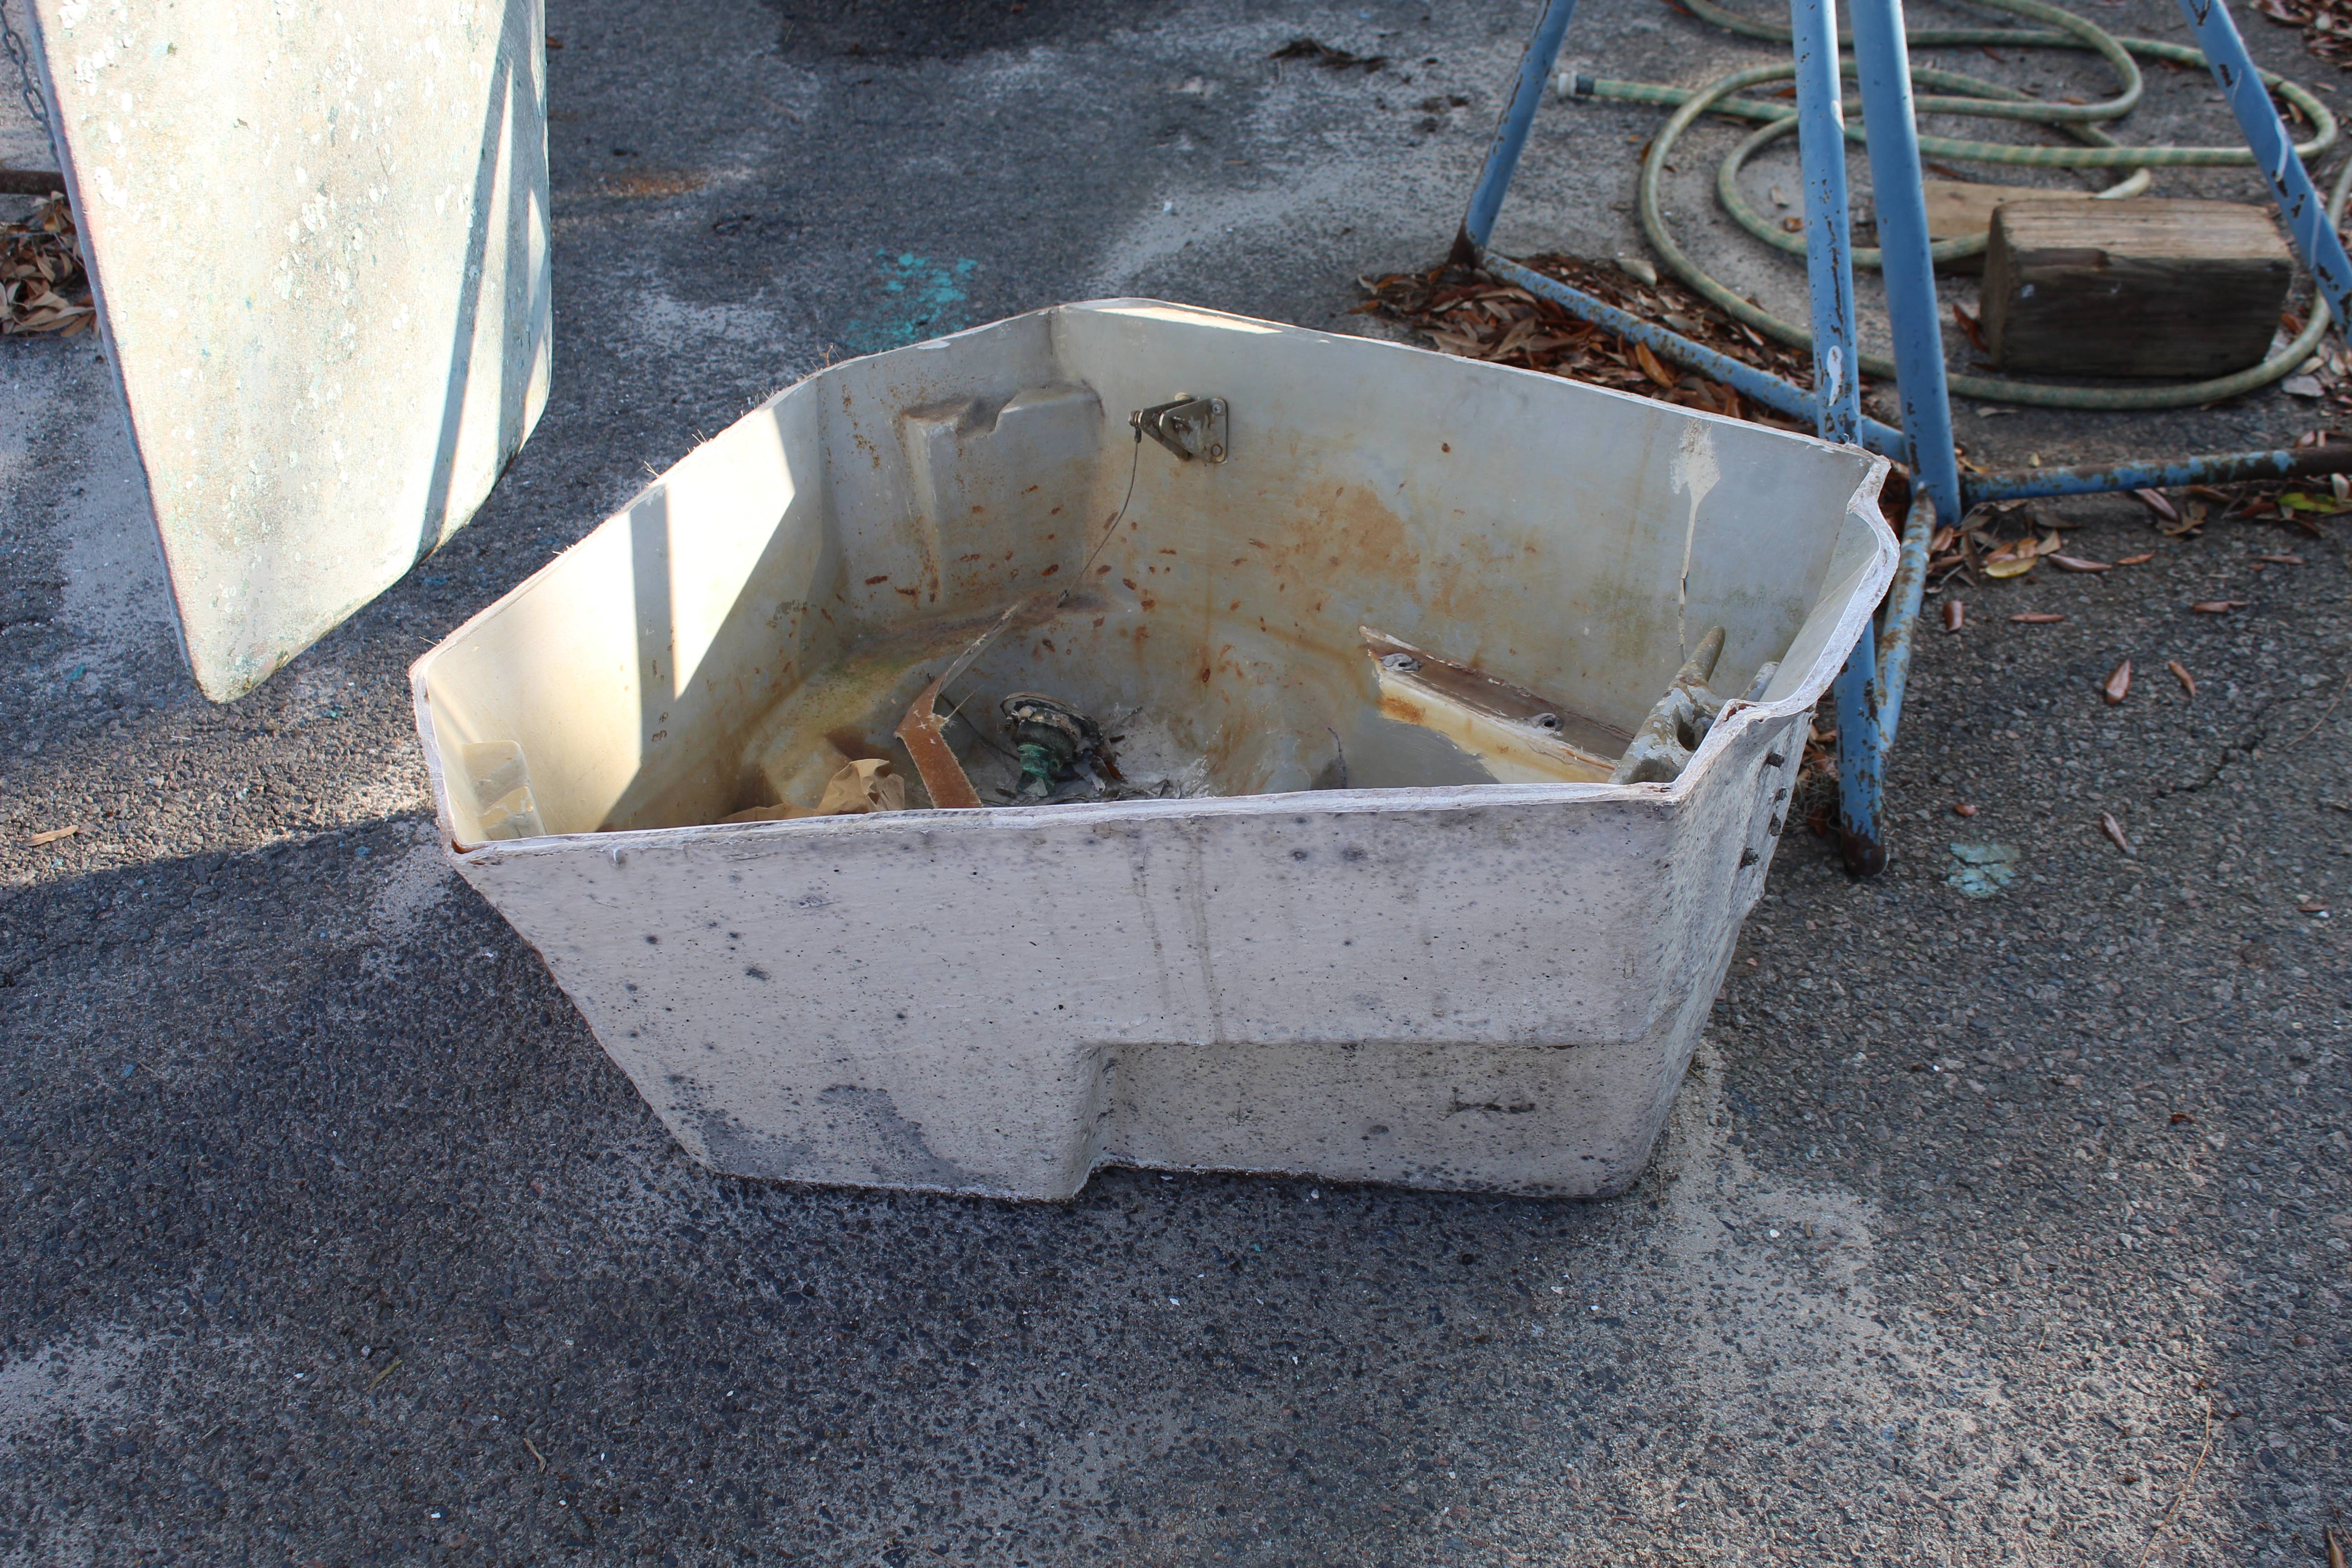
I did check the weather forecast prior to cutting the anchor well out - that's a very large hole in the boat! Good thing I waited, a few days before surgery we had a thunderstorm come through that dropped just over 4" of rain in an hour and a half! But now I've got clear skies forecast for the next several days. Time to get to work, no excuses allowed.
Stay tuned!
Mark san (back in Japan now
After 2 consecutive failed leave periods - at least as far as boat time goes - there was no way I was going to let trivial stuff like health, etc., get in my way this time! So upon arrival in May I got to work!
If anyone has been keeping score, I have up to this point kinda ignored the v-berth. This was by design, simply because I have always wanted to increase the size and capacity of the anchor well. I just needed time to sort out exactly how to do it, and fixing/changing the anchor well is a big part of the v-berth prep work. I have lots of plans for the v-berth but the anchor well has to be done before any of it can be done. This closer image of inside the v-berth looking at the actual anchor well highlights the issues and what I want to accomplish:

1: I can deepen the well quite a bit. But just how deep can I or should I go?
2: The original well is a molded piece of the deck and leaves a significant gap between it and the hull sides. There is nothing in the gap, just empty space. Another problem is towards the front of the well - it's almost impossible to get to the bow roller bolts. I had to grind off the bolt heads to remove the mangled bow rollers and couldn't even remove the old bolts.
3: The original well had a molded portion with a relief molded in for anchor stowage. Problem is, I don't nor will I use that type anchor and it just takes up space that could be used for more anchor chain.
4: The drain. This is the factory drain - not kidding! I can do better, but one potential issue is if I go too deep I will have to glass over this drain and make one for a deeper well and I really don't want to mess up my shiny new paint!
5: The hull liner/inner structural grid member. If I dropped a bulkhead straight down to meet the hull I would have to either build around this structure or cut it away and reinforce this area.
6: Tying the cabin top into a new anchor well structure.
So after lots of head scratching, providing beers to the guys in the yard for advice and much teeth gnashing, here's what I decided to do:


I did check the weather forecast prior to cutting the anchor well out - that's a very large hole in the boat! Good thing I waited, a few days before surgery we had a thunderstorm come through that dropped just over 4" of rain in an hour and a half! But now I've got clear skies forecast for the next several days. Time to get to work, no excuses allowed.
Stay tuned!
Mark san (back in Japan now
The bow looks better already. You can plug the thru-hull on the inside and leave it as a dummy so that you do not mess up the beautiful paint.
Sounds right to me. However, on the cruising side, as I gave up racing many years ago, we actually sail 50% of the time on the water at best due to wind, weather, etc. So for cruisers as we are, sailing is at best 25% of what we do on the water. I am not at all complaining, after all this is my life.I figure I spend a 50:50 ratio of sailing to dockside maintenance, upgrades, cleaning, etc. My boat is 20 years old, is sailed and race hard, and is in better than new condition. I enjoy all of that. Sailing. But 3 years without stepping a foot on deck under sail while working on a rebuild of a totaled 40 foot boat, NOT sailing to me. Not to you either I suspect.
こんにちは 先生
In the fall of 2018 I bought a 1985 Hunter 40 that'd been on the hard for a couple years, but had been a liveaboard boat for a decade prior. She'd been a bit neglected, but with an inspection telling me she was in decent shape, I felt confident I could learn as I go and not be completely in over my head. I look back at that moment and laugh now.
I've been able to live on board, but my aft cabin is rotted and water streams in along the rails. My diesel (despite passing inspection) is contaminated and the fuel tank is a PITA to get at. My forward holding tank is cracked (knew that), my aft head leaks like the Trump administration, and the DC wiring appears to have been done by a troop of gibbons armed with duct tape.
I have one refrigerator that exploded over the winter, and another that died of ennui. My fresh water lines drip at every intersection, and the water pumps do nothing.
I began to despair. I'd worked on cars plenty, but boat work was somewhat new to me. (I'd helped a friend work on his, but that's about it) And, as you know, in cars you generally don't *cut* anything.
After binging your thread like it's an HBO special, I've saved all of your photos so I can reference them like they're x-ray shots of what's actually going on behind my cabinets. I can see what's really under the rear bed, and that it's not even close to as complicated as it looked in my boat (PO seemed to have been making a bird's nest out of discarded wire and duct tape under there). I can see that the cabinet where you're putting your pantry (where my fridge is) isn't some critical piece that mustn't be touched. And you even put in that porthole to give you more light!
And because I'm exactly like you minus all the knowledge, skill, talent, finances, tools, experience, space, family, career, and good looks (guessing here), I can see now that none of the tasks I have mapped out (fits neatly onto a 12 page spreadsheet) are, in fact, impossible. I can do what I wished I could do and just rip out the rotted bed frame and build a new one. It's not the end of the world! I can cut holes in my cabinet to put in a bigger fridge that actually fridgifies. It's possible to do! And if I need to rip things out, new things can be made to fit where the old things were.
Thank you for posting all of this very very much! Look forward to buying your book!
Hi Gary! Looks interesting but lately I seem to be lucky to get more than one day off at a time here - makes it tough to plan a trip up there. If it lightens up I'll be calling!I guess you are based in Chiba.
I am in Sendai. If you have a weekend off and want to come up for a festival and a sail, drop me a line
Gary
Mark
Thanks Kermie! Believe it or not I even like working on power steering systems! It's just the timing - when the wife's car is broken, everything stops until it's fixed!I’m proud of Mark-san. Seems to me he’s doing exactly what he wants to do with his boat. And his time. (With the exception of fixing a power steering system.)
A long awaited update, final chapter (part deux):
With a few days of good weather and a big hole in the boat it's time to get busy!
After removing the existing anchor well I was able to get a good look at how much space I had to work with. From there the plan came together. First up, measuring and setting in the base to the new well:
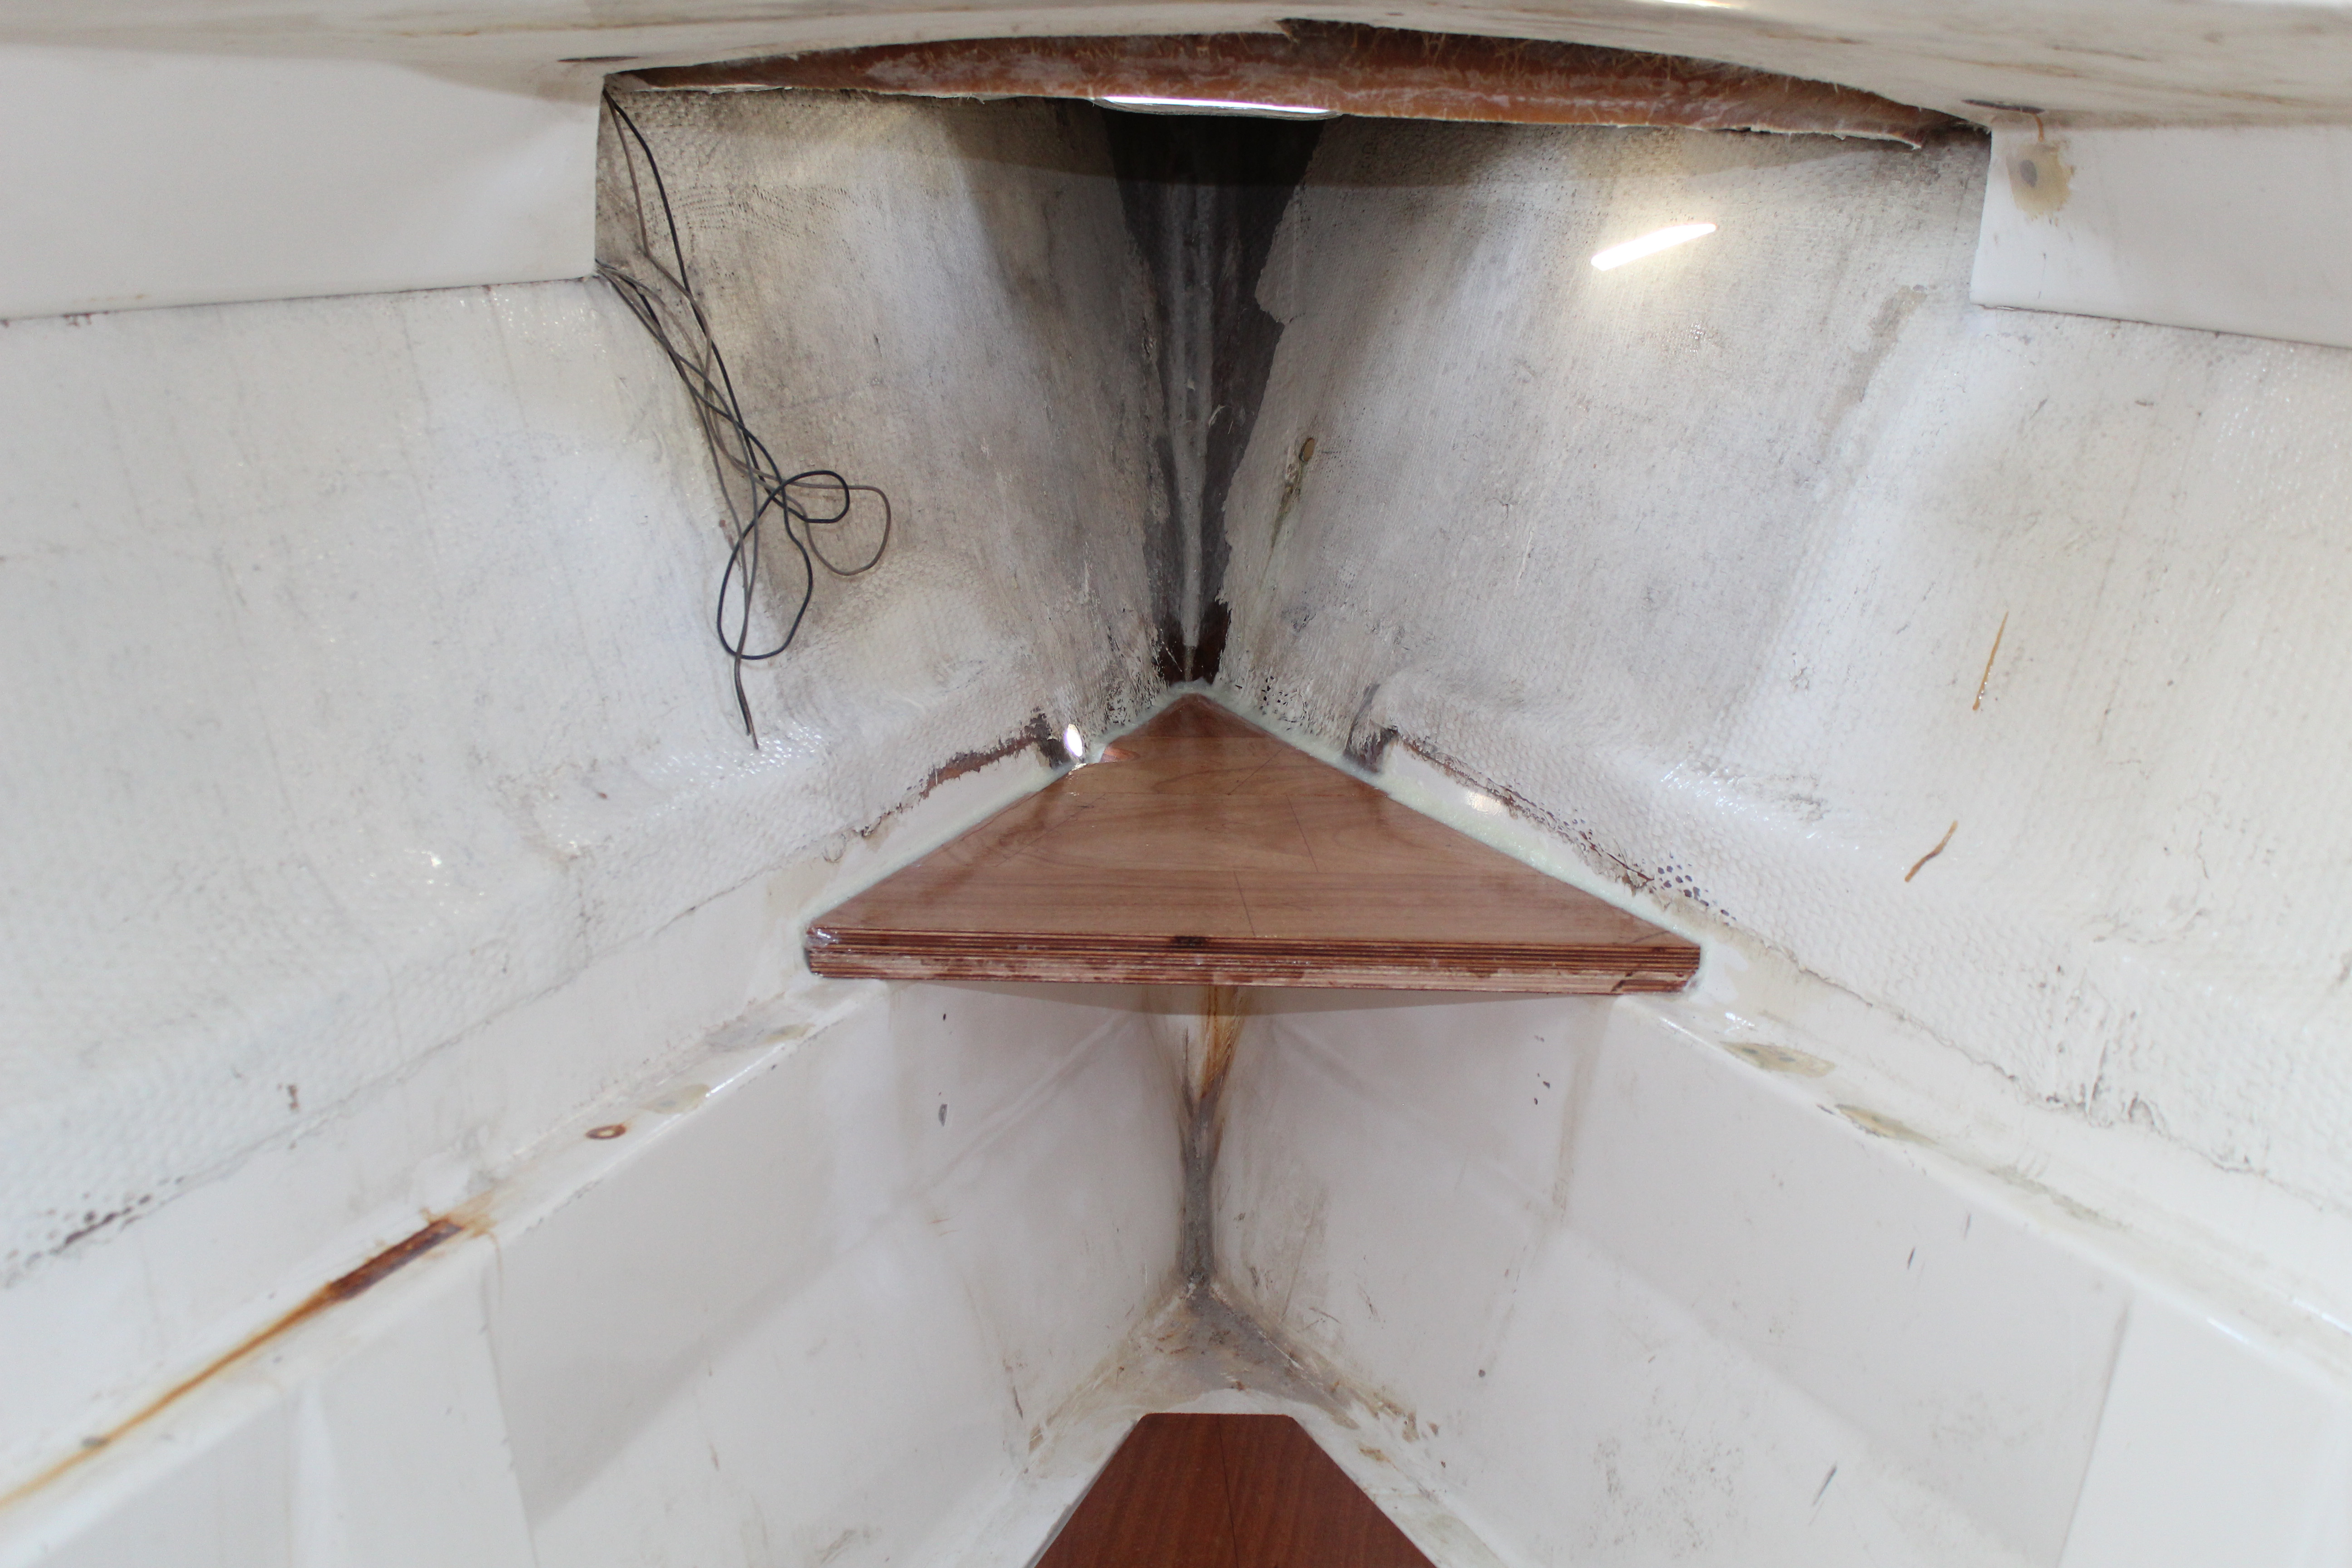
I decided not to remove any of the liner - I found I could use it to my advantage and fix the base to it. As a plus, after measuring I found that doubling the ply layers for the base gave me both added strength to handle the weight of chain I want and raised the level up so that by cutting a relief I could use the existing drain location. After epoxying in the base, next up is measuring and cutting the side and back pieces to close everything in:
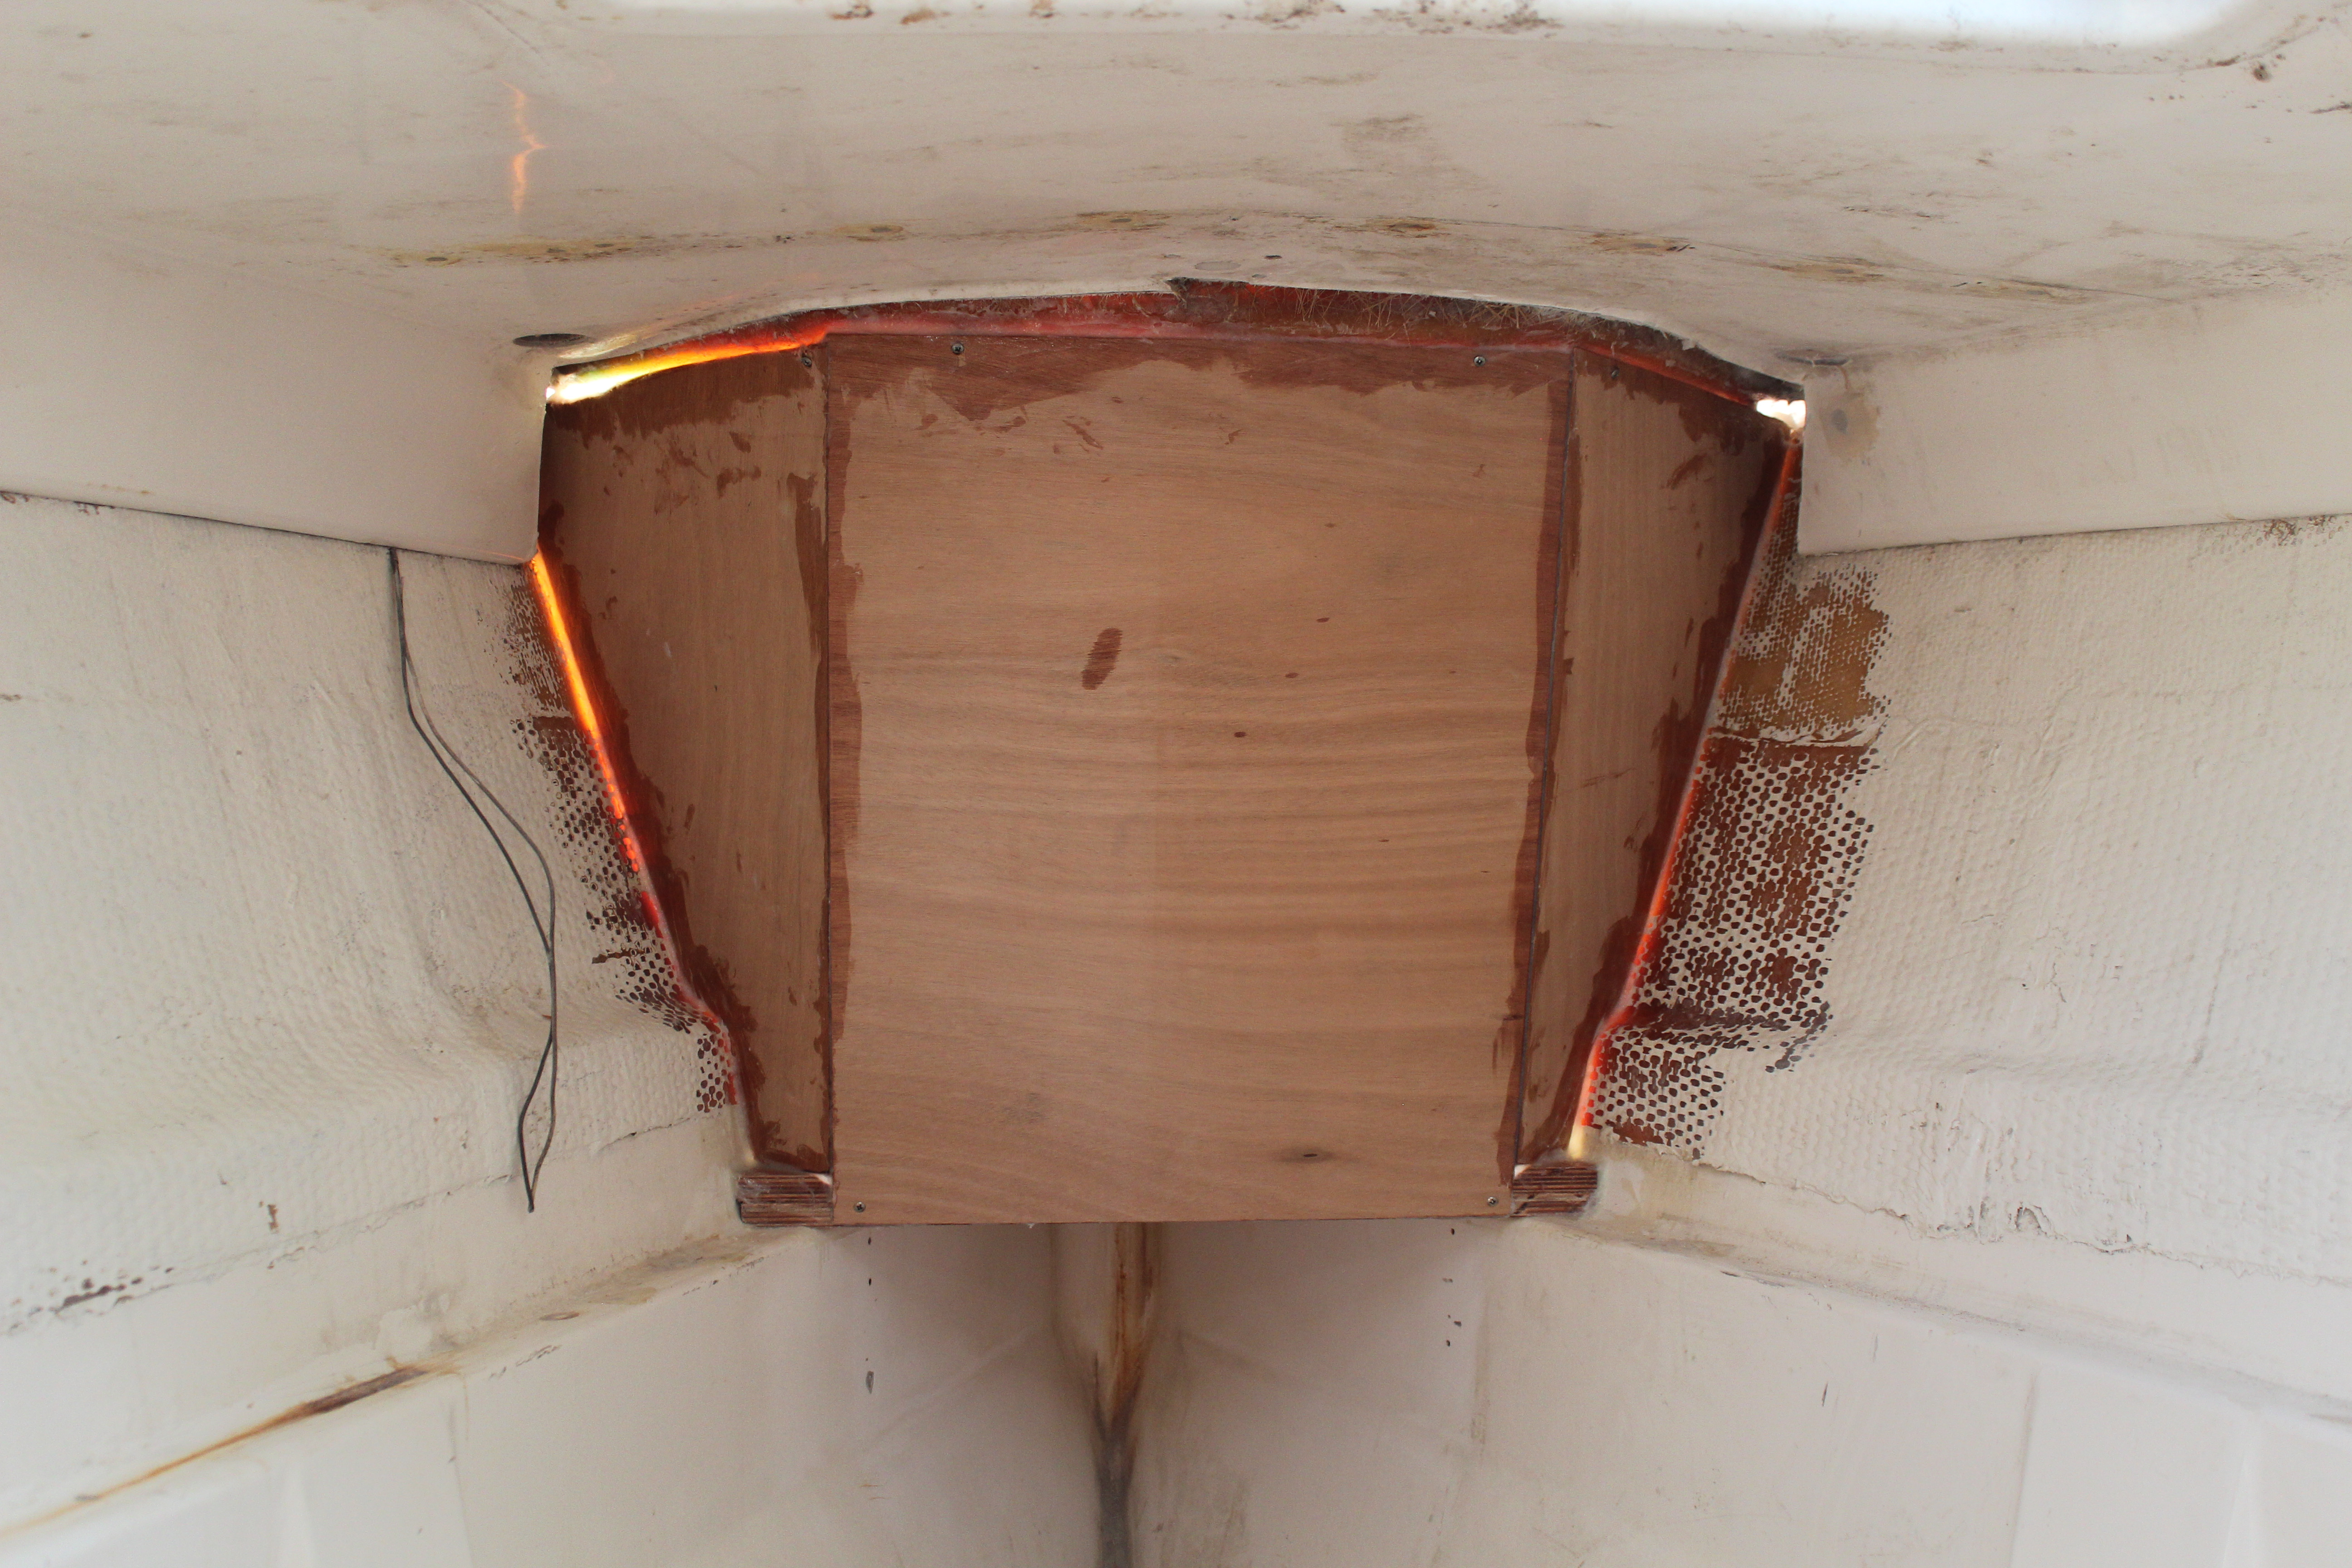
Here's a view from the top:
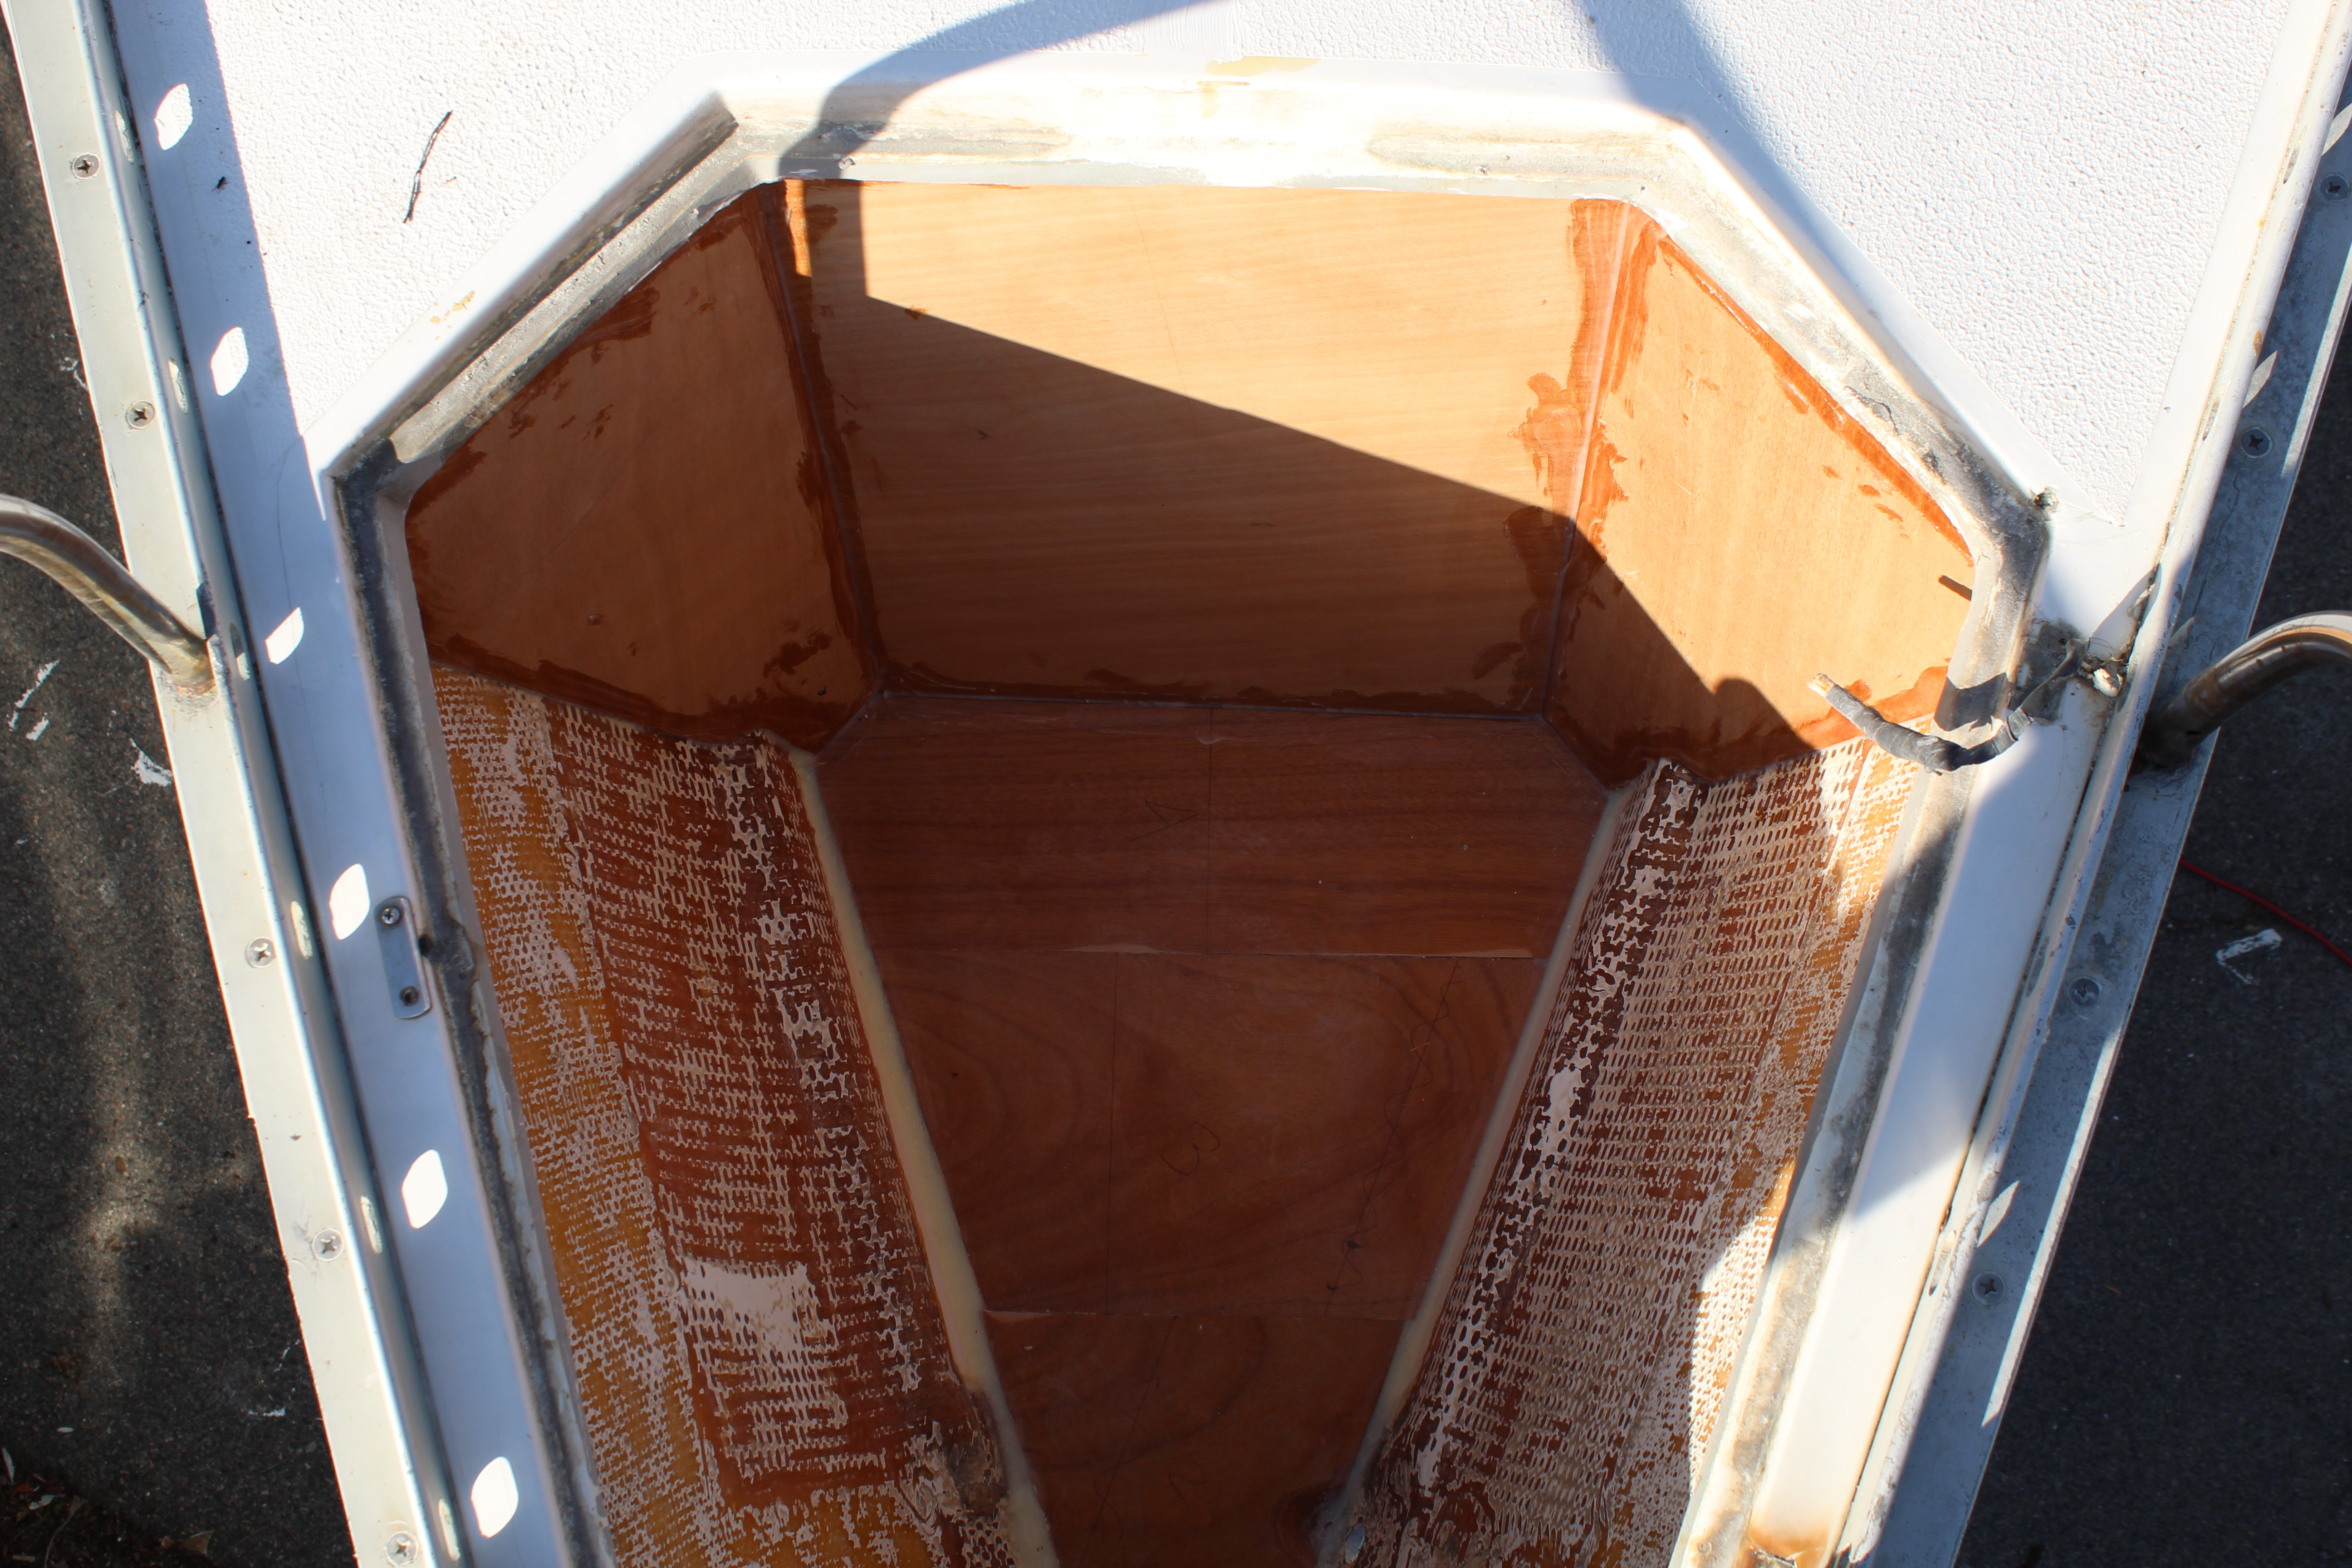
I forgot to add that prior to adding the new pieces there was hours of glorious, glorious sanding and grinding to prep the inner hull sides for glass. After everything dried I added fillets to all the corners for a good radius for the next step:
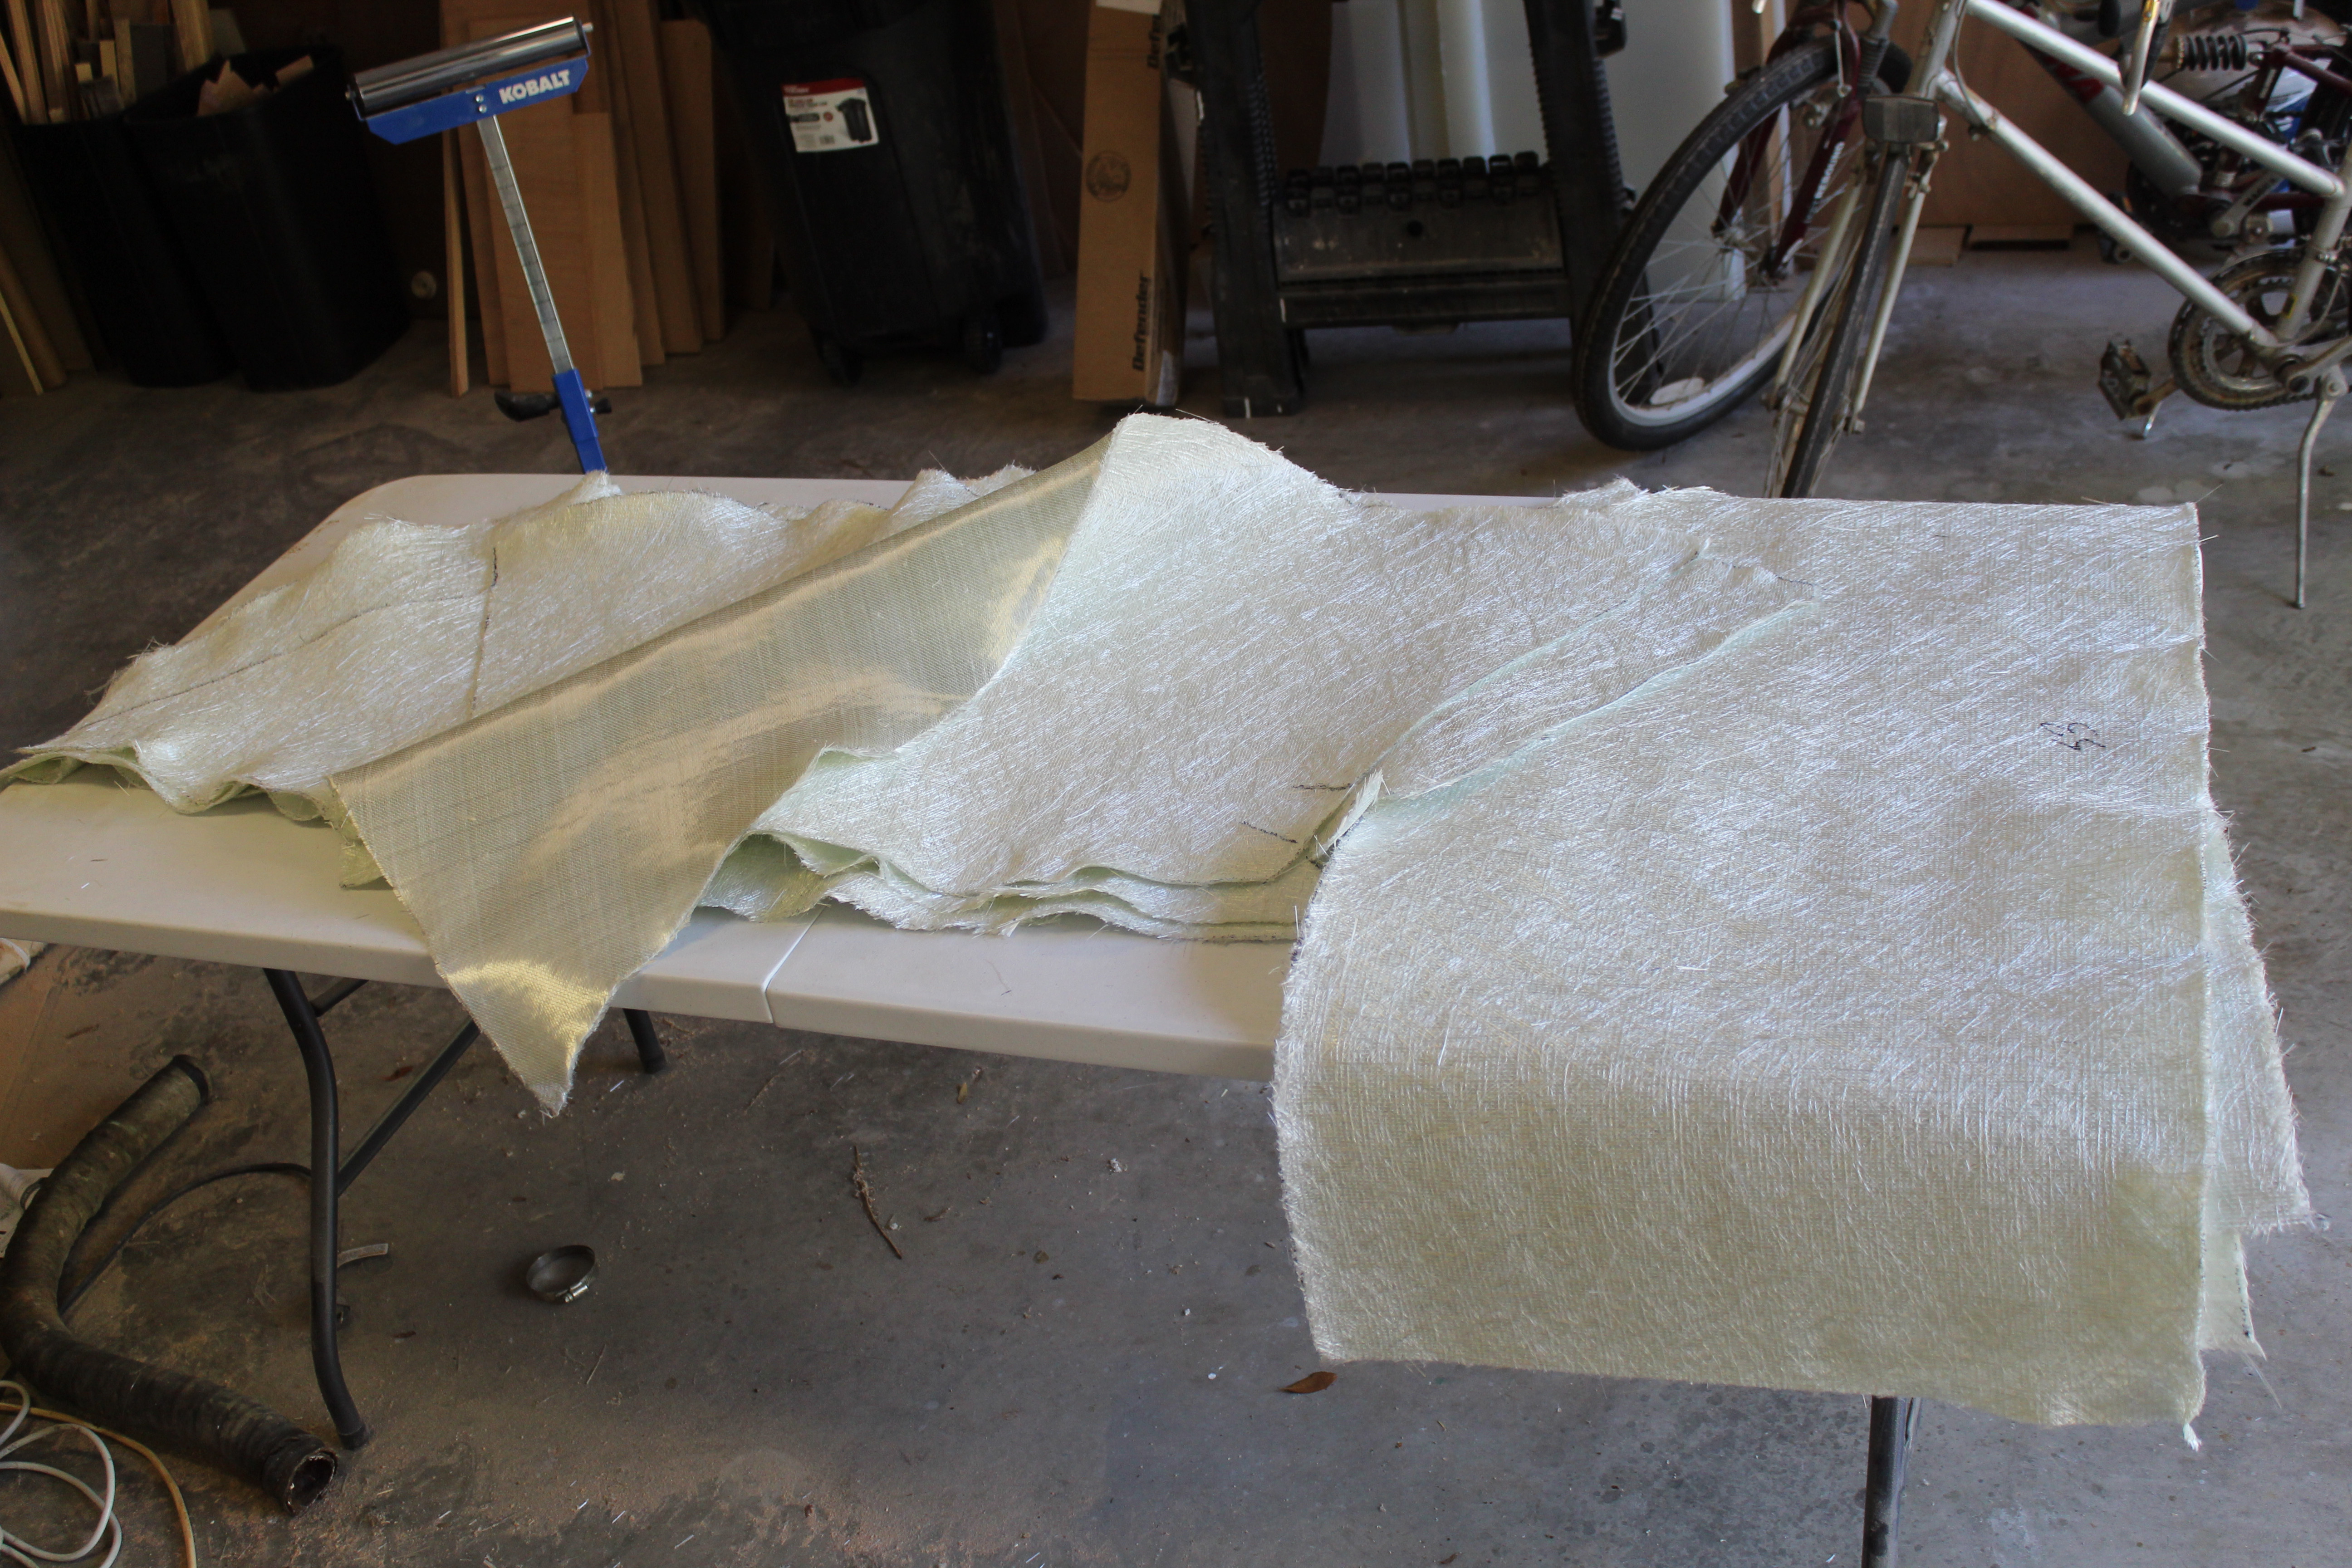
Here's a lot of glass cloth patterned, cut and ready. I departed from my usual glassing methods of alternating layers of e-cloth and s-cloth and tried something new - 1708 cloth. Don't know what 1708 stands for but type it in the search bar on Defender and - voila! I've been watching lots of videos (Sail Life and Boatworks) about using it so I thought I'd give it a go. Basically it's a bi-layer cloth with woven glass and mat stitched together. Good for quick bulk and balanced strength. For me the jury is still out - I have a few more projects that will require glass so I'll report my findings (opinions) then.
I needed to accomplish three things: Tie in the new structure to both the hull sides and the deck, sandwich the ply on both sides with multiple glass layers (the ply essentially becomes a core) and add layers of glass to the hull sides because they have now become the sides of the anchor well and need additional thickness.
First attempt (first layer): successful but OMG!, I have to find a better way! The pieces for the hull sides were pretty large and getting them in place was a chore. I could stand in the well while positioning them but as I progressed this was not going to be an option. After the first layer on the base the only access was by laying on the deck - or across the rails, or any way I could find to support myself over the work area.. So I cut the subsequent pieces a little smaller to make them easier to work with. This worked better and made the layup easier with an additional benefit - the temps were just warm enough that I had to be careful with my epoxy mix sizes to prevent them from hardening prematurely. The only down side here was that I wanted also to try using peel ply (a removable layer of plastic-type stuff that allows the epoxy to cure but prevents amine blush. When the peel ply is removed no sanding is required to tie in additional layers). Because I was working on such a large area with relatively small epoxy batches I had varying drying times so the peel ply will have to wait for another day.
Glass day one was three layers all around:
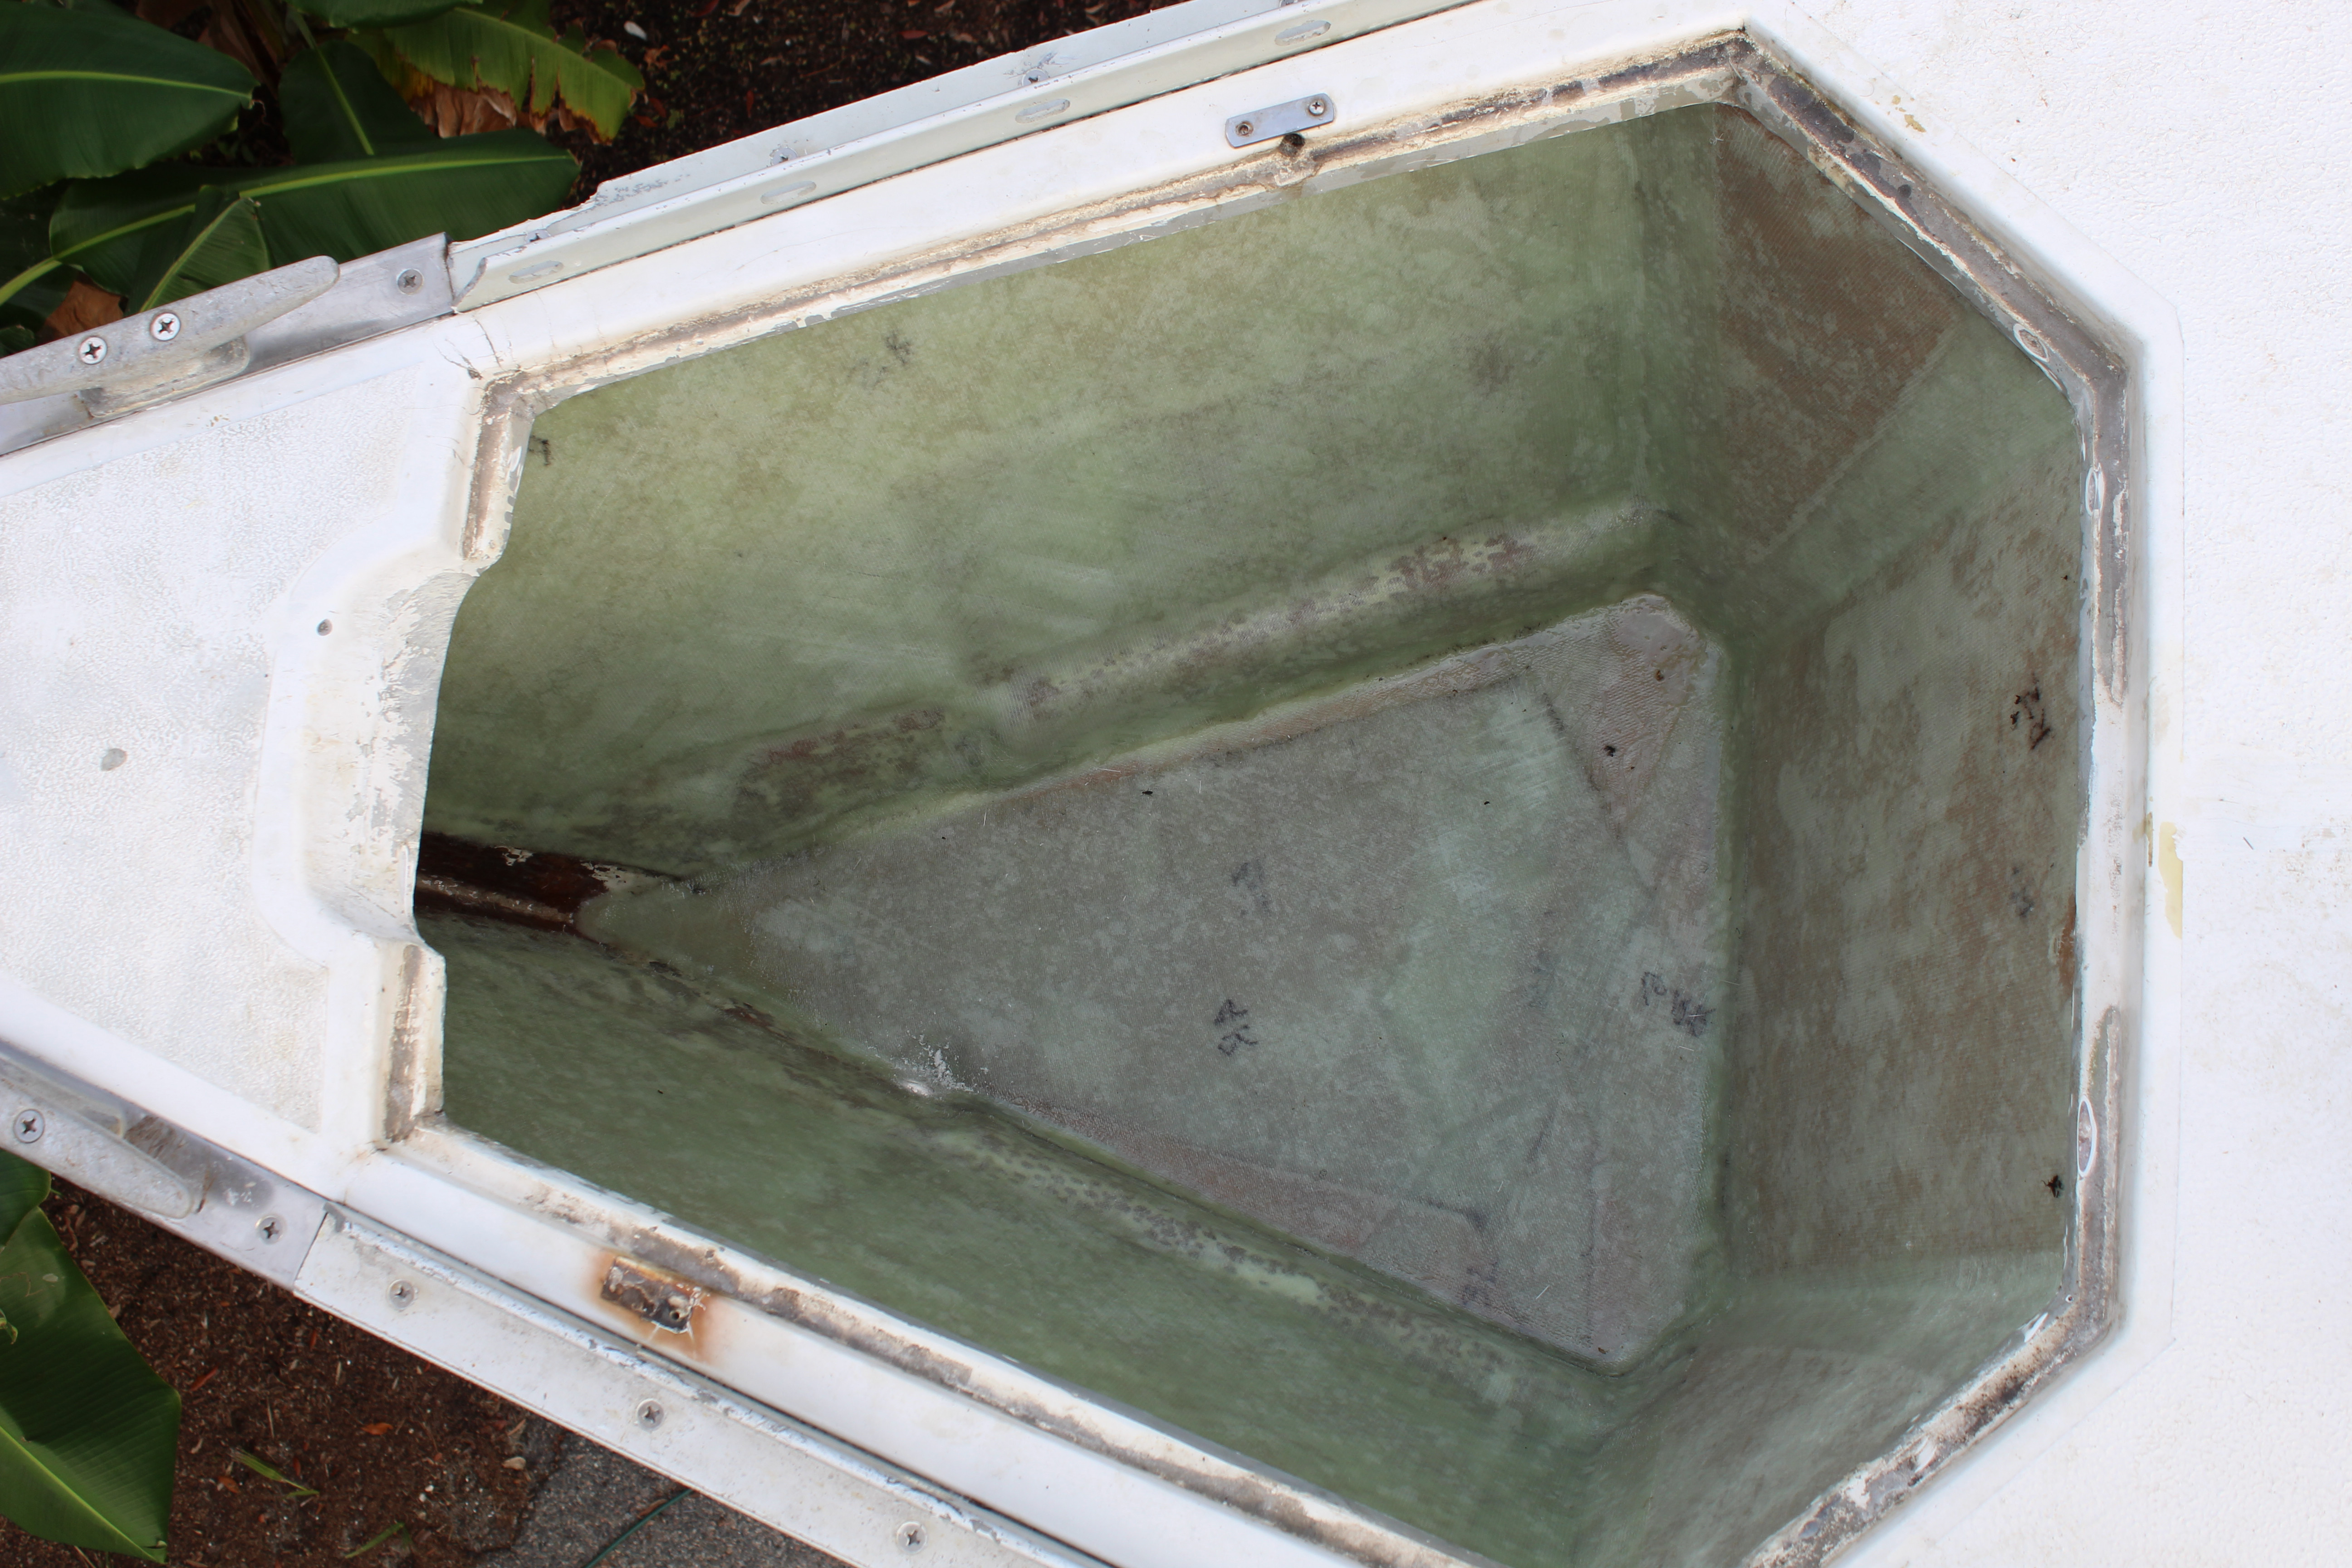
The next morning started with working out the muscle soreness!. Then a scrubdown to remove the amine blush and sanding everything to get things ready for the final layers. That took most of day two so day three I got the remaining glass layers done, inside and out. After that, and with the boat now once again watertight I took a day off for rest, recovery and power steering system repair!
I'm getting a little long on this post so the two part final chapter will have to be in three parts!
Cheers,
Mark san
With a few days of good weather and a big hole in the boat it's time to get busy!
After removing the existing anchor well I was able to get a good look at how much space I had to work with. From there the plan came together. First up, measuring and setting in the base to the new well:

I decided not to remove any of the liner - I found I could use it to my advantage and fix the base to it. As a plus, after measuring I found that doubling the ply layers for the base gave me both added strength to handle the weight of chain I want and raised the level up so that by cutting a relief I could use the existing drain location. After epoxying in the base, next up is measuring and cutting the side and back pieces to close everything in:

Here's a view from the top:

I forgot to add that prior to adding the new pieces there was hours of glorious, glorious sanding and grinding to prep the inner hull sides for glass. After everything dried I added fillets to all the corners for a good radius for the next step:

Here's a lot of glass cloth patterned, cut and ready. I departed from my usual glassing methods of alternating layers of e-cloth and s-cloth and tried something new - 1708 cloth. Don't know what 1708 stands for but type it in the search bar on Defender and - voila! I've been watching lots of videos (Sail Life and Boatworks) about using it so I thought I'd give it a go. Basically it's a bi-layer cloth with woven glass and mat stitched together. Good for quick bulk and balanced strength. For me the jury is still out - I have a few more projects that will require glass so I'll report my findings (opinions) then.
I needed to accomplish three things: Tie in the new structure to both the hull sides and the deck, sandwich the ply on both sides with multiple glass layers (the ply essentially becomes a core) and add layers of glass to the hull sides because they have now become the sides of the anchor well and need additional thickness.
First attempt (first layer): successful but OMG!, I have to find a better way! The pieces for the hull sides were pretty large and getting them in place was a chore. I could stand in the well while positioning them but as I progressed this was not going to be an option. After the first layer on the base the only access was by laying on the deck - or across the rails, or any way I could find to support myself over the work area.. So I cut the subsequent pieces a little smaller to make them easier to work with. This worked better and made the layup easier with an additional benefit - the temps were just warm enough that I had to be careful with my epoxy mix sizes to prevent them from hardening prematurely. The only down side here was that I wanted also to try using peel ply (a removable layer of plastic-type stuff that allows the epoxy to cure but prevents amine blush. When the peel ply is removed no sanding is required to tie in additional layers). Because I was working on such a large area with relatively small epoxy batches I had varying drying times so the peel ply will have to wait for another day.
Glass day one was three layers all around:

The next morning started with working out the muscle soreness!. Then a scrubdown to remove the amine blush and sanding everything to get things ready for the final layers. That took most of day two so day three I got the remaining glass layers done, inside and out. After that, and with the boat now once again watertight I took a day off for rest, recovery and power steering system repair!
I'm getting a little long on this post so the two part final chapter will have to be in three parts!
Cheers,
Mark san
The main reason for removing the forward water tank (110 gal., about 800 lbs when full) and moving the water storage under the main cabin floor was to allow for more weight in ground tackle, plus better predictability in handling since the weight forward will no longer vary so much. I figure the bow will actually be slightly lighter when all is said and done. Plus much better anchoring since the old setup was so unwieldy.More room means more weight, but better chainfalls. Great job.
Les
Mark
I can cheat - I have the old bulkheads to use as templates , most of which did not fit too well, and add my own templates to the old bulkheads when patterning the new ones. There's still some trimming and sanding to get a good fit but I like a good fit too!Your bulkheads fit so perfectly!!!!
That aint easy to do
