Need instructions to remove HUNTER polycarbonate windows

Feb 11, 2023
4
Hunter Passage Chestertown
HELP!!! Just bought an older Hunter Passage. The previous owner (a number of years ago) caulked everything (and not well) and anything in sight - and I mean EVERYTHING. Clearly they thought there was a leak - but the clear caulking is cracked, shriveled and a plan old MESS. So, I researched and reviewed a ton of videos on replacing port lights, and thought we could do this easily. NOPE. The Hunter windows extend across gel coat (so it looks like large window on outside - but in the cabin, the window is much smaller). There are also little (what looks like it should be a screw hole - but there is clear silicone over the black caulk) and I'm nervous about digging into this.

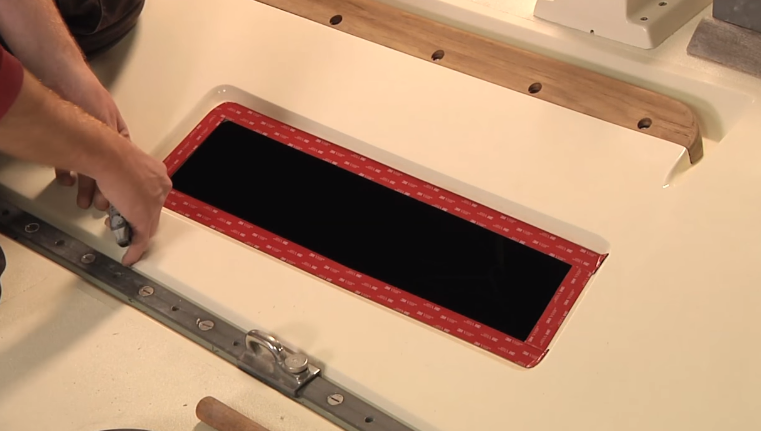
The attached pic is just of the port light, but the polycarbonate that extends on either side was sloppily caulked all the way around the edges, so cleaning that up without getting the black caulk is impossible.

HELP!!! HOW does one remove these windows so they can rebed it, recaulk it, etc. I can't find instructions anywhere. All of our windows need to be redone. I'm hoping someone out there has instructions/a video or can show me how to do this! Any information will be greatly appreciated! Safe (dry) sailing :)
 

Attachments

Dec 25, 2000
5,900
Hunter Passage 42 Shelter Bay, WA
Our 1991 side port lights do not leak and no messy caulk to deal with, so no advice to offer. However, most are badly crazed and/or cloudy and need to be replaced at some point. Perhaps someone will chime in with some tips.
 
May 27, 2004
2,041
Hunter 30_74-83 Ponce Inlet FL
I have replaced all of my original portlights on my 1979 H 30C twice over the past 42 years.
And, while mine are slightly different, it appears yours are similar and can be removed safely.
You'll note I didn't say the portlights can be saved...The one in the pic looks shot.
If I am correct, the inner frame/lens assembly is "one component" and the trim ring,
aka 'bezel', is a separate component on the outside.
If I were in your spot, I would use a box cutter and a putty knife to remove the outside bezel.
These are available from Lewmar, Pompanette, etc. and maybe even this site's ship's store
as a replacement item. It will break when you remove it, so be prepared.
Once you get it off, you will see the "spigot" of the portlight nearly flush with the
outside skin of the cabin.
if you decide to remove the port light itself, you will have to dig out as much sealant from around the spigot as possible before using the putty knife on the inside flange along with
a pry bar, chisel, hammer, C-4, etc. to remove it. The plastic gets brittle in UV over the years, it's just the nature of the beast and It will break when you remove it, so ...
But, the good news is, the outside and inside cabin wall can be cleaned up well enough to prep for new portlight install.
Let us know what you decide please and I will give you some tips on prep.
Good luck.
G.
SV Intuition
 
  • Helpful
Likes: rgranger
Jan 19, 2010
12,553
Hobie 16 & Rhodes 22 Skeeter Charleston
I thinkg @ggrizzard 's advice is spot on... you will have to recalibrate your thinking and go for a replacement rather than just cleaning these up.

Probably not what you wanted to hear but 90% of the pain is the labor so you might as well go for a finished product that you will be happy with rather than something that is probably going to need fixing again very soon.

:confused:
 
  • Like
Likes: ggrizzard
Jun 9, 2008
1,792
- -- -Bayfield
A trick I have used over the decades is not a screw driver or pry bar, unless you are replacing with new and don't care if you bust it up. Rather get some wire, such as a thin stainless rigging wire and use it like dental floss and run it between the fiberglass and the port or window to release them without breaking up the parts. Clever aye?
 
  • Like
Likes: danstanford
Jan 4, 2006
7,150
Hunter 310 West Vancouver, B.C.
Rather get some wire, such as a thin stainless rigging wire and use it like dental floss and run it between the fiberglass and the port or window to release them without breaking up the parts.
I've heard of this before B U T how the $@!&*-@# do you jam the wire in between the landing and the acrylic ?

This is the front fixed hatchlight of my H-310 :

1676933282782.jpeg

View attachment 213167

The landing around the outer edges has got to be 3 inches wide.

Most of the fixed portlights on the boat have a width of at least 2 inches wide.

1676933648775.png


Can you please give me a blow by blow description as to how you start a wire through these wide landings ?
 
  • Wow
Likes: ggrizzard
Jun 21, 2004
2,765
Beneteau 343 Slidell, LA
Razor utility knife
Heat gun; careful, don't over heat
multi / oscillating tool with thin non serrated blade
plastic body and fender chisels and wooden wedges. Windshield removal kit including cutting wire with handles on ends
Go slow and have lots of patience; you can remove them without breakage. If you decide to replace because of crazing, scratches, etc. you will have usable templates to fabricate new ones.
 
Last edited:
  • Like
Likes: LloydB
Jan 4, 2006
7,150
Hunter 310 West Vancouver, B.C.
Thanks, Big. I'll file those instructions.

I have read here (which proves nuttin') that using fine wire is a better way of cutting out the glass. I will be saving the glass only as a template, as the glass has to go because it is collecting stars and other signs of growing old :

1676942114226.jpeg


And no, it hasn't been physically hit. I've got these marks in several other places on other portlights. The glass is tinted a light bronze and from the outside, the glass surface is blemish free.

So, any experience using wire and if so, which is easier ?
 
Jan 4, 2006
7,150
Hunter 310 West Vancouver, B.C.
OUCH !

Maybe lots of damage to the interior around the window ?

Pound an ice pick through 2 inches of DC795 and see how the interior edge of the FG looks at that point :

1676957833777.png


Rather get some wire, such as a thin stainless rigging wire and use it like dental floss and run it between the fiberglass and the port or window to release them without breaking up the parts. Clever aye?
Everybody says passing a wire between the glass and landing is a piece of cake. Someone actually said to use whipping twine as it's coarser that fine wire. Andy in Boatworks Today shows the installation of the glass but not the removal.

NOBODY SHOWS THE REMOVAL. I JUST CAN'T SEE IT. HOW ?
 
Jun 21, 2004
2,765
Beneteau 343 Slidell, LA
OUCH !
NOBODY SHOWS THE REMOVAL. I JUST CAN'T SEE IT. HOW ?
Ralph, I really believe you can remove the side portlights without using the wire. I recently removed a 6 foot deck skylight similar to that shown in your photo. The only area I used the wire, was in the center support area, otherwise, i had someone apply heat on the exterior lens surface and hammered plastic chisels from the interior. Wood wedges (door shims from Lowe’s) were used to prevent the adhesive from reattaching once the chisel was withdrawn. Work your way around the entire perimeter until the lens completely detaches. You may also need to use a multi/oscillating tool blade from the inside to cut thru the adhesive (be sure to protect the interior surfaces with tape or cardboard to prevent damage from multi tool). If you are also removing the deck skylight, use heat, multi tool, chisels & wedges until there is sufficient clearance to insert the wire between the lens & deck support. This will be much more manageable with a helper and the sidelights should be easier to remove vs the deck skylight. Once the lens is removed, use the oscillating tool blade & sanding attachment to remove the old adhesive. It ain’t easy, but doable.
 

LloydB

.
Jan 15, 2006
927
Macgregor 22 Silverton
I watched this YouTube example how to remove and install a plexiglass panel and good insight as to the process and necessary equipment>' youtube.com/watch?app=desktop&v=_8Ogoqg3sWo '. The video shows what they did to replace windows rather than a, do these six steps and then you will be done technical video. Watching the process as it is taking place gives you a feel of the actual time and effort you'll have to make including having the proper tools ahead of time. It was clear to me that two people prying the window off is better than one alone. Also a little bit of masking tape on gelcoat where you don't want sealant would be a time saver.
 
Jan 4, 2006
7,150
Hunter 310 West Vancouver, B.C.
@BigEasy , appreciate your ongoing detailed description of pulling out the original glass. Tell me, does your boat have an exposed interior around the windows as mine shows as opposed to the interior frames you often see in boats ? The open exposed surround looks nice but could be a real bugger when avoiding damage along the edges.
 
Jun 21, 2004
2,765
Beneteau 343 Slidell, LA
Yes & no!
The deck mounted skylight (that I replaced) has an exposed fiberglass interior, similar to your portlights. My portlights that are mounted on the sides of the cabin are all Lewmar with aluminum frames and removeable interior acrylic trim rings.
Yes, have to be careful not to damage the exposed fiberglass. Use multiple layers of masking tape or any suitable barrier, especially when using the oscillating tool.
 
Jan 4, 2006
7,150
Hunter 310 West Vancouver, B.C.
I watched this YouTube example how to remove and install a plexiglass panel
Thanks for the link @LloydB . Unfortunately, it shows the removal and replacement of the plex in an opening portlight as opposed to the removal of the glass from a fixed portlight.

About 14 years ago, I replaced the glass from two smaller Lewmar opening hatchlights :

1677006936792.png


The plexi in both of these had failed miserably after only 10 years. Covered in sparkles and translucent at best. It was a nice winter indoors project. Covered the three openings with plywood and poly over the winter and replaced in the spring.


And a larger Bowmar hatchlight also removed :

1677007016834.png


Used the original lenses as templates and cut new glass for the three using a router template bit. Good to +/- 0.001" on a bad day.

1677007629014.png


Back in with DC795 and still look brand new after 14 years. Maybe Lewmar planned the acrylic that way but they never got another penny out of me.
 
  • Like
Likes: LloydB
Jan 4, 2006
7,150
Hunter 310 West Vancouver, B.C.
Use multiple layers of masking tape or any suitable barrier, especially when using the oscillating tool.
This is my only holdback in proceeding with fixed portlights. As mentioned, I have done 3 opening hatchlights and have a complete workshop with every tool known to mankind (Tim Allan style) for the cutting and installation of the glass, but still chicken:poop: to start on my first fixed portlight removal. With your material and a library of additional material, I will eventually start in the most obscure location and corner of an out of sight fixed port. Good a place as any to start learning. Thanks again.
 
  • Like
Likes: ggrizzard

Apex

.
Jun 19, 2013
1,210
C&C 30 Elk Rapids
@aas1110
look up gone with the wynns youtube channel, they did large side lights. use an oscillating tool from the inside.
 
Sep 25, 2008
7,336
Alden 50 Sarasota, Florida
Don’t know if this option has been discussed but I found it was easy when I had to remove a large fixed port.

Rather than start at an edge, start in the middle. Cut a small hole near center and progressively expand the hole by cutting until you reach the edges which are then easily pulled away from the opening.
Works equally well with both framed and up framed ports With no damage to the boat.