Got a new sailing dinghy
- Thread starter Davidasailor26
- Start date
Have you thought about making a male and female mold out of plywood so that you have continuous support?
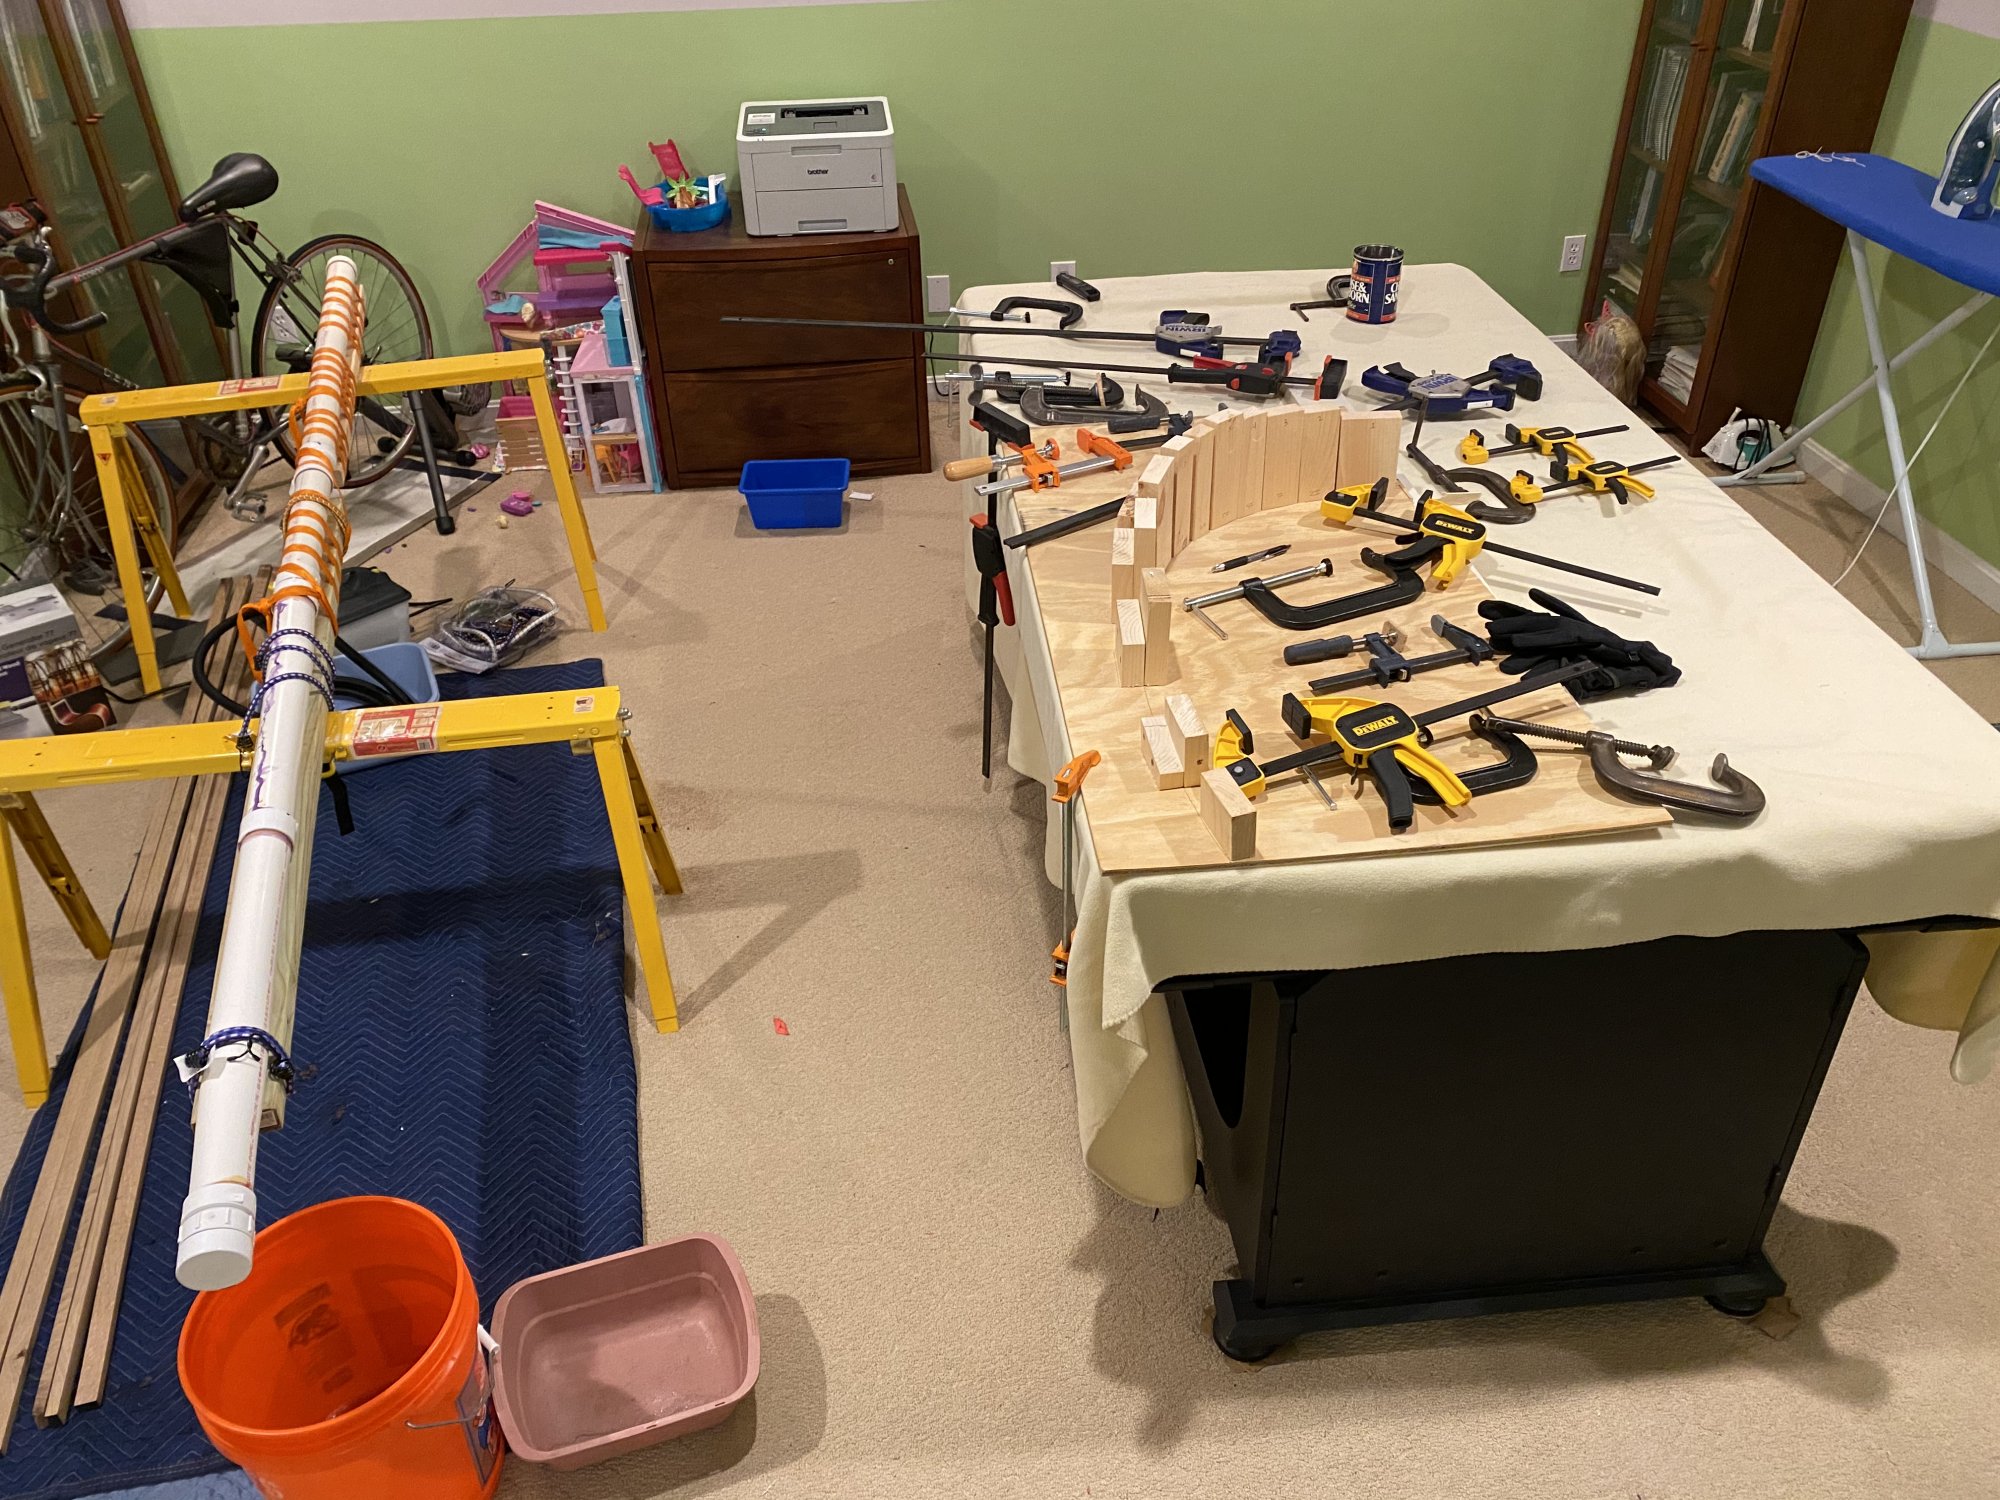
Indeed. When I move on to making the full bow section I’m going to need a bunch more.Clamp heaven.
I have. After I see how bad the pinches are from the hard spots I’ll decide either on that or just a couple more supports. The tricky part about plywood is that I’d need to cut it to the radius but also bend it to match the 3D curve. So I’d probably need to get a few thin sheets, cut the radius into all of them, bend them to the up/down profile, and then laminate them.Have you thought about making a male and female mold out of plywood so that you have continuous support?
The other possibility is to put a few sections of a thin slice of wood into the mold to span the gaps. I couldn’t do it in one section because of the up/down curve, but a few lengths could probably be made to work. It wouldn’t be as solid and smooth as the plywood option but better than just the posts.
Pawn shops, 2nd hand tool places and some thrift shops might have some. Here in FL Habitat for Humanity runs thrift stores called ReStore which have a pretty good hardware inventory. Worth a walk thru if there is one nearby.Indeed. When I move on to making the full bow section I’m going to need a bunch more.
jssailem
SBO Weather and Forecasting Forum Jim & John
- Oct 22, 2014
- 24,475
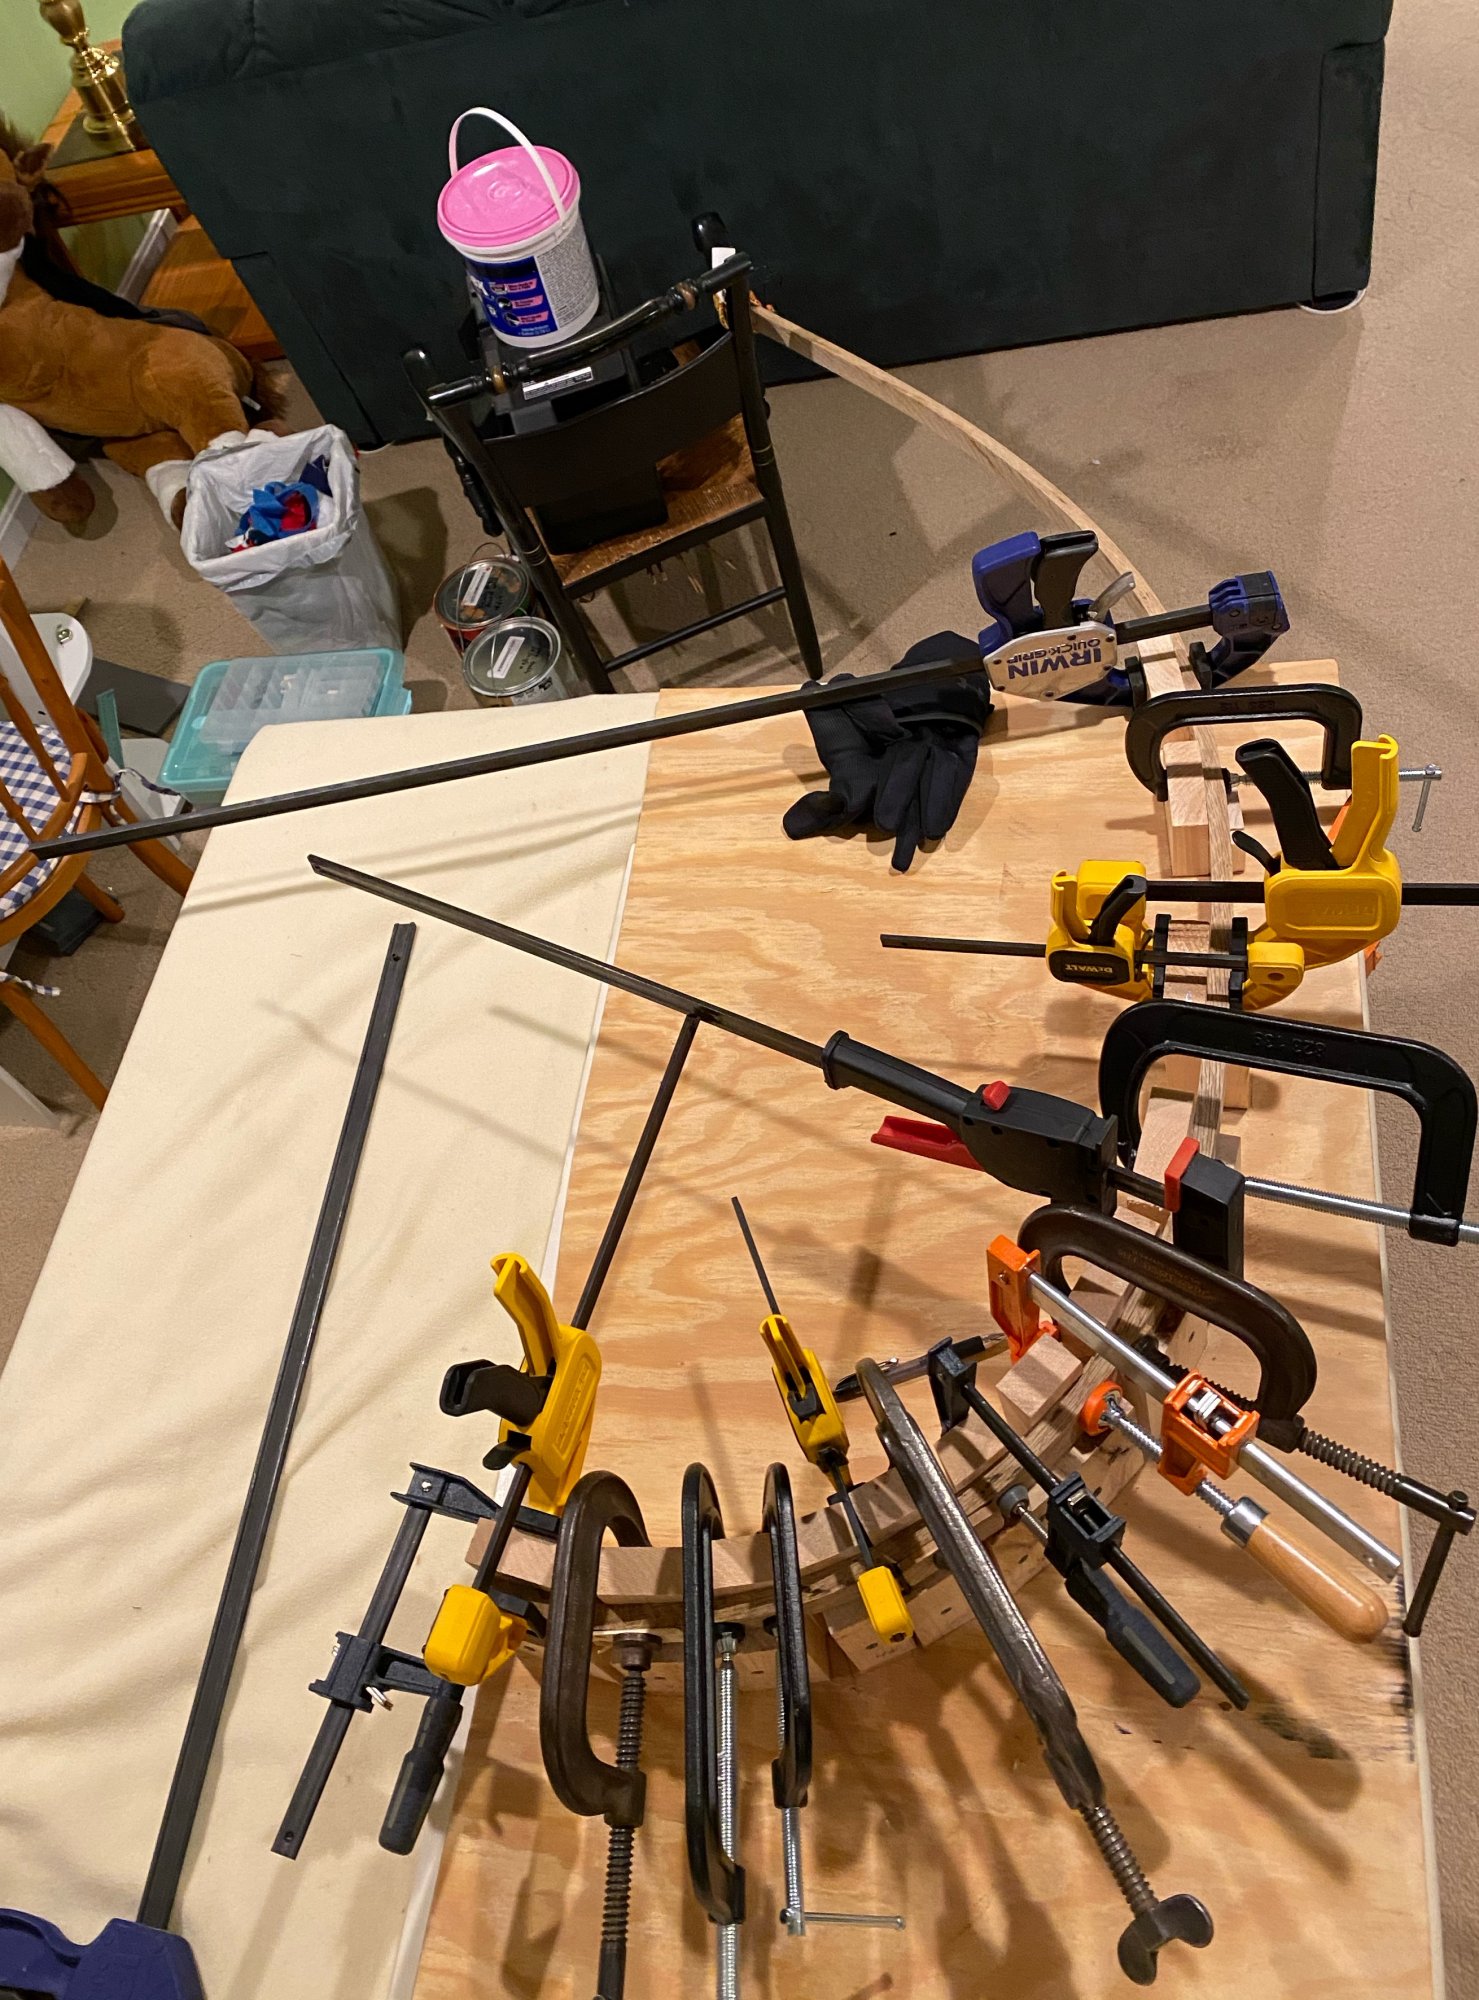
Did you see the bend system in the video used by Lou the shipwright?
He took a metal bar. Bent 90 degrees at each end. Placed the steamed board between the bent ends, then with a come-a-long he pulled the ends towards each other. The compressing frame bends the wood. Such bend means there is less spring back when the board is removed from the frame.
He took a metal bar. Bent 90 degrees at each end. Placed the steamed board between the bent ends, then with a come-a-long he pulled the ends towards each other. The compressing frame bends the wood. Such bend means there is less spring back when the board is removed from the frame.
Revision 3 of the jig is just about right ") -
-
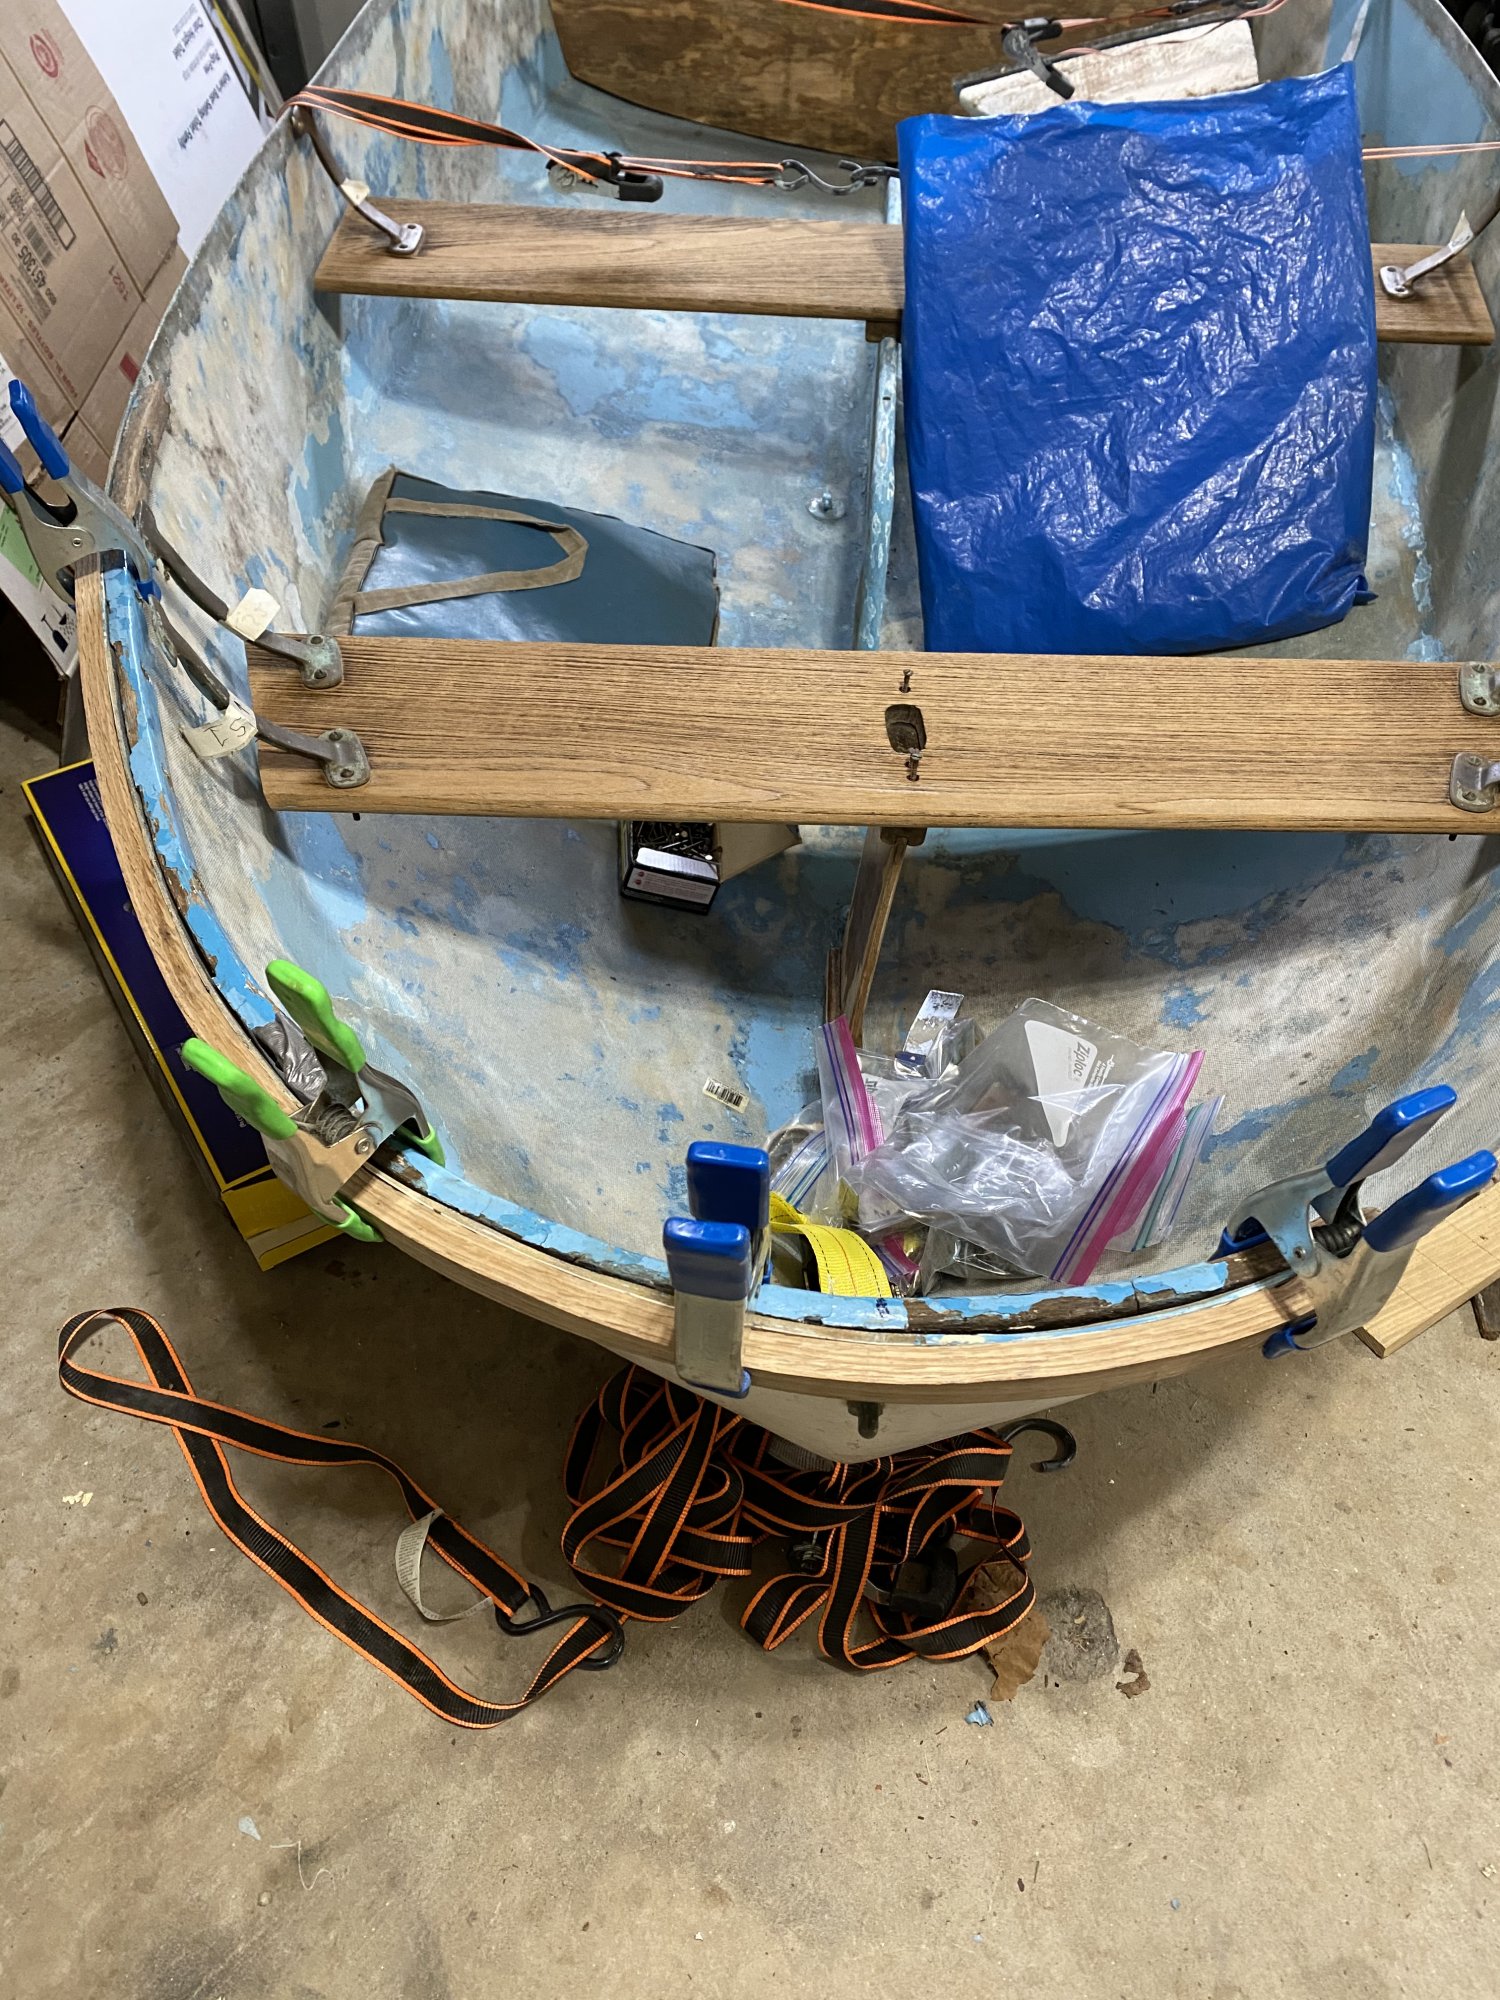
Now I just need to transcribe the curve to a second jig for the port side. The section behind the jig is relatively straight so I’m going to see if I can just clamp either a cold or steamed piece straight onto the hull there rather than making more jigs.
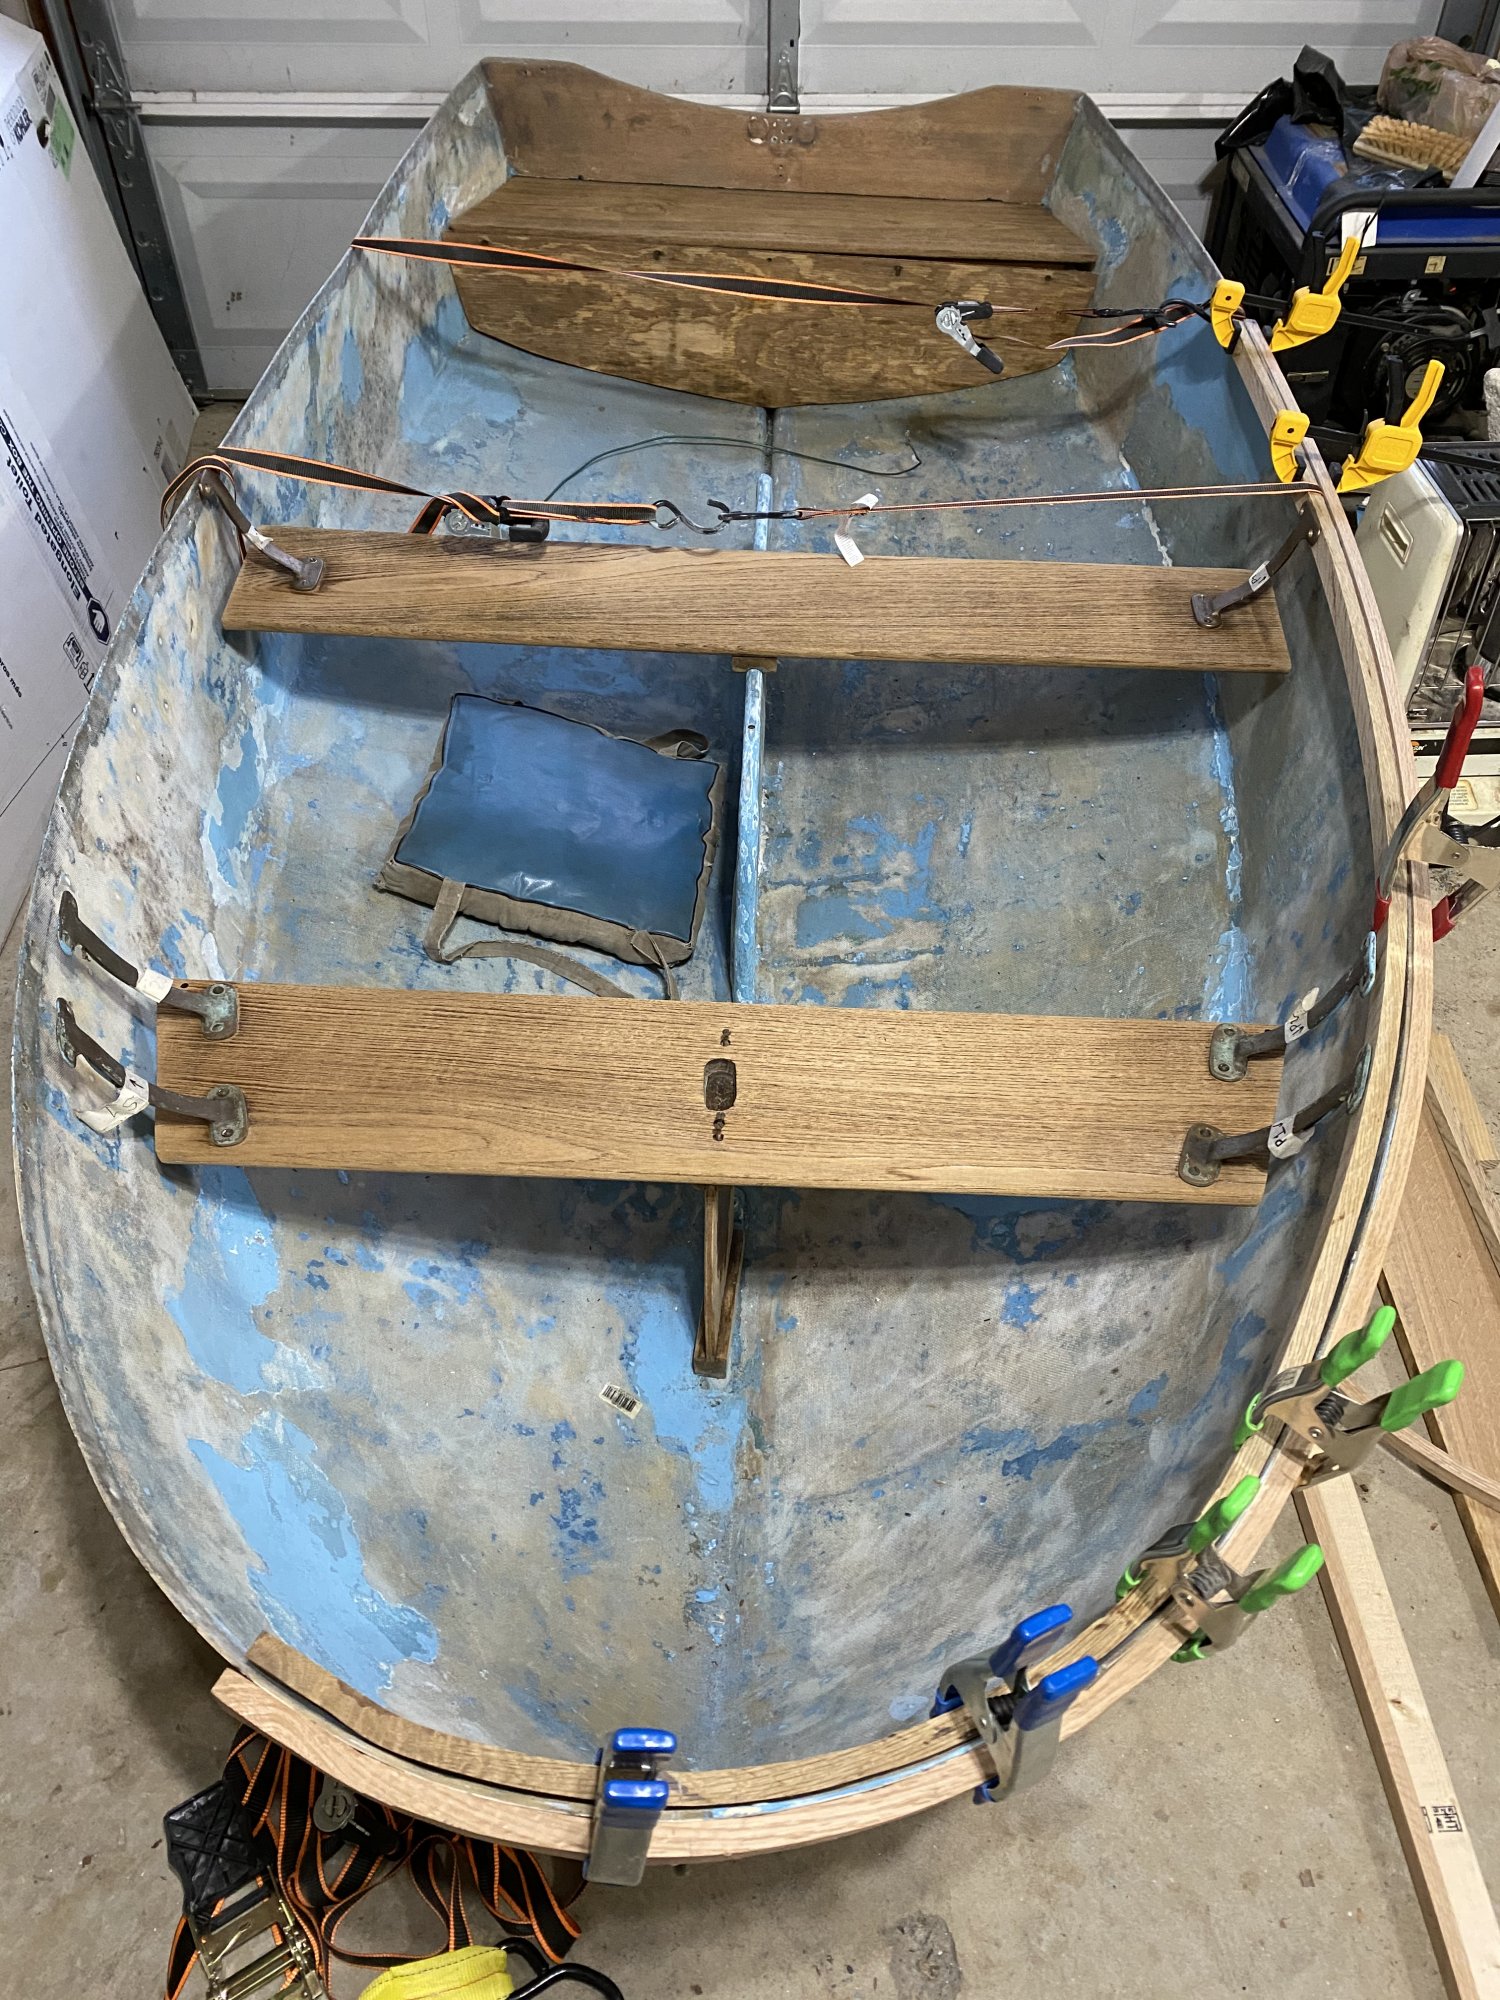
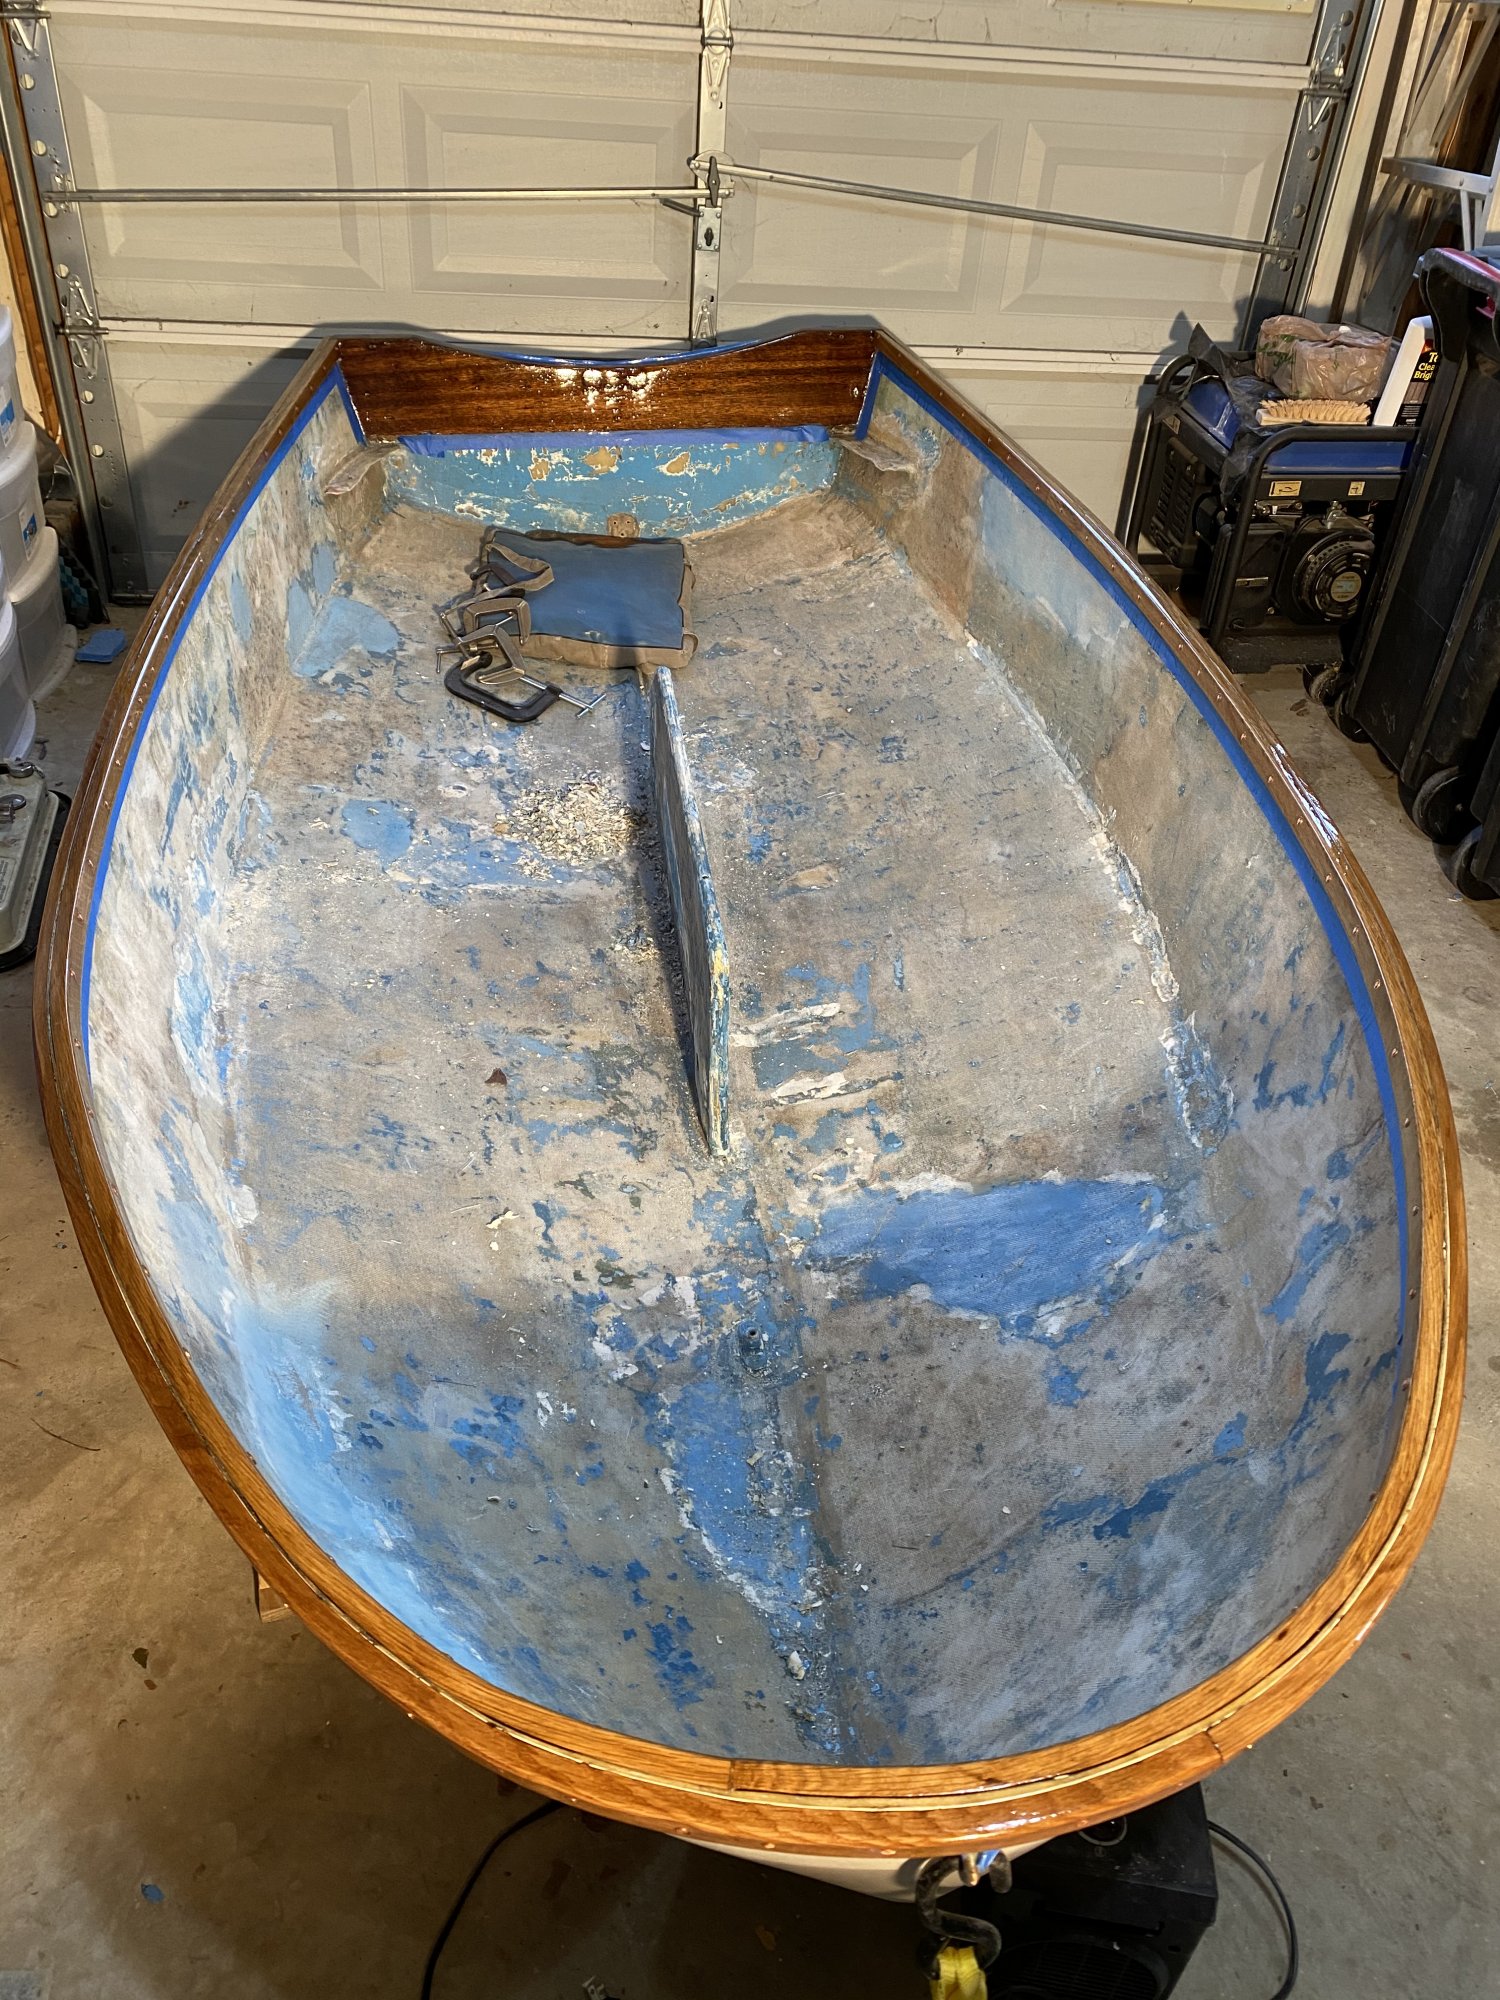
I did take the floatation boxes off the front seat so I could clean the teak better. The boxes were held on with about a thousand staples and a lot of them are now stuck to the boxes with coats of paint, so cleaning all that up and reattaching them will be more fun.
-Now I just need to transcribe the curve to a second jig for the port side. The section behind the jig is relatively straight so I’m going to see if I can just clamp either a cold or steamed piece straight onto the hull there rather than making more jigs.
I did take the floatation boxes off the front seat so I could clean the teak better. The boxes were held on with about a thousand staples and a lot of them are now stuck to the boxes with coats of paint, so cleaning all that up and reattaching them will be more fun.
The seats are TEAK? Mine have been painted blue at least since my father went frostbiting in the '70's, so never noticed. Grain in your photo looks a bit open for teak; are you sure it's not oak or ash? (Which is perhaps why mine are painted?) Please confirm.
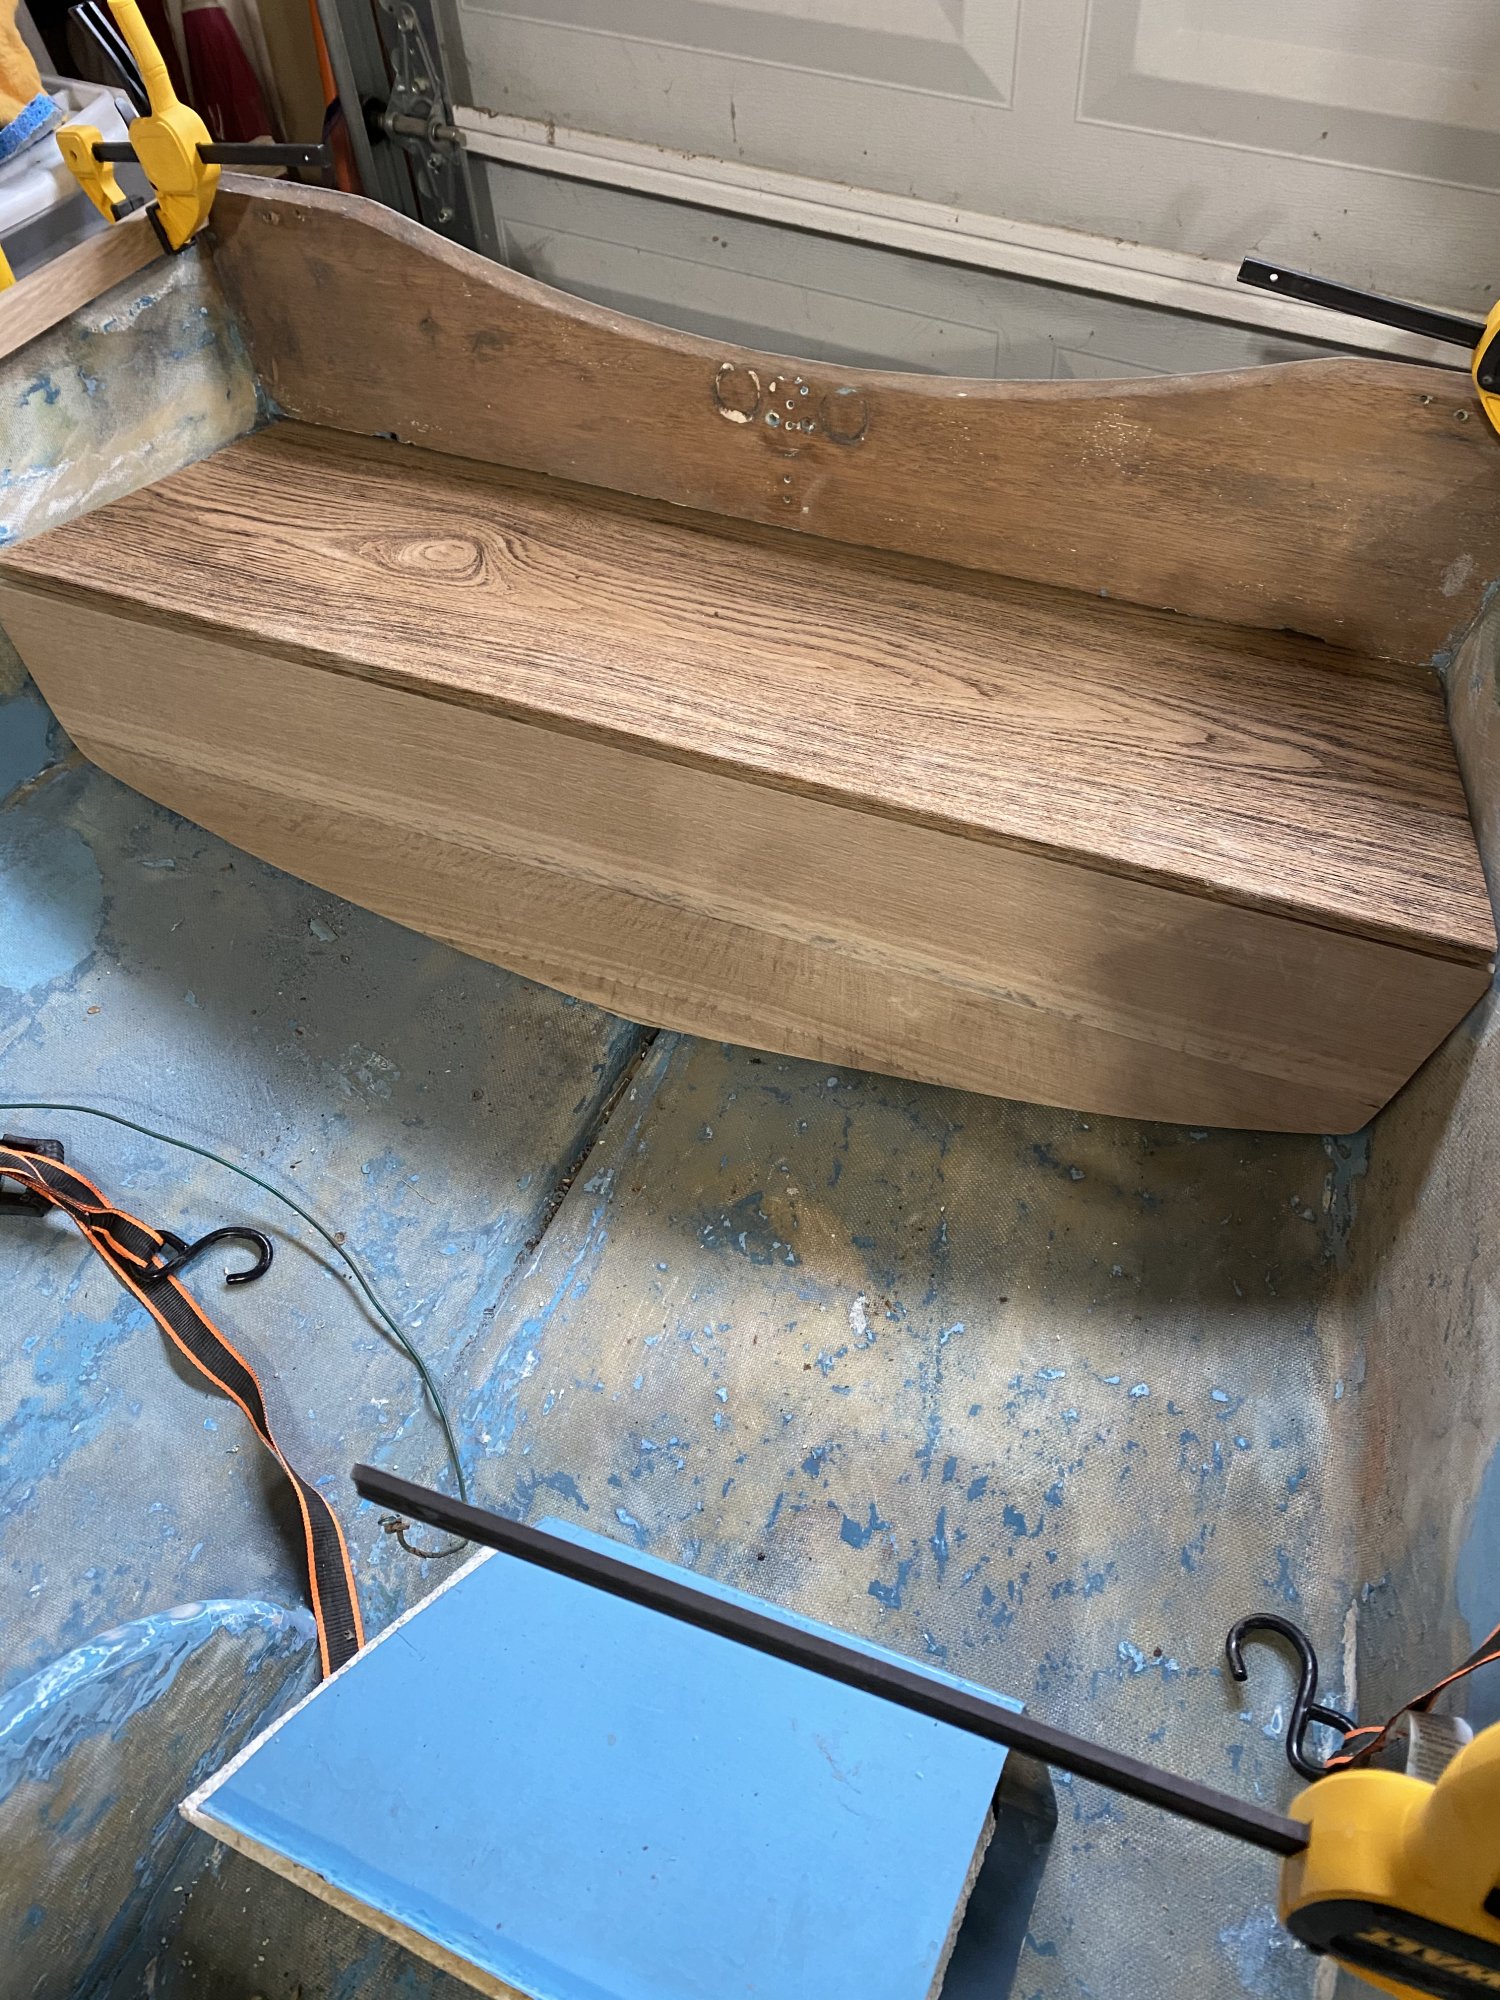
The Dyer parts list offers seats in mahogany or teak. The color of mine seems to be more teak than mahogany. You’re right that the grain looks pretty course but I think that’s just from weathering having eroded some of it. Here’s what the relatively unweathered bottom of the seat looks like -The seats are TEAK? Mine have been painted blue at least since my father went frostbiting in the '70's, so never noticed. Grain in your photo looks a bit open for teak; are you sure it's not oak or ash? (Which is perhaps why mine are painted?) Please confirm.
@Will Gilmore will be able to tell us, I'll bet. What say you Will, is that teak or mahogany (or something else)?
I'm going to go with teak. It isn't mahogany. It could be a stained white oak or ash, but teak fits the best from the photographs.
-Will (Dragonfly)
-Will (Dragonfly)
I’ve started the process of rebuilding the centerboard. Instead of 3/8” plywood I’d like to make a fiberglass board that won’t warp, swell, or rot. So I started by building a couple of scaled down prototypes to practicing laying up fiberglass and experiment with a couple different approaches.
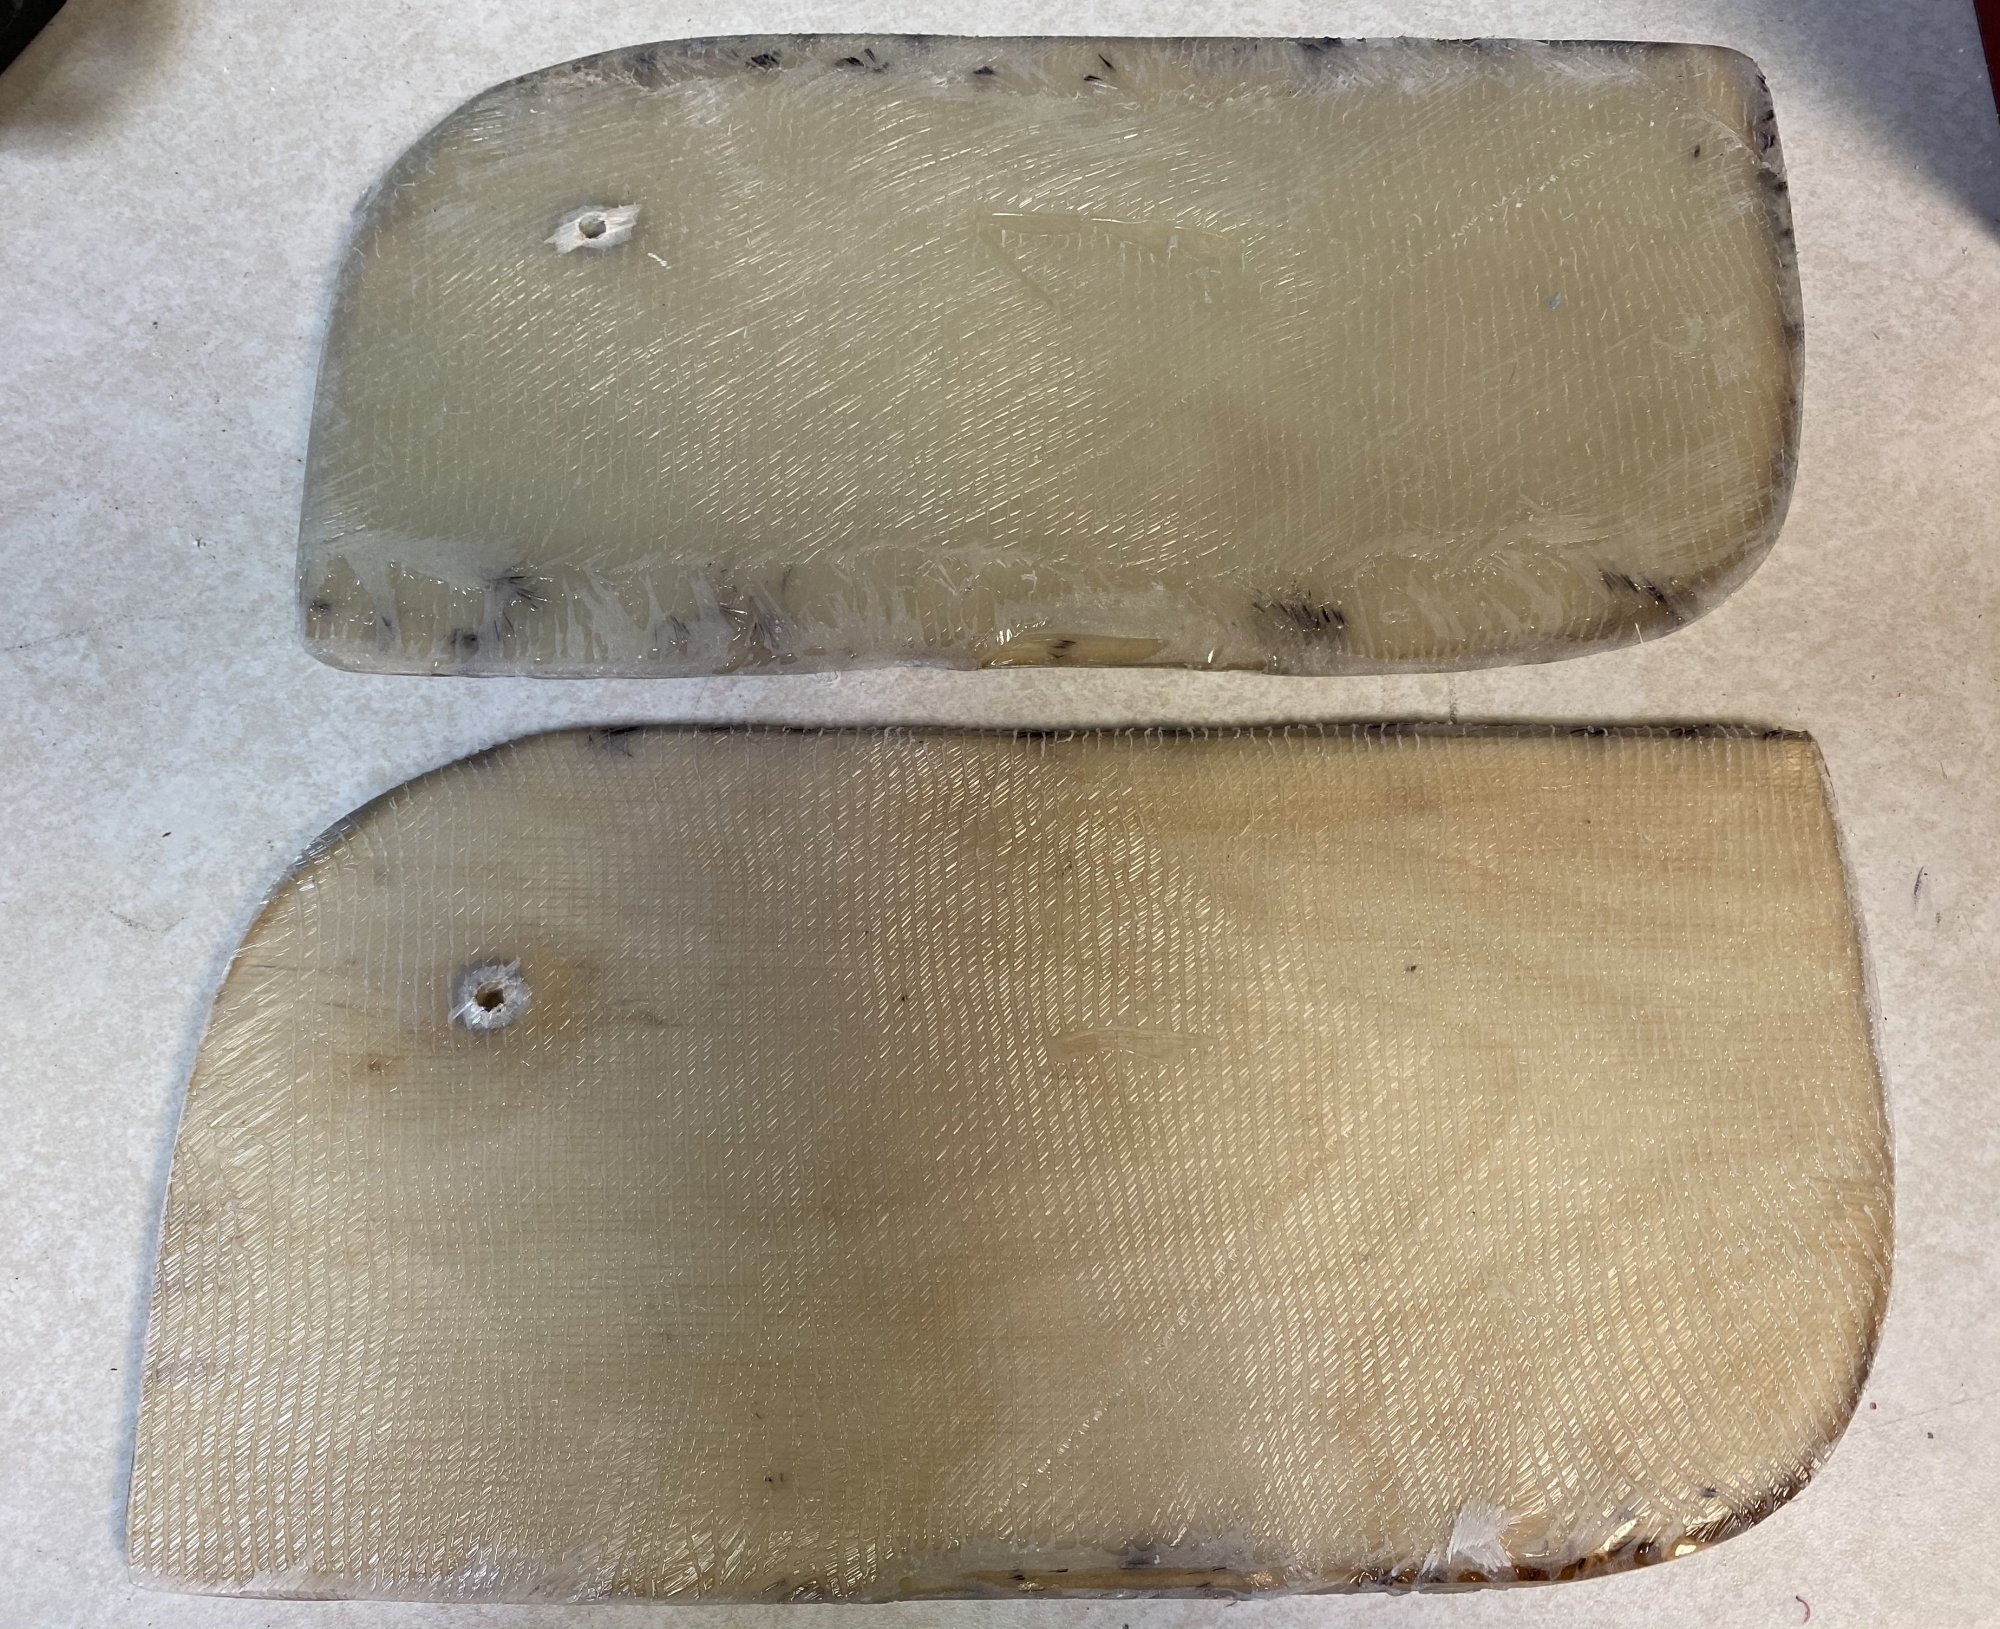
The top board is 1/8” plywood with 3 layers of 17 oz biaxial cloth added to each side. The bottom one is two sheets of plywood laminated together with epoxy, then one sheet of fiberglass over each side. The double ply version is a little thicker, at .325” vs .305 for the singly ply. The original was .375”, so either way I have some room to play with for fairing and any adjustments. The double ply is a few ounces lighter, probably about a pound lighter for the full size board, though both versions will be a couple pounds heavier than the original plywood sheet. I clamped both pieces down to a table and used a spreader clamp to check their strength -
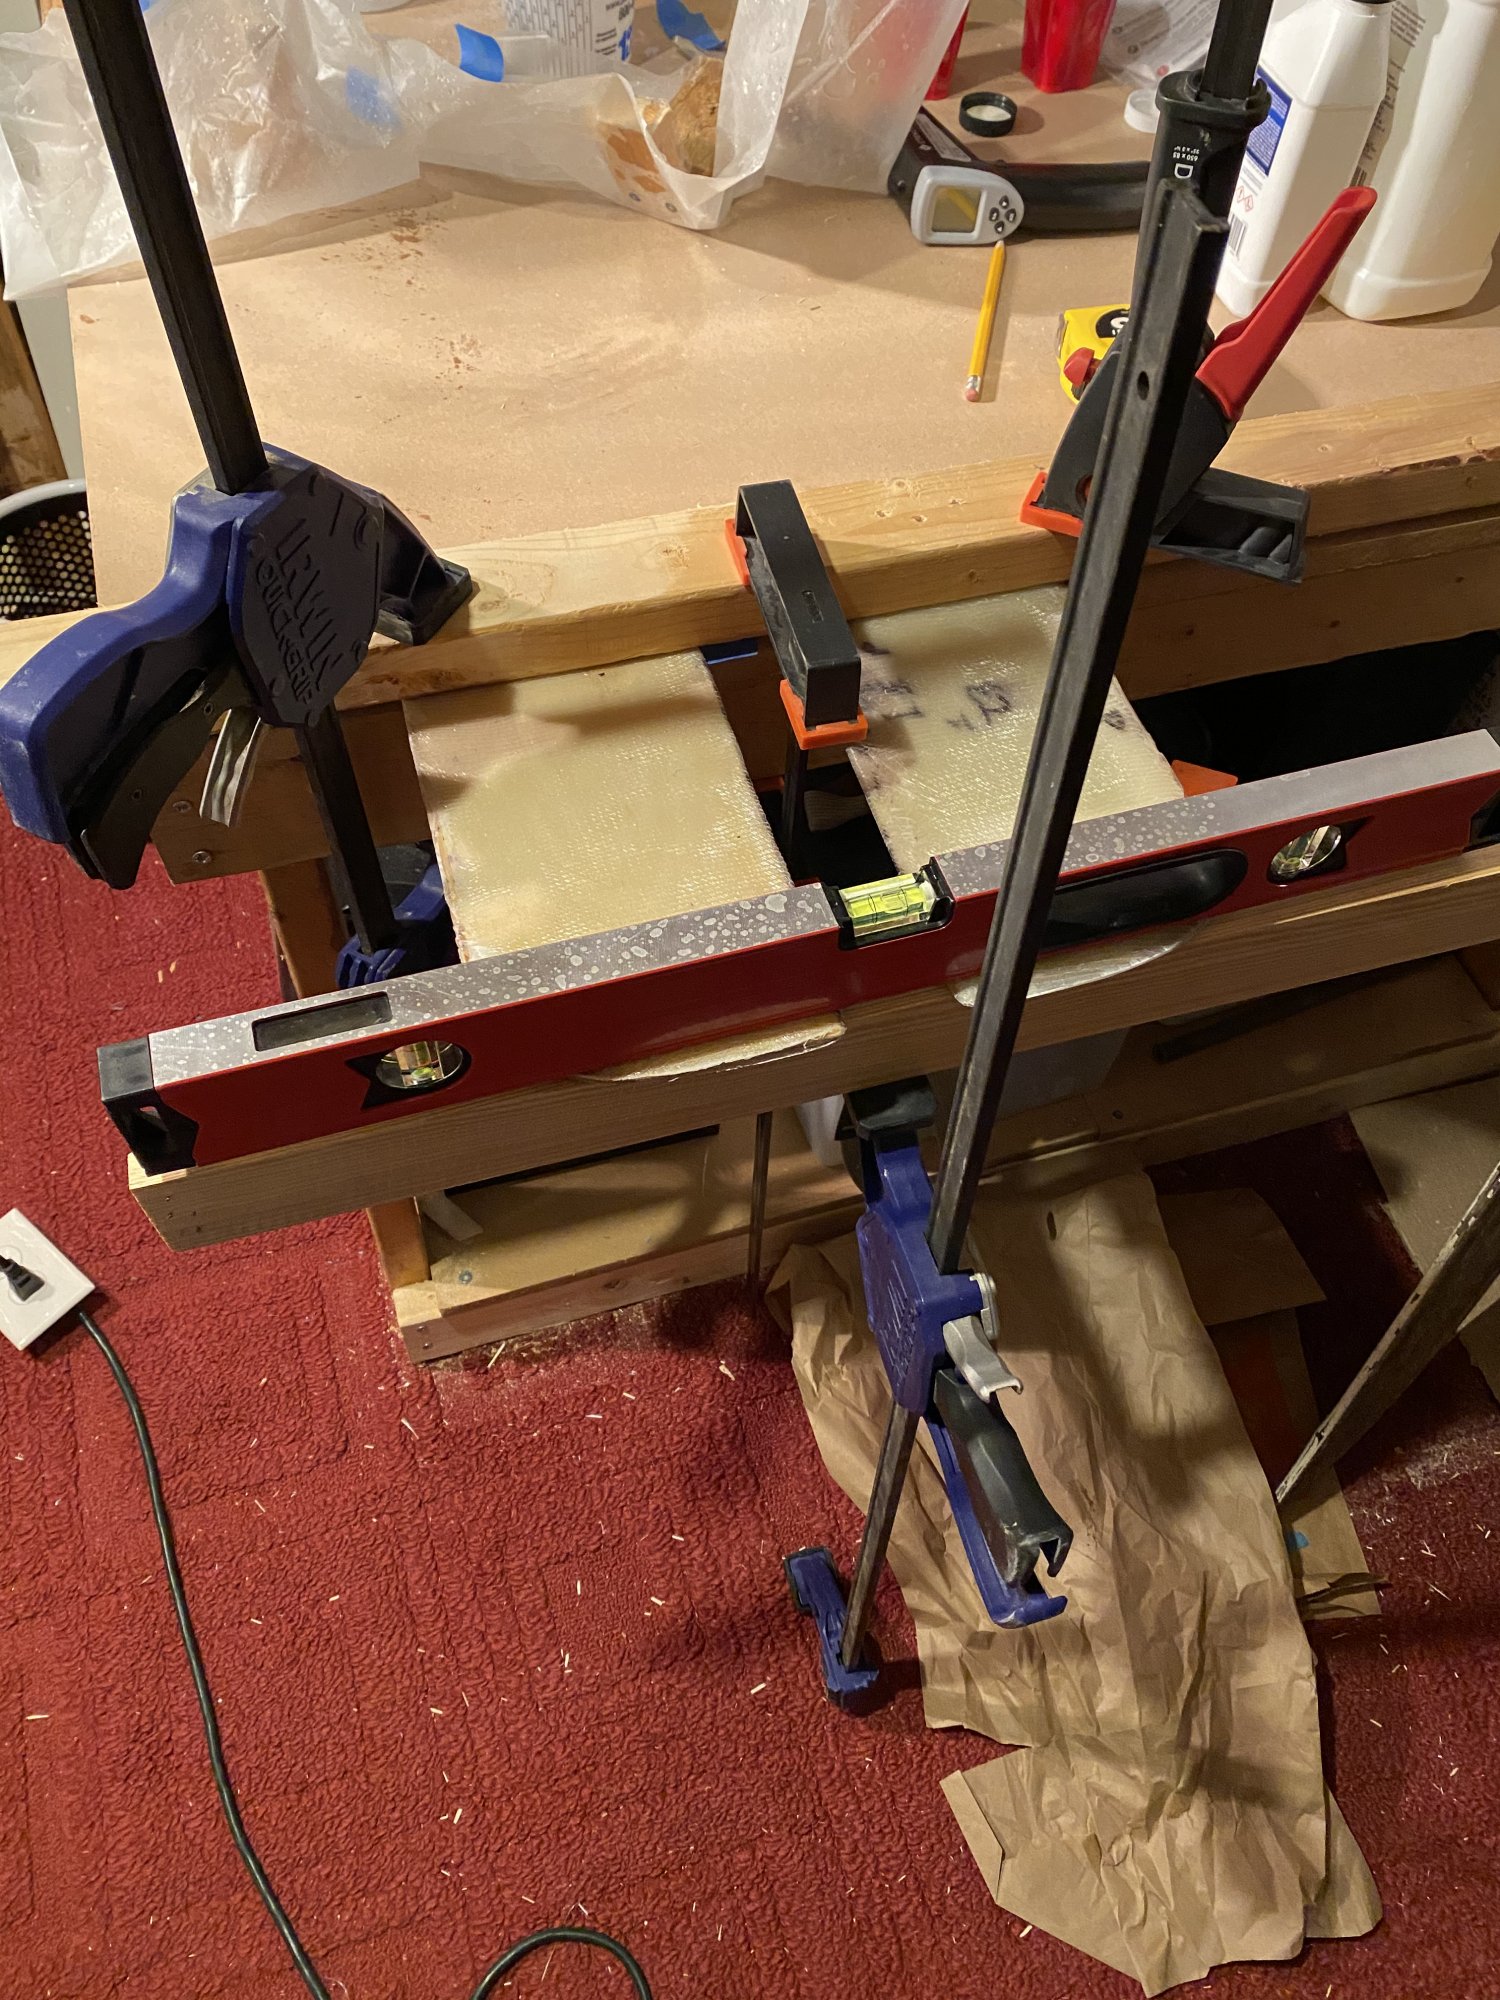
Both versions deflected about the same amount before the spreader started lifting the whole table off the floor, so no big advantage there either way.
I’m leaning toward the double ply approach for the final version. It was easier to drape the cloth over the top of the 1/4” surface than 1/8”, so I could get a good wrap around the leading edge. Laying a single layer is less work and less materials. I just need to make sure one layer is impact resistant enough and practice covering the curves and non-leading edges a little more.
The top board is 1/8” plywood with 3 layers of 17 oz biaxial cloth added to each side. The bottom one is two sheets of plywood laminated together with epoxy, then one sheet of fiberglass over each side. The double ply version is a little thicker, at .325” vs .305 for the singly ply. The original was .375”, so either way I have some room to play with for fairing and any adjustments. The double ply is a few ounces lighter, probably about a pound lighter for the full size board, though both versions will be a couple pounds heavier than the original plywood sheet. I clamped both pieces down to a table and used a spreader clamp to check their strength -
Both versions deflected about the same amount before the spreader started lifting the whole table off the floor, so no big advantage there either way.
I’m leaning toward the double ply approach for the final version. It was easier to drape the cloth over the top of the 1/4” surface than 1/8”, so I could get a good wrap around the leading edge. Laying a single layer is less work and less materials. I just need to make sure one layer is impact resistant enough and practice covering the curves and non-leading edges a little more.
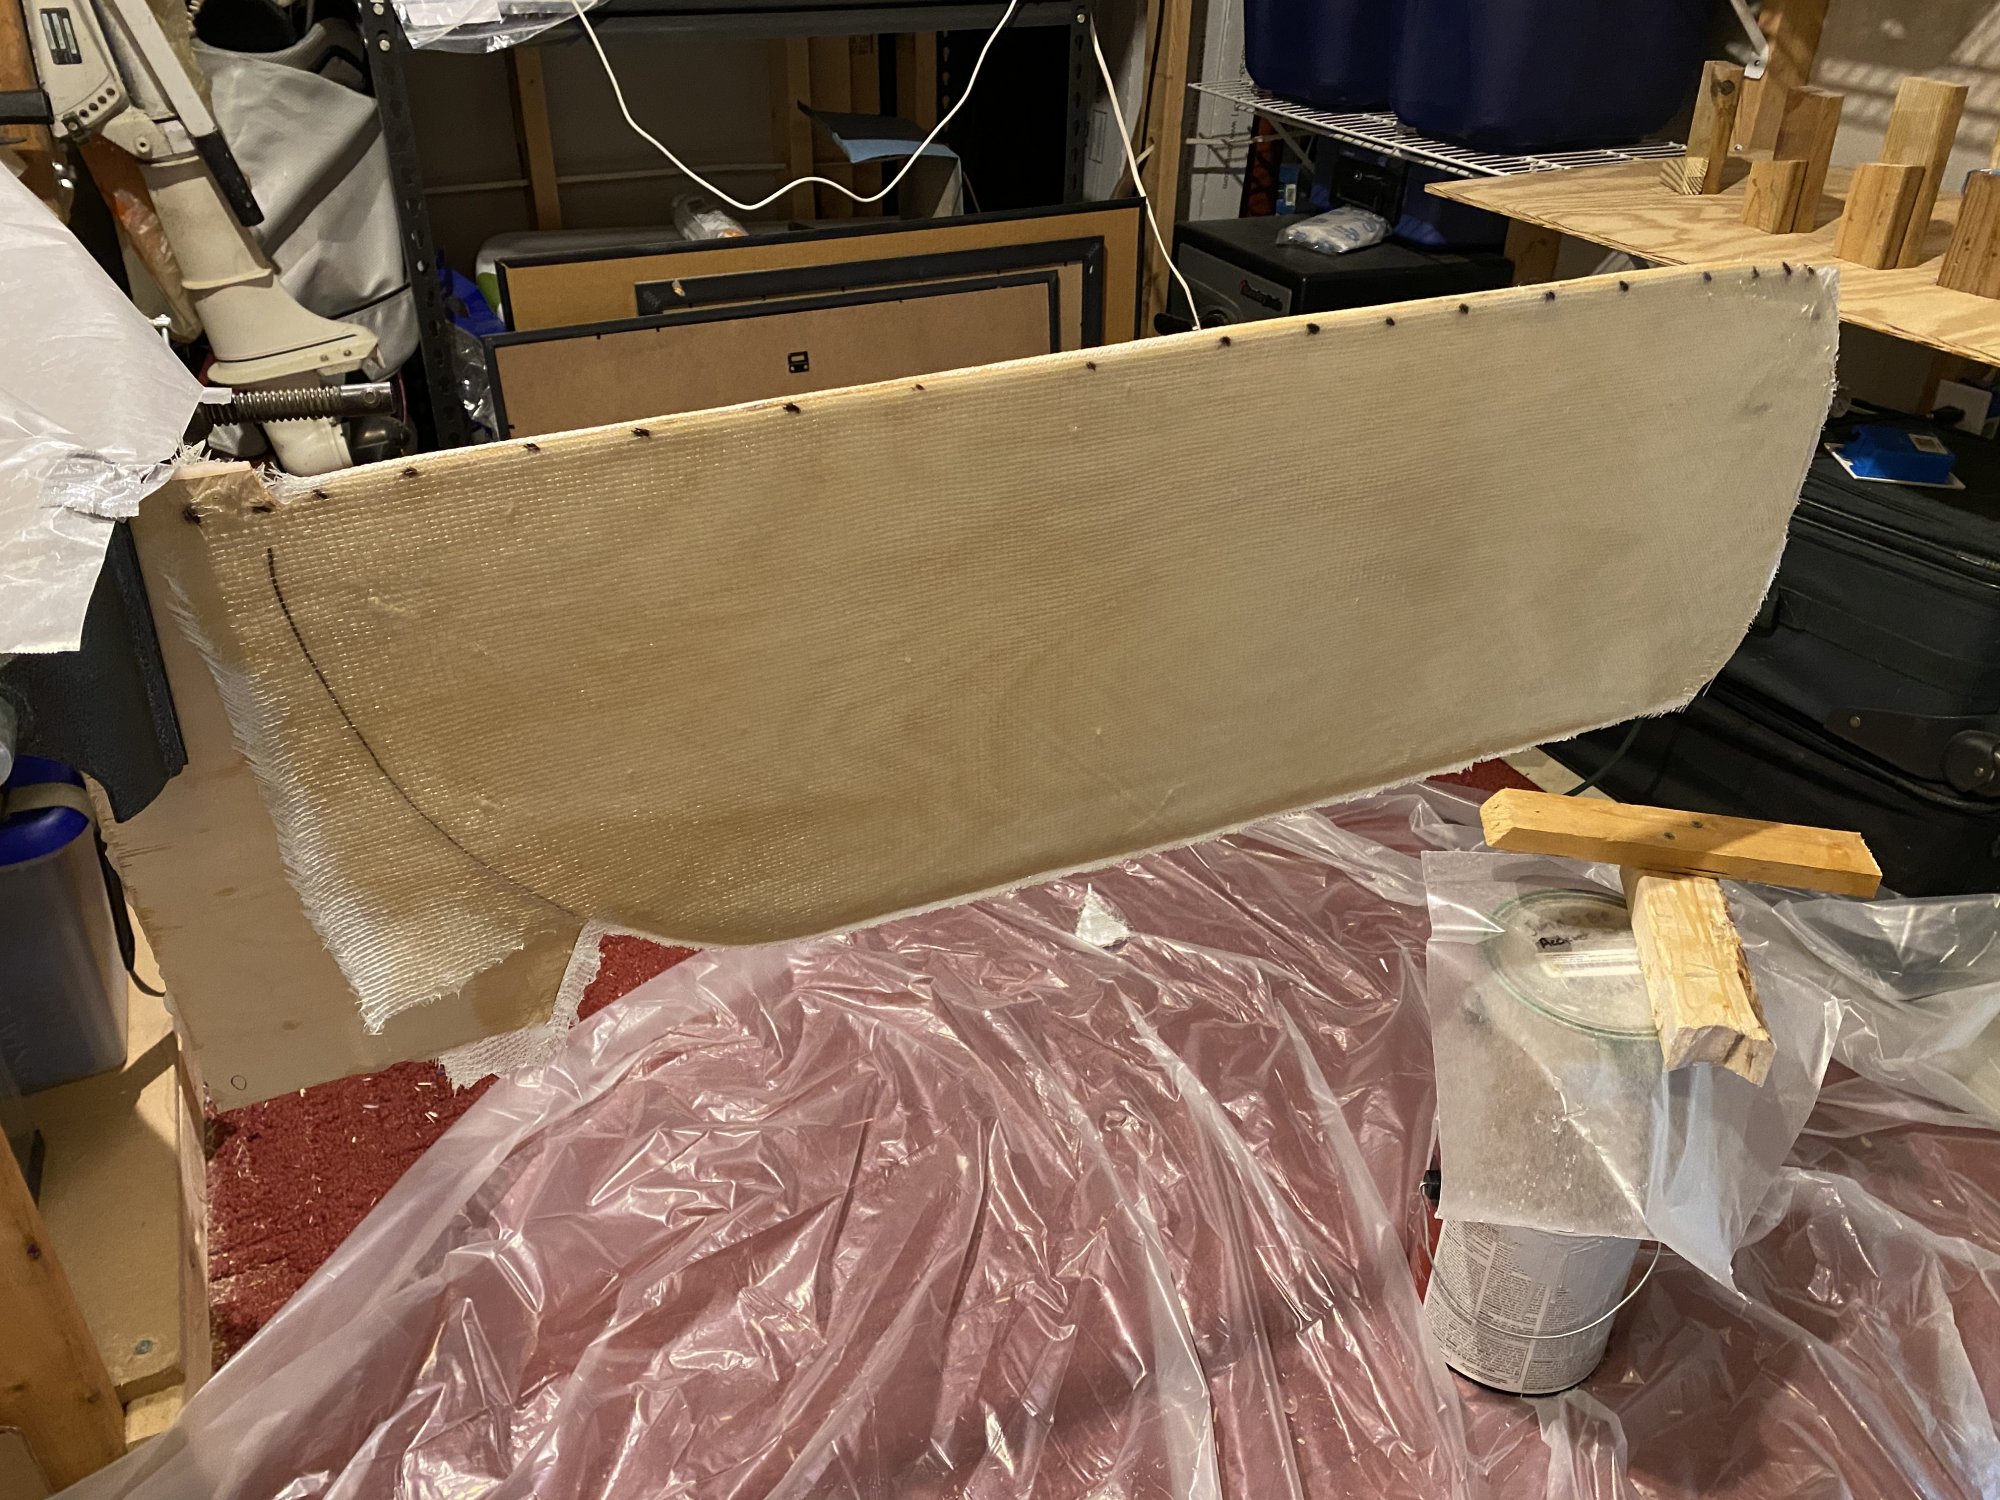
I’ve had a pretty productive weekend. I finished “impact testing” my prototype mini-centerboard (whacking the leading edge with a hammer a few times and seeing the glass still mostly intact). So I moved on to epoxying two sheets of plywood together, cutting out the centerboard shape, and draping the fiberglass over it -
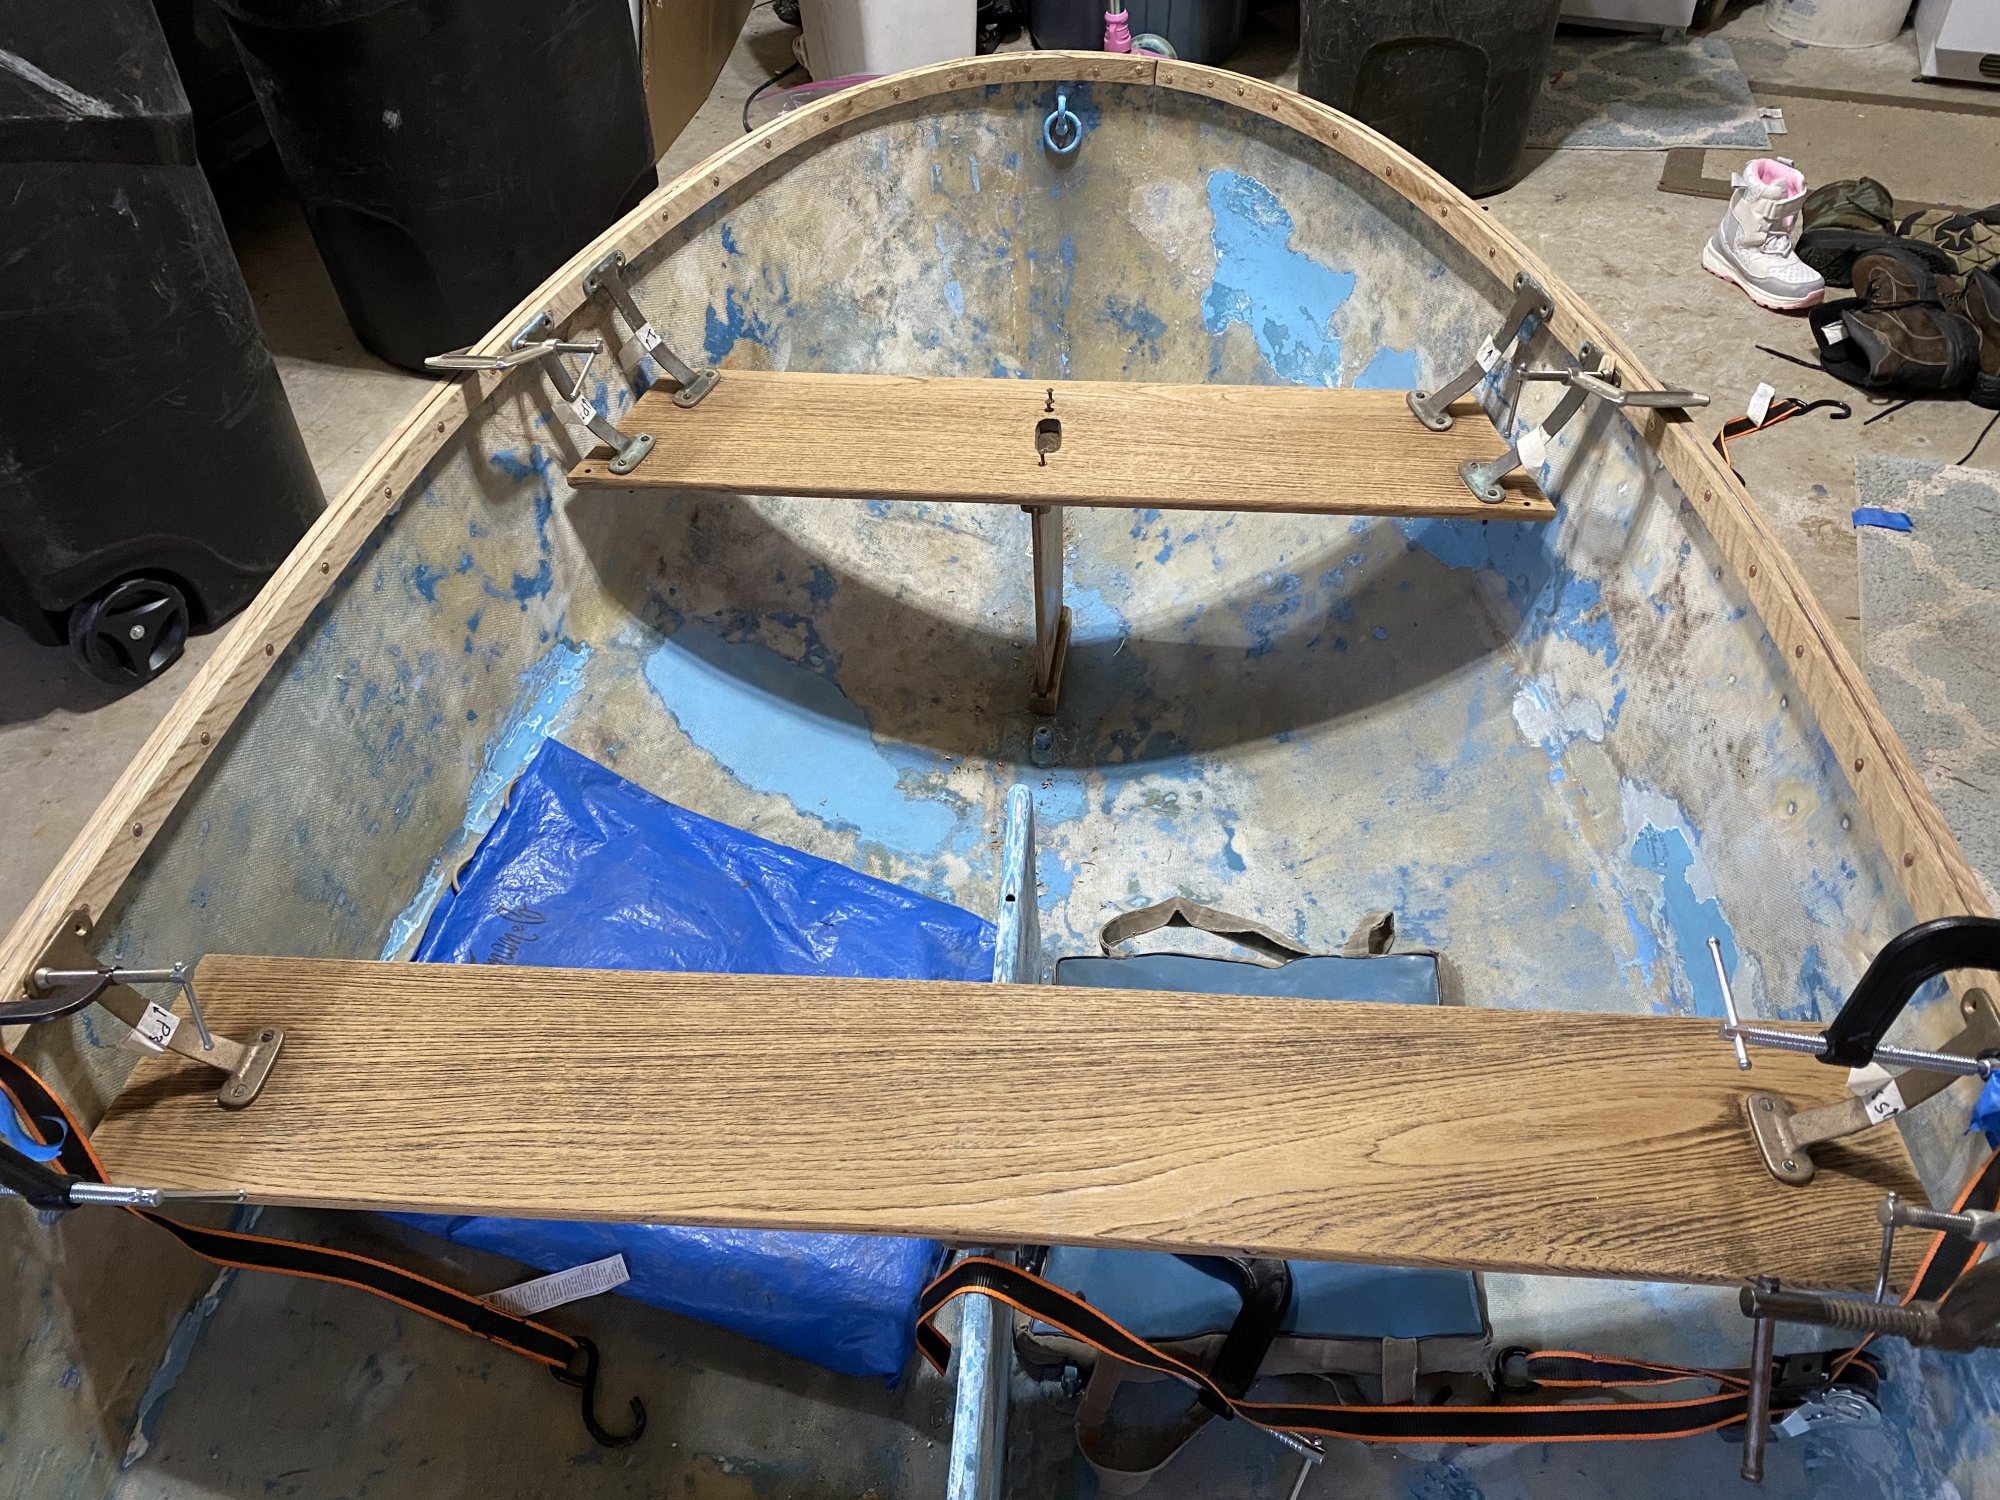
I’ve also advanced the gunwale bending. I finished making the jig for the port side and advanced to full 8’ segments, to get around the bow and back past the oar locks -
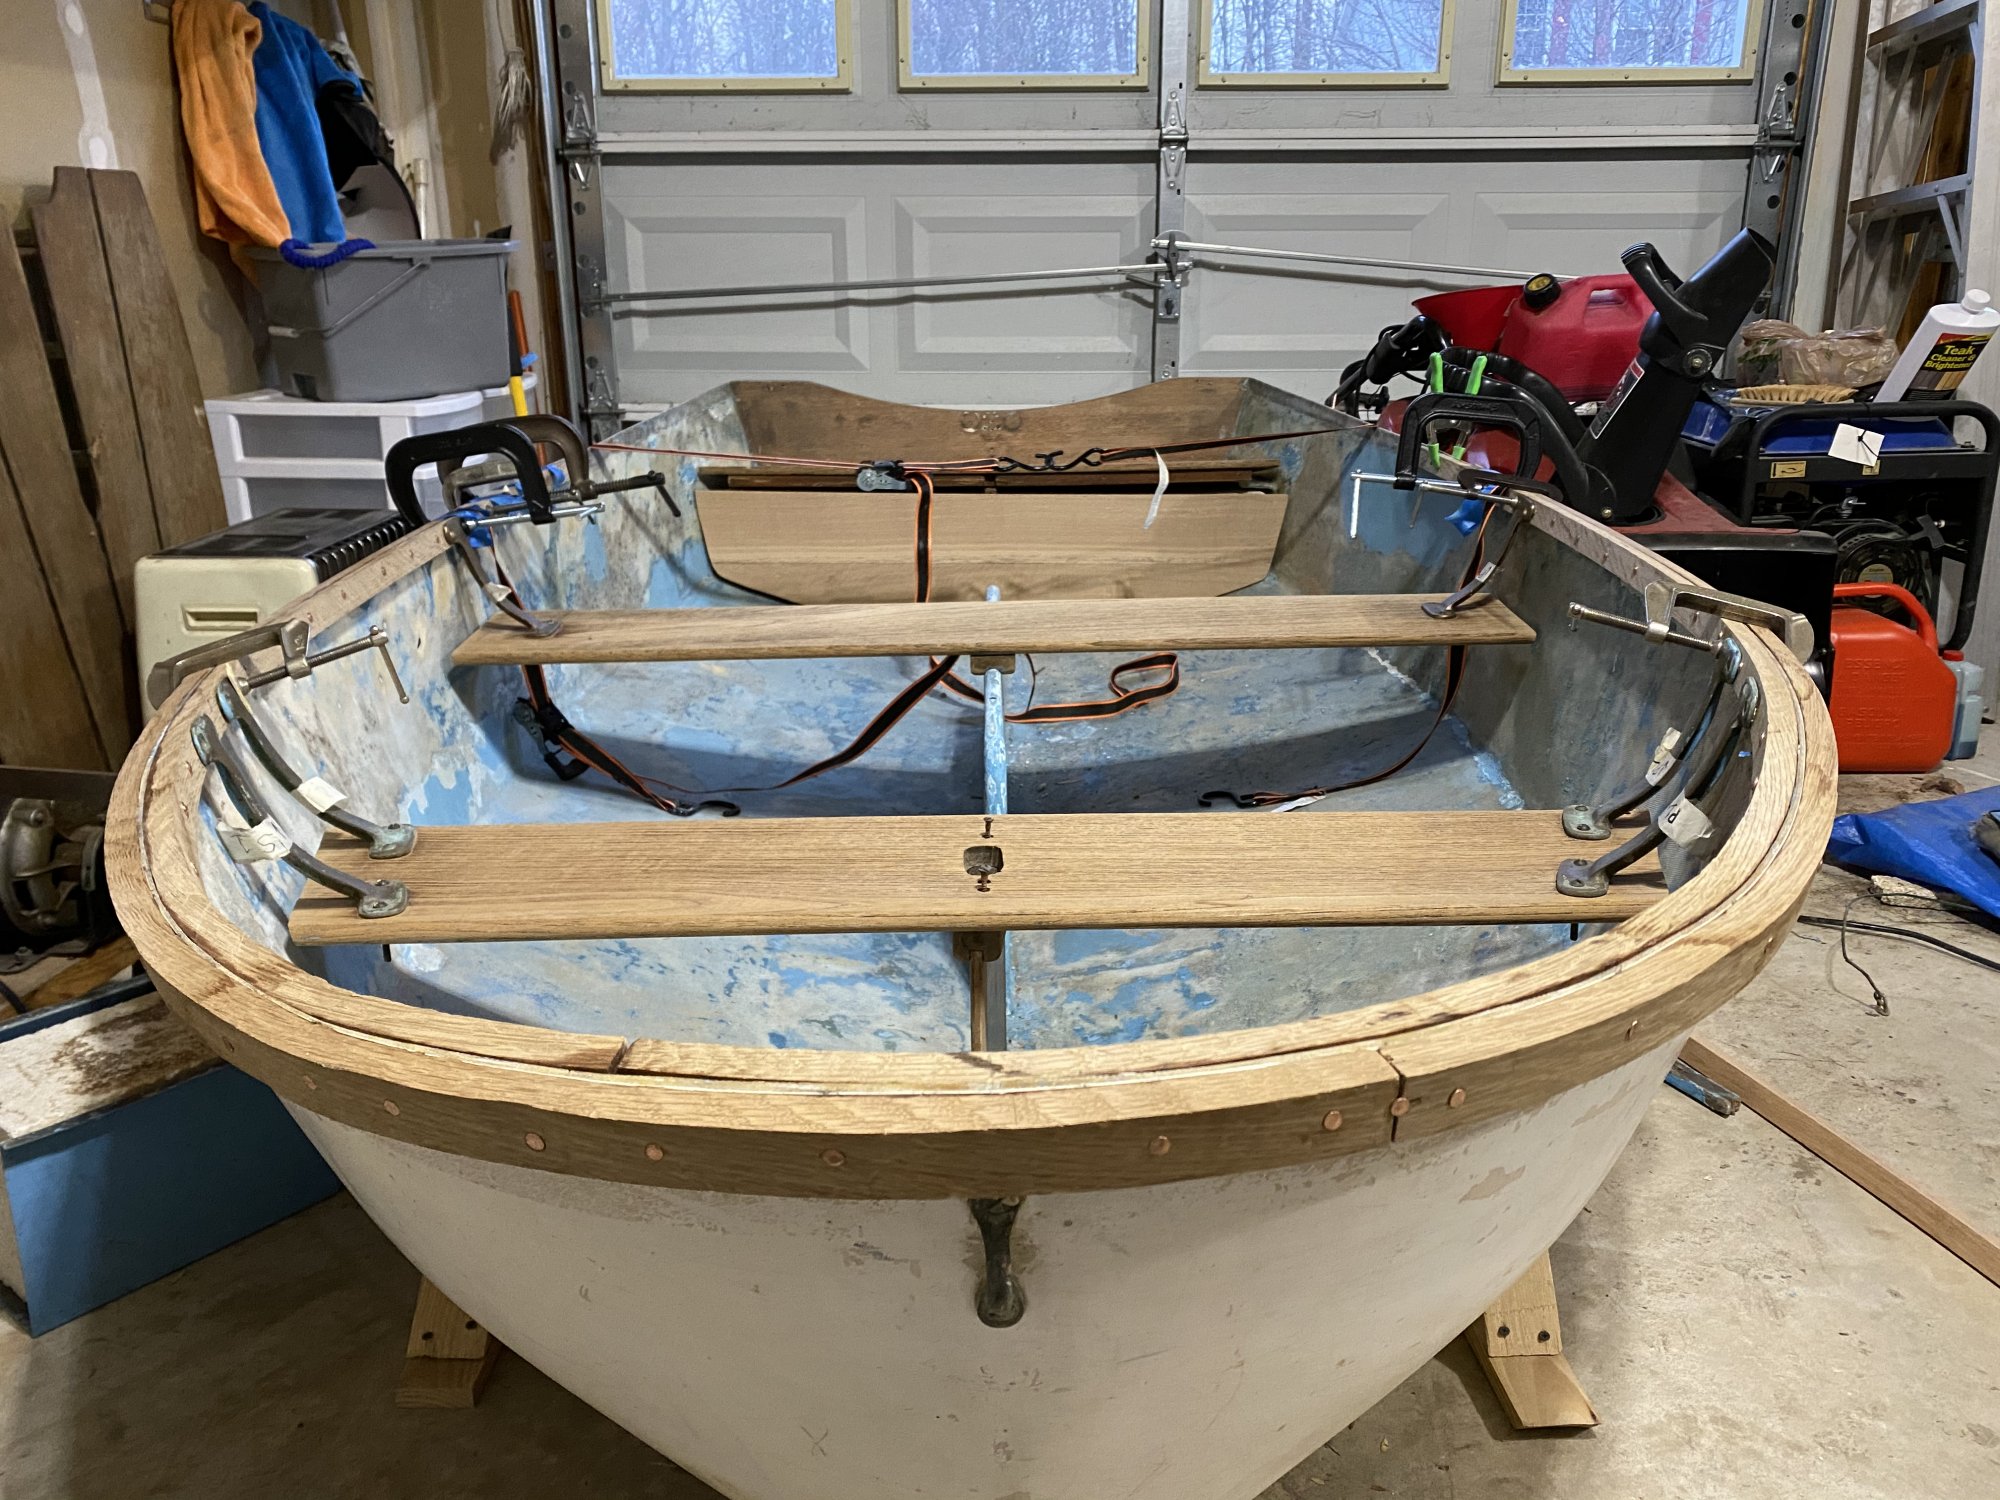
After a last successful test with red oak I moved on to a first length of white oak. That worked well, and I now have one “complete” gunwale segment -
The inner rail is the final one; the outer one is the last test piece, to be replace by a second rail that I steamed this evening and is “relaxing” now.
It is pretty rewarding to see it all fit together. Two more steam bends for the port side and the hard parts of the building will be done.
I’ve also advanced the gunwale bending. I finished making the jig for the port side and advanced to full 8’ segments, to get around the bow and back past the oar locks -
After a last successful test with red oak I moved on to a first length of white oak. That worked well, and I now have one “complete” gunwale segment -
The inner rail is the final one; the outer one is the last test piece, to be replace by a second rail that I steamed this evening and is “relaxing” now.
It is pretty rewarding to see it all fit together
. Two more steam bends for the port side and the hard parts of the building will be done.Thats 4 well bent gunwale segments.
At the bow the segments are joined with butt joints, staggered so one joint is slightly to port and the other slightly to starboard. The segments aren’t quite long enough to make it all the way back so I cut scarf joints, in front and behind where the oar lock will be.
The end is in sight for the gunwale project now. Just need to put wood preserver on the inside edges, epoxy the scarf joints, rivet the rails to the hull (which will be a project I’m sure), round the edges, and varnish. So, not exactly done yet, but getting there.
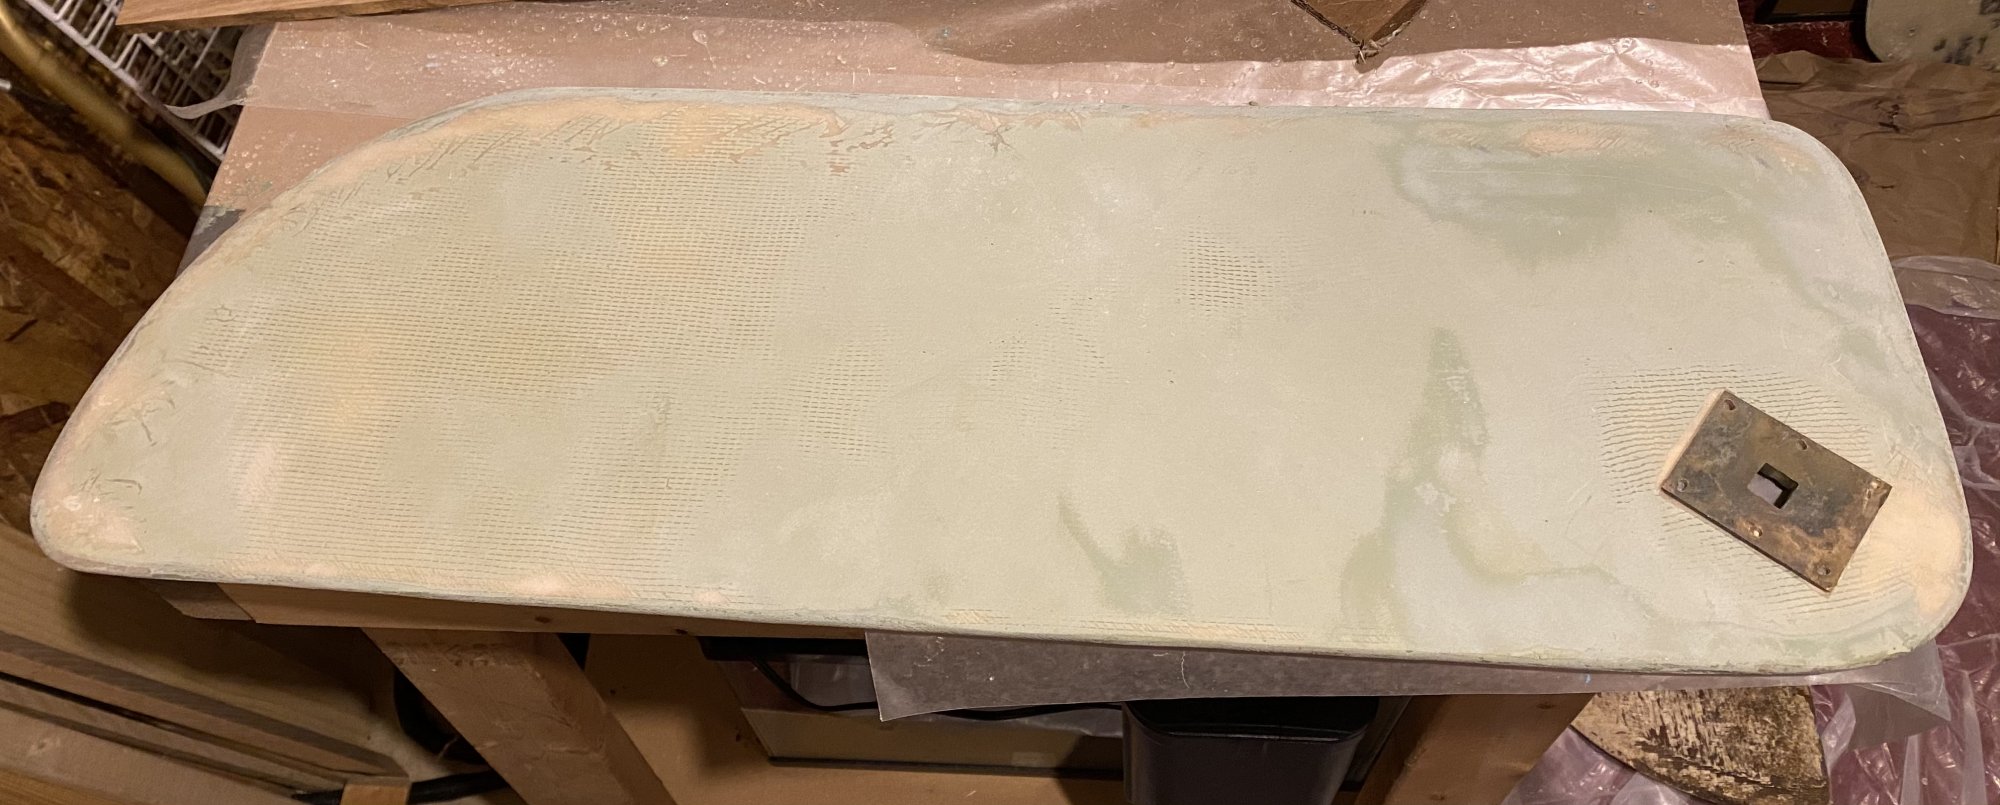
I’ve made a little progress on other projects too. I’ve finished laminating the new centerboard and started fairing it -
And I’ve taken a first try at replacing one of the flotation box enclosures that is breaking. I used the foam block with wax paper as a mold and laid a layer of cloth over the top. I’ll see how that works out after it’s cured.
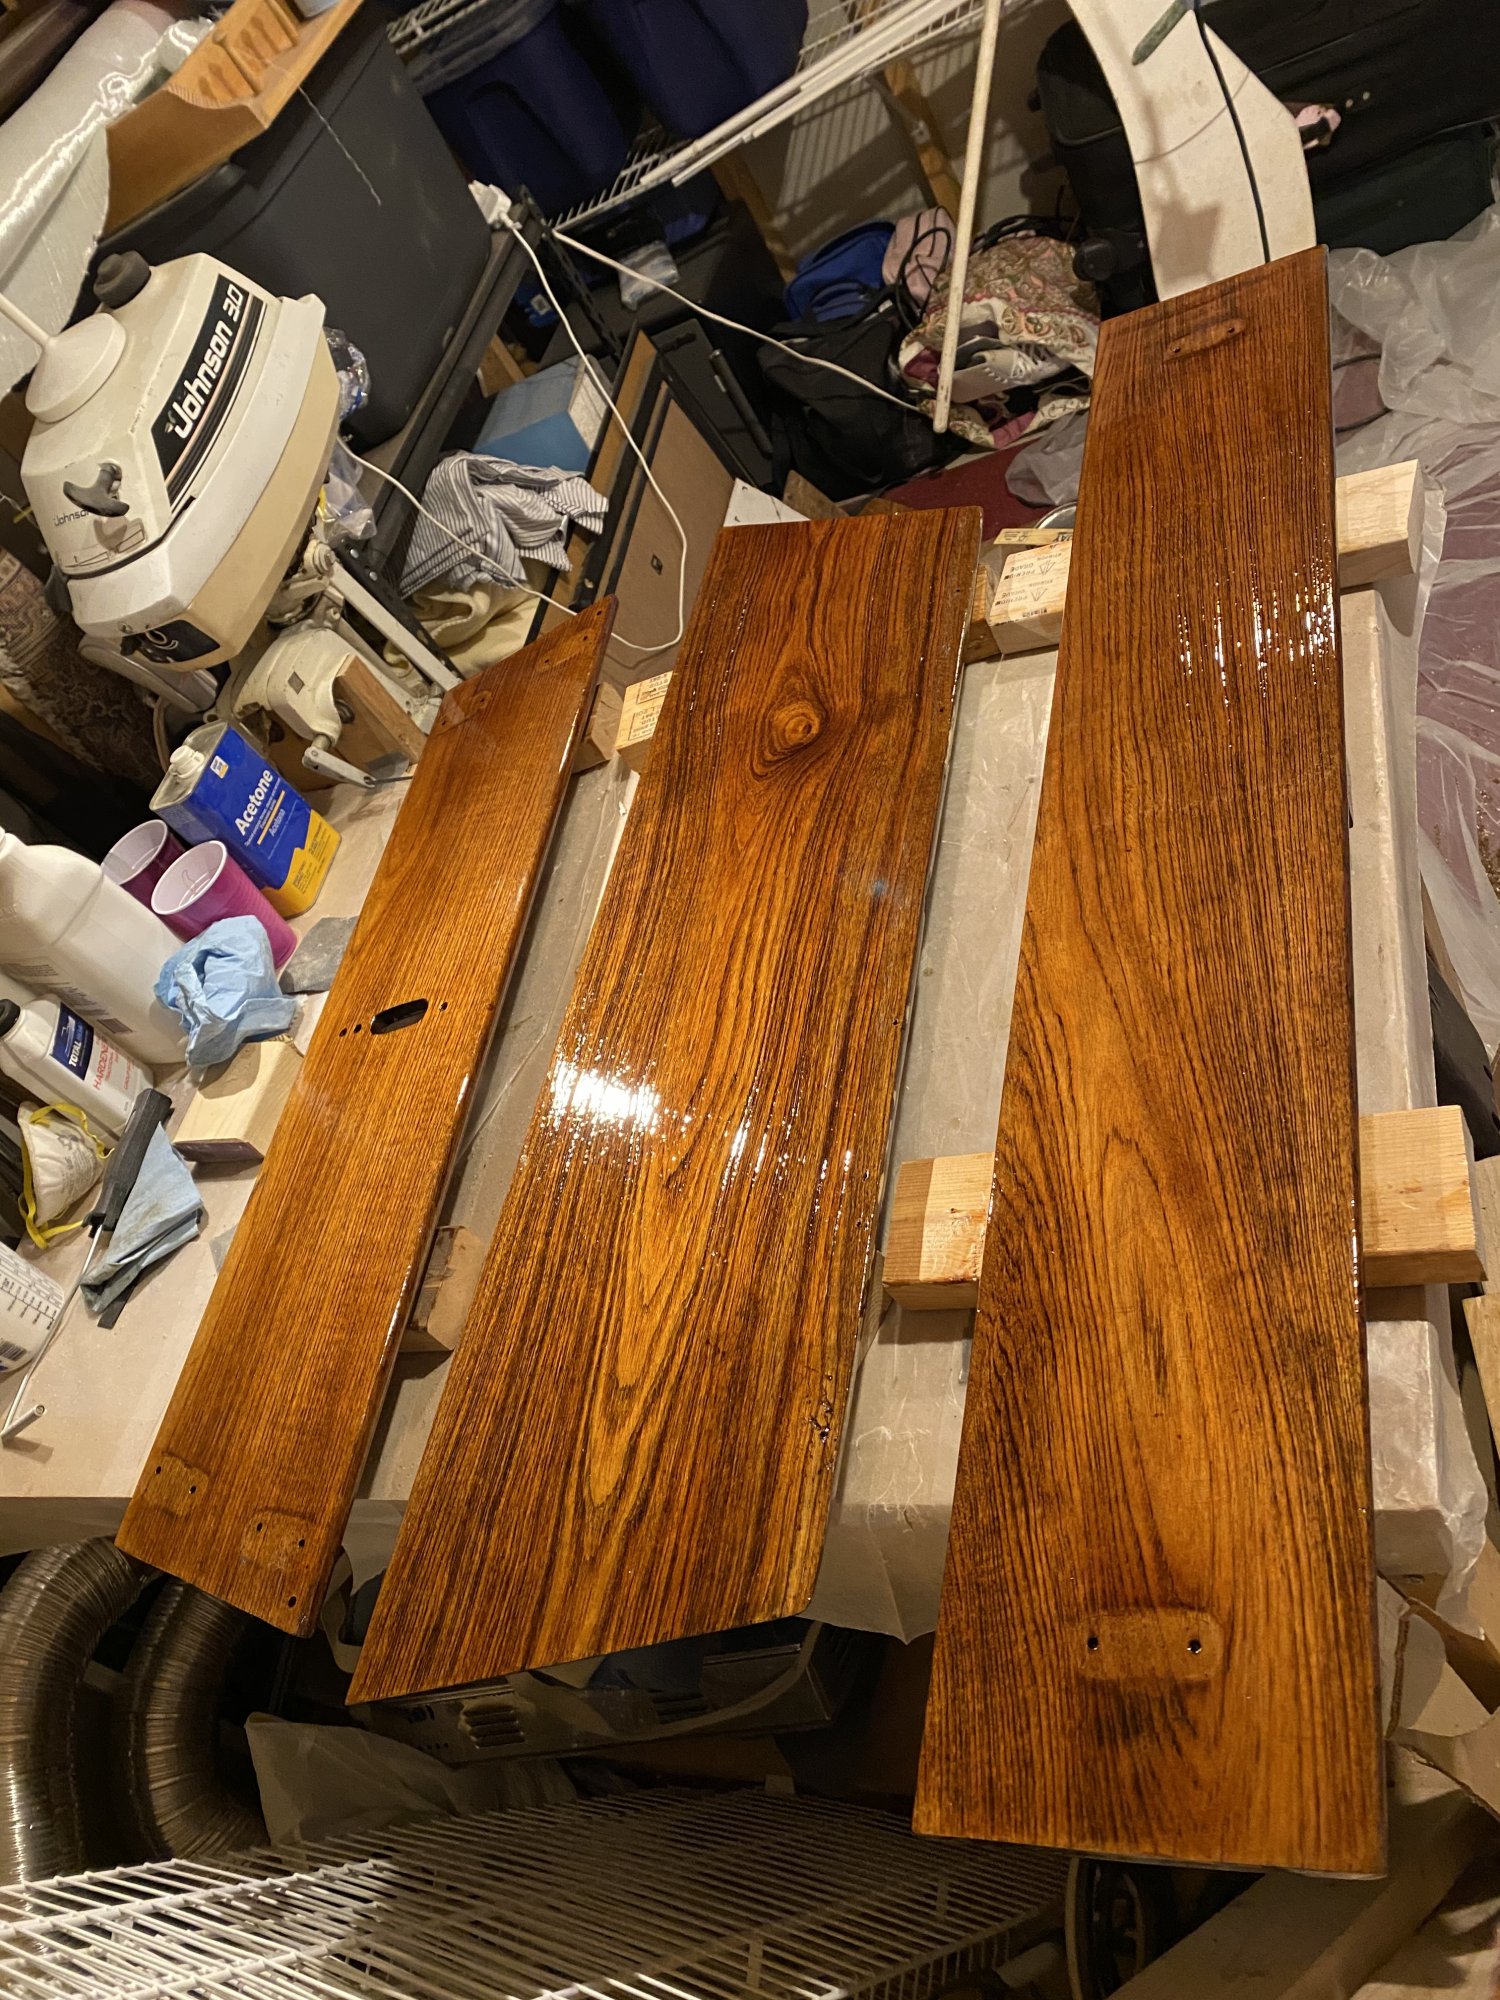
A little bit of progress this week. I used white oak leftovers from the gunwales, joined it with some biscuits and epoxy, and rebuilt the previously water stained plywood trim board for under the aft seat.
Once that and the gunwales are varnished they should match nicely.
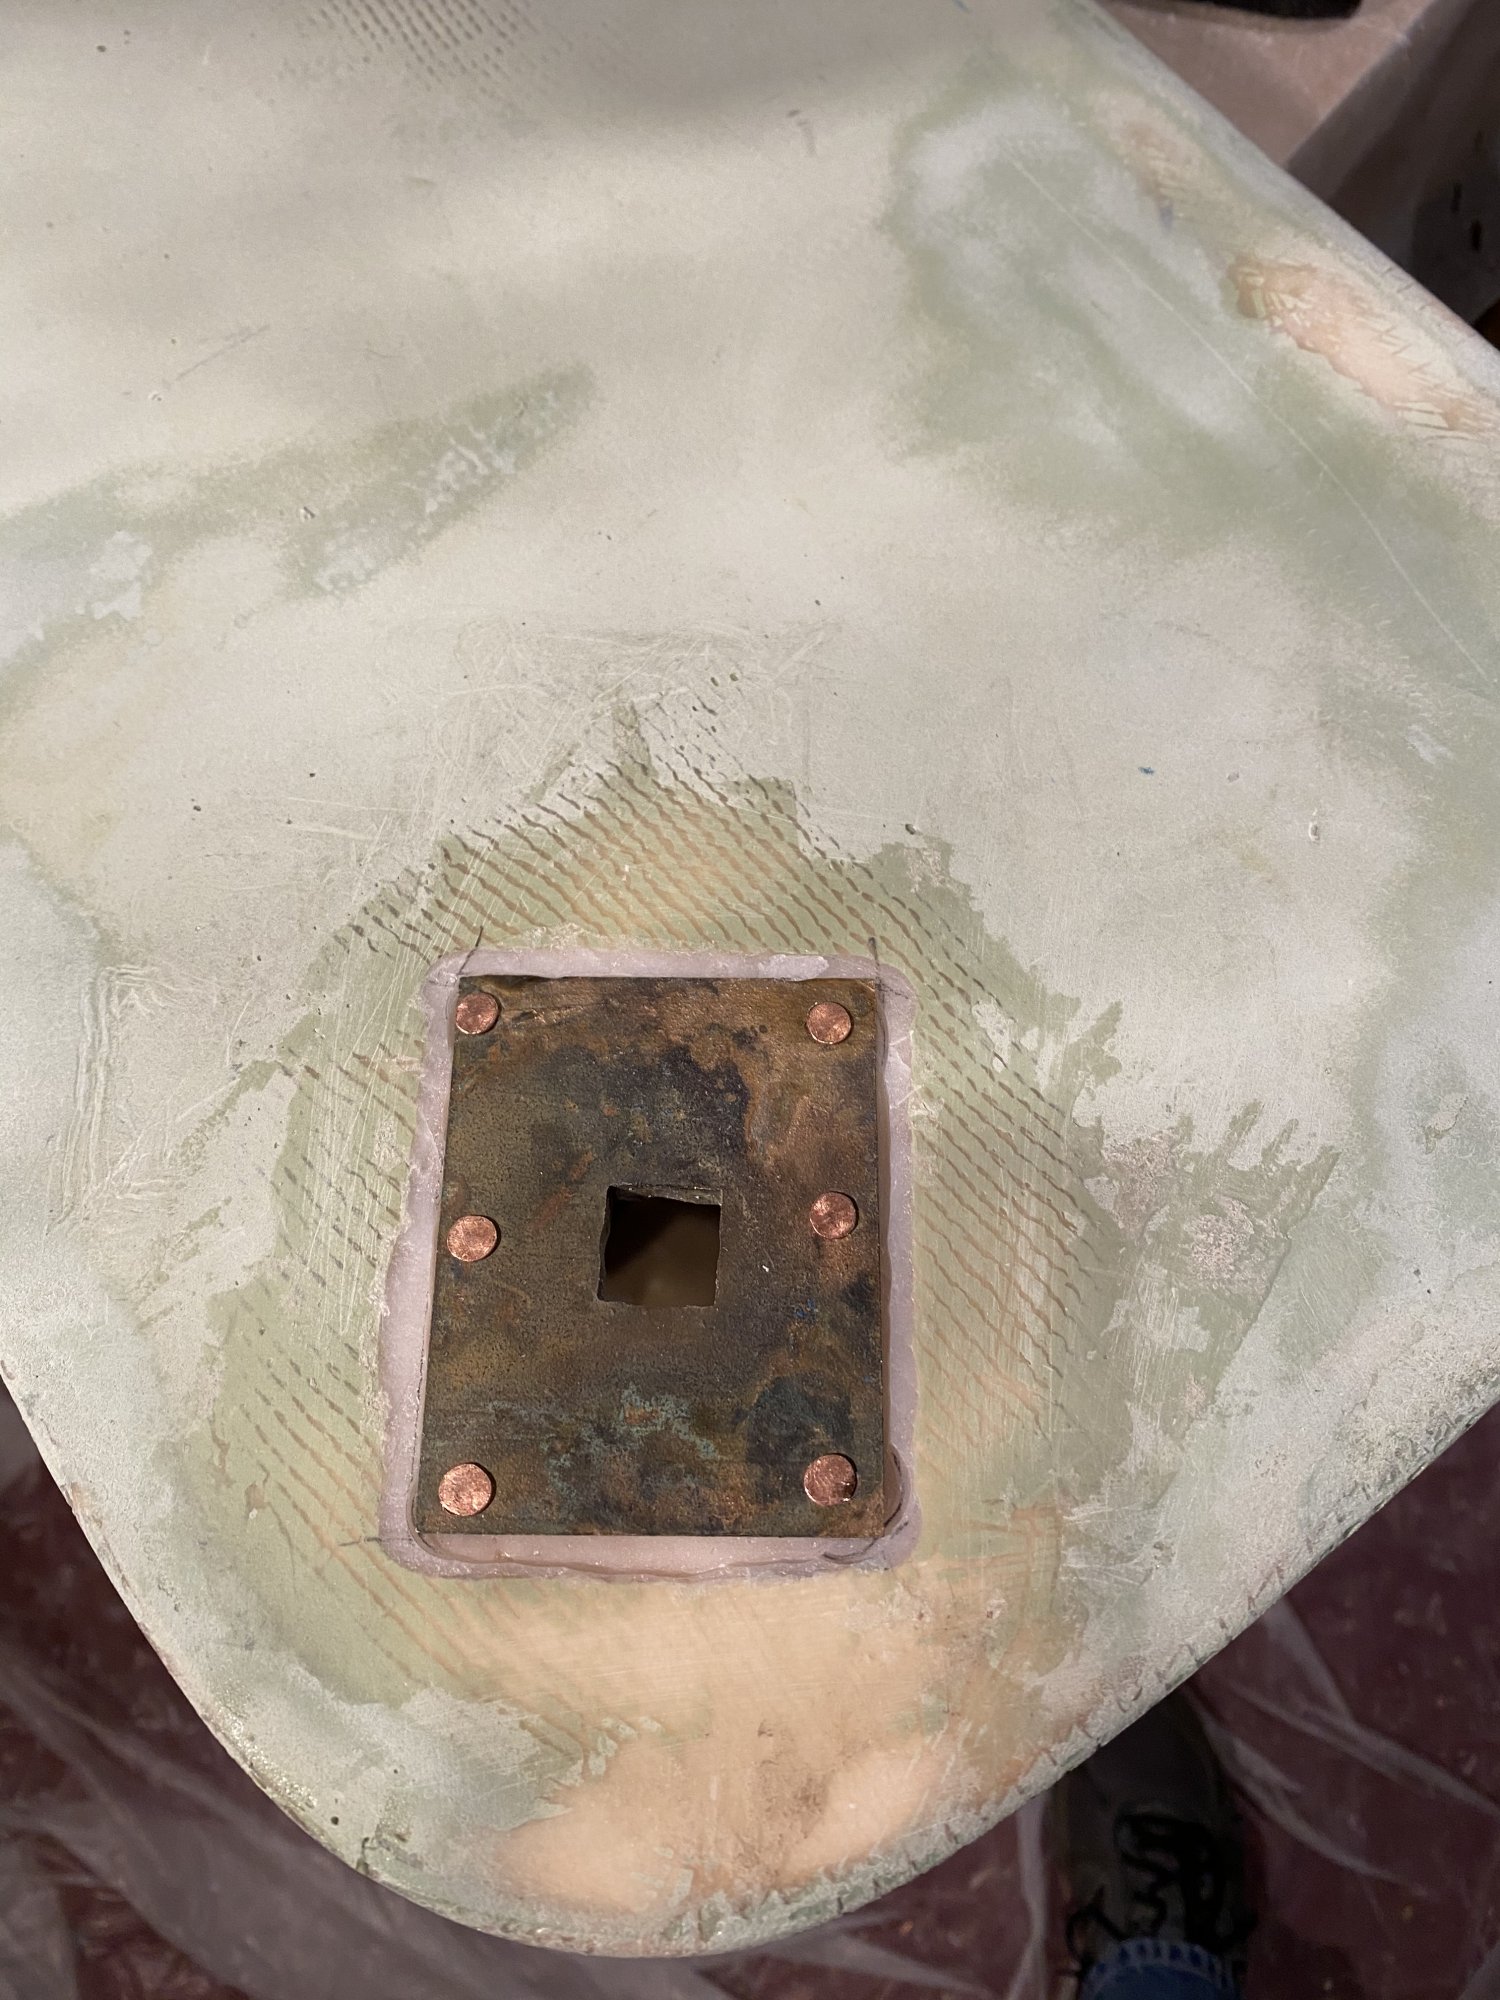
I lifted the bow enough to test fit the new centerboard. The fairing compound had apparently built up a little too much and it was too snug in the trunk, so that took a little “oh glorious sanding” to fix. The bronze plate for the lever also protruded too far, so I had to route out a recess for it to fit in. It seems like I’m able to keep the recess minor enough that there’s still epoxy over the plywood core, but once I see how proud the rivets sit I’ll know if that’s still the case.
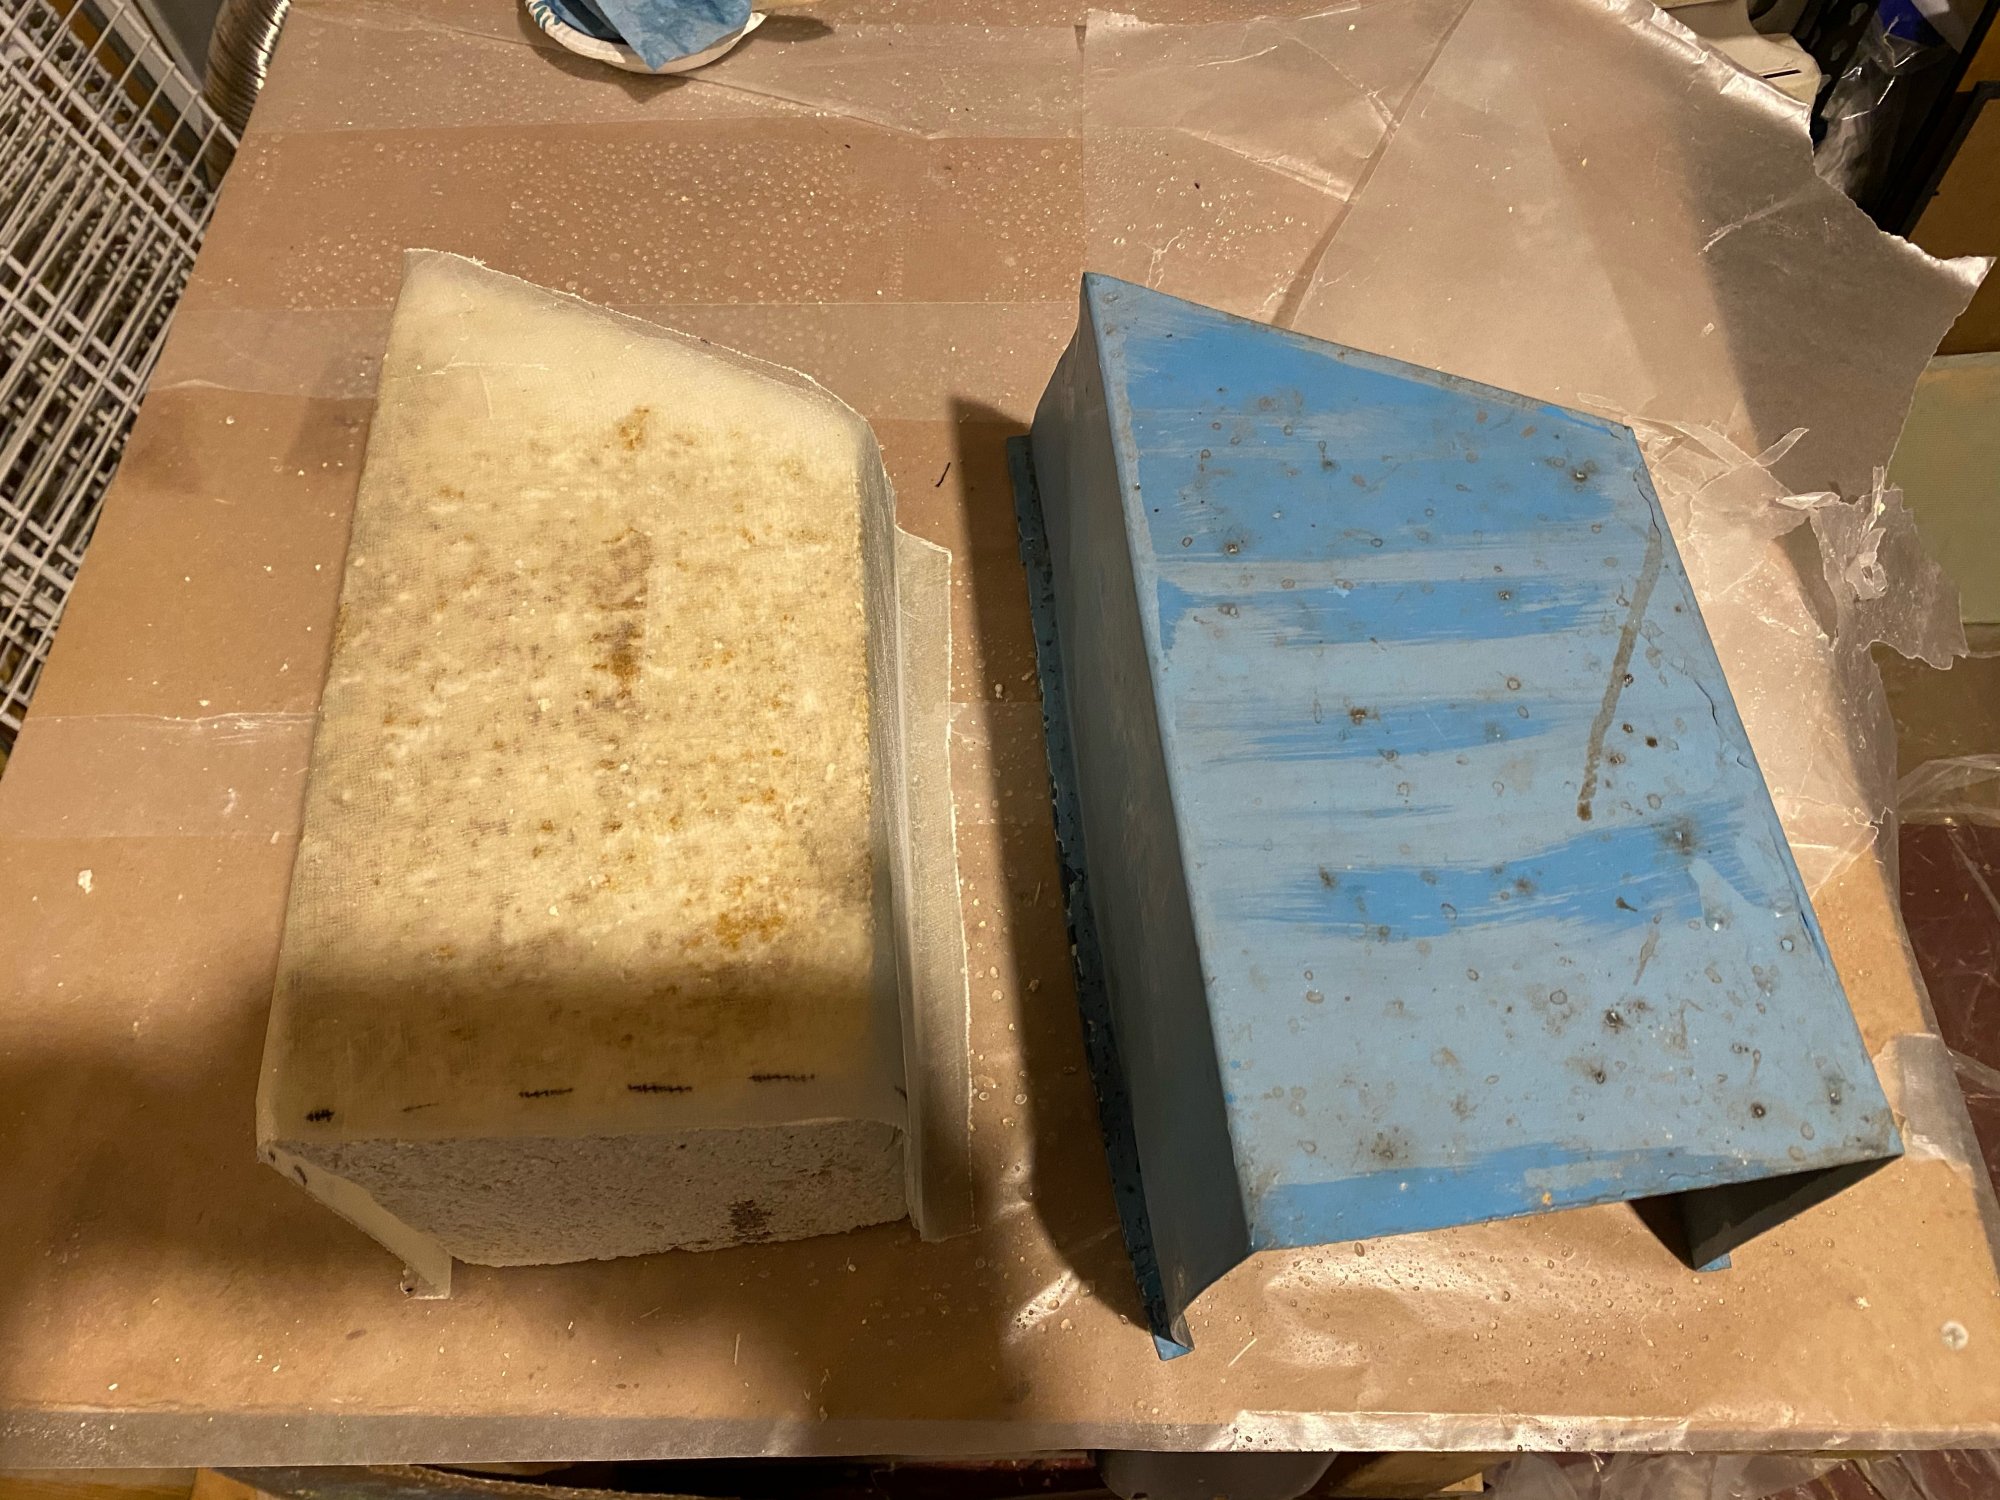
I also added a second layer of cloth to the new flotation box housing, feeling that one layer of 6 oz cloth was a little too flimsy. Old box on the right, and new one on the left ready for paint (which should hide the discoloration in the foam nicely) -
Once that and the gunwales are varnished they should match nicely.
I lifted the bow enough to test fit the new centerboard. The fairing compound had apparently built up a little too much and it was too snug in the trunk, so that took a little “oh glorious sanding” to fix. The bronze plate for the lever also protruded too far, so I had to route out a recess for it to fit in. It seems like I’m able to keep the recess minor enough that there’s still epoxy over the plywood core, but once I see how proud the rivets sit I’ll know if that’s still the case.
I also added a second layer of cloth to the new flotation box housing, feeling that one layer of 6 oz cloth was a little too flimsy. Old box on the right, and new one on the left ready for paint (which should hide the discoloration in the foam nicely) -
That is really nice work. This will be a very cool dinghy when you are finished.
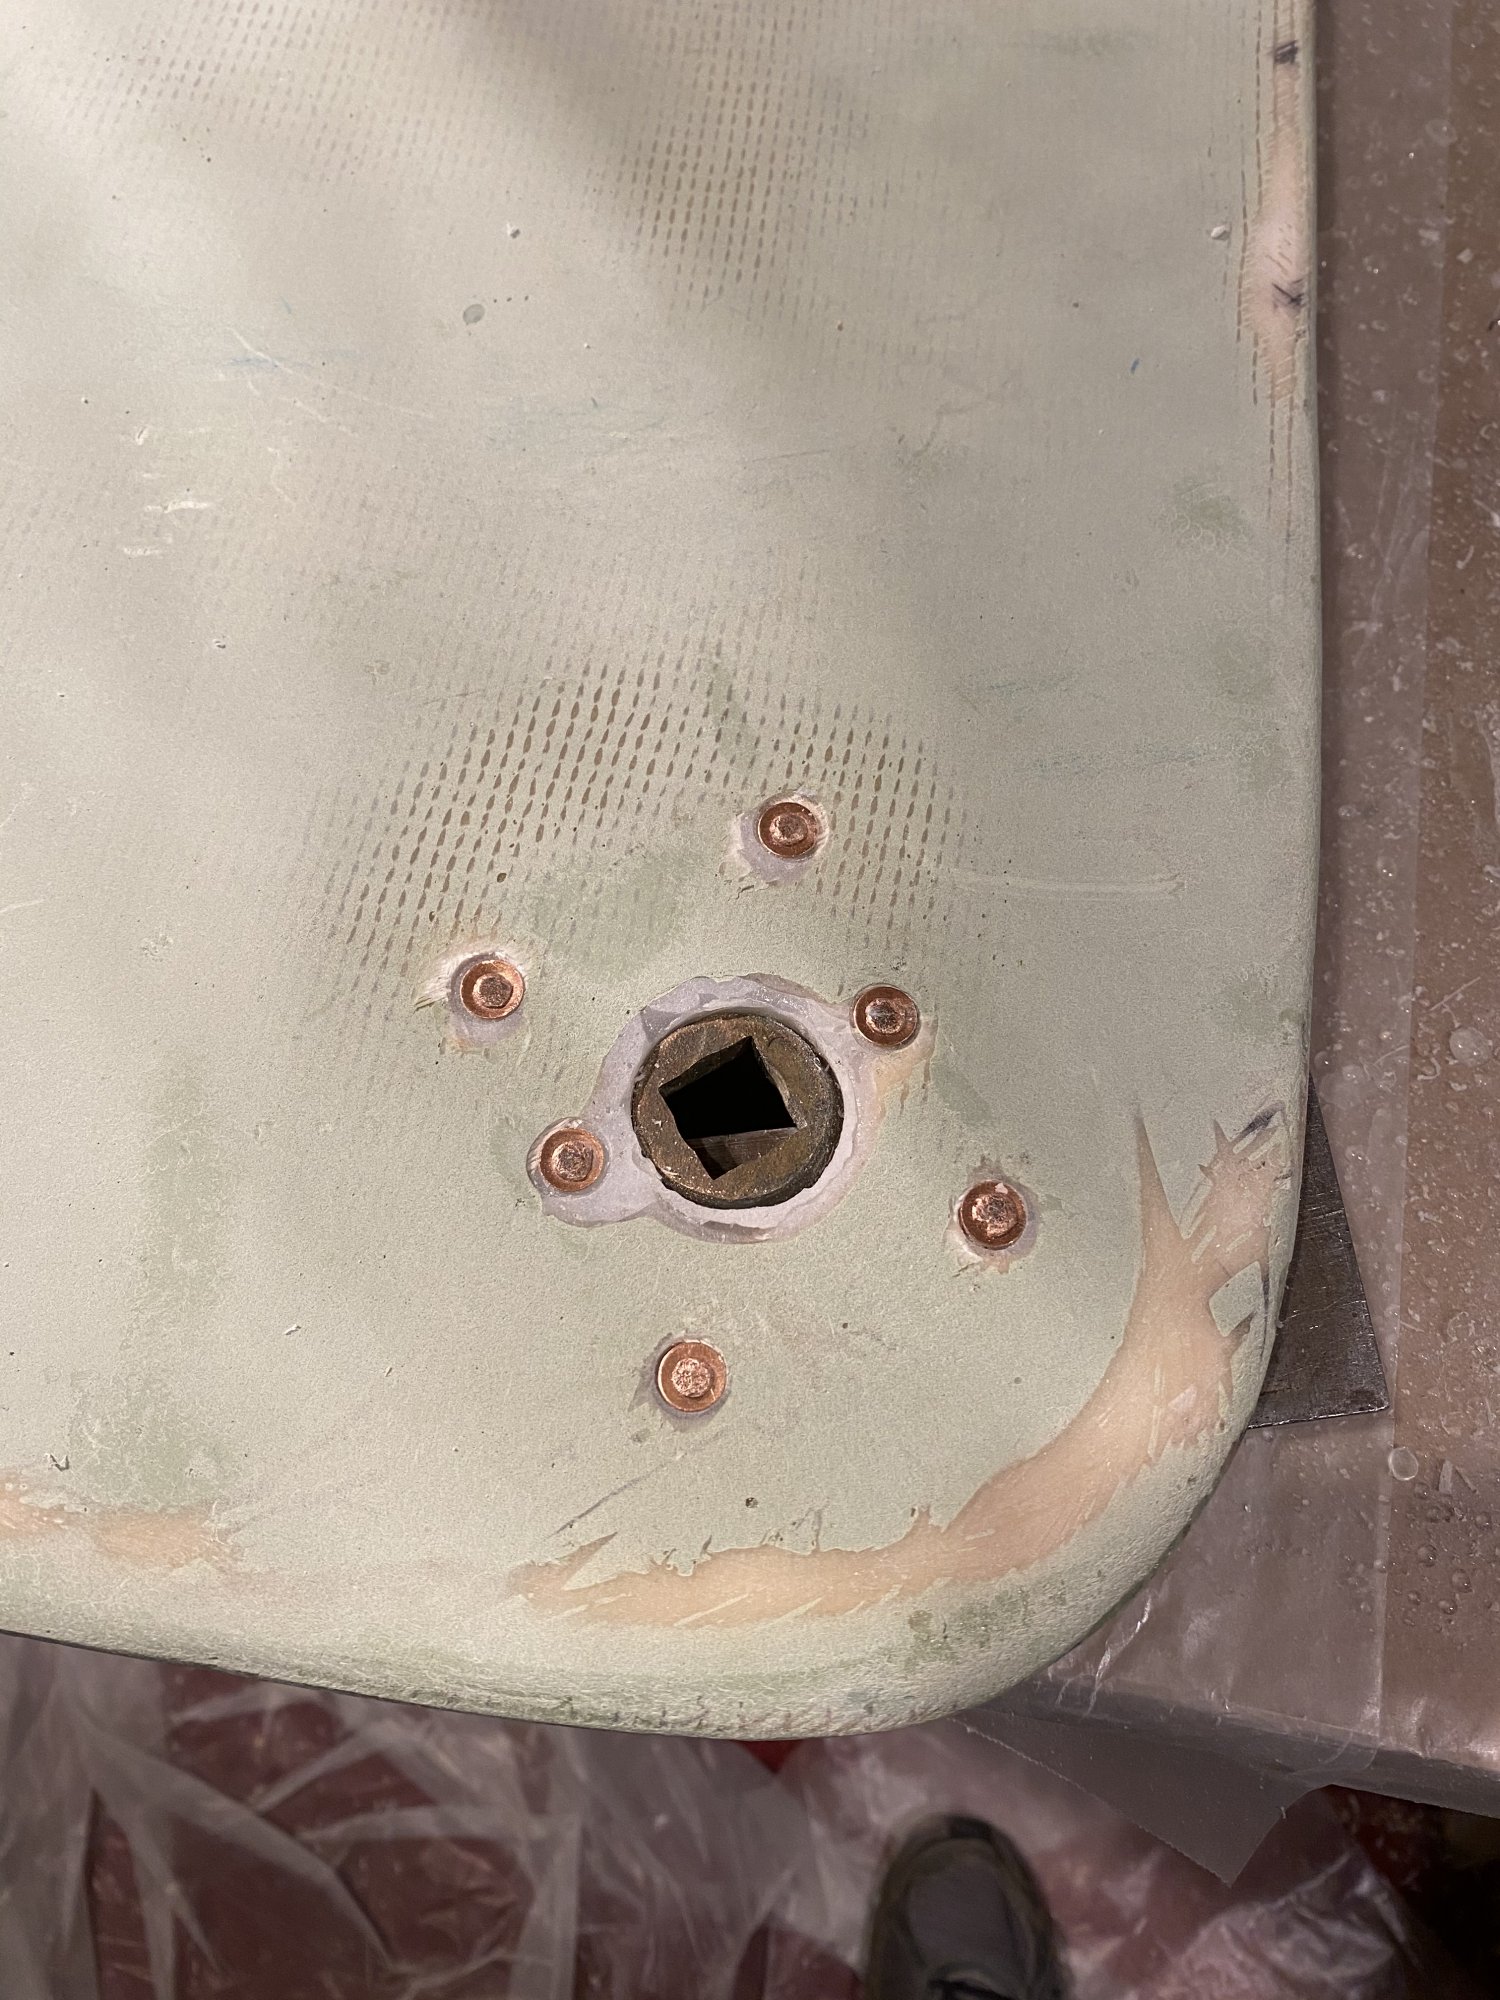
Lots of riveting this weekend. First riveting the bronze plate for the centerboard handle.
Then riveting the gunwales onto the hull -
I’m happy with how that’s going so far - very tight on the hull, and keeping the right shape relative to the seats. I was able to rivet everything from the middle seat forward. I need my garage to be a little warmer so I can epoxy the scarf joints toward the back of the boat before I rivet those sections together.
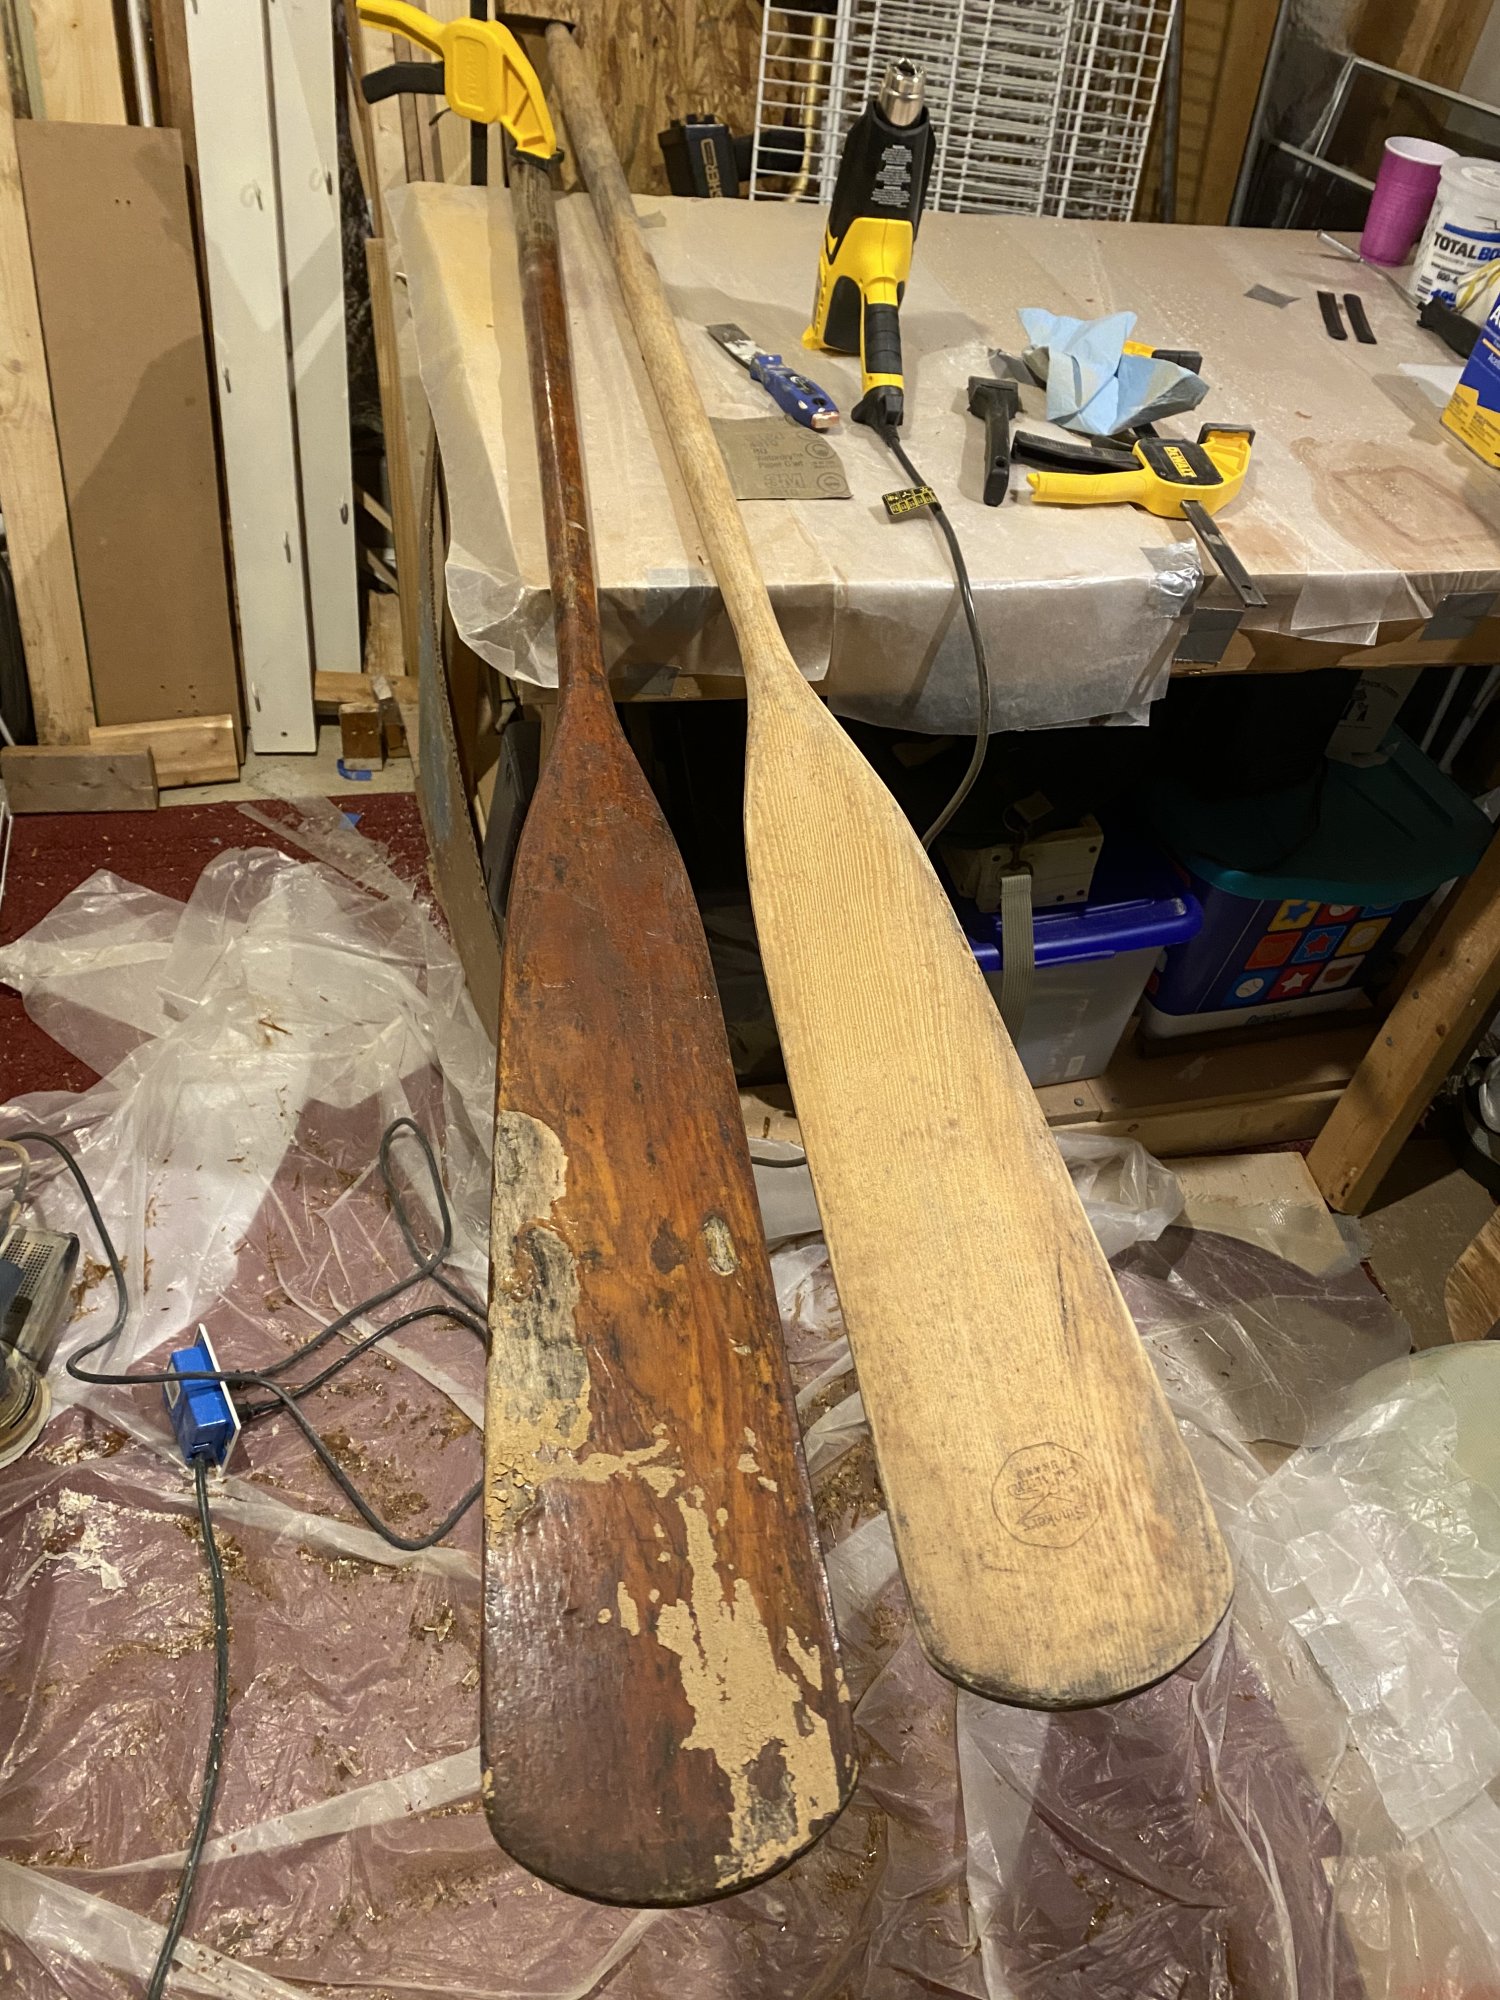
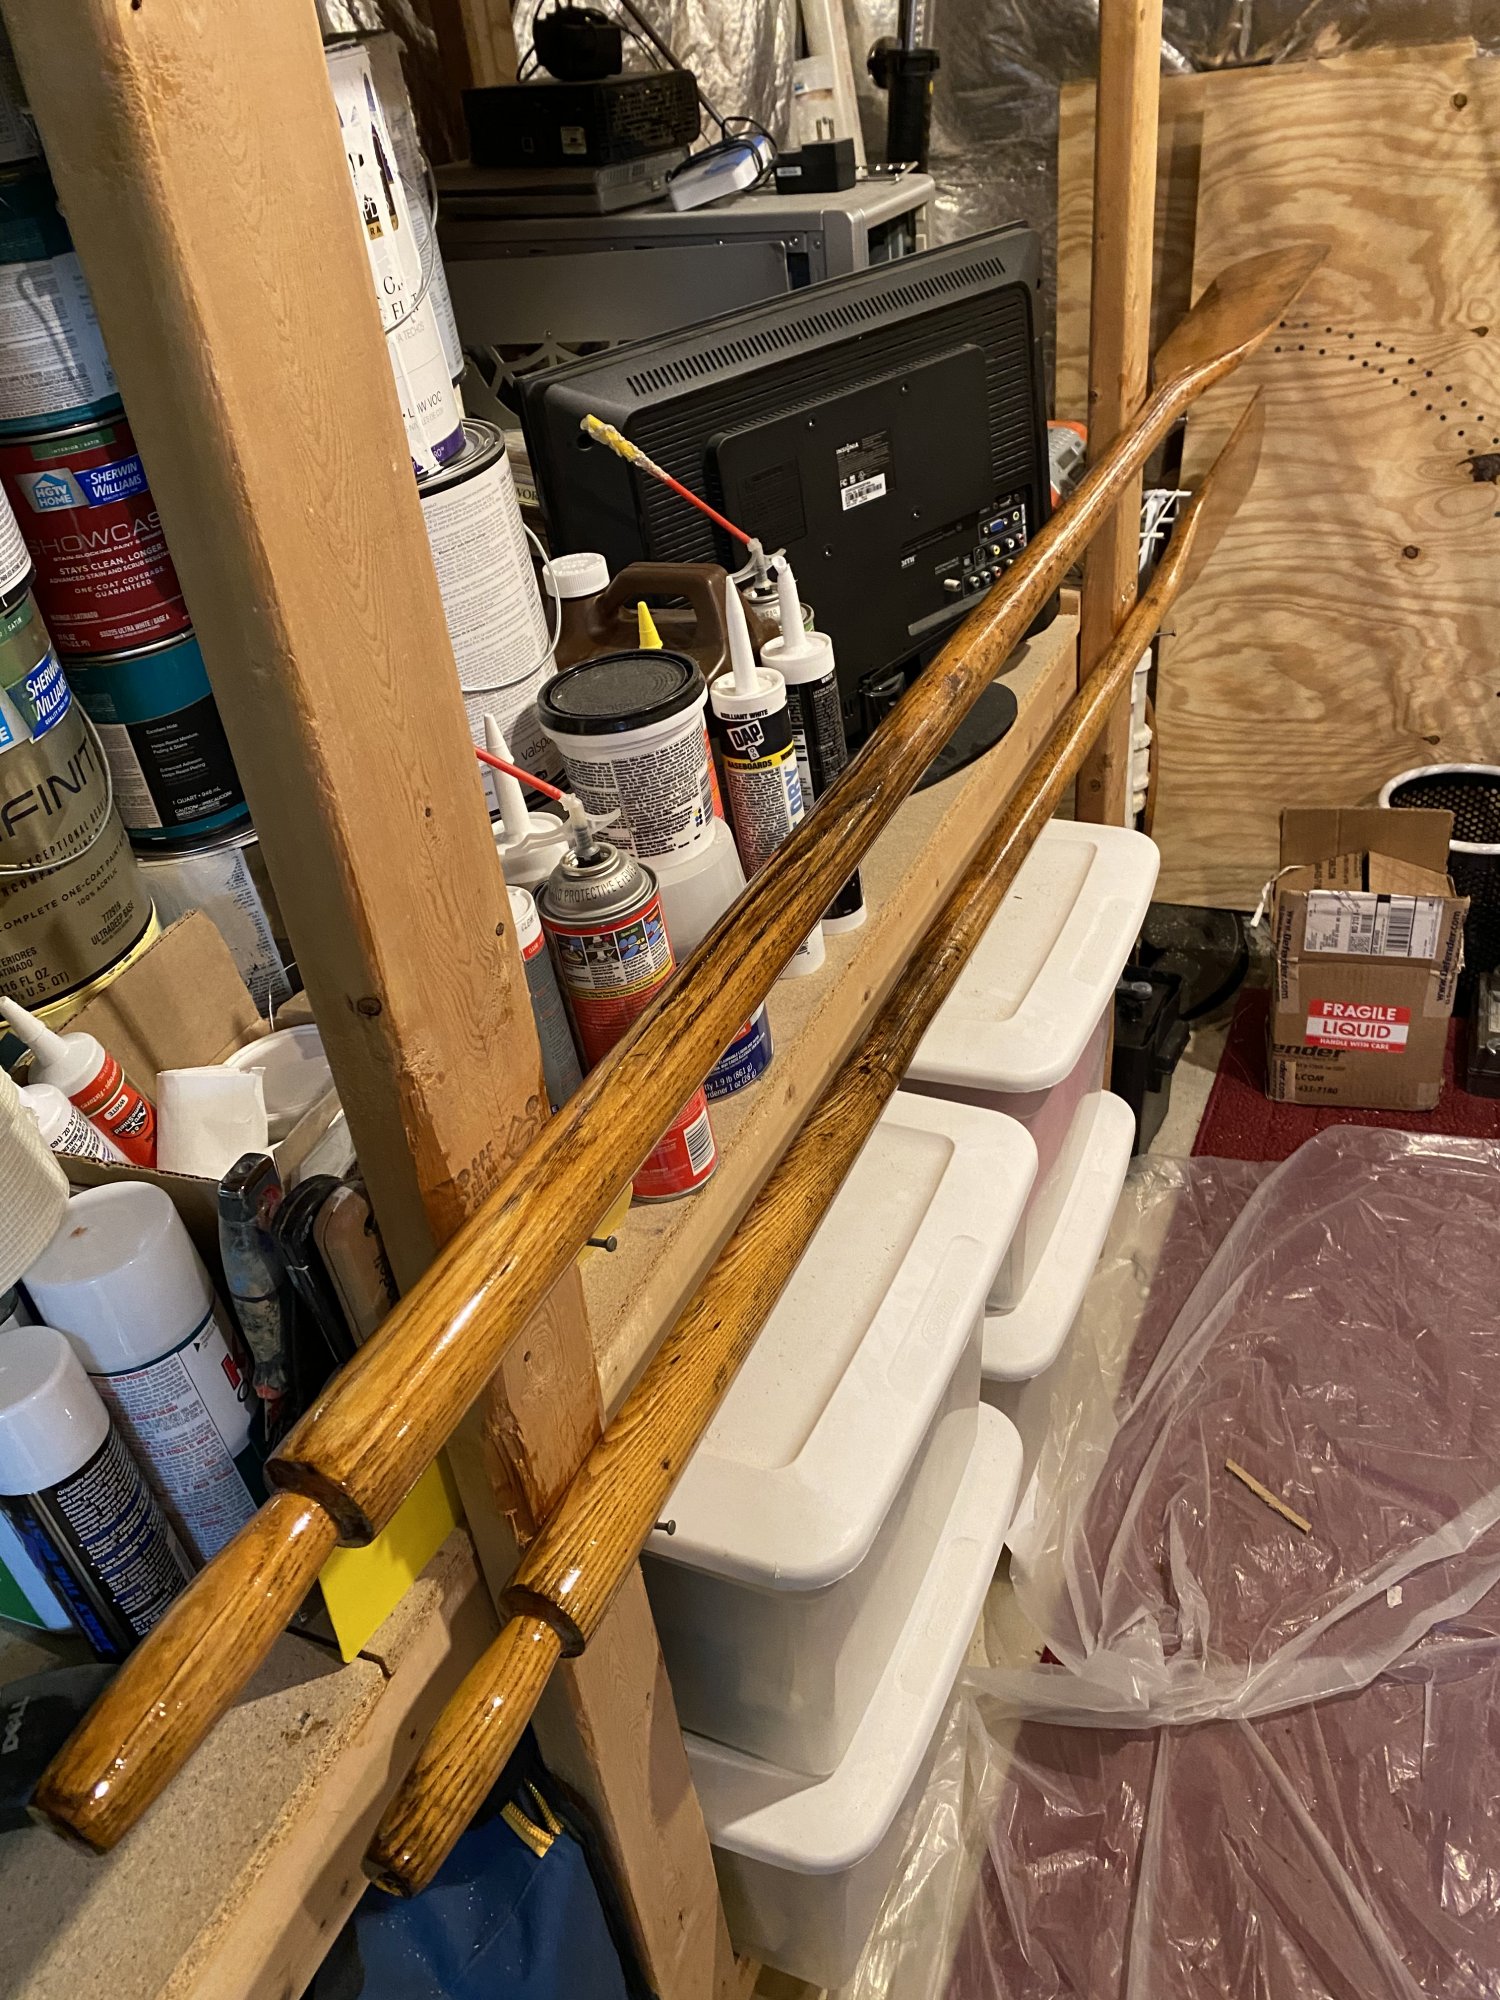
So, what to do while I wait for the weather to be warm enough to cure epoxy? Well I do have two oars in need of cleaning up. More heat gun work on those and a little sanding got the old varnish off. Before and after -
Then riveting the gunwales onto the hull -
I’m happy with how that’s going so far - very tight on the hull, and keeping the right shape relative to the seats. I was able to rivet everything from the middle seat forward. I need my garage to be a little warmer so I can epoxy the scarf joints toward the back of the boat before I rivet those sections together.
So, what to do while I wait for the weather to be warm enough to cure epoxy? Well I do have two oars in need of cleaning up. More heat gun work on those and a little sanding got the old varnish off. Before and after -
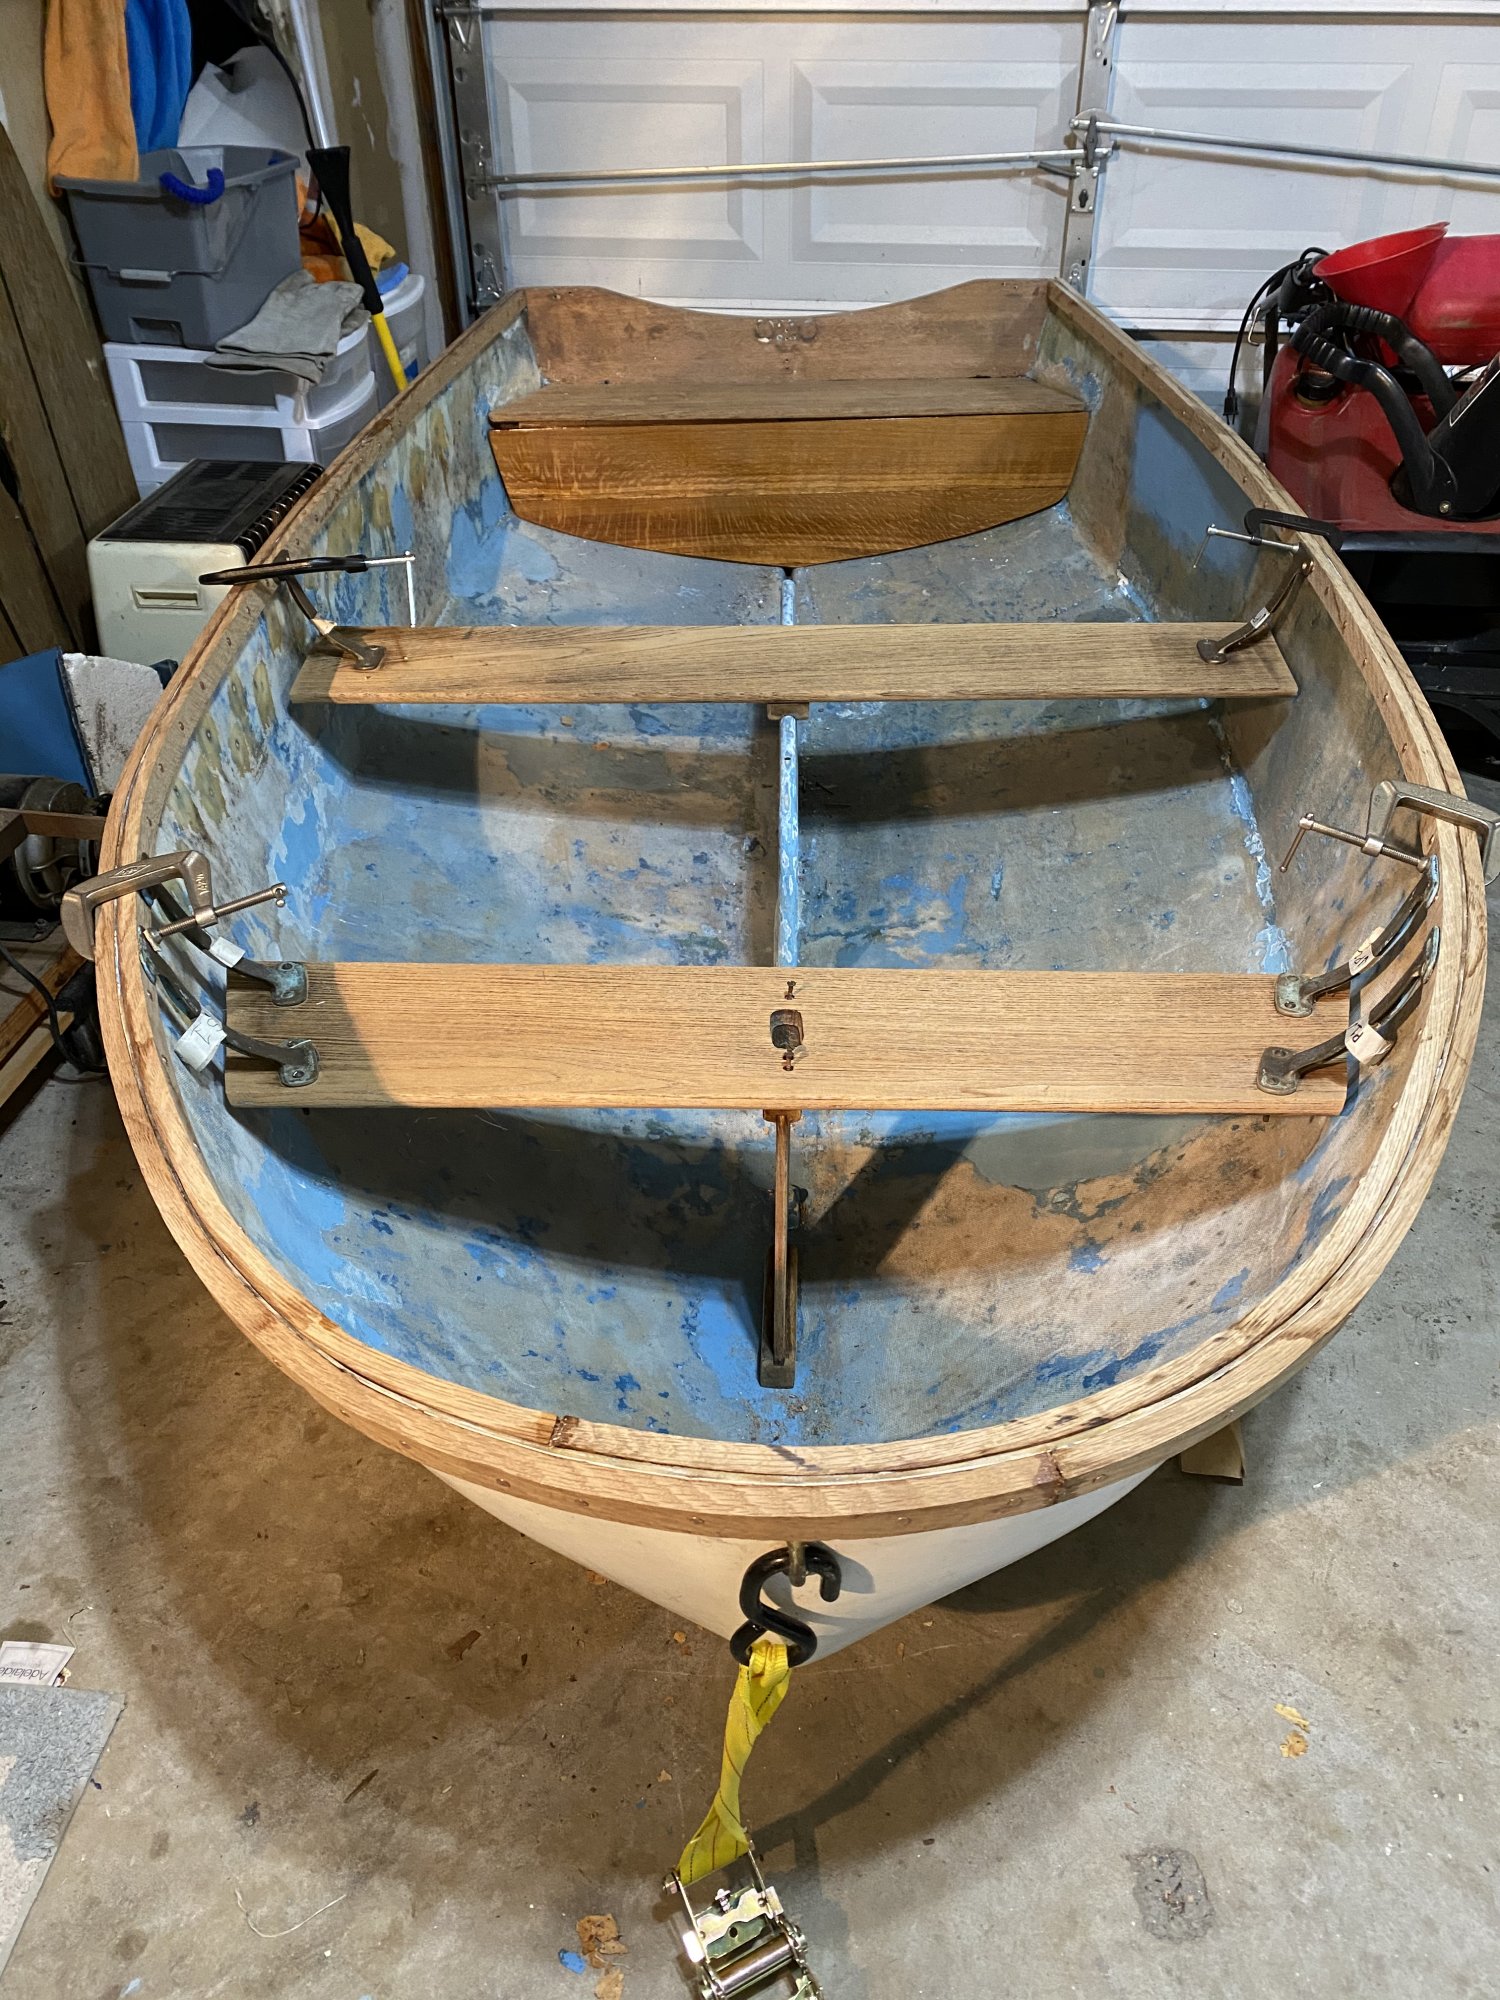
My garage was warm enough for epoxy to cure this weekend, so progress is well underway again. I was able to epoxy the scarf joints where the gunwale sections meet toward the back of the boat, and finish all the riveting. There are a lot less clamps on it now .
The board under the aft seat has a few coats of varnish and just needs one or two more. Looking forward to seeing all the gunwales that color too. Next step will be to sand the corners of the gunwales to soften the edges a little, then to start varnishing them.
.The board under the aft seat has a few coats of varnish and just needs one or two more. Looking forward to seeing all the gunwales that color too. Next step will be to sand the corners of the gunwales to soften the edges a little, then to start varnishing them.
There are a lot less clamps on it now
A little more progress -
That’s three coats of varnish on all the wood. Planning on doing about 5 more. Turns out, varnishing is pretty time consuming.
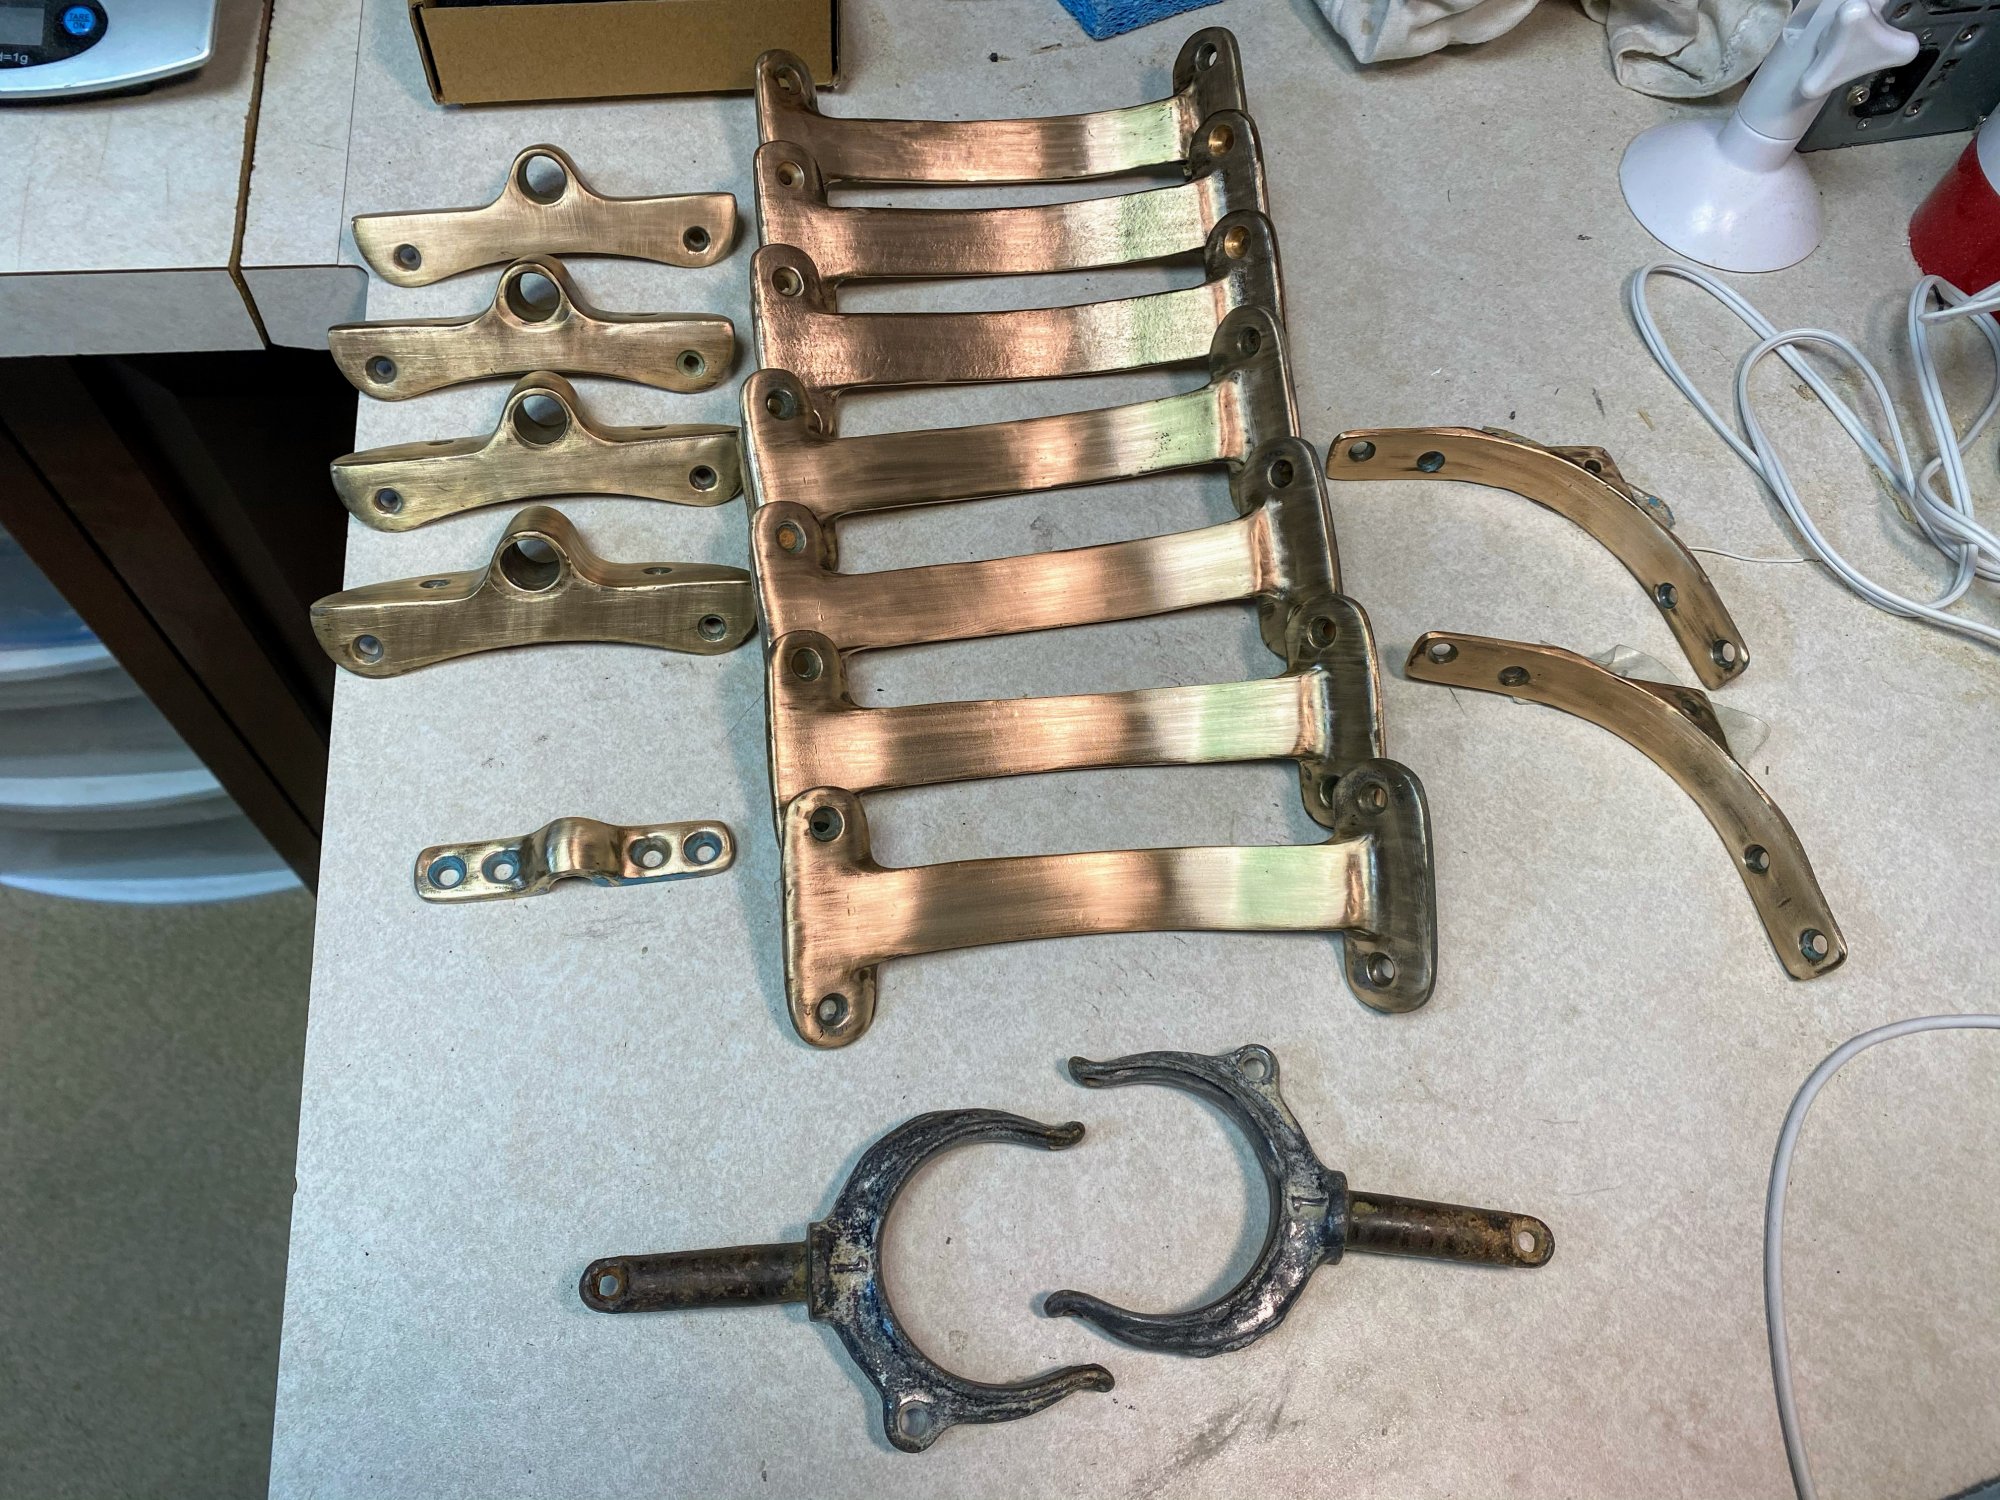
After all this prettying up of the woodwork I didn’t want to reinstall the same old tarnished and paint speckled hardware -
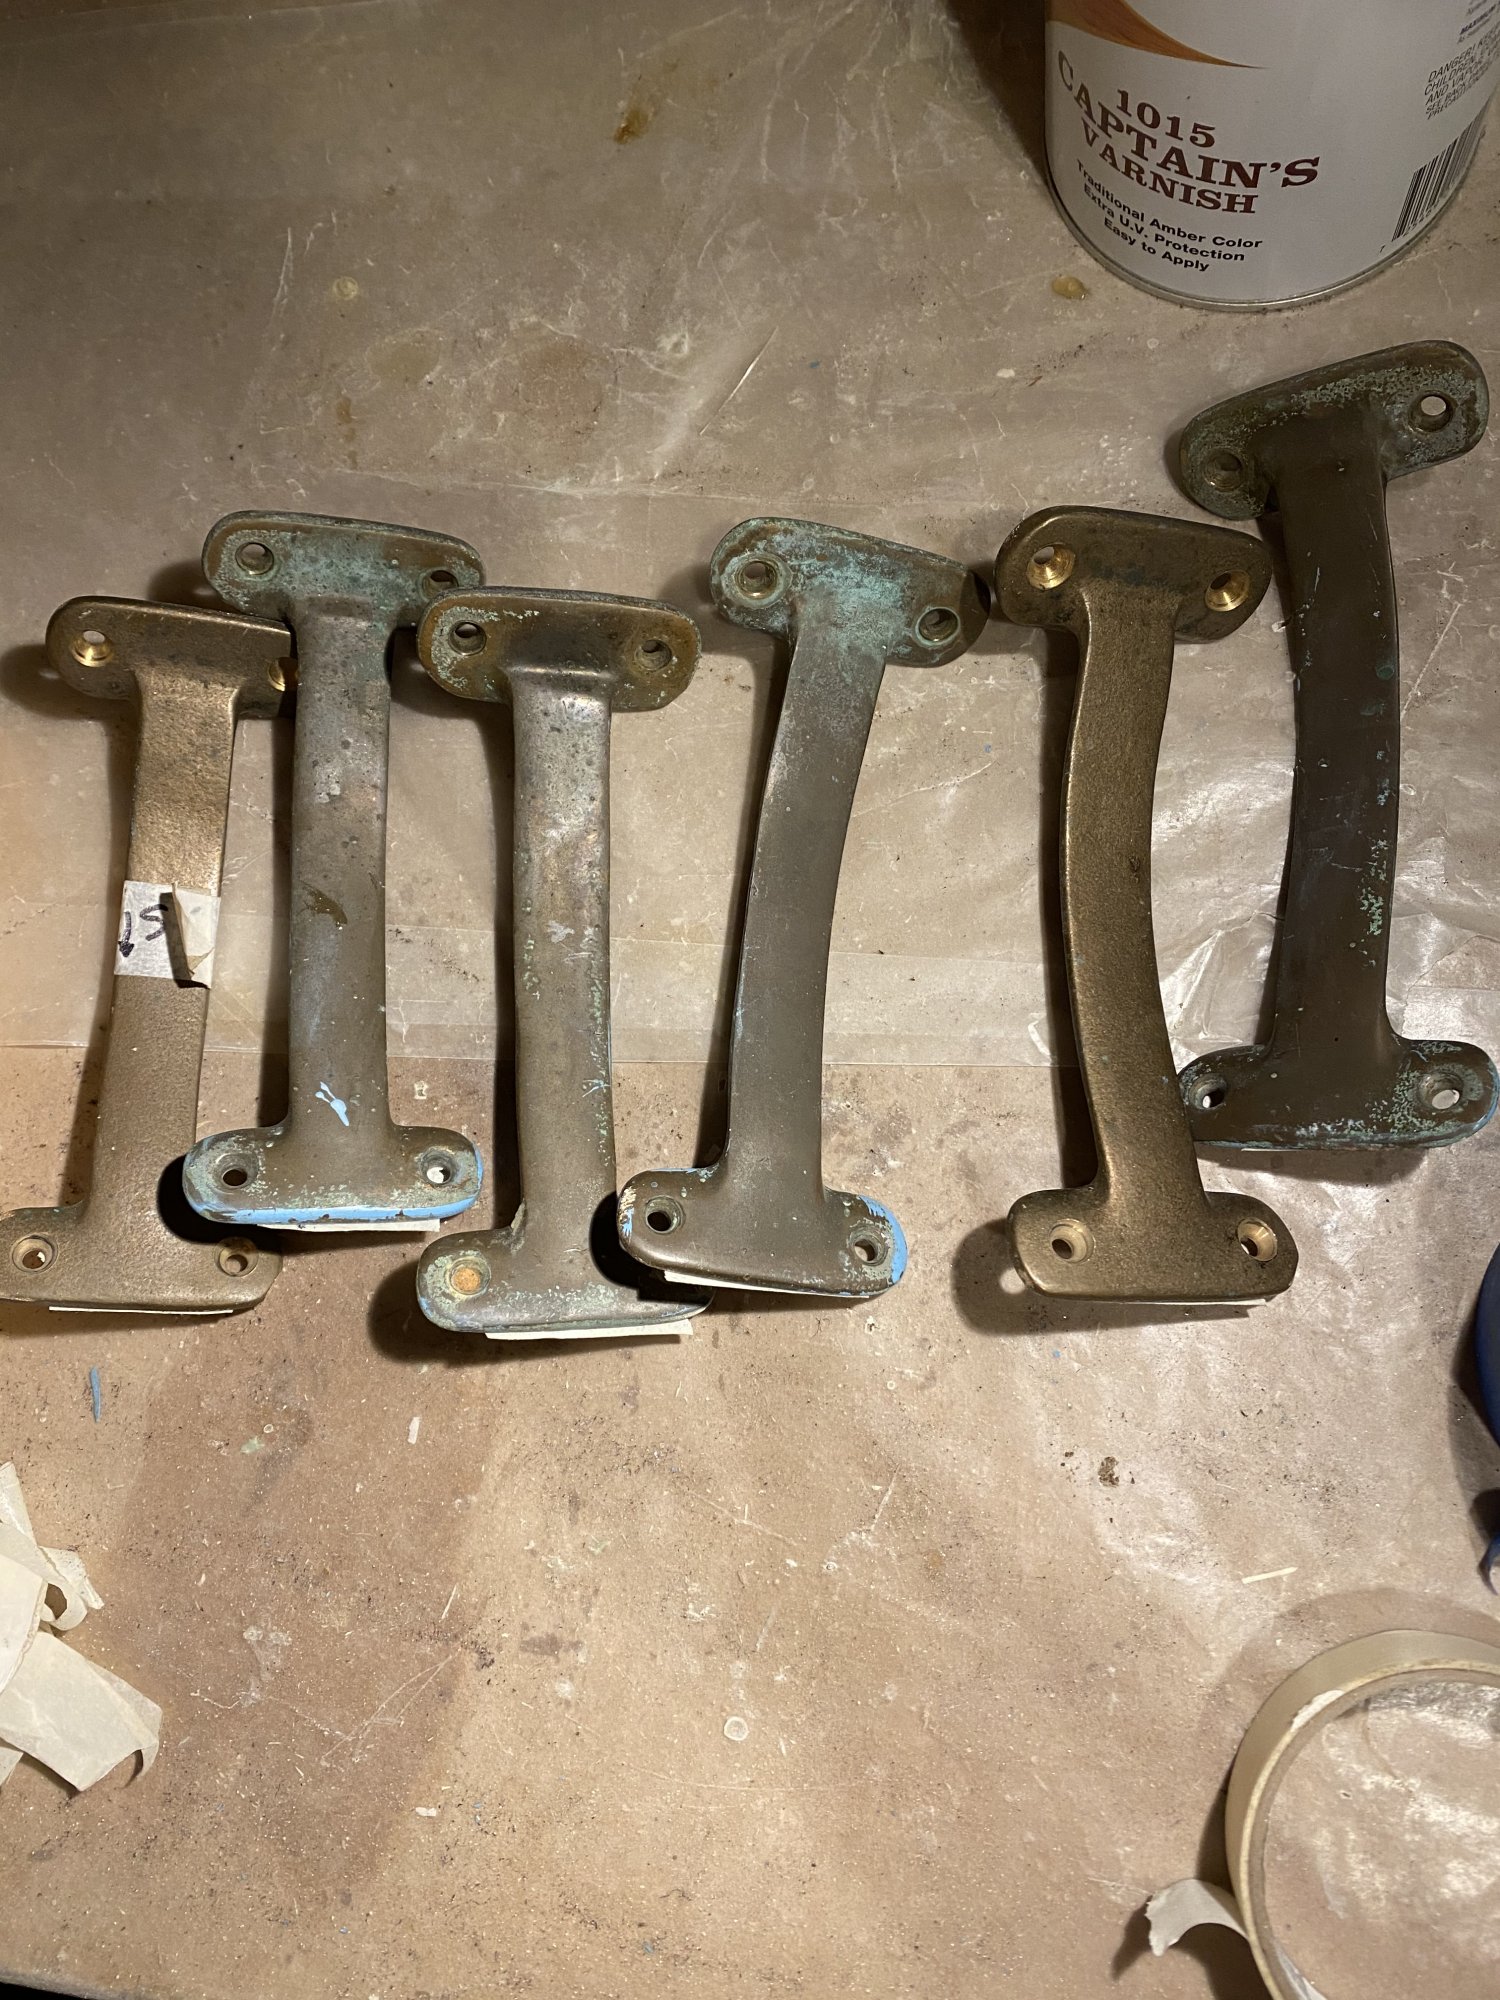
So I got some dremel polishing bits and set to work on that. Things are a little shinier now -
That’s three coats of varnish on all the wood. Planning on doing about 5 more. Turns out, varnishing is pretty time consuming.
After all this prettying up of the woodwork I didn’t want to reinstall the same old tarnished and paint speckled hardware -
So I got some dremel polishing bits and set to work on that. Things are a little shinier now -
