Future Rust Prevention For Ends of Saw-Cut 316 SS Tubing?

Status
Not open for further replies.
Jun 21, 2007
2,118
Hunter Cherubini 36_80-82 Sausalito / San Francisco Bay
I am looking for recommendations to prevent freshly cut/drilled/grinded 316 stainless steel from future surface rusting/staining.

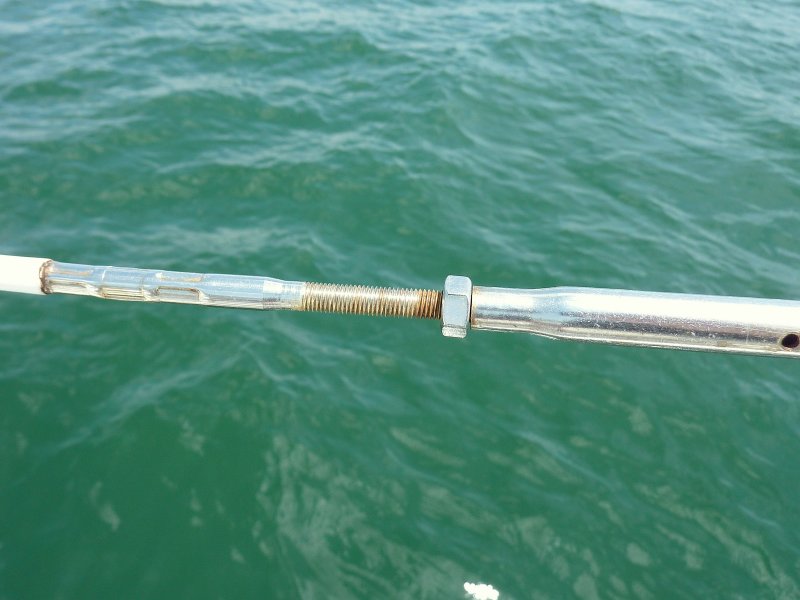
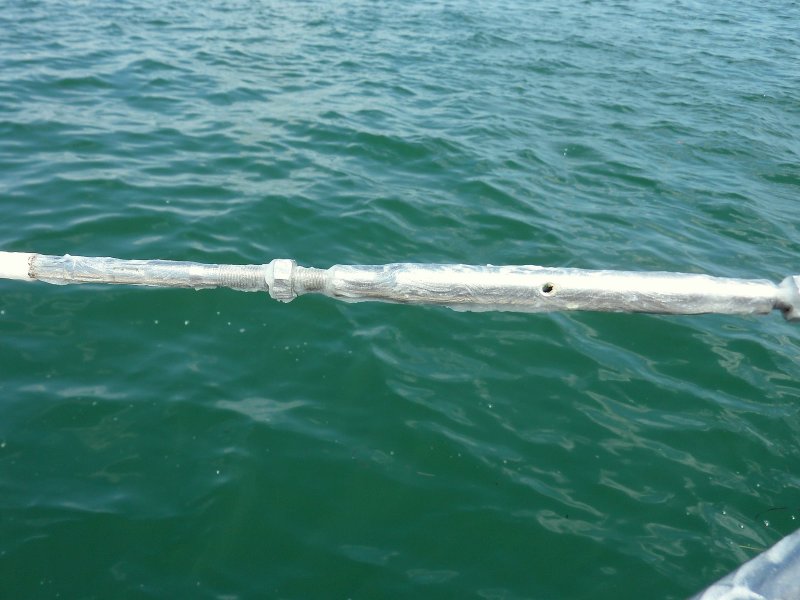
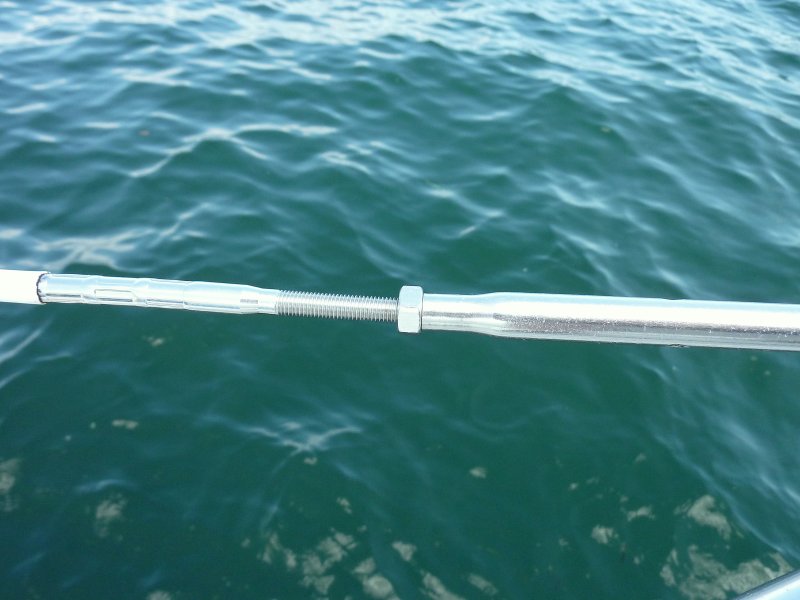
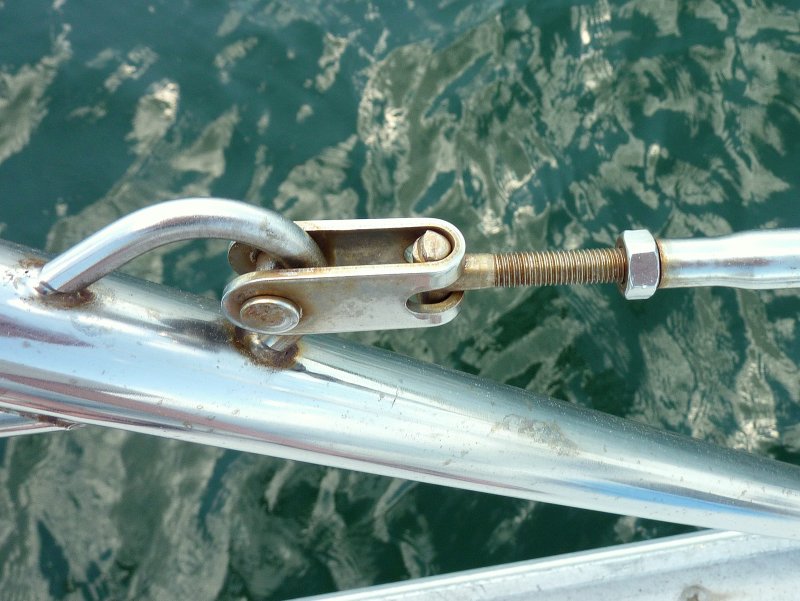
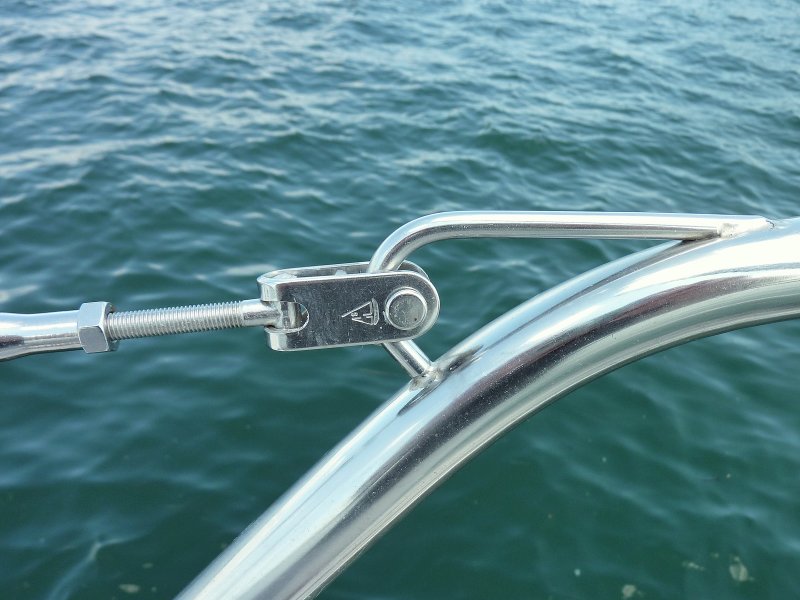
In this particular case, five years ago I removed my teak hand rails and instead replaced with the stainless steel arrangement in the below picture. Over the years, the hack-saw cut ends of the tubing inside the fittings developed the typical SS surface rust. Also I had to grind the bottoms of the fittings from flat to slightly concave to better conform to the curve of the cabin top surface. This removed the original factory finish so the exposed SS also surface-rusted which bled a bit into the surrounding painted gelcoat.

The rust has only had cosmetic effect ... no deep corrosion at all. But now I know that it does happen, I would like to avoid a repeat in the future. So far, I have applied to the exposed cut/ground surfaces SpotlessStainless citric acid based stainless steel cleaner to remove the rust and passivate. (By the product's description citric acid does passivate and I have had excellent results with it on many exterior stainless steel components.)

I am also thinking to apply a thin coat of West Systems' epoxy to both the cut tube ends and to the ground fitting bottoms before I reinstall.

Aside from sending the pieces to a professional for industrial polishing and passivation, any other DIY suggestions?
 

Attachments

Feb 6, 1998
11,760
Canadian Sailcraft 36T Casco Bay, ME
I am looking for recommendations to prevent freshly cut/drilled/grinded 316 stainless steel from future surface rusting/staining.

In this particular case, five years ago I removed my teak hand rails and instead replaced with the stainless steel arrangement in the below picture. Over the years, the hack-saw cut ends of the tubing inside the fittings developed the typical SS surface rust. Also I had to grind the bottoms of the fittings from flat to slightly concave to better conform to the curve of the cabin top surface. This removed the original factory finish so the exposed SS also surface-rusted which bled a bit into the surrounding painted gelcoat.

The rust has only had cosmetic effect ... no deep corrosion at all. But now I know that it does happen, I would like to avoid a repeat in the future. So far, I have applied to the exposed cut/ground surfaces SpotlessStainless citric acid based stainless steel cleaner to remove the rust and passivate. (By the product's description citric acid does passivate and I have had excellent results with it on many exterior stainless steel components.)

I am also thinking to apply a thin coat of West Systems' epoxy to both the cut tube ends and to the ground fitting bottoms before I reinstall.

Aside from sending the pieces to a professional for industrial polishing and passivation, any other DIY suggestions?
Spotless Stainless, they need to be re-passivated...
 
Jun 21, 2007
2,118
Hunter Cherubini 36_80-82 Sausalito / San Francisco Bay
Spotless Stainless, they need to be re-passivated...

Maine Sail:

Thanks the quick response, but unsure your message:

Spotless Stainless means of passivation is enough?

... Or ...

I need to find a SS guy to passivate industrially?

regards,
Rardi
 
Feb 26, 2004
23,353
Catalina 34 224 Maple Bay, BC, Canada
Re: Future Rust Prevention For Ends of Saw-Cut 316 SS Tubing

Spotless Stainless

Simple: it's a product.

Google it...:)

Good stuff.
 
Jun 6, 2006
6,990
currently boatless wishing Harrington Harbor North, MD
Re: Future Rust Prevention For Ends of Saw-Cut 316 SS Tubing

You can "passify" your stainless by taking a NEW wire brush to it. I found out by being just frustrated on a similar project. It did not rust there till I cut it and now it does.... Wire brushed the rust and most of it did not come back, wire brushed it again and even more did not come back. Had an Epiphany and wire brushed the snot out of it and its been fine since.
 
Sep 15, 2009
6,244
S2 9.2a Fairhope Al
You can "passify" your stainless by taking a NEW wire brush to it. I found out by being just frustrated on a similar project. It did not rust there till I cut it and now it does.... Wire brushed the rust and most of it did not come back, wire brushed it again and even more did not come back. Had an Epiphany and wire brushed the snot out of it and its been fine since.

did you use a fairous(spelling?? meaning black iron ) or none fairous(meaning ss) wire brush.........

regards

woody
 
Jun 21, 2007
2,118
Hunter Cherubini 36_80-82 Sausalito / San Francisco Bay
Spotless Stainless
Simple: it's a product.
Google it...:)
Good stuff.
Hi Stu:
I've been using Spotless Stainless for a couple of years now -- Yes, very good product. Rust goes away. Even in tight spots that can't be reached otherwise. Yes, I have first-hand seen evidence that it does passivate. Takes much longer for rust to re-appear than after simple polishing. But also rust does reappear sooner or later. Certainly sooner than newer industrially passivated SS. I have already applied it to the cut/ground areas of my hand rail assembly. Just couldn't tell from Maine Sail's response if he meant that Spotless Stainless passivation ability is enough for the final solution. What's your take about further protection such as epoxy covering? Or will that open the door for crevice corrosion and make things worse.?
 

RichH

.
Feb 14, 2005
4,773
Tayana 37 cutter; I20/M20 SCOWS Worton Creek, MD
Re: Future Rust Prevention For Ends of Saw-Cut 316 SS Tubing

You can passivate, blob on Spotless Stainless until you're 'blue in the face' but if you don't remove the surface roughness down to a mirror polished surface, the rust and rust blooms of 'crevice corrosion' will return and continue .... until you planarize the surface by sanding and buffing to a mirror-like surface, then passivation/electropolishing.

How to do mirror polishing.
First power-SAND down through 600 grit (smaller grit if you can find it), then follow by power buffing ('white' metal polish or 'tripoli') with 400 grit through 1000-2000 grit to produce a mirror quality surface. Technically a mirror surface will approach a surface roughness of approx. 5 micro-inches Ra ... or Root mean squared 'average'.
.... THEN passivate or 'electropolish'. Passivation or electropolishing chemically removes the peaks of the roughness to better result in a planar surface.

Here's some FAQs for polishing stainless grades: http://www.finishing.com/453/66.shtml
 
Jun 21, 2007
2,118
Hunter Cherubini 36_80-82 Sausalito / San Francisco Bay
You can passivate, blob on Spotless Stainless until you're 'blue in the face' but if you don't remove the surface roughness down to a mirror polished surface, the rust and rust blooms of 'crevice corrosion' will return and continue .... until you planarize the surface by sanding and buffing to a mirror-like surface, then passivation/electropolishing.

How to do mirror polishing.
First power-SAND down through 600 grit (smaller grit if you can find it), then follow by power buffing ('white' metal polish or 'tripoli') with 400 grit through 1000-2000 grit to produce a mirror quality surface. Technically a mirror surface will approach a surface roughness of approx. 5 micro-inches Ra ... or Root mean squared 'average'.
.... THEN passivate or 'electropolish'. Passivation or electropolishing chemically removes the peaks of the roughness to better result in a planar surface.

Here's some FAQs for polishing stainless grades: http://www.finishing.com/453/66.shtml
Rich: - Thanks and I scanned your url link. Much more work than I want to take on! Guess I'll live with the eventual return of stains and make them go away every six months or so with another dab of Spotless Stainless. Question, say I want a new dodger and frame. Does the SS fabricator actually put a mirror fine finish on the ends of the SS tubing?
 
Feb 6, 1998
11,760
Canadian Sailcraft 36T Casco Bay, ME
Rich: - Thanks and I scanned your url link. Much more work than I want to take on! Guess I'll live with the eventual return of stains and make them go away every six months or so with another dab of Spotless Stainless. Question, say I want a new dodger and frame. Does the SS fabricator actually put a mirror fine finish on the ends of the SS tubing?

No they don't.. They do often cut the tube with a pipe cutter and wheel specifically deigned for cutting SS.. It still leaves some ferrous issues behind but I've found if I soak the ends in some Spotless Stainless I don't have problems with the rust returning.

As Rich mentioned polishing is a precursor to passivating yet I've found that even without a mirror finish Spotless Stainless, if left to work long enough, will pretty much cure the problems.

If you don't have one a cotton buffing wheel on a bench grinder and some tripoli or other stainless polishing rouge works extremely well. The wheels can be had at Home Depot for about $15.00 and the rouge for another couple. Just take one wheel of your grinder and replace it with a cotton buffing wheel...

Grizzly Industrial Tools offers some excellent quality buffing wheels. The last one I bought is still going after FIVE YEARS of use..... A little better than the cheap Ryobi ones at Home Depot, but even they still work..
 

RichH

.
Feb 14, 2005
4,773
Tayana 37 cutter; I20/M20 SCOWS Worton Creek, MD
Rich: - Thanks and I scanned your url link. Much more work than I want to take on! Guess I'll live with the eventual return of stains and make them go away every six months or so with another dab of Spotless Stainless. Question, say I want a new dodger and frame. Does the SS fabricator actually put a mirror fine finish on the ends of the SS tubing?
In reverse order -

Dodger - He doesnt have to as all the tube ends are usually terminated in 'sockets' .... 'cept the ends that under the fabric and the ends are internally 'ferreled'. A good idea to add wax, etc. when assembling (for several reasons)

Lessen the hassle of repeated dabbing .... apply WAX.

It is indeed a lot of work to mirror polish ... thats why even mill polished SS is so damn expensive. The ChemProcess and Pharmaceutical, etc. Industries found out about 70 years ago that mirror polishing, etc. was much less expensive than continual replacement.
 
Jan 4, 2006
7,650
Hunter 310 West Vancouver, B.C.
Lots of Work .......................................

....................... for very little return.

The SS tubing within the fitting (and the interior of the fittings) is going to corrode from oxygen deprivation, passivated or not, that's a given. All of my 1" dodger tubing is as pretty as can be outside of the fittings .................... inside they're a stained mess. Occasionally the corrosion products did leak out and slightly stain the gel coat in the vicinity.

The only way I found to avoid the corrosion was to slather the interior of the fitting with silicone sealant (and I'm sure there's much better materials out there) which sealed the interior of the fitting. I wiped it judiciously and no silicone shows on the exterior. Also make sure there is no other way for water to enter the tube. I haven't had the ambition to pull one of the fittings apart to see how the corrosion is doing inside but I very much doubt anything is happening. It's hermetically sealed. No water, no corrosion. BTW, the silicone joint in the fitting can be released if required by strong heating.

The fittings with the concave bottoms may be a bit more of a challenge. Have you tried butyl tape under the concave bases with the idea of keeping water away from the underside ? Again, no water, no corrosion. Any grinding damage to the side of the bases will be protected by the presence of oxygen. If that doesn't work, look for some other form of flexible, sticky adhesive which is going to stay stuck to the underside and keep the water away. My only worry about coating the bottom with epoxy is that it's susceptible to cracking away from the surface and staining will again appear.

Definitely keep this one simple for the best results.
 
Mar 20, 2012
3,983
Cal 34-III, MacGregor 25 Salem, Oregon
for doing stainless work, you need to keep a few dedicated tools for it... a new cutting disc used only for stainless... a new stainless steel wire wheel.... or stainless wire brush... and an area away from regular iron dust.
using any tool that is made of steel/iron, or has been used previously on regular steel/iron will leave a deposit on the stainless that will activate the oxidizable alloys in the stainless... its only a surface thing, but its ugly. dont use a hack/band saw for cutting your tubing, use a dedicated abrasive cut-off wheel. a stainless steel wire brush is only a couple dollars more at the welding store and you can keep one on the boat without fear of it disintegrating into a handle with rusty red holes where the wires used to be:D
 
Jun 21, 2007
2,118
Hunter Cherubini 36_80-82 Sausalito / San Francisco Bay
Thanks for the discussion everyone. I've got my handrail assemblies removed now... And for several months more while I leisurely prepare my smooth cabin top section for a repaint with Perfection. I'll smooth somewhat better the cut-off ends of the tubes and my ground fitting bottoms with hi-tech sand paper and then Spotless Stainless a few times to passivate best possible "out in the field". Also use the stuff on the insides of the fittings (which by-the-way are not mirror finish smooth).

Centerline: Got it -- No plain steel wire brushes or steel wool on my boat! I have a couple of SS swimming pool brushes around for the duty.

Ralph: Based upon your OK experience, will give thought to some sealant inside the fittings. I don't want to cement them in place however. I like the idea of a small gap between the tube and the fitting so moisture that gets inside inside can drain/evaporate out = less crevice corrosion.

As to the fitting bottoms which will be Spotless Stainless passivated, I am now thinking to do nothing more to them. But maybe I will first press on some white riggers' tape to the cabin top before re-screwing the fittings on and otherwise bedded with Maine Sail recommended butyl. Then carefully cut the excess tape off with an Exacto knife for a clean look. This at least will isolate the fitting from the cabin top paint and reduce future rust bleeding (if there is any rust - post Spotless Stainless!).
 
Jun 21, 2007
2,118
Hunter Cherubini 36_80-82 Sausalito / San Francisco Bay
Spotless Stainless Before and After

In case somebody is following this thread, and doesn't know about Spotless Stainless or has been vacillating on making a purchase, here are before and after pictures of a very troublesome spot on my boat's stern pulpit tubing. A PO obviously had mounted something around it that afforded perfect conditions for crevice corrosion. I had been unable to remove the embedded discoloration with polishing compounds. Quite a few months after the "after" picture was taken, the appearance was still very much the same which evidences the product does in fact passivate SS. The product also restored new clean metal look to the weld crevices at the base of my stanchions... another impossible to clean area.

I tried the product after Maine Sail posted his positive experience with it a few years ago.
 

Attachments

Apr 8, 2010
1,606
Frers 33 41426 Westport, CT
Re: Future Rust Prevention For Ends of Saw-Cut 316 SS Tubing

Hmmm, just looked at the store on this site, doesn't look like Phil is selling spotless stainless anymore. Defender doesn't carry it either. Where are people buying it from now?
 
Mar 8, 2011
296
Ranger 33 Norfolk
I scrubbed the chain plates I made with an "Ospho" knock-off and they have only the slightest of staining more than a year later. I'll scrub them down again with it and have no worries for another year.

I read the phosphoric acid is what does the passivising (sp?). . .
 
Feb 6, 1998
11,760
Canadian Sailcraft 36T Casco Bay, ME
I scrubbed the chain plates I made with an "Ospho" knock-off and they have only the slightest of staining more than a year later. I'll scrub them down again with it and have no worries for another year.

I read the phosphoric acid is what does the passivising (sp?). . .
Only nitric and citric are used for passsivating. Other acids can make problems worse and permanently dull the finish.

Spotless Stainless is sold direct by the manufacturer. It's one of those products that really works...

This is a post I made a few years ago..


Spotless Stainless (LINK)
= Direct mail order only

The stuff works quite well though is a tad slow and on some older stuff and may require two applications.

Some things I have learned about it.

Do not use in direct sun
Do use it on a warm humid evening so evaporation is kept down
It won't work well in cooler temps
Work on the shaded side of the boat if working during sun up hours
Don't stand their watching it


Here are the ACTUAL photos of Spotless Stainless working. Thanks for inducing me into getting around to uploading them..;)

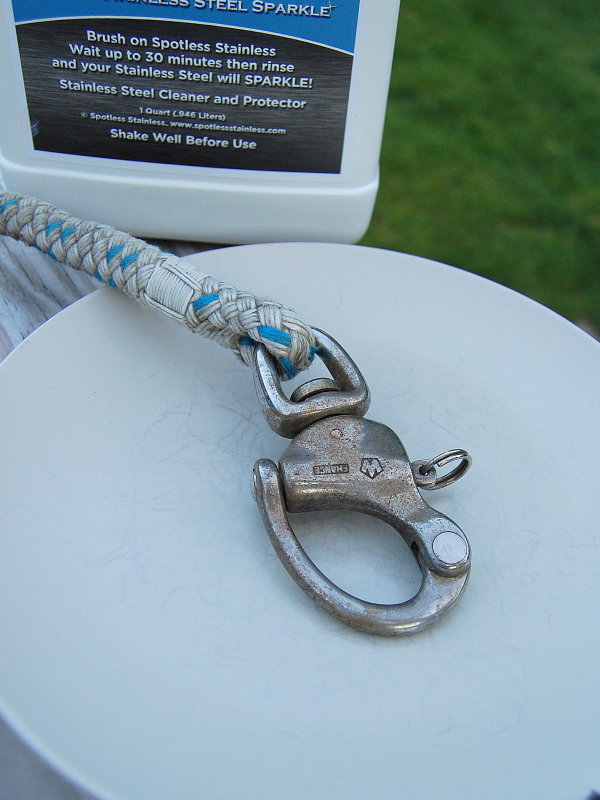
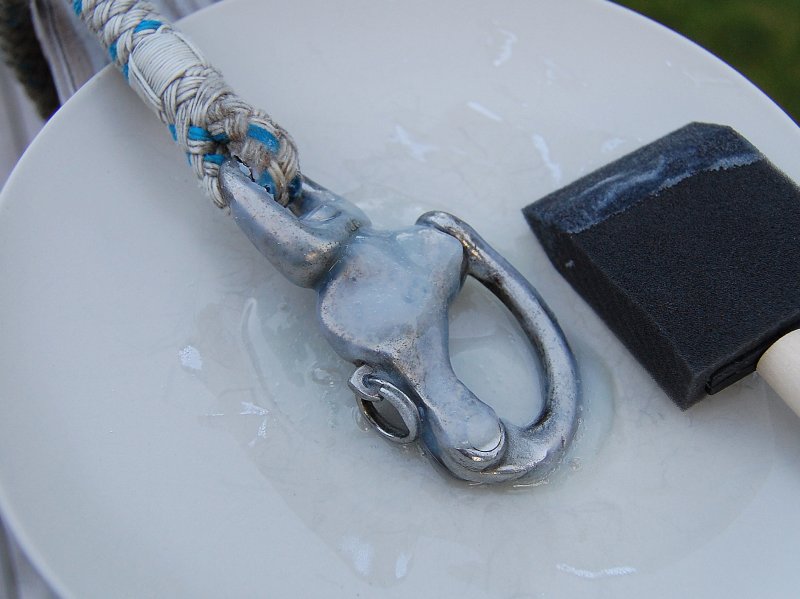
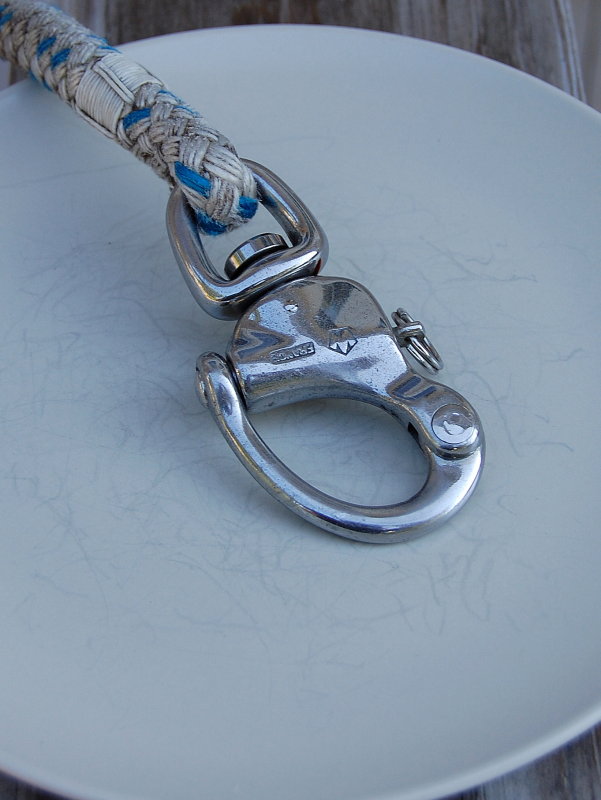
Temp 68F, humidity 63%, set time 1:20 minutes, only because I got side tracked. I can't accurately comment on how long it actually took to get that clean. This was a 25 year old Wichard snap shackle that I have had on a number of halyards. The surface is pitted from time and exposure, and the Spotless Stainless won't fix pitting, but it did and does remove the rust very well even if a little slow. In higher temps and humidity it does seem to work faster. Below 70 degrees it seems to begin to slow down.

It is what it is:

Before:


During:


After Rinsing:


Not bad for doing nothing but brushing it on, letting it sit and rinsing it.

Oh and YES I do find it a tad expensive but don't doubt the price will come down when volume eventually goes up.

Yesterday the boat was on the mooring and after a sail I busted out the SS and a chip brush. Worked up near the bow. While waiting I got some paperwork done then went back and rinsed it off. Overall really, really easy. The ability to clean stainless while I am doing work for my "real job" is really quite nice..

For rinsing it I used a bucket of water and a wet microfiber rag. I did not feel like going into the dock to rinse down or to get out out my on-board hose. Rinsed off fine..

I also tested a spot where I waxed over some rust purposely. It does not work very well unless the stainless is unprotected and may take considerably more time or perhaps not work at all depending upon how thick the wax coating is.

These pics were all taken yesterday 6/23/10..

Before:


During:


After:


These pics were all taken yesterday 6/23/10..


Temps were 78F with about 84% RH and it worked in about 30 minutes today. It was however direct sun so I had to keep it wet. I discovered that you can cover it with a dampened and wrung out microfiber rag and it keeps it wet longer.

Keep it wet and use in warm temps and the stuff really works and leaves a very nice shiny surface.

For experimentation's sake I tried it on a seacock. I also used a Mr. Clean Magic Eraser with the Spotless Stainless. This took a long time, a lot longer then the stainless, but the results were great when it finally had enough time to do its work. Getting through the verdigris took a while but this is right next to my nav station where I was working so it was easy to keep an eye on the progress..

I don't advise using the product in this manner, not its intended use, but I did do it.


Jun 21, 2007
2,118
Hunter Cherubini 36_80-82 Sausalito / San Francisco Bay
Hmmm, just looked at the store on this site, doesn't look like Phil is selling spotless stainless anymore. Defender doesn't carry it either. Where are people buying it from now?
I'm not totally comfortable giving this info in these days of who-knows-what-might-unfold-with-unintended-consequences when giving info on an Internet post.

But (hint) Bing or Google or Yahoo or Ask.com etc with the name of the product in the search field ...

.... that should be risk free enough for me.
 
Jun 21, 2007
2,118
Hunter Cherubini 36_80-82 Sausalito / San Francisco Bay
Re: Future Rust Prevention For Ends of Saw-Cut 316 SS Tubing

Adding to Maine Sail's post, the only other observation that I have experienced is that if Spotless Stainless has dried out at all on the item, it's useful to use a brush along with the rinse water to really make sure that all of the product is removed. Just a blast with the dock hose isn't enough and a short time later, some staining does seem to reappear. But this is just very light on the surface. A very thin second application and rinsing/brushing will remove and then good for quite some time.
 
Status
Not open for further replies.