
Have you considered Cetal? Easier than varnish and looks great. Three coats and done.But it should be less maintenance... depending on the point of view.
C22 New Style "Stormwatch" Purchase and Refit
- Thread starter Leeward Rail
- Start date
I have.Have you considered Cetal? Easier than varnish and looks great. Three coats and done.
Here's my thinking on the various methods.
Varnish alone:
Pro: Nicest looking. Easy to freshen up or strip
Con: Takes longer to apply initially. More maintenance.
Cetol:
Pro: Less time to apply. Lasts longer than varnish.
Con: Not as nice looking (according to some). More work when reapplying/stripping.
Epoxy + varnish:
Pro: Less time to apply. Looks like varnish but more durable.
Con: Harder to refinish due to epoxy layer. Epoxy will yellow if varnish topcoat is allowed to fail.
Oil:
Pro: least effort to reapply
Con: needs constant reapplying. Doesn't have the "wet" look of other finishes.
So, what you save in lifespan, seems to be offset by difficulty in refinishing when a finish does eventually fail.
Last edited:
Looks great LR! I'm with RJD on the use of Cetol on your exterior wood work. I also removed all my hatch trim for sanding and re sealing and thankfully, my screw holes were not as messed up as yours. One of these days when I find a big enough chunk of mahogany or teak, I'm planning on replacing the threshold but for now, I just keep the Cetol on it and so far, it seems to have stopped the deterioration.
@ShotgunSlim That's the deal with the threshold at this point. Stop the deterioration and make it presentable.
I have a piece of teak large enough, left over from making the galley drawers and hand rails, but my patience and the summer are growing short.")
I have a piece of teak large enough, left over from making the galley drawers and hand rails, but my patience and the summer are growing short.
"You picked a fine to time to leave me loose wheel.....
Driving through the canyon, with a tandem on my heels...
You picked a fine time to leave me loose wheel."
I finally got all the pieces together, to repair the left wheel bearing, which failed this spring when simply towing the trailer from it's storage location.
Since I only had miles to go before I had the trailer beside my shop, with all the tools...I simply did a visual inspection before leaving.
I then towed the trailer a couple miles, and checked both hubs for heat. Everything seemed fine.
By the time I got the 7 miles to the house, the left wheel bearing had failed and the grease cap had fallen off.
Just goes to show how quick they can fail, and reinforces why I replace them every spring.
This stuff can happen in the most inconvenient locations, so I carry a "kit" with all the thing I need to be able to replace bearings at the side of the road.
The one time I wasn't prepared, was when I had installed new hubs and bearings for towing the boat home when I bought it. Read my other thread for that adventure.
Here's what I carry:
Trailer Towing Kit:
-2 cotter pins
-2 Grease caps
-2 complete sets of bearings in zip bags, pre-packed with grease.
-2 washer
-1 castle nut
-wrench or socket for castle nut
-pliers for cotter pins
-hammer
-punch to remove races from hub
-chisel to remove damaged bearings
-bearing race driver set to install new races
-Sanding Cloth
-grease
-floorjack and 2 jack stands
-spare rim & tire
-breaker bar and wheel nut socket
Trailer and boat usable now.... too bad I don't have any free weekends.
Driving through the canyon, with a tandem on my heels...
You picked a fine time to leave me loose wheel."
I finally got all the pieces together, to repair the left wheel bearing, which failed this spring when simply towing the trailer from it's storage location.
Since I only had miles to go before I had the trailer beside my shop, with all the tools...I simply did a visual inspection before leaving.
I then towed the trailer a couple miles, and checked both hubs for heat. Everything seemed fine.
By the time I got the 7 miles to the house, the left wheel bearing had failed and the grease cap had fallen off.
Just goes to show how quick they can fail, and reinforces why I replace them every spring.
This stuff can happen in the most inconvenient locations, so I carry a "kit" with all the thing I need to be able to replace bearings at the side of the road.
The one time I wasn't prepared, was when I had installed new hubs and bearings for towing the boat home when I bought it.
Read my other thread for that adventure. Here's what I carry:
Trailer Towing Kit:
-2 cotter pins
-2 Grease caps
-2 complete sets of bearings in zip bags, pre-packed with grease.
-2 washer
-1 castle nut
-wrench or socket for castle nut
-pliers for cotter pins
-hammer
-punch to remove races from hub
-chisel to remove damaged bearings
-bearing race driver set to install new races
-Sanding Cloth
-grease
-floorjack and 2 jack stands
-spare rim & tire
-breaker bar and wheel nut socket
Trailer and boat usable now.... too bad I don't have any free weekends.
Last edited:
That's a great idea on the bearing bag! After buying my boat in the fall, working on her all winter, I was finally ready for the maiden voyage that spring on my one day off in 2 weeks of work. I had been assured all about the new bearings in the trailer by the P.O. so I shot some grease to them, departed and was promptly on the side of the road with a smoking hub 7 miles later......Thank goodness it didn't blow on the 250 mile drive when I picked her up across the state. Needless to say, I now carry basically the same kit along with at least 1 complete hub assembly in that bag.
Quickest way to repack wheel bearings
Sure, you can repack wheel bearings by holding the bearing in the palm of your hand...
but what fun is that ? Messy, slow, and messy.
A few years ago, someone showed me this tool, and I had to buy one.
Drop the bearing in, press down, and the grease is forced up through the rollers. Done in 10 seconds or so.
The design is called a "handy packer". Mine is the exact same unit but branded as "Mac".
Harbour freight makes a clone version that supposedly doesn't work as well.
I don't have a youtube account so here's a video that some other guy posted online
It amazes me how fast they can fail. I always feel the hubs for heat after a few miles, yet a few miles later they can be smoking.That's a great idea on the bearing bag! After buying my boat in the fall, working on her all winter, I was finally ready for the maiden voyage that spring on my one day off in 2 weeks of work. I had been assured all about the new bearings in the trailer by the P.O. so I shot some grease to them, departed and was promptly on the side of the road with a smoking hub 7 miles later......Thank goodness it didn't blow on the 250 mile drive when I picked her up across the state. Needless to say, I now carry basically the same kit along with at least 1 complete hub assembly in that bag.
Normally I've been able to have enough warning by feeling the hubs.
That's one reason why I want to update the trailer to dual 3500lb axles. That way the axles/bearing/tires are well below their max load, and you don't have a single point of possible failure on each side.
Glad to hear my ramblings help.Never considered putting a kit together before, but will now. Thanks for sharing.
Last edited:
Galley Mod Continued
Other than handles for the new drawers, and caulking the corners of stove recess, the galley is ready to use.
I still have to make the bullnosing trim for the additional bulkhead, but that won't prevent the galley from being used.
Once It's been in actual use for a while, We'll be able to decide if we want to put a shelf above the stove.
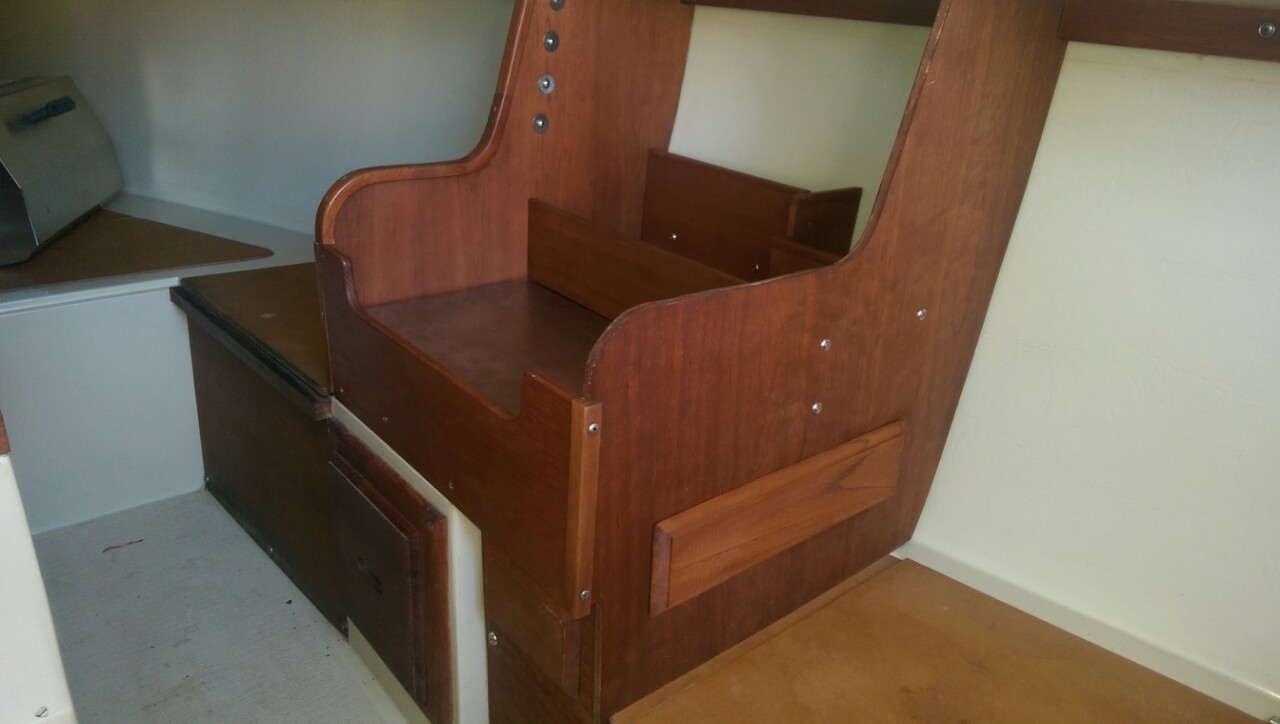
Galley with stove/coffee pot storage divider installed
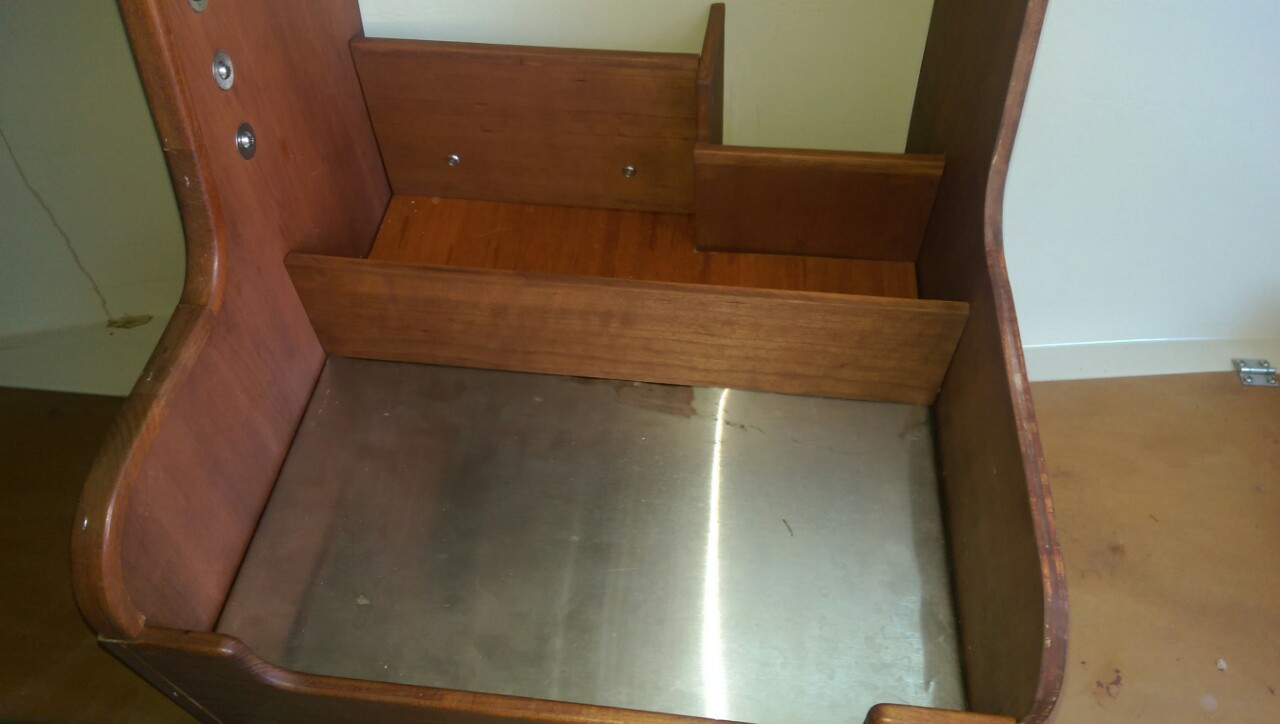
Stainless bottomed stove recess (to be caulked to contain any spills)
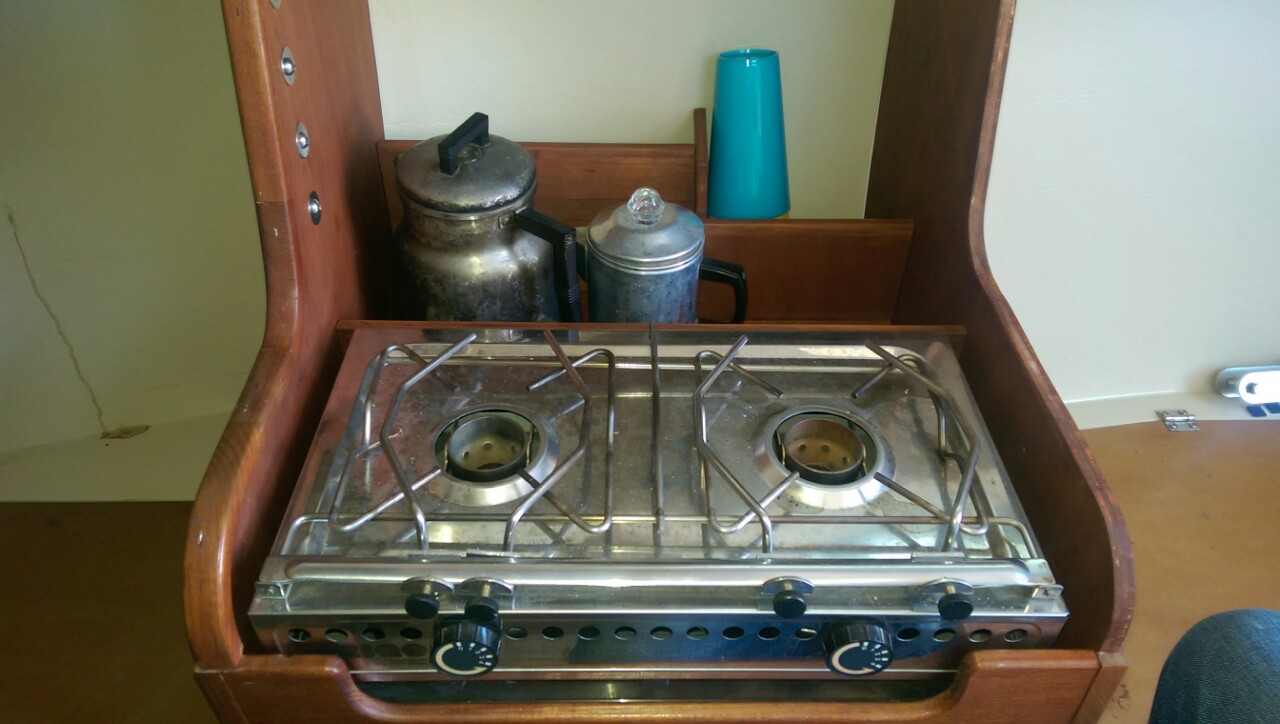
Basic usage configuration (minus spices etc in the left bin, a bottle of wine in the deep space on right rear beside the 8 stacked cups, and a french press for coffee )
Other than handles for the new drawers, and caulking the corners of stove recess, the galley is ready to use.
I still have to make the bullnosing trim for the additional bulkhead, but that won't prevent the galley from being used.
Once It's been in actual use for a while, We'll be able to decide if we want to put a shelf above the stove.
Galley with stove/coffee pot storage divider installed
Stainless bottomed stove recess (to be caulked to contain any spills)
Basic usage configuration (minus spices etc in the left bin, a bottle of wine in the deep space on right rear beside the 8 stacked cups, and a french press for coffee
)
Last edited:
hehe. The menu plan is not far from that.Is that a sailboat or the inside of a high-end bistro? Looking good!
A friend of mine has a tradition of having wine/tea/coffee + cheese and crackers immediately after anchoring.
He got me hooked on it.
LOL, actually..I'm envious of the older C22 galley location. With it beside the companionway, on a pop-top boat you can stand up when cooking. On the new style boats, it's too far forward.Darn you new stylers with your fancy configurations
With the stove rotated, like I've done, it improves access since one burner is 8 inches further aft.
Still not as good as making a custom galley, like some people have done on older C22s though.
Thanks for the compliments guys.
I'll be blissfully happy if it works out to be as functional as I hope.
Having dedicated drawers for plates, bowls, knives, and cooking tools, in addition to easy access to spices, kettle etc will be a huge improvement over the factory design.
I have to thank @watercolors II for the concept. All I did was take his basic design and make it my own.
I still have not idea how I'm going to put handles on the 2 new drawers. I'd prefer to router them, just like the original ones, but I don't have the bits to do that.
Putting those "round hole" pulls in would be simple, but I've always thought they were a great way to break a finger.
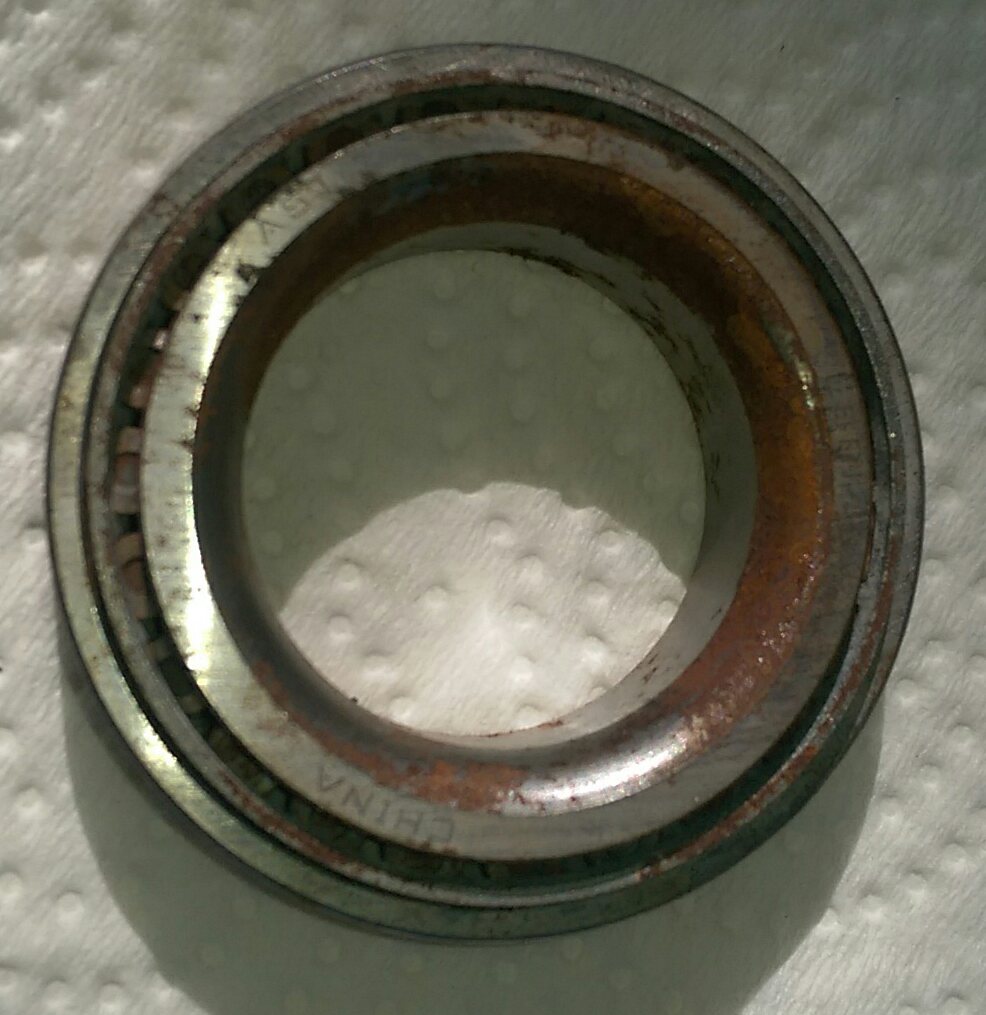
Why keeping your spare trailer bearings prepacked in grease in zip bags is a good thing...
Below is a photo of a new bearing that was stored in it's original plastic packaging, in the toolbox that come with the boat.
Rust won't happen like that when it's packed with grease.
Below is a photo of a new bearing that was stored in it's original plastic packaging, in the toolbox that come with the boat.
Rust won't happen like that when it's packed with grease.
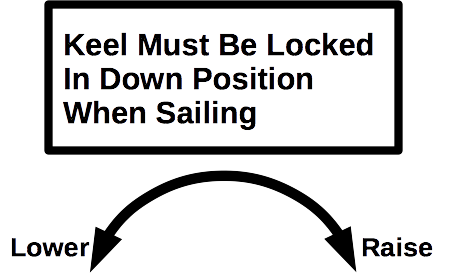
New Design Keel Winch Warning Label
Our boat came with a label affixed by the winch, which warns about having the keel down and "locked" when sailing.
Over the years it has deteriorated, so today I quickly made a graphic to replace it.
In the process, I added a graphic that shows which direction to turn the winch.
It's unlikely I'll let an inexperienced person use the winch, but just in case I thought I'd add it.
If I was just copying the original label, I could simply print it on my printer, protect it with something like Krylon "Preserve it", or clear packing tape.
With the arrow included, I think it will look better if it's printed on a clear label.
In fact I think it will simply look better as a clear label.
The original looks like a cheap last minute idea. I've copied it's look, but it would be easy to add a C22 logo, change the font, or something to make it look better.
Here's the basic design:
I'd buy that for a dollar!New Design Keel Winch Warning Label
Our boat came with a label affixed by the winch, which warns about having the keel down and "locked" when sailing.
Over the years it has deteriorated, so today I quickly made a graphic to replace it.
In the process, I added a graphic that shows which direction to turn the winch.
It's unlikely I'll let an inexperienced person use the winch, but just in case I thought I'd add it.
If I was just copying the original label, I could simply print it on my printer, protect it with something like Krylon "Preserve it", or clear packing tape.
With the arrow included, I think it will look better if it's printed on a clear label.
In fact I think it will simply look better as a clear label.
The original looks like a cheap last minute idea. I've copied it's look, but it would be easy to add a C22 logo, change the font, or something to make it look better.
Here's the basic design:
View attachment 127471
I'm going to call a printing guy I know to see what price it would be for a sheet of clear water proof ones.I'd buy that for a dollar!
A 8x11 sheet of clear label material is $16 CAD from staples here, and thatkrylon spray to waterproof the ink from my inkjet printer is about $40. They must be able to do it cheaper than that if I supply the PDF.
Without the arrow/winch direction section it would simple to just print it on my laser printer and laminate it with packing tape. That would end up looking like the original label, with the white background.
What do you guys/gals think ?
Clear with arrow ?
Just original rectangle label ?
Add a C22 or Catalina logo ?
I detest stickers. You can't buy a freakin' ping pong ball these days without having to peel nineteen warning labels off it, usually requiring the use of acetone and/or other solvents. Drives me nutz.
The brass plaque idea would be cool ... for you people who actually use keel locks.
The brass plaque idea would be cool ... for you people who actually use keel locks.