Or, you could switch to a refrigeration conversion. First read the exaggerated claims from the manufacturers concerning economical electrical demands. Then install the chosen system. Then expand your batteries to support the new fridge. Then purchase a bigger alternator to charge your expanded batterieds. Then purchase a larger shore power charger. About the time you have all that completed it will be time to replace all your batteries. You think ice is heavy?
A lost art: Conserving ice.
- Thread starter TomY
- Start date
i am sure that your upgrade of the insulation will be a huge improvement. i too have the same counter top. i too would not change it even though it shows it's age. but if i did, i'm a white corian guy. that's just who i am.
Thanks, Jon, and everyone that has replied.i am sure that your upgrade of the insulation will be a huge improvement. i too have the same counter top. i too would not change it even though it shows it's age. but if i did, i'm a white corian guy. that's just who i am.
That's what I'm looking for, - a solid improvement in stretching the ice. I'm getting tons of good ideas here and elsewhere.
The vac panels are a miracle but only easily applicable if you're starting from scratch and building a box. They can supply the top as well.
I think Iso. foam, a better air-tight install, an additional inch between the Alden 'ribs' on the bottom (giving 3" there) and a plumbing/insulation improvement on the drain. Someone has made their own pipe extensions to spray foams with great results.
Good suggestions of thin insulating mat on top, perhaps a couple sections of a bubble wrap over provisions that could be easily lifted. I shoulda thought of that.
Plus someone floated the idea of a refrigerated cooler as a supplement. Thier experience: When ice is running low, provisions tend to as well. That would be the time to pull that out of a cockpit locker, put the remaining perishables in it on the cabin sole, and go for a motorboat ride.
Maybe even make ice blocks as we go.
")
I'll post when I get back to it.
It's 12F outside right now. Hard to get excited about insulating an icebox.
I finally got back to this project. Lots of good advice.
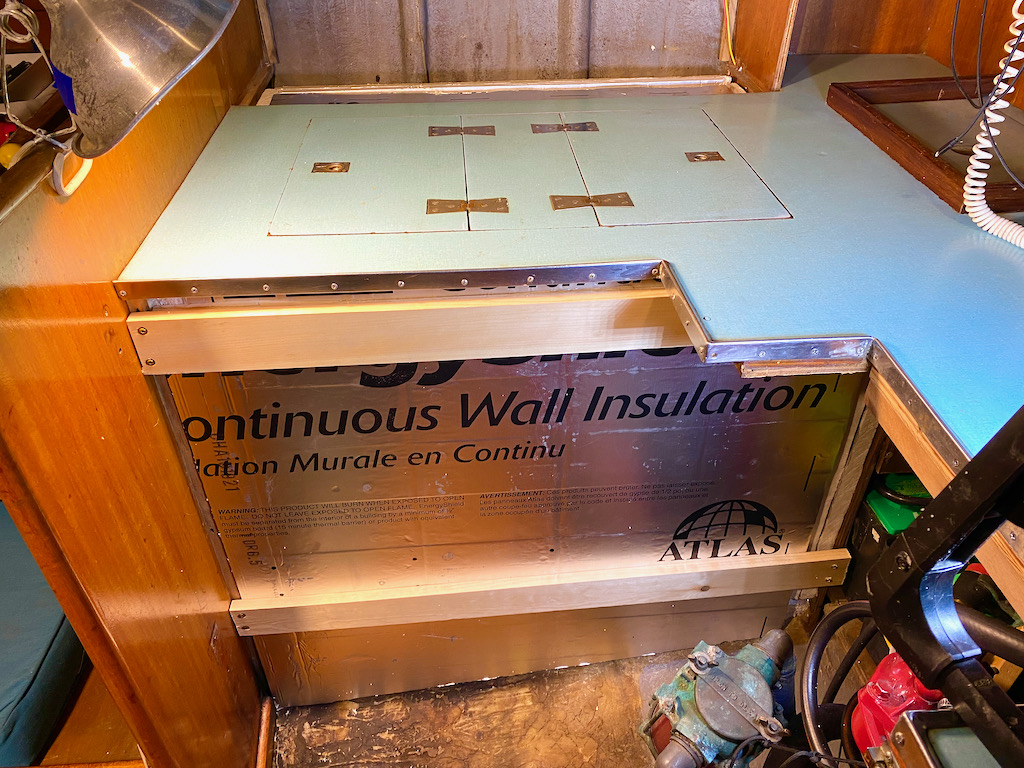
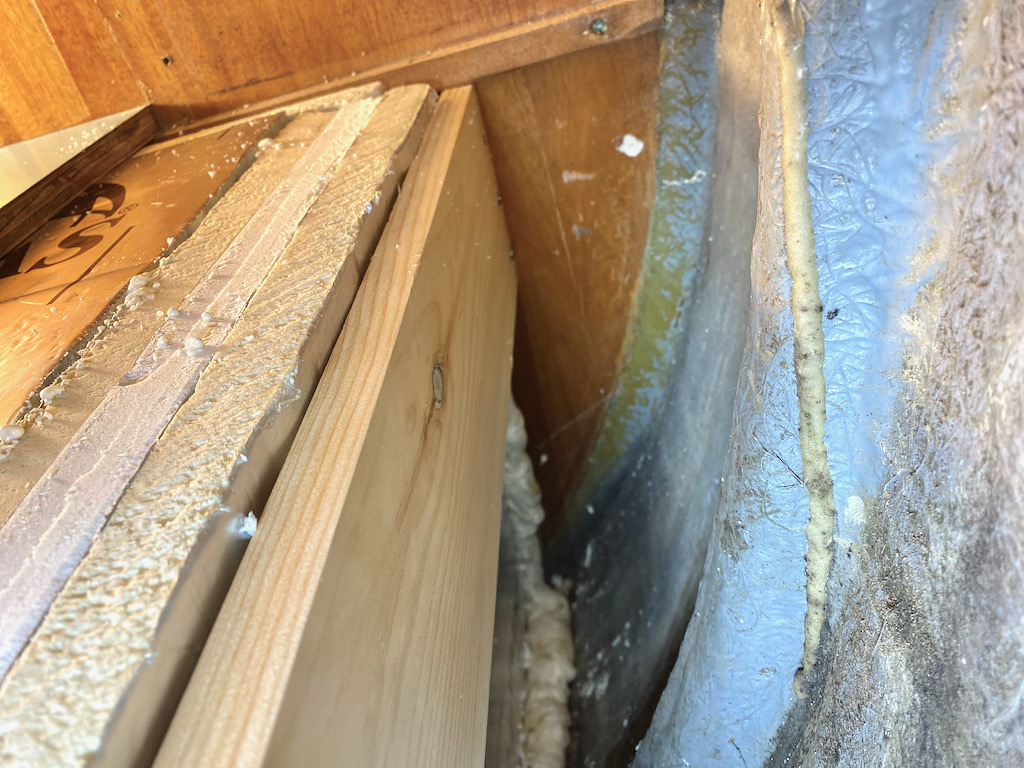
I forced 2 1" polyiso sheets between the hull ribs and the SS box. That left 1"+ void at the tops of the ribs. As hull moves out that space grows to 4". With an extension tube on the expanding foam cans, I was able to reach the middle of the void from each side to begin filling the void. It went pretty well on Saturday. I used 7 12oz. cans. I returned today to finish filling those voids.
Suffice it to say, I don't work with foam much.

Ok, so I could have gotten away with 6 cans.
But all voids are filled along the hull. The back has tons of space so I'll put 3" of polyiso sheet back there.
I now have the two sides fitted with 2" polyiso. That leaves about 1/2" void remaining so I'll attempt to shoot those voids with foam between the iso and the SS box. Every bit will help.
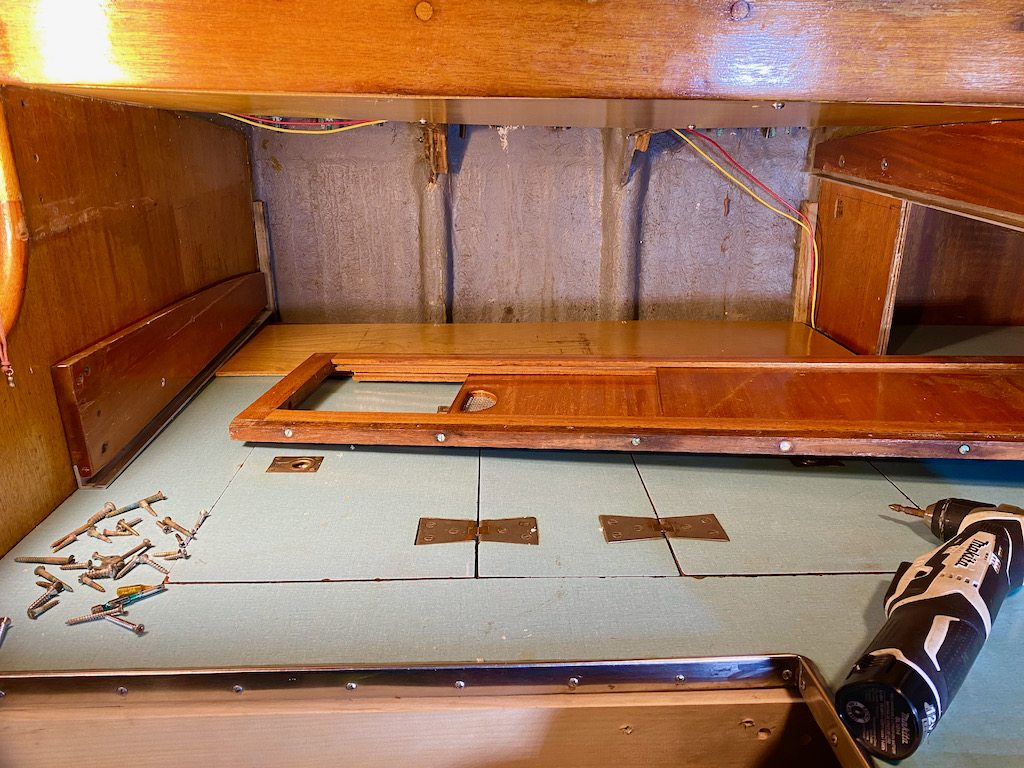
I've removed the starboard sliding settee to access the icebox drain stub (right-hand side of the photo). Per advice here, I plan to put a loop in the new drain hose that raises about an inch above the bottom to act as a water trap.
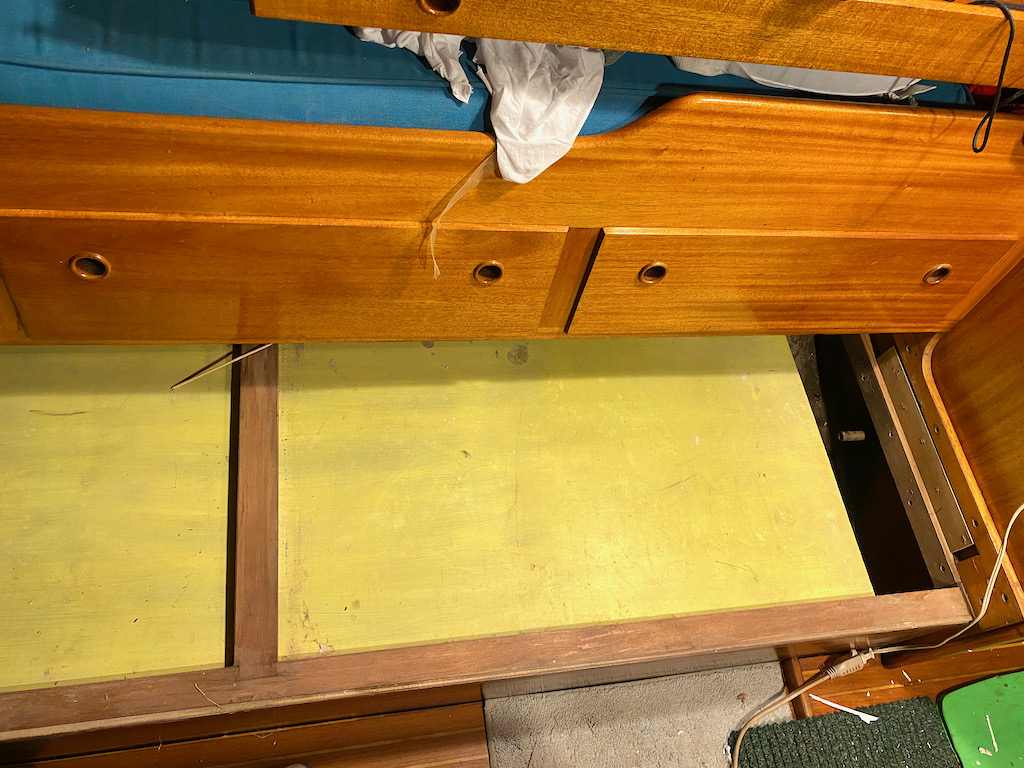
This is the first time I've seen the Alden monel water tanks installed in 1961. There are 3, 40 gallon tanks on board. I can't see any sign of corrosion even around the outlet stubs. I always make sure to run anti freeze through so that those copper outlets are freeze protected.
I forced 2 1" polyiso sheets between the hull ribs and the SS box. That left 1"+ void at the tops of the ribs. As hull moves out that space grows to 4". With an extension tube on the expanding foam cans, I was able to reach the middle of the void from each side to begin filling the void. It went pretty well on Saturday. I used 7 12oz. cans. I returned today to finish filling those voids.
Suffice it to say, I don't work with foam much.
Ok, so I could have gotten away with 6 cans.
But all voids are filled along the hull. The back has tons of space so I'll put 3" of polyiso sheet back there.
I now have the two sides fitted with 2" polyiso. That leaves about 1/2" void remaining so I'll attempt to shoot those voids with foam between the iso and the SS box. Every bit will help.
I've removed the starboard sliding settee to access the icebox drain stub (right-hand side of the photo). Per advice here, I plan to put a loop in the new drain hose that raises about an inch above the bottom to act as a water trap.
This is the first time I've seen the Alden monel water tanks installed in 1961. There are 3, 40 gallon tanks on board. I can't see any sign of corrosion even around the outlet stubs. I always make sure to run anti freeze through so that those copper outlets are freeze protected.
Plus make your boat lighter in weight.If you can get these to fit – these would be fantastic! [Sic:Vacuum insulation panel]
Jim...
between the the ice box and the hull on the starboard side, where the glass ribs are on these old aldens, did you leave an air gap between the ribs? can air move between the bilge and the deck along the inside of the hull?
is the foam water proof or will it absorb water?
on aeolus it is important to me to have the air gap open along the inside of the hull so to get circulation. the teak deck is different than your glass deck. it needs to swell after coming out of the barn to be tight. just like any wood vessel will do. once swollen it's dry. until then i want circulation.
well, i like the bilge to circulate all season long. 'the bilges are sweet'
If you want an air space you would need to design for that.between the the ice box and the hull on the starboard side, where the glass ribs are on these old aldens, did you leave an air gap between the ribs? can air move between the bilge and the deck along the inside of the hull?
is the foam water proof or will it absorb water?
on aeolus it is important to me to have the air gap open along the inside of the hull so to get circulation. the teak deck is different than your glass deck. it needs to swell after coming out of the barn to be tight. just like any wood vessel will do. once swollen it's dry. until then i want circulation.
well, i like the bilge to circulate all season long. 'the bilges are sweet'
There are two types of foam (generic) open cell and closed cell. Open cell will absorb water. Closed cell will not.
Hope this helps.
dj
p.s. In my opinion, open cell foam has no place on a boat.
In my quest to extend my ice, I entombed it, Jon.between the the ice box and the hull on the starboard side, where the glass ribs are on these old aldens, did you leave an air gap between the ribs? can air move between the bilge and the deck along the inside of the hull?
is the foam water proof or will it absorb water?
on aeolus it is important to me to have the air gap open along the inside of the hull so to get circulation. the teak deck is different than your glass deck. it needs to swell after coming out of the barn to be tight. just like any wood vessel will do. once swollen it's dry. until then i want circulation.
well, i like the bilge to circulate all season long. 'the bilges are sweet'
My 'advisors' said sure, many boxes are foam between the hull and box liner on glass boats. This would be death for a wooden boat, for sure.
It's all closed cell foam so won't absorb water. It's pretty easy to remove the cabinetry and expose that area to inspect. No deck leaks so it's been dry.
You should use this for on board insulation when possible. You can make it flex too, buy razor cuts.If you want an air space you would need to design for that.
There are two types of foam (generic) open cell and closed cell. Open cell will absorb water. Closed cell will not.
Duct Board
No closed cell, all FRP
Jim...
3 4X8 sheets of 1" polyiso later. It's a big box,....
It's still only 2" on the top, front and sides, now 3+" on the bottom and back. Polyiso foam is rated about 2X of the original 1961 foam. Plus it's all fit more tightly now. I lost count of the cans of foam.
It's still only 2" on the top, front and sides, now 3+" on the bottom and back. Polyiso foam is rated about 2X of the original 1961 foam. Plus it's all fit more tightly now. I lost count of the cans of foam.
A skilled stick-built boat builder knows (knew), that you'll be taking apart their work sometime in the future. Screws and bolts were pre-drilled in parts to prevent splitting, hand tightened, and made to be removable.
The icebox front had rotted out in the corner from decades of condensation. Boulter plywood in Ma. carries marine stock. Shipping large pieces is expensive so I marked the size I needed (plus an inch extra) so they could cut a 4X4' piece down for shipping. You get the leftover waste as well.
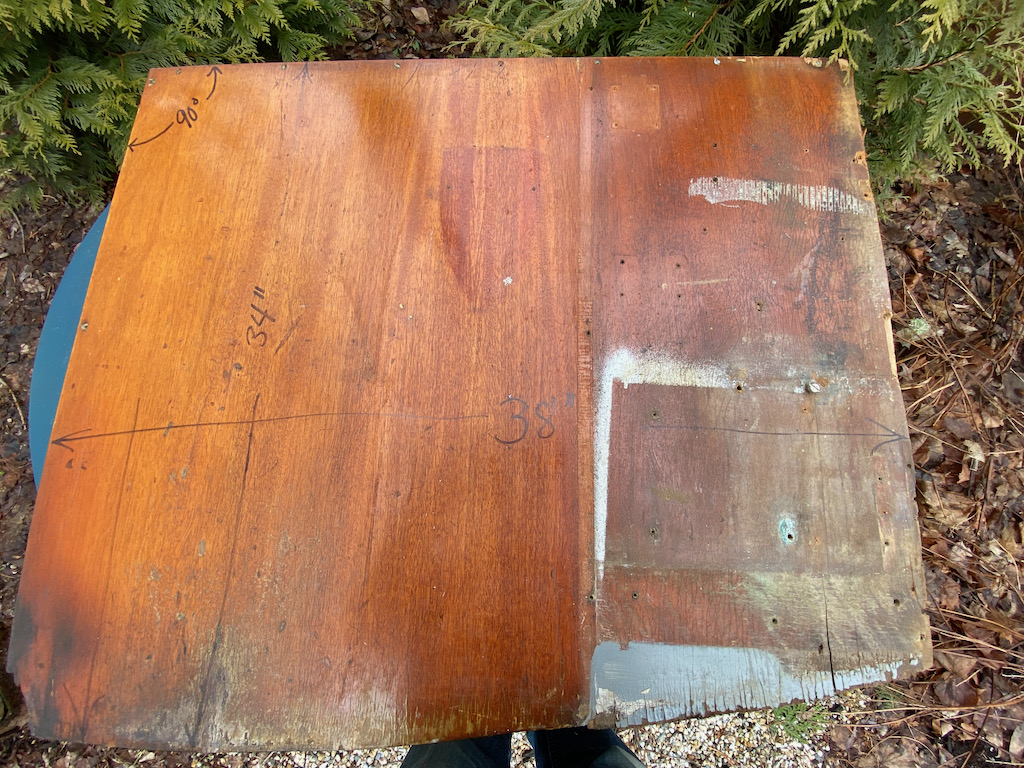
The closest match they had was 3/8" Sapele marine ply. I used the old piece as a template for the replacement. Here it is with 2 back to back sealer coats and 2 coats of Captain's varnish.
It could go in place now but I'll put a third coat of varnish on, just because it's too much fun not to.
The icebox front had rotted out in the corner from decades of condensation. Boulter plywood in Ma. carries marine stock. Shipping large pieces is expensive so I marked the size I needed (plus an inch extra) so they could cut a 4X4' piece down for shipping. You get the leftover waste as well.
The closest match they had was 3/8" Sapele marine ply. I used the old piece as a template for the replacement. Here it is with 2 back to back sealer coats and 2 coats of Captain's varnish.
It could go in place now but I'll put a third coat of varnish on, just because it's too much fun not to.
jssailem
SBO Weather and Forecasting Forum Jim & John
- Oct 22, 2014
- 24,478
Lovely work Tom.I'll put a third coat of varnish on, just because it's too much fun not to.
It is not often you hear that phrase from boat owners. With the push to less boat work more play, conversion to plastic and steel, the thought that laying a coat of varnish on wood could be fun seems like a canceled past time.
Some things are enriching for the boat and the soul.
Thanks go sharing.
It was my understanding that 3 coats for boat work was always considered a minimum....It could go in place now but I'll put a third coat of varnish on, just because it's too much fun not to.
Beautiful work! But I'm clearly a wood lover!
dj
That's true for above decks but this piece is below and not subject to the elements. What I want is the piece to be easily cleaned which spar varnish achieves. This coating will last untouched for decades of use.It was my understanding that 3 coats for boat work was always considered a minimum....
Beautiful work! But I'm clearly a wood lover!
dj
@TomY Curious - how much sanding did you have to do on that piece before applying the varnish? I have interior pieces with veneer that I'm looking at some refinishing. But I'm worried about the surface prep...That's true for above decks but this piece is below and not subject to the elements. What I want is the piece to be easily cleaned which spar varnish achieves. This coating will last untouched for decades of use.
dj
Thanks for asking. My point in showing this varnished work was in how easy it is if you do it right. And with a flat horizontal piece like this, it's fast:@TomY Curious - how much sanding did you have to do on that piece before applying the varnish? I have interior pieces with veneer that I'm looking at some refinishing. But I'm worried about the surface prep...
dj
I used a 6" random orbital sander for nearly every step, with the pad carefully flat on the surface, and each sanding was for no more than 5 minutes, usually less.
1- Roll and tip with foam roller and one coat of Petit wood sealer.
2- Roll and tip a second coat of sealer about 2 hours later, no sanding between coats. Overnight dry
3- Sand with 120 in RO, medium pressure until the surface is smooth and flat. Tack rag well.
4-Roll and tip one coat Captains varnish (mid-range varnish). Overnight dry
5-Sand with 180 in RO, light pressure, until the surface is smooth and flat, but don't take the coat off! Tack rag well.
6-Roll and tip one coat. Overnight dry.
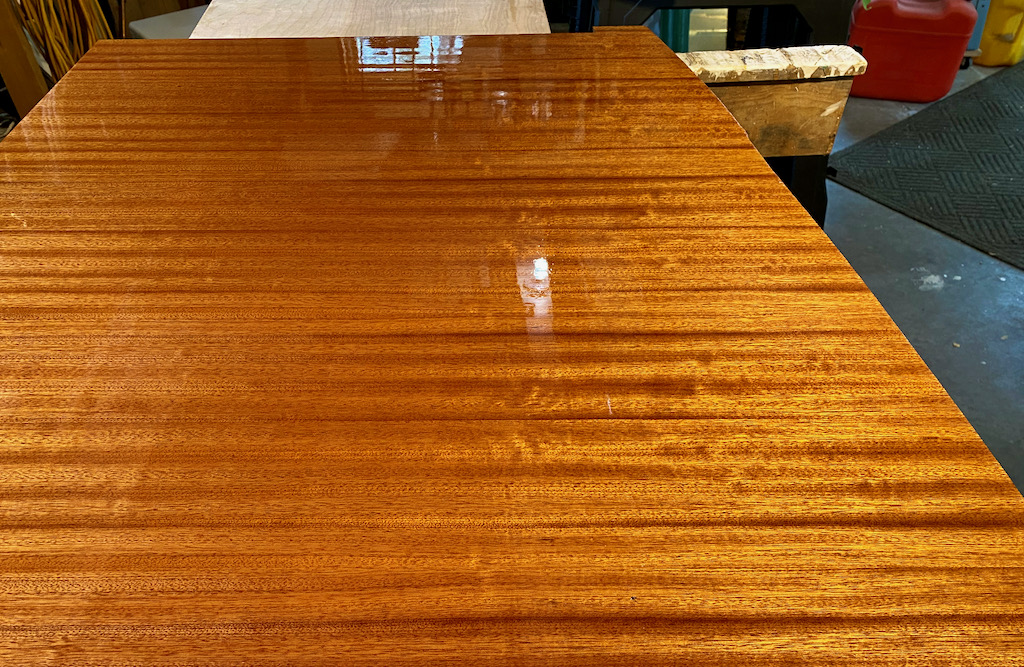
That's when I took the photo, 3 coating seasons later, 2 coats of varnish. Actual work time,... hour maybe? Actual sanding time, 10-15 minutes? What I'm looking for is a smooth durable coating that can be washed, over and over (it's right in the galley). It looked fine at this point but you could see small pores in the veneer that weren't filled.
So I did one last coat yesterday. Here I used 320 grit paper on a rubber sanding block. A light touch, all I wanted to do was fog the entire surface, flat. Maybe 5 minutes of easy sanding. Then a good rub with the tack rag to get all the dust.
On the rolling and tipping: Apply a full coat rolling in one direction, then rolling in the opposite for checkerboard effect. Rolling is what applies an even coat you can't do with just a brush. The final tipping is always with a very light touch, with the grain.
Now it is done and ready to install this weekend. It feels like a sheet of glass.
I'm still working these days so I don't have time to endlessly sand and varnish (which is doing it wrong).
On your surface prep: Is the surface in good condition and is it an oil-based finish like varnish or urethane? If it is, don't sand much. Just get the old finish clean, flat and smooth. You probably won't need more than one or two coats. Don't sand too much just achieve making the surface flat. Then roll and tip.
On the other hand if you have a finish to remove be very careful not to go through veneer. Don't sand much!
