1973 Catalina 22 restoration winter project

Oct 26, 2005
2,057
- - Satellite Beach, FL.
I'm using Behr oil based exterior satin to repaint my interior. Mixed with Penetrol it flows out pretty smooth when rolled or brushed.
$27/gal. instead of almost $90/qt. (perfection) at WM.
 
Sep 29, 2012
128
Catalina 22 Clucluz Lake, BC
Let us know how that Brightside holds up. I just can't decide between that or the Perfection.

I've already knocked a bit of the paint off in a few spots like where the cockpit hatches rub and when I was lifting the pop top into place. But so far it seems to be pretty good. Time will tell. At least the off white colour that I chose was a very close match to the original colour of the boat so small dings don't stand out.
 
May 26, 2013
44
Catalina United States High Cliff State Park
Yeah, I just don't think I would be happy with that at all, if it's coming off already just putting the boat back together. I don't mind doing it, or really the cost factor too much, but I want to do it once and never again, ya know? It really makes me want to re-gelcoat it. As far as it being easier or cheaper, if it all falls off and looks like crud in 6 months it really wasn't cheaper or easier. The original gel lasted 41 years. Really shows the limitations of paint. I hate these types of decisions, there is no right answer.
 
Oct 17, 2011
2,808
Ericson 29 Southport..
You want to get serious about it, go Awlgrip. IT will be there for a VERY long time.
There is however a steep learning curve with this stuff, as it is not for the handy homeowner.
Awlcraft is your next best bet, as it is a tad more forgiving.
But the Awlgrip is second to no paint..
 
Aug 3, 2012
2,542
Performance Cruising Telstar 28 302 Watkins Glen
You want to get serious about it, go Awlgrip. IT will be there for a VERY long time.
There is however a steep learning curve with this stuff, as it is not for the handy homeowner.
Awlcraft is your next best bet, as it is a tad more forgiving.
But the Awlgrip is second to no paint..
Give us some tips on Awlgrip. I remember working as a mate on a 46.6 Bertram as a kid, and the locals used Awlgrip to repaint decks. I never got to do that. I am planning to repaint my deck next Spring, and I want the job to turn out top-notch.

Thanks,

Andrew
 
Sep 30, 2009
98
Catalina Capri 22 (loved my old C-22) NorCal
Fantastic restoration. I love seeing other breathe new life back into these great boats. It's looking beautiful. While admiring your pictures, one struck me as worth mentioning. Post #42 of this thread states:

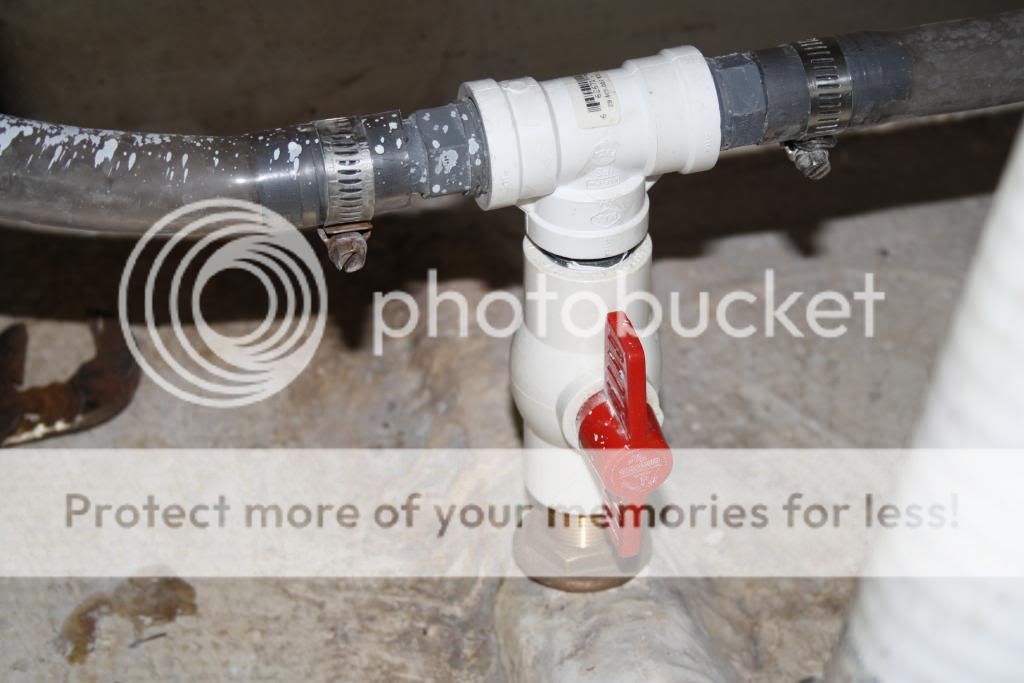
Here is my new scupper plumbing (I'll add the pipe clamps later) and break winch. Its not coated in zinc but I won't be sailing on saltwater anyways.
In the photo of your scupper plumbing, it looks like you used a Home Depot PVC ball valve screwed onto a metal or plastic nipple to replace the thru hull for your cockpit drain. Since this drain is below the waterline, I strongly encourage you to replace it with a proper seacock. This seacock and the volcano tube for the keel cable are the two most critical pieces to keeping your awesome restoration job from the bottom of Davey Jones' Locker. :cry:

Check out the "I've Sprung a Leak" post from 6/18/13 to see what a small leak at this seacock can do:
I chased a similar leak when I first launched mine. It was the brass fitting thru the hull for the cockpit drains.
Now, imagine the whole valve breaking off creating a 1/2" hole in your beautiful boat...

Hope I have not turned into Mr. Buzz Kill. Great work, keep those pictures coming!!!
 
Sep 29, 2012
128
Catalina 22 Clucluz Lake, BC
hmmm The original fitting was a brass nipple which turned and twisted right out of the hull. I replaced it with a plastic nipple because I had one handy and the brass one had seized to the old gate valves threads. I could probably retrofit a proper seacock in by cutting down some of the fibreglass at the top of the hole and building up the bottom of the hole with epoxy and filler because its rather concave in that area. I like the idea though and I'll take pictures when I do it.
 
Sep 29, 2012
128
Catalina 22 Clucluz Lake, BC
Those are some excellent pictures so far. Were you able to flatten the bottom out with a forstner bit or did you use something else?
 
Apr 23, 2013
7
Catalina 22 Riverside,Ca
I used a 2 1/8" hole saw to widen the keel slot and a 2" grinding disk to flatten the mating surface for the thru hull...it took a little bit of creativity to make it this far!
 
May 26, 2013
44
Catalina United States High Cliff State Park
Interesting to see how thick the hull is. It's a bit thicker than I thought it would be.

As far as Awlgrip goes, I would love too, but I don't know if I can afford it, were in the Obama economy after all. Perfection is pretty good stuff and a lot cheaper.

Anybody know where the best prices are for Awlgrip?

I would do a few small areas, maybe hatch lids or something to get used to the product before I tried the big areas, read all the cans, follow the directions, take your time and have an extra pair of hands, I think Awlgrip would go ok.
 
Oct 17, 2011
2,808
Ericson 29 Southport..
I don't know if this belongs here, but this post has gone about everywhere, and I'll try and not write the short novel over it. I could no problem, but......I'm lazy.
Last year, (despite all my silliness about staying drunk or high, I don't really drink at all), I came as close as I have in a long time to taking a drink of liquor than I can remember. Over Awlgrip.
I was using this stuff on a customers very, very, expensive 54' Alden ketch, and I was in a push because of a deadline to get it to a movie set. Close ups of the actors, on the deck. It had to be right. I wish he had hired someone who knew what they were doing.
While that part about the experience is not necessarily true, at times I feel like the biggest flunky alive when messing with stuff of this nature. Awlgrip demands the exact same attention, and dedication that high-end varnishes require. Devotion. Madness. Nerve pills. And I love the stuff. When you get through, and it comes out right, it's awe inspiring how good it looks. And it is really not all THAT hard, you just can not cheat the details. Go ahead, try it. Go by the directions, and it will warm your heart. Don't, and it's probably going to be another restraining order. Again.
The cheats you may already be thinking about: Stupid primers. Negative.
All paint jobs are in the prep, and Awlgrip is no different. Use the two part epoxy primer. Yes it's expensive, but if you've chosen Awlgrip, you've already gone with the best, not the cheapest, and there is no cheap, short ways out. "Glob" it on, and wet sand it to where you want it. Nothing special here, it's a 50/50 mix, and those plastic measuring cups that they have at NAPA, or any paint store is a huge part of this. Because the Awlgrip measures 75/25. And only acetone will touch this stuff, alcohol will only swish around in the cup, amazing. Throw the brush away. Seriously, forget it. And if you are rolling it on, make sure you get "Brush converter", not spray reducer, (unless of course you are spraying it). Here's where you need to decide flow. It's an art form perfected by witch-doctors, and they are not telling. Depending on the weather of course, I use AROUND 10 percent reducer. For flow. And too much will give you holidays.If you are painting a deck or other flat surface, it is a helluva lot easier to get the hang of this stuff as opposed to a vertical surface. You only get to TIP IT ONCE! If you go back for another swipe because you see something you don't like, you have messed it up. If it is that bad, wet sand it out the next day, cover or buff it if you have the paint thick enough. Three coats and you can buff it hard, (after waiting a week). You can wet sand the next day. Done right, you shouldn't need to do either. I've been experimenting with nice, high quality foam brushes with this, and I like it better. No brush strokes to flow back in. This is where the art form comes in particularly. Even brush strokes, with even pressure ON THE TIP of the brush, not dragging it like a rope. Practice on the ol' ladies car, something that is not very important.

With that, don't be scared off by it. No other paint will give you the absolutely amazing results that Awlgrip will. There are few senses of gratification that you will get from stepping back and looking at it. My God the stuff is beautiful. And will hold up forever. I forget exactly, but the hardness comes way up there with gelcoat.

One last thing. This stuff smells to high HELL! You can smell it 500 feet away. I'll spare you all the tear wringing crap about gloves, (Awlgrip WEARS off of your hands, it does NOT wipe off), respirators and the like safety equipment. There again, it's targeted at the pro, so act like one. Sailboat owners are typically not idiots, so do not act like one. Spraying it without an air-fed mask is suicide. Just take my word on that one...
 
Sep 30, 2009
98
Catalina Capri 22 (loved my old C-22) NorCal
hmmm The original fitting was a brass nipple which turned and twisted right out of the hull. I replaced it with a plastic nipple because I had one handy and the brass one had seized to the old gate valves threads. I could probably retrofit a proper seacock in by cutting down some of the fibreglass at the top of the hole and building up the bottom of the hole with epoxy and filler because its rather concave in that area. I like the idea though and I'll take pictures when I do it.
Another new post in the "I sprung a Leak" thread gives a great how-to to replacing the nipple and seacock. Timing couldn't be better for you. Here it is again. Kudos to CCrane2299.

The brass fitting is just pushed thru the hull with some kind of sealer. My po had jb welded around the top of mine. Big mistake. Simple job to remove it and reseal it. Just take some channell locks and wiggle it out. I used 3m 4200 because it was quick set and I had it on the boat. Several weeks in and it is fine. I assembled the whole thing including the cockpit drain hoses before I reinstalled it (liberally coated both in the cleaned hull and on the fitting.) I smoothed the excess out inside the hull as I finished. I assembled everything first so that I wouldn't be torquing around on the fitting after it was set. The valve and fittings were easier to assemble and seal together topside, and the hoses helped to locate it after installation as the sealant cured.

The water under the floor enters from the right side of the boat. It gets trapped under the floor by the single layer of fiberglass that connects the floor to the hull and "seals" the water from getting under there. There is no such layer on the side under where the galley goes.I drilled a hole above the hull, under the floor, near the volcano. Then under the front dinette seat into the same area. Then, under the floor...above the hull in the front unfinished storage compartment. Water ran out for a good while. It helped to walk back and forth on the boat to help it slosh out. If yours is on the trailer, you can adjust the tounge height and make it go faster. Maybe even just drill one hole in the rear? I kept drying until I got it all. I have been thinking about resealing the holes I drilled, but I think I'll leave them since it seems to be the only way to completely drain this area. I don't see how it could be dry under there without some drilling. I suppose you could drive the boat on the trailer so that it leaned over far enough, with a rearward slant and get it out that way?

I had some gelcoat cranks there too and kept drying them only to have the water return. If your cockpit drain thru hull is suspect, I'd not relaunch until it was resealed. When the boat is in the water, the pressure is much greater than simply pouring a few gallons in the hull. Again if I didn't know when the brass tube had been resealed last, I'd redo it. It needs it. From what I've read there are two things guaranteed to sink your boat, that fitting and the rubber tube on the volcano. That fitting is nothing more than a hardware store brass nipple threaded on both ends and pushed through a non threaded hole in the bottom of your boat.

When I'd did mine, I pushed it pretty far thru the hole. In retrospect, I wonder if the keel could contact it when fully raised?


I thought about grinding the cracks a little to smooth things up and the use white roll on Bed liner to make things pretty. It would make it a nicer place to stow things.

After all of this I still have a little leak topside when it rains. It flows,to exactly,the same spots and makes finding the main leak much harder. I feel confidant that mine is fixed because the three weeks after the repair the boat was none dry. On the fourth week it rained hard and I had just a little in the same area just in front of the volcano near the battery box.

Good luck.
 
May 26, 2013
44
Catalina United States High Cliff State Park
Ohh yeah, I've heard some horror stories about Awlgrip. I think the biggest thing about it is to well...be in the mood to do it. If your all in a hurry and being(no pun intended) Ham-fisted your going to get a job that looks like a marshmallow in a microwave. But, if you do exacting prep, ohh yes the good primer is a must, proper safety(I don't have an air fed mask, so rolling is probably the way to go), and start small on a hatch lid or something not invaluable to get the technique down before tackling your beautifully smooth hull topsides. I would probably move to the stern after the hatch as it's the smallest part of the boat to F-up. See how that goes. I feel pretty good about perfection too, especially for the cost savings. But, Awlgrip I would probably never have to do agian. Anyone know of the real world differences between the awl grip and awl craft, supposedly the awlcraft is easier and more forgiving? But does it get as good of results?
 
Sep 29, 2012
128
Catalina 22 Clucluz Lake, BC
Here is my somewhat rushed attempt at upgrading the through hull. I used a 2" Forstner bit on the bottom and a sanding wheel inside to flatten out the areas. The seacock was 2-1/8" so I sanded down the edges slightly to reduce it to 2" and make it fit. I then loaded up the flange of the seacock with lots of 4200 to fill in any gaps and put it all back together. I think I should build up the fibreglass around the top as well because its now a little thin in that area.


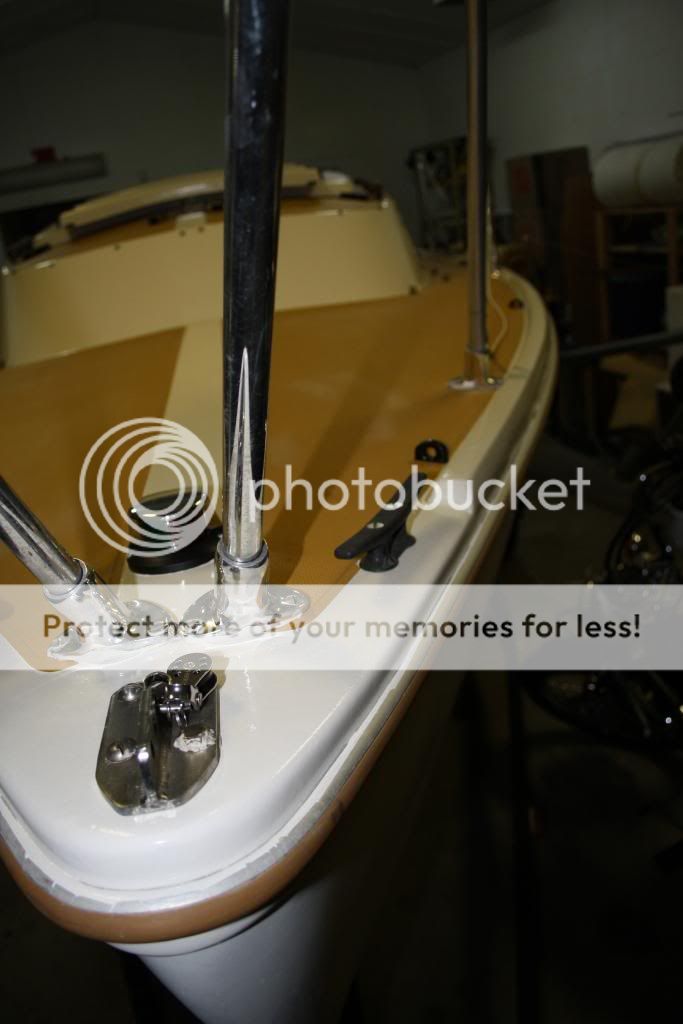
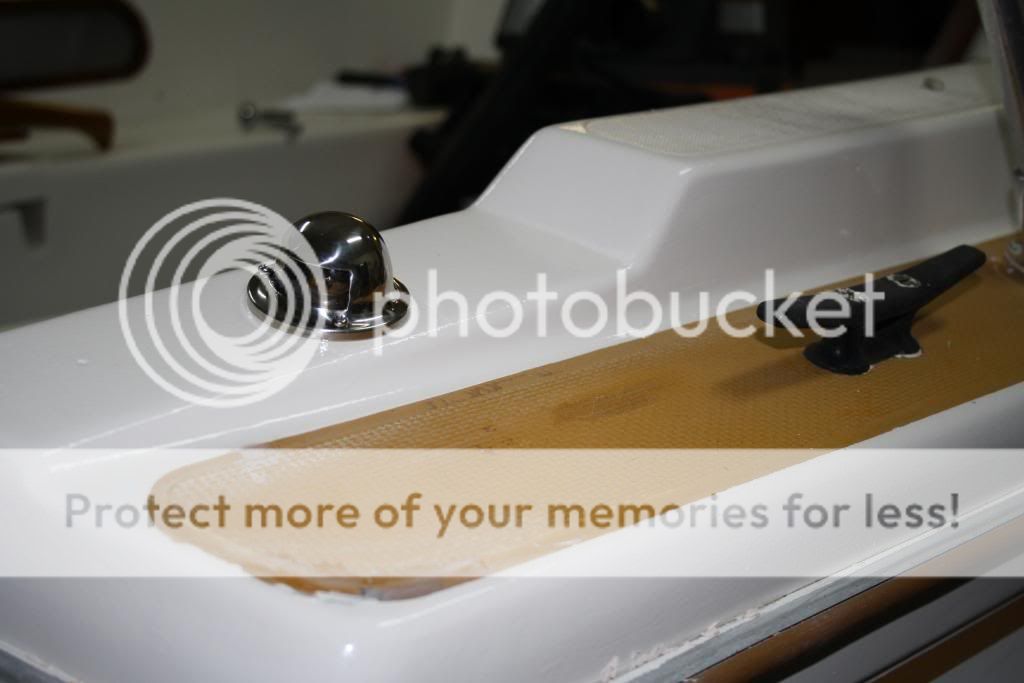
I got some more hardware installed recently too. New spreader brackets, windex, hatch dogs and deck organizers for the halyards led aft kit and jib downhaul kit. I also installed a new stern light because the original was missing and only a hole was left behind when I bought the boat.


So lets see whats left to do: A boom topping lift, an oil lamp, a cansail tiller lock, an electric panel, paint the sliding galley and I need to make some repairs and upgrades to the sail club dock where I'll be keeping the boat. Well I guess I better get back to work.
 
May 26, 2013
44
Catalina United States High Cliff State Park
The thing about a plastic valve is something nobody(but an engineer) thinks about, hydraulic pressure. If you get in waves and the boat starts slapping into the troughs it creates tremendous hydraulic pressure on valves and through hull fittings and can cause then to blow right out. I've seen in happen in bigger boats. I have seen very heavy metal fittings shoot out like out of a gun and water geyser through. I had over a foot of water in a 48'er once because of this, was a horrible experience. I know most of us don't sail 22's in that kind of conditions, but as everyone knows it's not what you planned for that gets you. Not a criticism, just food for thought.
 
Sep 30, 2009
98
Catalina Capri 22 (loved my old C-22) NorCal
The thing about a plastic valve is something nobody(but an engineer) thinks about, hydraulic pressure.
Touche!!! I am an engineer and that is what I think about...

Whatcaneyedo - The new thru-hull looks great! A tremendous improvement. However, as Hamsandwich stated, I too am still nervous about that PVC valve as it's not designed for a marine application. I have had them break on my sprinkler lines and wouldn't want it below the waterline on my boat. I'd hate seeing that $4 piece of plastic sink your beautifully restored 22.

Replace it with a proper seacock like the one sold here: http://shop.catalinaowners.com/prod.php?16138/Marelon Full-Flow Ball Valves and you are golden. CD sells the same one. The extra $36 is cheap insurance.

Love the pictures. Good luck and keep up the great work.
 
Sep 29, 2012
128
Catalina 22 Clucluz Lake, BC
Sure why not. I'll pick up something brass this weekend when I grab some more Cetol Marine for the crib boards. Fortunately its suppose to be a cold wet weekend so I should be able to finish that and the repainting of the sliding galley aka the oversized-outboard-counterbalance-device.
 
Jan 13, 2013
214
Catalina 22 Lake Champlain
Virtually every full-port ball-valve is rated 300# WOG (water, oil or gas) Around half the cost - and, all stainless or brass w/cast-nylon packing.