Commissioning tasks and ongoing improvements of a 83 Cat 22 from trailer to saltwatercamper

Sep 14, 2014
1,251
Catalina 22 Pensacola, Florida
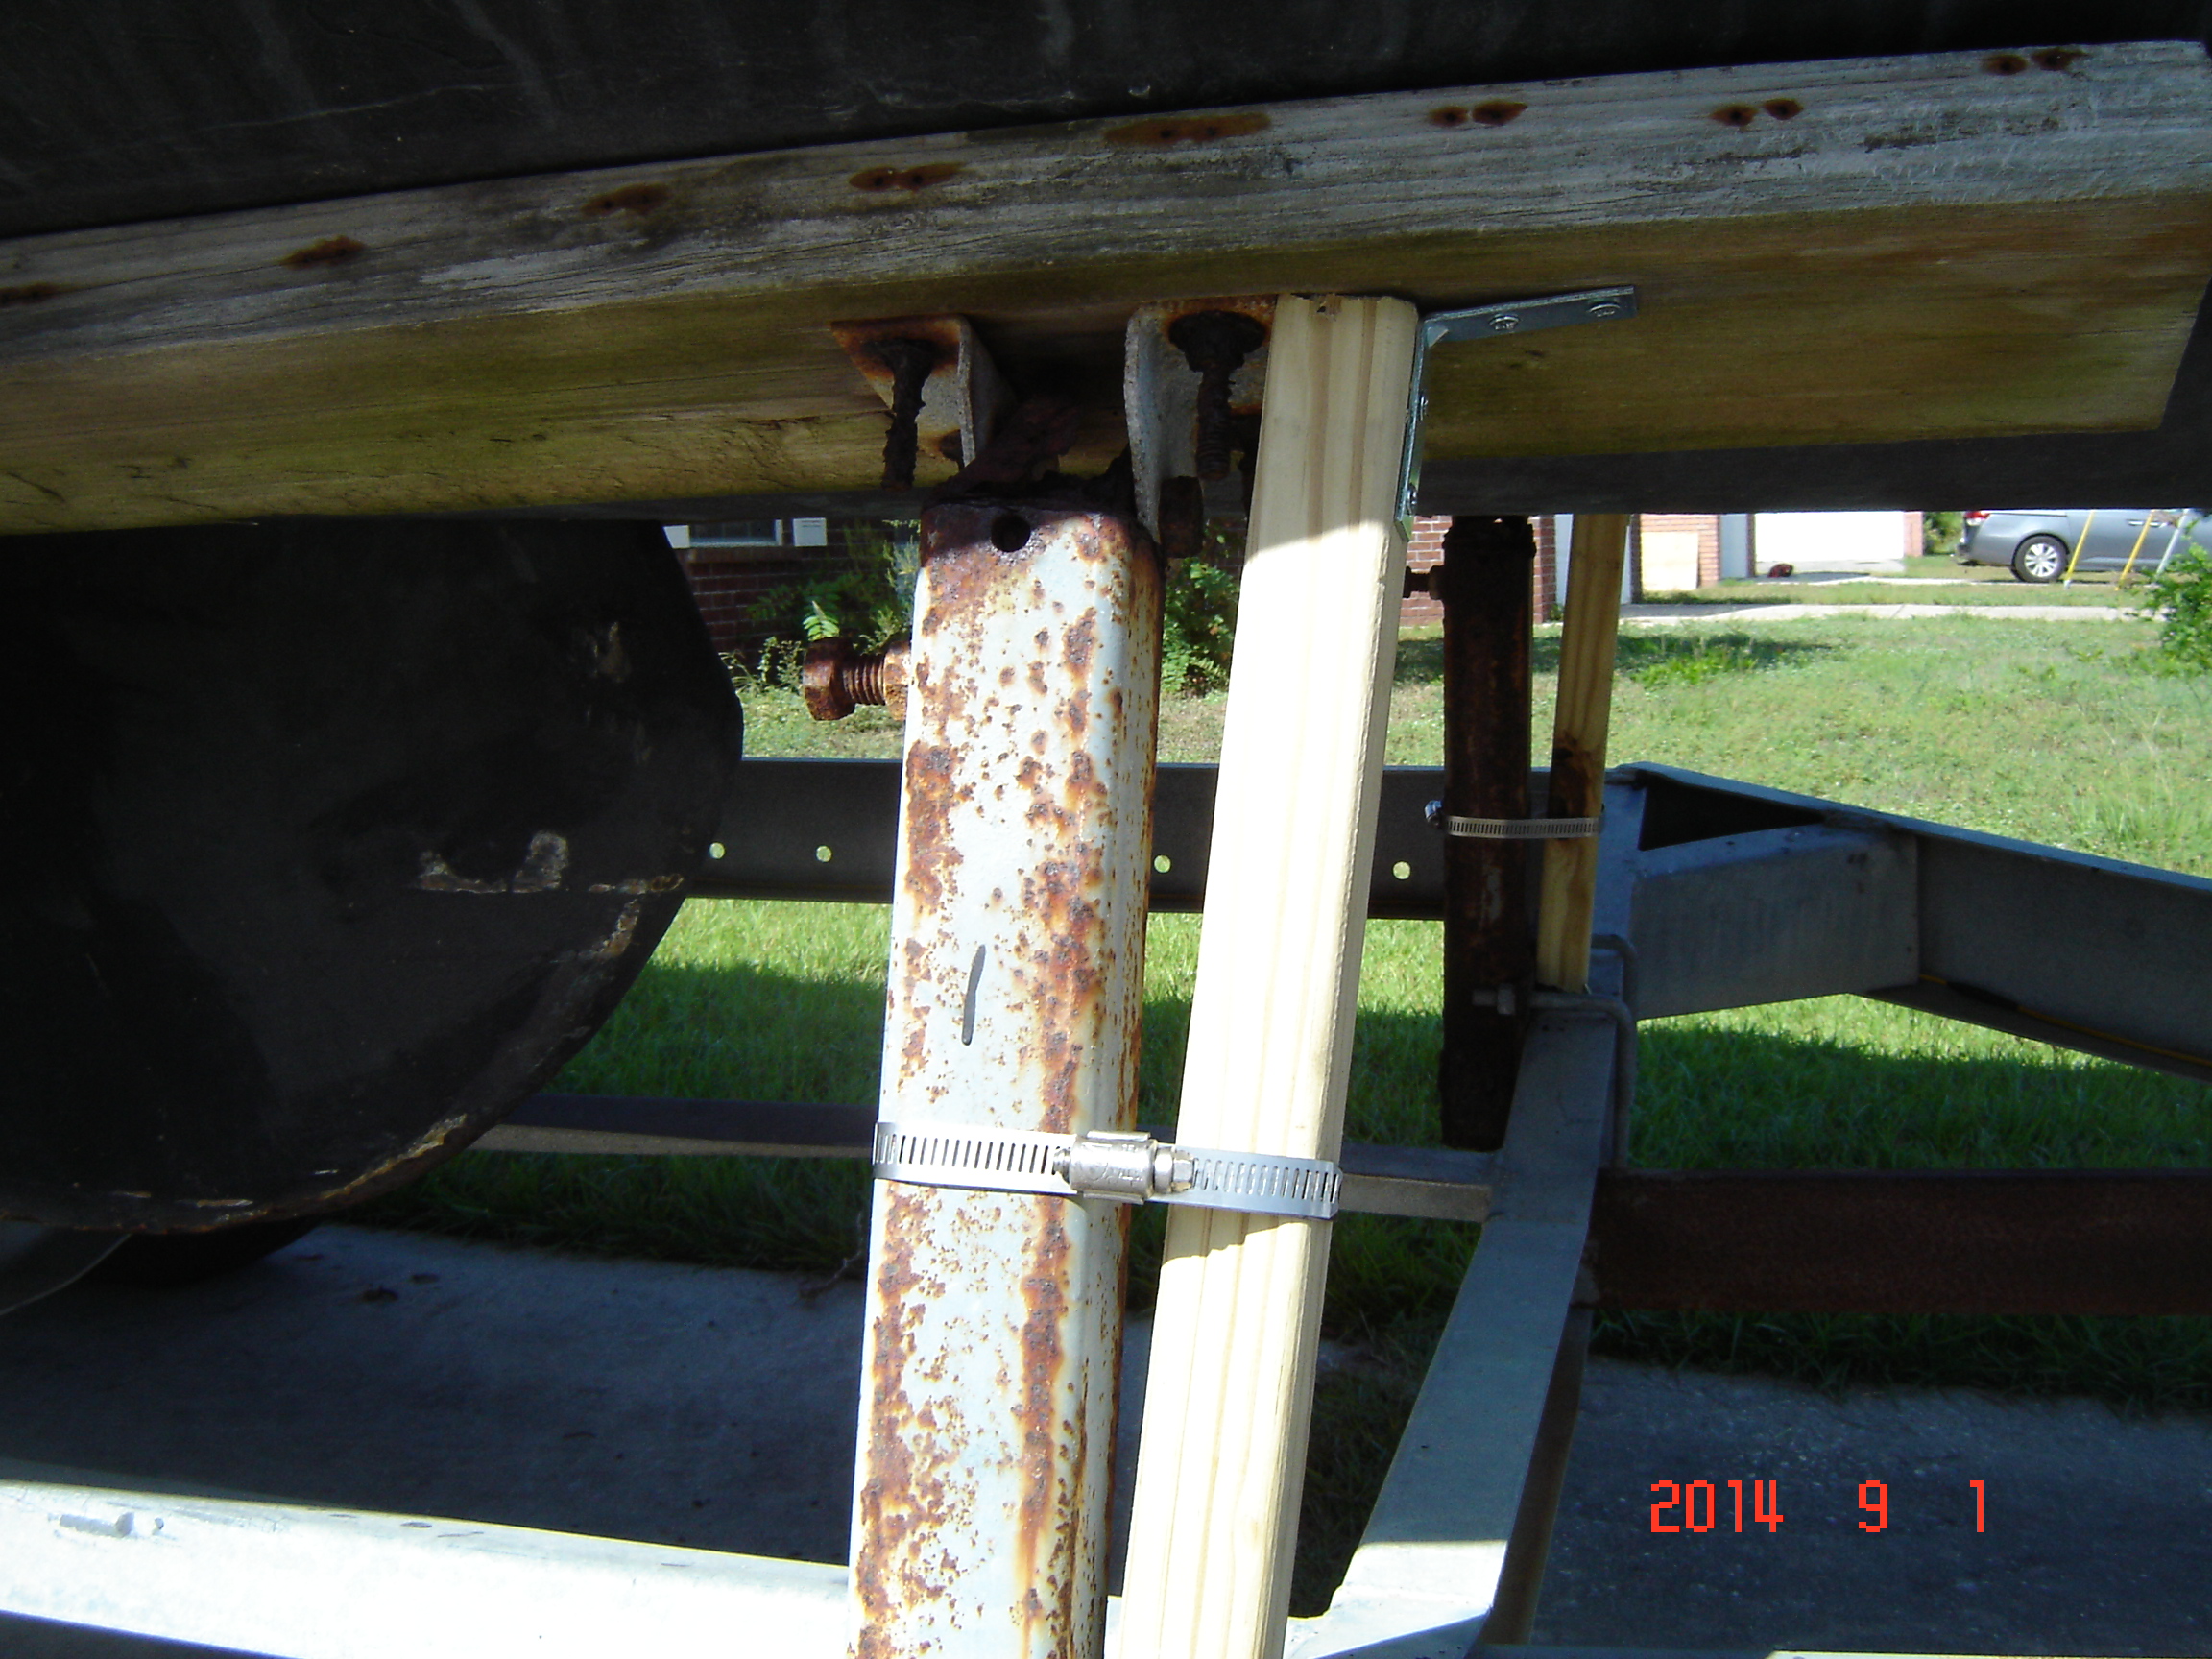
I thought it might be helpful to new owners of old Catalina 22s if i posted some of the 100 odd things I had to do to get my 83 from a trailer at the side of the previous owners house to the lovely slip in the marina. Lots of these things have been posted before, but maybe some of the details may have been a little different for me. Classic example is drill 3/4 inch hole in cabin top and fish out wires. Well I am still working up the courage for that one but I did have a small heart flop when I cut the 3 and 3/4 inch hole in the fore-deck hatch to install a passive vent and then replaced it with a solar one. I will get to that one later but I was pleasantly surprised at the thickness of the hatch lid and it made me more comfortable standing on it after that. I will need to work out the kinks in the new upload method for pic but here goes. By the way my "new" boat had no HIN I could find but a sticker on it from a conservation officer in florida with a made up number that matched the title. Except it designated it as a homebuilt (default position in system) so I had to fight the tag people a little about it being a production boat. That is another story. So anywho My first task: Stabilizing the rusty bunk board supports so I could tow it without punching two giant holes in my new hull. So a trip to home depot and a little thought resulted in the solution pictured below. More to come.
A Seagul 3 yard pix (1).JPG
 
Last edited:
Sep 14, 2014
1,251
Catalina 22 Pensacola, Florida
A Seagul 3 yard pix (7).JPG
A Seagul 3 yard pix (5).JPG
A note , I also found interesting facets of the trailer once I towed it with fear and trembling to a yard and had it put on stands after they lifted it off with a forklift! Some things are better off out of sight, as you might give serious second thoughts to driving off with a boat and trailer that has not moved in 2 years.
 
Sep 14, 2014
1,251
Catalina 22 Pensacola, Florida
Well next step was to have the yard guys put it up on stands and put the mast on saw horses beside it so I could begin to work on the keel and hull. One of the first issues was to get it high enough up on the stands so I could lower the keel and be able to work on it and the cavity up inside. The guys did a good job and I then lowered it for inspection. It looked kind of rugged but having been on a trailer most of the time I at least did not have to deal with barnacles and coon oysters which are usually seen on hulls docked here. As you can see it had some spots of rust but was generally in good shape including the cable connection and the cable itself. I was told by previous owner that the keel cable etc had been replace about a year or so earlier. C Keel before and after (6).JPG A Seagul 3 yard pix (11).JPG B Yard keel work (2).JPG
 
Nov 19, 2008
2,129
Catalina C-22 MK-II Parrish, FL
FYI, looking at that first photo, the keel hangers are installed upside-down. Would be a good time to reverse them while it's so convenient to work on it.

Don
 
Sep 14, 2014
1,251
Catalina 22 Pensacola, Florida
Will have to wait till next pull out, been sailing it for 14 months since the pix.
 
Sep 14, 2014
1,251
Catalina 22 Pensacola, Florida
One of the things I did besides a light sanding of barrier coat and some epoxy patching of any nicks etc on the hull, was to use an angle grinder to take out all the of the rust spots on the keel, then after acetone cleaning of bright iron instantly put a coat of west system epoxy with filler to thicken it on all the spots. While it was still tender I put a second coat on all the spots to get good adhesion to first coat, light sand, acetone swipe and carry on. This gave me a nice barrier coat all over to put two coats of Trinidad SR anti-fouling. For the inside of the keel trunk (box) I used a paintbrush taped to a stick after prepping as well as possible and then generous spray of good old outboard engine anti-fouling where I could not reach. Of course I raised and lowered the keel so I could get a good coat on the very front of the keel. C Keel before and after (9).JPG C Keel before and after (8).JPG
 
Sep 14, 2014
1,251
Catalina 22 Pensacola, Florida
Most of the rest of the work involved giving the hull two coats of Trinidad SR antifouling as well as the keel itself and rudder blade. This is just light sand, acetone wash and tape up to keep paint where it needs to be and rinse and repeat. The yard guys lowered the stands for me so this was easier to reach than way so I could lower the keel all the way to paint it. Next stuff was rigging and other tasks easier to do in yard than in water.
L up on stands getting tush panited (1).JPG L up on stands getting tush panited.JPG
 
  • Like
Likes: Will Gilmore
Sep 14, 2014
1,251
Catalina 22 Pensacola, Florida
One of the next tasks was working on the mast while I had it down and reachable. Only one wire cable from a steaming light (not working) to base and out a grommet to a auto two plug connector. So I first added a anchor light to the masthead using a side mount LED anchor light left me by the previous owner in a bag with some parts. It turns out you mount the bracket on the mast side, run the cable through its base and then out through a grommet at the base. No conduits in this mast so went to Harbor Freight and bought a 30 fiberglass snake, no good too flexy, traded it in for 50 foot metal snake with drum. Aha, feed it down through hole in masthead to base, attach cable and pull back out to top. Also remembered to add zip ties with tails uncut about ever 8 feet or so. Keeps the cable from banging around in the mast (keeping you awake at night, trust me) Series of pictures summarize the little more than half day project. Later on I worked on connections at base to boat wiring but I wanted all the mast stuff done so I could erect it and go sailing!F  More mast details.JPG F  More mast details (1).JPG F  More mast details (3).JPG F  More mast details (4).JPG
 
Sep 14, 2014
1,251
Catalina 22 Pensacola, Florida
I also mounted a vhf antenna (shorty so called racing version) on the opposite side of the masthead and put its cable through a grommet and fished and ran it down the inside of the mast in a similar fashion including the zip ties . With the coax and two two wire harness cables inside most of the mast it got a little crowded so no body bangs around in there. Fortunately my halyards were external!!!:kick: Then out thru a grommet and all just tied up- in a bunch at the base awaiting hookup. The mast connector on there used by the PO had a automotive directional flat plug so I used the same plug on the mast end of the new anchor light. So I could either use the steam light by plugging it in or the anchor light. I also put together a 8 AA battery source to just hook up to the anchor all by itself instead of being on the running light circuit. Later I upgraded all this paleolithic engineering with a proper harness, thru deck and coax thru deck to new radio. Selected pix are below. Feel free to comment on temp wiring but it is like :deadhorse:because everybody has an opinion. F  More mast details (5).JPG F  More mast details (6).JPG G radio antenna mount and coax.JPG
 
Sep 14, 2014
1,251
Catalina 22 Pensacola, Florida
The next item in the yard was the fun one, many threads on this one, RAISING THE MAST!!
I started out with a block and tackle to stem attached to forestay end figuring to just pull it up like I had done on my Luger 21 previously. After I rigged it up and gave it a tug I realized this mast is a little more weighty, and apparently I have aged some since the last raise of my Seagull II mast back in the late 90s or so. So I dragooned (try that on wiki!) two of the yard guys and we raised it with them pulling and me guiding. In my defense I had gotten the mast into the crutch and got it up to the intermediate stage solo. Anyway here are the pix.M Stepping the mast (1).JPG M Stepping the mast.JPG M Stepping the mast (2).JPG M Stepping the mast (4).JPG
 
  • Like
Likes: Will Gilmore
Apr 13, 2016
29
Catalina 22 Fort Worth
I would love to get my boat up off the trailer high enough to drop the keel and have a good look underneath! Looks great!
 
Sep 14, 2014
1,251
Catalina 22 Pensacola, Florida
Well the yard guys picked it up with a forklift off the trailer and blocked it up for 150 plus daily 15 in the yard, maybe you can find a marina or yard to do that for you .
 
Sep 14, 2014
1,251
Catalina 22 Pensacola, Florida
speaking of forklifts, after putting the numbers back on and name on its butt,( none there before as I could find) I had them fork it into the water (a process not for the faint of heart to watch). The shot of its rear at the dock getting ready to motor over to its slip shows why my boats get the name they get; (Hint: name of the smoky outboard you see running is a British Seagull Silver Century) The motor it came with ran good, but no throttle control, some part broke, not produced anymore. so dug out my trusty seagull from the garage and with fresh fuel and cleaned spark plug started right up after about 10 years in storage. H Official name.JPG D anode attachement and new numbers (1).JPG N on the forklift to splash.jpg O Leaving under Seagull power.jpg
 
Apr 13, 2016
29
Catalina 22 Fort Worth
I thought about a yard but would like it at the house to be more convenient to work on. I'm searching for some stands but their pretty proud of all the ones I've found so far.
 
  • Like
Likes: Trent Lindsey
Sep 14, 2014
1,251
Catalina 22 Pensacola, Florida
Well the nice thing about the yard was water, air, and electric right at the boat, spare hand when needed and they did not charge for the lowering step from high to work on keel to low for hull painting as considered part of the job to pick up and dunk. They always include one lift to move the pads to paint under them too. Worth the cost and travel which for me was a half mile or so. L up on stands getting tush panited.JPG
 
Sep 14, 2014
1,251
Catalina 22 Pensacola, Florida
One of first things after safely docking was to install one of my capture devices as I single hand most of the time. It saves using the boat box or the part of the bow just below the stem as a dock deflection device. It is pretty low tech, effective and especially low cost, all of my favorite boxes checked. It is just a simple V of lines with a floatie, pool noodle or old fender at the notch of the V. All nylon so it stretches. You can actually come in under very low power, and catch a stern line, then go neutral and stay in place like magic.
IMG_20160206_112336.jpg
 
Sep 14, 2014
1,251
Catalina 22 Pensacola, Florida
Another item that needed work on the boat once I got it in the slip was the cover plate in front of the winch which the handle goes through. I took it off, which involved removing the split ring on the handle which only comes off if you lower the keel all the way to take off the tension. Reverse to remount.. Anyway it lots of damage around the handle hole probably caused by owners twisting the wood plate around and worming out the hole to get it off with the handle still mounted. sheesh guys. So rather than try to create a new teak board with the square shaped relief divot on the reverse I just fabricated a new face for the handle hole and mounted it all back up. Pictures below of steps and final product. Still has original warning label!Winch board project (1).JPG Winch board project (2).JPG Winch board project (3).JPG Winch board project (4).JPG
 
Mar 20, 2015
3,094
C&C 30 Mk1 Winnipeg
Well the yard guys picked it up with a forklift off the trailer and blocked it up for 150 plus daily 15 in the yard, maybe you can find a marina or yard to do that for you .
Heck I'd pay $150 without question !
 
Sep 14, 2014
1,251
Catalina 22 Pensacola, Florida
Had to come up with quick tiller extension in time for NGCC 2016 so dropped by Home Depot, with quick hacksaw to shorten, and pliers to bend it I put a paint roller on a 6 dollar quickie brand extension handle. Looks good and works so far.
home depot tiller extension.jpg