C22 New Style "Stormwatch" Purchase and Refit

Mar 20, 2015
3,094
C&C 30 Mk1 Winnipeg
---------------
Houston, We have Liftoff....
---------------


Well... on Saturday the boat finally hit the water for the first time under our ownership.

The marina/harbour is small, but as expected the launch works well for the Catalina 22.
As I mentioned before, there is an early C22 berthed there. (Only other sailboat was a MacGregor 26)
Unfortunately the launch ramp doesn't have a dock right beside it. Having one makes boat launching simpler.

This harbour is on a straight section of shoreline, but the space is fairly tight in strong winds.
There is a stone breakwater to help block the wind and waves but it is by no means sheltered.
When launching we had Force 5 winds (approx 15 to 20 knts) outside the breakwater.

Compared to the small fishing boats there, the C22 is affected by windage a fair amount.
In this case, while my wife was pulling the truck+trailer off the ramp, I had to lower the rudder, lower the keel if possible, and quickly get the boat moving so I could steer her and keep the wind from blowing her onto the docks.

We rigged the boat, and quickly tested the outboard to ensure it would start immediately.
When on the ramp, the boat would have the wind blowing on the starboard bow,
We chose a dock that we wanted to tie up to. There were a few empty berths, so I chose one that would allow me to have fenders on the port side. Having never had the boat in the water, I was worried about how it handled. By having the fenders on the port side, I also had the backup option of putting the boat into the slip which was in the channel directly behind the ramp.
With the fenders out, docklines ready, and 3 hours of daylight left, we crossed our fingers.

The launch itself was easy. There's a good drop-off just into the water, so the boat was floating before the truck axle was in the water. I backed into position, then jumped into the bed of the truck. My wife then backed up until the boat was floating. She then got out and held the bowline, while I climbed off the pickup's lowered tailgate, over the bow, and into the boat.
I fired up the outboard and my wife released the bowline.

I had hoped that the keel, even though it was up, would give good directional control.
I had planned to use the rudder and outboard to pull the stern to port, and once I had room, motor forward to get the bow through the wind, and motor to the berth.

Nope... nothing doing.
As expected, the boat drifted sideways, until the rudder was down, which then caused the bow to fall off the wind.
But even with the boat moving astern, the bow still wanted to fall off more than I expected.
Being unsure of the boat's abilities, I wasn't comfortable in the remaining space I had, to simply crank the throttle forward to get the bow around.

Very quickly, the boat was going to be laying perpendicular to the channel, instead of "in" it.
I quickly changed plans aka panicked aka became very focused.
I had no idea how deep the water was, but I QUICKLY dropped the keel a couple cranks, shoved both the rudder and outboard over more and give it full throttle in reverse. Once I knew I was going to clear the dock beside the channel, and the bow was coming over, I threw both tillers over the other way and cranked the throttle forward to slow the boat down, then throttled back.
I was able to throw a dockline over a cleat, and it pulled the boat pulled to the dock.

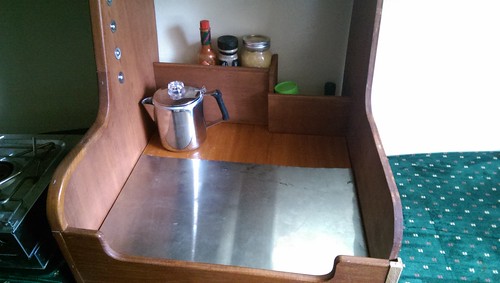
Once tied to the dock, I waited for my wife to come back from parking the trailer+truck. We fired up the stove for tea, and I considered changing my shorts.

While it worked out ok. I absolutely HATE being surprised.
I'm used to sailing dinghy's and large keelboats. (this is my first experience with something in the middle)
Every time I've sailed an unfamiliar boat, I do some figure eights out on the water, to get a feel for how it handles.
If there are empty berths I'll use them to see how the boat handles. How much prop walk ? How well does she handle going astern ?
It goes a long way to help things the first time you pick up a mooring ball, or pull into a crowded dock.

The C22 is a lighter boat than a normal keelboat, so it would obviously be pushed around easier.
I had considered having my wife, use the line to help pull the bow through the wind, and help keep the boat in full control.
In hindsight I could have tackled it differently in other ways.
A word of advice.. One which I usually heed. Don't rush... Even if the sun is going down and you desperately want to have your boat in the water.

And of course.... As soon as the boat was tied to the dock, the wind died down with the coming sunset. hehe :doh:

------------
Last few things on the checklist before departure.
------------

Now that the boat was in the water, and kettle was on for tea, I proceeded to check the last few things on my "Is that ok ?" list.
I fired up the VHF and did a radio check with the coast guard station. Working great !
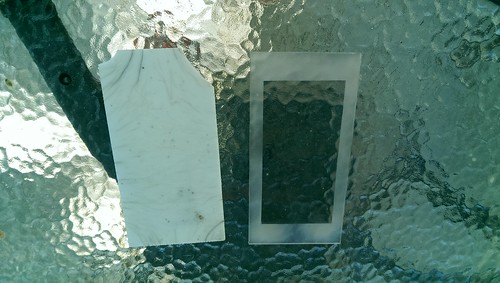
I fired up the Signet Smartpak depth finder/log to see if it's getting a signal. Nope.. I suspected that, but now I know for sure.

Great ! Now to do some sailing.

Me: "It's getting late. We don't have time to sail today, and get the boat back on the trailer."
Mate: "What if we leave the boat in the marina for a few days, and come back and sail on Monday ?"
Me: "That might work. We'll have to check the forecast"
Me: "At the very least we should head out onto the lake for a few minutes !"
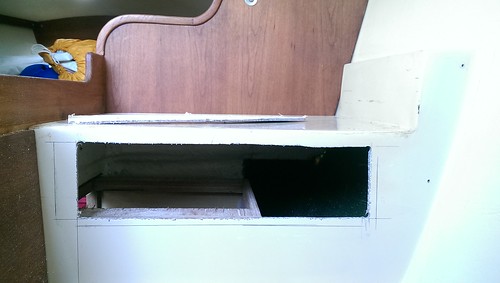
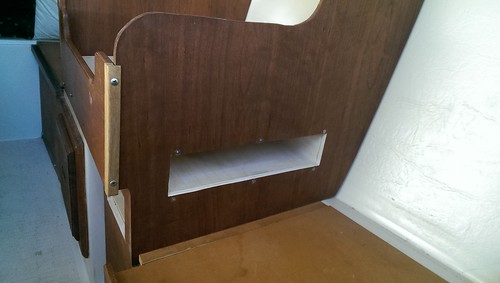
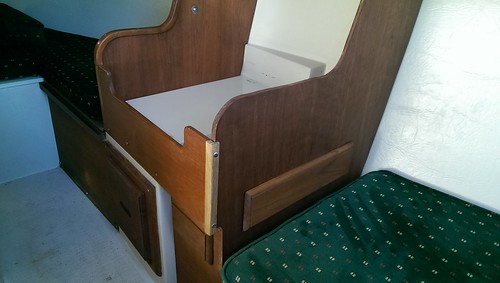
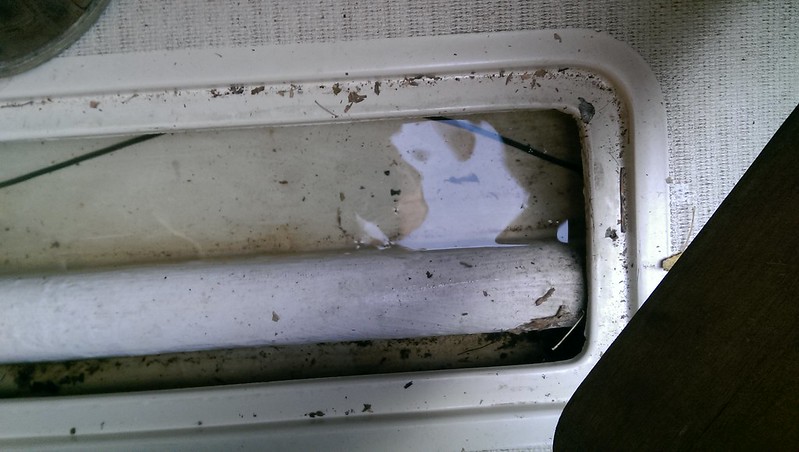
Me: " Hey... do me a favour and pull that cabin sole access panel up, we have to check one more thing......"

Ever see that Berlitz Ad.. where the the German Coastguard guy says.. "Vat.. Are you sinking.. abowt ?"

Mate: "There's water in there"
Me: "It may just be rain from the darn pop-top seal leak.... Let's check to see where it's coming from"
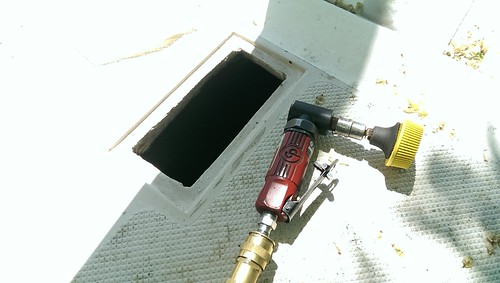
Me: After pulling the cooler out of the way.. "Oh Oh... The depth finder transducer is leaking... In fact it's leaking fairly fast... I don't think we have time to finish our tea, never mind take the boat out on the lake for 20 minutes... I'll go get the truck..." :eek:


Final result: We aren't getting to sail the boat this year. :p
Yeah spartacus99.. you can laugh.. :-D

It's "All Good" though... I can't say we're not disappointed, but we got a lot done, and we now know exactly what condition she is in, and have added the last few things to the project list
  1. The furling drum needs to be moved higher to allow easier rigging
  2. Streamline the mast crutch so that backstay doesn't get caught when raising mast.
  3. Put more air in the fenders
  4. Replace the bow eye safety chain on the trailer
  5. Speaking of that... any suggestions for instruments ?


The launch ramp


"Hyacinth ! I SAY... is the tea brewed yet ? The boat won't float all day. Keep Calm and Carry On !"


Last edited:
Sep 30, 2013
3,538
1988 Catalina 22 North Florida
Awww man, I wish you could have gotten one good sail in. Way to keep it positive at least. So ironic ... sailing season here is just about to kick back IN, after four months of blistering summer hell. If y'all can hop a flight down here in January/February, we'll take you out a day or two! By your standards it'll probably be swimming weather!:biggrin:
 
Mar 20, 2015
3,094
C&C 30 Mk1 Winnipeg
By your standards it'll probably be swimming weather!:biggrin:
That reminds me of the first time I saw a palm tree back in the 70's. My parents took me to Disneyworld. The weather was cold by locals' standards, but we had just come from -25 F weather. I thought it was warm and couldn't figure out why there was hardly anyone walking around. I don't know whether is was St Pete, Orlando, or Fort Launderdale, but there was a "museum" submarine near one of our hotels. I was really disappointed that the sub was closed.
If anything, living in the midwest has conditioned me for darn near anything temp wise. We get a range of -30F to 95F.
I spent a winter up working on an ice road in the high arctic, and have spent time in SE Asia. Growing up with large temp ranges helped with the adjustment. The amazing thing is how fast your body can adjust. 30 F in the fall seems freezing, but after a few months of real cold it seems downright warm. I see people walking around in shorts on sunny spring days at 32F

So you may be right... By that time, it may feel like swimming weather. :)

One day I'll take that offer. We are hoping to get away this winter, but nothing firm. If anything It will be a last minute trip.


Edit: Hmmm I wonder if I can put blades on the C22 trailer and use it as an Ice Boat. No need to worry about thru-hull leaks.
 
Sep 30, 2013
3,538
1988 Catalina 22 North Florida
Do you have any ice boat sailing where you are?? From the pictures I've seen, it looks insanely fun.

 
Mar 20, 2015
3,094
C&C 30 Mk1 Winnipeg
Do you have any ice boat sailing where you are??
With the number of lakes around here, and the ice thickness in the peak of winter, you would think there was. I've never seen any around though. Lake Winnipeg, the huge lake here, is probably too big for the ice to freeze in a nice smooth surface, though I can't see why other smaller ones wouldn't work perfectly.
 
Mar 20, 2015
3,094
C&C 30 Mk1 Winnipeg
While I'm waiting for the kettle to boil so I can make breakfast, I thought I should update my progress on the boat.

The time when I have to put the boat in storage for winter is getting very close. With that in mind, I'm trying to get 2 projects done so I have less work in the spring.

One of those, is to complete the galley modification, that I based on "Watercolors!" previous work.
During the few times we have slept and cooked on the boat so far, we came up with some ideas.
I followed the majority of his design, but am making some changes based on our needs.

If you look back in this thread, you will see that Watercolors! did the following to the stove area in his New Style C22:
  1. Convert existing deep drawer into 2 shallower ones
  2. Rotate stove position 90 degrees and add another bulkhead (thereby losing approximately 8" of starboard settee length)
  3. Add large drawer that slides out over the starboard settee
  4. Add small, long, drawer in the newly created space beside the original drawer.
  5. Add shelf above stove.
  6. Add a deep storage space for cups
  7. Add small worktop area with storage underneath behind new stove location. (also holds stove in place)

For my version of the mod, have decided to do everything highlighted
in RED above.
The biggest change in our configuration is changing the space behind the stove.


The single most used item, in our kitchen, is our kettle. This is even more true when it comes to camping or sailing.
We boil water for tea, coffee, instant hot cereal, soup, hot chocolate, boil in bag foods, etc.
We also use thermal mugs all the time.

Reading comments by New Style C22 owners, the sink is used by them for storage when sailing. It's a no brainer really. Where is the best place to put stuff so it "stays put" on a boat ? In a deep container.

So instead of a small worktop area, we simply left the space open so that we can store our kettle, french press, and thermal mugs behind the stove. We also made a small shelf beside the cup storage area, that is just large enough to hold a few things like spices, sugar, coffee etc.

To keep the stove in place we have two options at this point. We can either put in a wood divider or gimble mount the stove.
The new stove position makes it easy to gimble mount the stove. It could be done with the oem origo mount or some DIY setup that utilizes the bulkheads that are now on both sides of the stove. I'm not sure If I'll gimble the stove at all, since I have the metal pot holders for the stove. But it's an option for the future.

Time for me to get outside and finish the basic setup. I hope to post more details and build photos tonight. Stay Tuned..
 
  • Like
Likes: Ellwebs
Mar 20, 2015
3,094
C&C 30 Mk1 Winnipeg
--------------------------------------------
Galley modification continued:
--------------------------------------------

For reference, here's where I left off on the galley modification:


In the photo, the starboard settee has been shortened, the aft stove panel has been moved to the inboard side of the fibreglass galley support, a new bulkhead 90% built, a new starboard settee bulkhead built, and the stove has been rotated 90 degrees from it's original position.

For most of the modification, I copied Watercolors! design. This includes how the drawers were installed.
Since both new drawers need guides for sides of them, he came up with the idea of putting the large drawer inside a box.
That "drawer box" is attached at both ends to the original and new bulkheads. This way it ties the whole assembly together.

So the next step was to cut a hole in the fibreglass galley support. That's where the "drawer box" will go.
I made the hole as big as possible, so the drawer could be as big as possible.
The liner is an important part of the strength of the hull, and the fibreglass stove support is what the chainplates mount to.
Because of this, I needed needed to keep enough of the fibreglass intact, so that it will hopefully be strong enough for the structural loads. I'm not an engineer so this was guesswork on my part. Once the boat is in use again, I'll be keeping an eye out for any signs of problems.


Marking the position of the hole.
One other consideration for the position and size of the hole, is the curvature of the hull.
Looking at the photo, you can see how it would be impossible to make the drawer the full width of the panel,
without it hitting the hull at the forward bulkhead.

In Summary:
  1. I left enough fibreglass at both the top, and left sides, to keep things strong.
  2. I left enough fibreglass at the bottom so that the drawer would be above the top of the seat cushion AND ALSO above the top of the original factory drawer.
  3. I left enough fibreglass so that the drawer could go all the way forward to the bulkhead, without being too close to the hull.


Holes drilled in the corners so I could cut with a jigsaw.
Rounded corners will also help prevent cracks in the future.


Completed Hole
Note: In this photo you can see that the bottom of the hole is in line with the top of the guides for the original factory drawer.
No wasted space !


The Large Drawer Guide/Box

I made the box that the drawer sits inside, out of 1/2" Baltic Birch plywood that uses exterior adhesives.
It also uses thinner veneers for more layers and minimal to no voids. This is same stuff that guys around here use for rebuilding transoms on aluminum fishing boats.
Box was glued with Elmer's probond waterproof wood glue and tacked together with a brad nailer. I plan on putting in stainless screws before I do the final assembly. Since this box will tie the two bulkheads together so I wanted it strong.
As my Great Grandfather, who was a cabinet maker, would probably say... "for wood you use glue and screws !"

I made the box slightly longer than needed.
Since one end would be attached to the uneven fibreglass inside the hull liner/galley support, I had no way to know exactly how long the box needed to be. By making it a bit too long, I could then trim it to exact length later.


The box before trimming to final length.


The box in place and trimmed to the correct length
I inserted the box into it's final location.
EDIT: The box isn't sitting tight against the forward bulkhead. There is a small gap to make room for the nuts that hold the the bottom of the original bulkhead in place.
The box will be attached to the forward bulkhead with long screws.
( I had planned to simply replace the bolts along the bottom of the bulkhead, with longer ones, and simply bolt them together. Unfortunately the box is sitting lower than expected and the upper edge of the box is where the bolts would be)

I then used a large contractors square against the end of the wood front panels to mark the final length of the box.


Marking the wood panel for location for the small drawer


Now that the exact location of the new large drawer was determined, it was time to figure determine the size of the new small drawer.
This one was easy. The drawer simply had to fit in the space between the large drawer's box, and the old settee support.
I made the drawer as long as possible and centered it in the space between the fibreglass and the new bulkhead.
I had to leave enough space on the bottom for a drawer guide made of some 1/4" plywood with strips of 3/8" plywood glued+screwed along the edges.


Marking the location of the large drawer on the inside of the new bulkhead.


To mark the location of the hole in the new bulkhead, for the large drawer, I simply held the new bulkhead in position and ran a pencil around the edge of the drawer box.

I put masking tape along the cutting line so that the wood wouldn't splinter, and cut the holes with a jigsaw and straight edge.


Panel with hole for small drawer.


The Drawers
I made the drawers out baltic birch plywood, with the fronts made from plantation teak I had left over from my deck handrail project.

Judging from the photos he sent me, Watercolours! appears to store disposable plates, bowls, and cutlery in his large drawer.
In our case, the large drawer fits 4 small plastic bowls, and 4 full size plates, and a nylon bag containing normal cutlery.
Note: The bowls can be a bit of a problem due to the depth of the drawer. We got lucky and found some used plastic ones that were just small enough when stacked.

The small drawer is perfect for items like long knives, tongs, aluminum foil etc.
Note: The original factory drawer is very short. This is done so that you can remove the drawer in the small space between the port and starboard cabinets.
Due to the location of the new small drawer, I was able to make it much longer. By notching the top end of the drawer (see photo), the drawer can be inserted at an angle. That way it has just enough room to clear the fibreglass beside the forward table seat.


Small Drawer Guide of 1/4" and 3/8" plywood

To mount the small drawer guide I used stainless steel screws.
I'm screwing the major components together so that I can easily dismantle it later if needed.


The Small Drawer In Position On It's Guide

Notice the notched top edge in the drawer, which enables removing it in spite of it being longer than the space in front of the galley.


Large Drawer Box in Final Position


New Bulkhead In Position

I used 6 stainless steel screws to attach the drawer box and bulkhead.
Eventually there will be other screws in other locations, including along the edge where the lower panel meets the bulkhead.
EDIT: The forward part of the box is also screwed to the bulkhead, but with trim washers.


Basic Galley Configuration Complete !


Next up... Planning the top stove area configuration

UPDATE: Galley Mod Continues HERE
 
Last edited:
  • Like
Likes: ShotgunSlim
Mar 20, 2015
3,094
C&C 30 Mk1 Winnipeg
Am enjoying your adventure.
Thanks Ellwebs ! I'm glad to hear that.
I'm hoping it helps as many people as possible. Even if they simply avoid making the same mistakes I've made. Worst case they get a laugh out of it. :)
 
Last edited:
Mar 20, 2015
3,094
C&C 30 Mk1 Winnipeg
----------------
Foredeck Deadlight
----------------

The New Style C22 came with 2 different forward hatches. the first version had a solid fiberglass hatch, and the second one had a Plexiglass/Aluminum Bomar Hatch.

On the boats, with the solid fiberglass hatch, Catalina put a small, opaque, acrylic, deadlight in the deck to allow additional light into the v-berth.

When we bought Stormwatch, we knew that the deadlight on the foredeck was cracked and leaking.

Besides cracking, the original deadlight had been resealed with silicone... ugh.

You can get a kit to replace the deadlight with a polycarbonate one. Polycarbonate is likely the best choice because you step on the deadlight when on the foredeck.

While the kit is a great product at a good price, I thought that a clear deadlight would be a better choice than the opaque one, because it would allow more light in the boat. I simply went to a local glass shop and had them cut 2 replacement lenses for me out of polycarbonate.

Using a clear deadlight lens creates a problem though.
The hole in the deck is not "finished", and using a clear lens would allow you to see the rough edges of the hole. I thought that a simple solution would be to sandblast the outer 1" of the lens so that the middle was clear, and the edge, opaque.


Original Lens on left. New Lens with Sandblasted Edges on Right


Cleaning the Deadlight Mounting Edge So The Sealant Bonds Well

UPDATE:
Unfortunately I overlooked something that makes this unworkable.
The clear sealant I used, filled in the rough sandblasted edge, and after drying, it's more or less clear again.
Next year I'll investigate other options, and may just end up buying the kit , but for now my DIY deadlight lens is functional, with no leaks.


Original Design Flaw:
One design flaw of the factory deadlight, is that there is a second plastic "window" on the inside of the hull.
This setup, has the risk of allowing any water that leaks through the outer panel, to be trapped by the inner panel.
This would allow the water to easily soak through the seam between the inner and outer deck skins, and eventually rot the deck core. To make matters worse, there may be no visible leak inside.

One of my first few jobs was to get a small piece of lexan at the local glass shop, and replace the original.
I removed the inner deadlight "window" and didn't reinstall it.
This way, when (not if) the deadlight started leaking again, I would see the leak before it did any damage.

If you don't reinstall that inner deadlight, you have an ugly, unfinished, visible lip inside the boat.

My solution was to use some scrap pieces of leftover teak, and make a trim ring to cover the lip:


New Trim Ring Made From 4 Small Pieces of Teak.


Trim Ring In Place. Lots of light from that Clear Lens !


Deadlight From Outside.

(From this photo, you can see why the edges, or whole lens, needs to hide the rough deck hole. Unfortunately frosting the edges didn't work. Back to the drawing board.. )
 
Last edited:
Mar 20, 2015
3,094
C&C 30 Mk1 Winnipeg
--------------------------------------------
Galley modification continued:
--------------------------------------------


Now that the basic Galley mod is built, I needed to figure out how we wanted to utilize the additional space behind the stove.

"Watercolors!" design has a flat surface behind the stove, that hinges upwards to allow storage underneath.

After some discussion on which cooking items we use the most, we decided to use the space for storing our stainless steel coffee pot, which we mostly use for making tea and boiling water, and for our thermal mugs. At home, on a boat, or camping, they get the most use by far.

Many people have mentioned that they usually use the sink for storage. A recessed space is perfect for storing things without them flying around the boat. The area behind the stove will serve the same purpose.
In the photo below I have our new 6 cup coffee percolator in the space.
(We are returning it and getting a taller 9 cup model)

Like "Watercolors!" design, we used the deep hole, on right rear of the space, as storage for a stack of reusable plastic cups, and other tall items, like cooking oil or wine.
In the photo below I have 4 tall stacking cups, and a bottle of red wine. :)

On the left rear of the space there is a fibreglass area which I made into a shelf.
In the photo below I have a normal sized bottle of tabasco, a large container of steak spice, and a small mason jar full of honey.
We like using honey on a boat since it won't spill, unlike sugar. (We won't actually be using a mason jar since it's a glass container, but couldn't find our camping/boating one)


Reference photo for where the shelf and deep storage are

I had a left over piece of stainless steel sheet, that I'm using under the stove. This should make it easier to clean.

Next stage:
A wood divider where the stainless steel ends, which will hold the stove in place.
A second shelf along the hull between the two bulkheads, like "Watercolors!" design.

Photos of the design "test" are below:


Wine Bottle, 6 cup Coffee Percolator, Spices, Large Cups and a jar of honey... Ready for the steaks !


Question for you:
I'm considering gimbal mounting the stove on the fore/aft axis so the stove tilts with the roll of the boat.
The side bulkheads would make it easy to do. Another option is to make some stainless side brackets that attach to panel the stove sits on, similar to the official origo 3000 gimble.

What do you think about gimbal mounting the stove on the one axis ?
 
Last edited:
Sep 30, 2013
3,538
1988 Catalina 22 North Florida
Pretty important if you intend to cook while underway. If not, I wouldn't bother.
 
Mar 20, 2015
3,094
C&C 30 Mk1 Winnipeg
Come on man ! It's about "Pimping" the boat !! LOL

Seriously though...
I've never bothered with cooking food when underway, but hot beverages can be a godsend and I've always made them, if possible. My fave sailing time is the off season as long as the water isn't hard.

The trick is how do it ?
The origo 3000 gimbal is over $100 and a DIY one shouldn't be too hard to make.
With the stove rotated and bulkheads on either side, it makes it possible.
 
Nov 19, 2008
2,129
Catalina C-22 MK-II Parrish, FL
Nothing like a hot cup of chicken soup to take the chill out of you on a long ocean crossing....

002 Chicken Noodle Soup.jpg
003 Soup for Lunch.jpg
 
Sep 30, 2013
3,538
1988 Catalina 22 North Florida
Come on man ! It's about "Pimping" the boat !! LOL

Seriously though...
I've never bothered with cooking food when underway, but hot beverages can be a godsend and I've always made them, if possible. My fave sailing time is the off season as long as the water isn't hard.

The trick is how do it ?
The origo 3000 gimbal is over $100 and a DIY one shouldn't be too hard to make.
With the stove rotated and bulkheads on either side, it makes it possible.
Absolutely! You've made it clear how much you use your kettle, so you have the best excuse in the world to gimbal the stove and be able to use it underway. Heck, you've come this far, why stop now??

Let that pimp flag fly!!
 
Mar 20, 2015
3,094
C&C 30 Mk1 Winnipeg
Hehe yup can't have guys like Don have all the cool stuff.

A pot with a spout. Soup, coffee, tea, sangria, beer, you name it, it can hold it or heat it. The trick is keeping it clean so you don't end up with soup flavoured coffee.

The only reason I'm not sure about a gimbal is the size/height of one. at least one like the Origo oem model.

There's a thread someplace where someone said the pot holders , which I have, were able to hold a coffee pot to 45 degrees. If the pot isn't full it may work....I reserve judgment until next summer.
 
Last edited:
Mar 20, 2015
3,094
C&C 30 Mk1 Winnipeg
Update:
  1. A bunch of broken photo links in thread fixed. (If anyone notices photos missing.. PM me)
  2. Detail photos of bullnose edging on port bulkhead added HERE
 
Last edited:
Aug 11, 2011
759
catalina 22 Islamorada
--------------------------------------------
Galley modification continued:
--------------------------------------------


Now that the basic Galley mod is built, I needed to figure out how we wanted to utilize the additional space behind the stove.

"Watercolors!" design has a flat surface behind the stove, that hinges upwards to allow storage underneath.

After some discussion on which cooking items we use the most, we decided to use the space for storing our stainless steel coffee pot, which we mostly use for making tea and boiling water, and for our thermal mugs. At home, on a boat, or camping, they get the most use by far.

Many people have mentioned that they usually use the sink for storage. A recessed space is perfect for storing things without them flying around the boat. The area behind the stove will serve the same purpose.
In the photo below I have our new 6 cup coffee percolator in the space.
(We are returning it and getting a taller 9 cup model)

Like "Watercolors!" design, we used the deep hole, on right rear of the space, as storage for a stack of reusable plastic cups, and other tall items, like cooking oil or wine.
In the photo below I have 4 tall stacking cups, and a bottle of red wine. :)

On the left rear of the space there is a fibreglass area which I made into a shelf.
In the photo below I have a normal sized bottle of tabasco, a large container of steak spice, and a small mason jar full of honey.
We like using honey on a boat since it won't spill, unlike sugar. (We won't actually be using a mason jar since it's a glass container, but couldn't find our camping/boating one)


Reference photo for where the shelf and deep storage are

I had a left over piece of stainless steel sheet, that I'm using under the stove. This should make it easier to clean.

Next stage:
A wood divider where the stainless steel ends, which will hold the stove in place.
A second shelf along the hull between the two bulkheads, like "Watercolors!" design.

Photos of the design "test" are below:


Wine Bottle, 6 cup Coffee Percolator, Spices, Large Cups and a jar of honey... Ready for the steaks !


Question for you:
I'm considering gimbal mounting the stove on the fore/aft axis so the stove tilts with the roll of the boat.
The side bulkheads would make it easy to do. Another option is to make some stainless side brackets that attach to panel the stove sits on, similar to the official origo 3000 gimble.

What do you think about gimbal mounting the stove on the one axis ?
Unless I missed it somewhere and that is entirely possible I was looking at your stove modifications that I really like. Don't think I'll be changing mine but I like yours regardless.

Anyway you might want to consider above your stove since you rotated it 90deg the metal above it wont cover the roof from the heat of the stove. Might want to add a wider piece of metal there. Maybe you already did or maybe it doesn't need it that bad. Also be careful of the curtains.

Looks super good though.
 
Mar 20, 2015
3,094
C&C 30 Mk1 Winnipeg
Anyway you might want to consider above your stove since you rotated it 90deg the metal above it wont cover the roof from the heat of the stove. Might want to add a wider piece of metal there. Maybe you already did or maybe it doesn't need it that bad. Also be careful of the curtains.
I have wondered about that, and haven't used it enough IMO to be 100% sure it's ok as is.
While the original configuration was especially risky for the curtains, and fiberglass, the new stove position has the burners no longer under the deck at all.
The few times I've used it, the burners were wide open with no issue with the flames being near the fiberglass, or excessive heat on it. That's including when we used it for a heater without a pot on it.
If I end up gimbal mounting the stove, there will be increased risk on a starboard tack.

I had planned on using an old coleman catalytic white gas heater on the boat, but I think simply carrying extra alcohol would make more sense. If I do use the stove as a heater, I'd like to build a ceramic cover, or something, for the burner.

Who knows, I may end up making a larger heat shield.
The curtains will always be a bit of a concern. I'm almost inclined to remove them, since the smoked ports give privacy anyhow.
Just one less thing to clean.
 
Aug 11, 2011
759
catalina 22 Islamorada
yah when I was looking at it you moved the stove out so I think that would help.

My current setup I cant imagine using the burner that's close to the wall it just looks like a great way to melt,burn,fire the starboard side of the boat not sure why they put it the way they did.

But for me 1 burner is all I need typically just heating something up, I aint no cook hehe.