when something little turns in to something more

Apr 1, 2010
398
Cal 33 and Sea Pearl 21 . Crystal River, FL
after finally putting the axle back in after losing a bearing a couple of weeks ago I decided to just check the keel bolts while I was near. I had zero intentions of messing with anything, I just wanted to see what I was going to be in for when I finally did get around to dropping the keel. the starboard aft bolt looked to be a little looser than the other one so I started there. barely touched the damn thing (seriously) and the head fell off!!! :cussing::cussing:

then since I knew I wasn't sailing soon I proceeded to check the others, the port aft broke off also and the two forward bolts came out clean. now overwhelmed with the number of small projects I had going on (wiring, gps install, led nav light install, fiberglass work on the hatch) I had a talk with the wife and decided to do a quick mini-rebuild on her. I will be replacing a few small areas of on the cabin top/cockpit, kiwigripping the whole thing and painting the cap and the hull. I will also be making new crib boards and trim and doing other odd and end trim work.... all because I just "had" to check the dang bolts :eek:

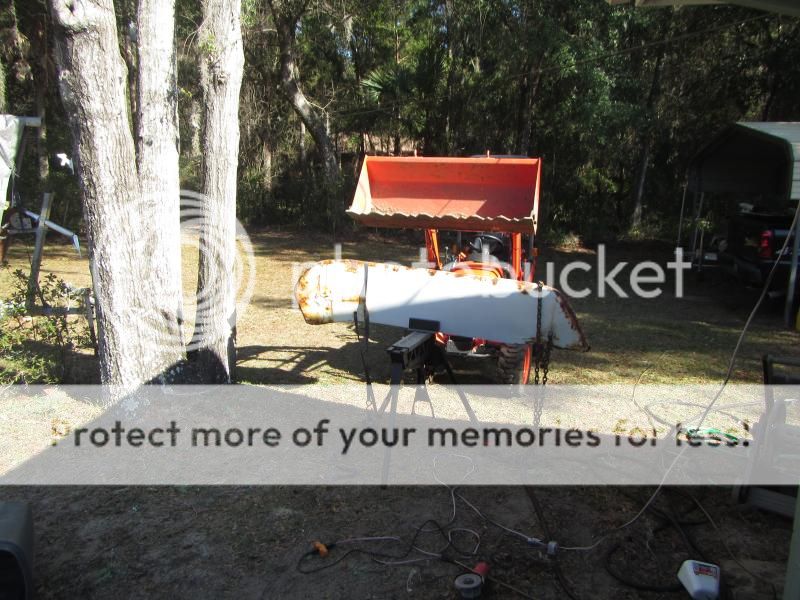
here is where I am as of today. I cant decided whether or not to have the keel sandblasted as the PO seems to have shaped it pretty well and I would hate to mess it up.

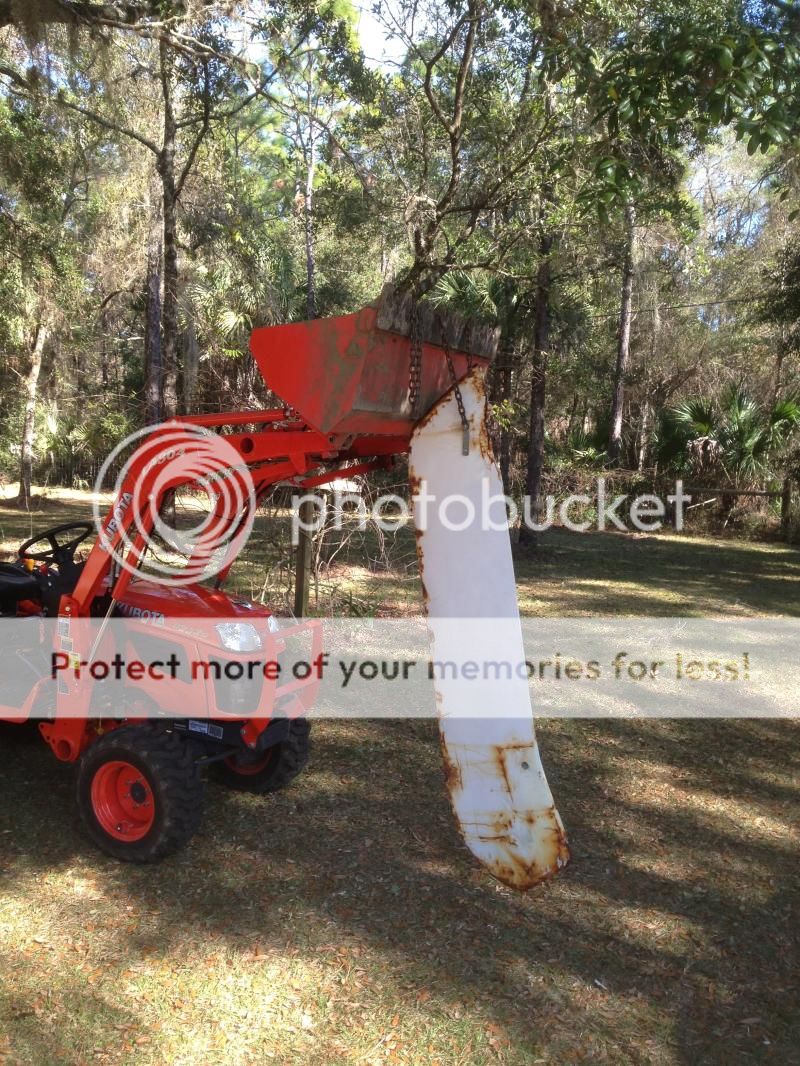
first comes the keel:


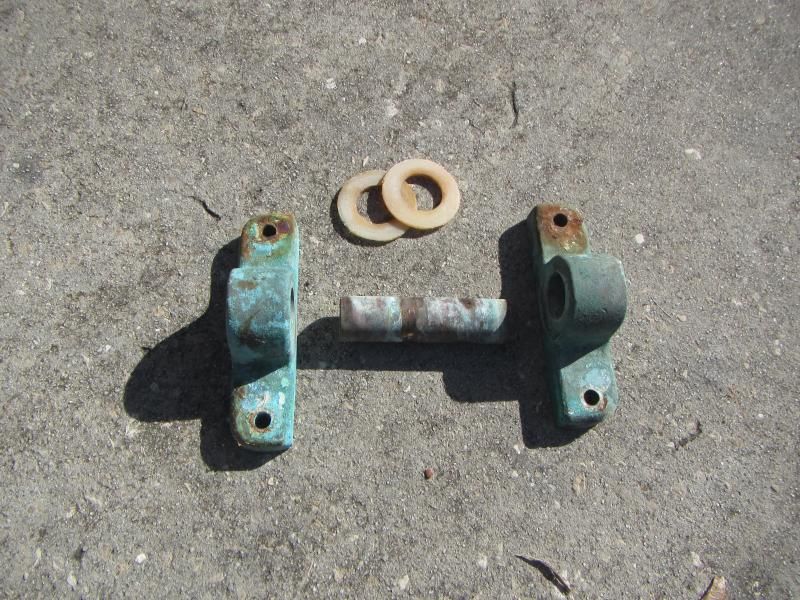
pin had hardly any wear:


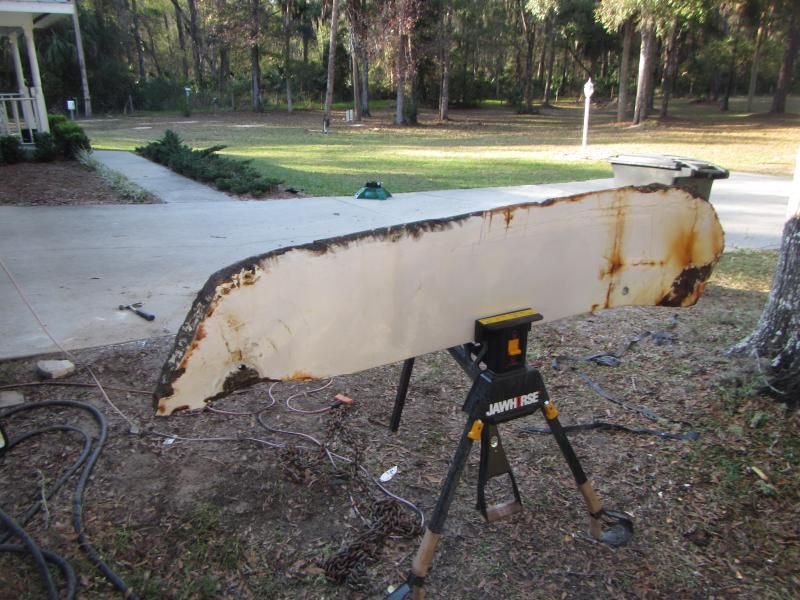
keel after some grinding:


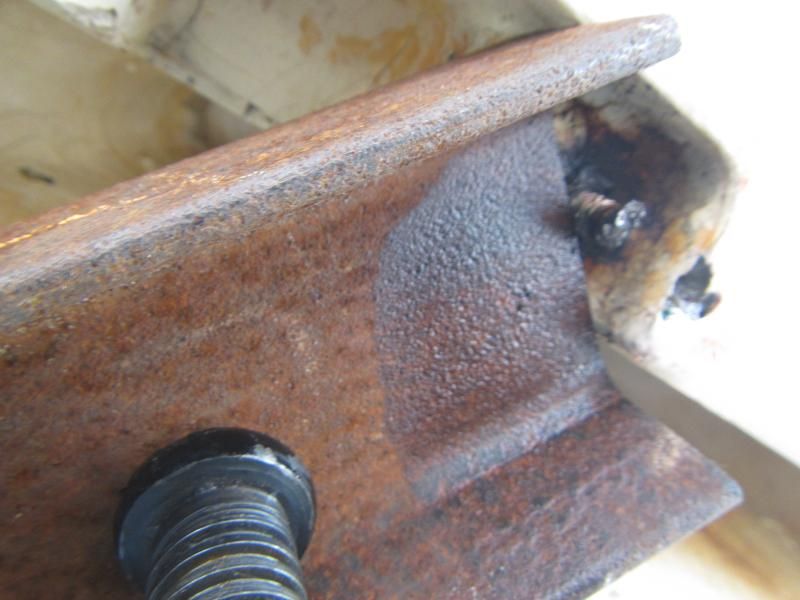
whats left of the starboard bolt. I am going to REALLY try to get it out as that would save me from having to cut out the finished part of the trunk to replace the weldment:


then I went inside the boat to take a break. for whatever reason I grapped onto the hose for the keel cable and it seemed awfully flexible. I then proceeded to remove it with ZERO effort!!! man did I luck out that it didn't come off while sailing! then I saw the turning ball:


and last but not least the hatch. when I bought the boat, the area where the hinges bolt were broken off. this is halfway through the repair:
 
Apr 1, 2010
398
Cal 33 and Sea Pearl 21 . Crystal River, FL
I do have a question... the pin hole in the keel is perfectly circular, not elongated at all but the pin has a little play. is it normal to be able to wiggle the pin around?
 
May 11, 2014
156
Catalina 22 Lake Pleasant, AZ
Hawk: good post! When I bought my 1980 about 4-years ago, I was concerned about keel bolt problems after having read about issues online. But, our local boat shop pro said no to worry - he had never heard of anyone losing a keel. Your post makes me think that maybe I need to have a good look at them, and soon.

- Bob
 
Apr 1, 2010
398
Cal 33 and Sea Pearl 21 . Crystal River, FL
well ya know Bob, if I hadn't touched them I probably would have had years of trouble free service... but alas, I can not leave well enough alone. the turning ball for the keel cable was my big surprise. the pics don't do it justice, it is REALLY worn!

I do feel that it is all justified since the one bolt head basically fell off when touched though.

I just placed a big order with CD including the upgrade hangers and shim kit to try to minimize the wobble
 
Feb 9, 2008
292
Catalina 22 Long Beach Harbor, MS
Better to find out on the hard than in a blow. If you have little play in the pin hole and it is round, you are in good shape. Mine was severely elongated. The CD kit comes with a bushing to install. Might be a minor thing to enlarge the hole a bit and drive it in (don't remember the O.D.). The keel looks great from the pics. I sandblasted but you could probably just clean up the rusty areas and go. I used Interlux 2000e on mine. Kit did well for me. No slop and peace of mind that it is done. Good luck on getting the remaining keel bolts out. That would be very helpful.
 
Sep 8, 2014
2,551
Catalina 22 Swing Keel San Diego
Hawk, no matter how annoying it is to discover trouble like those broken keel bolts its still good you checked now rather than have trouble in the water. You made the right choice buying the CD kit, the improved hangers and shim kit will give you another 20 or 30 years of trouble free service so long as you keep up with bottom paint maintenance. Yes, the turning ball looks gnarly but check out my resto thread and see how bad mine was!

On the keel, I HIGHLY recommend getting it sand blasted... seriously. All that running rust is coming from moisture that got into the base metal. The only for sure way to deal with that and have a clean, dry substrate is to sand blast and then rinse with acetone just prior to coating. Interprotect 2000 is a great choice, especially if you can't immediately add the fairing filler (looks like you will only need a little). You can go with straight resin as a barrier coat so long as you can recoat as soon as the previous application kicks off and firms up... you really want to avoid sanding between coats of epoxy, trust me.
 
Sep 8, 2014
2,551
Catalina 22 Swing Keel San Diego
Also, from recent experience... When you install the SS bushing for the new keel pin you'll need to enlarge the hole from 1 inch to 1 & 1/4". Trust me on this and don't get yourself in a mess that could result in disaster, find a Tapered 1.25" Ream that you can rent or borrow from a machine shop buddy. You really don't need to buy a $150 tool for one job... I used a combo of a 1.25" drill bit (that was too dull), a hole saw (that ended up loosing teeth), and a carbide burr on a die grinder. My resulting new hole was a mess and I was only able to epoxy in the new bushing because I had some cast iron in the middle of the span that was just enough to hold it square. I really should have taken a picture of how bad the hole was and what it took (about 8 steps of epoxy applications) to get the bushing set in square.
A tapered 1.25" ream is the correct tool for the application, trust me on this.

BTW, *****in Tractor!
 
Apr 1, 2010
398
Cal 33 and Sea Pearl 21 . Crystal River, FL
todays progress: took the mast/stays/shrouds all off the boat, did some shaping on the repaired hatch and reinstalled it and started removing deck hardware. Also took out my switch panel so I can play with it and see if I can figure out why I have no electricity.

probably going to start cutting open the cabin top and cockpit this week to replace two rotten areas.

after that the wife and I spontaneously decided to build some bat houses (she loves animals and 2 of our acres are wetlands so we have lots of "food" for the bats!!
 
Apr 1, 2010
398
Cal 33 and Sea Pearl 21 . Crystal River, FL
clouddiver: do I need to use the bushing if my hole is round?

also, what are the advantages of interprotect 2000 (don't have on hand) vs a coat or two of epoxy resin prior to fairing/shaping (have lots of resin)? I would prefer to save $ if I can, but if it offers significant advantages I will do whats necessary
 
Sep 8, 2014
2,551
Catalina 22 Swing Keel San Diego
Using the bushing now could save you from having to do the job again in the future. If your hole is still round with no material torn away from the edges, one good option is to really clean the hole well (round wire brush on a drill, wash with acetone) the brush the walls with epoxy, 2 coats at least. Then chase the hole with a good sharp 1 inch drill bit (not a hole saw, you'll only be drilling cured epoxy so it should be easy). This should add come corrosion and wear resistance to the inside surface of the hole. The stainless bushing is just the way to go if you can get in there though, not only does it give you the corrosion and wear resistance, it also distributes the load evenly across the cast iron... vice where corrosion may occur and remove material then the contact areas of the pin are point loading or unevenly distributing weight. The only reason my keel pin hole wasn't destroyed was because it had been replace once before and the fit was so tight that the corrosion sealed the hole shut around the pin.

The advantage to Interprotect 2000 is that it is a tenacious primer that bonds well to metal and since it is epoxy based then you have no issues with fairing filler sticking well to it, but more importantly the advantage on the keel is primarily that if you cannot immediately apply follow on coats of resin and/fairing filler its no big deal. You can slap on this primer and have several weeks (I think up to 60 days, but check website) to topcoat it without sanding. Disadvantage to Interprotect 2000 - Freaking expensive!

If you have a bunch of resin on hand I'd go with that. Just plan a day that you can dedicate to it and not walk away from the job till its done. When you apply each coat let it kick off and tack up and then apply your next coat so you won't have to sand until you do the last fairing filler coat, then just let that cure solid. With the small amount of physical damage to your keel I'd recommend 2 coats of straight resin as a barrier coat, the some high density filler to knife in on the big chunks on leading and trailing edge. Let that filler get mostly hard but not cure overnight, shape the areas with rasp (sureform tool, rough sand paper), one more unthickened coat of resin, then your sandable fairing filler... let cure, sand smooth, prime then bottom paint and done.

clouddiver: do I need to use the bushing if my hole is round?

also, what are the advantages of interprotect 2000 (don't have on hand) vs a coat or two of epoxy resin prior to fairing/shaping (have lots of resin)? I would prefer to save $ if I can, but if it offers significant advantages I will do whats necessary
 
Apr 1, 2010
398
Cal 33 and Sea Pearl 21 . Crystal River, FL
well I brought the keel to be sandblasted yesterday. the guy there advised that I try to remove some of the fairing compound myself. he said that sandblasting will remove it, but slowly and that time adds up quick at $75 per hour. I took his advice and with the assistance of an air chisel got it down to this


the PO had is shaped pretty good, the fairing compound extended past the trailing edge of the keel by this much


I also saw why my pin hole wasn't elongated... it had been repaired before. there is also a stainless plate that wraps around the front edge of the keel


now I do have a question... when I get it back from blasting, should I treat it with ospho or similar to get rid of any rust that has developed in the hours since blasting?
 
Jul 23, 2013
487
1981 Catalina 22 #10330 Bayview, ID
Good advise from the sandblaster. That's what I just did with mine and the blasting cost only $77.

I doubt you'll need to treat it when you get it home. Mine was several hours before I got it sealed and I didn't see any evidence of overall rusting yet even though the humidity was very high that day (raining on and off). And it does form FAST. Where the bare metal was in contact with a damp pallet, an obvious rust patch had already formed. It was easy to remove with some Naval Jelly I had on hand. I did wrap it up tightly in a tarp for the trip. Take all the precautions you can and you should be okay.
 
Sep 8, 2014
2,551
Catalina 22 Swing Keel San Diego
I hope by the time you read this you will have done the work already, time is critical in keeping additional moisture off the raw cast iron. As Stingy Sailor pointed out, Naval Jelly or a similar type product should remove the remaining rust, just give it a liberal washing with Acetone after that to rinse away any chemical residue, rust, and it will displace any moisture present. Get your first and second epoxy barrier coats on as soon as possible! Follow that immediately with a liberal application of epoxy with high density filler (microfibers or HD filler, there are two types of WEST fillers that are good, not colloidal silica which does not sand as well). After you use a thick application of the filler you can allow to cure. Then get your rough shape using a sure-form tool and 60 grit sand paper on blocks. the surface you end up should be pretty flat for sanding and then you can finish with fairing compound, sand and then prime/paint.

Since you have that repair around the keel bolt and its already stainless, no need to using the busing from the CD kit! You are good to go there. Good luck! If I was in your neck of the woods I'd be happy to come lend a hand, but I'm on the left coast!
 
Apr 1, 2010
398
Cal 33 and Sea Pearl 21 . Crystal River, FL
Clouddiver, its not that far of a drive!!!

I wasn't able to get out of work soon enough so the keel didn't make it back to the sandblaster today. hopefully I can drop it off tomorrow and they can do the work monday
 
Apr 1, 2010
398
Cal 33 and Sea Pearl 21 . Crystal River, FL
as far as resins/fillers, I made a pretty good template of the keel before I stripped it. I am going to use colloidal silica to get close, as I want the strength, then I will use a fairing compound from there. I am also leaning towards a couple layers of 1708 biax tape along the leading edge to help prevent water from getting to the metal in the event that I bump the keel on something.
 
Jul 23, 2013
487
1981 Catalina 22 #10330 Bayview, ID
I forgot to mention that you should instruct the sandblaster to also keep your keel dry as possible. They probably aren't used to working on such a sensitive part. I think mine sat out in the snow and rain before it was blasted. I asked them to call me as soon as it went into the booth so that I could be there when it came out and immediately wrap it and go. They called when it came out, but I was about 45 minutes away.
 
Sep 8, 2014
2,551
Catalina 22 Swing Keel San Diego
as far as resins/fillers, I made a pretty good template of the keel before I stripped it. I am going to use colloidal silica to get close, as I want the strength, then I will use a fairing compound from there. I am also leaning towards a couple layers of 1708 biax tape along the leading edge to help prevent water from getting to the metal in the event that I bump the keel on something.
I'd highly recommend 403 microfibers or 404 High Density filler. I used these on my feel and they performed better for filler than Colloidal Silica. They also shape and sand much better. The silica is so light it gets used up faster. I would recommend mixing in a tablespoon or two of silica with the 403 or 404 because it helps reduce air bubbles trapped in the mix.
 
Apr 1, 2010
398
Cal 33 and Sea Pearl 21 . Crystal River, FL
Stingy- I was planning to do the same (have them call me asap), hopefully that will work out.

Cloud- having done two entire boat builds from literally a bare hill with no stringers (and a third currently, a Kevlar raceboat), I guess you can say I am stuck in my ways. I have a 2gal pale of cabosil that after two entire boats is only about 25% empty, not sure what you mean by being used up fast? I also have 1 gal of microballons for fairing after.

I do appreciate the alternate opinions though as we have just made it clear that there is more than one way to skin a cat!!
 
Apr 1, 2010
398
Cal 33 and Sea Pearl 21 . Crystal River, FL
Btw stingy, I really enjoy your page/blog. I find myself reading it quite often. Last night I was reading about your autopilot install as I hope to get one soon. Thank you for taking the time to take the pics and write it all up!