Stopping Leaks with the Magic of Butyl Tape

Nov 18, 2010
2,441
Catalina 310 Hingham, MA
Ever since we have owned Smitty there has been a pesky leak in the hatch right over our berth. It wasn’t constant but it would drip a lot anytime it rained.

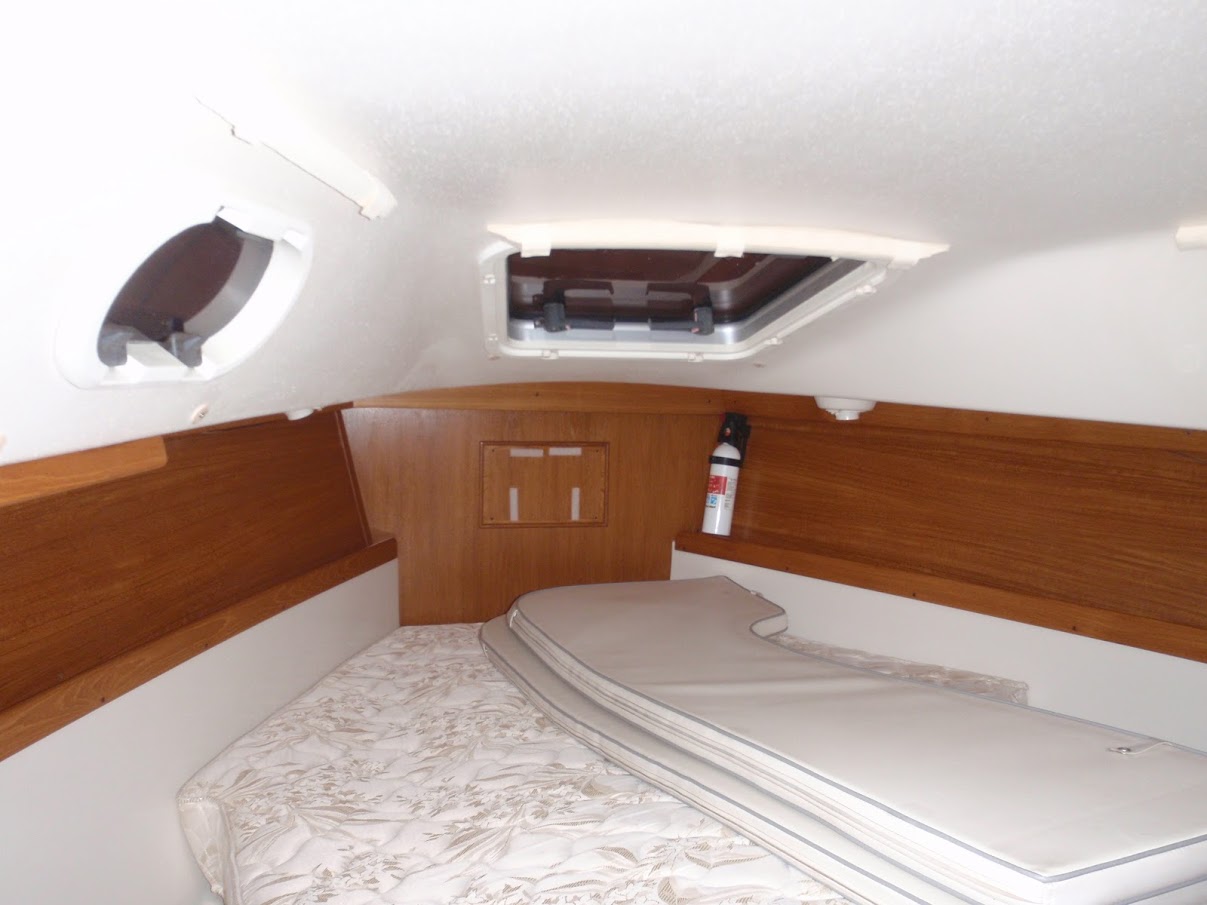
The previous owner tried to fix this with lots of crappy silicone caulking around the metal frame of the hatch. The problem is that one, you should almost never use silicone on boats and two, it wasn’t the frame of the window that was the source of the leak. So on top of having crappy silicone caulking to cleanup I still had to fix the leak.

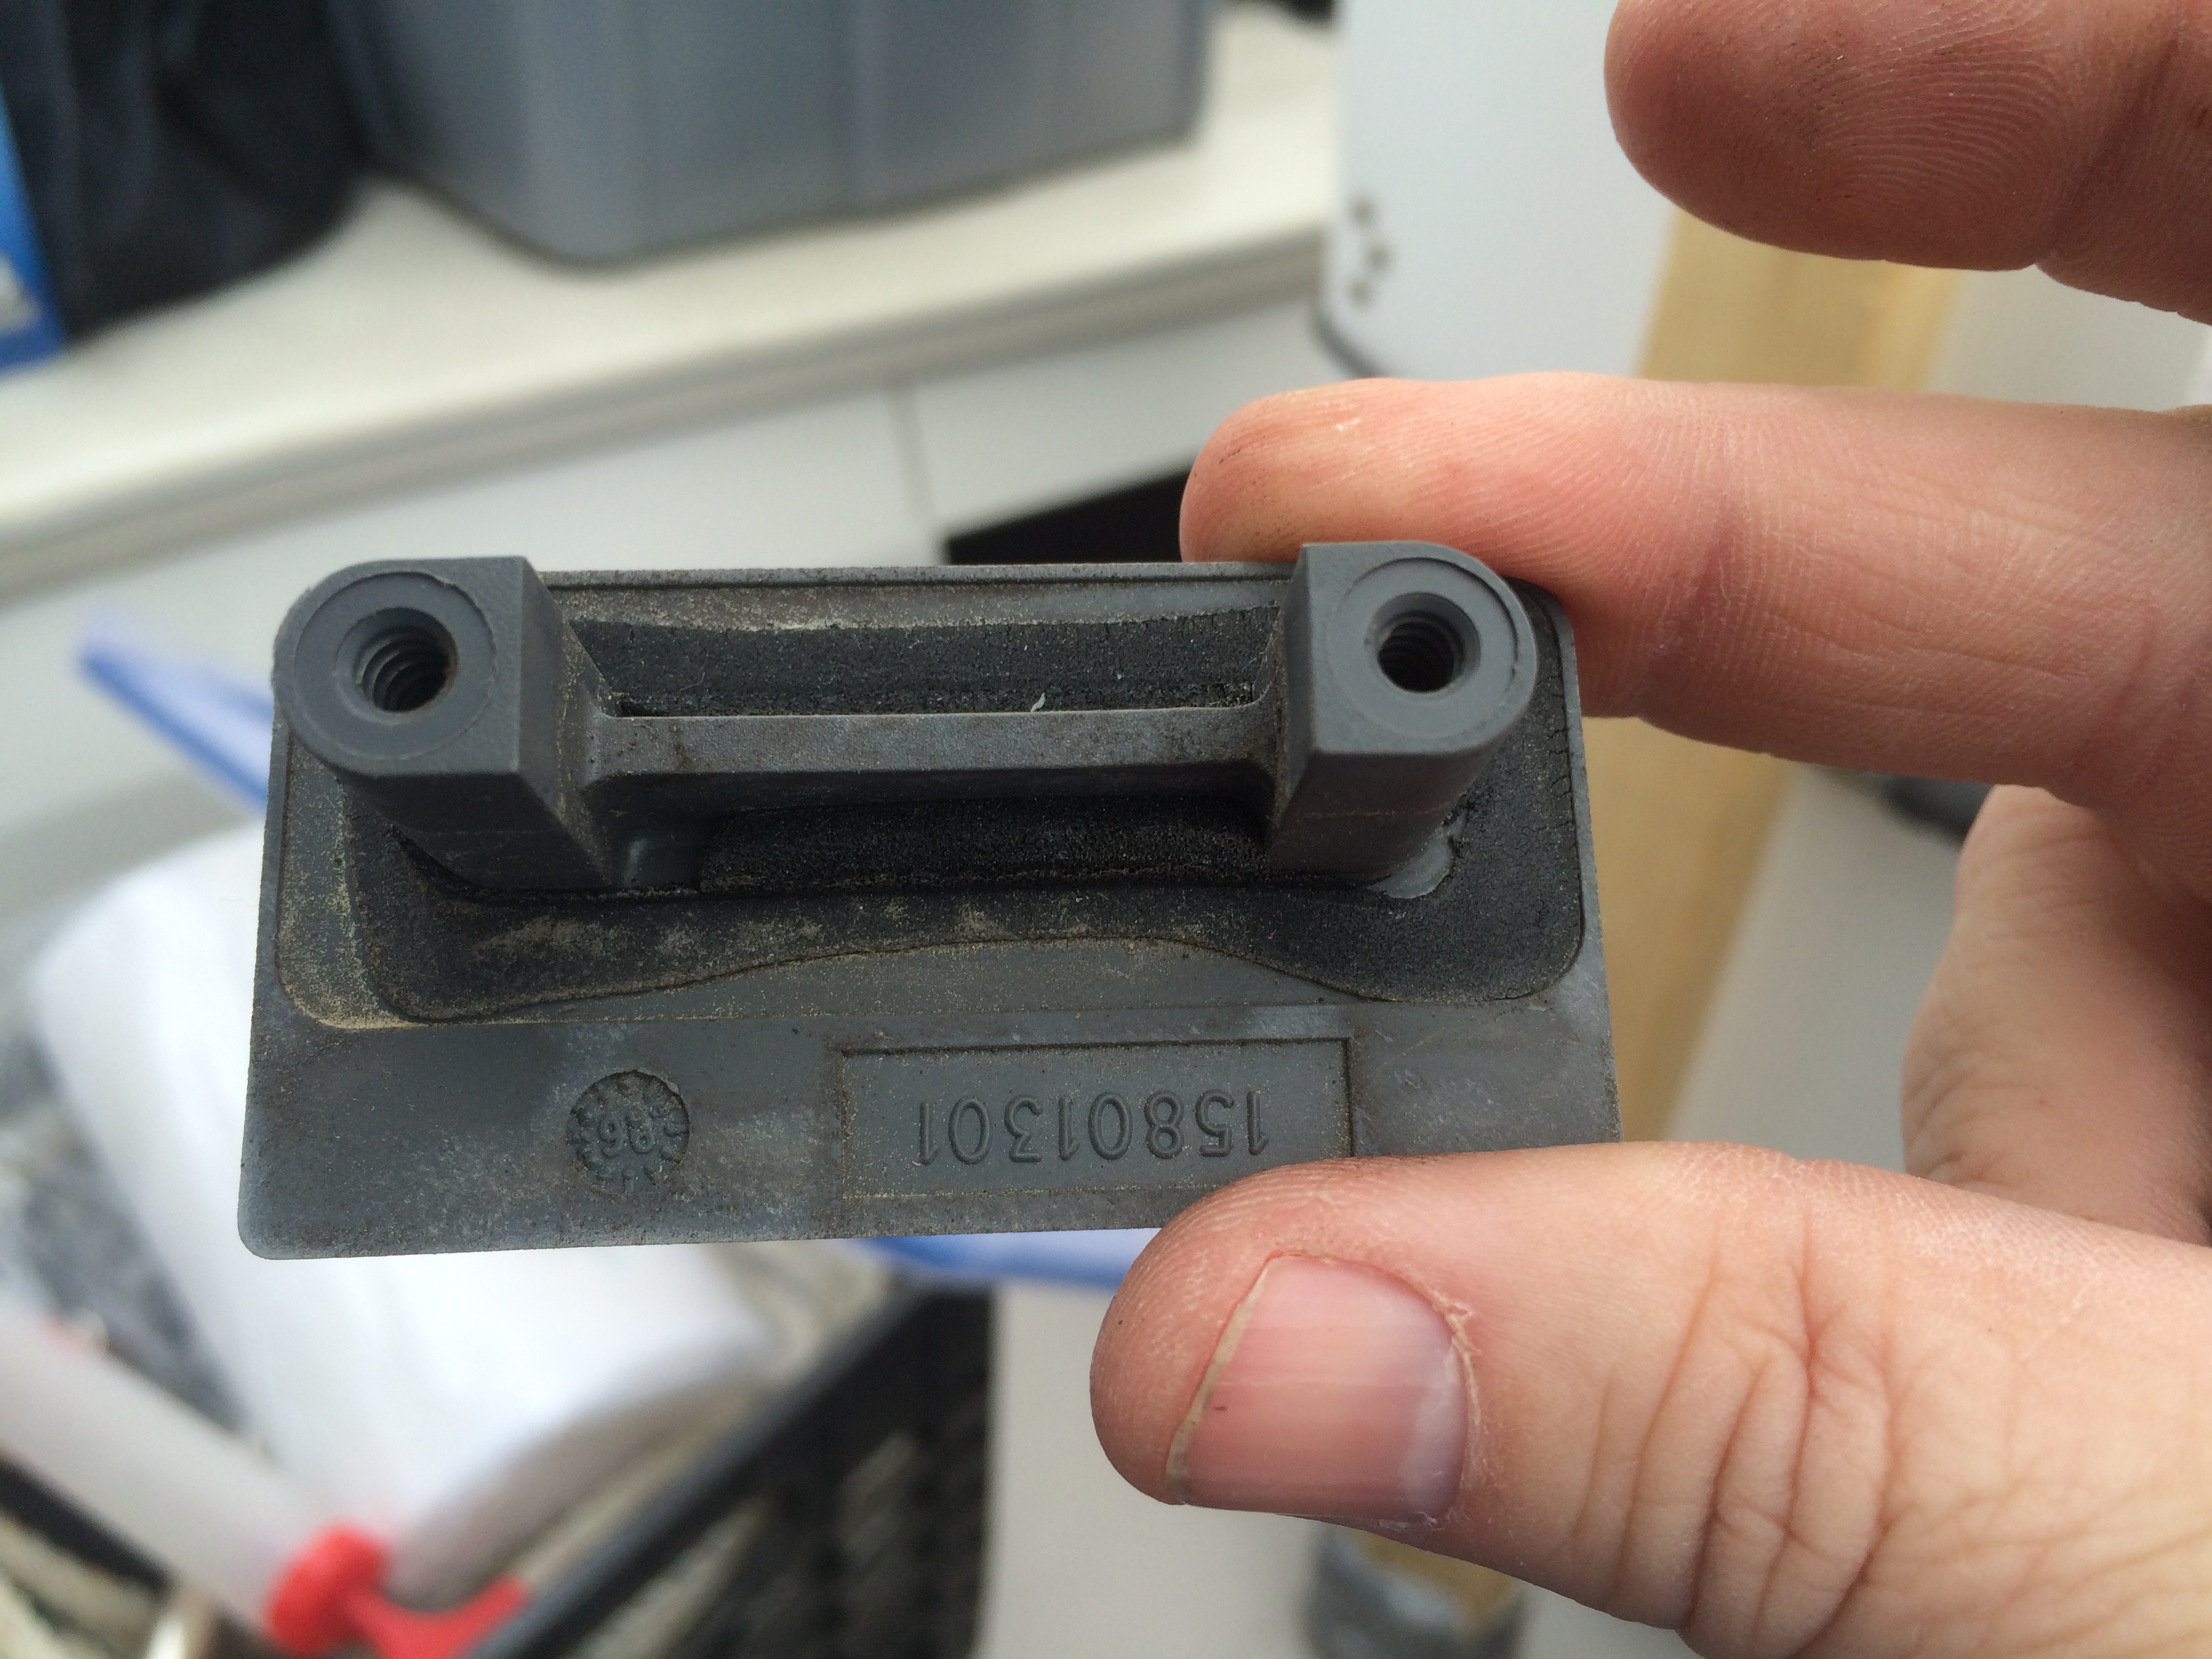
After a little bit of research and testing I found out that leak was actually coming from the friction hinges. These hinges are sealed with gaskets at the factory and those gaskets do breakdown and need to be replaced. With the shrink wrap up this winter it was a perfect time to take care of this nuisance.

When I removed the hinges it was easy to see that the foam gasket had deteriorated to almost nothing.


To fix this I could have ordered new foam gaskets from Lewmar. But I felt that a better repair was possible. I went to my boat guru, RC from Compass Marine (aka Maine Sail). I had previously learned of the wonders of butyl tape from him for bedding hardware. I felt that butyl tape would make a longer lasting fix for the hinges. After a quick confirmation with RC that the plastic could handle the butyl tape if I took time to tighten the screws, I decided to use butyl tape for the repair. I had previously purchased a couple of rolls Bed-It Butyl Tape from Compass Marine, so I was all set to do the repair.

I removed the old gasket and then cleaned the inside of the plastic hinge connector with soap and water. I then let the connector dry completely for a couple of days. This job was made easier by having the shrink wrap up so I didn’t have to worry about more leaks during the repair. I worked the butyl tape to make a layer of the material on the inside of the plastic hinge connector.


The hinges were then reassembled. I didn’t tighten the screws too tight. Just enough to start to compress the butyl tape. I then let it sit; it was about 65 degrees under the clear shrink wrap on this cold, sunny day due to the greenhouse effect. Later in the day I turned the screws a couple more turns to compress the butyl tape a little more. Over the next couple of weeks, whenever the temperature got above 65 degrees under the shrink wrap I would give the screws a couple of turns. Eventually it was completely tight and the excess butyl tape had squished out from under the hinge connector.


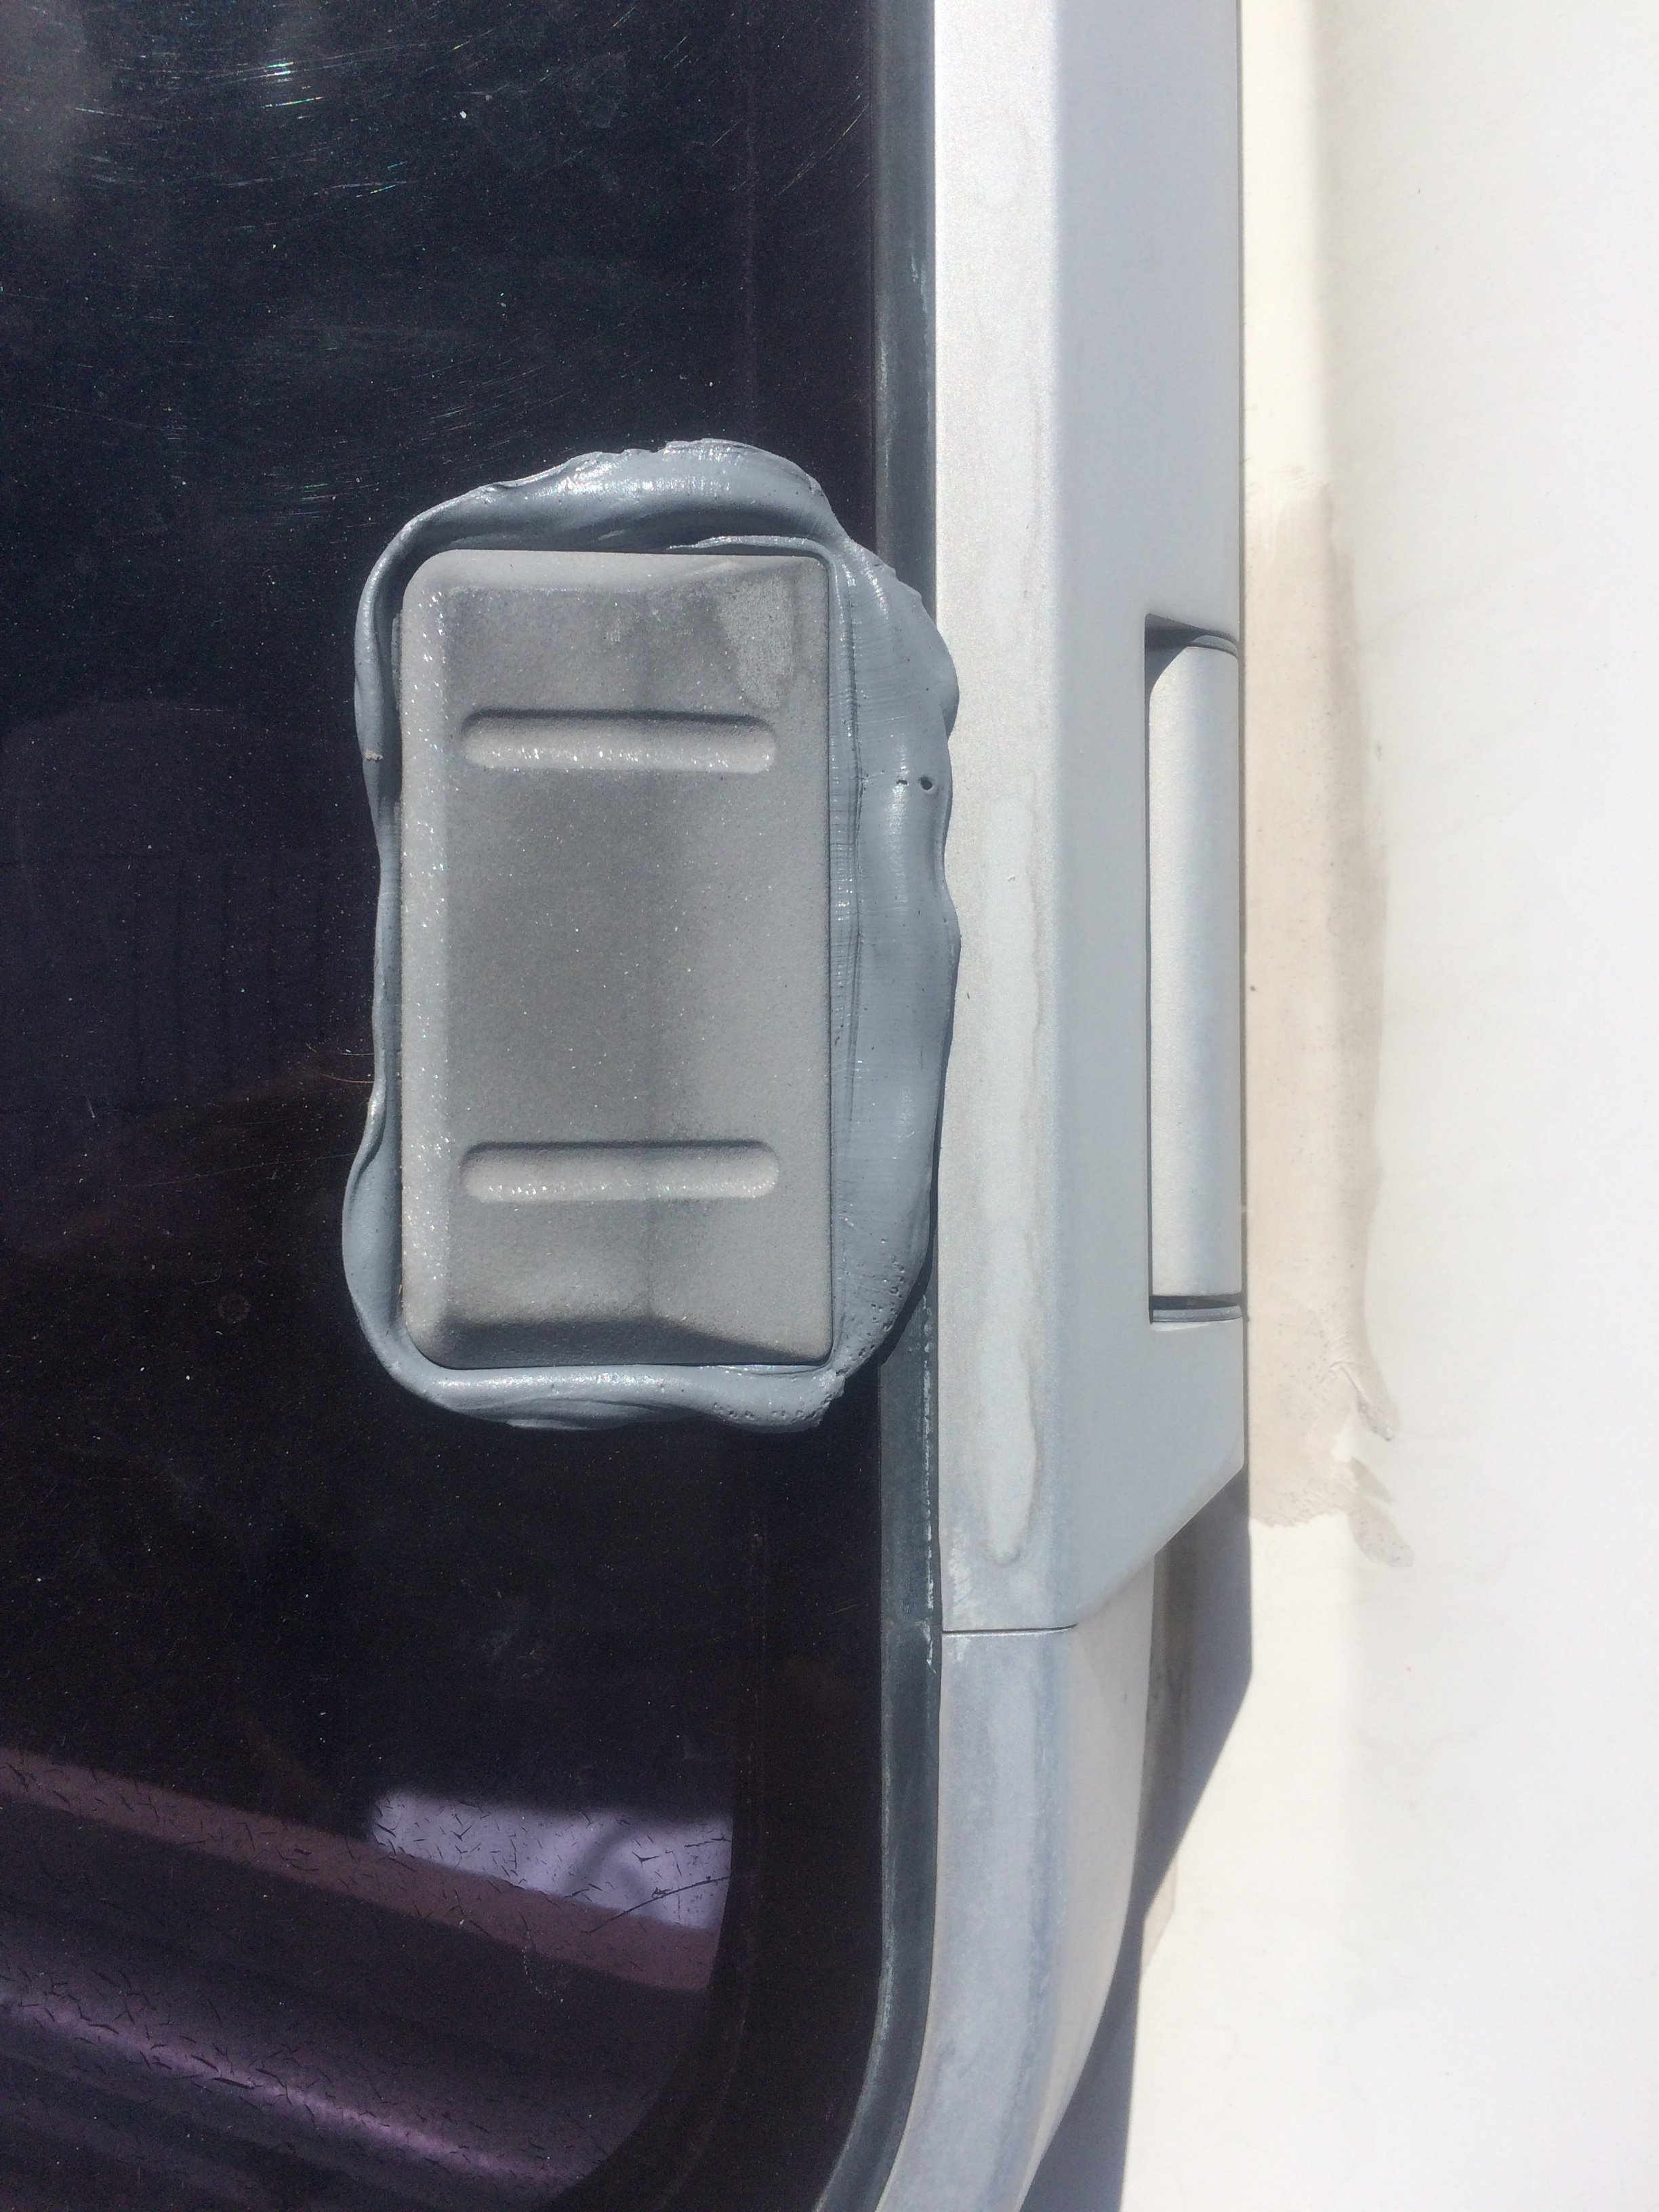
I used RC’s technique to cleanup the excess butyl tape. I used a ball of excess butyl tape from another project and pulled away the butyl tape from the hatch. I then did a quick wipe with a clean rag with a little mineral spirits.

While I was there I also replaced the O-rings and lubricated the hatch dogs. I used the Lewmar Drip Stop Hatch Dog Rebuild Kit from Catalina Direct.


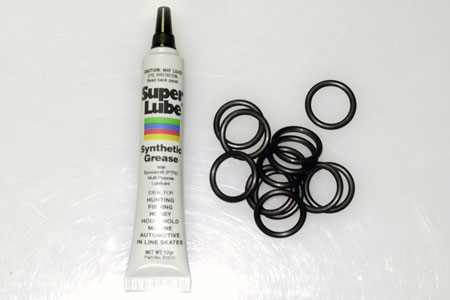
The hatch dogs weren’t leaking yet but I figured a little preventative maintenance is always a good thing.

The shrink wrap has been off for a little over 2 months now and no sign of any leaks.

Cross posted on my blog.
 

paulj

.
Mar 16, 2007
1,361
Catalina 310 Anacortes,Wa
Very creative bead with that Butyl Tape.........:theman:


paulj
:troll:
 
Feb 26, 2004
22,759
Catalina 34 224 Maple Bay, BC, Canada
Nice job, Smitty.

You just solved 99% of the problems sailors have with those @#$@@ Lewmar hatches. :eek::eek::eek:

You should patent it. :dance::dance::dance:

Lewmar will NOT be happy :neutral::neutral::neutral: that it's such a simple thing to do. :):):)
 

JRT

.
Feb 14, 2017
2,037
Catalina 310 211 Lake Guntersville, AL
@JK_Boston_Catalina310 I know this is an old tread, but I have to pull my fwd hatch for a leak. I'm 99% sure it is the frame to hull leaking as the water backs up in the trim ring on the inside and then gushes out. The hinge at the lens, like this thread shows, is not leaking that I can tell, and this weekend I was on board for a good downpour.

A couple of questions, do I have to remove the hatch from the hinge to access the screws at the top that hold the frame in to remove them? I plan to use MS butyle tape for the frame and will do the hinge plat to lens at the same time.
 
Nov 18, 2010
2,441
Catalina 310 Hingham, MA
@JK_Boston_Catalina310 I know this is an old tread, but I have to pull my fwd hatch for a leak. I'm 99% sure it is the frame to hull leaking as the water backs up in the trim ring on the inside and then gushes out. The hinge at the lens, like this thread shows, is not leaking that I can tell, and this weekend I was on board for a good downpour.

A couple of questions, do I have to remove the hatch from the hinge to access the screws at the top that hold the frame in to remove them? I plan to use MS butyle tape for the frame and will do the hinge plat to lens at the same time.
I have not removed my hatch for rebedding but it's on the list for this hurricane season. I don't think you can use butyl tape as the hatch is currently setup. I believe the screws you see on the outside of the hatch are simply wood screws into the deck. This would not give sufficient compression for butyl tape. So I plan to investigate through bolting the hatch. This will likely require filling the gap between the two hull pieces (the deck and the ceiling) so that it doesn't deform. This will likely mean some thickened epoxy and possible glass or G10.

I will report that we have been taking a lot of bluewater over the bow this last month in rather unseasonably large seas for the Caribbean. The hatch hinges have still not leaked following this repair. Obviously I can't say the same for the frame to deck seal as evident by rebedding being on the to do list. I am also working on possible ideas on how to rebed the chain plates with butyl tape but that will require some modifications.

Good luck and it would be great if you post some pics of the hatch out of the boat and what the hull looks like.
 

JRT

.
Feb 14, 2017
2,037
Catalina 310 211 Lake Guntersville, AL
I can do that, it might be a few weeks, I still don't know how to remove the top screws, I assume the hinge has to come off the actual hatch like you did and then I can access them. I didn't see how to remove the hinges.
 

jviss

.
Feb 5, 2004
6,745
Tartan 3800 20 Westport, MA
I believe the screws you see on the outside of the hatch are simply wood screws into the deck.
You mean wood screws into the deck core?
This would not give sufficient compression for butyl tape.
Why do you say so? I imagine enough compression to hold the hatch in place is more than enough to compress the butyl tape adequately. It's not compression that makes butyl tape seal, it's the stickiness and lifetime elasticity that make it a great seal.
 

jviss

.
Feb 5, 2004
6,745
Tartan 3800 20 Westport, MA
Great write-up, JK. I presume that's a Lewmar Ocean hatch? I'll keep that in mind.

I think you over-did it, a bit, with the tightening sequence. One used to do a two-pass tightening with the polysulfides, like 3M 101, but with butyl tape I think you're fine to tighten all the way, at once. So sayeth Mainesail, for what it's worth.
https://marinehowto.com/installing-newfound-metals-portlights/
 
Nov 18, 2010
2,441
Catalina 310 Hingham, MA
I think you over-did it, a bit, with the tightening sequence. One used to do a two-pass tightening with the polysulfides, like 3M 101, but with butyl tape I think you're fine to tighten all the way, at once. So sayeth Mainesail, for what it's worth.
https://marinehowto.com/installing-newfound-metals-portlights/
Go read that article again. MS said one tightening is fine for polysulfides but he spent 2 days tighten the butyl on this project. Butyl moves slow, well a little quicker down here in the tropics, but it takes time to squeeze out. With this project I was using self-tapping screws into plastic. If you tried to tighten it all the way at once you would likely strip the little fins of plastic out from between the screw flights. This would render your screws useless and destroy the plastic parts of the hinge.
 
Nov 18, 2010
2,441
Catalina 310 Hingham, MA
You mean wood screws into the deck core?
Yes. I don't believe they are through bolted. I could be wrong as I haven't removed the plastic trim ring on the inside yet.

Why do you say so? I imagine enough compression to hold the hatch in place is more than enough to compress the butyl tape adequately. It's not compression that makes butyl tape seal, it's the stickiness and lifetime elasticity that make it a great seal.
The compression forces the butyl tape into the space between the hardware and the deck (hopefully with some bevel to allow the butyl to create a good deal). Butyl is not an adhesive sealant like say 5200 that might hold something together on its own. It is there to make a watertight seal by filling the open space. Using a self-tapping screw setup with butyl can work if you are very careful and the substrate is very competent. But is say the wood is a little wet or you have screwed that self-tapping screw into the same hole multiple times or you have overtightened that screw you strip the hole. Thus leaving the screw essentially sitting in space with nothing to grab. A mistake I have made many a time even when trying to be careful to not do it. That's why the best setup for butyl is a machine screw with backing (at least a fender washer) where you can hold the screw in place and tighten the nut from the bottom.

Good luck
 

jviss

.
Feb 5, 2004
6,745
Tartan 3800 20 Westport, MA
I beg to differ. I have read the article a couple of times, and I think you have it backwards. Search for the following text and read form there:

"Having learned the art of bedding fittings from some of the guys at Hinckley Yachts I believe in the bevel/chamfer and tighten once method for most things. I don’t generally subscribe to the “tighten over a few days to create a gasket” method."

Maybe I missed something? If you can refer me to a specific section of the article I will read it and perhaps change my view.

I have those very same friction hinges on two Lewmar Ocean hatches, and have had them on and off a couple of times. I find the grip of the screws into the plastic to be quite good, and I doubt very much you'd strip them squishing butyl tape. Besides, you could start the screws, close the hatch, and stand on that plate outside to squish the butyl. But, your mileage may vary, as they say. We'll see, if I ever have to re-do mine (just replaced the hatch lids, so have new gaskets on those parts.
 

jviss

.
Feb 5, 2004
6,745
Tartan 3800 20 Westport, MA
But is say the wood is a little wet or you have screwed that self-tapping screw into the same hole multiple times or you have overtightened that screw you strip the hole. Thus leaving the screw essentially sitting in space with nothing to grab.
I think it would be very important to find out how water is getting into the core, drying it out, and they finding a water-tight method of securing the hatch. Perhaps embed threaded inserts into it with a glass/resin slurry?
 
Nov 18, 2010
2,441
Catalina 310 Hingham, MA
"Having learned the art of bedding fittings from some of the guys at Hinckley Yachts I believe in the bevel/chamfer and tighten once method for most things. I don’t generally subscribe to the “tighten over a few days to create a gasket” method."

Maybe I missed something? If you can refer me to a specific section of the article I will read it and perhaps change my view.
Two paragraphs after the one you quoted.

"On these ports, using the butyl, it is very, very difficult to tighten them down all the way at once. I tightened the ports over two days, which is short enough so my polysulfide sealant did not fully harden, but long enough to fully compress the butyl."
 
Nov 18, 2010
2,441
Catalina 310 Hingham, MA
I think it would be very important to find out how water is getting into the core, drying it out, and they finding a water-tight method of securing the hatch. Perhaps embed threaded inserts into it with a glass/resin slurry?
The problem with the threaded inserts is that means you are screwing down from the top. This can cause the butyl to walk down the threads and possibly jam. It can be done but takes a little more practice.

As for the water, this is where potting comes into play.
 

jviss

.
Feb 5, 2004
6,745
Tartan 3800 20 Westport, MA
Two paragraphs after the one you quoted.

"On these ports, using the butyl, it is very, very difficult to tighten them down all the way at once. I tightened the ports over two days, which is short enough so my polysulfide sealant did not fully harden, but long enough to fully compress the butyl."
Important qualifier: "on these ports."
 
Apr 17, 2013
153
Catalina 310 57 Pompano Beach, FL
I had the same problem. First I took off the trim ring so I could really see where it was leaking. It was leaking where the hatch is attached to the deck. I used Boatlife Life-Calk to fix the problem. I did not take off the hatch. I backed out each screw and coated them with Life-Calk and tightened them back up. I did notice that some of the screws were loose. After tightening all of the screws I put a thin layer of silicone on the head of each screw. It seems that many people on the forum are not fond of using silicone on a boat. There are situations where it can be very helpful. Next I did a perimeter seal with silicone where the frame meets the deck. I think it is important to use a good quality silicone I use GE II+. When you are caulking you need to push the sealant into the groove not pull it in. After running your bead you can wet your finger and push the sealant in. I found this fix on this forum from another owner. The last thing I wanted to do was to remove the hatch and rebed it. We just came back from 3 months in the Bahamas, lots and lots of rain and thunderstorms and beating into seas which covered the hatch. Bottom line no leaks, I left the trim ring off so I could see if it leaked. Maybe just tightening the screws fixed it and sealing the perimeter seal didn't hurt. With leaks if you can slow them down you can usually fix them without a major job.
 
Last edited:
Nov 18, 2010
2,441
Catalina 310 Hingham, MA
I'll put up a bigger post later. But here is the issue with how Catalina installed the hatch in my opinion. Lewmar recommends that at least the screws near the hinges be through bolted. But Catalina just used wood screws. So we ended up potting all the locations and through bolting them. We used Bed-It butyl tape to seal it all. It worked great and feels way more solid. I have not figured out how to put the trim ring back on.

Fair winds,

Jesse
 
Jan 17, 2013
439
Catalina 310 St. Simons Island, GA
I bought the gaskets from Lewmar and the fix was quick & simple which is what I like. Only problem is that I had to buy like 30 of the gaskets so whenever I meet another 310 owner I give them a couple gaskets...
 
  • Like
Likes: jviss