Hi All,
I promised Hermit I would show how to make a backing block with tapped studs to avoid through bolting to your hull. Many don't feel comfortable drilling extra holes in the hull and this is a good way to get nearly the strength without additional holes.
1- Start: This post already assumes you're using fiberglass for the backer blocks and have already made the circle. Unlike the other method where you glass the backing plate to the hull first then drill the hole for the thru-hull with this method you drill the thru-hull hole first. To do this project a drill press is HIGHLY recommended.

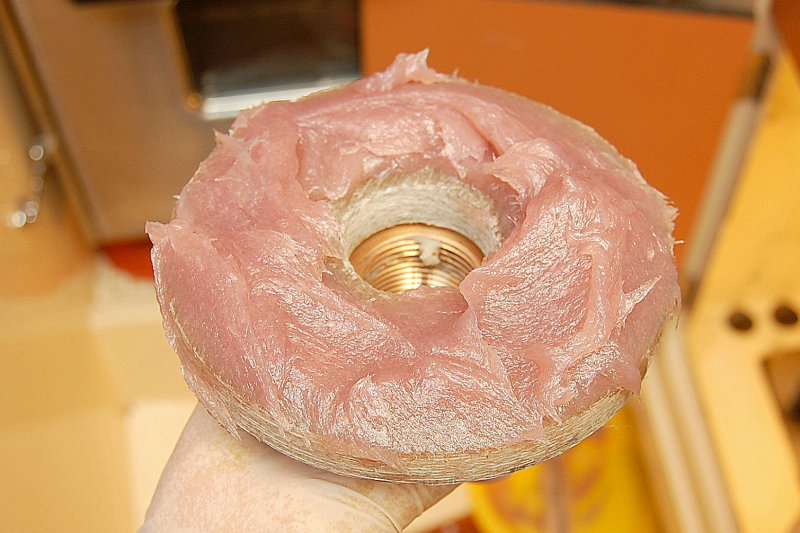
2- Cut the hole: Be sure to use a hole saw as close to the OD size of the thru-hull as is humanly possible. There should be very little room between the threads and the fiberglass.

3- Make a shim: Before you drill and tap the backer block you need to tighten the flanged adapter to the backing block using the thru-hull. Because you are missing the thickness of the hull you will need to create a spacer. I used some PVC exterior trim lumber and drilled the same diameter hole as in the backing block. Then all I did was center & tighten the flange and thru-hull together with the backing plate and spacer sandwiched in between.

4- Clamp & drill: This is the most critical step and why you really should have a drill press. Because you are literally drilling and tapping a piece of 5/8" fiberglass, the threaded holes MUST be perfectly centered in the flange holes, and they must be 100% vertical. I made my spacer square, and wider than the head of the thru-hull, so I was able to clamp it in my drill press vice. I can not stress enough how important it is to make perfectly vertical holes that are perfectly centered in the holes of the flange or seacock. There is NO wiggle room here. Mess this up and you just wrecked a backing block..


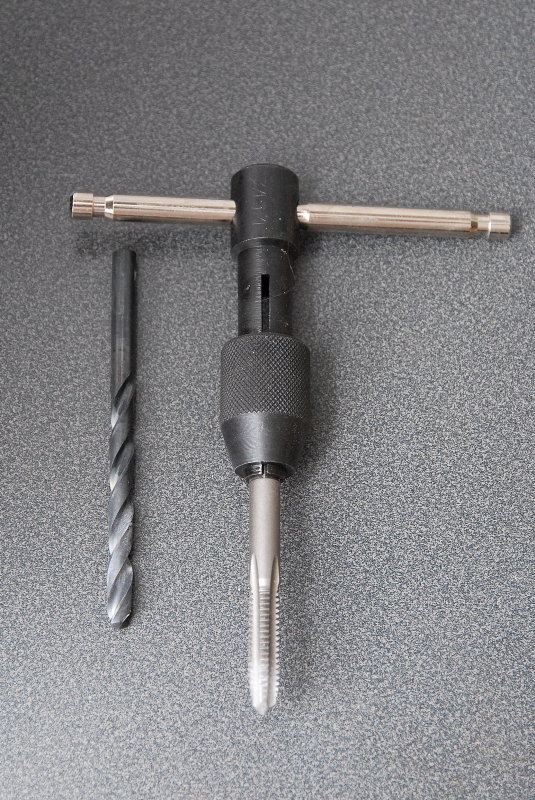
5- Drill & tap: Please DO NOT cut corners on the quality of your tap and always use the proper sized drill for the tap. This is an "F" drill for a 5/16" X 18 thread tap. You can also use a 17/64" drill with a 5/16" tap. Fiberglass is very susceptible to off center tapping so be very, very careful to not cut crooked or wobble your tap side to side as it will make the tapping bigger than you want. Practice in a scrap piece of fiberglass if you first if your not comfortable with this..
6- Tapping the backing plate:

7- Cutting the studs: Silicon bronze threaded rod is expensive but carriage bolts are cheap. Simply install two nuts onto the bolt and clamp one nut in the vice while tightening the other back onto it essentially locking the bolt into the vice.

8- Cut off wheel: Though this 1 1/2" Dremel cut-off disc says "Plastic" it is my favorite bolt cut-off wheel and it works well on stainless or bronze.

9- Cut off the head: As you get good with the Dremel you can make some amazing bolt cuts with threads that work as good as factory. Of course you could use a hack saw too but the Dremel just works better.


10- Finish the threads: Once I cut the bolt I clean the end on my bench grinder with a brass wire wheel. This one looks almost as good as the factory end and works the same too.

11- Insert Studs: With the studs made you simply thread them into the backing block.

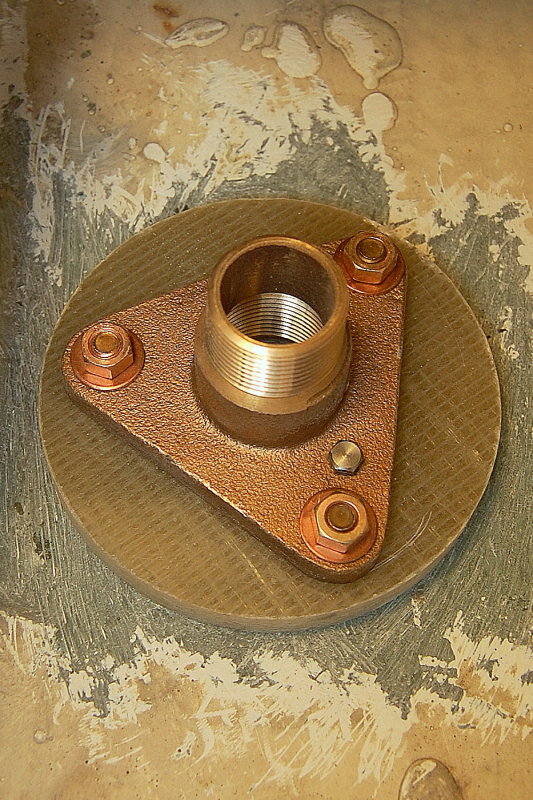
12- Install Flange or seacock: Once the studs are in simply drop the flange over put on the nuts and your ready for a dry test fit in the hull.

13- Side view: This photo shows a side vie of the assembly. The hull & sealant are the only pieces missing.

I should be installing this in the next few days and will hopefully remember to photograph the rest of the steps for installation and post it as a follow up..
I promised Hermit I would show how to make a backing block with tapped studs to avoid through bolting to your hull. Many don't feel comfortable drilling extra holes in the hull and this is a good way to get nearly the strength without additional holes.
1- Start: This post already assumes you're using fiberglass for the backer blocks and have already made the circle. Unlike the other method where you glass the backing plate to the hull first then drill the hole for the thru-hull with this method you drill the thru-hull hole first. To do this project a drill press is HIGHLY recommended.
2- Cut the hole: Be sure to use a hole saw as close to the OD size of the thru-hull as is humanly possible. There should be very little room between the threads and the fiberglass.
3- Make a shim: Before you drill and tap the backer block you need to tighten the flanged adapter to the backing block using the thru-hull. Because you are missing the thickness of the hull you will need to create a spacer. I used some PVC exterior trim lumber and drilled the same diameter hole as in the backing block. Then all I did was center & tighten the flange and thru-hull together with the backing plate and spacer sandwiched in between.
4- Clamp & drill: This is the most critical step and why you really should have a drill press. Because you are literally drilling and tapping a piece of 5/8" fiberglass, the threaded holes MUST be perfectly centered in the flange holes, and they must be 100% vertical. I made my spacer square, and wider than the head of the thru-hull, so I was able to clamp it in my drill press vice. I can not stress enough how important it is to make perfectly vertical holes that are perfectly centered in the holes of the flange or seacock. There is NO wiggle room here. Mess this up and you just wrecked a backing block..
5- Drill & tap: Please DO NOT cut corners on the quality of your tap and always use the proper sized drill for the tap. This is an "F" drill for a 5/16" X 18 thread tap. You can also use a 17/64" drill with a 5/16" tap. Fiberglass is very susceptible to off center tapping so be very, very careful to not cut crooked or wobble your tap side to side as it will make the tapping bigger than you want. Practice in a scrap piece of fiberglass if you first if your not comfortable with this..
6- Tapping the backing plate:
7- Cutting the studs: Silicon bronze threaded rod is expensive but carriage bolts are cheap. Simply install two nuts onto the bolt and clamp one nut in the vice while tightening the other back onto it essentially locking the bolt into the vice.
8- Cut off wheel: Though this 1 1/2" Dremel cut-off disc says "Plastic" it is my favorite bolt cut-off wheel and it works well on stainless or bronze.
9- Cut off the head: As you get good with the Dremel you can make some amazing bolt cuts with threads that work as good as factory. Of course you could use a hack saw too but the Dremel just works better.
10- Finish the threads: Once I cut the bolt I clean the end on my bench grinder with a brass wire wheel. This one looks almost as good as the factory end and works the same too.
11- Insert Studs: With the studs made you simply thread them into the backing block.
12- Install Flange or seacock: Once the studs are in simply drop the flange over put on the nuts and your ready for a dry test fit in the hull.
13- Side view: This photo shows a side vie of the assembly. The hull & sealant are the only pieces missing.
I should be installing this in the next few days and will hopefully remember to photograph the rest of the steps for installation and post it as a follow up..
")