Well, that's some sad news to drop on you suddenly. My condolences. I hope things work out for your wife and FIL as best as possible. Having elderly in-laws has put some limits on our cruising plans both last year and this coming summer. But, it's all part of the circle of life and we all do the best we can.
Repairing Hunter 40 damage from Hurricane Matthew
- Thread starter B757Captain
- Start date
Thanks gents for the kind words. Things have started to settle down a bit but still a long way to go yet.
My travel plans have been finalized and I'll be out of pocket for the next few weeks. I have managed to get some work done so not a total loss and I'll detail that next. I've concentrated mostly on work in the galley and main cabin and put the cabin top/hard dodger on hold until I return - I would much rather not interrupt that project halfway thru") .
.
I'll split up the posts and stretch them a bit so there's hopefully not too big of a gap.
Cheers,
Mark
My travel plans have been finalized and I'll be out of pocket for the next few weeks. I have managed to get some work done so not a total loss and I'll detail that next. I've concentrated mostly on work in the galley and main cabin and put the cabin top/hard dodger on hold until I return - I would much rather not interrupt that project halfway thru
.I'll split up the posts and stretch them a bit so there's hopefully not too big of a gap.
Cheers,
Mark
Stuffing things into the galley:
With the big pieces for the galley sides rough cut it's time to make sure there is room behind for everything. I've got to fit the AC unit and its plumbing and ducting behind there, the water heater (if there is room - I have an alternate location for that if necessary) the fresh water pump, room for the stove top gimbal, etc. So, the elephant behind Door #1 is the AC since it will take up the most room.
After lots of research and hair-pulling on what direction to go AC-wise, I settled on the easiest solution - replace what I had with the same or similar. After Matthew I had contacted Flagship Marine and explained what happened; they said send them the unit, they would test it and see if it was repairable. Well, I waffled for a while but a year (or two) ago I had a trip to Miami scheduled so I took the unit with me and dropped it off. Turns out it was not economically repairable. Immersed in seawater and stuffed in the corner of the garage for a year or so - imagine that!
So needing a new AC unit, and having good luck with Flagship I settled on them for the replacement. I had an 18,500 BTU unit before, and figuring more is better, I scoped out a 20,000 BTU unit and based on the dimensions on the website I cut a board to mimic the footprint:

It's a little bit bigger than the old one! I tried the old location and there just was not enough room. However, if I raised it up to the built-in shelf in the liner, plenty of room:

Except for two things: the installed height is too close to the bottom of the counter-top, and it interferes with the stove:

So, plan B. There's maneuvering room down there, so:

Once I trim back the side panels there's room there. Now to see about the water heater:

A little too tight for me, this location overlaps the seacocks and I'm not thrilled about the potential for condensate dripping onto the water heater, so it will go to the alternate location. Now that I know there's room, time to work on finalizing the galley. But then:
I called to order the AC unit and, unfortunately, due to this global mess we are in, they are backordered on compressor units until late summer (at least). Plan C: they have a refurbished 18,500 BTU unit on the shelf ready to go, a few years newer with a few upgrades vs. my old one. Sold!
Next up, what to do while waiting for the AC.
Cheers,
Mark
With the big pieces for the galley sides rough cut it's time to make sure there is room behind for everything. I've got to fit the AC unit and its plumbing and ducting behind there, the water heater (if there is room - I have an alternate location for that if necessary) the fresh water pump, room for the stove top gimbal, etc. So, the elephant behind Door #1 is the AC since it will take up the most room.
After lots of research and hair-pulling on what direction to go AC-wise, I settled on the easiest solution - replace what I had with the same or similar. After Matthew I had contacted Flagship Marine and explained what happened; they said send them the unit, they would test it and see if it was repairable. Well, I waffled for a while but a year (or two
) ago I had a trip to Miami scheduled so I took the unit with me and dropped it off. Turns out it was not economically repairable. Immersed in seawater and stuffed in the corner of the garage for a year or so - imagine that!So needing a new AC unit, and having good luck with Flagship I settled on them for the replacement. I had an 18,500 BTU unit before, and figuring more is better, I scoped out a 20,000 BTU unit and based on the dimensions on the website I cut a board to mimic the footprint:
It's a little bit bigger than the old one! I tried the old location and there just was not enough room. However, if I raised it up to the built-in shelf in the liner, plenty of room:
Except for two things: the installed height is too close to the bottom of the counter-top, and it interferes with the stove:
So, plan B. There's maneuvering room down there, so:
Once I trim back the side panels there's room there. Now to see about the water heater:
A little too tight for me, this location overlaps the seacocks and I'm not thrilled about the potential for condensate dripping onto the water heater, so it will go to the alternate location. Now that I know there's room, time to work on finalizing the galley. But then:
I called to order the AC unit and, unfortunately, due to this global mess we are in, they are backordered on compressor units until late summer (at least
). Plan C: they have a refurbished 18,500 BTU unit on the shelf ready to go, a few years newer with a few upgrades vs. my old one. Sold!Next up, what to do while waiting for the AC.
Cheers,
Mark
Waiting for the AC, Part 1:
With the basic layout for the AC sorted, it's time to rough out the rest of the galley. In my previous galley remodel I had eliminated the L-shape with the sink towards the centerline and changed to a more open cabin layout with all the galley fixtures lining the starboard side. Version 2.5 moved the fridge out a bit when I relocated the AC unit under the galley. This setup had one major flaw - with the sink offset to the side drainage and the hose setup for the sink became a constant headache.
Now with version 3 I'm reverting back to the closer-to-centerline sink location with the sink directly over the seacock. For the L- I wanted to try a (greater than my 1 1/4" corners) larger corner radius so off to the hardware store for some PVC pipe. I then cut up some test panels from 3/4" ply:

to get the right spacing and depth of cuts to achieve this:

After some work on the table saw I got the end pieces cut and ready for forming. I filled the voids with thickened epoxy and taped the ply/gooey epoxy mess to the PVC pipe and let it dry. Worked out well for the outside radius corners I wanted. I did also want to try to make an inside corner which didn't work out quite as well:

I couldn't get the accordion to lay tight against the pipe, no matter the method, so I resorted to driving wedges into the slots to help hold the shape. The results looked too much like a banana so still scratching my head on that one.
I did have two outside corners to work with though, so onwards:

Stay tuned!
Mark
With the basic layout for the AC sorted, it's time to rough out the rest of the galley. In my previous galley remodel I had eliminated the L-shape with the sink towards the centerline and changed to a more open cabin layout with all the galley fixtures lining the starboard side. Version 2.5 moved the fridge out a bit when I relocated the AC unit under the galley. This setup had one major flaw - with the sink offset to the side drainage and the hose setup for the sink became a constant headache.
Now with version 3 I'm reverting back to the closer-to-centerline sink location with the sink directly over the seacock. For the L- I wanted to try a (greater than my 1 1/4" corners) larger corner radius so off to the hardware store for some PVC pipe. I then cut up some test panels from 3/4" ply:
to get the right spacing and depth of cuts to achieve this:
After some work on the table saw I got the end pieces cut and ready for forming. I filled the voids with thickened epoxy and taped the ply/gooey epoxy mess to the PVC pipe and let it dry. Worked out well for the outside radius corners I wanted. I did also want to try to make an inside corner which didn't work out quite as well:
I couldn't get the accordion to lay tight against the pipe, no matter the method, so I resorted to driving wedges into the slots to help hold the shape. The results looked too much like a banana so still scratching my head on that one.
I did have two outside corners to work with though, so onwards:
Stay tuned!
Mark
Looking great Mark. The curious cat in me was wondering if you went back to your preferred location for the AC given that you will be installing a 18.5kBTU unit instead of the 20kBTU you had sized for?
It looks like you stole my Makita table saw. Maybe I should look in the garage. I have always been very impressed with how accurate and smooth that thing cuts given its cost.
It looks like you stole my Makita table saw. Maybe I should look in the garage.
I have always been very impressed with how accurate and smooth that thing cuts given its cost.The AC location is sorta set due to (believe it or not!) space limitations. One would think that with the entire interior removed I would have some leeway but after other higher priority item locations were set - mainly batteries, water tanks, etc. - the location under the galley is the best remaining. The AC unit itself takes up less space than the ducting so I had to plan more for that than anything. Another thought in the back of my mind is lateral balance - lopsided weight distribution was always a headache on this boat.Looking great Mark. The curious cat in me was wondering if you went back to your preferred location for the AC given that you will be installing a 18.5kBTU unit instead of the 20kBTU you had sized for?
It looks like you stole my Makita table saw. Maybe I should look in the garage.
The saw is a Ryobi, can't remember the model but an older one. Made of some pretty solid material and it has held up surprisingly well considering the use (and abuse) it receives. It is starting to eat tailhousing bearings though and I am worried it might wind up on the list of tools I have worn out!
Edit: I just re-read your post and finally got what you were asking - yep, back in the original location!
Thanks Mark.The AC location is sorta set due to (believe it or not!) space limitations. One would think that with the entire interior removed I would have some leeway but after other higher priority item locations were set - mainly batteries, water tanks, etc. - the location under the galley is the best remaining. The AC unit itself takes up less space than the ducting so I had to plan more for that than anything. Another thought in the back of my mind is lateral balance - lopsided weight distribution was always a headache on this boat.
The saw is a Ryobi, can't remember the model but an older one. Made of some pretty solid material and it has held up surprisingly well considering the use (and abuse) it receives. It is starting to eat tailhousing bearings though and I am worried it might wind up on the list of tools I have worn out!
Edit: I just re-read your post and finally got what you were asking - yep, back in the original location!
On my Ryobi it started getting real loose in the blade angle adjustments so I went through the full setup and trouble shooing and got it back to where it is cutting great. One thing I have been doing since then is to remove the throat plate before raising the blade and grabbing the blade (with it unplugged) and lifting while cranking it up. That takes the strain off the slides and it has not gone out of spec again.
The blade adjusting apparatus on mine is still tight and working well, it just eats the rear armature bearing. Good news is I can still get new bearings so when it starts making noise I just slip a new one in. The problem is when something else breaks because some parts are getting scarce.Thanks Mark.
On my Ryobi it started getting real loose in the blade angle adjustments so I went through the full setup and trouble shooing and got it back to where it is cutting great. One thing I have been doing since then is to remove the throat plate before raising the blade and grabbing the blade (with it unplugged) and lifting while cranking it up. That takes the strain off the slides and it has not gone out of spec again.
Waiting for the AC, part 2:
After locating the "L" portion of the galley I could fix the location of the bulkhead separating the galley and the starboard settee. So next up is building the starboard settee:

Lots of measuring and comparing to the port side to make sure I got the depth (for the seat base) right, then adding the seat base:

All good, I think at this point I stopped for an adult beverage!
Update from the desert - another week here and I can get back home and back to the boat! Can't wait for some humidity - I feel like a raisin!
Cheers,
Mark
After locating the "L" portion of the galley I could fix the location of the bulkhead separating the galley and the starboard settee. So next up is building the starboard settee:
Lots of measuring and comparing to the port side to make sure I got the depth (for the seat base) right, then adding the seat base:
All good, I think at this point I stopped for an adult beverage!
Update from the desert - another week here and I can get back home and back to the boat! Can't wait for some humidity - I feel like a raisin!
Cheers,
Mark
Waiting for the AC, Part 3:
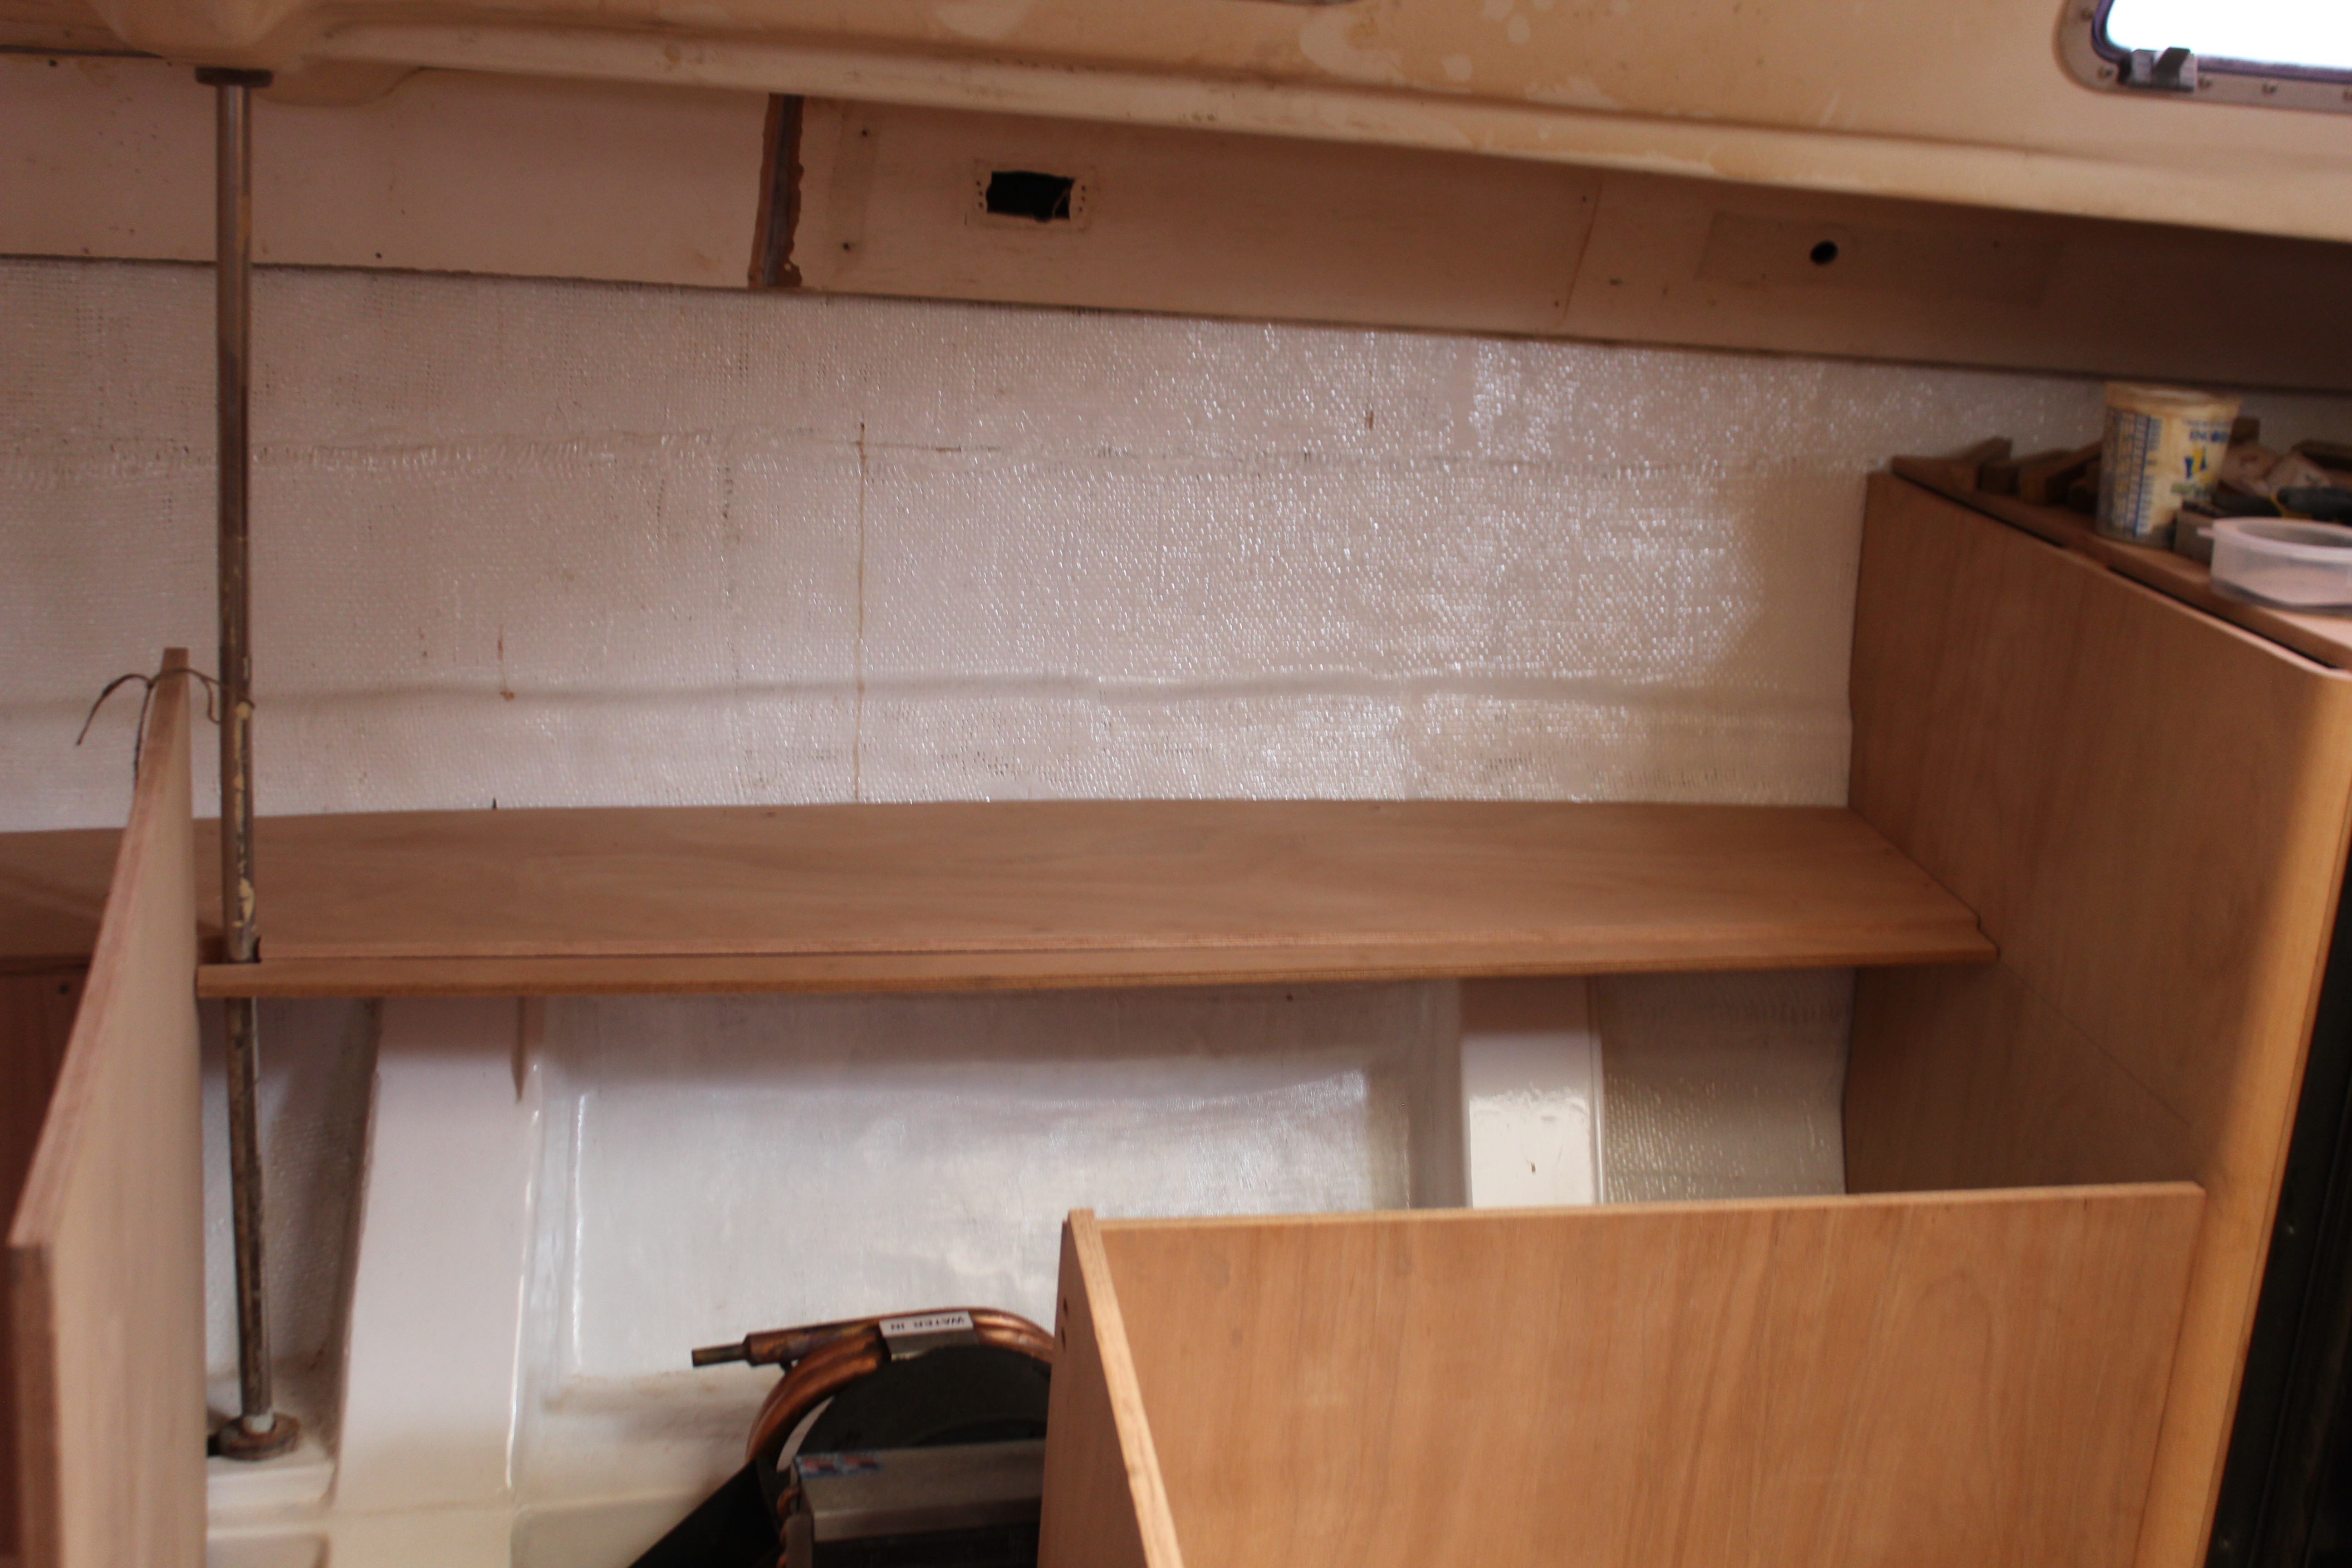
Continuing with the seat back, first thing is to get the shelf in place:

I fabbed up a slat & hot glue template for this - I must be getting good at that because all that was needed for final fitting was a quick swipe of one corner for a perfect fit. Yay!
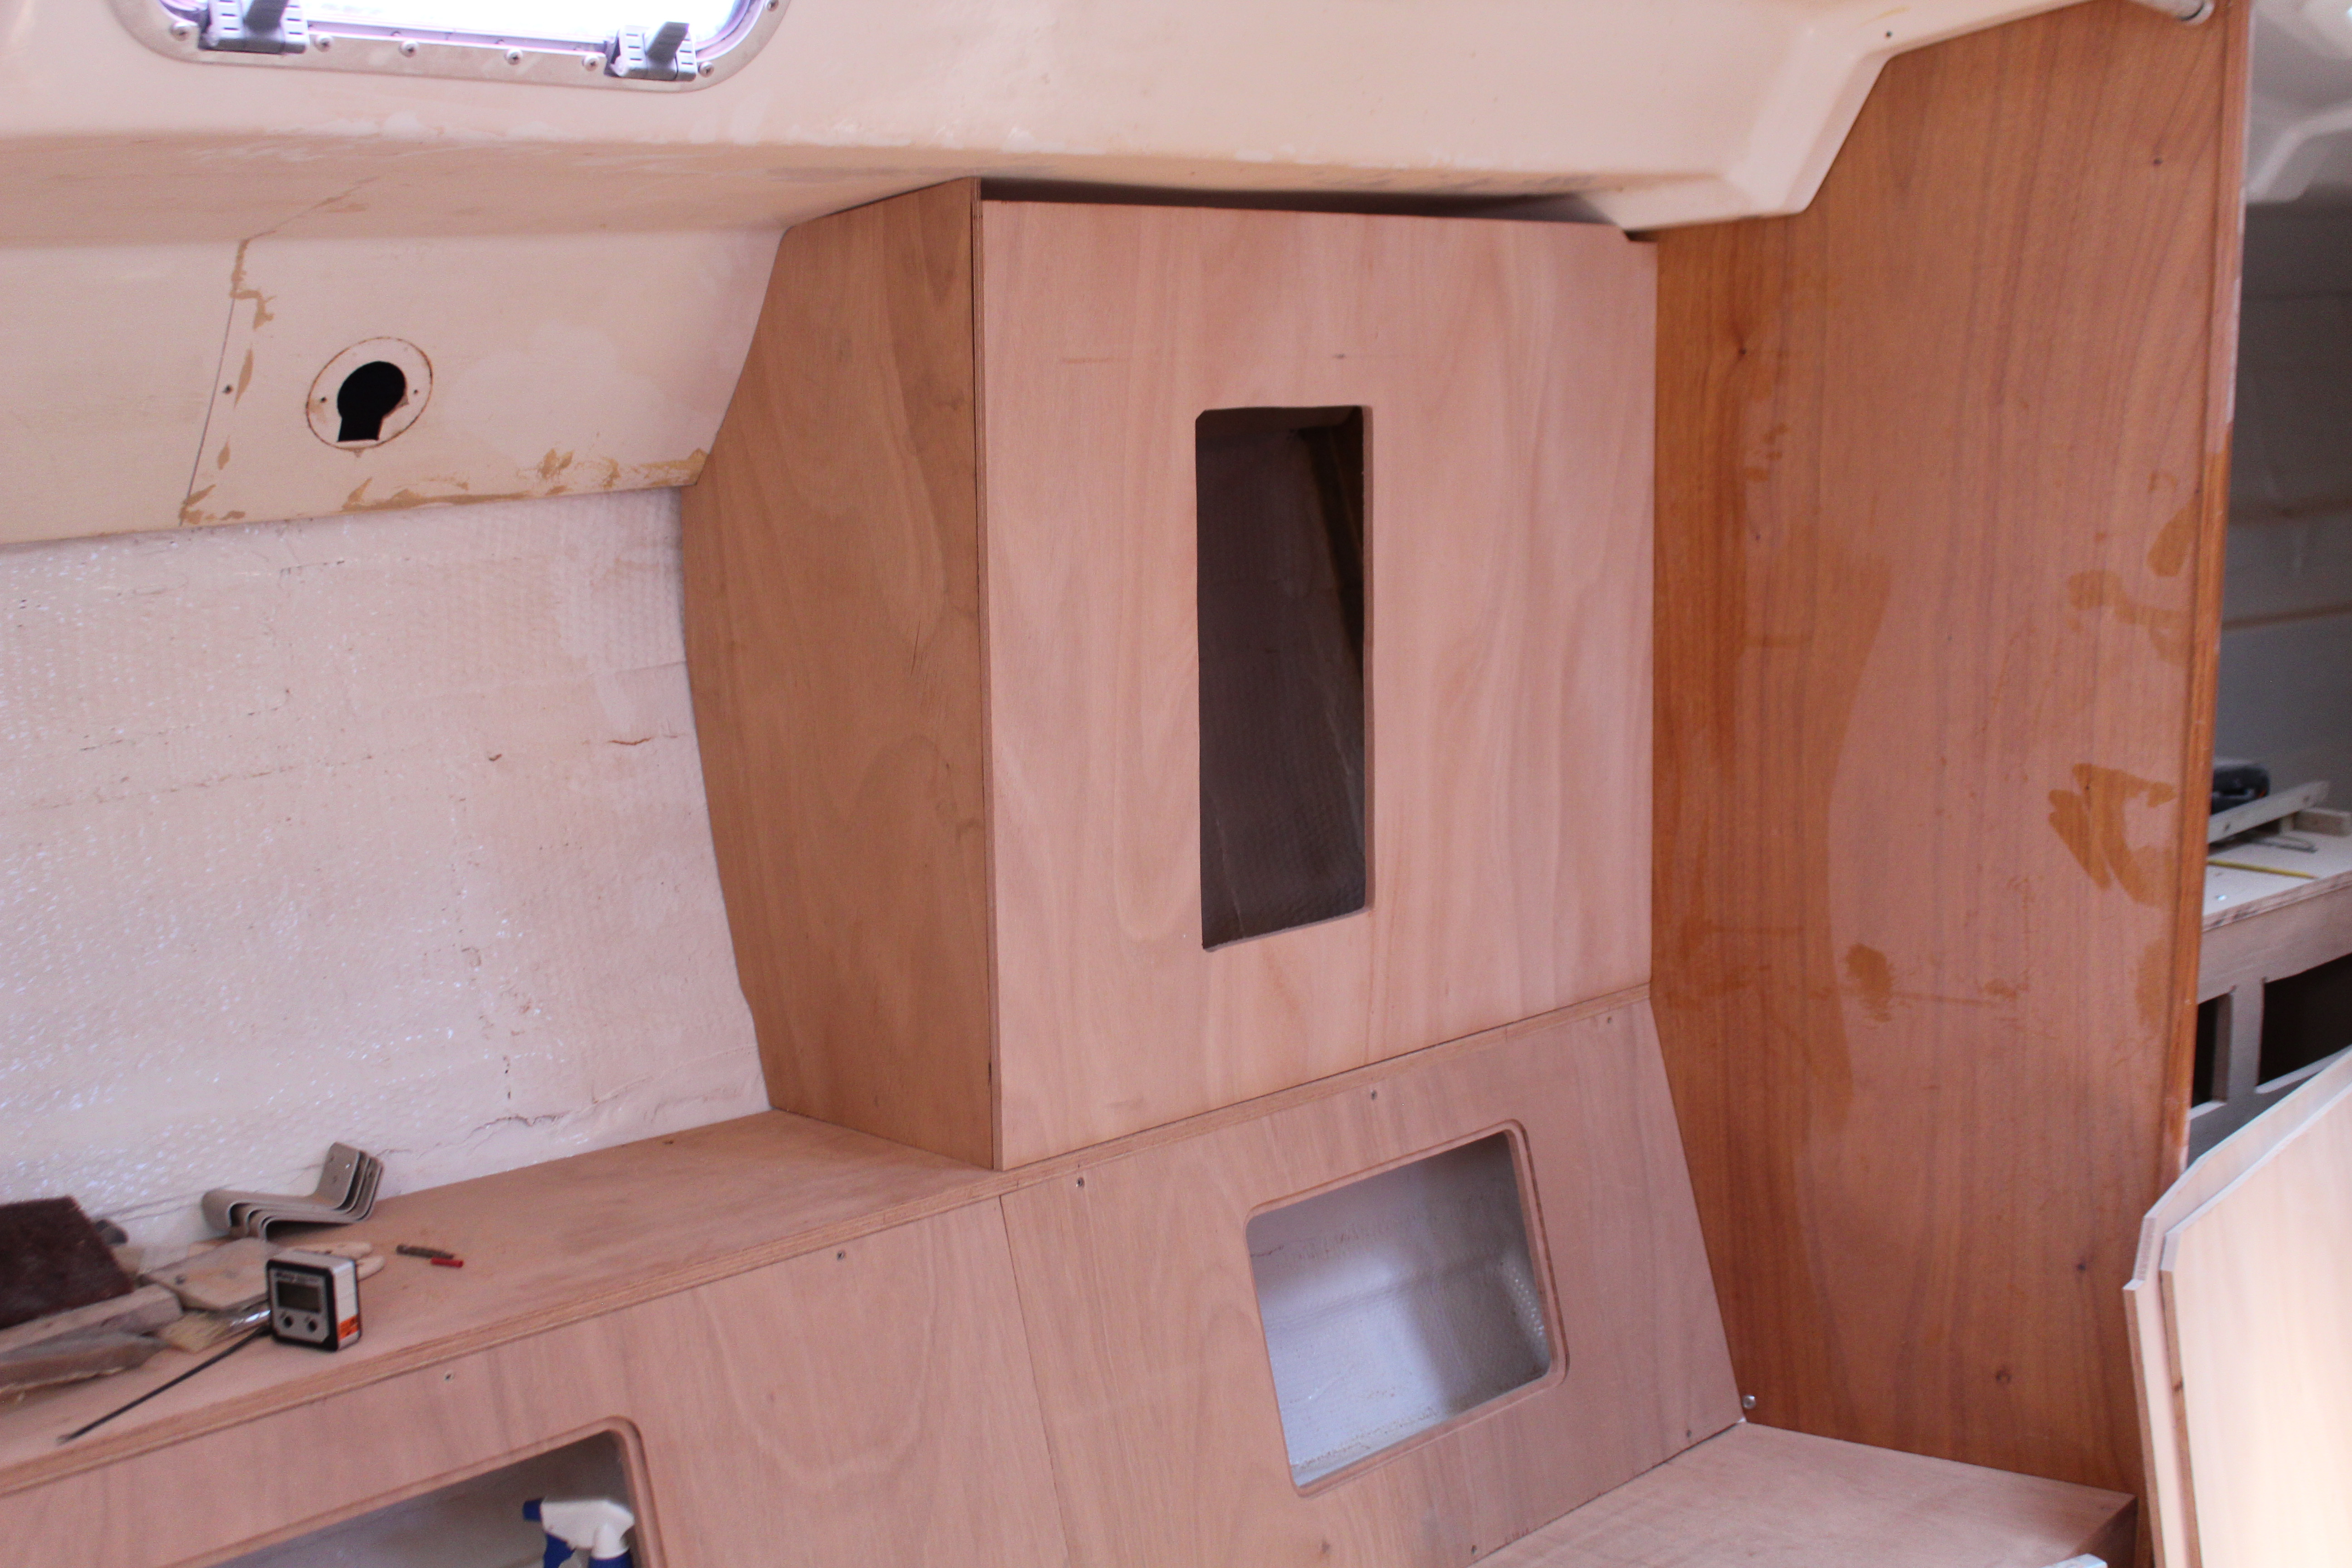
Next the seat backs, with locker openings cut:

I still have to support the seat base at the forward edge so this is just a loose fit for now. About this time came a knock on the boat, and guess what showed up?
Now to get it mounted.
Cheers,
Mark
Continuing with the seat back, first thing is to get the shelf in place:
I fabbed up a slat & hot glue template for this - I must be getting good at that because all that was needed for final fitting was a quick swipe of one corner for a perfect fit. Yay!
Next the seat backs, with locker openings cut:
I still have to support the seat base at the forward edge so this is just a loose fit for now. About this time came a knock on the boat, and guess what showed up?
Now to get it mounted.
Cheers,
Mark
Not waiting for the AC, Part 1:
I finally made it back home! Things at the FIL's place are a big giant mess and the admiral is still there, but at least I can work on the boat again. Of course I arrived just in time for the heat wave - it's been 95ish every day and lots of humidity so I have reverted to working a few hours in the morning and a few hours in the evening, plus running the portable AC in the garage during the day. It doesn't matter that I spent 5 years in Dubai and 2 years in Africa, it's just HOT! I must be getting old.
So, first things first, figuring out the mount for the AC. I went old school, I grabbed a bunch of boards and stacked them until the height was where it needed to be:

I checked for clearance with the stove - plenty!
Next up was to make up the actual mount:

No big drama here, but I do want to be able to remove the floorboard (if necessary) without removing the AC mount so I beveled the forward section of the legs to allow the floorboard to slide underneath. I'll add a removable post on the forward leg for added strength and stability if ever on a bouncy port tack. After fixing the mount I removed it for a coat of resin and then paint. While that was in progress I could continue in the galley with the rear shelf:
The shelf is (will be) two laminated pieces of 1/2" ply. The plan is to permanently fix this shelf which will also be the base for the galley cabinets. The bottom lamination extends 2 inches past the top which will give the galley countertop a lip to rest on. I decided against using 3/4" ply for the countertop because I remember the old one sagging over time. This way will hopefully give me a little more material to resist that, plus epoxying the laminations should give some rigidity as well.
Now for the paint to dry on the AC mount so I can continue.
Cheers,
Mark
I finally made it back home! Things at the FIL's place are a big giant mess and the admiral is still there, but at least I can work on the boat again. Of course I arrived just in time for the heat wave - it's been 95ish every day and lots of humidity so I have reverted to working a few hours in the morning and a few hours in the evening, plus running the portable AC in the garage during the day. It doesn't matter that I spent 5 years in Dubai and 2 years in Africa, it's just HOT! I must be getting old
.So, first things first, figuring out the mount for the AC. I went old school, I grabbed a bunch of boards and stacked them until the height was where it needed to be:
I checked for clearance with the stove - plenty!
Next up was to make up the actual mount:
No big drama here, but I do want to be able to remove the floorboard (if necessary) without removing the AC mount so I beveled the forward section of the legs to allow the floorboard to slide underneath. I'll add a removable post on the forward leg for added strength and stability if ever on a bouncy port tack
. After fixing the mount I removed it for a coat of resin and then paint. While that was in progress I could continue in the galley with the rear shelf:
The shelf is (will be) two laminated pieces of 1/2" ply. The plan is to permanently fix this shelf which will also be the base for the galley cabinets. The bottom lamination extends 2 inches past the top which will give the galley countertop a lip to rest on. I decided against using 3/4" ply for the countertop because I remember the old one sagging over time. This way will hopefully give me a little more material to resist that, plus epoxying the laminations should give some rigidity as well.
Now for the paint to dry on the AC mount so I can continue.
Cheers,
Mark
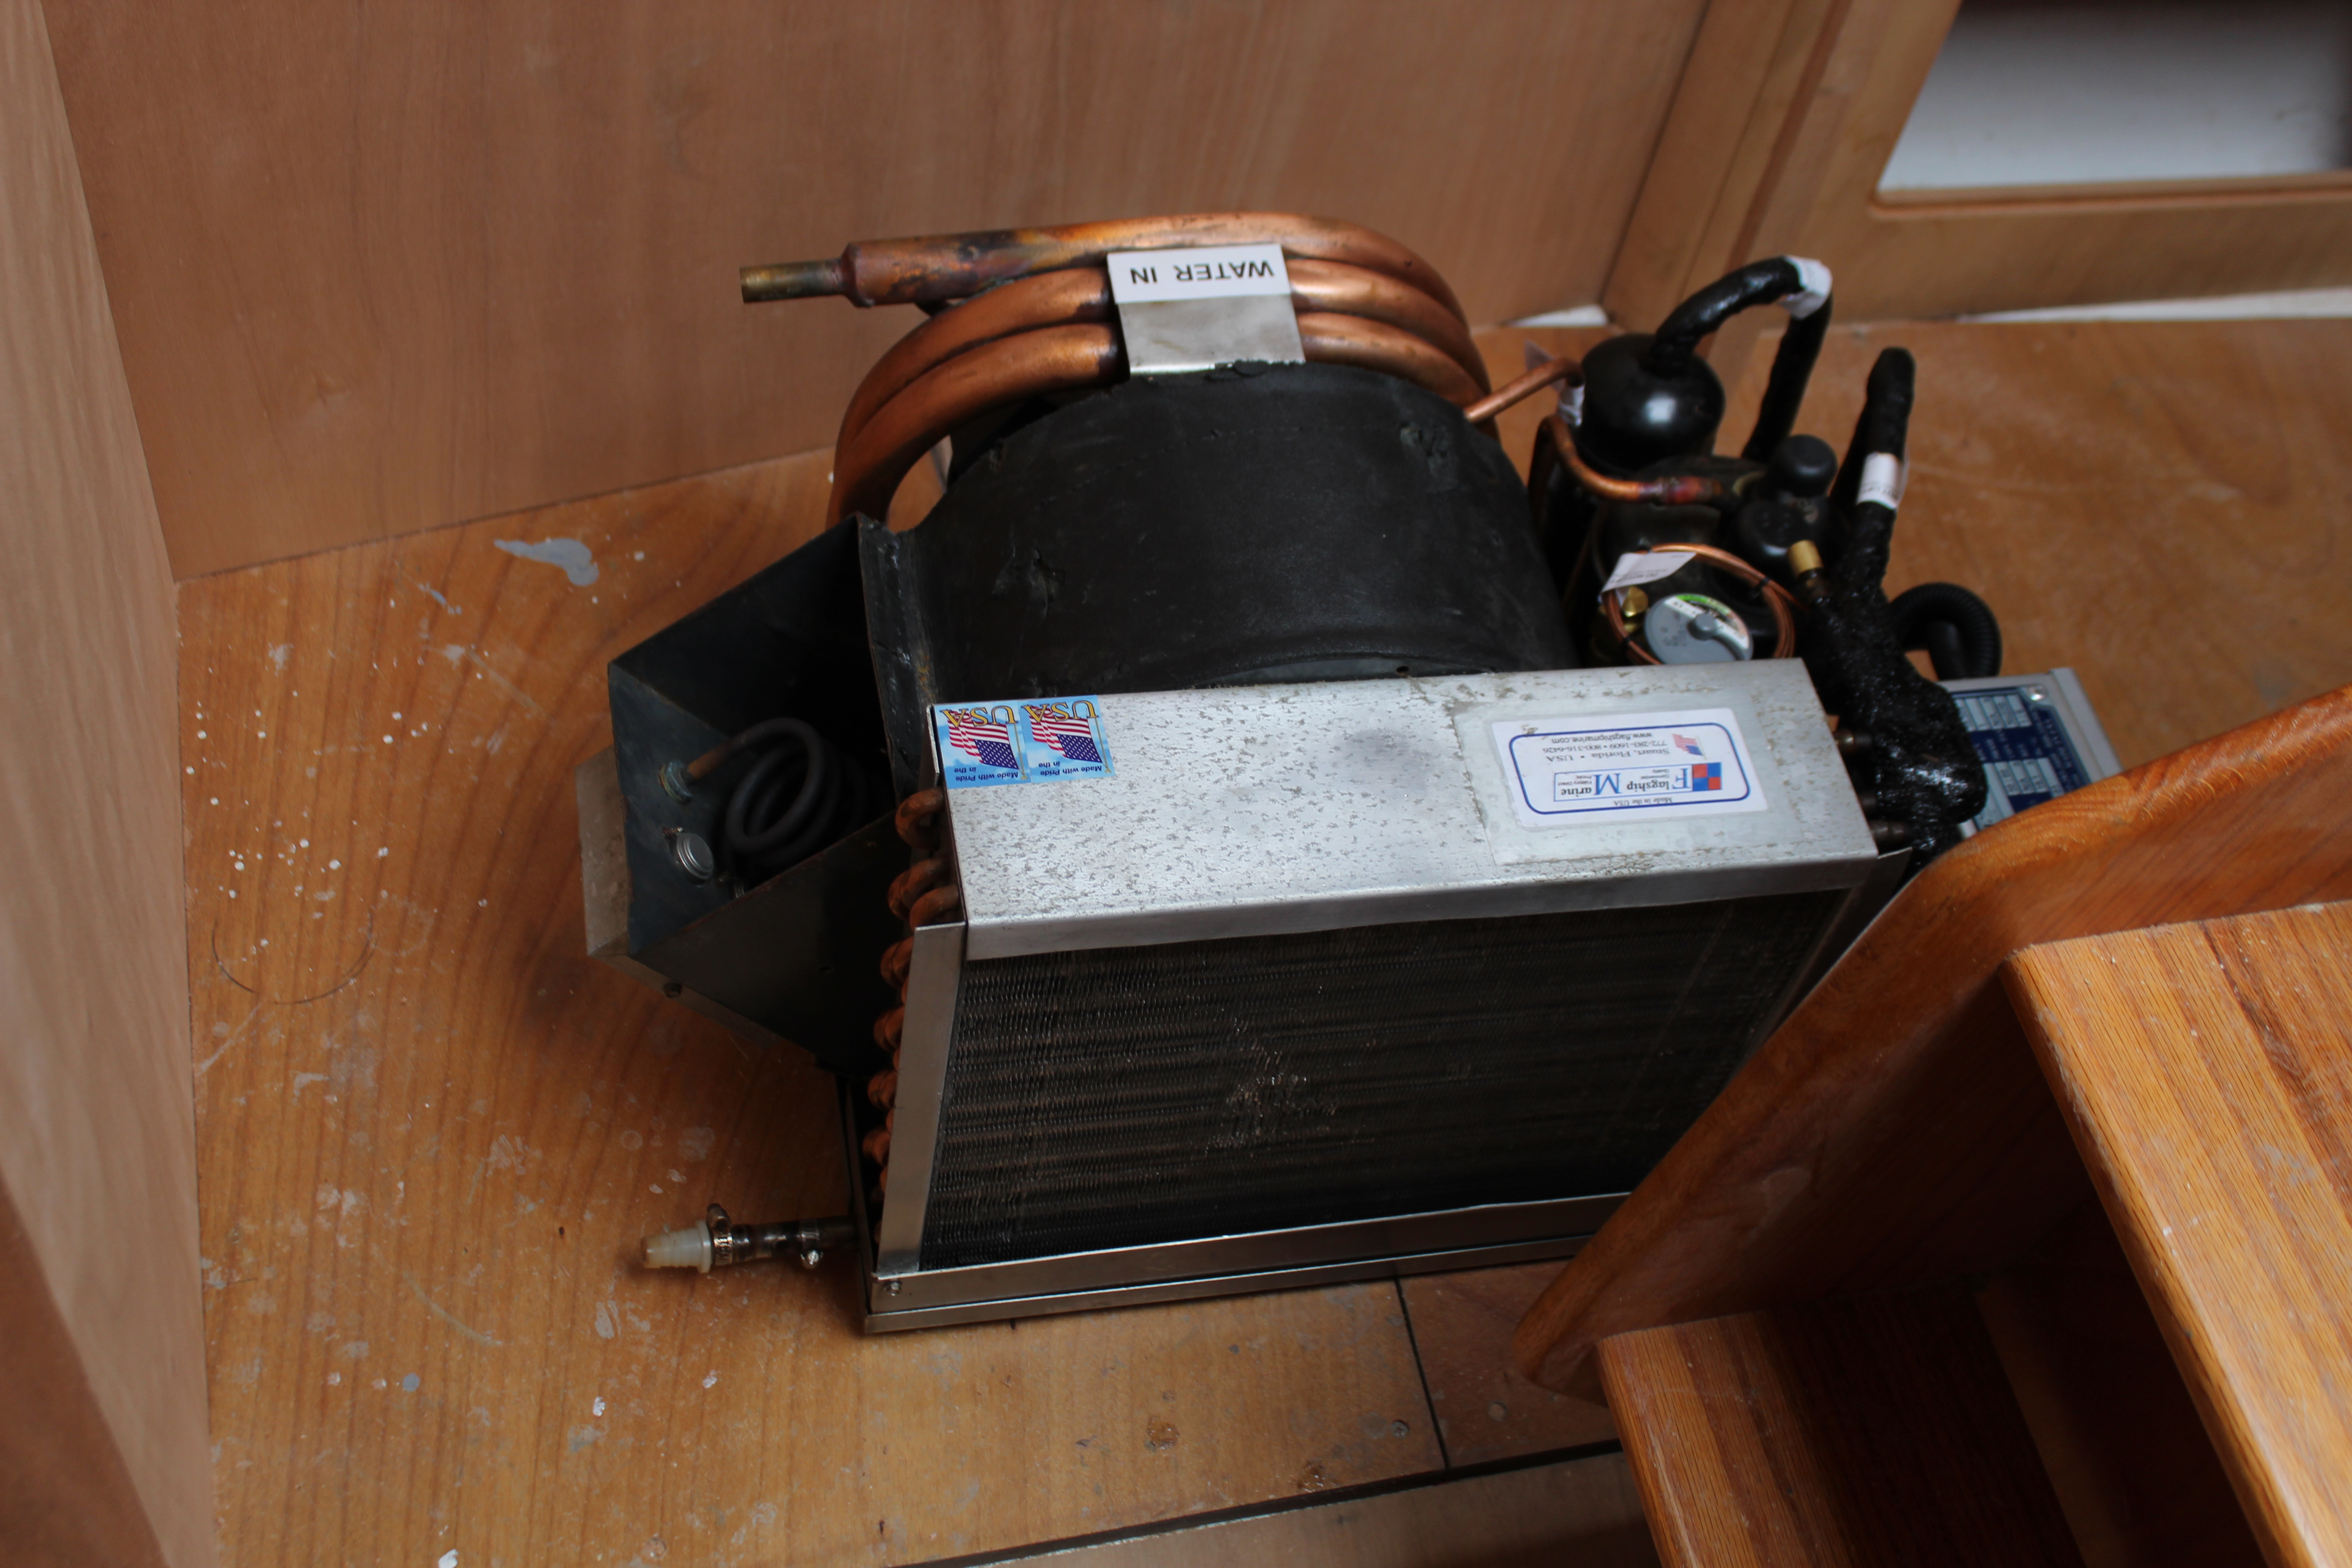
The AC unit has a built-in condensate pan with drain under the evaporator. The unit base is a stainless pan with upturned edges which also acts as a drip collector, though the primary pan under the evaporator usually is all that's needed. This AC unit is very similar to the one I had previously and I never had a (condensate) problem with it. The Flagship guys have engineered a pretty good system. The condensate drain connection can be seen here here in the lower left corner:I hope you are not forgetting to install the condenswater collecting pan. I don’t see it in your pictures.
The countertop:
I'm conducting a small poll here:
On your boat, how often:
A. Do various systems like the AC, fresh water (cold and hot), sink and sink drain, fridge, and stove need maintenance and/or repairs?
1. Never. I have a perfect boat
2. On occasion
3. They all break but never at the same time
4. All broken, gave up long ago
And,
B. How many of these systems are clustered near, under or behind the galley:
1. None. My boat is well engineered and is a joy to work on
2. All of them are in the galley area but ease of maintenance was first priority in the original design
3. All of them are in the galley and I have to lay upside down, stuff myself through an impossibly small opening and use a system of mirrors just to try to vaguely see what I barely reach with one finger of the wrong hand.
4. It's so bad I want to shoot the dummy who designed the systems on my boat
Ok, here's the reason for the poll. I freely admit that my boat maintenance resume doesn't extend much beyond a "gently used" 1986 Hunter 40 (that was an attempt at humor, btw) but I have helped out buddies doing repairs on various other types, Catalinas, Benes, and a really nice Pacific Seacraft. My experience has been that boat systems by necessity seem to cluster in the most inaccessible spots on the boat, and the boat designers tend to not think about the fact that these systems will eventually need maintenance and/or repair/replacement sometime over the life of the boat so they cover said systems with all sorts of cabinetry and joinery which must be mangled or outright destroyed to access said recalcitrant equipment.
Try and diagram that sentence! I dare ya!
My buddy with the Pacific Seacraft, after figuring out that almost the entire interior of his boat needed to be removed (mangled or destroyed in the process) to access the fresh water pump and leaking plumbing from it to the tank, resorted to just using shore water from a hose on deck when he needed water. Underway all water needs were met exclusively with beer.
Sliding back on today's topic, I too have uttered the occasional curse and nursed the occasional ouchy trying to fix things, and my boat does seem to have the curse of equipment cluster under the galley. Over the years I tried to relocate things but it just is what it is - lots of the systems tend to coagulate under the galley. As I get older I find myself less and less enthused about contorting myself into a pretzel to do the occasional repair, but how can I prevent this? Can I build a better mousetrap?
Maybe. My plan is to make the entire galley countertop easily removable. One piece, screwed down from the top, lift off, set it aside and all the AC, water systems and plumbing will be reachable from the top. And if I do need more access, strategic parts of the galley will be easy to remove once the top is off. All the while, once assembled the galley will be strong enough to park a tank on it. And functional. And aesthetically pleasing.
So, template made and both top and bottom 1/2" ply pieces cut and test fit:


The hardest part was trimming the the various vertical pieces, all (or most) of which I cut oversize, down to allow for a level countertop. Once in a great while I screw up in reverse:

That's my digital level. Just in case you can't read it:

Sometimes it's better to be lucky than good!
Countertop is off now for epoxying and formica(ing).
Cheers,
Mark
I'm conducting a small poll here:
On your boat, how often:
A. Do various systems like the AC, fresh water (cold and hot), sink and sink drain, fridge, and stove need maintenance and/or repairs?
1. Never. I have a perfect boat
2. On occasion
3. They all break but never at the same time
4. All broken, gave up long ago
And,
B. How many of these systems are clustered near, under or behind the galley:
1. None. My boat is well engineered and is a joy to work on
2. All of them are in the galley area but ease of maintenance was first priority in the original design
3. All of them are in the galley and I have to lay upside down, stuff myself through an impossibly small opening and use a system of mirrors just to try to vaguely see what I barely reach with one finger of the wrong hand.
4. It's so bad I want to shoot the dummy who designed the systems on my boat
Ok, here's the reason for the poll. I freely admit that my boat maintenance resume doesn't extend much beyond a "gently used" 1986 Hunter 40 (that was an attempt at humor, btw
) but I have helped out buddies doing repairs on various other types, Catalinas, Benes, and a really nice Pacific Seacraft. My experience has been that boat systems by necessity seem to cluster in the most inaccessible spots on the boat, and the boat designers tend to not think about the fact that these systems will eventually need maintenance and/or repair/replacement sometime over the life of the boat so they cover said systems with all sorts of cabinetry and joinery which must be mangled or outright destroyed to access said recalcitrant equipment.Try and diagram that sentence! I dare ya!
My buddy with the Pacific Seacraft, after figuring out that almost the entire interior of his boat needed to be removed (mangled or destroyed in the process) to access the fresh water pump and leaking plumbing from it to the tank, resorted to just using shore water from a hose on deck when he needed water. Underway all water needs were met exclusively with beer
.Sliding back on today's topic, I too have uttered the occasional curse and nursed the occasional ouchy trying to fix things, and my boat does seem to have the curse of equipment cluster under the galley. Over the years I tried to relocate things but it just is what it is - lots of the systems tend to coagulate under the galley. As I get older I find myself less and less enthused about contorting myself into a pretzel to do the occasional repair, but how can I prevent this? Can I build a better mousetrap?
Maybe. My plan is to make the entire galley countertop easily removable. One piece, screwed down from the top, lift off, set it aside and all the AC, water systems and plumbing will be reachable from the top. And if I do need more access, strategic parts of the galley will be easy to remove once the top is off. All the while, once assembled the galley will be strong enough to park a tank on it. And functional. And aesthetically pleasing.
So, template made and both top and bottom 1/2" ply pieces cut and test fit:
The hardest part was trimming the the various vertical pieces, all (or most) of which I cut oversize, down to allow for a level countertop. Once in a great while I screw up in reverse:
That's my digital level. Just in case you can't read it:
Sometimes it's better to be lucky than good!
Countertop is off now for epoxying and formica(ing).
Cheers,
Mark
TPI or LT1? Actually I had them both, both are equally - entertainingPoll answer - Similar engineering to that of changing the aft spark plugs in my C4, corvette!
We shall see but the trend for new boats seems to be the modular inserts - looks great until work needs to be done. I have attempted to keep maintenance of systems at the forefront as I progress.my poll answer 3 and 3 .... so if you find you have designed the better mouse trap please sell it to the boat manufacturers.
TPI. L-98. 1987.TPI or LT1? Actually I had them both, both are equally - entertaining
Roughing in the upper cabinets:
With the countertop in the garage getting its top, I moved to roughing in the port and starboard cabinets. The cabinet faces will run the length of the port side whereas the starboard side will merge with the galley cabinets. I looked things over and figured that I needed to start at the forward end first to set the proper cabinet face angle - that would be easier to keep continuity along the entire section. So, remembering something about how the Greeks figured out that columns should taper towards the top or they look like they are leaning towards each other, I got out the measuring tape and angle gauge to see if this would be a thing.
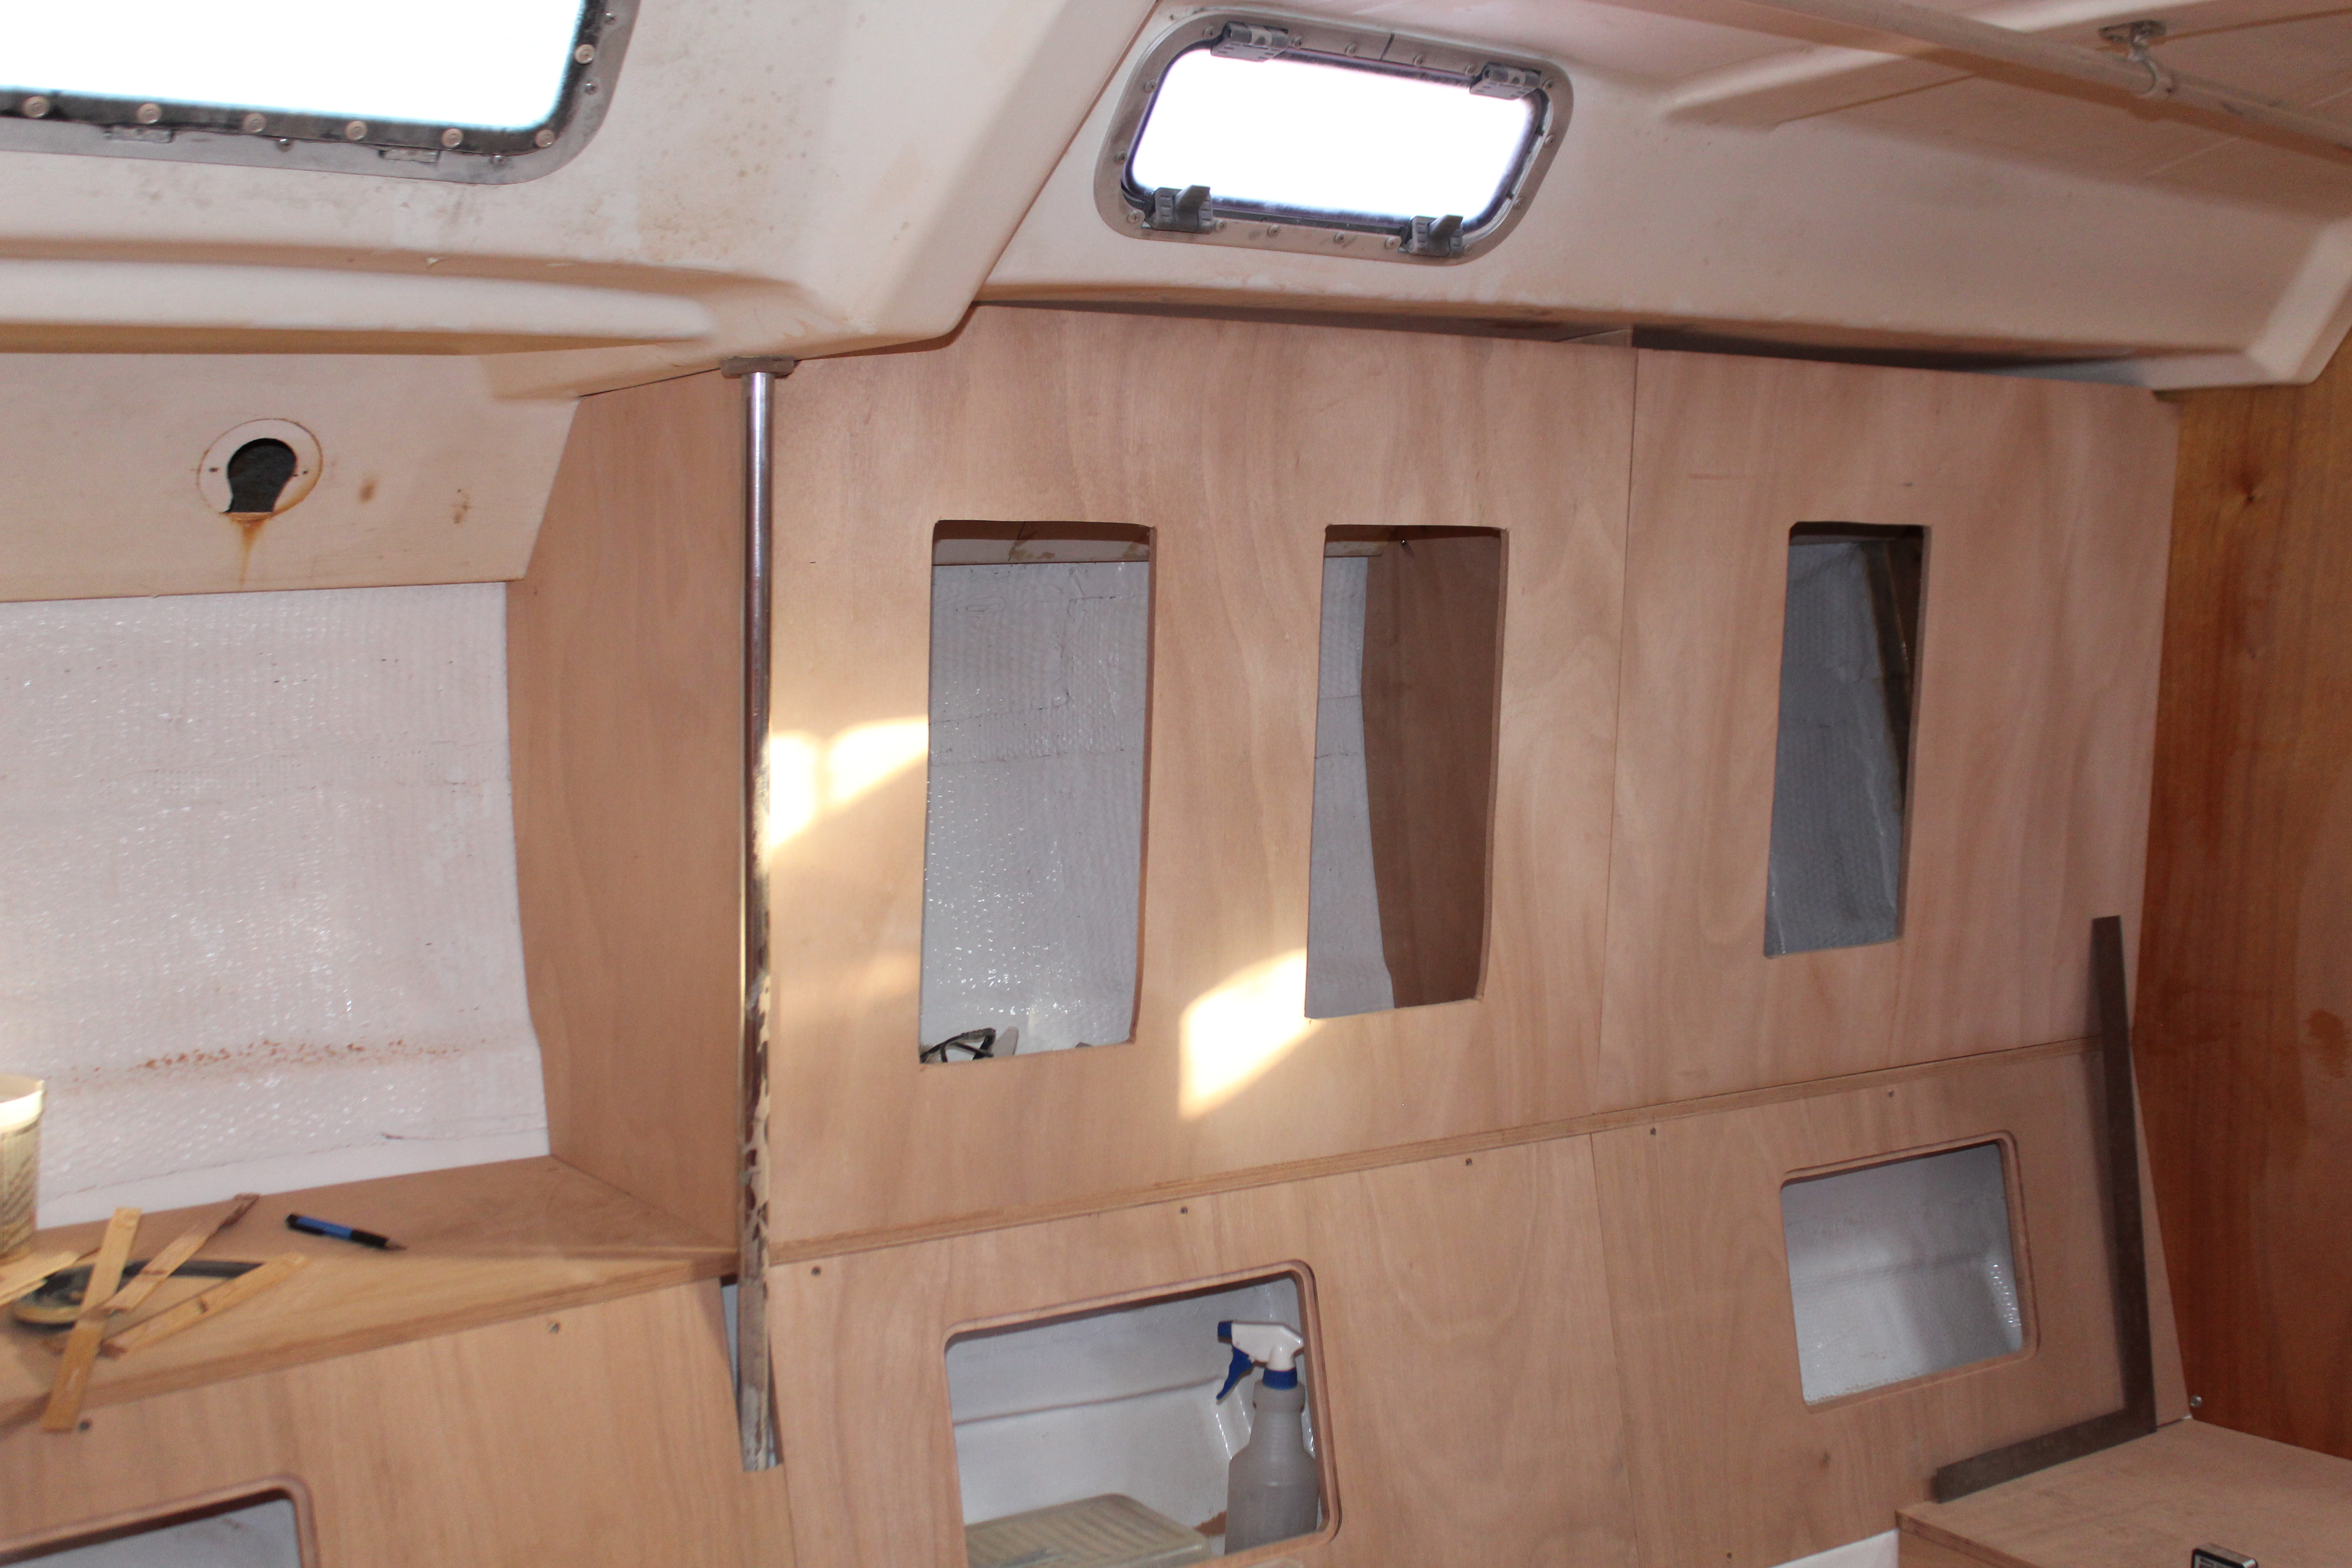
After quite a few adjustments and a few hours of sitting on the companionway steps looking with a critical eye, I found out that I am not in fact erecting Greek columns and it made no difference at all! Cabinet faces look perfectly good vertical - though I did measure twice (or more!) to make sure both sides matched:

I needed to cut a rough opening to access the back sides - I'm still working out what the actual opening size will be so the openings are undersize for now. I did offset the openings for the forward cabinets as there will need to be room close to the bulkhead for lights, outlets, etc. Once that was done the faces were screwed in place and the separator was patterned and fit:

And working aft for the next section:
Once both sides are fixed in place I will need to make a style decision - I decided not to carry the cabinet faces upper edges all the way to the cabin top. I'm going to leave a gap and install LED back lighting behind the upper trim. Now here's the thing: the cabin top is not parallel to the deck and mid-cabin line. It's about 1 1/2" higher towards the bow vs. the chainplate area. It is noticeable to the eye so I have to decide whether to carry the cabinet upper edge and trim parallel to the mid-cabin line, or parallel to the cabin roof. I'll fab up a trim piece and take pics of the various choices - see what you guys think looks best. Stay tuned
Cheers,
Mark
With the countertop in the garage getting its top, I moved to roughing in the port and starboard cabinets. The cabinet faces will run the length of the port side whereas the starboard side will merge with the galley cabinets. I looked things over and figured that I needed to start at the forward end first to set the proper cabinet face angle - that would be easier to keep continuity along the entire section. So, remembering something about how the Greeks figured out that columns should taper towards the top or they look like they are leaning towards each other, I got out the measuring tape and angle gauge to see if this would be a thing.
After quite a few adjustments and a few hours of sitting on the companionway steps looking with a critical eye, I found out that I am not in fact erecting Greek columns and it made no difference at all! Cabinet faces look perfectly good vertical - though I did measure twice (or more!) to make sure both sides matched:
I needed to cut a rough opening to access the back sides - I'm still working out what the actual opening size will be so the openings are undersize for now. I did offset the openings for the forward cabinets as there will need to be room close to the bulkhead for lights, outlets, etc. Once that was done the faces were screwed in place and the separator was patterned and fit:
And working aft for the next section:
Once both sides are fixed in place I will need to make a style decision - I decided not to carry the cabinet faces upper edges all the way to the cabin top. I'm going to leave a gap and install LED back lighting behind the upper trim. Now here's the thing: the cabin top is not parallel to the deck and mid-cabin line. It's about 1 1/2" higher towards the bow vs. the chainplate area. It is noticeable to the eye so I have to decide whether to carry the cabinet upper edge and trim parallel to the mid-cabin line, or parallel to the cabin roof. I'll fab up a trim piece and take pics of the various choices - see what you guys think looks best. Stay tuned
Cheers,
Mark