Repairing Hunter 40 damage from Hurricane Matthew

May 8, 2013
629
Hunter 40 Dataw Island, SC
That's a heck of a marina that's letting you do all this in their yard.
I'm curious how you came up with your costs.
there's at least $5k just in cushions and mattresses for that vessel. $25k seems very low,
Looks like one heck of a project though,
As fate would have it, I have all new foam and fabric for new cushions now sitting in the attic. New cushions were in the plan prior to the hurricane - the foam and fabric arrived the week after! True, I did not include these costs in the repair estimate (probably should have). I am toying with the idea of buying a sewing machine and trying it myself. Failing that, one of my good friends has a canvas shop and they do cushions. Stay tuned!

Working in the marina - see below.

Mark
 
May 8, 2013
629
Hunter 40 Dataw Island, SC
Comment about the marina - no doubt is in shambles, and the mess he is making is completely masked by the busted up boats and garbage from the storm. I'd bet they don't even notice him. As long as he can stay ahead of them, he shouldn't run into a problem. Of course that brings up a point. He should probably keep in contact with the marina schedule, and use their time frame as a way to set personal goals to his project. Its very easy to burn out on a project this size. Having goals and deadlines helps to prevent that. First and foremost will be to get the boat to the floatable stage. Then make it sail-able. Lastly the interior. Something tells me he sees this as an excuse to build a custom interior - something he's wanted to do for a long time, but never had the excuse.
Dave, you hit the nail on the head. I have had a good relationship with the boat yard for years and they agreed in this case that the important thing is to get boats repaired. I follow all their rules, try to be nice to my "neighbors" and try to not be too conspicuous. The yard is total chaos still - for example this boat just got raised last week:


The latest word is that most (if not all) of the totaled boats that were recovered and are in the yard will be scrapped in place rather than transported to another location. Definitely will be sad to see but the mayhem will increase before things slowly return to normal. My only real problem right now is that the only available space at first was directly in front of the marina office! I get interrupted multiple times daily with onlookers and the curious. I wanted and requested a spot back in the corner out of sight but it will be some time before they can make the space for that

All that said, we haven't really set the limits as to what I will be allowed to do - no problems with working on the interior, out of sight, out of mind - but when it comes to repainting I'm not sure yet. I have lined up a DIY yard where I can move to for this but that's quite a ways off.

Goals and deadlines - right on the money. First, make it float, next make it sail, then make it livable. I prefer the term "opportunity" rather than "excuse" though to build the interior :)

Mark
 
Last edited:
Oct 30, 2011
542
klidescope 30t norfolk
Three questions
1. Why aren't you using polyester resin to repair hull isn't the boat made with poly and shouldn't you match same.
2. Why remove water tank isn't that really an upgrade and not part of cost. Water tank should of survived flooding.

3. Electric wires especially marine tinned wires will survive flooding just need to cut back wires and reterminate.

Any plans to radically Change cabin lay out. Maybe to lighten boat for speed
 
May 8, 2013
629
Hunter 40 Dataw Island, SC
Three questions
1. Why aren't you using polyester resin to repair hull isn't the boat made with poly and shouldn't you match same.
2. Why remove water tank isn't that really an upgrade and not part of cost. Water tank should of survived flooding.

3. Electric wires especially marine tinned wires will survive flooding just need to cut back wires and reterminate.

Any plans to radically Change cabin lay out. Maybe to lighten boat for speed
The reason for not using polyester resin for the repair is that polyesters have poor mechanical adhesion characteristics. There's a great explanation for why on West Systems website. Some of the repairs I am doing are fixing previous repairs done with polyester resins where it was obvious the impact separated the bond cleanly, whereas an epoxy repair would (might) have held. Plus epoxies are much easier to work with - and smell a whole lot better!

The water tank is an upgrade but now is the time to deal with it. I have known for a long time that the tank needed attention - aluminum tanks have a lifespan. I was having to clean the primary filters quite often due to contamination; little chunks of calcium (?) which upon opening the tank it was obvious there was no way to mechanically scrub the tank because of the baffles. I never did find a good chemical cleaner that wouldn't react with the aluminum.

I'm going to look closely at the wiring. I'm leery of the potential long term problems with resistance increasing in the wires due to corrosion - MaineSail, if you're reading feel free to chime in. My plan for the new wiring system is to go with a distributed panel layout which should cut down on the total amount of wires. Plus the wiring itself is actually a small part of the overall cost so I'm not too worried about saving a few bucks here.

My previous (and future planned) use for the boat was/is cruising so the planned layout will reflect that. The boat has always been relatively fast but I don't race so shedding some weight is not a goal. If anything adding a few pounds in the right places will be better I think.

Thanks for the input!

Mark
 
Mar 31, 2013
234
O'day 23 Pa
Davinet, absolutely agree, and starting with a blank (fiberglass) canvas is a fantastic opportunity if time and finances allow
 
Oct 30, 2011
542
klidescope 30t norfolk
If he does something custom and eye appealing big spacious kitchen with granite counter tops resale value will increase he just needs look at New boats and copy there catchy ideas
 
May 8, 2013
629
Hunter 40 Dataw Island, SC
With so many boats written off, used prices will probably stay pretty solid
Some of the others here who have started looking for new boats have said this. Plus it's not just us, several marinas up and down the coast were hit hard, lots of boats damaged or destroyed.
 
May 8, 2013
629
Hunter 40 Dataw Island, SC
If he does something custom and eye appealing big spacious kitchen with granite counter tops resale value will increase he just needs look at New boats and copy there catchy ideas
Not sure yet about granite, but considering it. I have been looking at the new boats for ideas.

Mark
 
Jan 17, 2010
19
Hunter Legend 40 Edgewater
A heck of a story! I appreciate seeing what a 40' Legend looks like under all the millwork. I am real glad the engine is ok. Good luck putting her back together you seem like you have thought it through pretty clearly. Question: is the hull cored or solid laminate?
 
May 8, 2013
629
Hunter 40 Dataw Island, SC
Starting repairs:

Just a note, I won't detail each repair by itself start to finish, rather as I do them - or parts of them. The nature if fiberglass repairs is such that sometimes a layup or patch panel should sit for a day or two to harden before working it further. This will be apparent as I fix the holes in the hull, the first areas I have worked on.

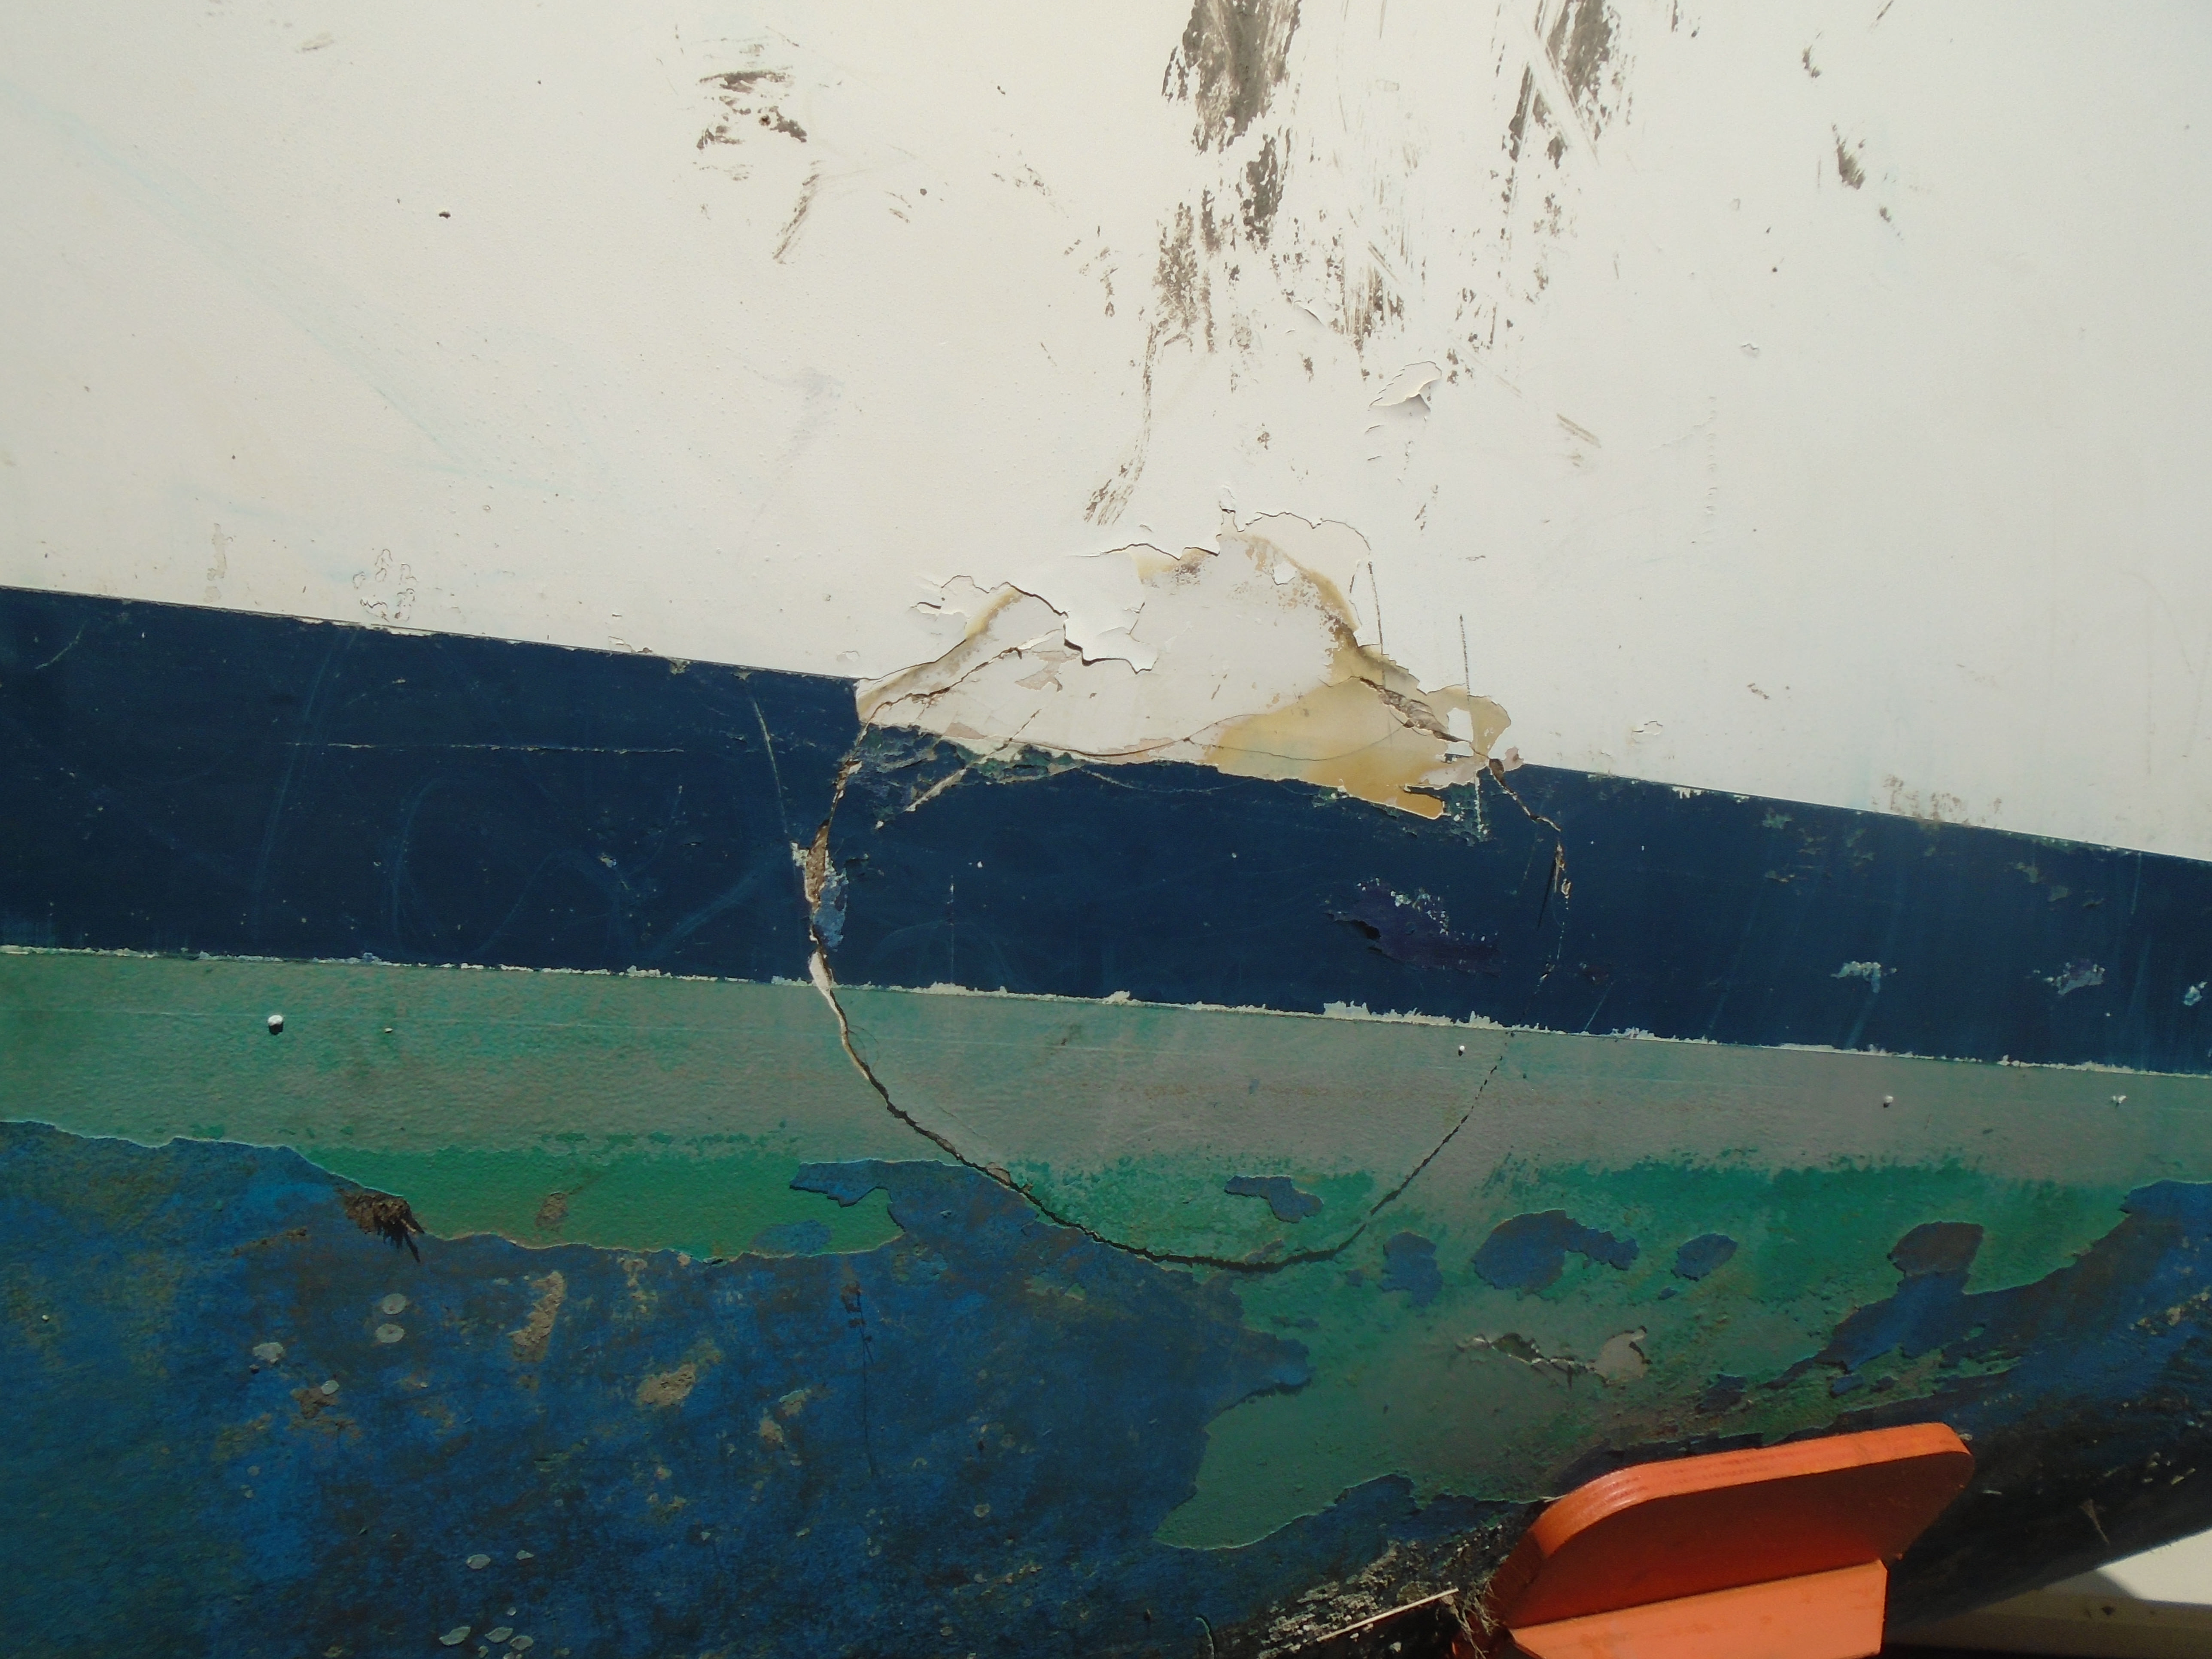
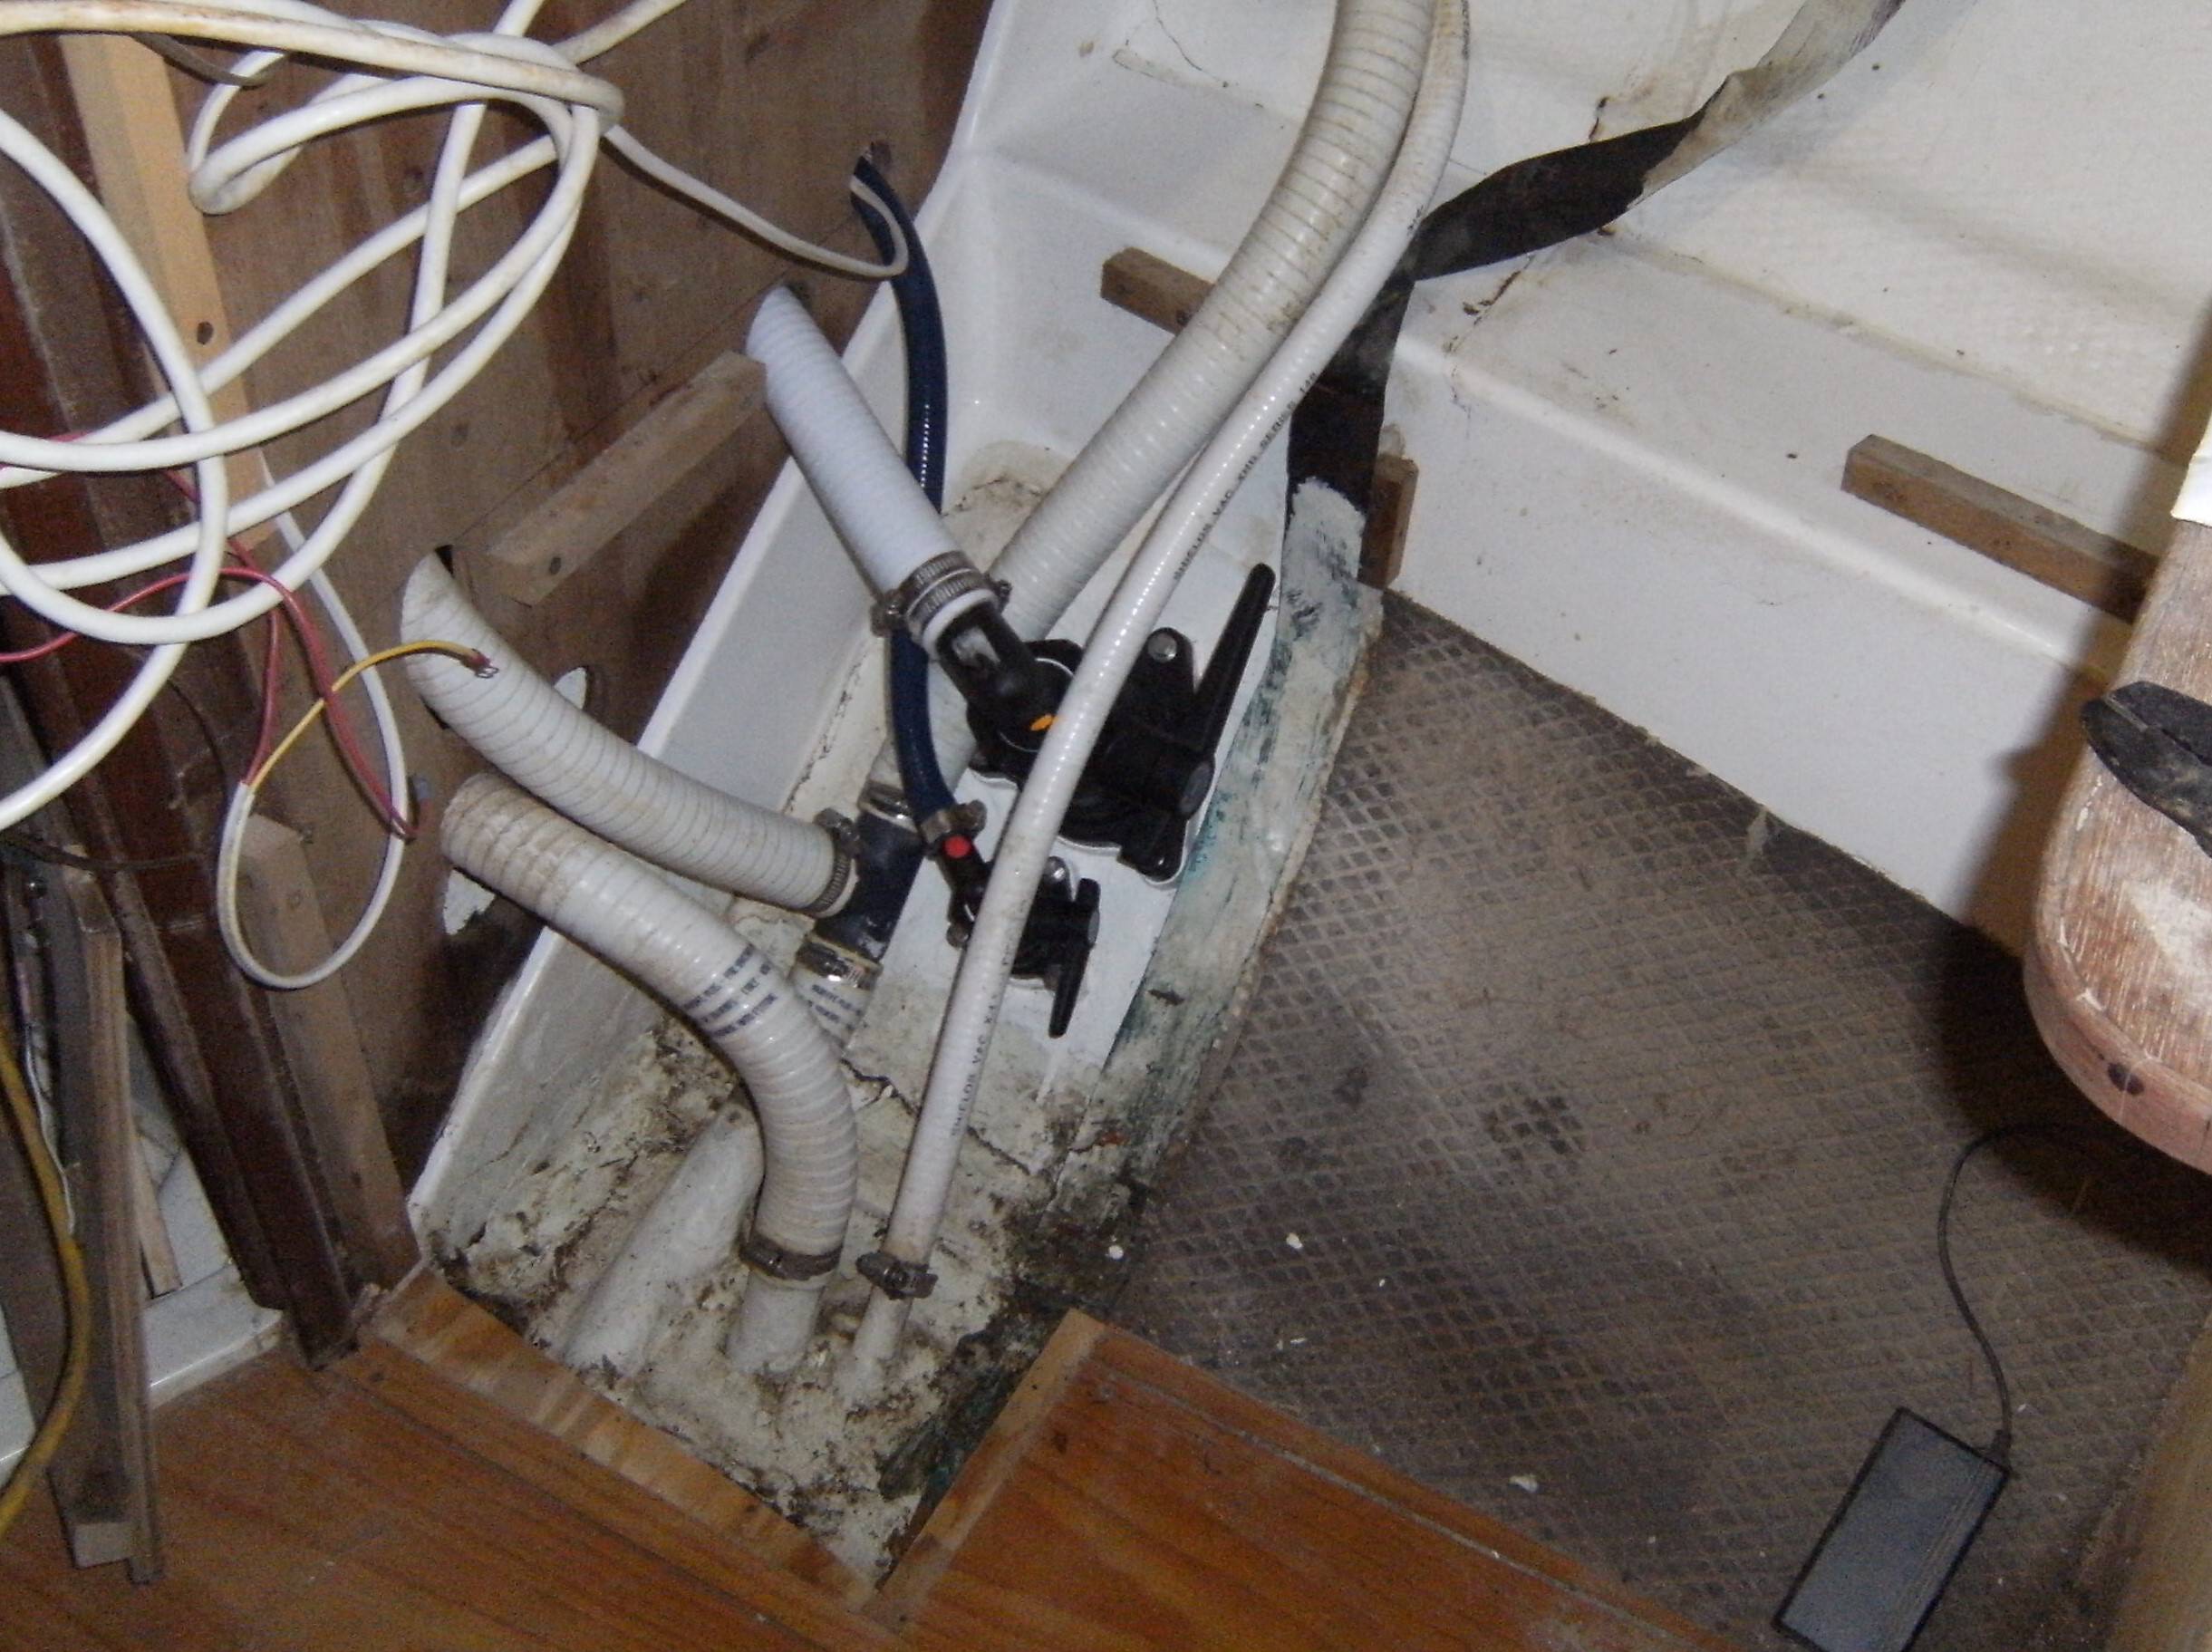
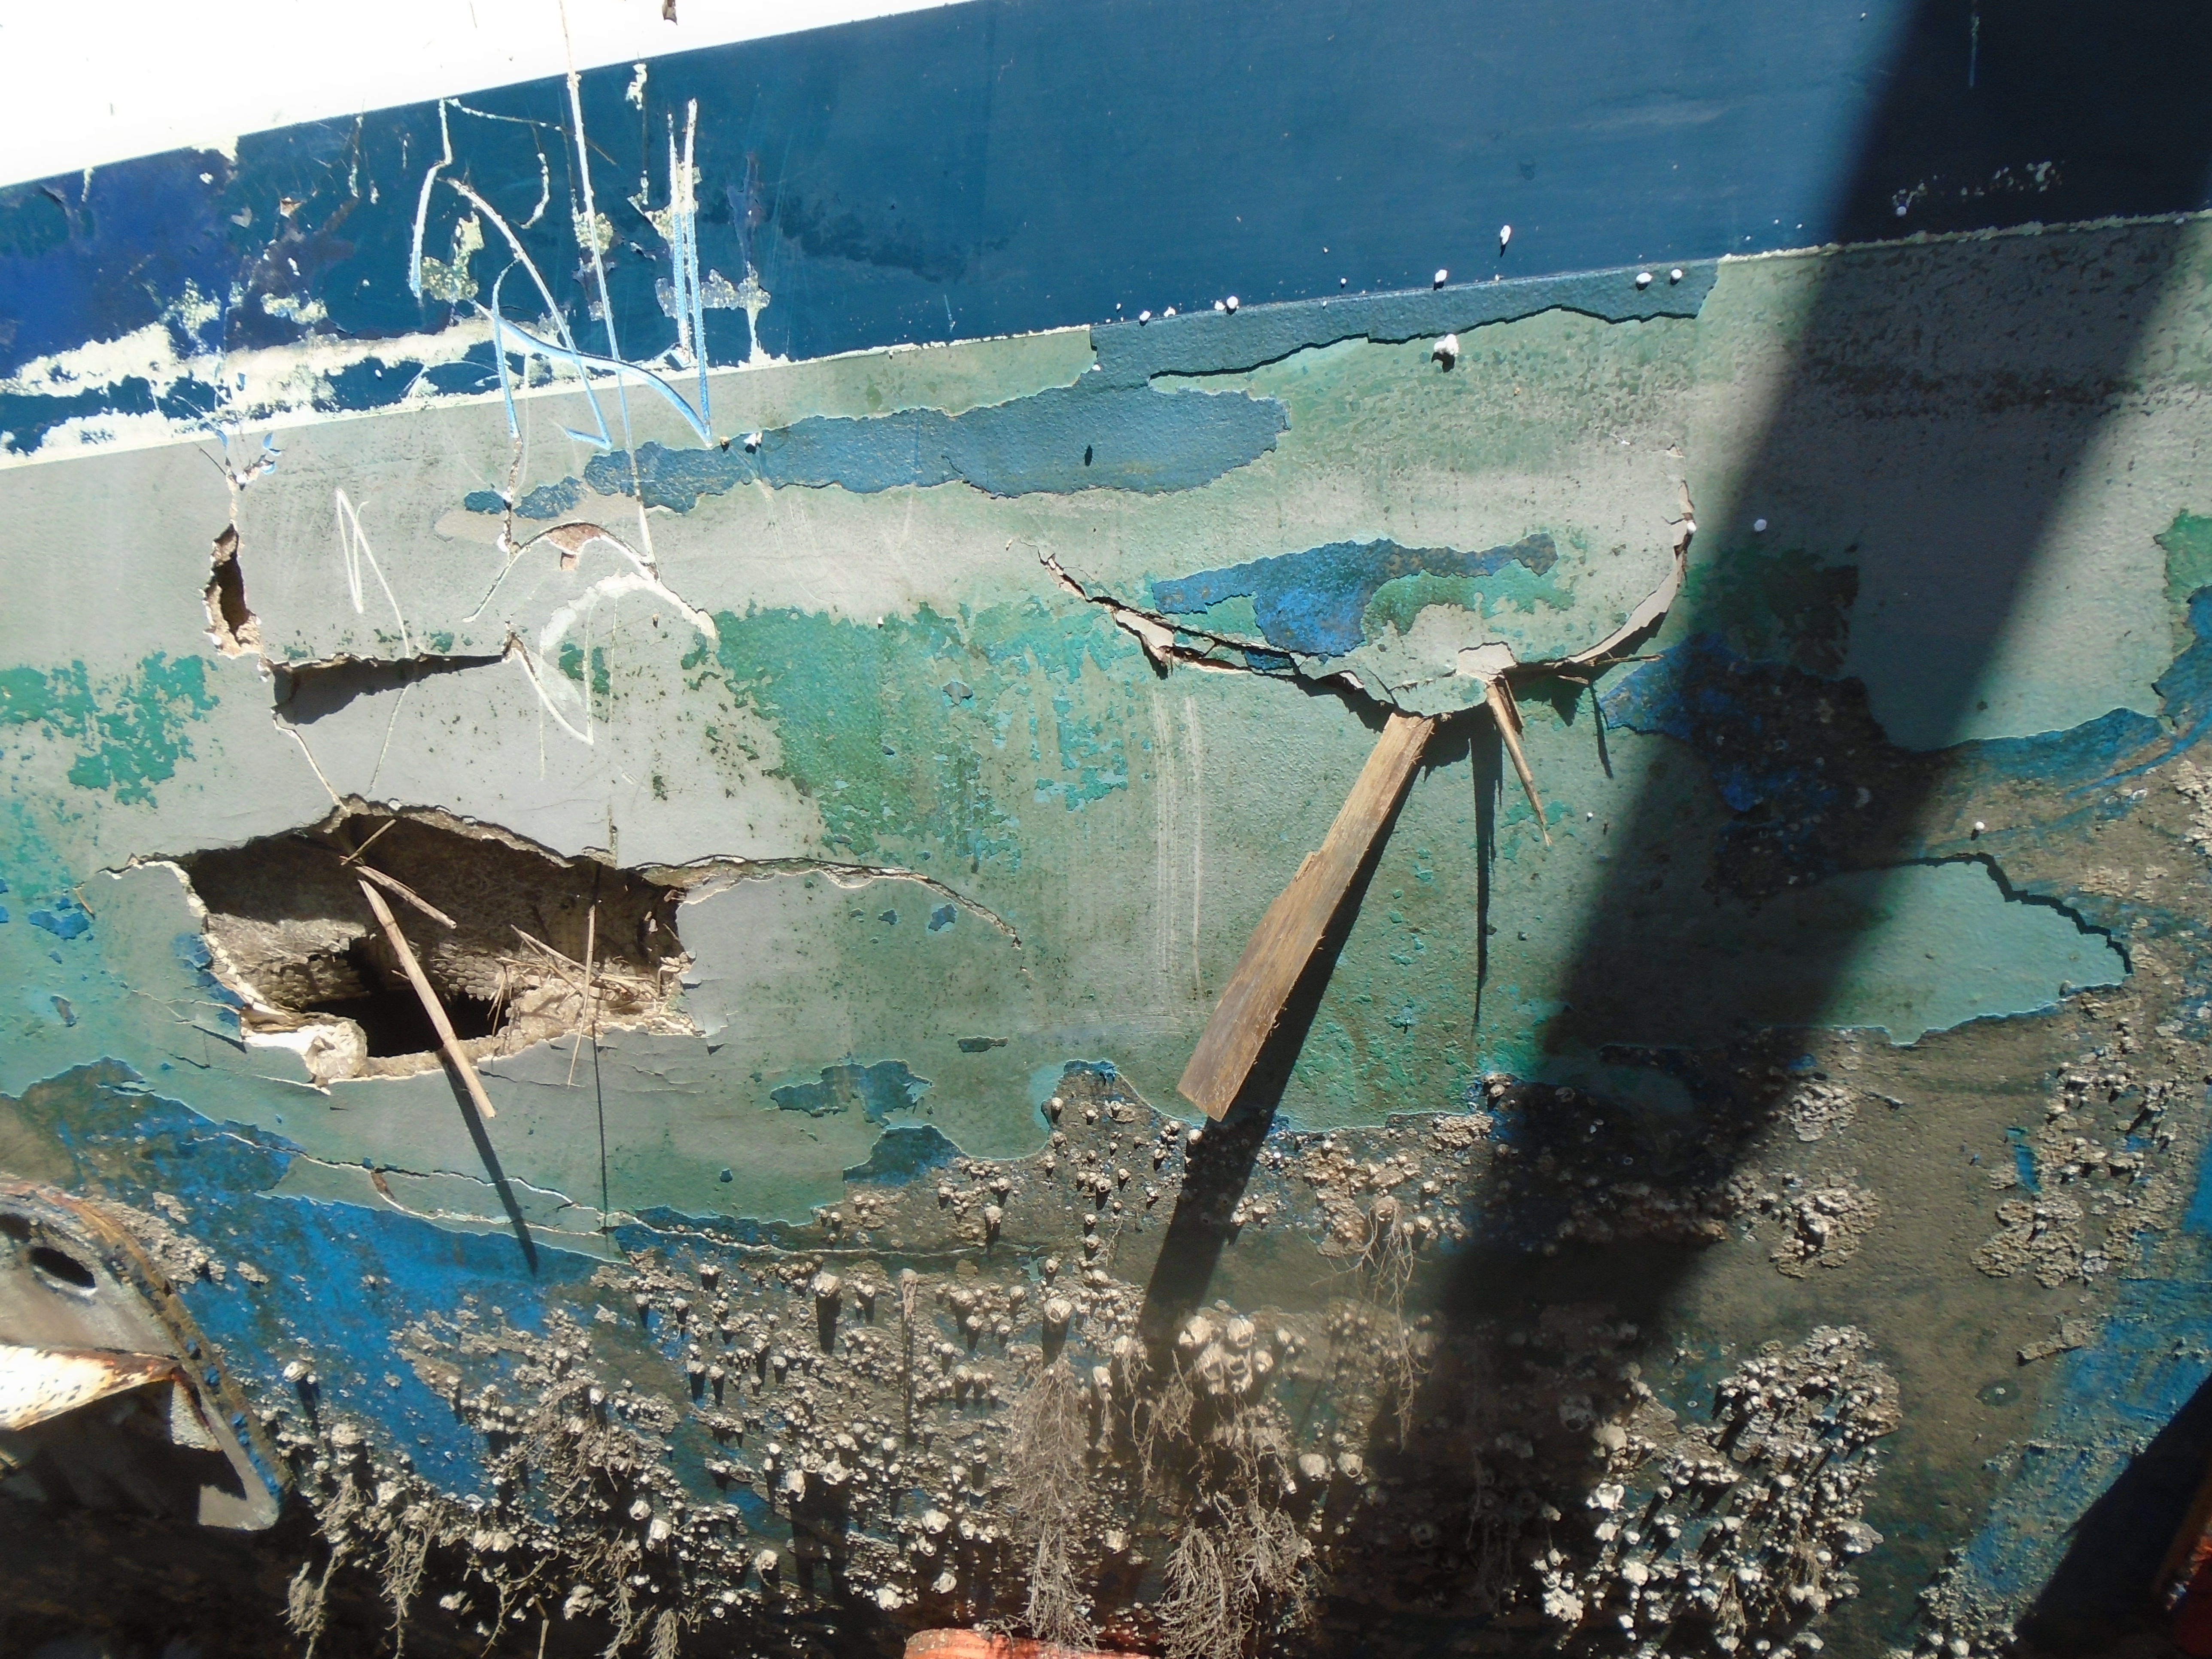
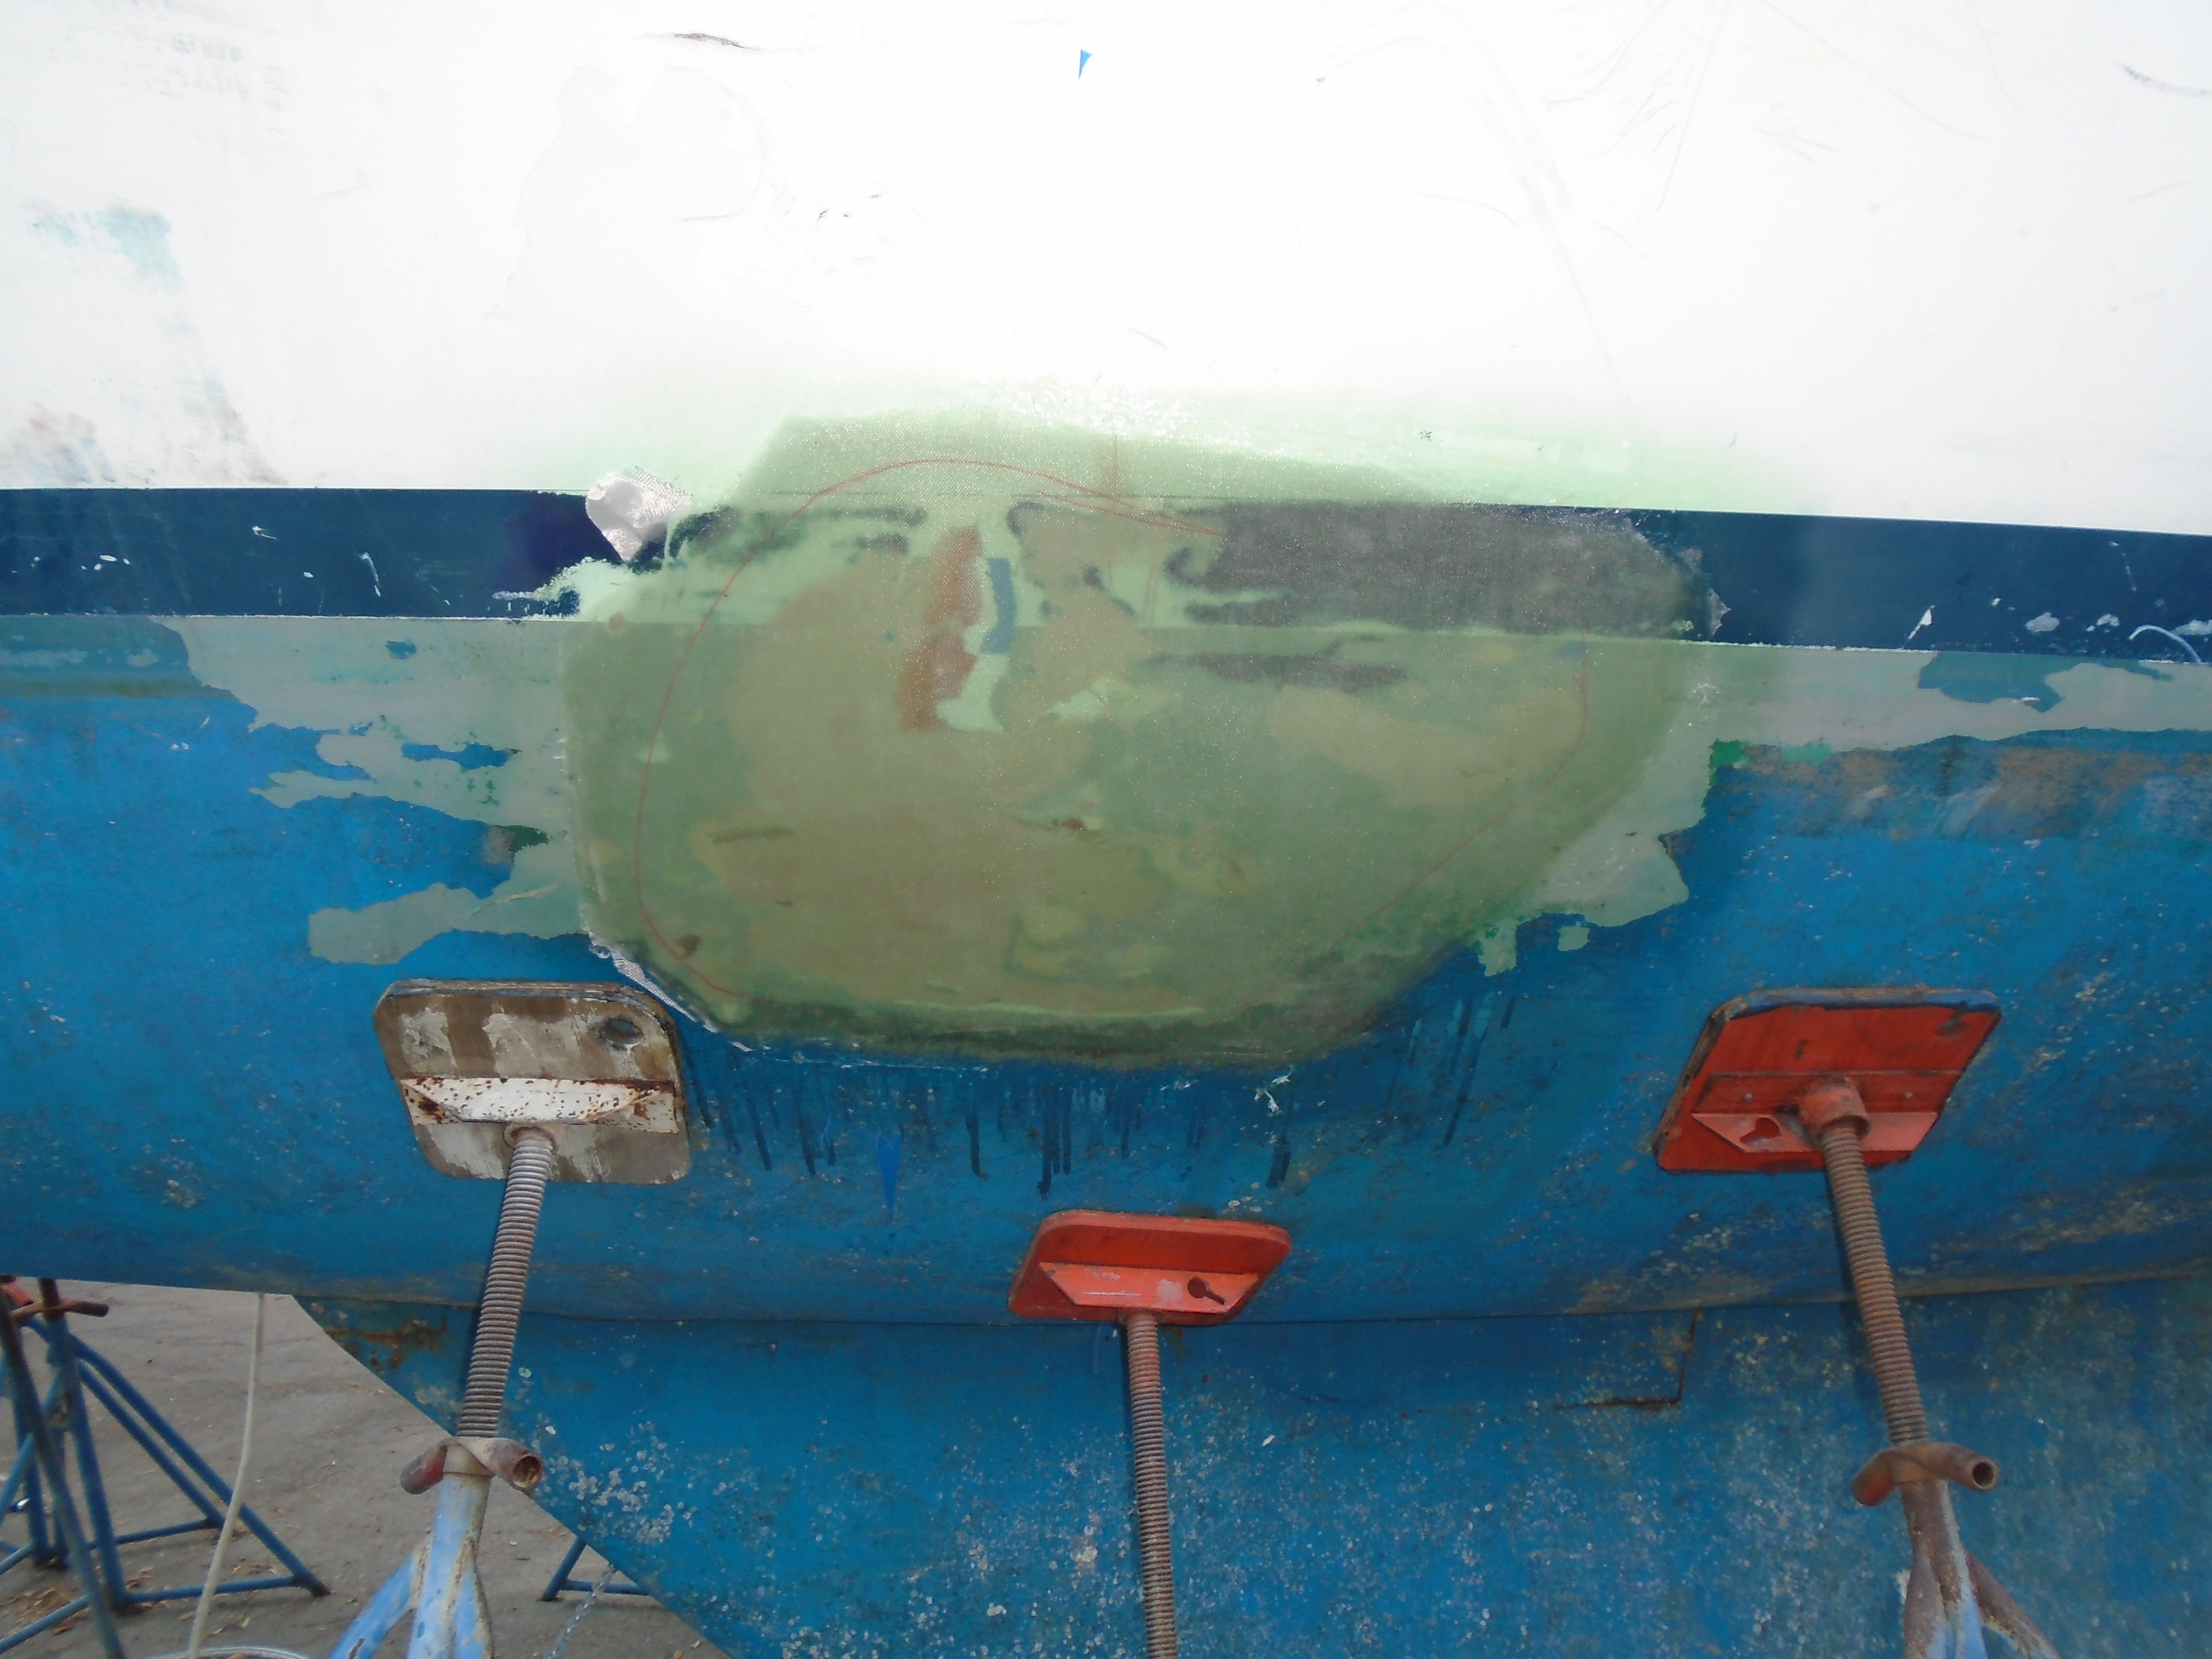
So first up, I was really curious just what was going on with this:


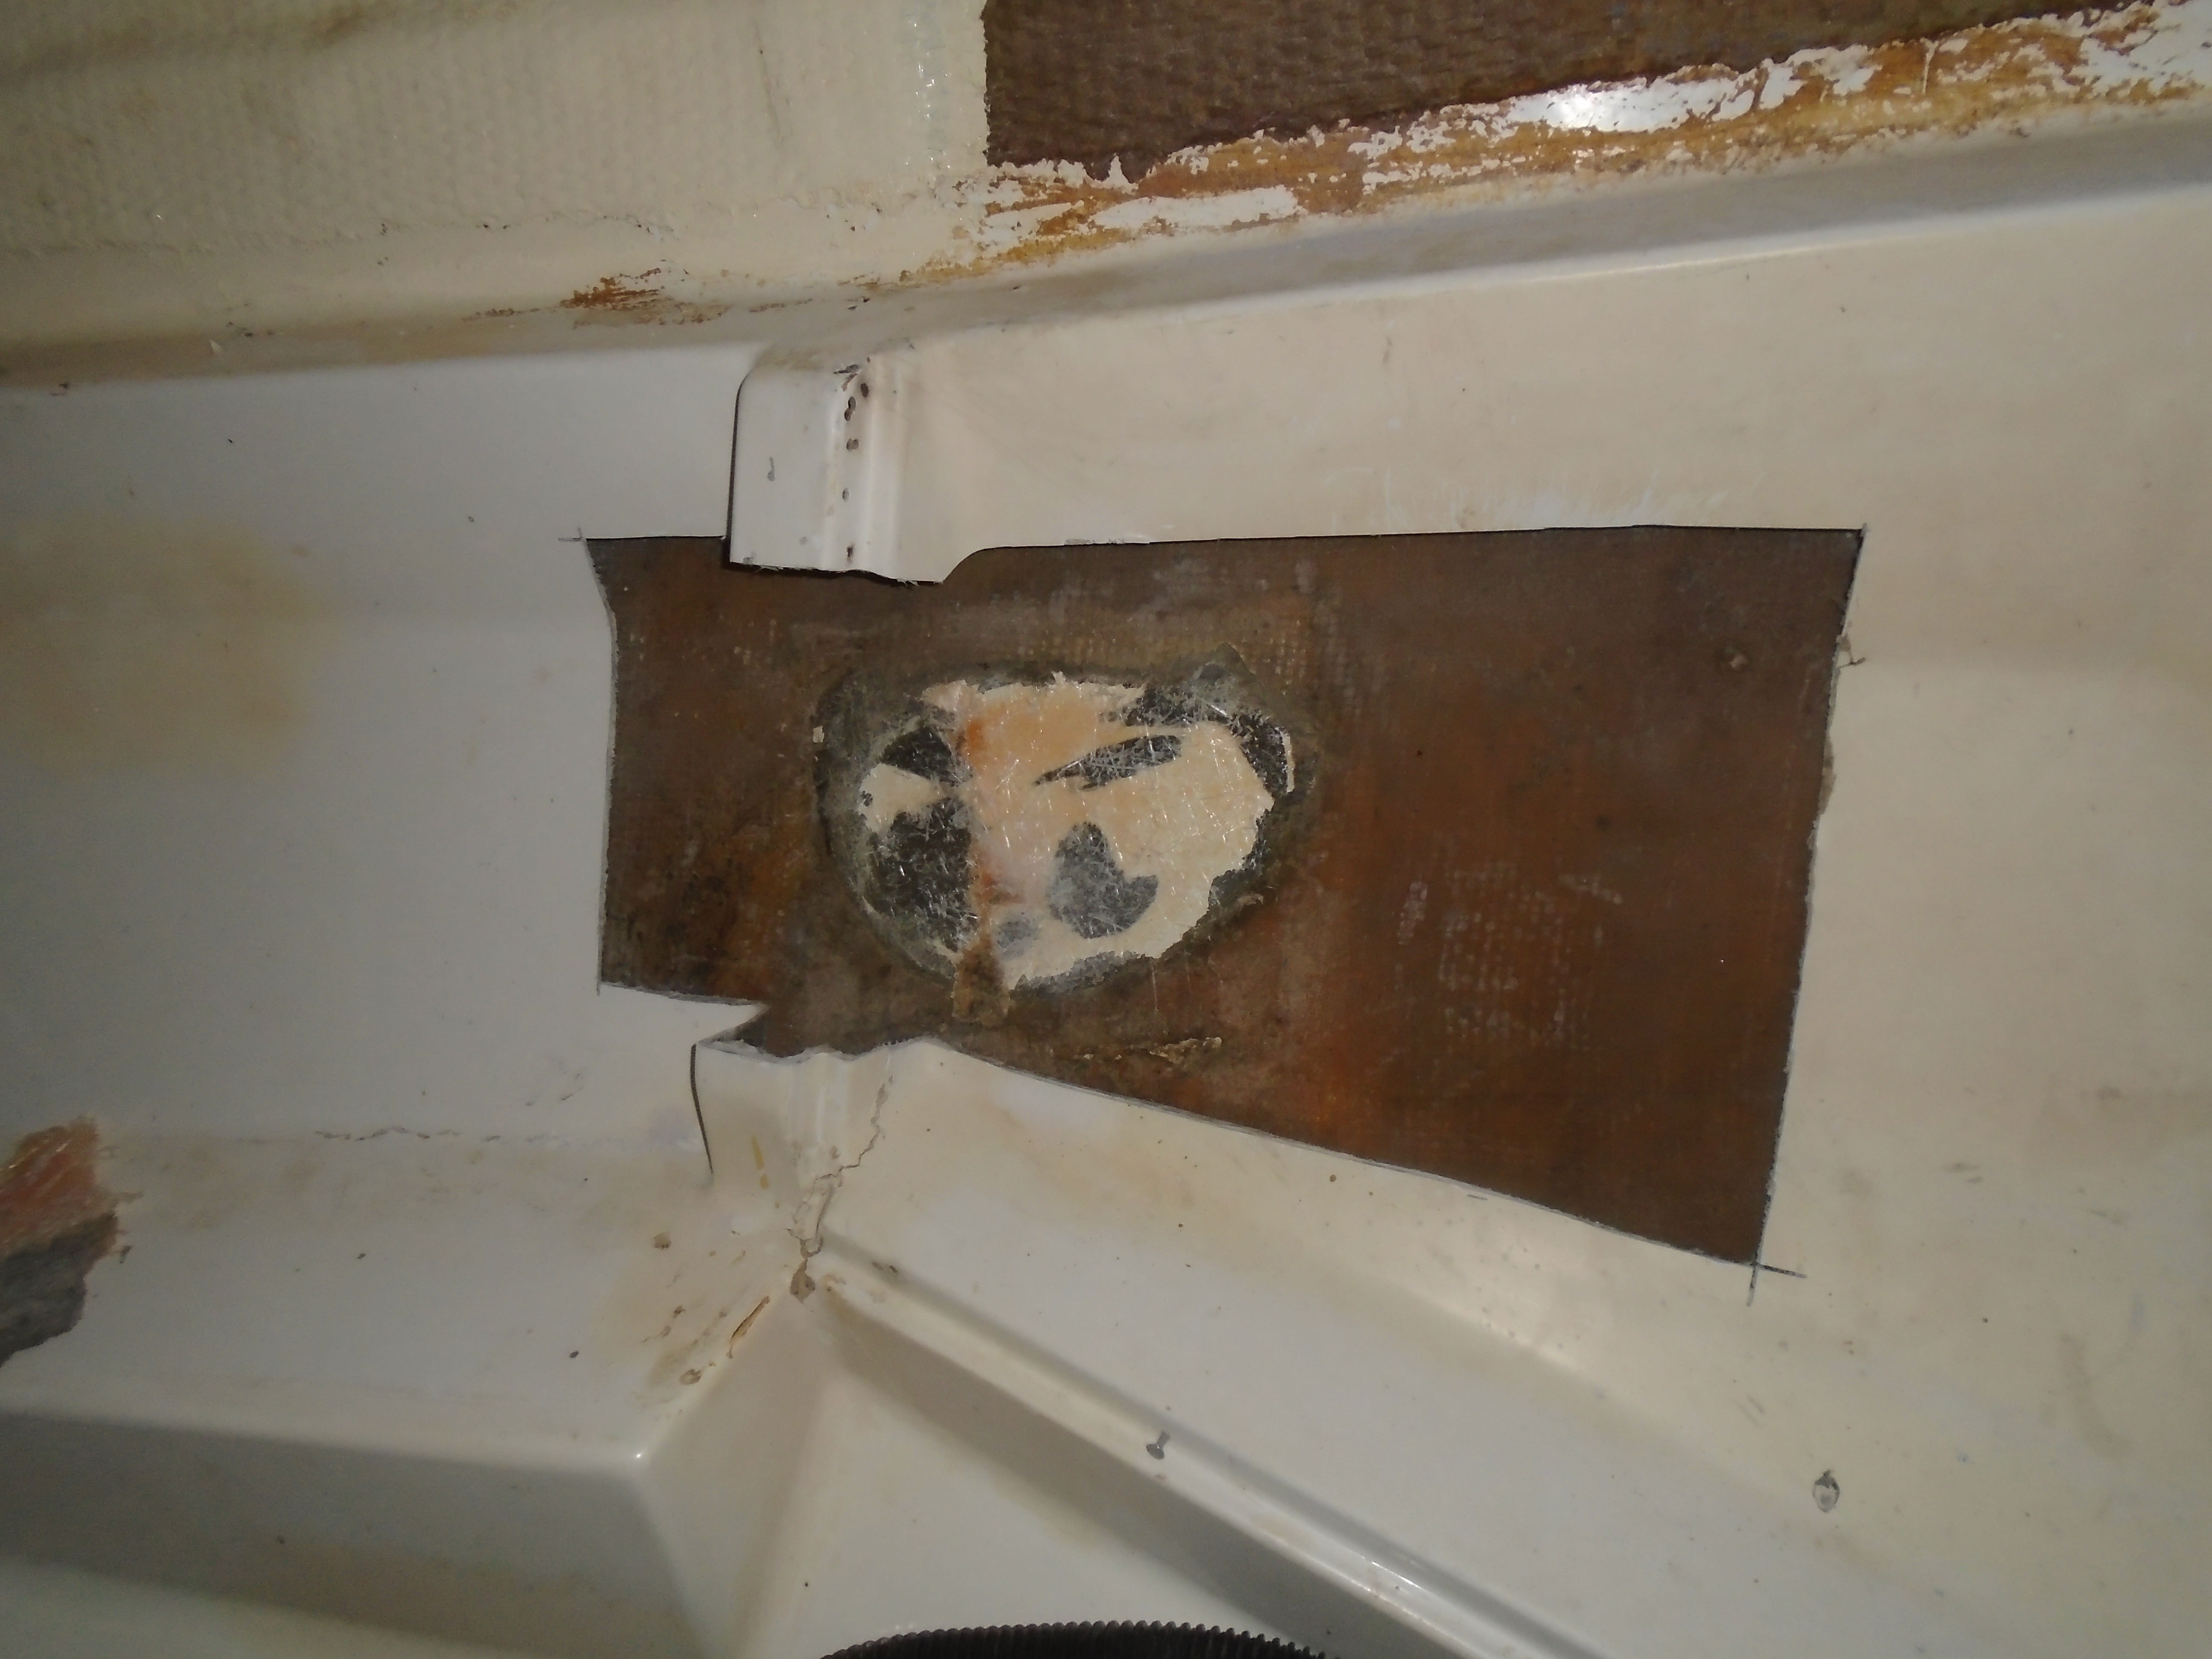
Port aft quarter, no apparent impact but obvious delamination of what was probably a previous repair. So first I needed to access the backside to see what I had. Part of the liner in the aft cabin had to be cut out:


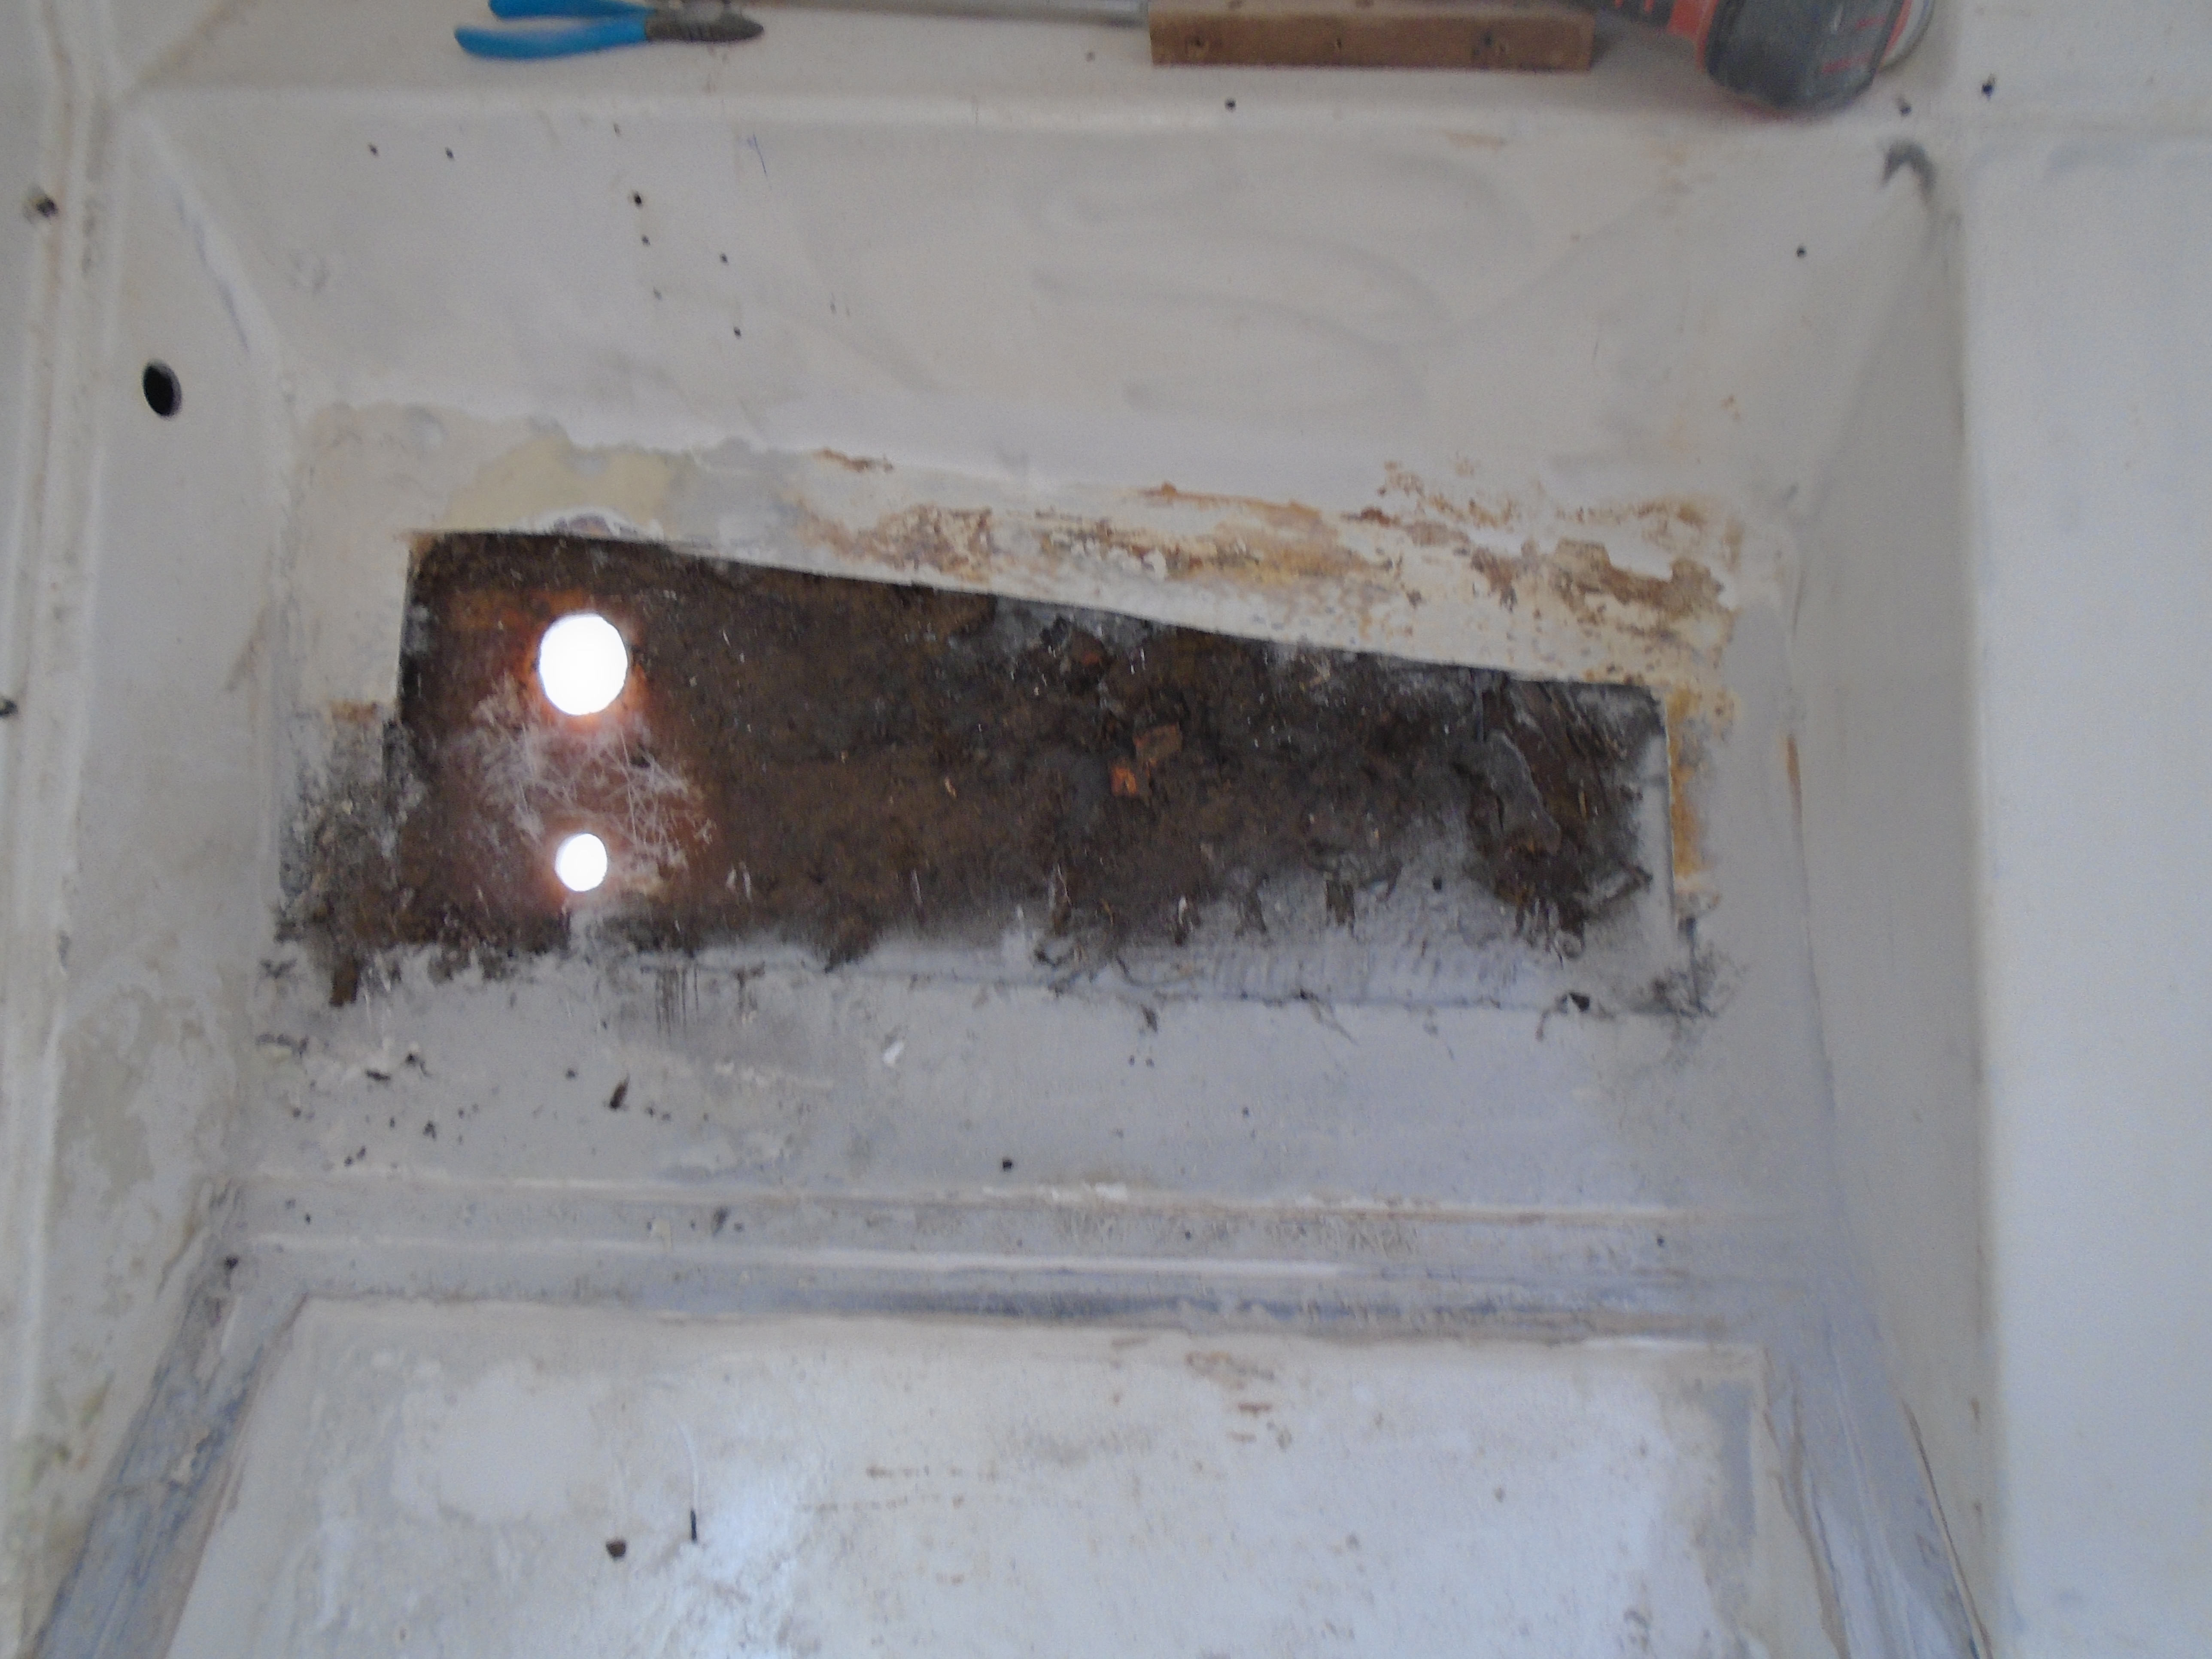
Sure enough, a previous repair. And not a good one! I was able to pry off the backing patch panel by hand. It had already popped loose from the edge of the hull but was also not well bonded to the outer patch. This is the danger of using polyester resin to fix fiberglass.

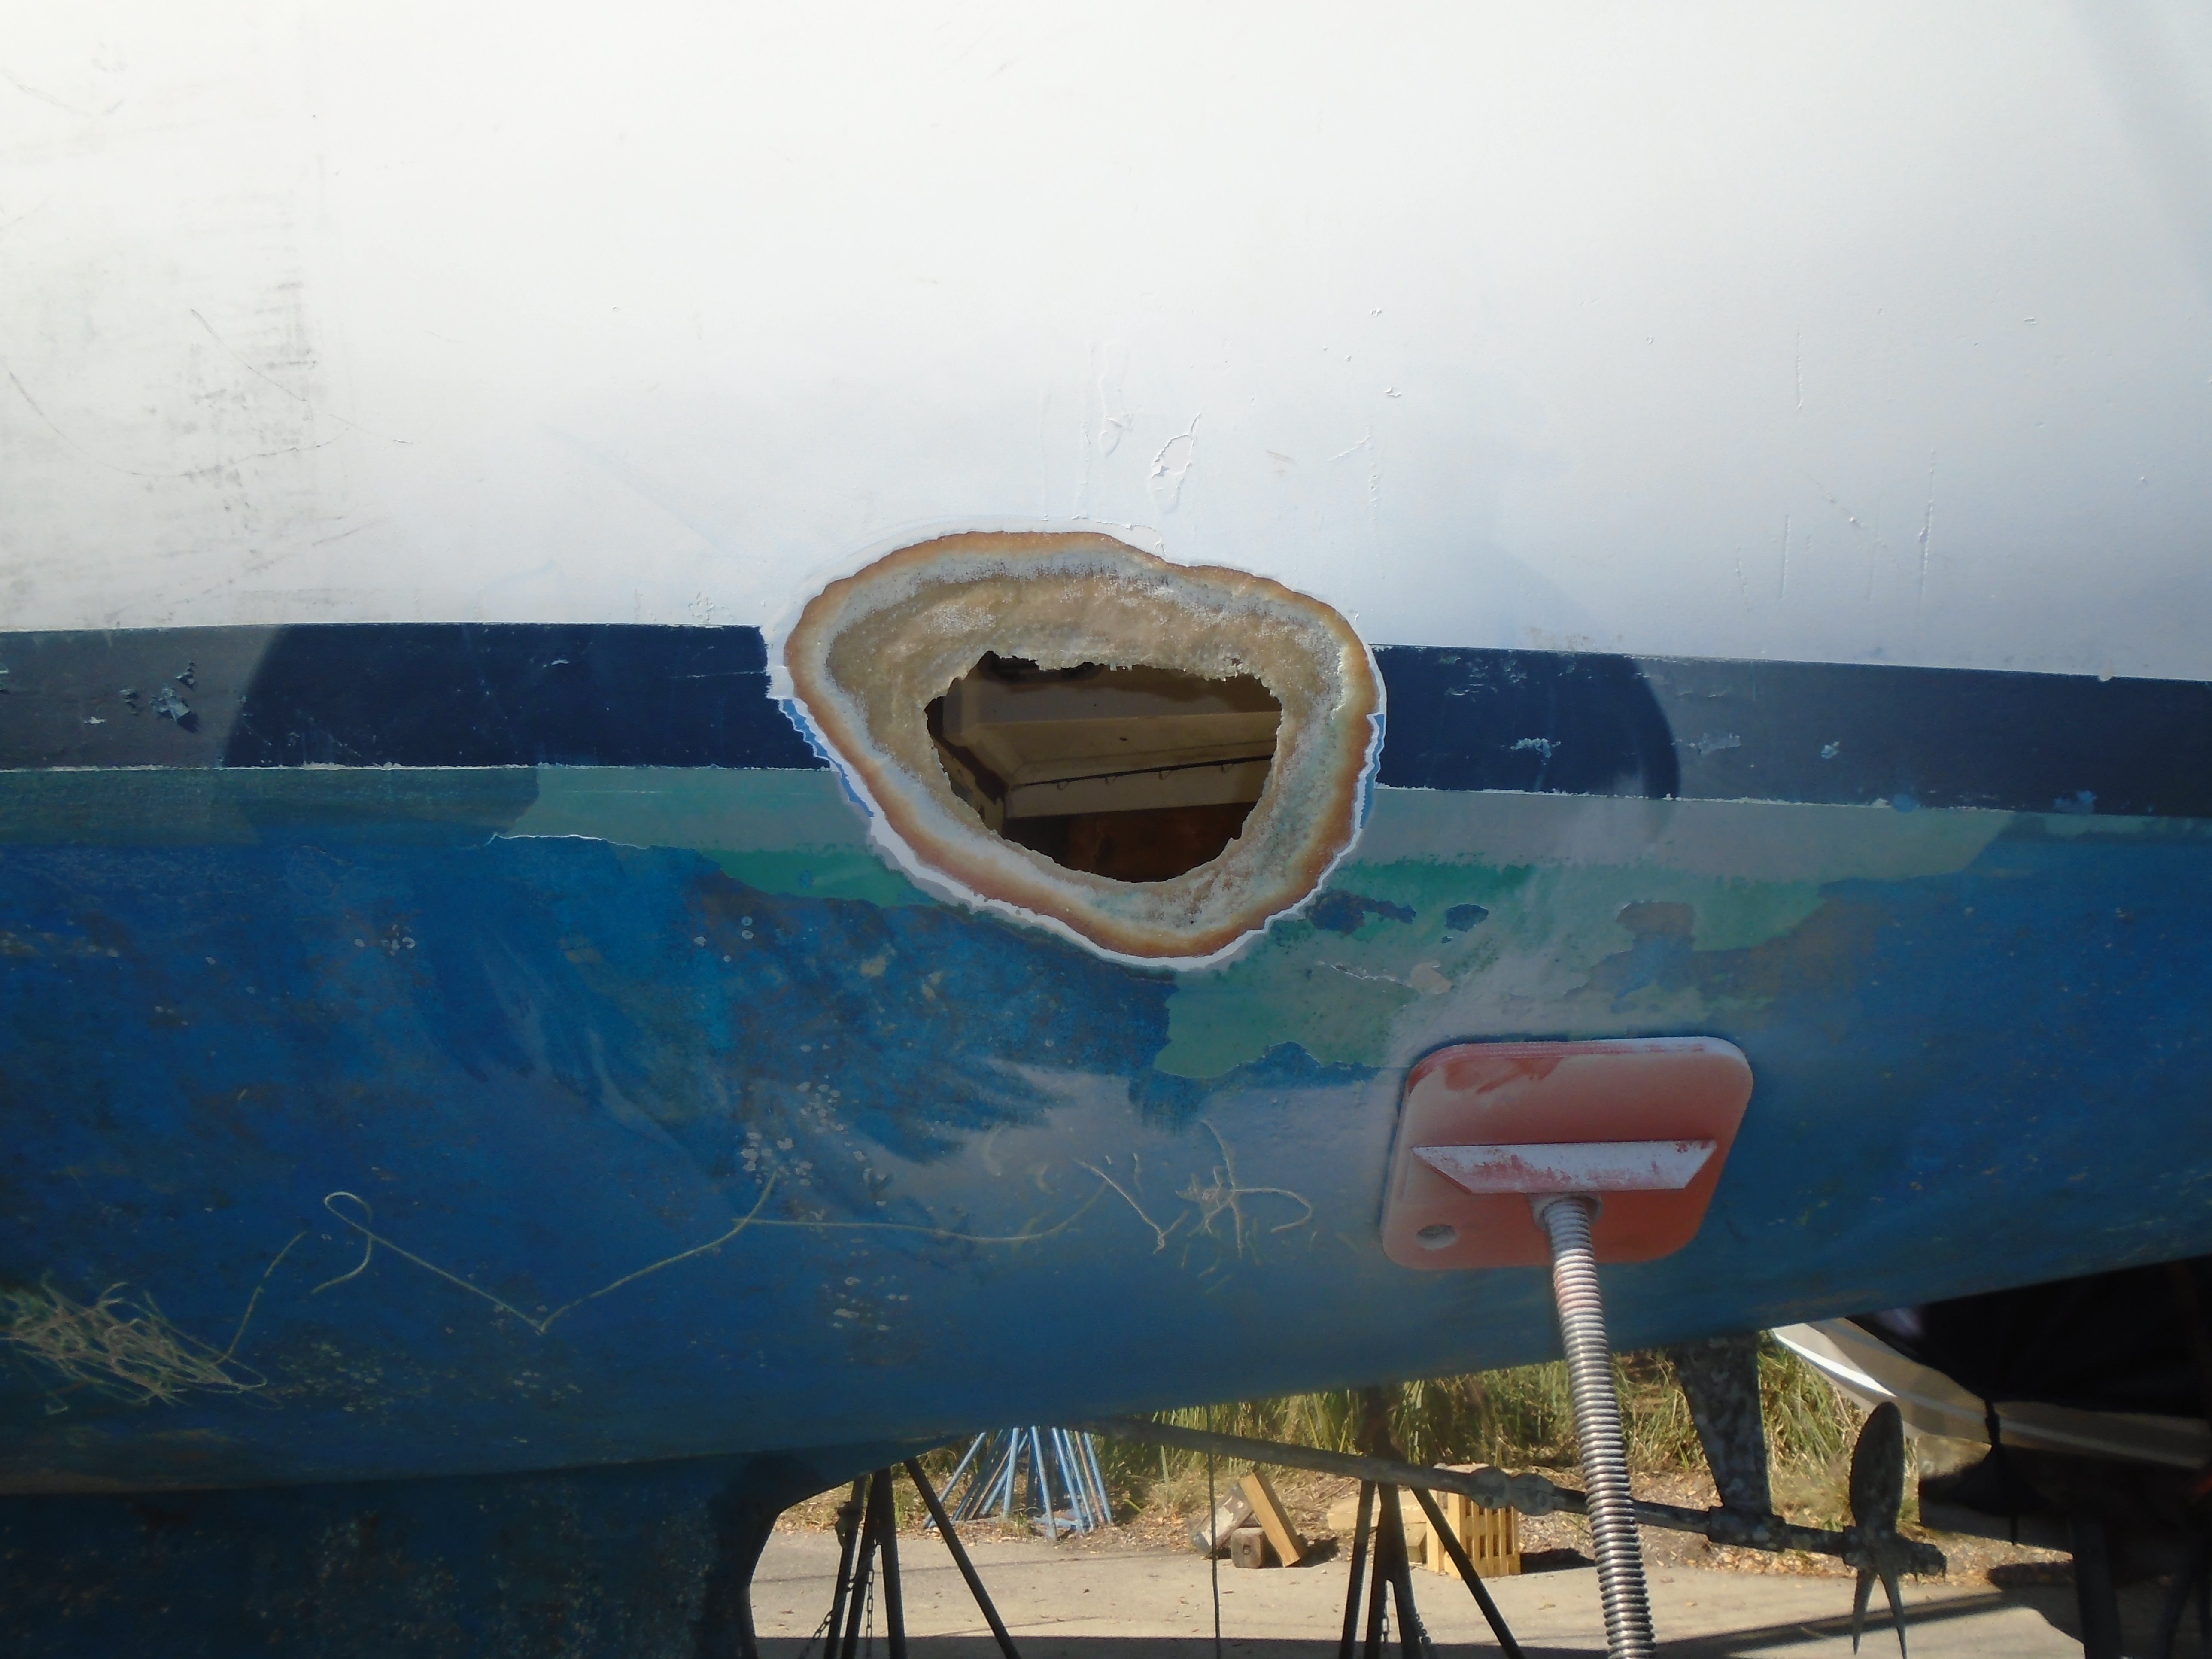
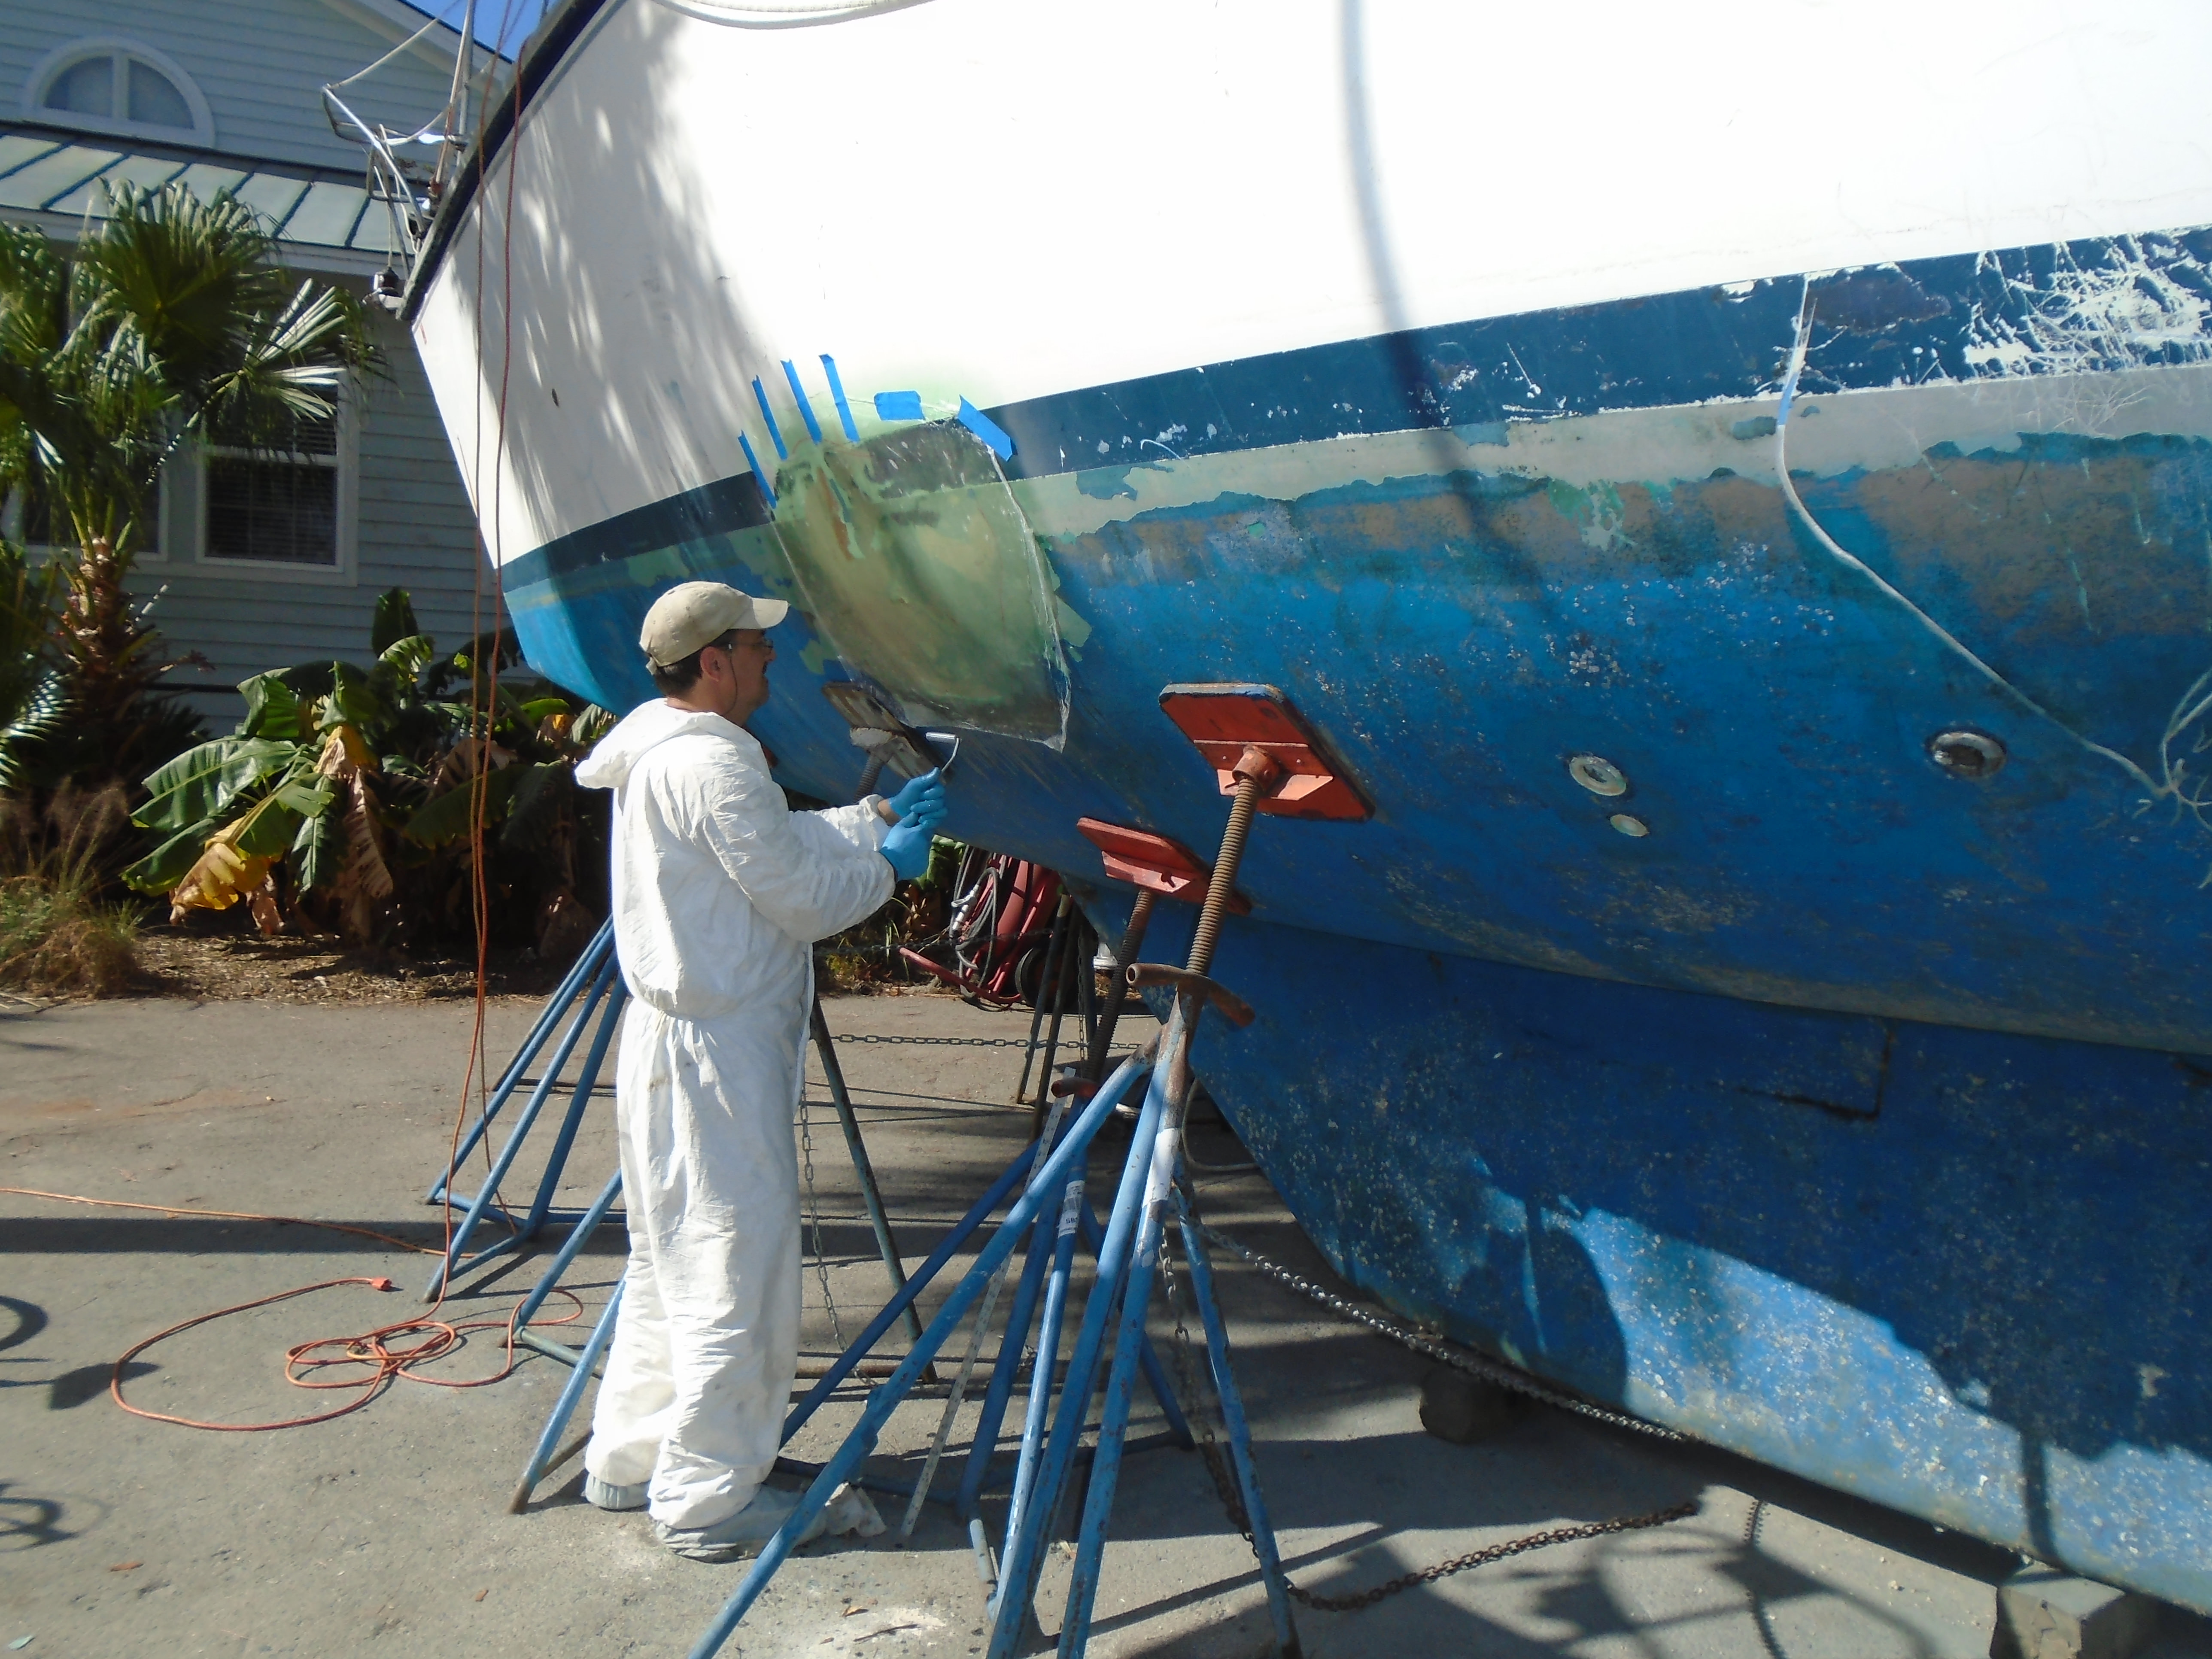
With the bad parts removed I had to grind the area a little farther due to some additional delamination at the edges. Then I started the bevel for the outer layers. Not ready to add them yet but for this hole it was better to do this first:


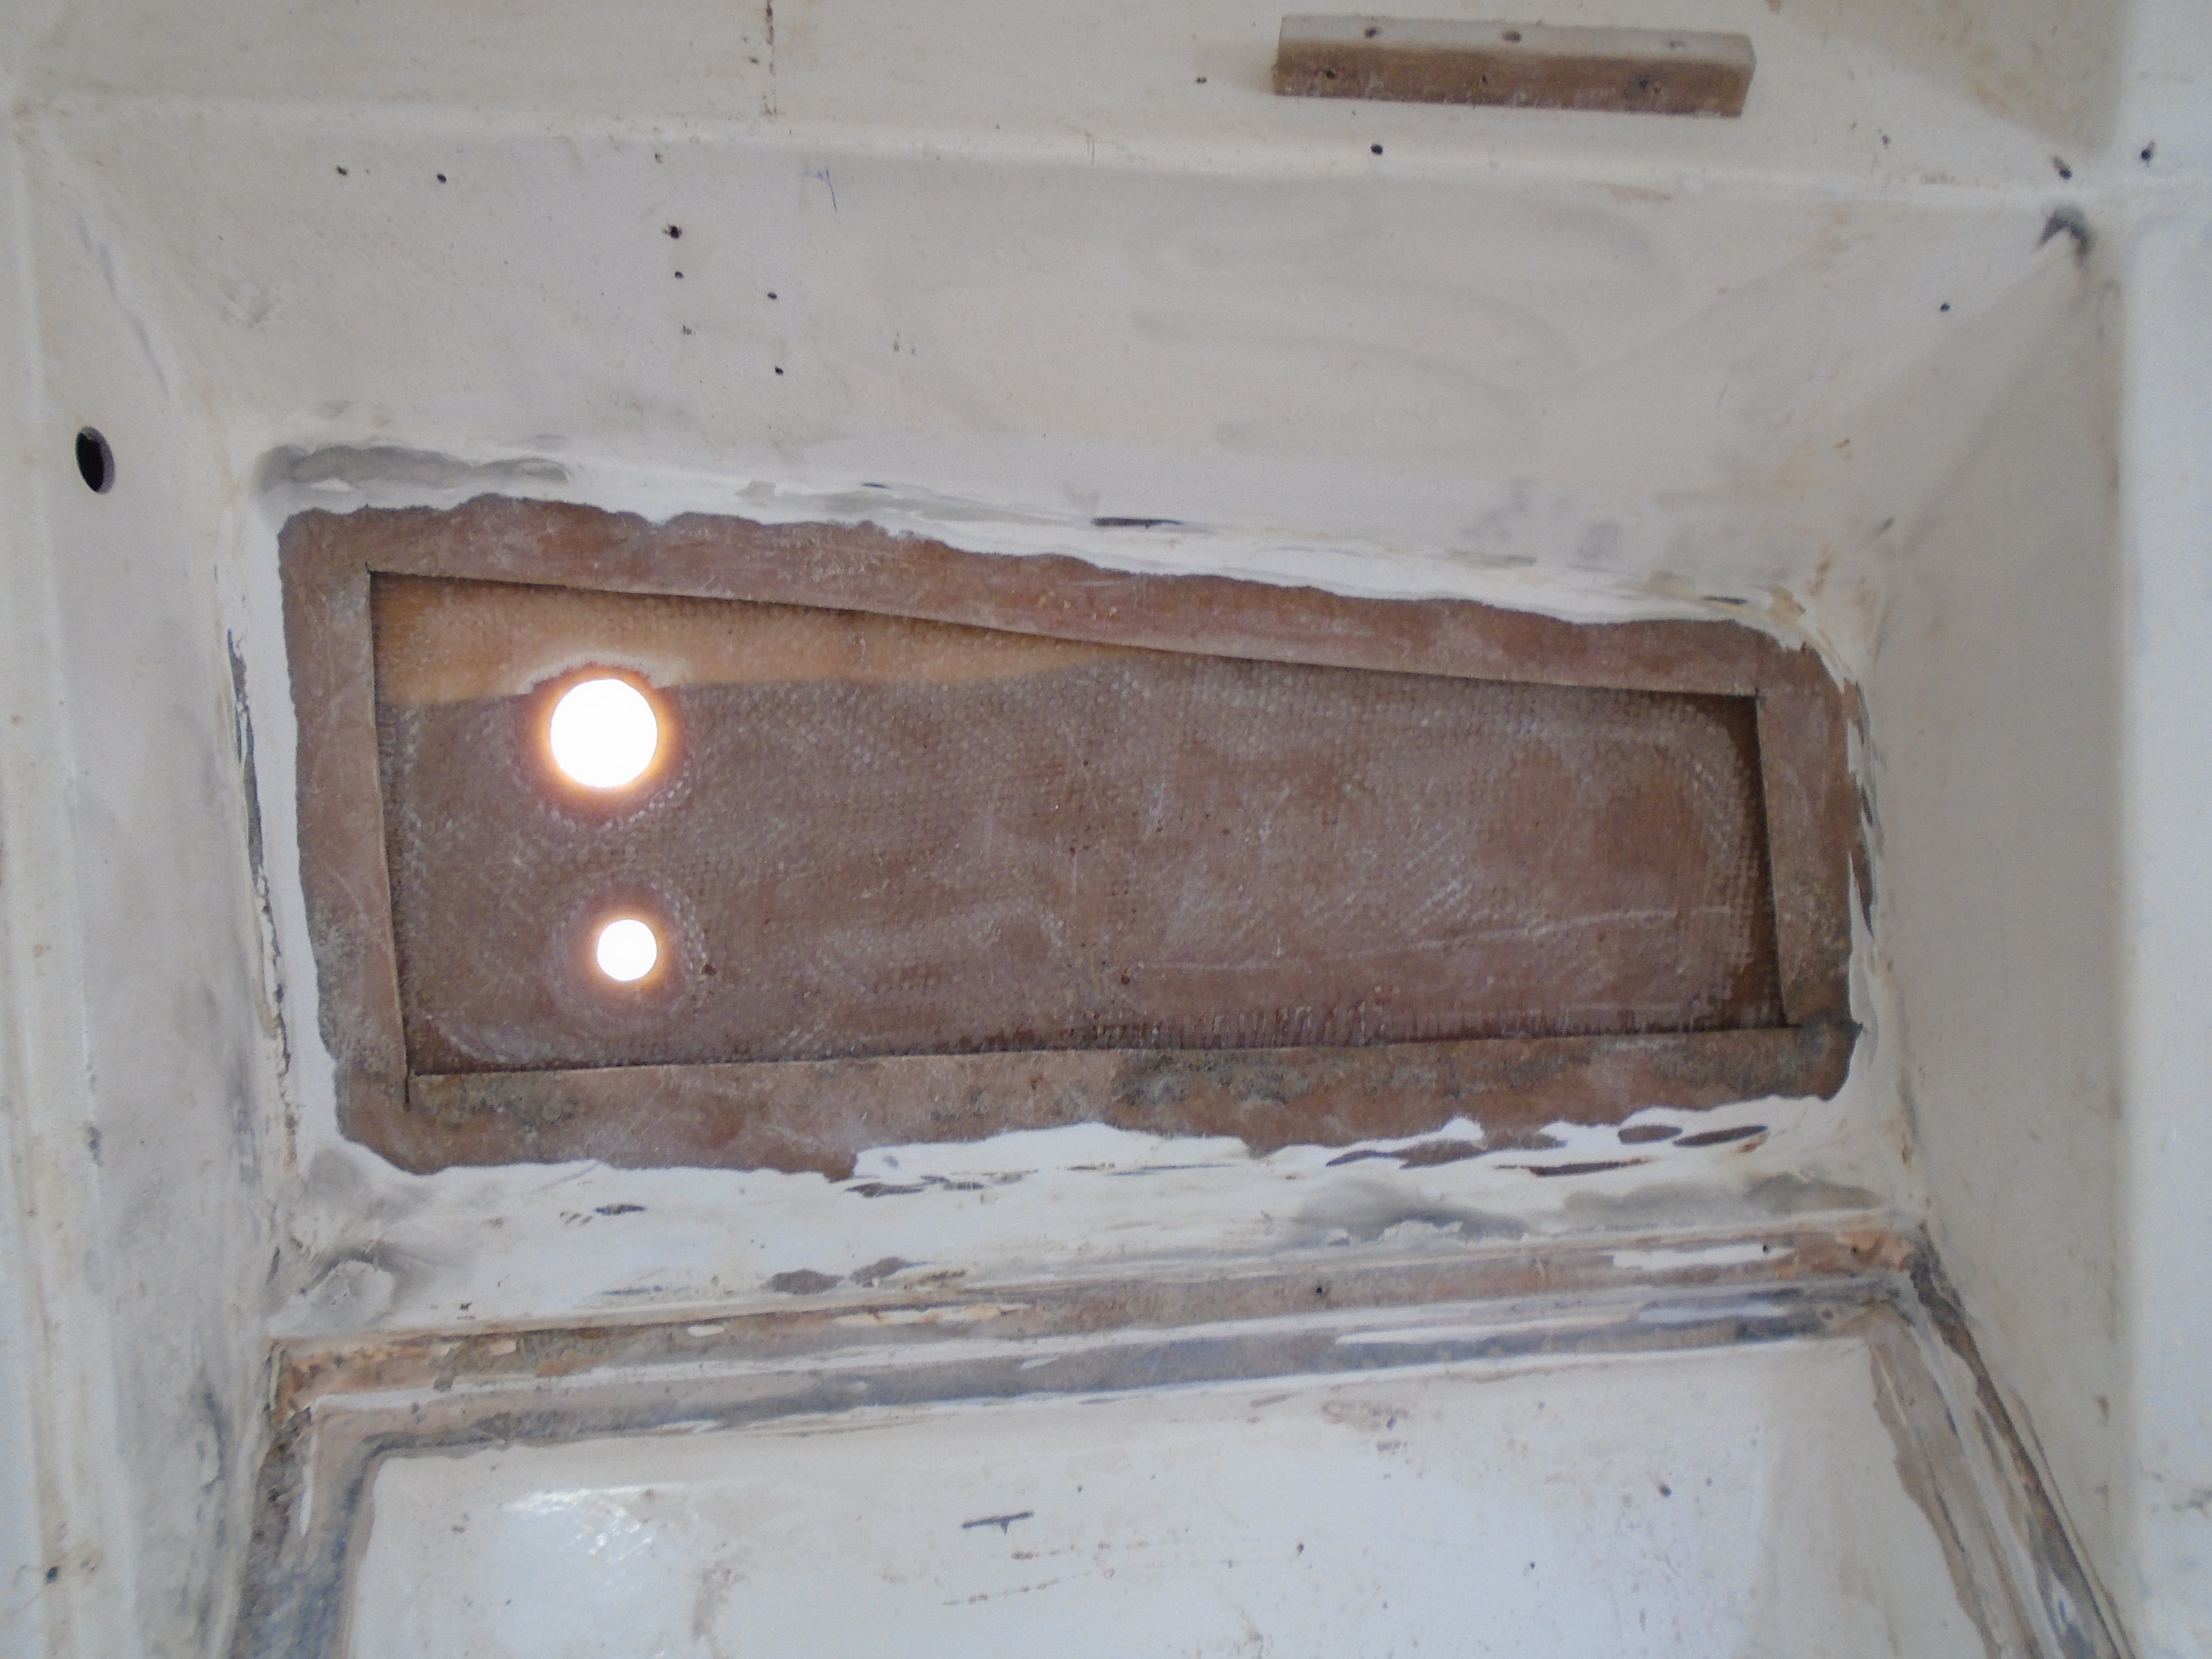
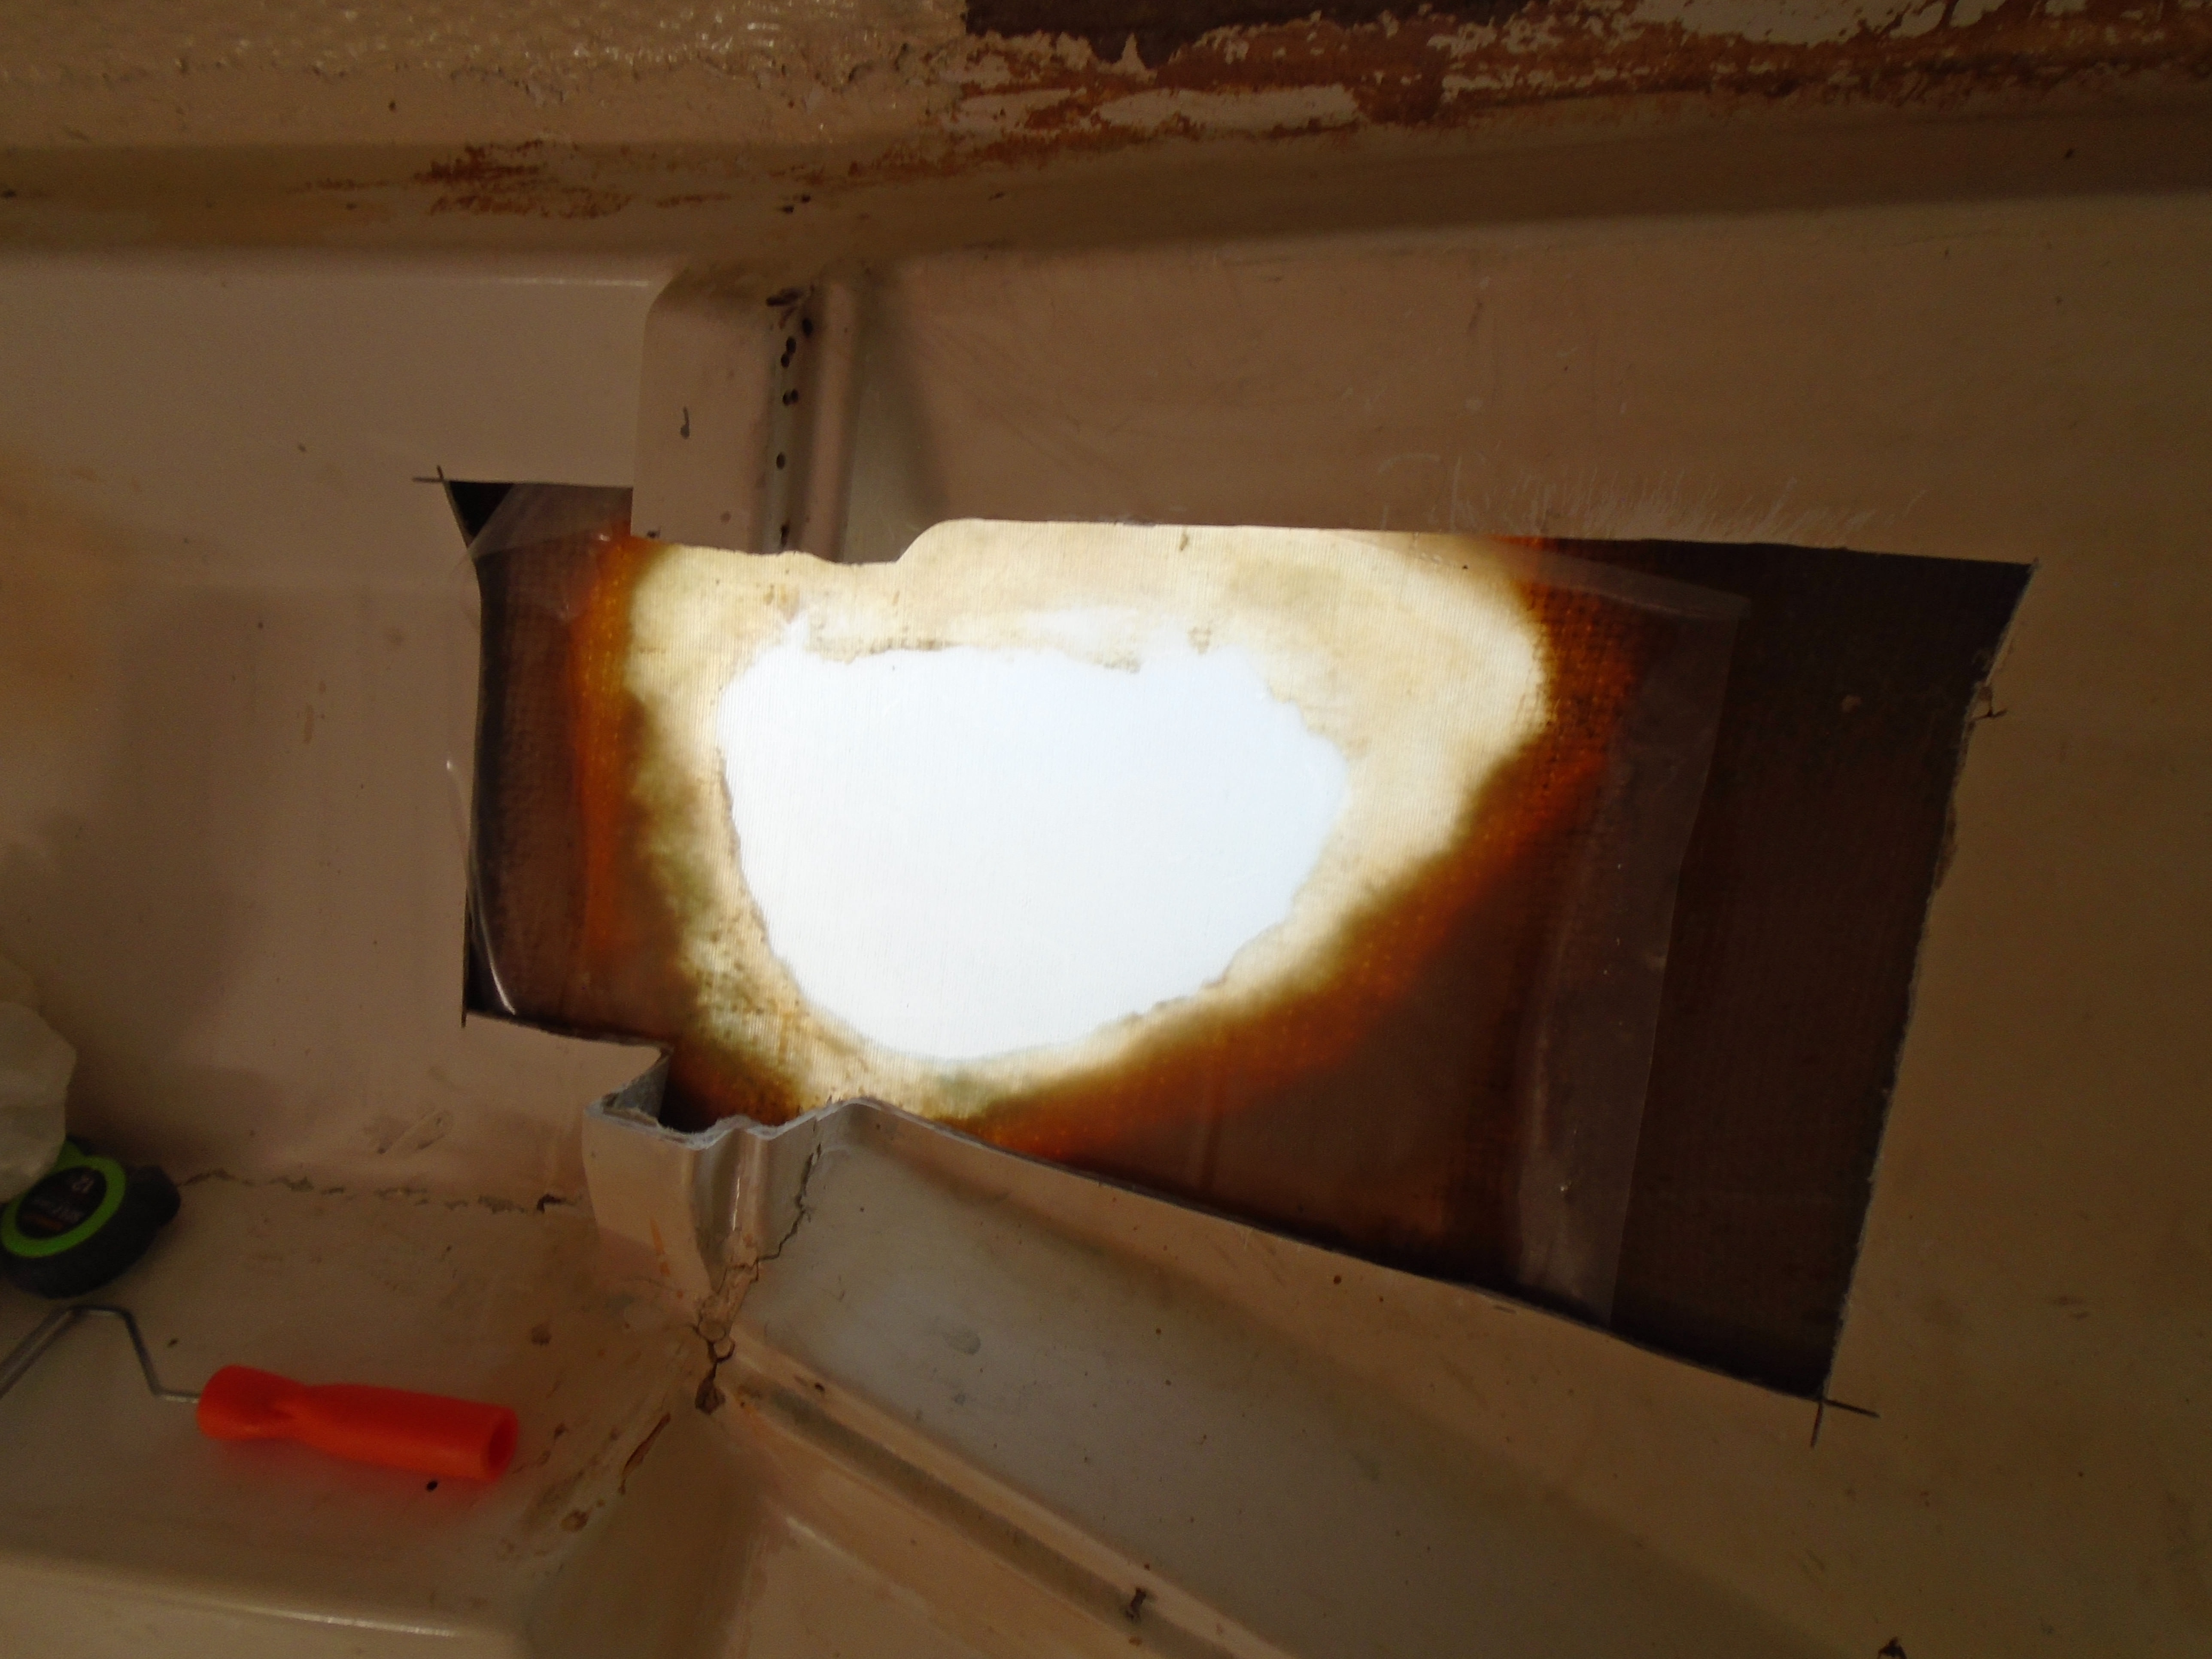
Next up is to prep the inside of the repair. First thoroughly clean (yep, always clean first. For outside gelcoat or paint, use wax & grease remover first, then acetone. If not an issue I wipe repeatedly with acetone) then I used the grinder with a sanding disc (I call it a flap-wheel but it may have another name) and ground thoroughly about 4 inches around the edges of the hole. I then traced this area onto some paper to cut the glass for the inside patch.

With a hole this size and orientation I couldn't lay a wet patch because gravity works! It would bulge out too much before hardening. I also couldn't make a hard patch due to the contour of the hull - the resultant repair would be too thick. So here's how I solved the problem: a trip to the hardware store to pick up some plastic painter's dropcloth. You can buy it in sheets of varying thickness from .4 mil all the way to 6 mil, maybe thicker. I have found that .4 mil is a little too flimsy but does allow for lots of flexibility for compound curves. 6 mil only works for flat surfaces. My go-to sizes are .8 mil and 2 mil. Cut a piece larger than the patch panel and lay on a flat surface. Then start the patch panel layup on the plastic. For this panel I used 6 layers of alternating 10 oz. E-glass cloth, 7.5 oz. E-glass cloth and 8.9 oz. S-glass cloth. Wet out the first three layers, roll the bubbles and excess resin out and walk away for about an hour (depending on temperature. It should be sticky but not wet, in cooler temps it may take up to 2 hours). I came back and added the next three layers and let it sit until this layer became sticky but not wet to the touch. I also brushed resin from this mix onto the hull around the hole. Then picked the patch up by the plastic and placed it in position. Use moderate pressure with a roller on the edges to stick the panel to the hull. Keep working with harder pressure against the plastic barrier but don't mess with the center. Then let it harden:


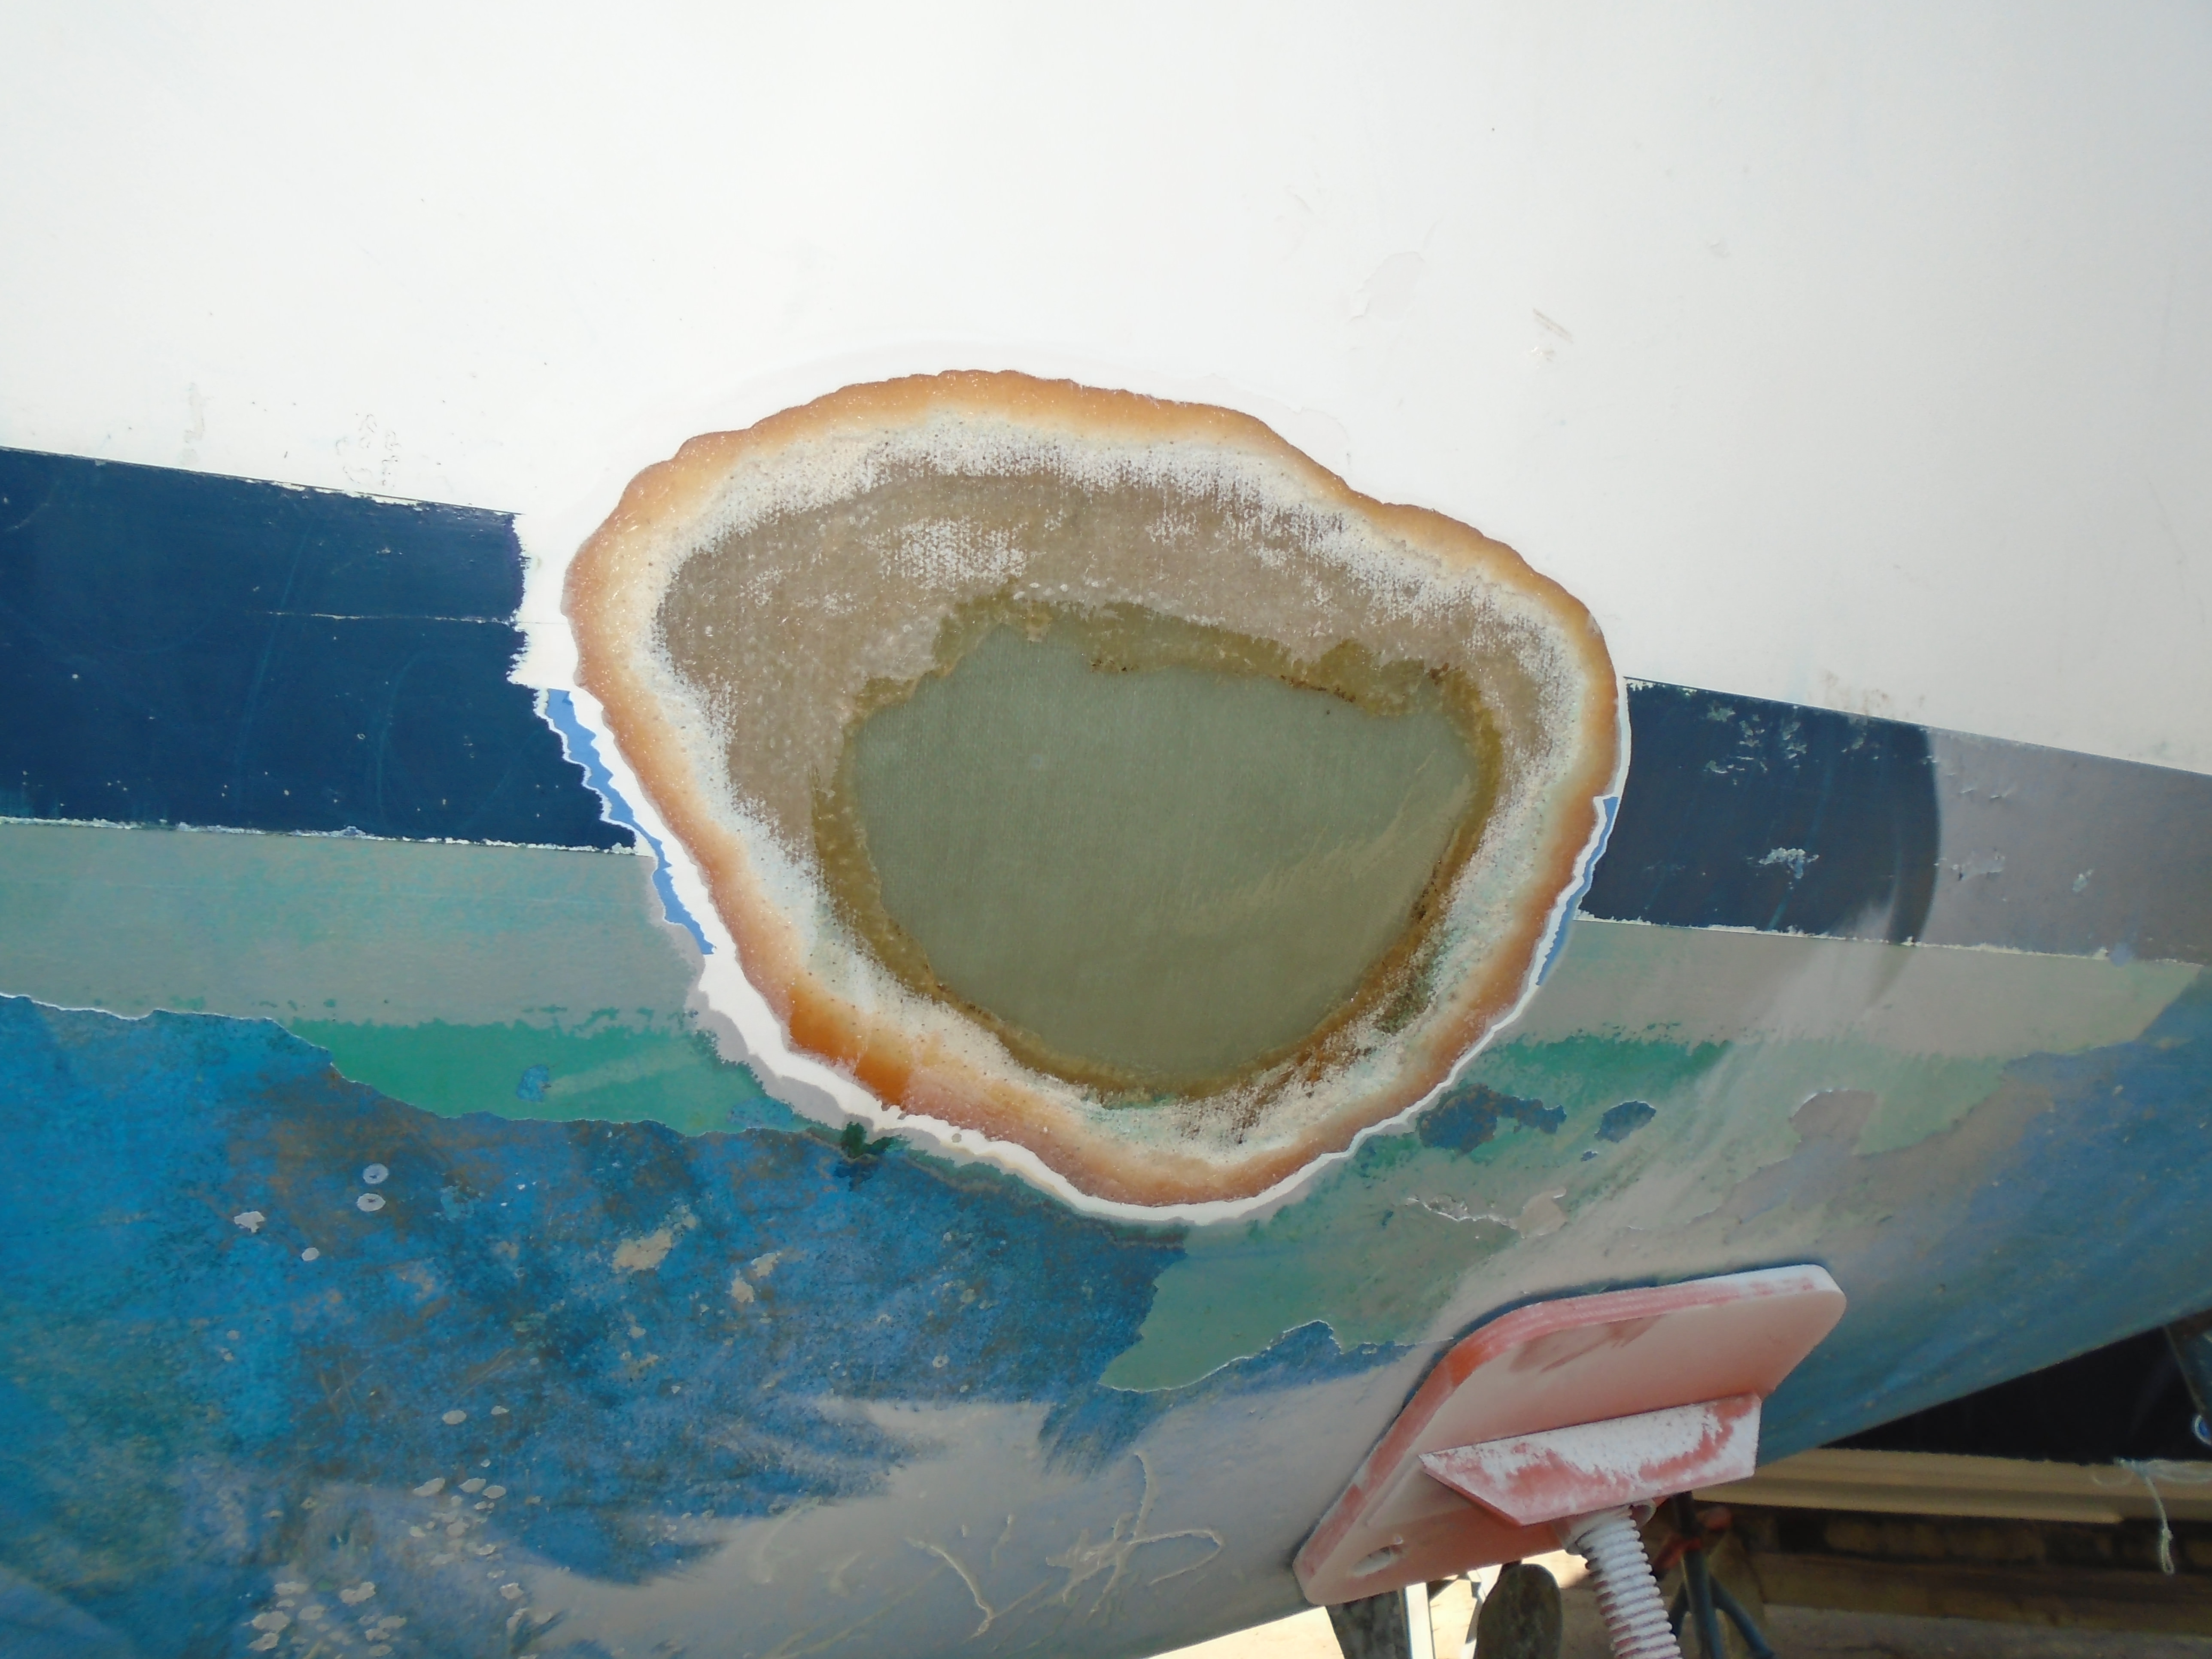
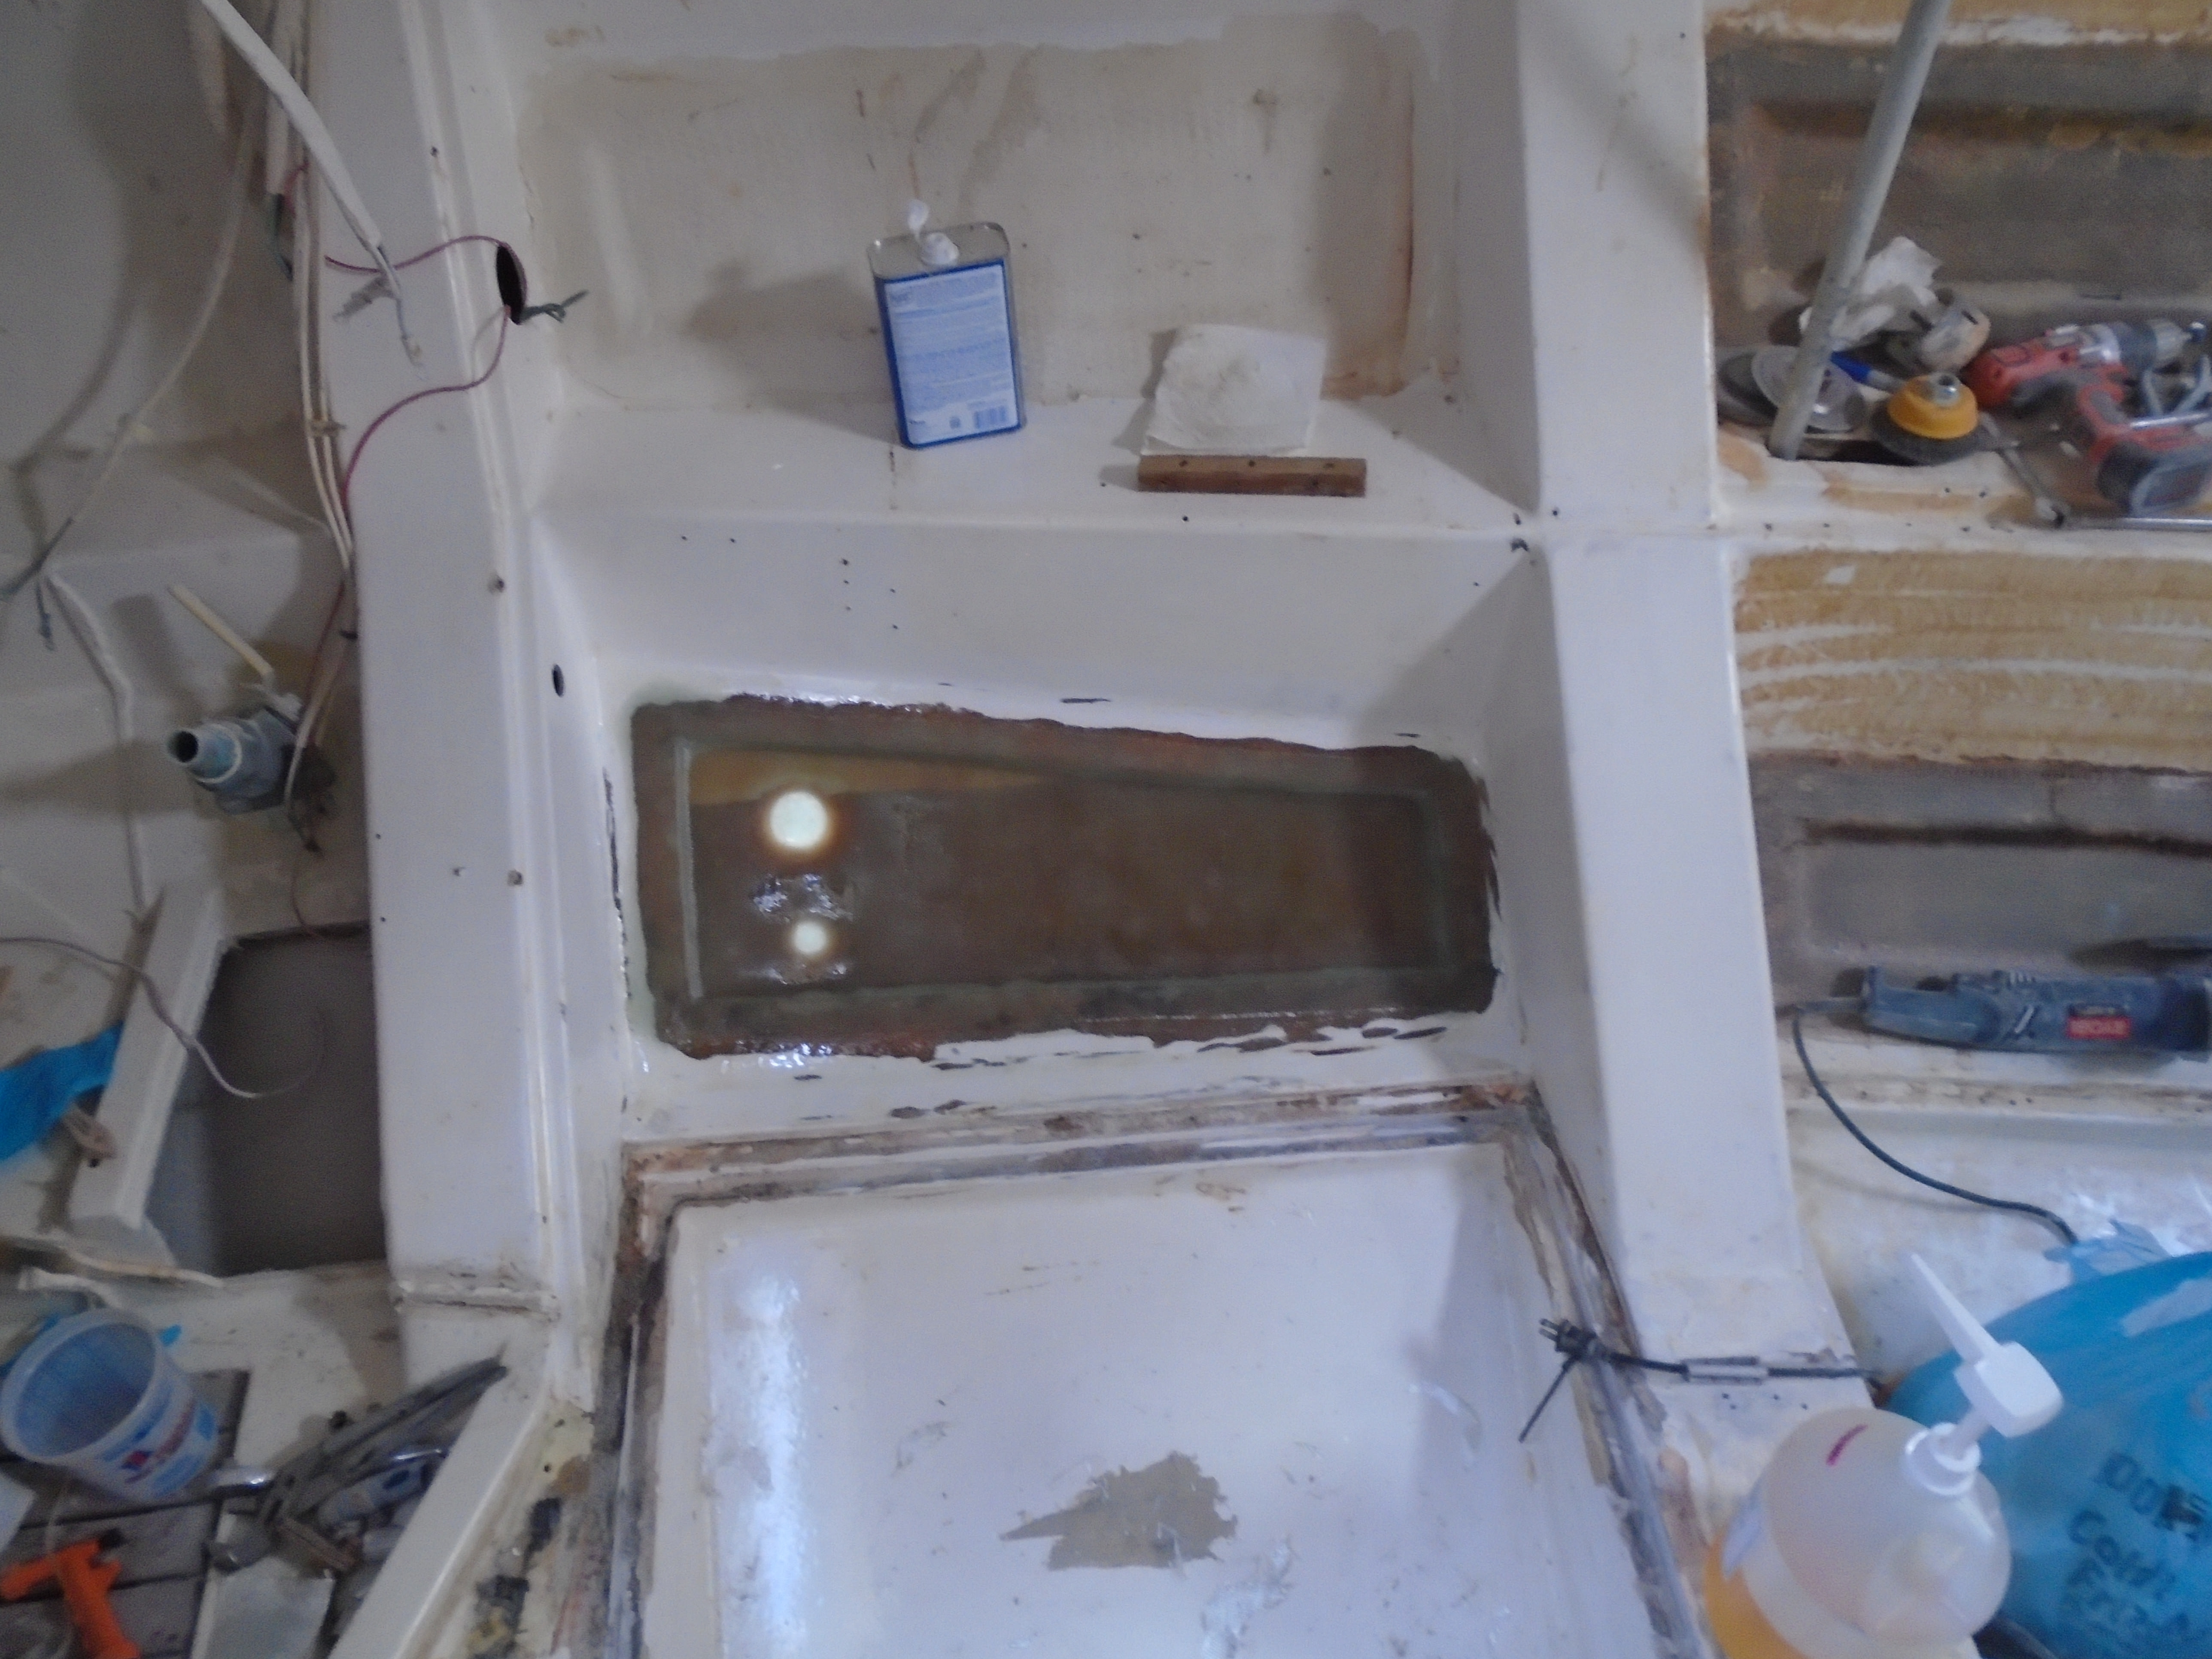
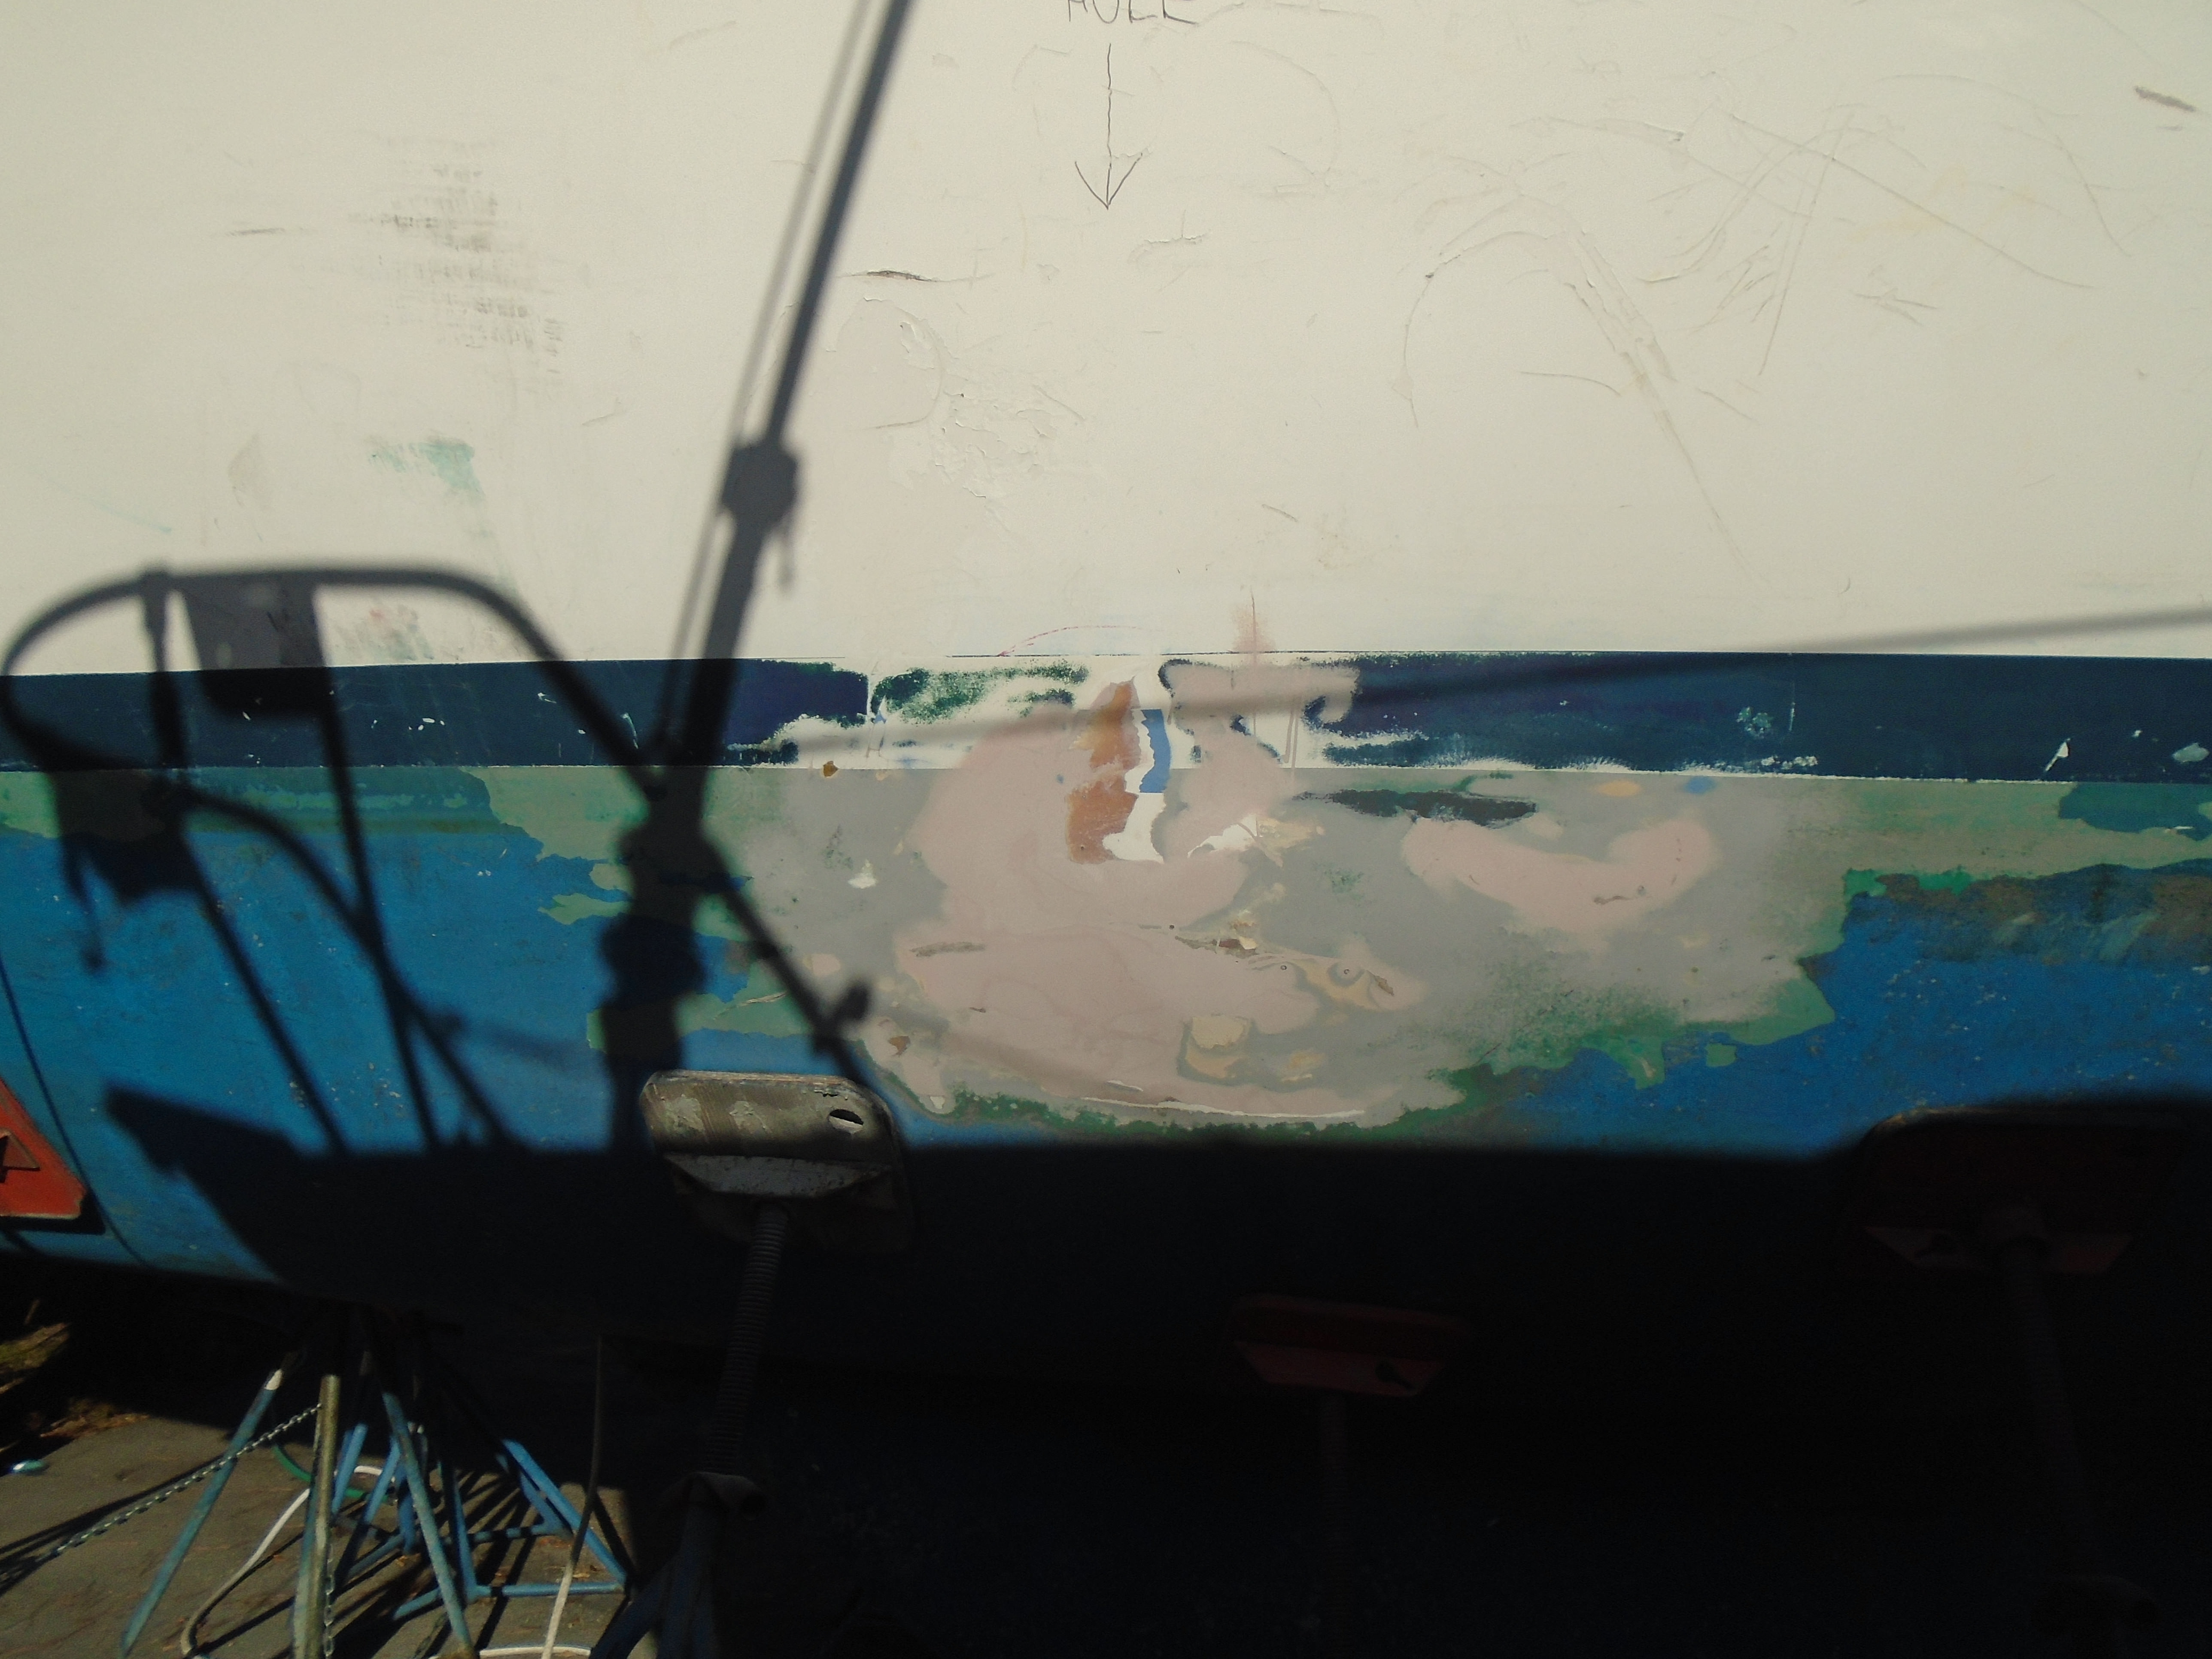
Patch panel from the outside:


After hardening I have a solid panel to work with on the outside. I will have to scrub the amine blush off and sand the patch to roughen the surface for a good mechanical adhesion of the outside layup. Once the patch hardens, the plastic can be easily peeled off the inside.

I couldn't use this technique for the other hole. More on that next time.

Cheers,

Mark
 
Last edited:
Mar 15, 2013
197
Islander 32 mkll Comox Hrb.
Thanks for sharing this with us Mark. I can tell I'm going to learn a lot from your expertise that will help in a few of my future projects, right now I'm going to look up the effects of amine blush!
 
May 8, 2013
629
Hunter 40 Dataw Island, SC
Thanks for sharing this with us Mark. I can tell I'm going to learn a lot from your expertise that will help in a few of my future projects, right now I'm going to look up the effects of amine blush!
Not sure if expertise is the right word! I knew that poly resins had the amine blush but didn't know epoxies did until I read up about it on West Systems website.
 
May 8, 2013
629
Hunter 40 Dataw Island, SC
So before I got too much into repairs I needed to work on the engine. It was still sitting full of diesel fuel and I had to wait for a new starter to arrive before I could progress. The old starter was ruined so I took it to our local auto electric shop for diagnosis. The verdict - not repairable, plus that starter was out of production so parts were not available anyway. Since I had been nursing a decaying solenoid and bendix it was a future replacement part anyway.

While I waited for the new starter I started un-pickling the engine. First step was to drain the diesel fuel from the crankcase, then suck the diesel out of the cylinders. My oil extraction tank probe was perfect for this, it fit right into the injector holes! Next came the breaker bar to turn over the engine. It turned easily but I did have a hydraulic lock at first. Turning back and forth a few times cleared that up and from then the engine turned easily.

New geared high torque (and expensive!) starter installed with a temporary starter button, new (cheap) oil and filter, trans drained and refilled with AT fluid, raw water intake hose stuck in a 5 gal bucket, and about 10 minutes of pumping the lift pump to pre-bleed the lines and injectors, crossed fingers, it's time to give it a try.

I hit the starter button and, no kidding, it started after about 2 turns of the crank! Settled down to a smooth idle within seconds! Yay Yanmar! So I set up the water hose to feed the bucket and restarted the engine and let it run for about 5 minutes. All looked good, no excess smoke, water pumping well but after a few minutes the oil pressure started dropping to below what I normally see at idle. Hmmm.

I shut it off and drained the oil. It came out really thin - not watery or milky, just a lot thinner than it should. Plus I put in 5 quarts and drained out about 6 or 6 1/2. Hmmmm again! So I let the oil set for a while to see if there was any water in it - nope. Finally I thought maybe there was some diesel sitting in all the little voids in the engine and running it cleaned the excess out. So, change the oil and filter again, start and run again but this time oil pressure is normal so I let it get to operating temperature before shutting it off. Drained the oil again and this time - 5 qts. in, 5 qts out, looks pretty, not milky or thin.

At this point I ran the engine for about 30 minutes and changed the oil and filter again. That is where I'm at on the engine at this point. I don't want to/shouldn't/can't run the engine above idle while I'm on the stands so I'm taking a big leap of faith that there is no damage to the engine and it will make power. I won't know for certain until I can get back in the water but I have faith in Mr. Yanmar. I still have some engine maintenance to do - replace the motor mounts and the damper plate (both planned pre-hurricane) plus I'll have to re-align the engine after straightening the shaft strut.

Next up: More hull repair.

Cheers,

Mark
 
May 8, 2013
629
Hunter 40 Dataw Island, SC
Back to hull repairs:

As I looked at the larger area of holes mid-ships, I knew this area was going to be a little harder and would require multiple steps to get right. The first thing was to ensure hull integrity surrounding the damaged area. I had noticed that some of the grid ties (not sure what else to call them) showed some delamination. One area aft delamination was evident because one of the jacks was pushing the hull in! This obviously needed to be reglassed, but it also presented an opportunity!

I replaced the seacocks three years ago - well, I got rid of the cheap PVC ball valves and installed proper seacocks - and never liked the location of the thru-hulls for the aft head:


As shown, the seacocks are actually in the main cabin under a settee and the hoses pass through the bulkhead to the head. I decided this was the time to relocate them to the head to simplify the plumbing. A little investigating with the borescope showed that the thru-hulls and seacocks could be moved aft to the area under the sink cabinet in the head.

So I removed the seacocks and thru-hulls and pried off the glass panel:


Didn't take much prying! Pretty dirty underneath too. The panel had obviously not bonded well to the hull. After some cleaning and grinding:


I did remember to release the jack to allow the hull to relax back to its normal position! I left it this way for a day for good measure then added some glass cloth circles around the holes for a filler, then reglassed the grid to the hull:


After letting this dry and cure for several days I re-tensioned the jack and all looked good.

Next up: Making a patch panel for the hull.

Mark
 
Last edited:
May 8, 2013
629
Hunter 40 Dataw Island, SC
The Patch Panel:

I had a few days of good weather and good temps so now was the time to deal with patching the main area of damage to the port side. A reminder of what I was dealing with:


I had three holes to fix plus some delamination which was not consistent relative to the holes. I was not going to try to repair each hole separately because I didn't trust the areas in between. I sounded the hull again and got an idea of where I thought the bad areas stopped. I assumed that as I got farther into it I would see some areas that extended beyond what I could find with the phenolic hammer so I planned to make the patch panel oversize to allow for this.

Next problem, how to make the patch panel. I was dealing with an area curved both vertically and longitudinally. A flat panel would work longitudinally but not vertically - if I did the repair would end up being about 3 times as thick as the surrounding hull. So, the patch needs to match the hull but how to fabricate the patch? My solution - break out the bondo!

As a general rule bondo isn't recommended for boat repairs, but it's great if you don't plan on leaving it on the boat. I screwed a backing panel to the big hole and secured the flaps on the smaller holes with screws as well, then globbed on the bondo. I got more than a few raised eyebrows as I was doing this! A few guys thought this was the actual repair. An afternoon of sanding, building up the bondo, sanding again, checking the contours, sanding again, and more sanding resulted in this:


The next morning I hooked up the HVLP gun and sprayed 3 coats of PVA on and let it dry (PVA is a water soluble mold release):


I had traced out the outline for the patch panel and cut out 10 layers of alternating E-glass and S-glass, laid out a sheet of plastic and wet out 5 layers onto the plastic. My reasoning was the full ten layers would be too difficult to handle at once. With an extra pair of hands, the first part of the patch was placed against the hull:


and the air bubbles rolled out. I then used up an entire roll of tape and taped just about every square inch tightly to the hull. Time for a long lunch! About two hours later I came back and (after verifying that the epoxy had started setting up, I peeled the plastic off - easy because the tape helped. Then another layer of glass, wait about an hour, repeat and repeat until I had all 10 layers on:


I let this set up for a few days as I was trying to ensure the patch panel would hold its shape when removed.

Next: Removing the patch panel and cutting a big hole in the side of the boat (caution - not for the squeamish!).

Cheers,

Mark
 
Last edited:
Sep 20, 2014
1,320
Rob Legg RL24 Chain O'Lakes
Something I've wondered about. When there is delamination, you end up with fibers where the epoxy has crumbled away, and all that is left is the fibers. If one were to vacuum bag that along with some of the additional mat, could they get the new epoxy to penetrate back into the fibers and make a good bond for the next subsequent layers? Seems that could be better than sanding everything away back down to solid glass.
 
May 8, 2013
629
Hunter 40 Dataw Island, SC
Something I've wondered about. When there is delamination, you end up with fibers where the epoxy has crumbled away, and all that is left is the fibers. If one were to vacuum bag that along with some of the additional mat, could they get the new epoxy to penetrate back into the fibers and make a good bond for the next subsequent layers? Seems that could be better than sanding everything away back down to solid glass.
I don't have much experience with vacuum bagging so I can't say whether that would work or not. I guess a factor for concern (at least in my case) might be that any area of delamination would have contamination between the separated layers, and how do you guarantee that you have a clean joint? Vacuum bagging would solve a problem with gluing layer back together though - thorough penetration eliminating voids and dry areas. I would be concerned that strength would be compromised if the delamination tore the glass fibers, but adding a layer between as you suggest might help tie the laminations back together. I just don't know.

I have always had to chuckle a little at us as a boating community when it comes to fiberglass and repairs though. On one hand you always read or hear that any repair must be done to a standard that mere humans only dream of achieving, because if it's not done right, heaven forbid, the boat will sink, the rig will fail, the sky will fall, your wife will leave you, dogs and cats will start living together, and the world economy will crumble to dust. However, in the very next statement we will sing the praises of fiberglass construction, pound our chests about how overbuilt these boats are and how forgiving a material it is.

Mark
 
  • Like
Likes: bawlmer