
How to re-bed the shrouds
- Thread starter rpwillia
- Start date
So here is the problem with real time posting. I figured out the issue. The other side has the exact same bent screws.
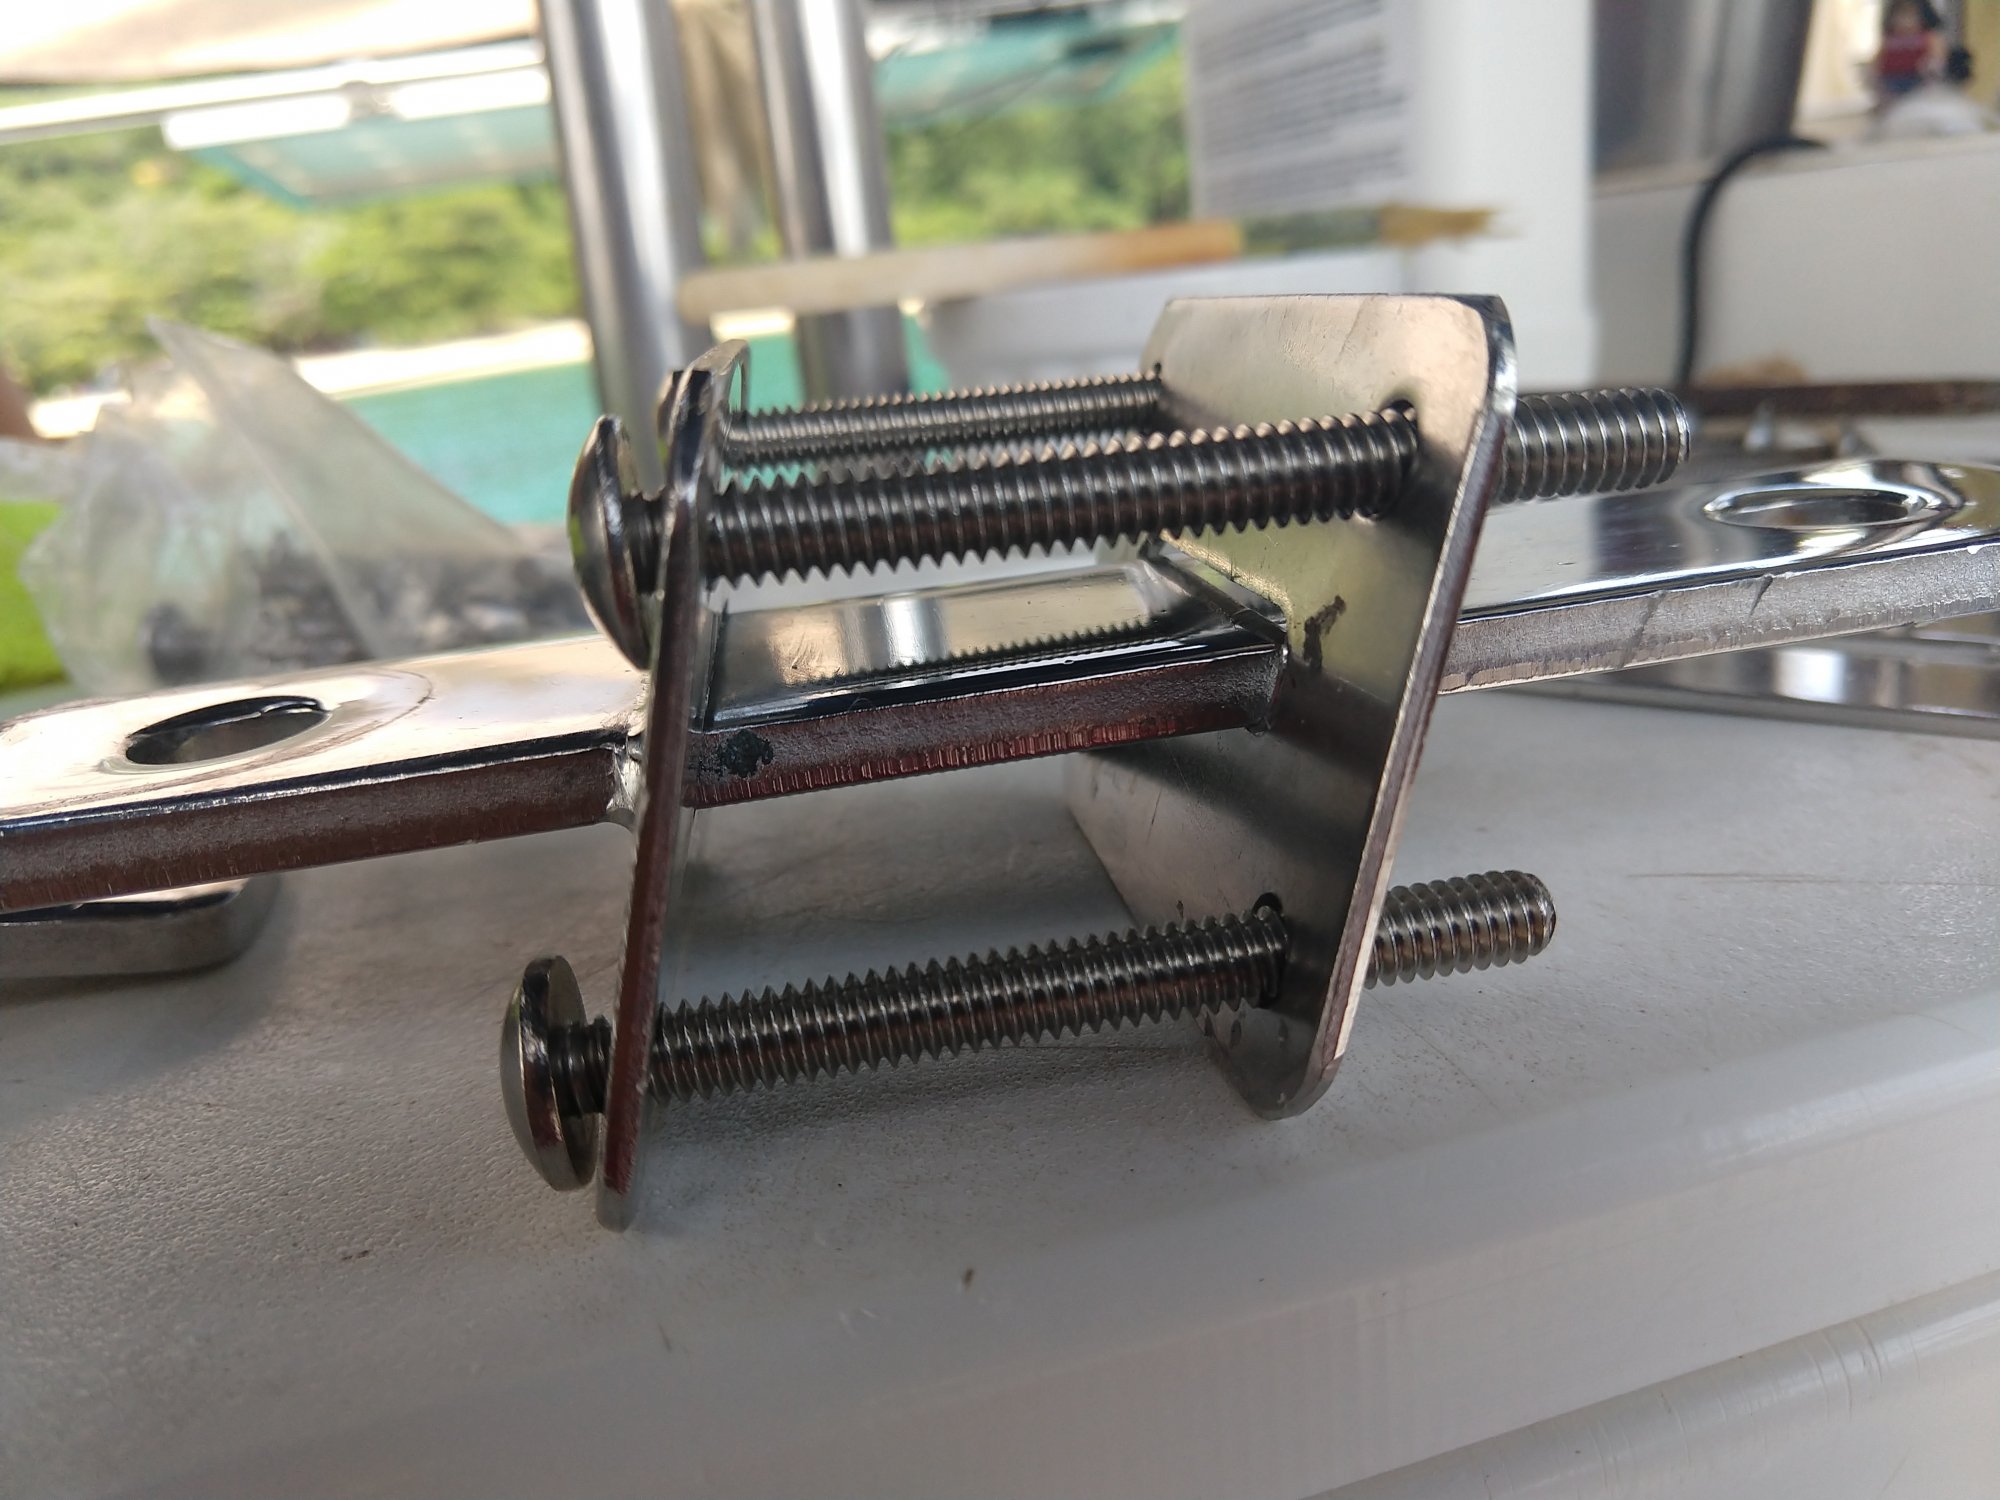
This is technically a design issue. When Catalina designed the deck plate and backing plate they put them together and had the holes match. However there is 2+ inches of deck. With the chain plates designed to go at an angle the bolts had to bend and twist to conform. The holes for the bolts are actually drilled at an angle. Really the backing plate should have been designed offset from the chainplate.
Deck looks fine. I will post some pics later.
") It won't be hard to design this correctly but it probably provides little value.
It won't be hard to design this correctly but it probably provides little value.So here is how everything lines up and the issue.
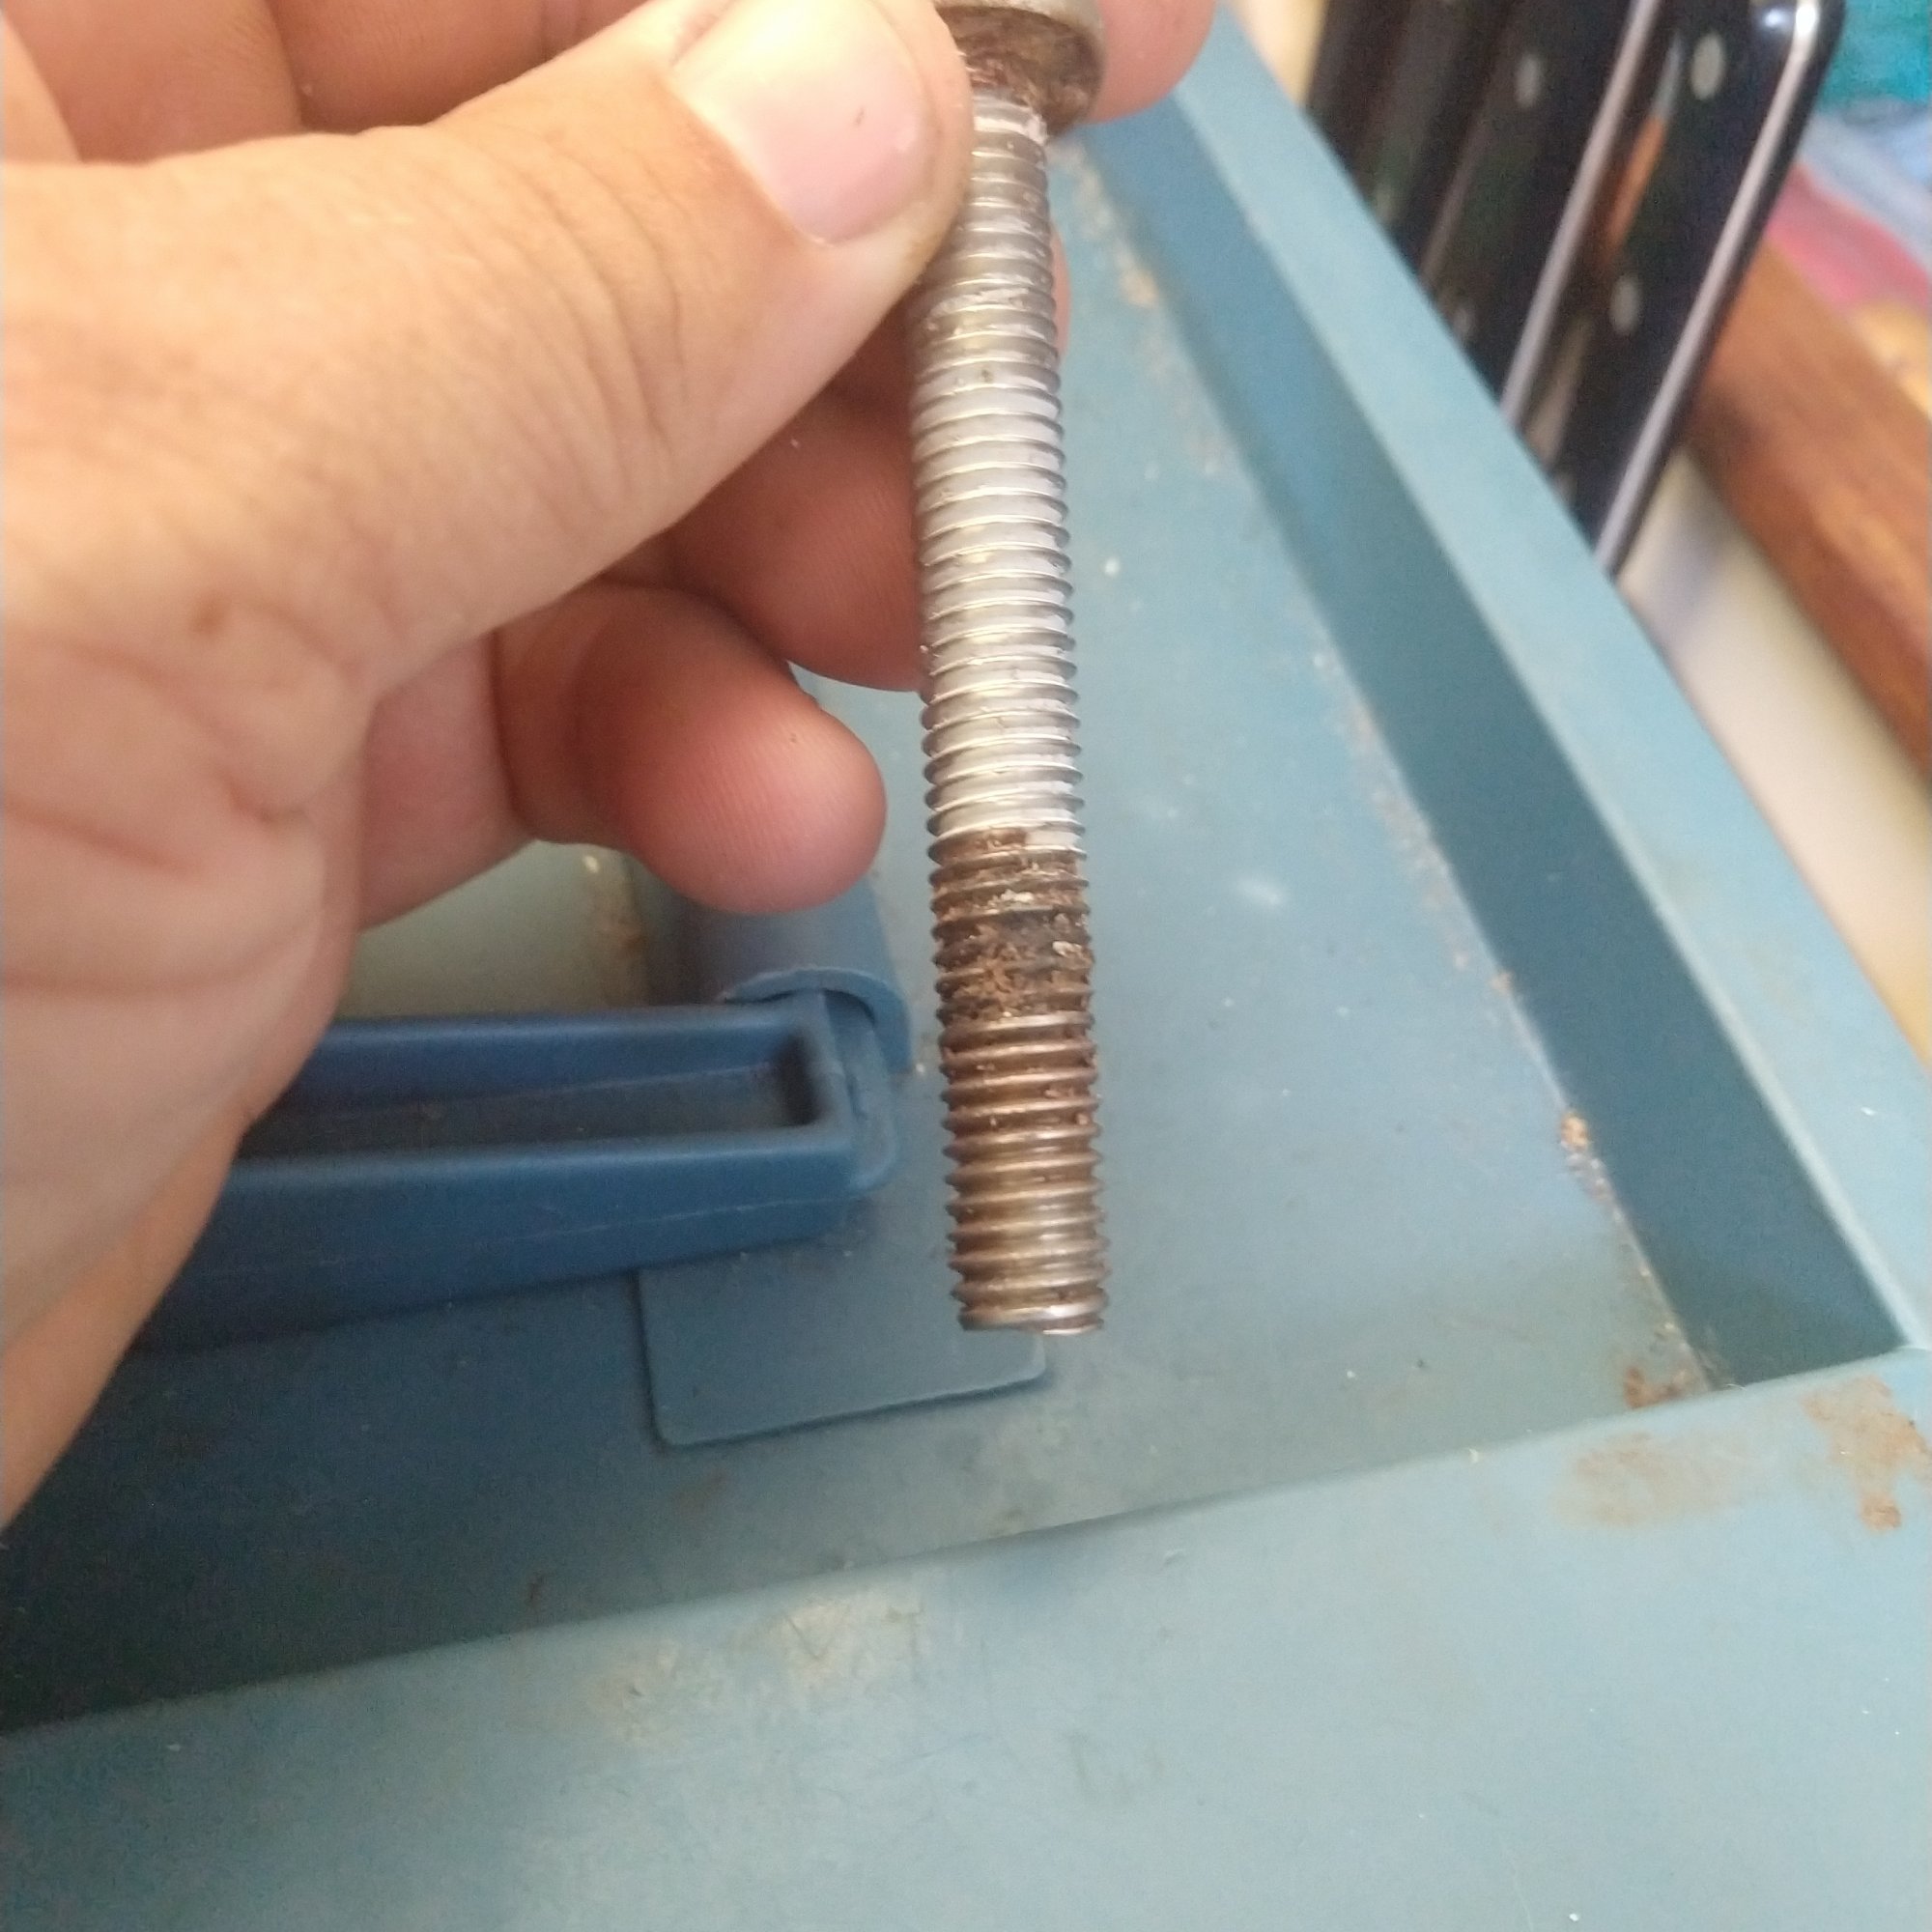
So I just put new bolts in and you could see and feel them bend to fit. Be careful, they are easy to break. I snapped one going to quick.
Another tip for doing the rear lowers, after you disconnect the shrouds go below and reach you hand into the small storage area behind the settee. You can feel the underside of the rod with a stack of washer and two nuts. Loosen up the nuts before you start disconnecting the rod from the chainplate. Otherwise you can gaul the threads on the bolt for the rod.
Remember to tighten the rod back up after but don't go too tight. Just so there is no movement.
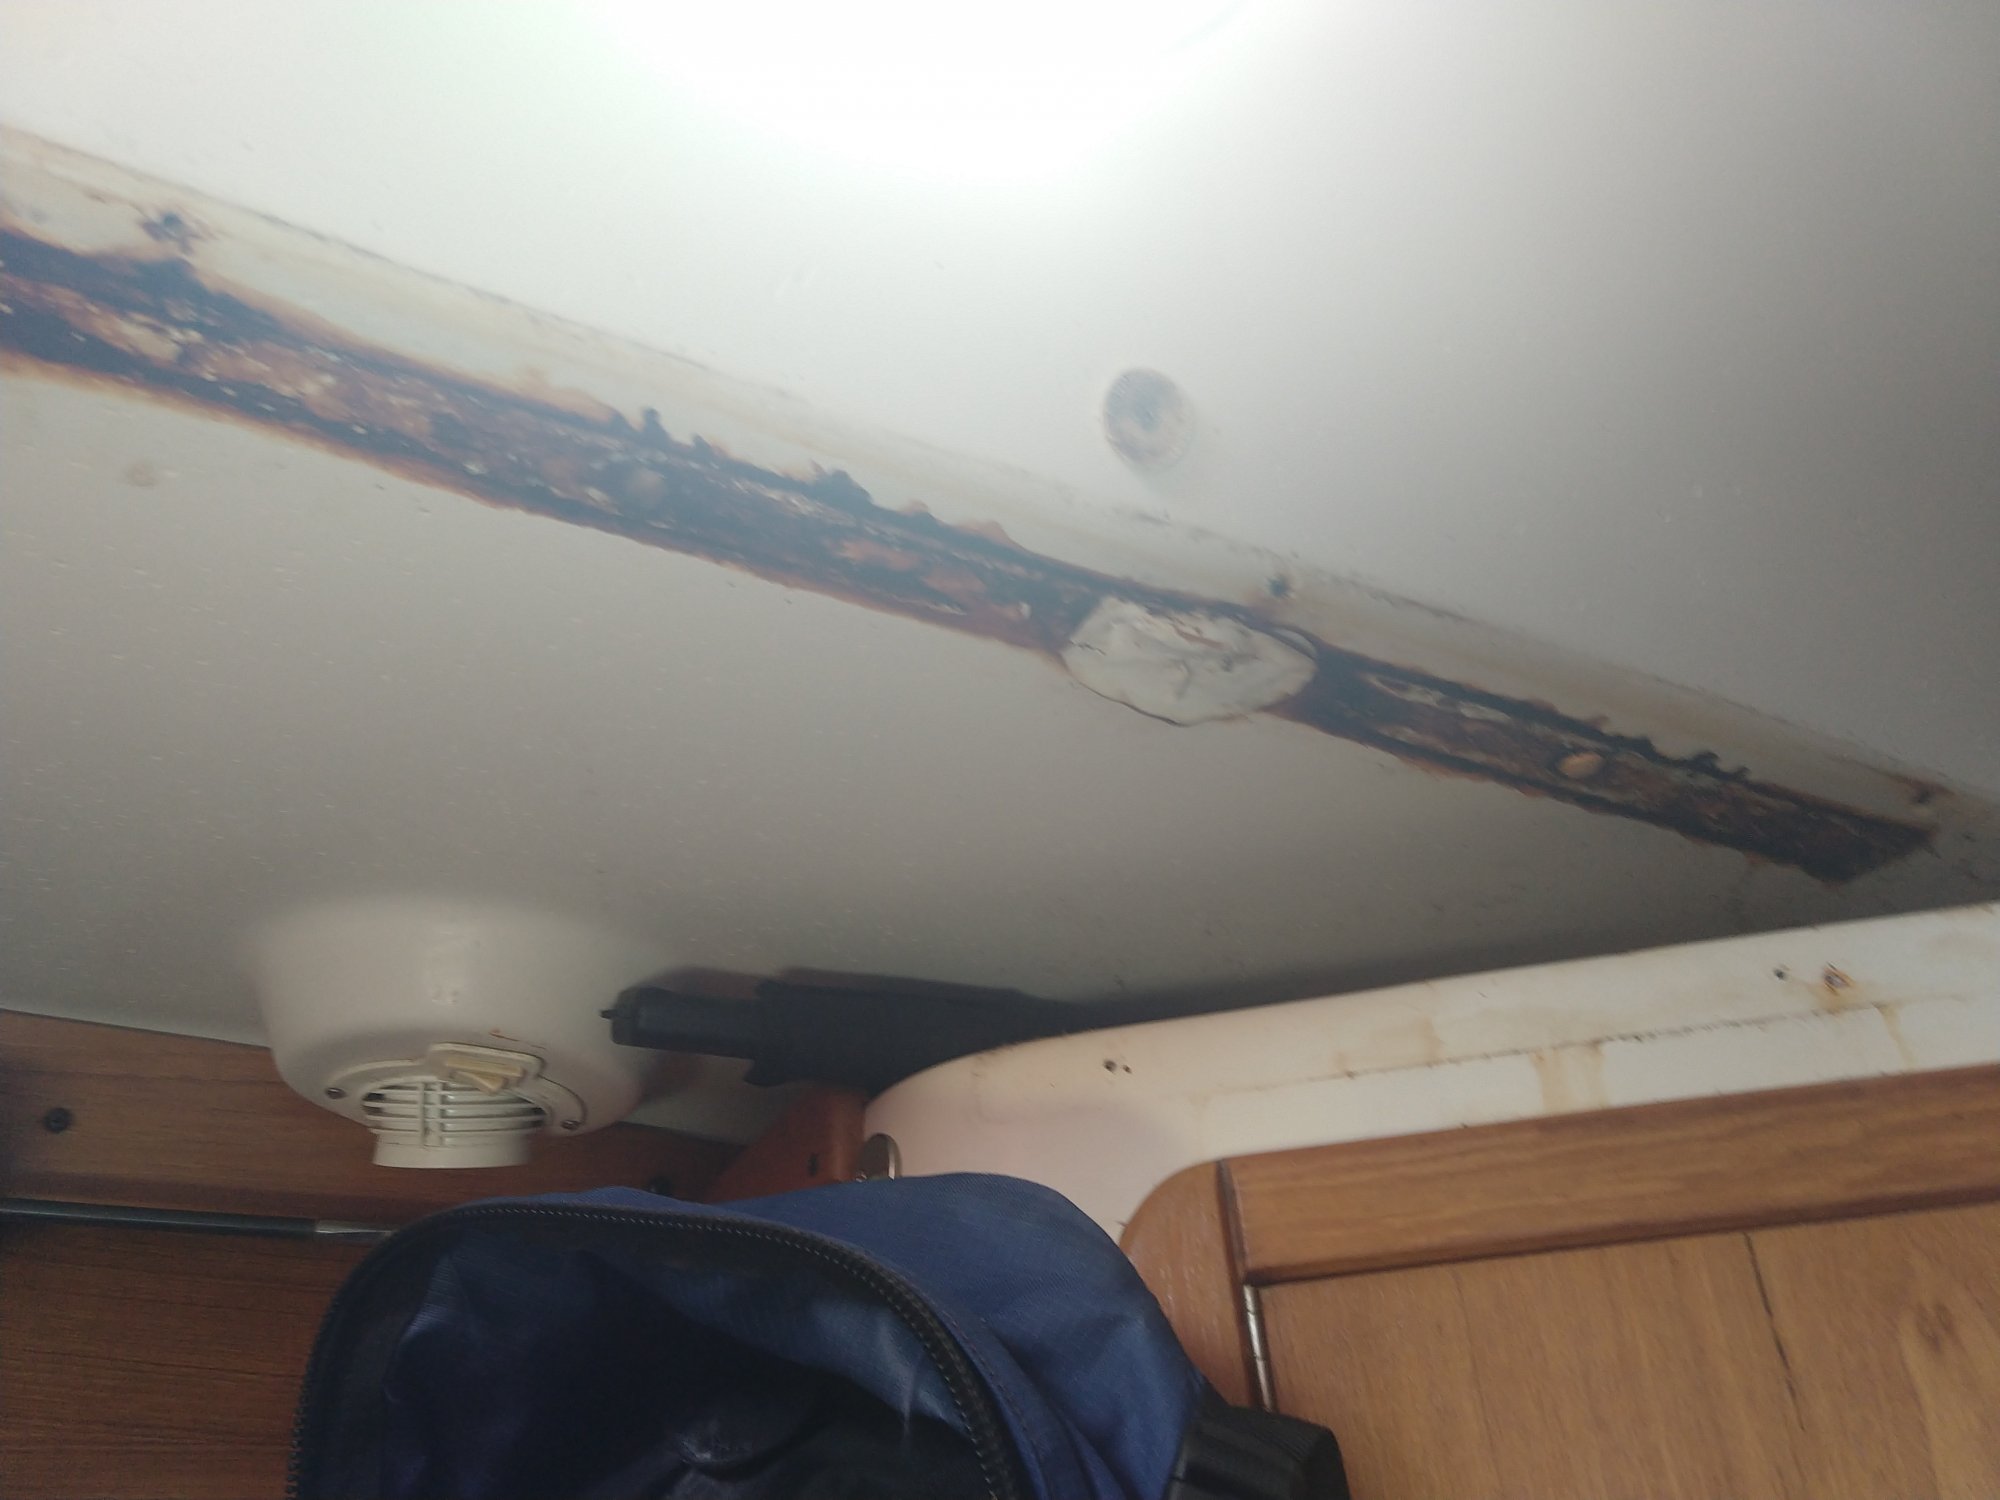
How is the deck condition? Guess it is good that you got them out now.
A little tough to tell in the pic but Catalina actually potted these holes. At least on my boat. I can't make any promises on other hulls. Saved a little work.
Today we are working on the lower forwards. These had the most indications of leaks.
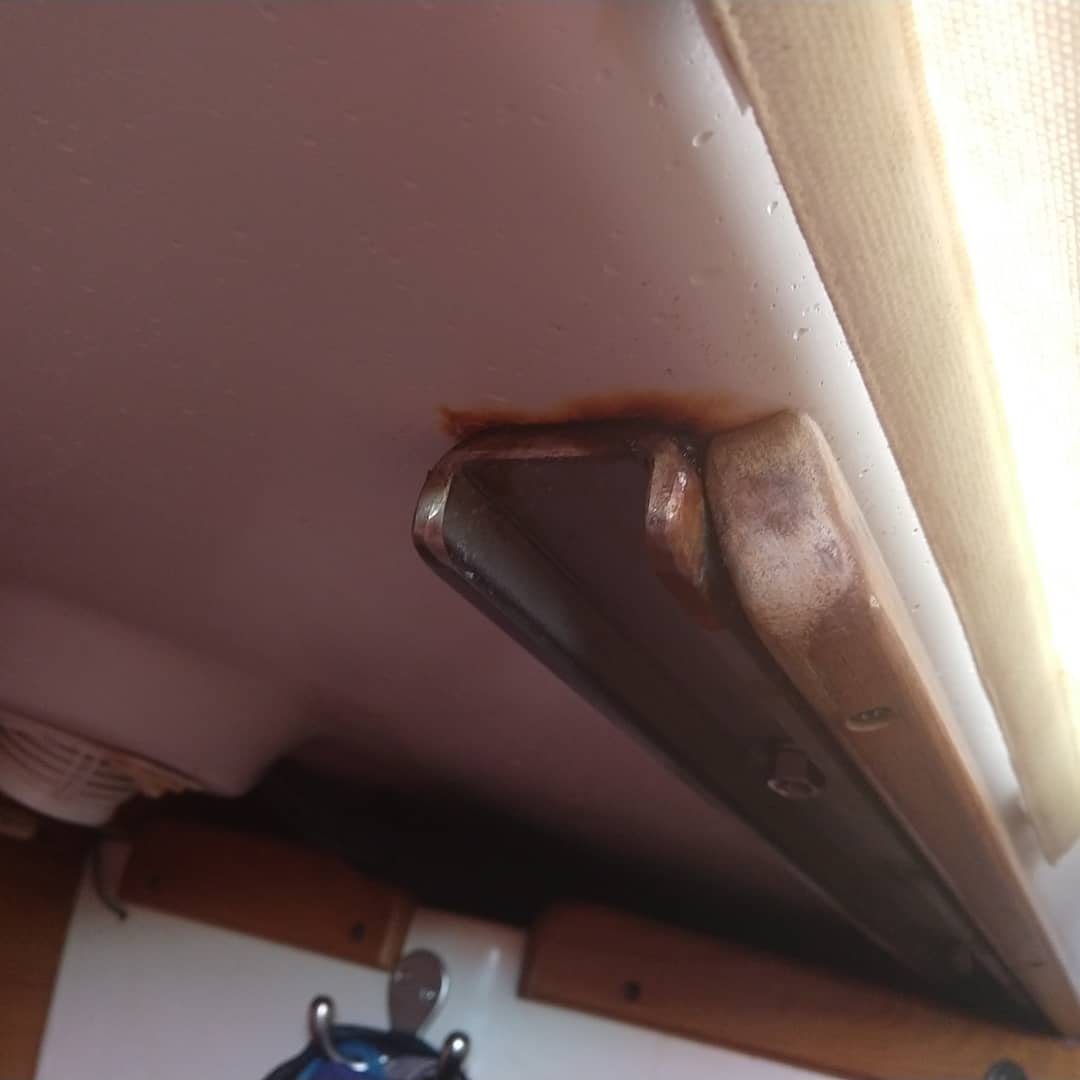
And sure enough we found some crevice corrosion.
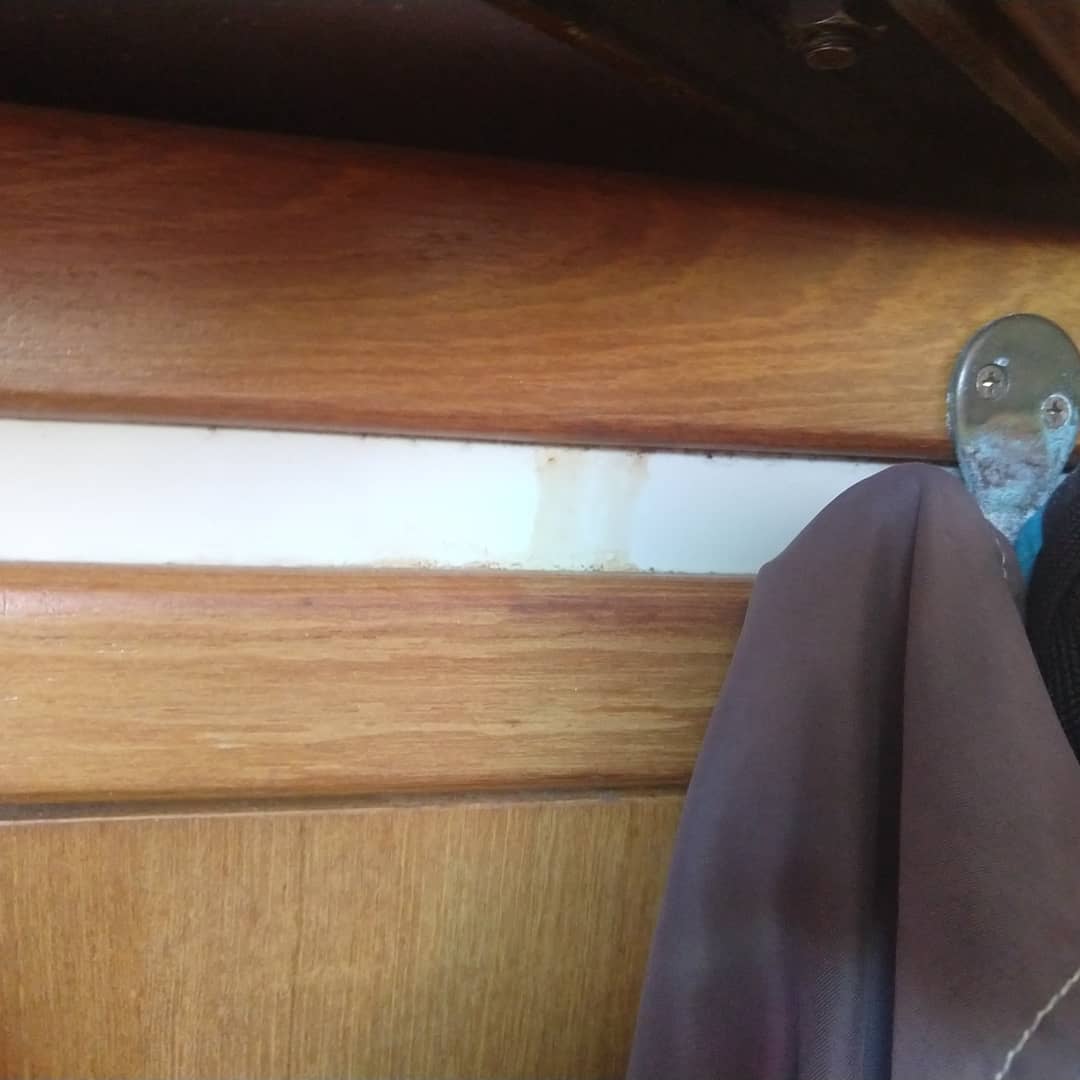
To remove the starboard forward chainplate you have to remove the teak trim above the hanging locker and the piece hiding the plate.
Back to cleaning up the hardware and bedding with butyl.
And sure enough we found some crevice corrosion.
To remove the starboard forward chainplate you have to remove the teak trim above the hanging locker and the piece hiding the plate.
Back to cleaning up the hardware and bedding with butyl.
We did the last set of chain plates yesterday. We did them with the mast up. On the lowers we were able to do them two at a time in pairs. But with the cap shrouds we had a fair amount of movement of the mast. So we used the main halyard and spin halyard to brace the side we were working.
For the most part these last two went smooth. We found some wood rot, but we knew it was there when we bought the boat. It was actually dry and more competent then I thought it would be.

I cleaned up the layers of old caulk/sealant. The best tool for this was a sharp chisel. I cleaned up the old sealant in the hole for the chainplate until I could see bare wood. I didn't see any rot or indications of water intrusion. I mixed up a small batch of thickened quick cure epoxy and coated the wood with a thin layer. Using a dremel I created a chamfer in the opening for the chain plate. I also used a counter sink bit to do the same for the screw holes.
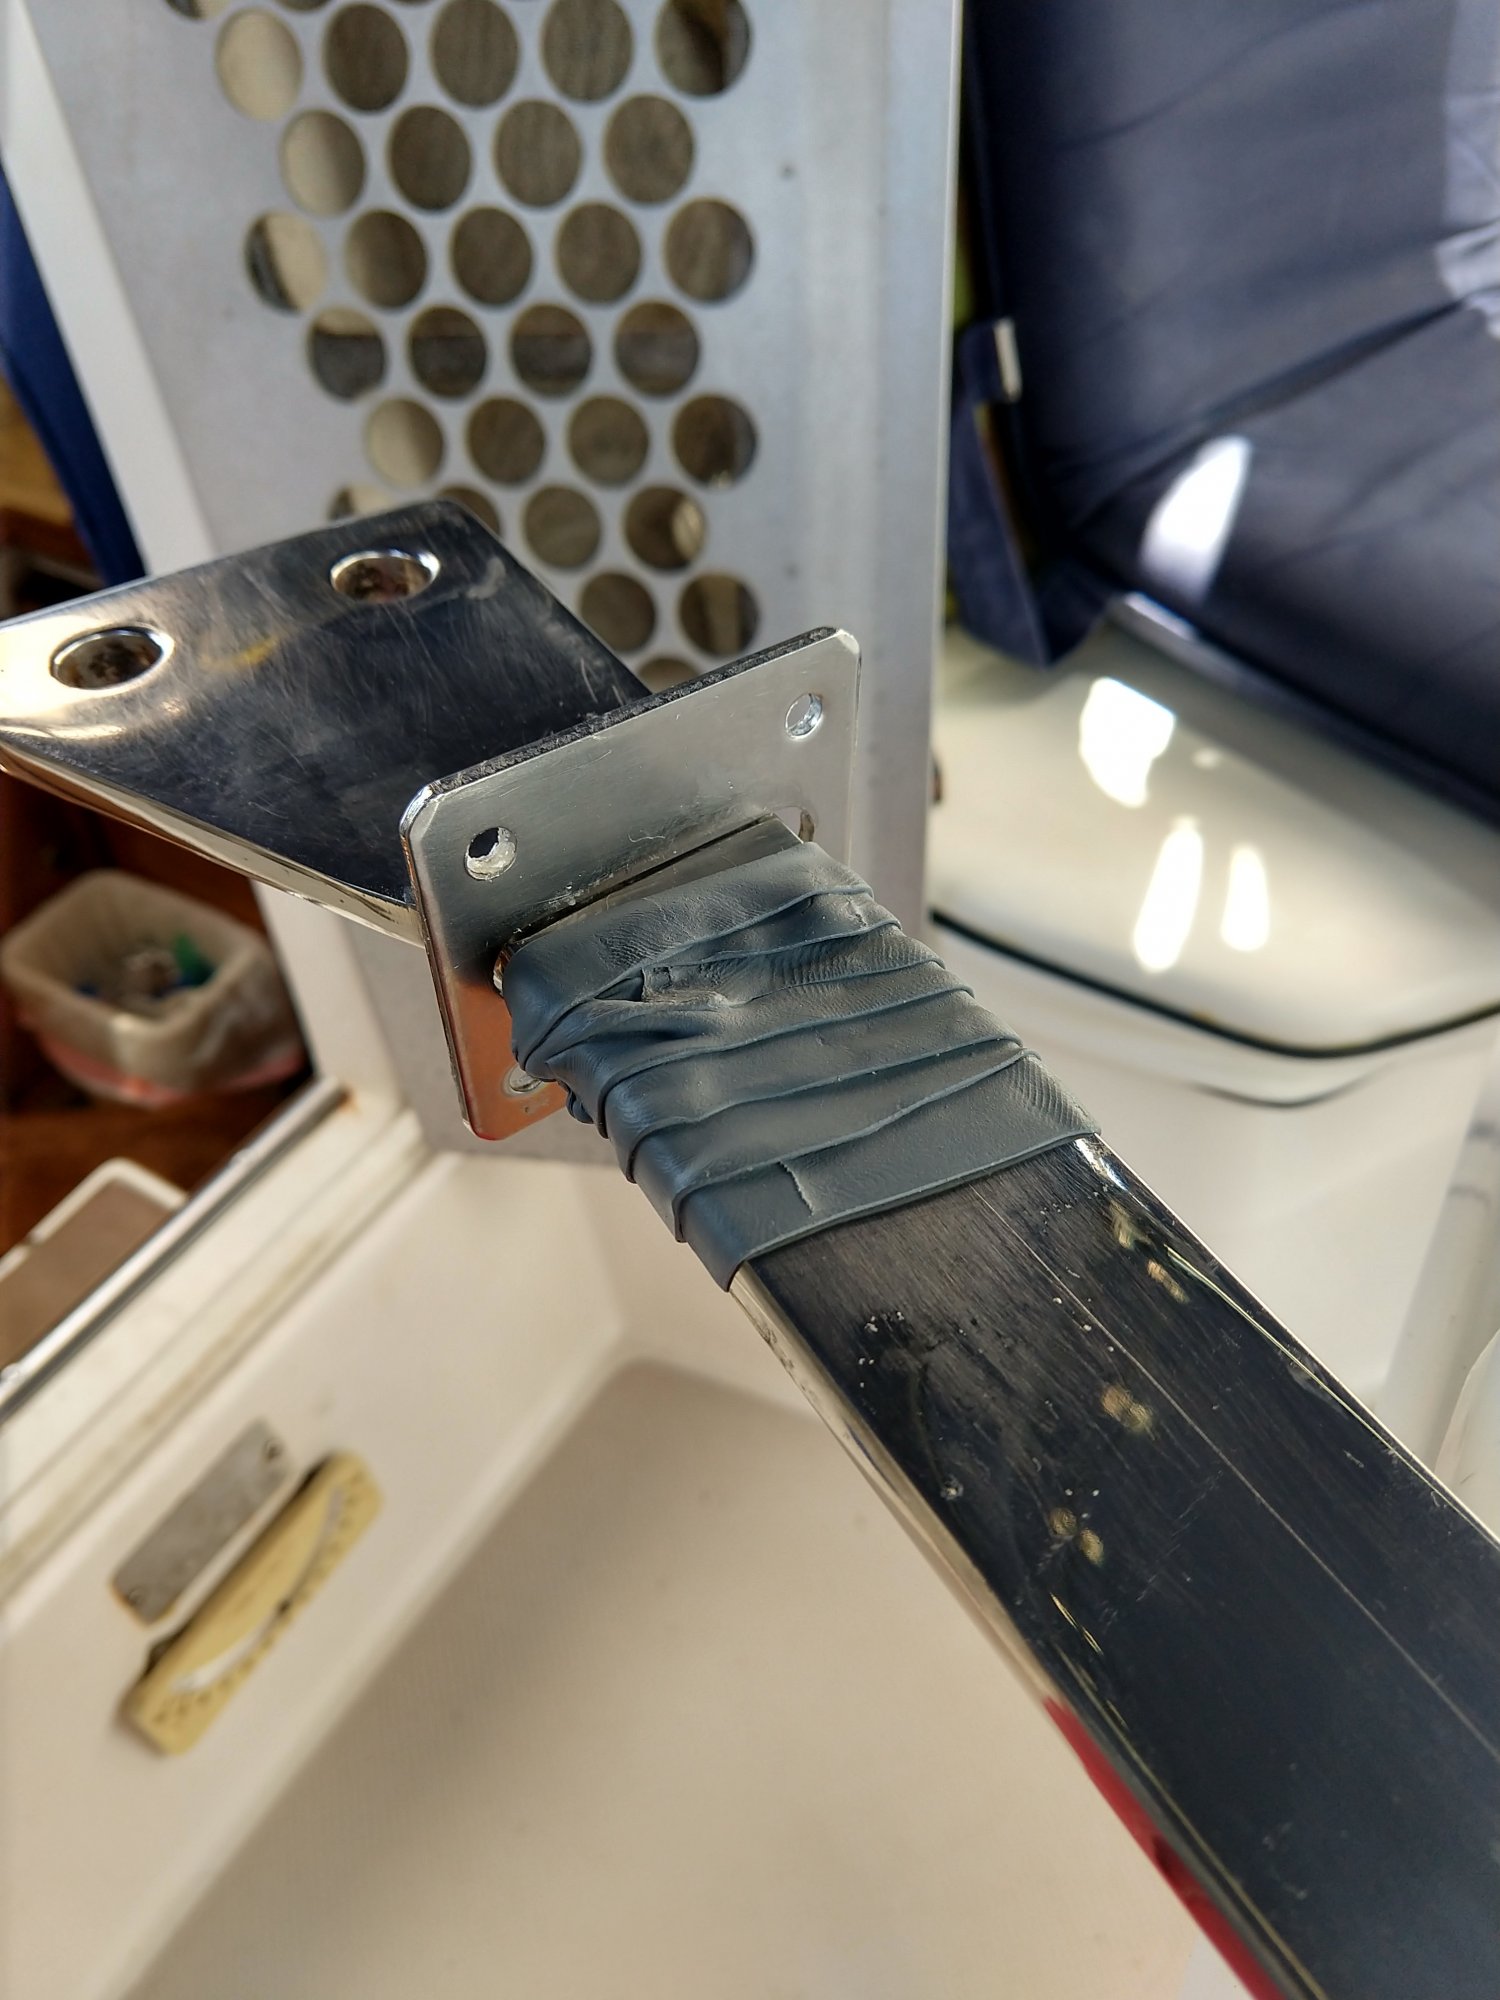
After cleaning and polishing the hardware, we bedded the plates with butyl tape. To do this we wrapped the part of the chainplate that passes through the hull with butyl.
This next part probably goes against Mainesail's advice. But instead of putting the butyl tape on the bottom of the cover plate, I put it on the deck. I have done this on a couple of other pieces that screw down as opposed to get through bolted, like the part of the stanchions on the toerail.
Then I inserted the chainplate and pushed it down until the bolt holes in the bulkhead lined up. I reinstalled those bolts.
Back on deck I lifted the cover plate and shoved more butyl tape around the top of the chainplate. I then put some butyl around the head of the screws.
Next I took a Qtip with mineral spirits and wiped in on the screws. I did this because it softens the butyl tape the screw contacts. Otherwise the butyl sticks to the screw and gets pulled down with the screw and you don't get butyl squishing out in those areas, so I don't think you get a good seal. With this method I use more butyl tape but I get a good squish out and a good, water tight seal.
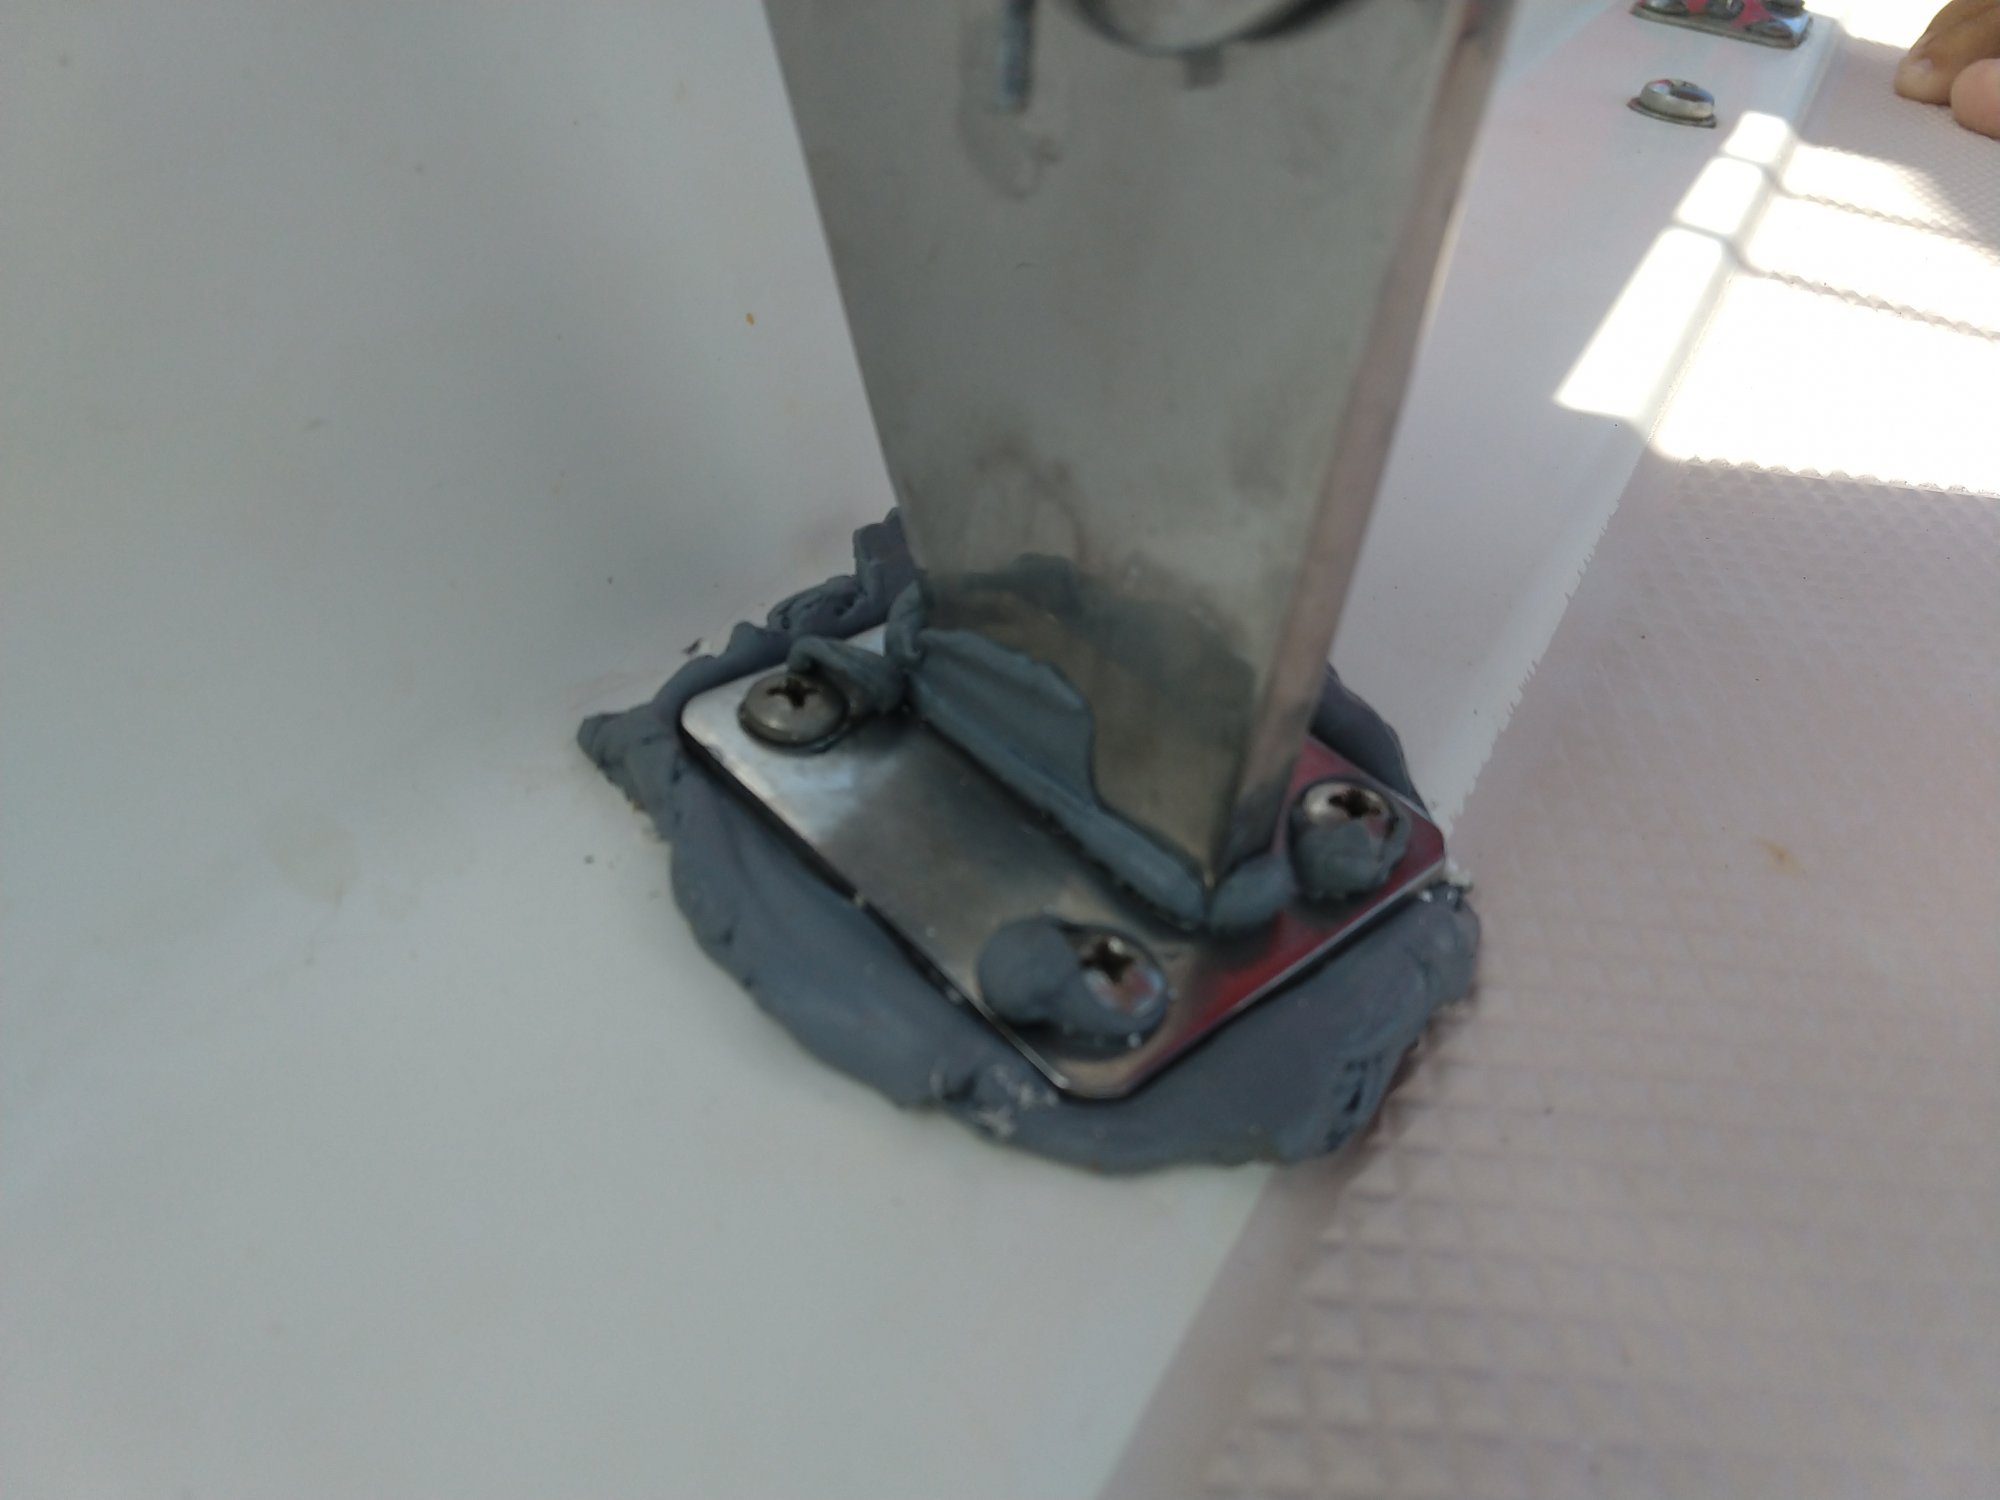
I might but a small bead of polysulfide sealant over the gap between the chainplate and the cover. This would mainly be because the butyl will pickup dirt.
If I had the chainplates that have the welded plates, I would do the plates following the normal Mainesail method and then just add some wrapped butyl doing down the chainplate with a second layer where the two areas meet like the cone on bolts.
Good luck and fair winds,
Jesse
For the most part these last two went smooth. We found some wood rot, but we knew it was there when we bought the boat. It was actually dry and more competent then I thought it would be.
I cleaned up the layers of old caulk/sealant. The best tool for this was a sharp chisel. I cleaned up the old sealant in the hole for the chainplate until I could see bare wood. I didn't see any rot or indications of water intrusion. I mixed up a small batch of thickened quick cure epoxy and coated the wood with a thin layer. Using a dremel I created a chamfer in the opening for the chain plate. I also used a counter sink bit to do the same for the screw holes.
After cleaning and polishing the hardware, we bedded the plates with butyl tape. To do this we wrapped the part of the chainplate that passes through the hull with butyl.
This next part probably goes against Mainesail's advice. But instead of putting the butyl tape on the bottom of the cover plate, I put it on the deck. I have done this on a couple of other pieces that screw down as opposed to get through bolted, like the part of the stanchions on the toerail.
Then I inserted the chainplate and pushed it down until the bolt holes in the bulkhead lined up. I reinstalled those bolts.
Back on deck I lifted the cover plate and shoved more butyl tape around the top of the chainplate. I then put some butyl around the head of the screws.
Next I took a Qtip with mineral spirits and wiped in on the screws. I did this because it softens the butyl tape the screw contacts. Otherwise the butyl sticks to the screw and gets pulled down with the screw and you don't get butyl squishing out in those areas, so I don't think you get a good seal. With this method I use more butyl tape but I get a good squish out and a good, water tight seal.
I might but a small bead of polysulfide sealant over the gap between the chainplate and the cover. This would mainly be because the butyl will pickup dirt.
If I had the chainplates that have the welded plates, I would do the plates following the normal Mainesail method and then just add some wrapped butyl doing down the chainplate with a second layer where the two areas meet like the cone on bolts.
Good luck and fair winds,
Jesse