Cockpit coaming to cabin joint repair.

TomY

Alden Forum Moderator
Jun 22, 2004
2,758
Alden 38' Challenger yawl Rockport Harbor
I've been putting this off. Now that I plan to build a new joint at the cabin to deck, I have to address this....

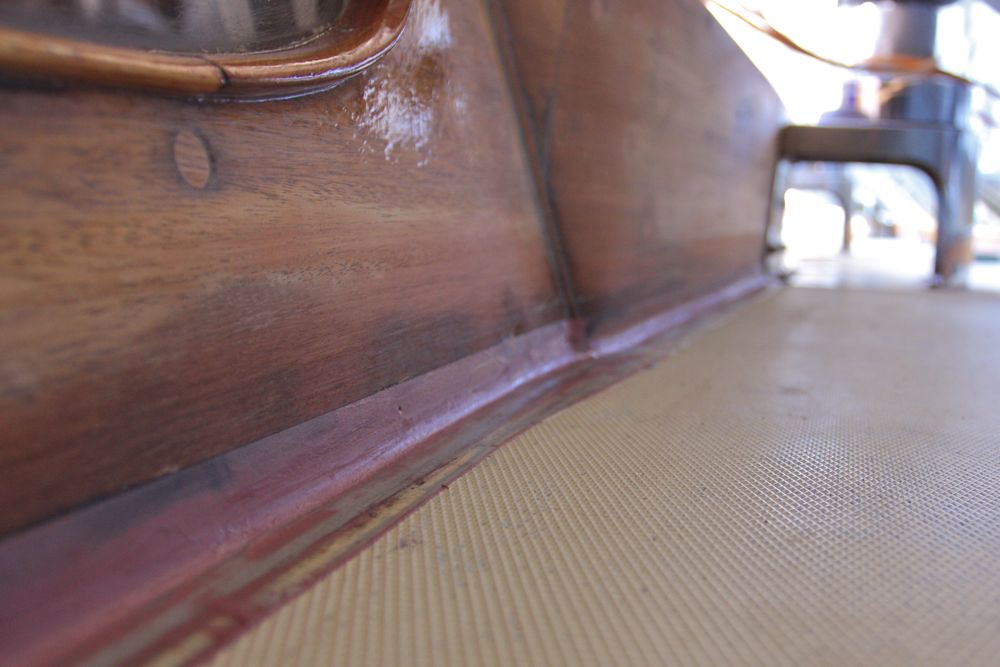
The joint between the coaming and cabin has opened over the years and people (myself and past owners) have been filling with various junk over the years. This is such a problem area of the Challenger for water leaks. I started pulling plugs and removing screws. The old bronze screws have about a 50/50 chance of removal on my boat. Those that don't come out, I cut through with a fine sawzall blade in a hand holder. They took some work, but finally I got the parts out.

As you may know, the upturned flange of the deck runs all the way to the corner(inside of the coaming). Then the deck flange turns down, and is bolted to the coaming. Any water that reaches that joint, goes into the cabin.

The top cap is screwed into the coamings, the filler block, and the through the cabin side.


Here's my plan; Clean up the blocks in my shop. Drill and scew the blocks and coamings back together with epoxy. Once dry, sand and shape the forward edge of the coaming-filler block while it is away from the cabin(about 1/2", that will make it easier).

Next, Clamp to the companionway(bar clamp) to pull coaming ends into the cabin(how tight? remains to be seen) and drill and screw from inside cabin. My hope is with thickened epoxy, proper screws and pilot holes to pull, I'll get a tight fit.
 

Attachments

TomY

Alden Forum Moderator
Jun 22, 2004
2,758
Alden 38' Challenger yawl Rockport Harbor
With sporatic visits, the coamings are coming along. A lot of steps if not a lot of work. I had to get creative with clamps.

Here's one ready to fasten to the cabin side. The blocks are fastened and epoxied to the coaming first. This allowed me to reshape the end grain a bit.Too bad poor past attempts made to fix the problem resulted in more holes to plug. But plugs are kind of like battle scars. Acceptable on an old well used boat.

Then thickened epoxy was worked onto both surfaces, a bar clamp draws the end in. I couldn't get it to completely close while dry fitting. So I cut filler pieces rather than fight for the last 1/8". Reused the old fastening holes from inside (about 6 # 12 screws on each) plus two from exterior into cabin corner. Its remarkable how strong this area is designed. It shows a lot of experience in what sort of forces it may encounter. There was a good squeeze out of epoxy all around. Left to do; shape the 1/8" filler ends and sand. Cut new tops today(the old ones didn't survive), install. These tops as well as fastened and glued to the coamings, are also fastened through the cabin. Another strengthening joint.
 

Attachments

TomY

Alden Forum Moderator
Jun 22, 2004
2,758
Alden 38' Challenger yawl Rockport Harbor
Shaping and cleaning up the coamings ends was next. A cabinet scraper was a handy tool here. Then I fitted oversized tops and fastened with thickened epoxy and screws. This afternoon, I took the plugs down, shaped the cap into the coaming and rough sanded. As I'm wooding the coamings this spring(I think I got 10 years out of the last wooding and varnish build), I'll wait to finish sand when I do those(cover off).

Varnish is forgiving for this. The cabin was wooded last spring so I'll be feathering in the varnish around the coamings.

The filler piece and thickened epoxy look fine to me. This whole area is covered by the dodger anyway. But the whole thing is now water tight(I believe) After I redo the deck/cabin joint (other thread that started this sidebar....), the only area for water ingress is through the bridgedeck, which I think I have water tight. We shall see,....
 

Attachments

TomY

Alden Forum Moderator
Jun 22, 2004
2,758
Alden 38' Challenger yawl Rockport Harbor
Waiting for weather,.... As my cabin/deck joint awaits warm enough weather for curing epoxy, I finished stripping the coamings. Thinking I did this not too long ago, it was in fact 8 years ago to the day. A much nicer April 11, 2004 spring day in Rockport Harbor.
Here's the same area of the coaming 8 years later. Typical failure at one spot along the bottom edge and a winch island bolt. I would have limped this along for another year or two had I not repaired the coaming ends(and had to strip the varnish from them).
I use a heat gun and stiff scraper to gently lift off the 20 coats +- of varnish. Then a few(careful!) light passes with a cabinet scraper and carbide scrapers(if needed to remove the remaining varnish).

I don't like to sand(it removes precious wood) so a few quick passes with a large block with 80# paper makes the flat surface flatter still. That's it until I varnish, then just a few passes with a block and 120# paper and a tack rag. I don't try to remove imperfections and do the least amount of sanding, I try to leave the surface flatter than I found it.


Some observations; my coamings are a full 3/4" thick today. I suspect they were closer to 7/8" 50 years ago(anyone else checked coaming thickness?). Cabin back also wooded in 2004 looks good for at least another 2 years, maybe more.(mostly protected by it's angle and dodger.

Anybody else waiting for weather,...?
 
May 21, 2008
30
Alden Challenger Portland
Hi Tom,Weathers been perfect in CT since I arrived back from the UK.I ground off the rust from the inside of my tank tops and epoxy coated them which should keep the oxygen and further rusting away for several years and I did it all outside in warm sunshine and low humidity but nobody answered my query about fitting a new fuel tank level gauge so I repaired the old one myself.
I will be moving into the cockpit area myself soon and I still have a lot to do to finish it but I hope to get into the water during the summer again and have both masts up this year and maybe get a bit of sailing in also whilst carrying on with the work whilst I live aboard and move around.I would also like to get a spray hood similar to yours made this year also but I may go to tiller steering after the time I have spent trying to get my wheel fittings in the right place having no patterns or drawings of that area has made life very difficult and time consuming.
 

TomY

Alden Forum Moderator
Jun 22, 2004
2,758
Alden 38' Challenger yawl Rockport Harbor
Hi Philip. Sorry I have no experience with the gauge either I'm afraid. It sounds like your project is moving along nicely(a big project!)

Yesterdays weather had me glass the joint, finally. It was tedious work and at first, I wondered what I'd gotten myself into! How it went;

Taping off first, I settled on 3/4" up the cabin and about the same on the deck margins. A block of 3/4" wood made taping much easier. I rode the block along the deck and simply set the tape as it's bottom edge rested on the block. I used 1 1/2" tape.

I brushed on straight West epoxy to get a good soaking into the cabin and deck. Anywhere I had a deeper recess(gap between cabin and deck), I worked in some thickened West(two separate containers)

After a bit, I began to get handier but it took about 4 hours to go around the cabin and cockpit coamings.

These photos show simply the first stage. tape applied and wetted out. This shows the 1/2" high saw kerf and the tape 3/4" up which I envision as the finish deck paint line.


Here's the cabin/coaming area. I let the gain in a bit farther here to soften the curve. The 1" tape appeared to fit well.


The forward cabin corners; The 1" fiberglass tape just made the turn and fit nicely to the 1/2" high gain cut into the corner post and deck recess that was scraped and sanded.


A problem area; The finish 3/4" fillet will hide 95% of screw holes and small rot damaged areas.


And so it went, all the way around....


It was a messy day. I was glad I had a box of 100 rubber gloves. The best way to place the tape was with finger tips. Many pair of gloves were used. Many mixing tubs were used. But I'm pleased so far.

In the afternoon, I went over the joint that was still tacky, with West Six/Ten pre thickened epoxy in their mixing caulking tubes. While I had hoped for a better finish with that step, truth is the area was too rough and I ended up with a foundation fillet that will need sanding and shaping after several days cure time(I was advised to expect this and work to a final finish "fillet").

With that done, the final step was to pull the tape before the epoxy cured and made that task a real chore.

I'll post the finish fillet in a few days. Spending the time along this joint has been a study. First, after 50 years, 99% of the damage to the cabin on my boat is inside of the 1" wooden trim piece. Above that notorious 1", the mahogany cabin is like new! These trim pieces bedded in sealant work. But as the sealant fails beneath, water gets inside and can cause damage.

If this project works out, it should save the cabin for years to come. I'm also anxious to see if there are any leaks in the area of the bridgedeck/cabin/coaming joint. I've not been able to totally eliminate an occasional drip there. I still have the original teak bridgedeck.
 

TomY

Alden Forum Moderator
Jun 22, 2004
2,758
Alden 38' Challenger yawl Rockport Harbor
Thank god for # 60 grit.

I'm wrapping this project up! West Six Ten is hard to sand because it's flexible(West tells you this). The Six Ten was not as smooth as I would have liked.
West Six Ten fill forward by Tom Young 3, on Flickr The sanding block saved me again. I cut three new pieces to the profiles I needed as well as matching squeegee shapes for the fairing to come. This shaped the Six Ten to a uniform if not smooth, shape.
Fairing tools by Tom Young 3, on Flickr
Fairng forward cabin by Tom Young 3, on Flickr

Again, the 3/4" block was used to set the masking tape for filling with West 407. This time, I included the whole deck margin along the cabin and coaming in the filling and fairing. It took two applications(with more sanding between), but the fillet is finished and ready. I'll go on to sealing and building back the brightwork. I plan to paint the deck in a few weeks(simple one part enamel) at which time I'll paint the fillet and be done. Time will tell how if this is a good solution.
407 cabin:coaming by Tom Young 3, on Flickr
407 D port by Tom Young 3, on Flickr
407 Forward cabin deck by Tom Young 3, on Flickr Nearly all the damage is below the 3/4" line that will soon be painted.
407 Corner post close up by Tom Young 3, on Flickr
 

TomY

Alden Forum Moderator
Jun 22, 2004
2,758
Alden 38' Challenger yawl Rockport Harbor
So far so good. Decks are ready to paint.

Waiting for rain to stop.... The fillet sanded nicely with 80 grit for enough tooth for paint adhesion. The cabin area and coamings that were partially or completely wooded, have a good build of minimum 7 coats of varnish, most more.

The two downsides so far may be the height of the fillet; 3/4" I think it would have been better kept at 1/2". But then more problems that were behind the 1" trim piece would have been visible. Number 2, the area along the deck is not a good blend of the wood above. Partly due to fresh mahogany newly planed and sanded which is quite dark in contrast, and the dark areas left from water intrusion that plagued the old trim piece.
My hope is sun will blend(bleach) the fresh wood over time and likely lighten even the water damage.

On the bright side, I may for the first time since owning the boat, not have a single drop of water after a rain storm! This without the dodger that protected the problem area of my boat; coaming ends, cabin aft corners, bridgedeck. Not a drop....

An unexpected addition, the decks are wider. It's only an inch but it was one of the first things I noticed.

I'm doing a simple deck paint job, just sanding the margins around the non skid enough to get good adhesion of a one part enamel. On the non skid, I used a paint remover to take any loose paint out. That worked pretty well. Truth is, the correct thing would be to strip the deck completely and sand it all flat and do a new non skid of two part paint. But that's not happening this year, maybe not on my watch ever. We'll see how the one part holds up. The existing decks non skid is no too bad.

I'll include some better photos once it's complete. Some dry weather is on the way so the decks will get a couple coats of a linen color, the cabin top(due for coating) a light gray.
 

TomY

Alden Forum Moderator
Jun 22, 2004
2,758
Alden 38' Challenger yawl Rockport Harbor
Done! Cabin deck joint, decks.

A few dry days allowed me to paint the decks with simple one part paint. The fillet painted up nicely and now blends in. From most angles, it disappears and simply looks like deck transitions into cabin. In time I hope the darker newly exposed mahogany will blend in and the darker water damaged areas will lighten a bit?
The old decks look better than I expected after two coats. However,...I think they're a little slick with the new coating so, I'll tape off the non skid areas (sigh...) only, and will put on one more coat with a an anti skid mixture in. THEN, I will be done(it's never done, this boat, it's simply launched each spring to take a sailing break)


TomY

Alden Forum Moderator
Jun 22, 2004
2,758
Alden 38' Challenger yawl Rockport Harbor
I never updated this thread. There were some concerns on the Woodenboat Forum that this stiff a joint might have problems connecting wood and fiberglass. So I've kept an eye on it but we used the boat hard this year and I'm happy to report, this is one of the best repairs/upgrades I've done on Christmas. Rockport Marine was very helpful and even though I did the work myself, friends there thought I'd have no problems. They were right(they have so many years experience with this somewhat controversial method).

Dry as a bone all around. I think water, even small amounts that didn't come into the cabin, were always moving through the joint. I only wish I'd done it as soon as I owned the boat, I could have saved the cabin any water staining. Maybe next time I wood the cabin, I'll make some improvements in the darkish areas that the epoxy didn't cover. With heavy water on the decks, deluge rain storms, no water below, none, not even a drop in the galley, finally...