I posted this to another forum, and a friend of mine, Maine Sail, asked me to post it to this forum as well, so here it is.
Please note: This thread is about going to visit a boat to see if it is worth looking at further. It is not designed to replace a proper survey and sea trial. This type of trip is what you should do to see if it is worth making an offer on a boat and spending the money on a survey and sea trial. IMHO, you really need to have a survey done by a competent surveyor. YMMV. Also, this post is actually in two parts, and the second part is the first reply in the thread... please read both parts
When you're going to look at a boat, as a possible future purchase, I would make some recommendations about what you should and shouldn't do. I would ask that anyone else chime in with recommendations they have as well. I'll edit this post to add the ones I think are most important.")
Basic Inspection Kit
First, put together a kit of tools for your boat visit. The kit should include the following:
Small Notebook—reporters notebooks or pocket-sized Moleskines are excellent choices for this.
Pencil—for making notes and sketches in notebook.
Small tape recorder—preferably with a lapel mic with windscreen, to record your visit to the boat, as it is often easier to make notes by speaking than writing when looking at a boat.
Digital camera—I prefer the small pocket sized Olympus Stylus SW series, as they are waterproof, shock proof and have a decent lens on them.
Tape Measure—Preferably a 25-30' tape
Small Flashlight—Preferably LED, like the Gerber Omnivore or Firecracker
Pocket Multitool—Get a good one, like the Leatherman Surge
Phenolic Resin Hammer (phenolic=plastic)—a small one will do.
Small Magnet—preferably one with a lanyard attachment.
Inspection Mirror—preferably one with a telescoping handle.
Small Volt-Ohm multimeter—preferably digital with a rubber casing.
Moisture Meter—see section below.
Additional Supplies: Clean White Rags, Awl, Waterless Hand Cleaner Wipes, Spray Cleaner Burgundy Scotch Brite Pad
The Trip
First Impressions
Now, when you get to the boat, take some photos of the boat as you approach it... Turn on the tape recorder and speak clearly about your first impressions of the boat. Make sure you get your first impressions down. The human brain is a weird thing and often the first impressions are the best ones... and there's usually a reason for them.
Systematically go through the boat from bow to stern, from top to bottom, recording what you find either on the tape recorder or as sketches and notes in the notebook, and document everything with photos using the digital camera if at all possible. If you have specific requirements, use the tape measure to take measurements.
Don't forget to note the make and model of the various equipment and parts aboard the boat. Some pieces of equipment, like specific models of engines and such have known weaknesses and specific problems to be aware of.
The magnet is to be used to check stainless steel hardware. If the magnet sticks, it ain't marine grade stainless. Austenitic stainless, which covers most marine grade stainless steel, is non-magnetic and includes 304 and 316 grades of stainless. The cheaper martensitic stainless is magnetic.
The flashlight and inspection mirror are used to look in nooks, crannies, deep unlit lockers, the bilge, engine compartment, etc. Looking in lockers and such can often tell you a lot about a boat's true condition, since many people will spruce up and clean the interior of a boat for sale, but will often forget to do the same for the less visible spaces. A good example of what you may find is traces of a visible waterline in the higher lockers may indicate that the boat was sunk at some point.
Tapping the deck with the phenolic hammer near stanchion bases may give you an indication if the deck has started to delaminate or has a wet core. Most boats have a cored deck and stanchions are often places where the water intrusion can start due to the loads that they're often subjected to. Caution: If you are not skilled with a phenolic hammer please DO NOT go pounding on an Awlgriped deck!! They are used for TAPPING not pounding.
Most manufacturers do not do a very good job of potting the fasteners or deck area around the stanchions or other deck hardware, especially on older boats, made when the water intrusion problems weren't well understood.
Look for cracks in the gelcoat—most spider cracks are normal and often due to the gelcoat being laid too thickly. Parallel cracks in the gelcoat, which often indicates stressing of the fiberglass there. Star-shaped cracks in the gelcoat are usually the result of an impact.
Look for flat spots in the hull or places where the hull doesn't follow a natural curve. These can often be indicators of previous damage or bad construction. Often, places where the hull isn't following a fair curve are due to bulkheads being improperly glassed to the hull and causing a hard spot—which can cause the laminate to hinge along the hard spot and results in the laminate fatiguing prematurely there.
Check mechanical systems to see if the parts that should move do, and that the parts that shouldn't move don't. If something sticks, like the tiller, and shouldn't—it is probably an indicator of something wrong or about to go wrong. Excessive play is often an indicator of wear and that something may need to be repaired or replaced soon. If a cabin door or cabinet door doesn't open or close smoothly, it may mean the hull and deck have changed shape and causing it to bind—this can often happen if a compression post has started to weaken.
The multimeter can be used to do some quick checks on the electrical system. If you don't know how to use one, take a class at a local vocational/technical school and learn—you need to know how to trouble shoot electrical problems using one if you're going to own a boat.
Go through the boat and open every locker if at all possible. Lift settee cushions. Look in the bilge. Photograph the rig. Get detailed photos of the chainplates, the rudder attachment points, the steering quadrant and other important pieces of equipment.
As for the pocket multitool... you'll figure out why I included it in the kit... they're just too damn useful not to have one around. I carry the Leatherman Surge with me almost 24/7, except when I know I'm going through airport or federal building security. The blades on it are just about long enough to qualify as a felony if carried in a federal facility.
Going Aloft
I generally won't go aloft on a boat that I'm a complete stranger to, unless the rig is vouched for by someone I know and trust.
 Also, I doubt most owners would let you go up the rig given the liability issues if the rig should fail and you get injured. Finally, many boats are on the hard when up for sale, and going aloft on the hard is a really, really bad idea IMHO.
That is why I recommend taking photos of the rig from the ground. The amount of detail you can pull off of a 8-10 MP image nowadays is astounding, even if the camera only has a fairly short focal length lens.
Moisture Meters*
If you are in the market for a 10k+ vessel do yourself a favor and invest in a moisture meter. It will pay for its self the first time you use it and rule out a boat!!
Surveys run $600+ clams, moisture meters are $169 clams. If you found a boat you really loved but the surveyor came out and found moisture your out $600 if you do your own "checking" you can rule out many boats safely without a survey and with each boat you rule out die to sever moisture the meter costs less and less until it's free! When you are done simply sell it here on Sailnet to another member or keep it which is what I'd suggest!
Please do NOT listen to the neigh Sayers like David Pascoe on this subject. He is a surveyor who DOES NOT want you to own a meter. He uses scare tactics and discuses how "difficult" it is to use one. That is complete BUNK! Using a meter, to a level where you can rule out a boat with severely wet decks, takes about a half hour to learn! More accurate and detailed use takes more time but that is not what you are after in this stage.
Trust me he and his cohorts WANT to survey three or four boats for you before you find one to buy. My buddy Eric surveyed five boats before finding one in salable condition. He spent over 2k in surveys. He could have ruled at least four of these boats out, if not all five, with about a half hours worth of reading and a $300 meter saving $1700.00....
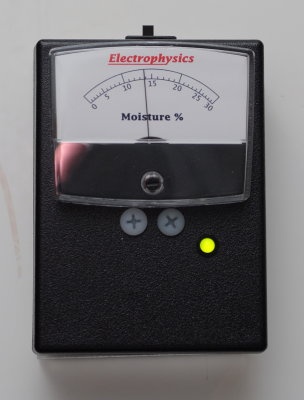
I use an Electrophysics CT33 moisture meter. This is basically the same meter as the $325.00 J.R. Overseas GRP33. The only difference I know of are the graphics on the analog display and the fact that it does not come standard with the $10.00 calibration block. As long as you don't mind ordering from a Canadian company you can save lots of money. The current price for the CT33 is $160.00 plus shipping from Canada. Oh and don't forget to order the calibration block @ $10.00..
So $160.00 - CT33 Moisture Meter
$10.00 - Calibration block
$9.00 - US Shipping
Total $179.00 Delivered
$160.00
Electrophysics CT33 Moisture Meter Ordering Informationn (LINK)
If you want fancier analog graphics $325.00:

As Maine Sail says: "When you DIY the tools are FREE!! There is NO excuse for anyone investing more than 10K in a new boat to NOT own a moisture meter.." I agree with him. Owning the right tools makes almost everything you do easier.
*FYI—Most of the Moisture Meter and Inspection Area sections were written by Maine Sail in response to my original post on sailnet, and hijacked by me with his permission. Any errors found in these two posts are probably mine... Use this information at your own risk... boat ownership is an expensive and addictive avocation.
Please note: This thread is about going to visit a boat to see if it is worth looking at further. It is not designed to replace a proper survey and sea trial. This type of trip is what you should do to see if it is worth making an offer on a boat and spending the money on a survey and sea trial. IMHO, you really need to have a survey done by a competent surveyor. YMMV. Also, this post is actually in two parts, and the second part is the first reply in the thread... please read both parts
When you're going to look at a boat, as a possible future purchase, I would make some recommendations about what you should and shouldn't do. I would ask that anyone else chime in with recommendations they have as well. I'll edit this post to add the ones I think are most important.
Basic Inspection Kit
First, put together a kit of tools for your boat visit. The kit should include the following:
Small Notebook—reporters notebooks or pocket-sized Moleskines are excellent choices for this.
Pencil—for making notes and sketches in notebook.
Small tape recorder—preferably with a lapel mic with windscreen, to record your visit to the boat, as it is often easier to make notes by speaking than writing when looking at a boat.
Digital camera—I prefer the small pocket sized Olympus Stylus SW series, as they are waterproof, shock proof and have a decent lens on them.
Tape Measure—Preferably a 25-30' tape
Small Flashlight—Preferably LED, like the Gerber Omnivore or Firecracker
Pocket Multitool—Get a good one, like the Leatherman Surge
Phenolic Resin Hammer (phenolic=plastic)—a small one will do.
Small Magnet—preferably one with a lanyard attachment.
Inspection Mirror—preferably one with a telescoping handle.
Small Volt-Ohm multimeter—preferably digital with a rubber casing.
Moisture Meter—see section below.
Additional Supplies: Clean White Rags, Awl, Waterless Hand Cleaner Wipes, Spray Cleaner Burgundy Scotch Brite Pad
The Trip
First Impressions
Now, when you get to the boat, take some photos of the boat as you approach it... Turn on the tape recorder and speak clearly about your first impressions of the boat. Make sure you get your first impressions down. The human brain is a weird thing and often the first impressions are the best ones... and there's usually a reason for them.
Systematically go through the boat from bow to stern, from top to bottom, recording what you find either on the tape recorder or as sketches and notes in the notebook, and document everything with photos using the digital camera if at all possible. If you have specific requirements, use the tape measure to take measurements.
Don't forget to note the make and model of the various equipment and parts aboard the boat. Some pieces of equipment, like specific models of engines and such have known weaknesses and specific problems to be aware of.
The magnet is to be used to check stainless steel hardware. If the magnet sticks, it ain't marine grade stainless. Austenitic stainless, which covers most marine grade stainless steel, is non-magnetic and includes 304 and 316 grades of stainless. The cheaper martensitic stainless is magnetic.
The flashlight and inspection mirror are used to look in nooks, crannies, deep unlit lockers, the bilge, engine compartment, etc. Looking in lockers and such can often tell you a lot about a boat's true condition, since many people will spruce up and clean the interior of a boat for sale, but will often forget to do the same for the less visible spaces. A good example of what you may find is traces of a visible waterline in the higher lockers may indicate that the boat was sunk at some point.
Tapping the deck with the phenolic hammer near stanchion bases may give you an indication if the deck has started to delaminate or has a wet core. Most boats have a cored deck and stanchions are often places where the water intrusion can start due to the loads that they're often subjected to. Caution: If you are not skilled with a phenolic hammer please DO NOT go pounding on an Awlgriped deck!! They are used for TAPPING not pounding.
Most manufacturers do not do a very good job of potting the fasteners or deck area around the stanchions or other deck hardware, especially on older boats, made when the water intrusion problems weren't well understood.
Look for cracks in the gelcoat—most spider cracks are normal and often due to the gelcoat being laid too thickly. Parallel cracks in the gelcoat, which often indicates stressing of the fiberglass there. Star-shaped cracks in the gelcoat are usually the result of an impact.
Look for flat spots in the hull or places where the hull doesn't follow a natural curve. These can often be indicators of previous damage or bad construction. Often, places where the hull isn't following a fair curve are due to bulkheads being improperly glassed to the hull and causing a hard spot—which can cause the laminate to hinge along the hard spot and results in the laminate fatiguing prematurely there.
Check mechanical systems to see if the parts that should move do, and that the parts that shouldn't move don't.
If something sticks, like the tiller, and shouldn't—it is probably an indicator of something wrong or about to go wrong. Excessive play is often an indicator of wear and that something may need to be repaired or replaced soon. If a cabin door or cabinet door doesn't open or close smoothly, it may mean the hull and deck have changed shape and causing it to bind—this can often happen if a compression post has started to weaken. The multimeter can be used to do some quick checks on the electrical system. If you don't know how to use one, take a class at a local vocational/technical school and learn—you need to know how to trouble shoot electrical problems using one if you're going to own a boat.
Go through the boat and open every locker if at all possible. Lift settee cushions. Look in the bilge. Photograph the rig. Get detailed photos of the chainplates, the rudder attachment points, the steering quadrant and other important pieces of equipment.
As for the pocket multitool... you'll figure out why I included it in the kit... they're just too damn useful not to have one around. I carry the Leatherman Surge with me almost 24/7, except when I know I'm going through airport or federal building security. The blades on it are just about long enough to qualify as a felony if carried in a federal facility.
Going Aloft
I generally won't go aloft on a boat that I'm a complete stranger to, unless the rig is vouched for by someone I know and trust.
That is why I recommend taking photos of the rig from the ground. The amount of detail you can pull off of a 8-10 MP image nowadays is astounding, even if the camera only has a fairly short focal length lens.
Moisture Meters*
If you are in the market for a 10k+ vessel do yourself a favor and invest in a moisture meter. It will pay for its self the first time you use it and rule out a boat!!
Surveys run $600+ clams, moisture meters are $169 clams. If you found a boat you really loved but the surveyor came out and found moisture your out $600 if you do your own "checking" you can rule out many boats safely without a survey and with each boat you rule out die to sever moisture the meter costs less and less until it's free! When you are done simply sell it here on Sailnet to another member or keep it which is what I'd suggest!
Please do NOT listen to the neigh Sayers like David Pascoe on this subject. He is a surveyor who DOES NOT want you to own a meter. He uses scare tactics and discuses how "difficult" it is to use one. That is complete BUNK! Using a meter, to a level where you can rule out a boat with severely wet decks, takes about a half hour to learn! More accurate and detailed use takes more time but that is not what you are after in this stage.
Trust me he and his cohorts WANT to survey three or four boats for you before you find one to buy. My buddy Eric surveyed five boats before finding one in salable condition. He spent over 2k in surveys. He could have ruled at least four of these boats out, if not all five, with about a half hours worth of reading and a $300 meter saving $1700.00....
I use an Electrophysics CT33 moisture meter. This is basically the same meter as the $325.00 J.R. Overseas GRP33. The only difference I know of are the graphics on the analog display and the fact that it does not come standard with the $10.00 calibration block. As long as you don't mind ordering from a Canadian company you can save lots of money. The current price for the CT33 is $160.00 plus shipping from Canada. Oh and don't forget to order the calibration block @ $10.00..
So $160.00 - CT33 Moisture Meter
$10.00 - Calibration block
$9.00 - US Shipping
Total $179.00 Delivered
$160.00
Electrophysics CT33 Moisture Meter Ordering Informationn (LINK)
If you want fancier analog graphics $325.00:
As Maine Sail says: "When you DIY the tools are FREE!! There is NO excuse for anyone investing more than 10K in a new boat to NOT own a moisture meter.." I agree with him. Owning the right tools makes almost everything you do easier.
*FYI—Most of the Moisture Meter and Inspection Area sections were written by Maine Sail in response to my original post on sailnet, and hijacked by me with his permission. Any errors found in these two posts are probably mine... Use this information at your own risk... boat ownership is an expensive and addictive avocation.
Last edited: