
The Dutchman System that is standard equipment on C310s with traditional mainsails is a decent setup for sail flaking. But it still requires someone to be at the mast to flake the sail properly or it will sit too high for the sail cover. It can also be tough to adjust properly so it doesn’t interfere with the sail shape but also holds the sail on the top of the boom.
For cruising, a mainsail pack is the preferred solution for mainsail dropping and covering. However, we have a footed mainsail. Most of the packs join under a loose footed mainsail with snaps. We like a footed mainsail for cruising and didn’t want to loose that as an option. In one discussion on Sailboat Owners’ Forum, someone posted this photo of a mainsail pack that doesn’t go under a loose footed mainsail.

I scoured the internet but couldn’t find anyone making a system similar to the photo. I talked to several canvas shops and none had ever make a pack in this manner. So this was going to require some or all DIY.
After talking to several friends we found Lee Sail Covers. Its a small company in Ohio that does various canvas work including making mainsail packs similar to the Sailrite system. They use WeatherMax80 fabric for their packs and it was a reasonable $440 for the completed pack. However, she had never heard of a system like we were doing. So we did the measurements (note: give yourself an extra 6-12 inches at the mast to allow for the height of the headboard on the sail) and had her make a pack that was left unfinished with no snaps on the bottom. We went with the 4 line attachment option.
From there we went to the Sailrite website and ordered some luff tape and aluminum awing track that fits 5/16-inch luff tape. When the pack arrived we sewed the tape onto the bottom of each side. This was all the easy part of of the project.
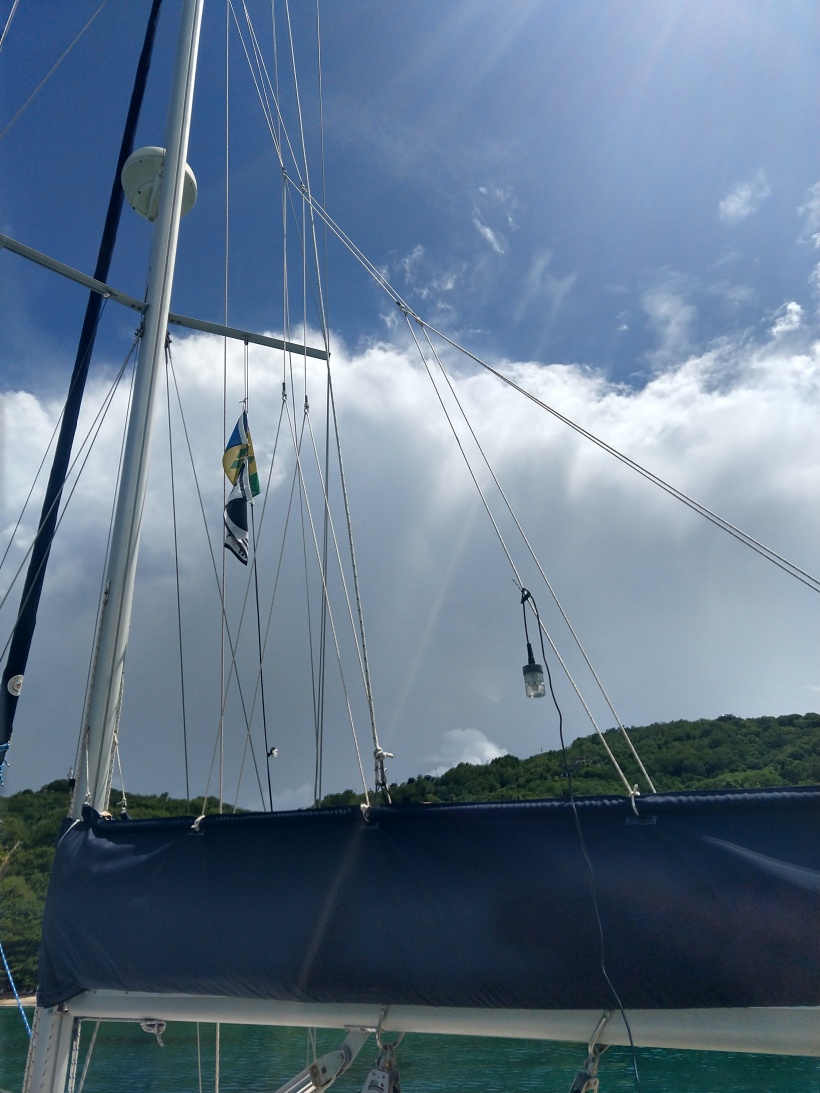
Next we needed to add two blocks to the mast (HARKEN 29MM CARBO CHEEK). I decided to install them just below the top spreaders. Our friend Jaime assisted with this greatly. I hoisted her up the mast and she drilled and tapped the mast to install the two blocks. I then drilled and tapped the mast for two cam cleats (RONS MEDIUM C CLEAT CAM CLEAT) to secure the lines. I used the plastic cam clean bases and sanded them to match the curve of the mast. Tef-Gel was used on each stainless steel machine screw. Note: I plan to add to fairleads where the lazy jack lines go past the bottom spreaders.


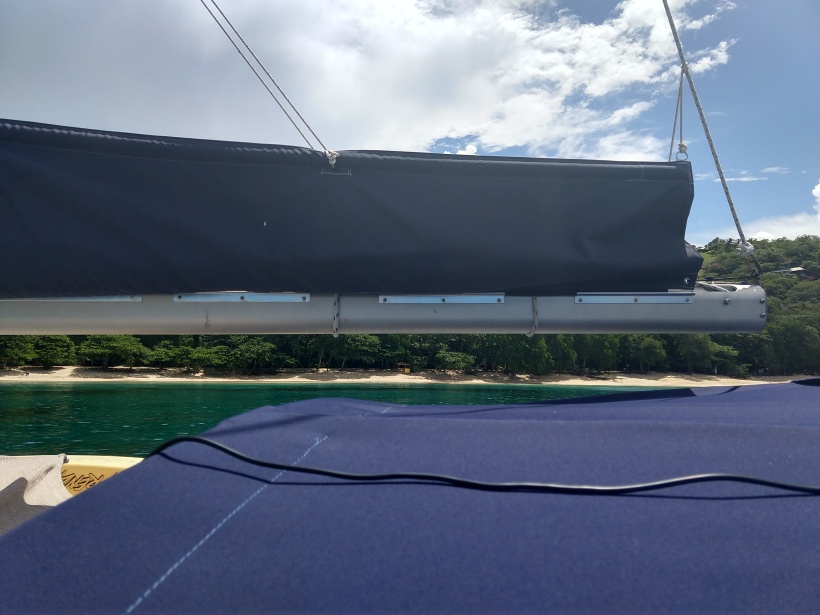
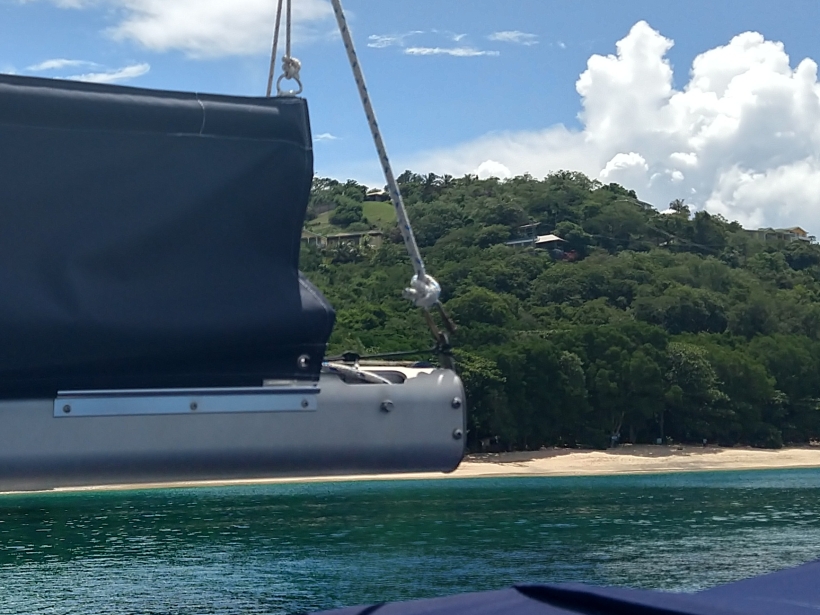
With the Sailrite style packs, 3/4 inch PVC pipe is used to stiffen the length of the pack. Our length was 13.5 feet. According to some friends that have used the system, using two pipes joined with a coupling creates a chaff point that damages the pack. So we had to go to a plumbing supply house and get 20 foot lengths of the PVC pipe. We also decided to get schedule 80 pipe as it has thicker walls and is stiffer.
To attach the aluminum awing tracks to the boom, we used #10 stainless steel machine screws every 8 inches. We drilled and tapped the boom. We used Tea-Gel on each screw to protect against galvanic corrosion between the aluminum and stainless steel. The track comes in 48-inch sections. We left gaps for drainage and reef lines at given spots.
For the lazy jack lines we used 3/16-inch Sampson Yacht Braid. Instead of splicing the stainless thimbles into the line I tied constrictor knots and finished with heat shrink (this was an experiment for the dynema lifeline project that was to come). We added a couple of short loops of paracord to the pack for securing the main halyard while anchored.
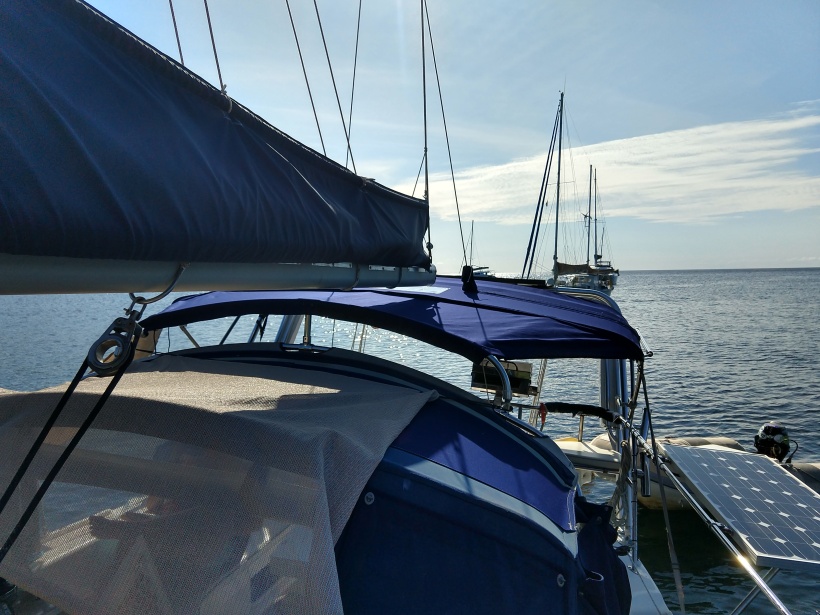
After we installed the pack, we did some shakedown sails. One problem we had was the pack wanted to move forward. To address this we added two grommets to the rear of the pack and tied a small line to the topping lift to keep it pulled back.
We have now sailed over 1,000 nautical miles with this setup and love the upgrade. With the full mainsail up, we can drop the halyard from the cockpit and sail goes 95 percent of the way down and sits in the pack. When we get into port, we put the sail down the rest of the way and zip the pack close.


One issue we have is that sailing in the Caribbean trade winds, we seldom have full mainsail up. When we drop the reefed mainsail it doesn’t have enough weight to pull the sail down. We are working to configure a down-haul to allow the dropping of the mainsail from the cockpit when reefed.
We also plan to add mast gates to allow the mainsail to drop closer to the boom.
Also posted on our blog.
For cruising, a mainsail pack is the preferred solution for mainsail dropping and covering. However, we have a footed mainsail. Most of the packs join under a loose footed mainsail with snaps. We like a footed mainsail for cruising and didn’t want to loose that as an option. In one discussion on Sailboat Owners’ Forum, someone posted this photo of a mainsail pack that doesn’t go under a loose footed mainsail.
I scoured the internet but couldn’t find anyone making a system similar to the photo. I talked to several canvas shops and none had ever make a pack in this manner. So this was going to require some or all DIY.
After talking to several friends we found Lee Sail Covers. Its a small company in Ohio that does various canvas work including making mainsail packs similar to the Sailrite system. They use WeatherMax80 fabric for their packs and it was a reasonable $440 for the completed pack. However, she had never heard of a system like we were doing. So we did the measurements (note: give yourself an extra 6-12 inches at the mast to allow for the height of the headboard on the sail) and had her make a pack that was left unfinished with no snaps on the bottom. We went with the 4 line attachment option.
From there we went to the Sailrite website and ordered some luff tape and aluminum awing track that fits 5/16-inch luff tape. When the pack arrived we sewed the tape onto the bottom of each side. This was all the easy part of of the project.
Next we needed to add two blocks to the mast (HARKEN 29MM CARBO CHEEK). I decided to install them just below the top spreaders. Our friend Jaime assisted with this greatly. I hoisted her up the mast and she drilled and tapped the mast to install the two blocks. I then drilled and tapped the mast for two cam cleats (RONS MEDIUM C CLEAT CAM CLEAT) to secure the lines. I used the plastic cam clean bases and sanded them to match the curve of the mast. Tef-Gel was used on each stainless steel machine screw. Note: I plan to add to fairleads where the lazy jack lines go past the bottom spreaders.
With the Sailrite style packs, 3/4 inch PVC pipe is used to stiffen the length of the pack. Our length was 13.5 feet. According to some friends that have used the system, using two pipes joined with a coupling creates a chaff point that damages the pack. So we had to go to a plumbing supply house and get 20 foot lengths of the PVC pipe. We also decided to get schedule 80 pipe as it has thicker walls and is stiffer.
To attach the aluminum awing tracks to the boom, we used #10 stainless steel machine screws every 8 inches. We drilled and tapped the boom. We used Tea-Gel on each screw to protect against galvanic corrosion between the aluminum and stainless steel. The track comes in 48-inch sections. We left gaps for drainage and reef lines at given spots.
For the lazy jack lines we used 3/16-inch Sampson Yacht Braid. Instead of splicing the stainless thimbles into the line I tied constrictor knots and finished with heat shrink (this was an experiment for the dynema lifeline project that was to come). We added a couple of short loops of paracord to the pack for securing the main halyard while anchored.
After we installed the pack, we did some shakedown sails. One problem we had was the pack wanted to move forward. To address this we added two grommets to the rear of the pack and tied a small line to the topping lift to keep it pulled back.
We have now sailed over 1,000 nautical miles with this setup and love the upgrade. With the full mainsail up, we can drop the halyard from the cockpit and sail goes 95 percent of the way down and sits in the pack. When we get into port, we put the sail down the rest of the way and zip the pack close.
One issue we have is that sailing in the Caribbean trade winds, we seldom have full mainsail up. When we drop the reefed mainsail it doesn’t have enough weight to pull the sail down. We are working to configure a down-haul to allow the dropping of the mainsail from the cockpit when reefed.
We also plan to add mast gates to allow the mainsail to drop closer to the boom.
Also posted on our blog.

