‘81 Yamaha 30 Stuffing Box

Oct 22, 2014
20,989
CAL 35 Cruiser #21 moored EVERETT WA
@Justin_NSA correct. You hand tighten the nuts and lock them down. I do not have any water coming out of the stuffing box when the engine is not turning the shaft. When turning I get the occasional drip. I also have a tube that vents water from the Heat Exchanger into the shaft log to reduce the chance of an air bubble forming in the shaft log and overheating the stuffing box causing the shaft to get scored.
 
Jul 7, 2004
8,402
Hunter 30T Cheney, KS
My new Lasdrop shaft seal has a vent for that same reason. It's just vented to the air though. The directions say if you are under 20 knots you don't need positive water flow. I guess speed would cause a siphon bubble


20180414_132617_resized.jpg
 
Oct 22, 2014
20,989
CAL 35 Cruiser #21 moored EVERETT WA
I guess speed would cause a siphon bubble
Quite possible. It is about cavitation. Your open hose has water in it to some level. Just keep the end above the outside water level. I tried lowering my hose below the water line and out came a trickle of water. THen I stuck it up on the fitting on the heat exchanger. I guessed the hose had not been removed in a long time as there was a salt plug in the hose. Cleaned it out and water flowed.
Your fitings look nice. Shiny.
 
Jul 7, 2004
8,402
Hunter 30T Cheney, KS
Quite possible. It is about cavitation. Your open hose has water in it to some level. Just keep the end above the outside water level. I tried lowering my hose below the water line and out came a trickle of water. THen I stuck it up on the fitting on the heat exchanger. I guessed the hose had not been removed in a long time as there was a salt plug in the hose. Cleaned it out and water flowed.
Your fitings look nice. Shiny.
I'm happy with it so far. I know water is getting up into vent tube. When i put it in the water for the first time yesterday. I had to tighten the double clamps some more. The other end is way up next to the siphon break in the exhaust water hose
 
  • Like
Likes: jssailem
Oct 22, 2014
20,989
CAL 35 Cruiser #21 moored EVERETT WA
Just be careful not to lay her over on her side beating up wind.. There could be a little spillage from the open hose. Not a drowning flood but splashes about the engine compartment that when found could drive you crazy looking for the possible leak.
One option is to put a closable valve on the end.. You shut it most of the time. You open it to let the box breath out any air bubbles.
 

Satori

.
Sep 25, 2008
13
Yamaha Y-30 MkII Sidney BC
Would also appreciate any thoughts from other Yam 30 owners as our boats appear to be unique in this regard, thanks.
Hi LVGS,
Congrats on the Yam 30. Love mine.

Sorry that I can't help you though. Previous owner installed a dripless and so it looks quite different.

cheers
Craig
 

LVGS

.
Apr 8, 2018
32
Hunter 33 Nanoose Bay, Vancouver Island
Hi Craig,
Glad to hear from another Yam 30 owner on the Island. Would you be able to post a pic of your dripless stuffing box and if possible, any details re: manufacturer/model.
Thanks!
 
Apr 12, 2017
5
Yamaha 26 Bellingham
I've got essentially the same stuffing box on my Yamaha 26 and I used it with one of the fancy new PTFE and graphite packings. Works great.. It is a fairy to replace the packing in it as several others stated. I will add 3 additional comments:
1. If you haven't replaced one before or at least never replaced it on this boat, I would do it out of the water. (i had the exact same debate as you the first time I replaced mine). While you probably could get it on without hauling the boat, having it on the hard gives you the time to completely inspect and clean the old packing out, taking your time. Similarly, you won't feel so pressured when installing the new one allowing you to double check your work and give you much more peace of mind.
2. On that shaft log it is very easy to over tighten the gland particularly when those 2 nuts are corroded and not turning easily. Less is more. Better to let it drip and then tighten rather than overdo it and burn/melt your packing.
3. You could save a bit on the haul if you can talk the boatyard into just charging you for a 1 way haul rather than a full 2 way. The yard I use will give me an hour in the slings at the cost of a 1 way haul saving the cost of blocking the boat. 1 hr. should be more than enough to get the job done.

Good luck.
 
Jan 20, 2017
78
Yamaha 33 Vancouver
Hi. Yamaha 33 owner here. The stuffing box on mine is practically identical. Here’s my input:

1. Under the waterline equals not the time to learn anything.

2. PTFE

3. Heat, and not drips per minute, is your guide. I haven’t dripped in years, and think that that metric is for pantywaists and milksops.

4. With our Yamaha set-up, use norlock washers, or nylock nuts (preferably both) on the finished product, and have more at hand.

5. Happy to provide pics for you, mate. When I was doing mine last year, it was so awkward I spent the whole time cursing my parents that I was ever born.

6. Only listen to the advice of other Yamaha sailboat owners, as we are a species elevated in integrity above flaneurs.
 

dezeen

.
Dec 27, 2017
5
Yamaha 33 Vancouver
I would not be too worried about one drop per minute. My 33 (engine under V berth - long shaft) drips at 3-4 drops per minute. After engine use 4 drops per minute and after a couple of days of no engine use 3 drops per minute.
It is a question of too tight and heating and too loose and dripping. More important to not have over heating. I like the present set-up as there is no heat or warmth on any part of the shaft when in use at 2700rpm. A few drops is not an issue as the bilge was designed to have overflow from the water tanks and the mast. As long as there is no heating you should be fine.
 
Aug 27, 2009
43
Yamaha 33 Portland
-Servicing this in the water is super easy. Get the graphite impregnated teflon material as it's slippery and runs cooler, (sorry, I can't remember the size, but you can pull the stuffing box apart to measure the gap - put it back together while you order the material). Cut 3 rings of it with a hobby knife to fit around the shaft. Get some hooks to remove the old material. Get a small punch to gently press the new material into the box.
-Now you're ready.
-Unscrew both nuts and work the cover off. You'll get some water coming in, but nothing too worrisome. Use your hooks to remove the worn material. As you dig that out, you'll get more water flowing, but it's not bad and your bilge pump will easily keep pace. Carefully scrape out the rest of the old stuffing. Sometimes it comes apart in little furry pieces, but the inflow of water will help. Don't worry about the water coming in - it's not too much and you have already cut replacement rings that are nearby and ready to install.
- Once you're sure you've got most of the old packing out, wrap your precut stuffing material around the shaft and press it in. Make a note of where the ends joined, as you'll stagger the next ring to keep the gaps from aligning, (i.e. if the first ring ends join at 12 o'clock, the next ring should join at 6 o'clock. (on my boat I use 3 and 9 so I can see them go in). You can use the stuffing box cover to gently tap your ring into the box evenly
-Use 3 rings of material, then reassemble the box with those nuts. Run the engine in gear at the dock for 20 minutes and adjust it to drip 1 to 2 drops a minute.

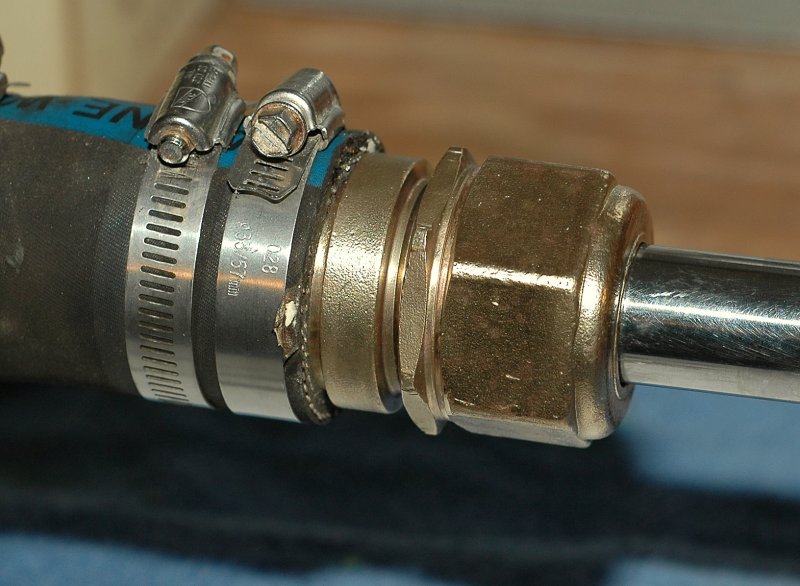
This is a water cooled system. Run the boat at cruise and periodically check the box. It should never be hot, but slightly warm to the touch is just right. Loosen the nuts to increase the cooling water flow if it's running hot. This is a pretty easy job I do on my Yamaha every couple of seasons. I added a second nut to each stud to lock in my adjustments. Let us know how you make out.