So far so good ...
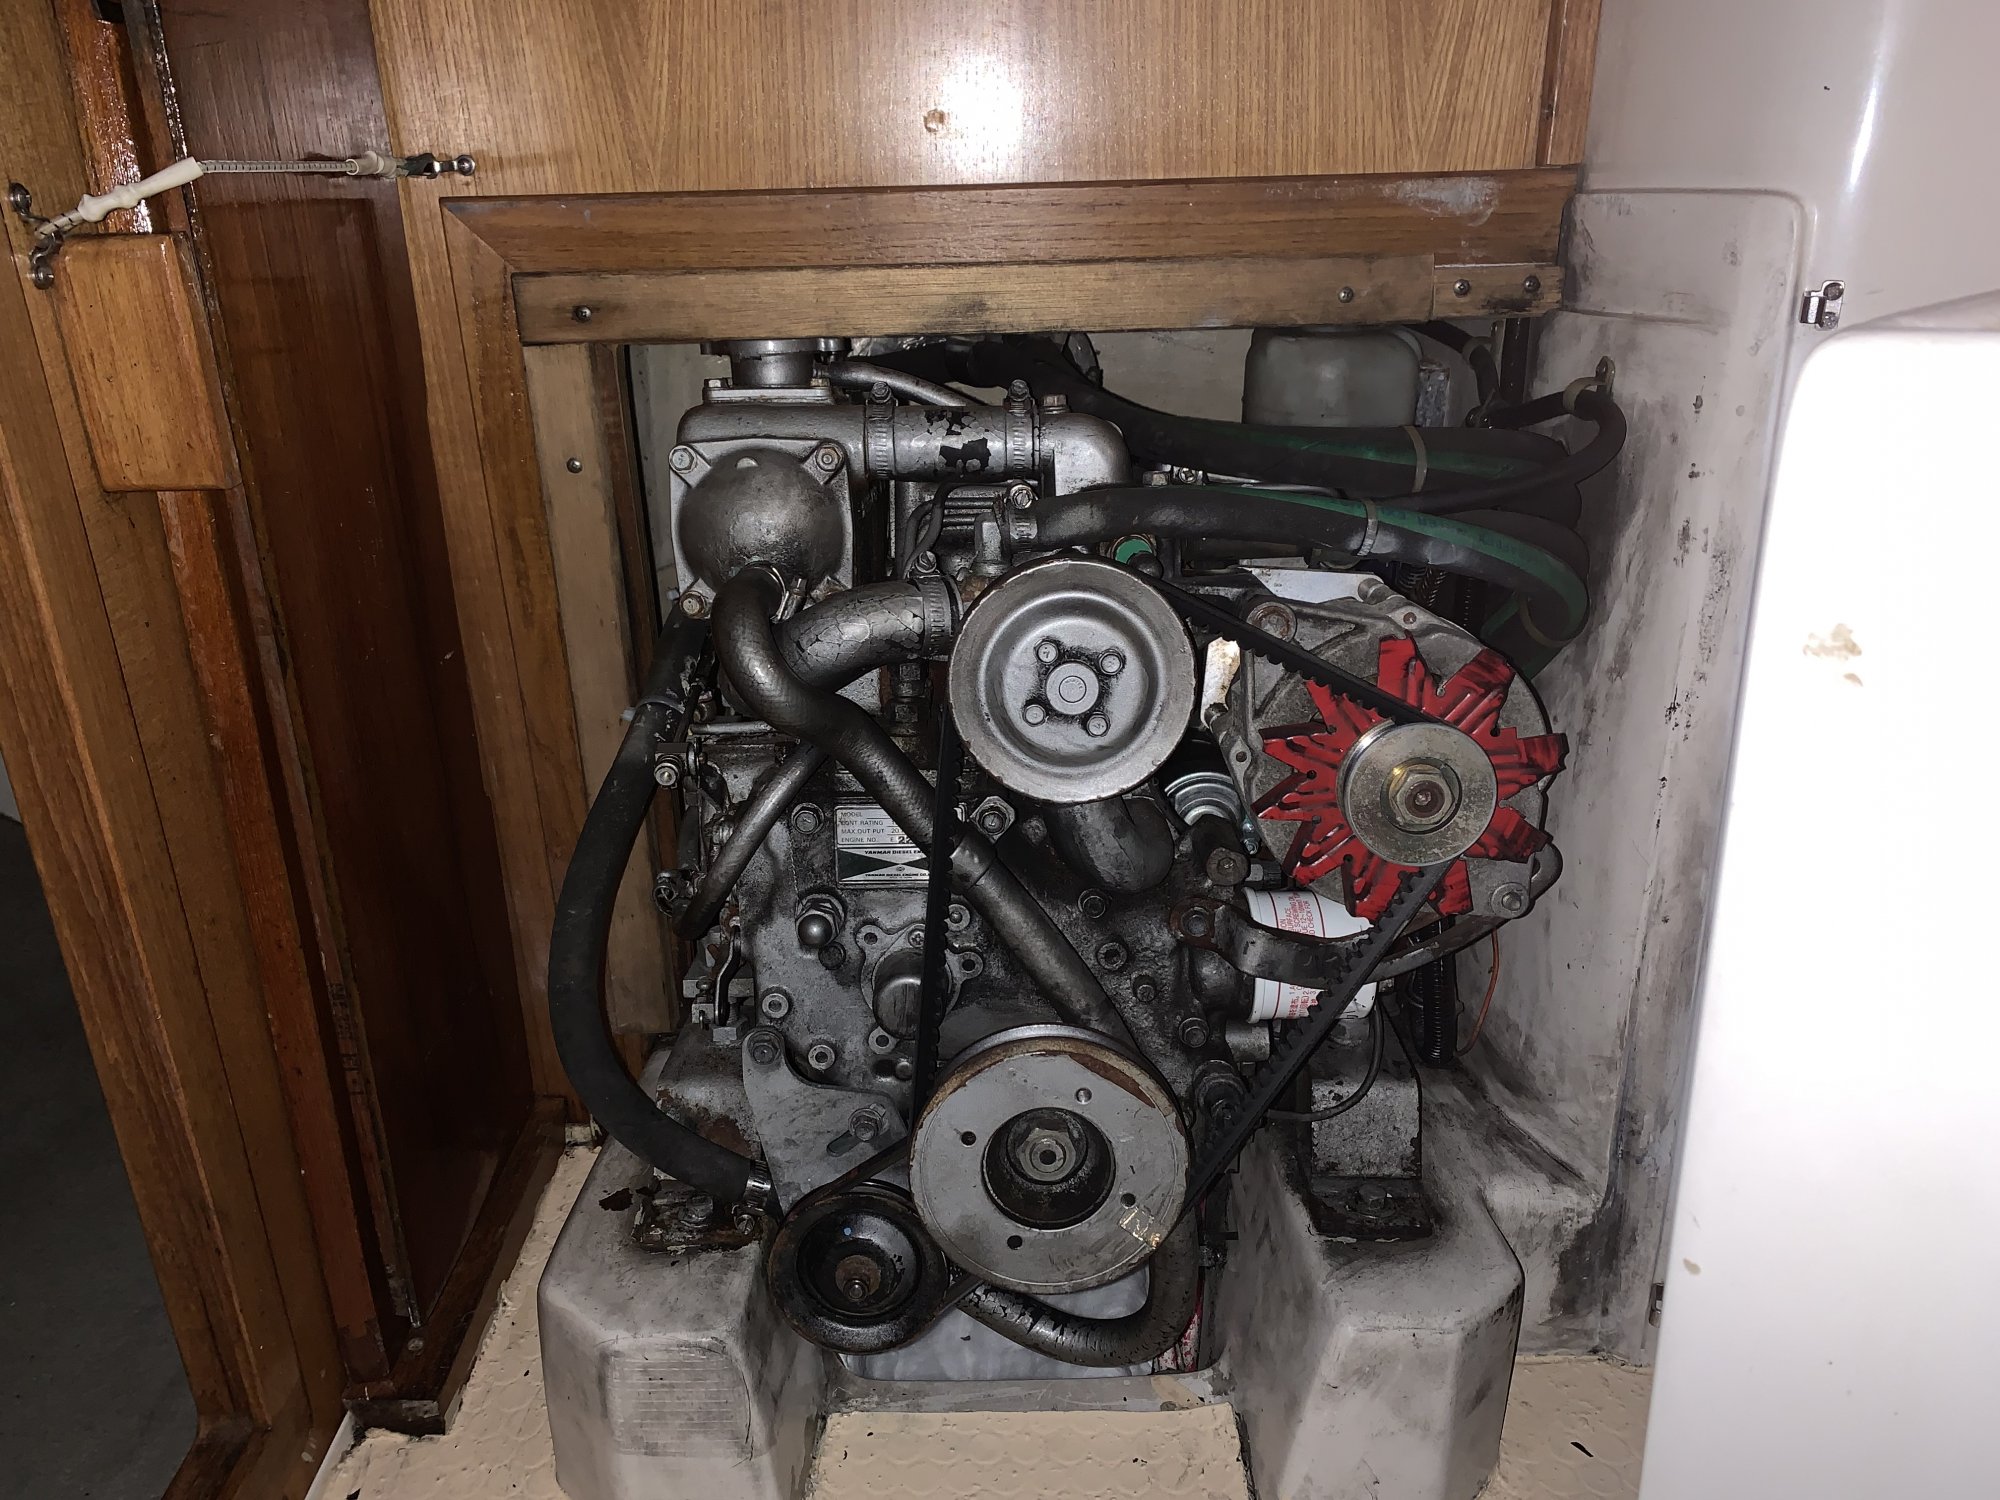
Before:
After:
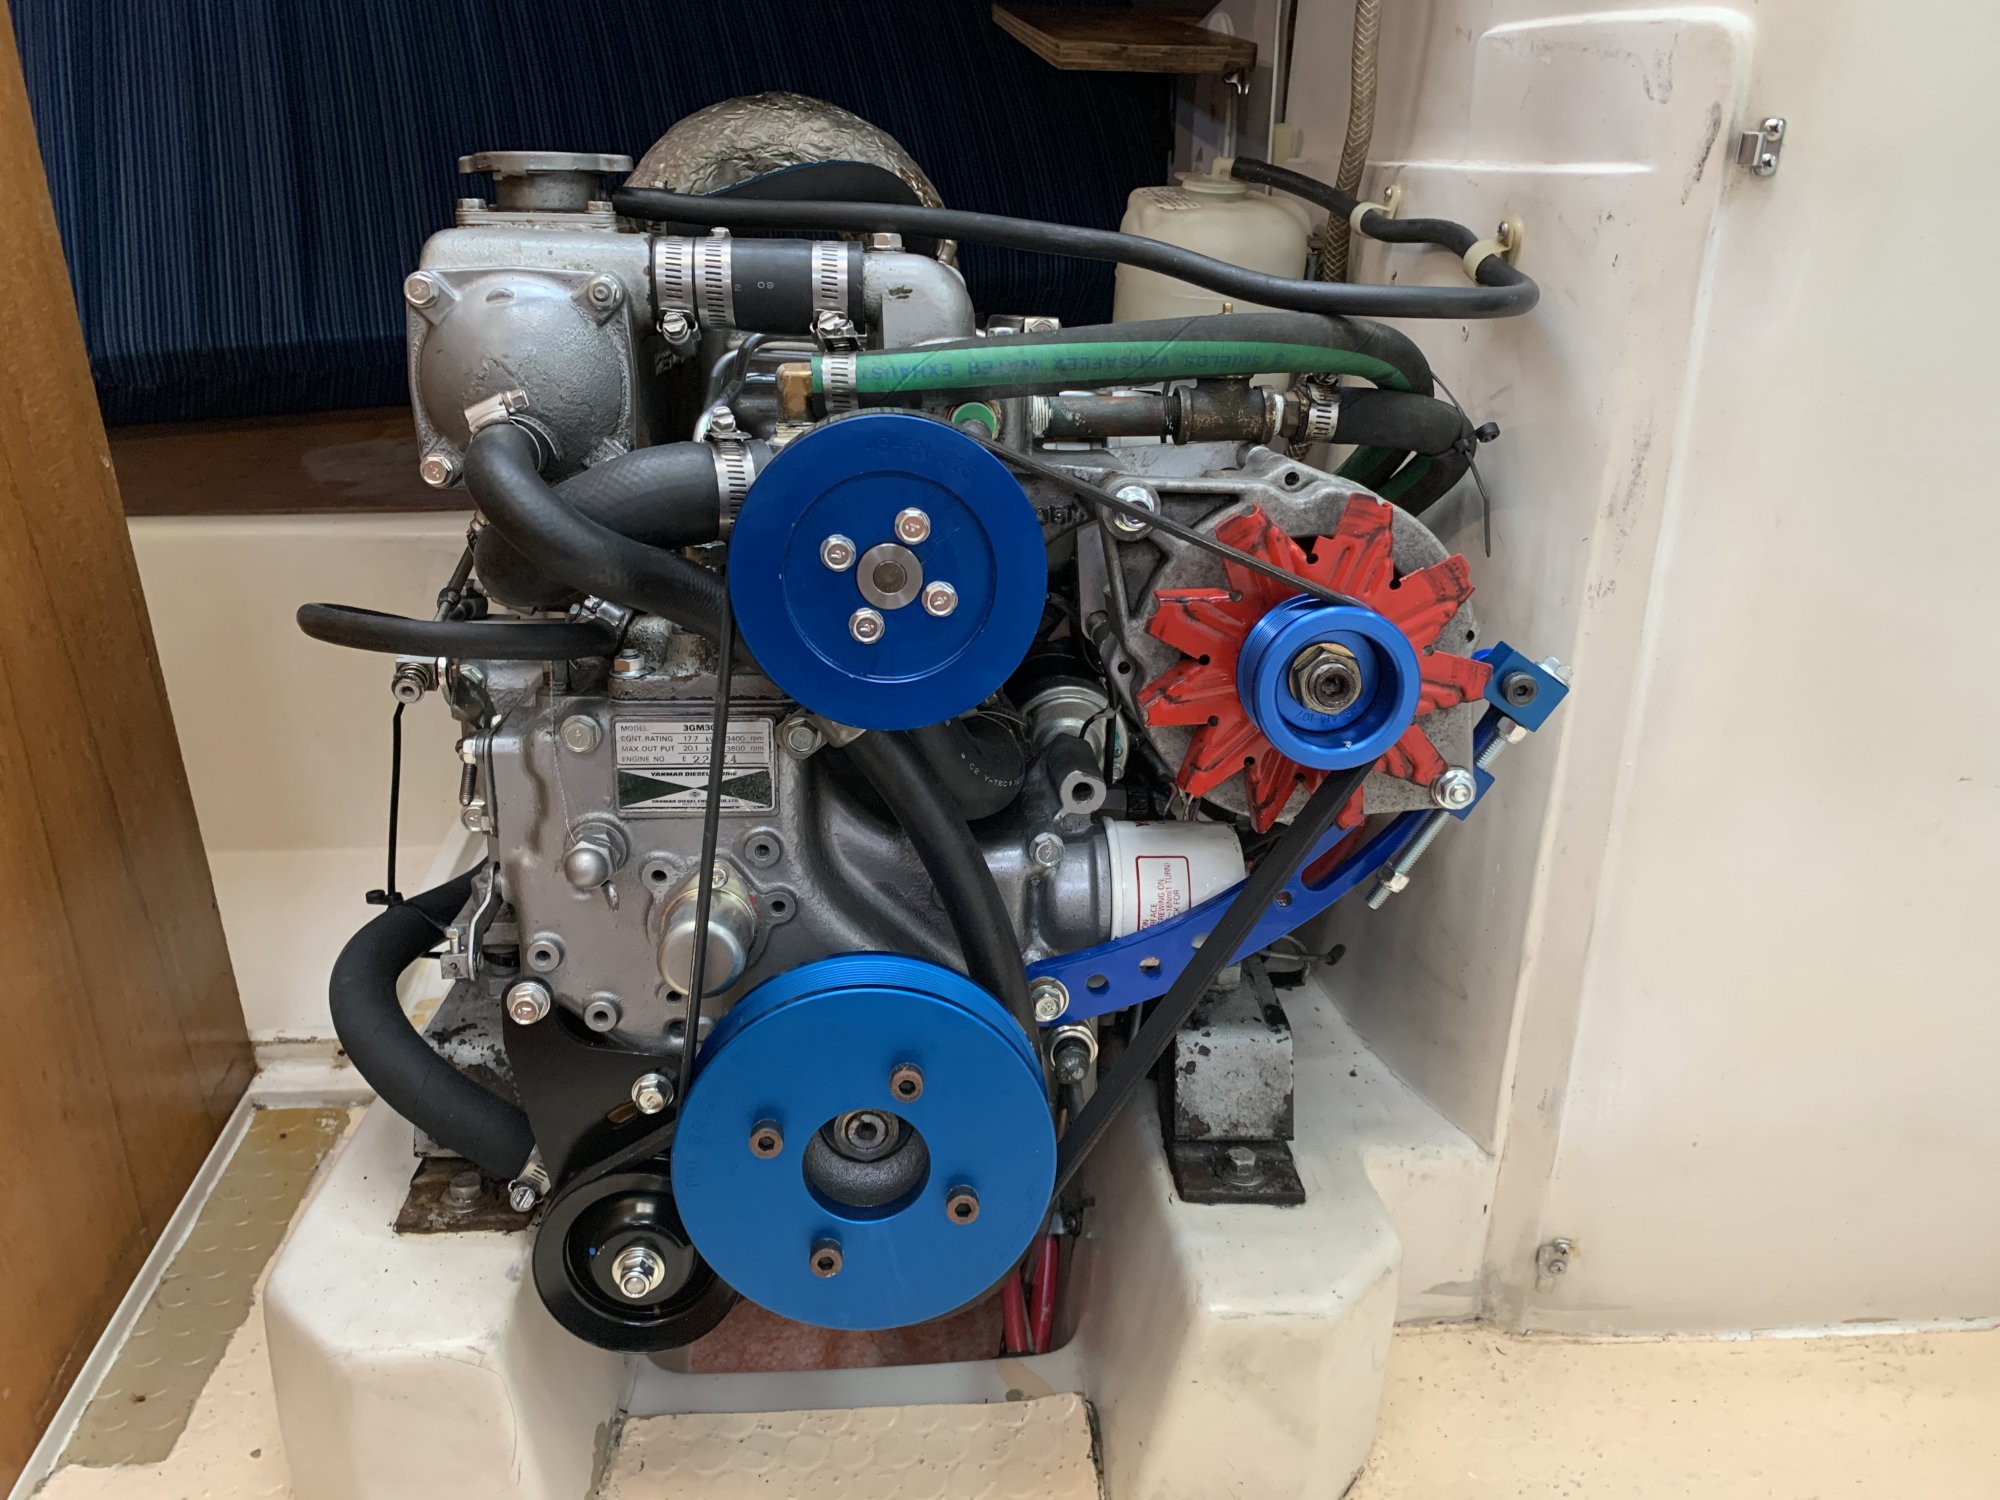
Primary objectives were to replace the standard pulley with serpentine pulley kit (courtesy Compass Marine), replace all hoses and replace the timing gear case gasket. In the process, I installed ...
New freshwater pump & new seawater pump
New sensors for water temp & oil pressure
New thermostat
New high pressure fuel lines
New chamber components in the cylinder head sockets for injectors
Cleaned & tested injectors
New suction manifold
New regulator lever assembly
New timing shims
Replaced every bolt, nut, washer & screw that I removed
Removed and cleaned the heat exchanger - but it was already free from any obstructions.
Replaced all the gaskets for any components removed.
I didn't replace the hoses to and from the water heater. I could not find any feasible way to pull those hoses thru the confined spaces. I was able to pull out enough excess hose to cut away several inches of beat up ends so they do look much better at least. I haven't installed the vented loop for the exhaust hose, but I have the new hose and loop to install now that I'm in the water. I have to fit a better location for the external regulator outside the engine compartment, but the wiring constrains the reach right now. I also have to make final adjustment to the governor.
Re-assembly went very well, thank you, until I put 2 quarts of oil in the coolant fill the evening before my scheduled launch! Has anybody done that?!?! I had the fill open and absent-mindedly just started filling ... the 2 fills are pretty much right next to each other.
  Just before I started pouring a 3rd quart, I was wondering why the dipstick hadn't started to show any oil yet. Several hours of draining and flushing and I was good to go. No issues getting from the travel lift to my slip at least. I'll drain it one last time after heating the coolant again.
Before:
After:
Primary objectives were to replace the standard pulley with serpentine pulley kit (courtesy Compass Marine), replace all hoses and replace the timing gear case gasket. In the process, I installed ...
New freshwater pump & new seawater pump
New sensors for water temp & oil pressure
New thermostat
New high pressure fuel lines
New chamber components in the cylinder head sockets for injectors
Cleaned & tested injectors
New suction manifold
New regulator lever assembly
New timing shims
Replaced every bolt, nut, washer & screw that I removed
Removed and cleaned the heat exchanger - but it was already free from any obstructions.
Replaced all the gaskets for any components removed.
I didn't replace the hoses to and from the water heater. I could not find any feasible way to pull those hoses thru the confined spaces. I was able to pull out enough excess hose to cut away several inches of beat up ends so they do look much better at least. I haven't installed the vented loop for the exhaust hose, but I have the new hose and loop to install now that I'm in the water. I have to fit a better location for the external regulator outside the engine compartment, but the wiring constrains the reach right now. I also have to make final adjustment to the governor.
Re-assembly went very well, thank you, until I put 2 quarts of oil in the coolant fill the evening before my scheduled launch!
Has anybody done that?!?! I had the fill open and absent-mindedly just started filling ... the 2 fills are pretty much right next to each other. Just before I started pouring a 3rd quart, I was wondering why the dipstick hadn't started to show any oil yet. Several hours of draining and flushing and I was good to go. No issues getting from the travel lift to my slip at least. I'll drain it one last time after heating the coolant again.Attachments
-
 444.4 KB Views: 270
 -
 418 KB Views: 254

![032[1].jpg](/data/attachments/173/173601-fa69b515caf9295a7154172ba8964505.jpg)
![033[1].jpg](/data/attachments/173/173602-0777e93f7b2be84eb9cbe3979b6c2099.jpg)
![034[1].jpg](/data/attachments/173/173603-592eb0ffb60c1b377787215fb17f4ac2.jpg)
![073[2].jpg](/data/attachments/173/173604-ed3be988a1921e6ffb947bfc8bf12338.jpg)
![079[1].jpg](/data/attachments/173/173605-ffc6c10a1233657f4502f4b2bba78b96.jpg)
![080[1].jpg](/data/attachments/173/173606-8b19c8023ae82d50318cca6a3a5e9603.jpg)


![IMAG0801[1].jpg](/data/attachments/173/173612-6baf86589e02e66fe3e7539953f8f058.jpg)
![IMAG0804[1].jpg](/data/attachments/173/173613-55e6a602b3e0eeee31846eba5f573ecc.jpg)
![img_6961[1].jpg](/data/attachments/173/173614-942cce228209366d8743dc00ccf3f417.jpg)
![seawater[1].jpg](/data/attachments/173/173615-c87a921b088fb1c1e11056247a04ec19.jpg)