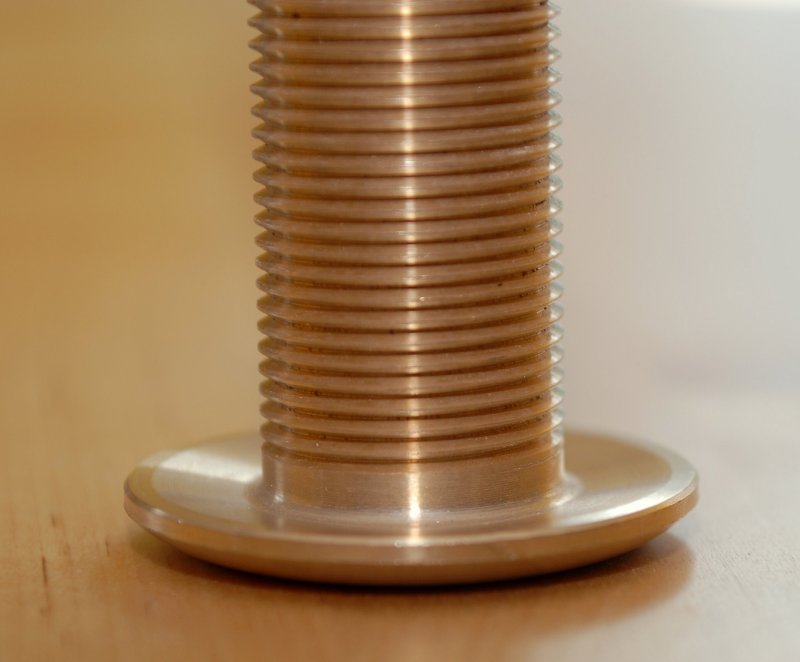
Glassing in backing plates for through hulls

Status
Not open for further replies.
Sep 25, 2008
2,288
C30 Event Horizon Port Aransas
I am ready to fix the backing plates tomorrow(sunday) to the hull. I bought a new drill, all the apropriate hole saws, epoxy, sikiflex, bronze hardware. I also picked up a can of short hair bondo polyester resin, and I have most of a can of long hair polyester resin.
The epoxy takes days to fully cure. The polyester bondo hair cures in 30 minutes or something like that. Is it worth turning it into a 2 day event to use epoxy instead of the hair polyester? If I use epoxy, all I have available for tomorrow is 24 oz. roving, can I cut that and unravel it and stir in into epoxy to make a suitable mixture for fixing these plates? What is the best way to do it with epoxy? Do I need to keep pressure on these plates to get them to adhere properly?
With the materials I have available, please give me a short detailed instruction of what and how I should do this.
I have long hair bondo polyester, short hair polyester, 1/2 gal. polyester resin in a can,
one gal.epoxy, 24. oz roving. I think I can get chopped matt from the yard tomorrow.
__________________
 

Ross

.
Jun 15, 2004
14,693
Islander/Wayfairer 30 sail number 25 Perryville,Md.
I would first cut the disk(s) and try fit them to the place on the hull. Then shape the mating surface for the smallest gaps. If your gaps are less than the thickness of the woven roving then you can use either resin. If you choose not to shape and fit the disks then use the filled bondo. Grind a nice chamfer on the exposed edge of the disk before you set it and you will like yourself better the next time you are down in there. You will probably need to keep the disk from sliding until the resin cures. Tape should be enough.
 
May 11, 2005
3,431
Seidelman S37 Slidell, La.
Poly resins

I don't think you will have a problem using polyester resin, but skip the bondo. It will absorb moisture. The advice Ross gave is pretty good.
 
Sep 25, 2008
2,288
C30 Event Horizon Port Aransas
The bondo is just bondo brand polyester resin with fibers already in it. It is a fiberglass waterproof product.
Thank you Ross for the summary.
I was going to move some through hulls but I have decided to try to make the holes that are already there work if I can. Moving them will be a last resort.
 
Sep 25, 2008
7,695
Alden 50 Sarasota, Florida
The bondo is just bondo brand polyester resin with fibers already in it. It is a fiberglass waterproof product.
Thank you Ross for the summary.
I was going to move some through hulls but I have decided to try to make the holes that are already there work if I can. Moving them will be a last resort.

No, it is not waterproof - it will absorb moisture just as you have been told.
 
Sep 25, 2008
2,288
C30 Event Horizon Port Aransas
Maine sail recomended what I bought. There are pictures of him using it on his site.
Has something bad happened with it?
 
Feb 6, 1998
11,760
Canadian Sailcraft 36T Casco Bay, ME
Resin..

Maine sail recomended what I bought. There are pictures of him using it on his site.
Has something bad happened with it?
You will be fine using it. As I said the secondary bonding of polyester resin is rather light so
I only use it when also through bolting the backing plates.. If not through bolting I still advise thickened epoxy with strands & filer. If installed correctly water should never see the kitty hair. Polyester is highly water resistant not totally waterproof over time. Your entire boat is polyester already so the real concern is the secondary bond..

I use a long bolt through the hole saws guide hole to center the backing plate and suck it into place with a wood jig on the hulls exterior.

You could also tape & wax the through hull and use it to set the backing plate. This would guarantee both holes were aligned and that the backing plate was in perfect alignment. Electrical tape works well to protect the threads from the resin as does teflon tape.
 
Sep 25, 2008
2,288
C30 Event Horizon Port Aransas
I have everything glassed in and dry fit in place. I was able to use the old holes and I did not glass up any holes in the hull. I drilled the holes for the through hulls in my shop. So I buttered the backing plate and the hull and set it in place. I then put a through hull in a plastic bag and used that to center the plate. I lucked out with those pipes that were glassed in. The hole saws went right around them and they came out in the plug.
I was going to sikiflex them together but the holes seemed really dusty with fiberglass dust from being drilled. Do you have a trick for cleaning those out?
Also just how flush do the through hull mushroom heads need to be with the outside hull?
When everything is tightened up, they are with in 1/16". (that is to say there are 1/16" gaps on some sides of the mushroom head.) I tried to sand the hulls at an angle to be parallel to the backing plate top surface.
I didn't have time to worry about compressing the plate to the hull, that stuff kicked off so quick. I made sure I really worked it into the surface of the hull and the backing plate before sandwiching them together though.

Let me clarify about something. I cut the thorough hulls to length. When tightened part of the mushroom head is against the hull and part has a 3/16" gap.
 

Attachments

Oct 22, 2008
3,502
- Telstar 28 Buzzards Bay
HS—

You really want the through-hull to be solidly supported by the hull. The 3/16" gap isn't really a good thing. Ideally, it should be snug up against the hull all around. If that isn't the case, you should probably make a fairing block to fill the gap an allow the through hull to seat properly.

BTW, I agree that the polyester filler should only be used if the through-hull is through bolted and properly seated. Otherwise, it would be far better to use thickened epoxy.
 

Ross

.
Jun 15, 2004
14,693
Islander/Wayfairer 30 sail number 25 Perryville,Md.
Hermit, You could get everything ready and coat your thru-hull fitting with your favorite non-stick spray, mix a small batch of bondo and butter the flange of the thru-hull fitting and press it into place and wipe away the squeeze out. Let it harden and you then have a complete support for the flange to bed against.
 
Sep 25, 2008
2,288
C30 Event Horizon Port Aransas
If I can't sand them flat enough, I will have to epoxy on the outside of the hull like Ross is talking about. I will probably drill a hole in a slick plastic disc and tighten the through hull up to flatten it out. That is a good idea Ross.
I am going to start using plastic whenever I can, if you use wax paper or wax it's just something you have to come back and remove. The top of those backing plates were made on wax paper and they have a wax coating that I haven't removed yet.
What's the best way to get the cooking spray off?
 
Feb 6, 1998
11,760
Canadian Sailcraft 36T Casco Bay, ME
Oops..

I have everything glassed in and dry fit in place. I was able to use the old holes and I did not glass up any holes in the hull. I drilled the holes for the through hulls in my shop. So I buttered the backing plate and the hull and set it in place. I then put a through hull in a plastic bag and used that to center the plate. I lucked out with those pipes that were glassed in. The hole saws went right around them and they came out in the plug.
You'd be much better off to hold the thru-hull to the exterior of the hull with a 2X4 or some aggressive duct tape like Gorilla tape and then butter up the backing plate with thickened resin & place it over the thru-hull and use a thru-hull nut or the flanged adapter to tighten everything down. By doing this both the internal and external planes of the backing plate and hull will be parallel. Like I said in a previous post I used a wooden jig to do this but a thru-hull also works very well. Just don't forget to remove any wax before installing it.


I was going to sikiflex them together but the holes seemed really dusty with fiberglass dust from being drilled. Do you have a trick for cleaning those out?
Acetone on a rag. If it was too dusty for Sika then it was probably too dusty for resin as well. Always clean and de-wax BOTH surfaces first and then rough up them before applying the resin. Roughing them up before de-waxing only serves to drive the wax from construction phase to be driven into the laminate. Interlux 202 is a great de-waxer!

Also just how flush do the through hull mushroom heads need to be with the outside hull?
As dog said perfectly flush is the goal!


When everything is tightened up, they are with in 1/16". (that is to say there are 1/16" gaps on some sides of the mushroom head.) I tried to sand the hulls at an angle to be parallel to the backing plate top surface.
The best way to fix this is to trace the outline of the mushroom head with a sharpie marker and mark the areas making contact. The use a Dremel to reduce the thickenss in teh areas of already made contact. You will essentially be recessing the mushroom head very slightly (1/16") into the surface of the hull until it is flush in a 360 degree manner. This will take some time to get just right so be patient. Sanding the inside is guess work at its best as you need to try to align the entire surface of the backing plate to the exterior of the hull blindly..

I didn't have time to worry about compressing the plate to the hull, that stuff kicked off so quick. I made sure I really worked it into the surface of the hull and the backing plate before sandwiching them together though.
This is why a jig already inplace or the thru-hull, in-place, is necessary for a proper alignment and why using epoxy is a better choice when alone as you'll have a lot more pot life and working time to get it just right before it kicks.

Let me clarify about something. I cut the thorough hulls to length. When tightened part of the mushroom head is against the hull and part has a 3/16" gap.
I understood that and this is because you did not use a jig or the thru-hull to compress the backing plate to the hull which would have kept everything in the proper plane..


Don't worry this is not the end of the world it just means more detail PITA type work. Next time it will be spot on!!;)
 
Feb 6, 1998
11,760
Canadian Sailcraft 36T Casco Bay, ME
Ross..

Hermit, You could get everything ready and coat your thru-hull fitting with your favorite non-stick spray, mix a small batch of bondo and butter the flange of the thru-hull fitting and press it into place and wipe away the squeeze out. Let it harden and you then have a complete support for the flange to bed against.

Ross,

If I understand your concept correctly I would caution this approach. By doing this you will have a mirror image of the mushroom heads mating surface on the hull. These heads have concave shapes or grooves designed to hold & capture and nice thick bead of sealant.

By making a mirror image of the head on the exterior of the hull you will not have enough sealant between the thru-hull and hull itself for a good seal.

You don't want a mirror image of this on the exterior of the hull..
 
Oct 22, 2008
3,502
- Telstar 28 Buzzards Bay
If you do what Ross suggests, you should counter sink the hole so that the sealant has someplace to sit and form a decent o-ring seal... :)
 
Sep 25, 2008
2,288
C30 Event Horizon Port Aransas
They are pretty close as they are now. I think I will try a sharpie to mark the high points and dremel them down.
I bought some epoxy and the pot life is much longer, but the total cure time is over a day, so I wouldn't be able to finish the job in a day, which I didn't do anyway.

I was concerned about the hull/keel joint. Since it had a one inch crack in front and in back. There was also something seeping on the side near the joint. Then I was really concerned. I got inside and drilled into the bilge by the keel bolts, it was dry wood.(I filled that back with polyurethane bed liner so no water could intrude) Then I went outside and grinded away where the seep was. I also grinded away other test areas to look at the joint. The joint was good everywhere I did the destructive testing. The weeping area was where someone drilled a hole from inside the bilge to aparently let it drain while in the yard. It was filled with what looked like blue body filler. My guess is they did not clean the hole before trying to putty it up after water drained out for a long time and slimed up the hole. I will clean out the hole and properly epoxy that up a week before I leave the yard.
 

Ross

.
Jun 15, 2004
14,693
Islander/Wayfairer 30 sail number 25 Perryville,Md.
Ross,

If I understand your concept correctly I would caution this approach. By doing this you will have a mirror image of the mushroom heads mating surface on the hull. These heads have concave shapes or grooves designed to hold & capture and nice thick bead of sealant.

By making a mirror image of the head on the exterior of the hull you will not have enough sealant between the thru-hull and hull itself for a good seal.

You don't want a mirror image of this on the exterior of the hull..
I agree! The impression that I have is that the curve of the hull allows contact at diametrically opposite points and a large gap at points 90 degrees from the contact points. Filling that gap was my intent. As Dog suggests a good size chamfer on the edge of the hole will allow a proper seal.
 
Jan 27, 2008
3,092
ODay 35 Beaufort, NC
Scott, Someone drilled a hole from the bilge to the outside?

This is a really bizarre thng to do if I read your post correctly? Seapage is possible if the keel bolts are not properly torqued, or if the sealant has failed. But to have someone purposely drill a hole through the hull to let it drain??? A drain in the boatyard is a sunken ship at sea. You definitely want to fill that with epoxy with microballoons or microfibers. You may want to put a layer of glass on the outside and inside also.
 
Sep 25, 2008
2,288
C30 Event Horizon Port Aransas
The seepage wasn't at the hull keel joint, the hole is above the hull keel joint. It seemed pretty stupid to me also. I know alot of people use the marine filler from 3M, but I just don't trust it, it isn't hard enough.
I don't think the problem was with the filler, it was seeping around the outside of the filler plug where the bond should have been.
I don't believe the filler was the problem, they didn't clean the hole before filling it.
It was weird becasue I first noticed the hole from the inside of the bilge and I wondered what it was.
 
Jan 27, 2008
3,092
ODay 35 Beaufort, NC
Take a picture for us

Scott see if you can take a picture and post it both inside the bilge and from the outside. The guys on this site will have a lot of great ideas for fixing this. I saw a fix a few weeks back for a hull to keel joint that i thought was outstanding. The whole keel was removed then rebedded and finally the entire joint was glassed over to prevent any future leaks. Not sure if the modification will stand up to the flexing of the keel when heeled and the boat is slammed around, it might crack but will likely stay water tight. Best of luck with this fix, doesn't sound too bad, you are starting to realize the fun of boating, working on the boat and spending money. The sailing is secondary.
 
Status
Not open for further replies.