Cockpit coamings get a lot of wear and tear from use. Mine had some problems I was putting off until they next, needed wooding (varnish failing), which is now.
This corner is the worst spot:
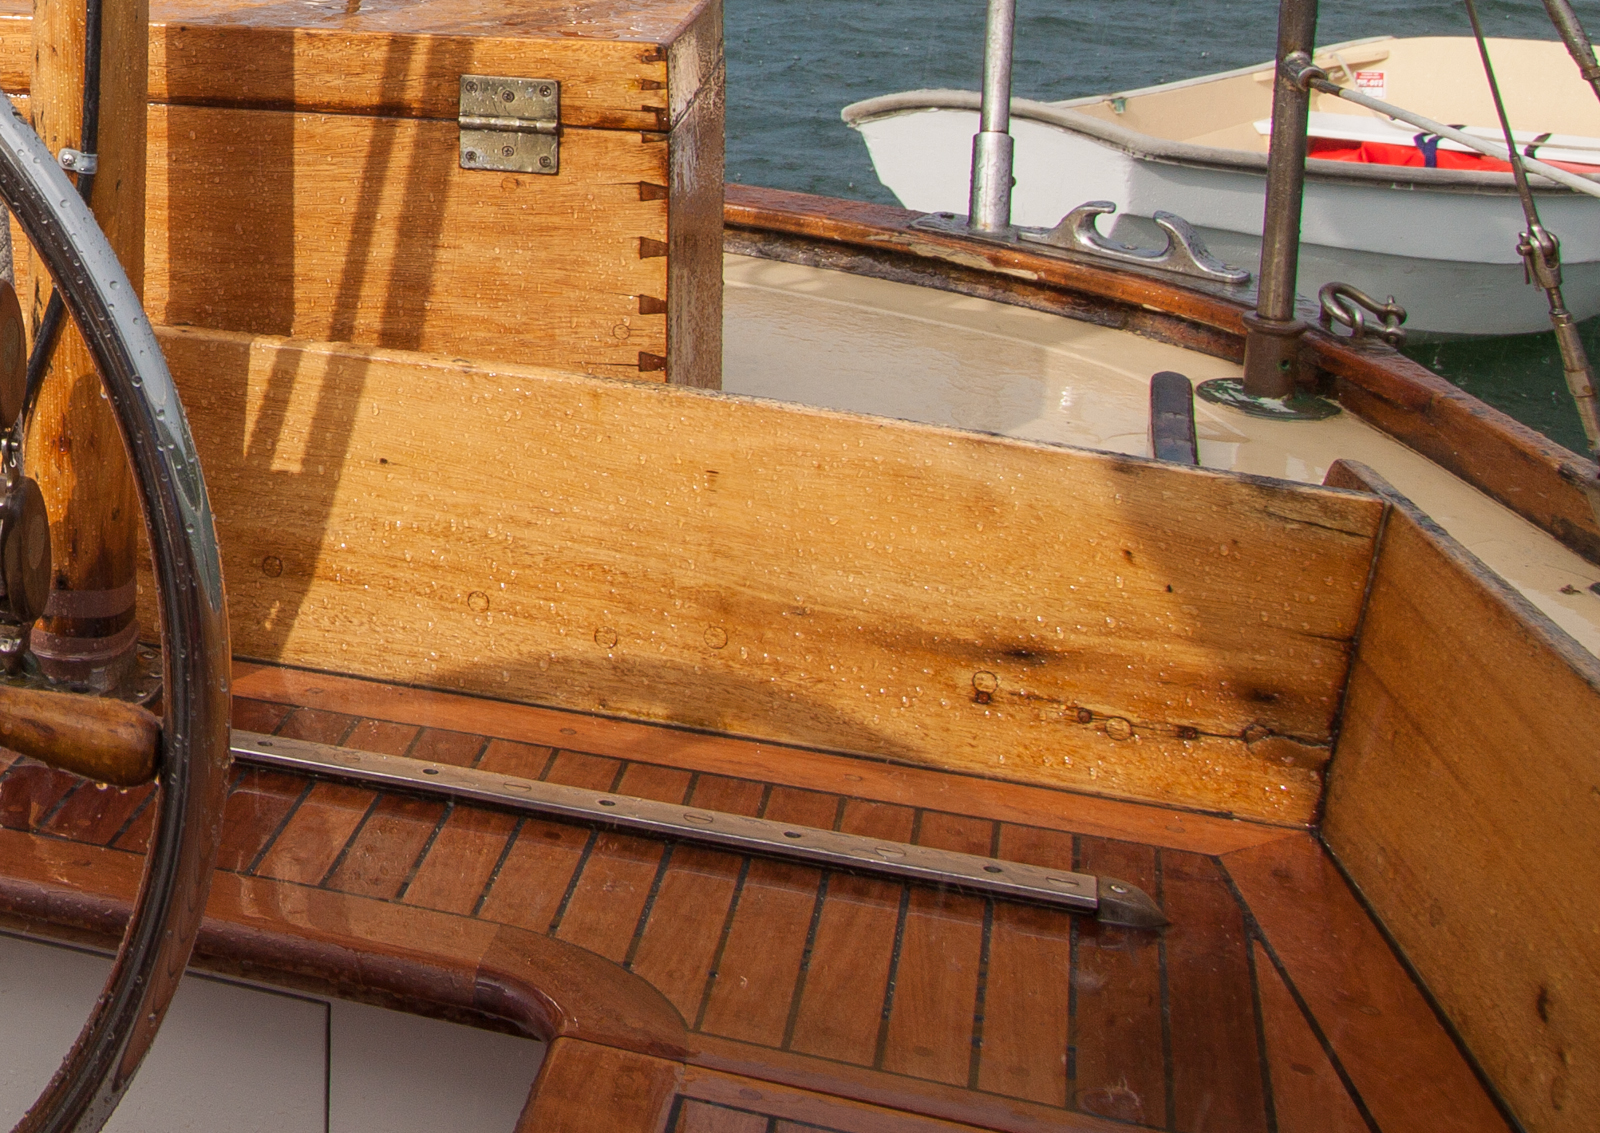
I could have ripped this aft coaming out and replaced it. But it's still strong so I'd rather repair stuff that still works(hard to match new wood with old).
Somewhere back in time (before I owned the boat), somebody mounted something (any ideas?) to this corner. Look closely; the lower large split had 4 mounting holes which were filled long ago. The larger wood plugs at the same height(all around deck) cover the through bolts of the coaming to deck flange connection(bronze, in fine shape).
Looking closely again, you may see 5 similar holes (long ago filled), on top of the coamings where the unknown piece was mounted. Plus, somebody used a filler (polyester resin?) near the corner, where one of the mounting holes rotted out.
The old classic idea of a Dutchman repair, or a graving piece, was to cut a patch out of the same wood, place it over the damage-trace it, and cut a gain in the damaged piece, fit the patch. It's not too difficult but it takes time.
Heres a faster way: Using a small router with an off-set base, I screwed a scrap to the base as a guide for the router. Next, I clamped another scrap of pine to serve as a fence, on the coaming.
Turn on the router and starting at the corner, carefully plunge the bit (which is set 3/16" below the wood fence) into coaming and slide along the fence to a mark(I made) that covers the damage, and turn the router off. Hold it steady so the line is true.
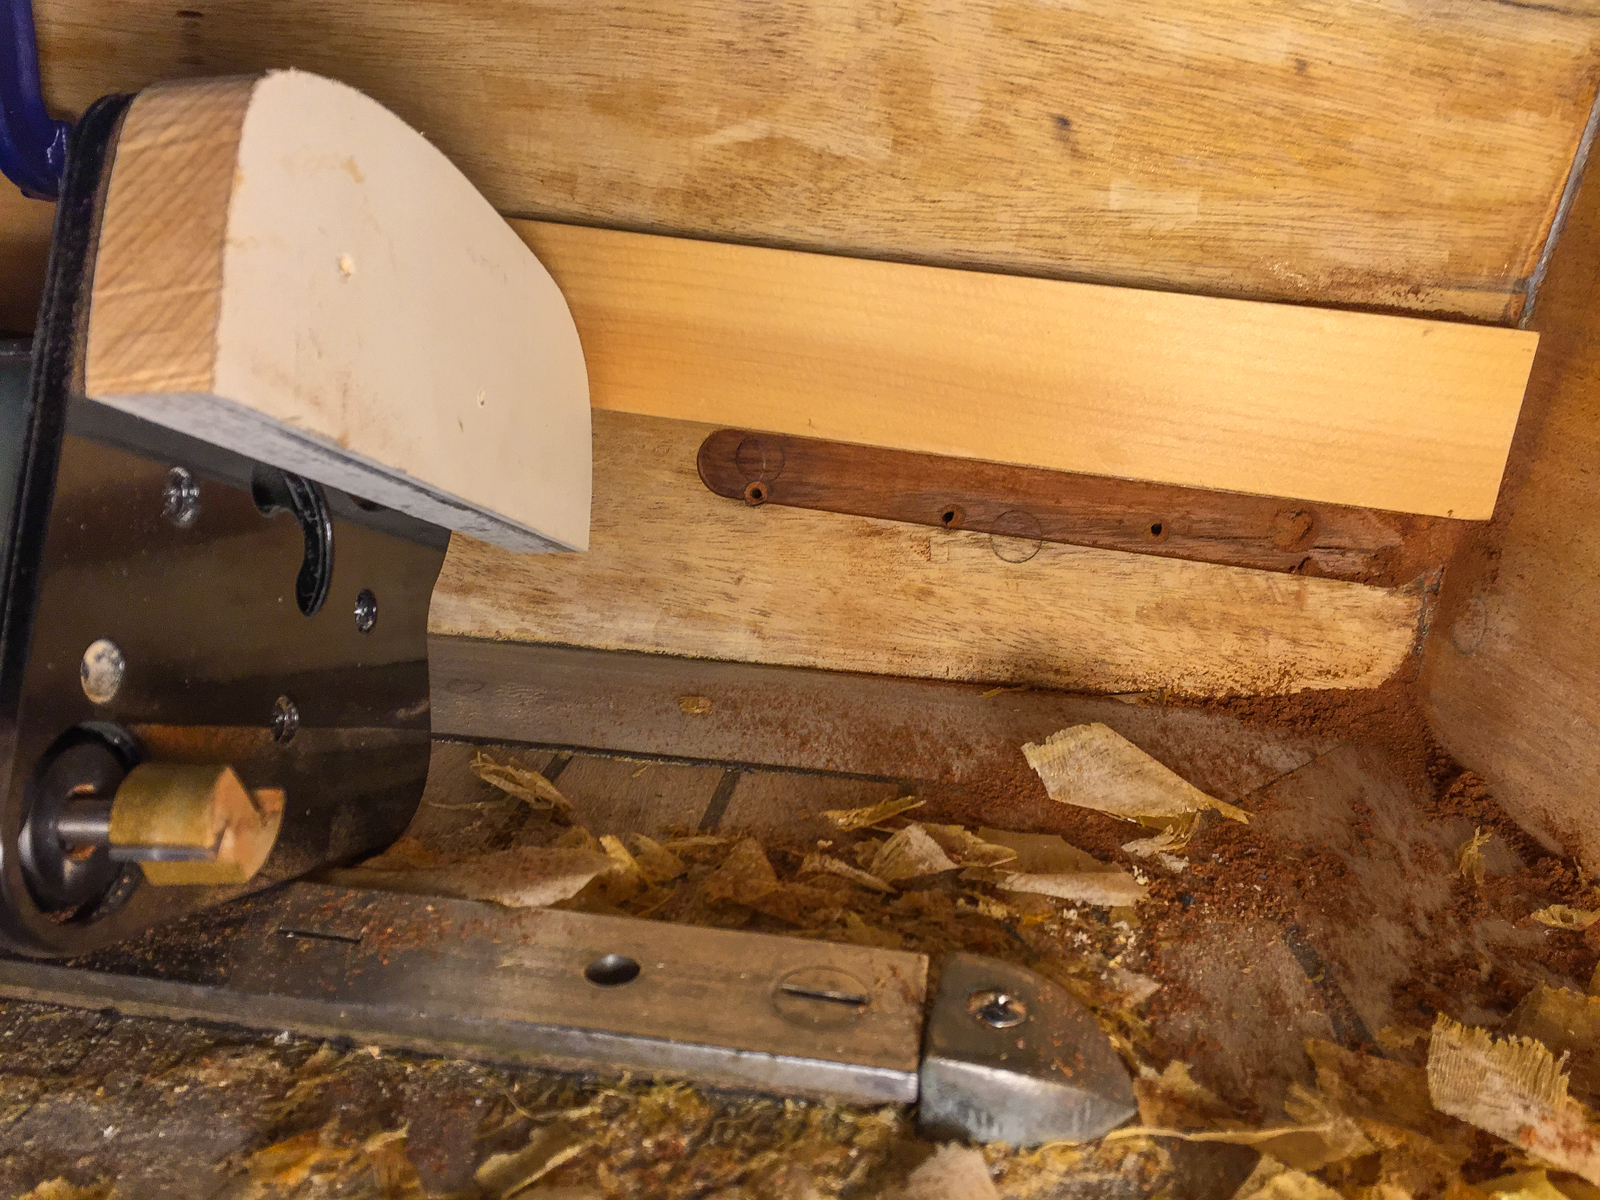
The gain could have been a tad wider but 3/4" is the largest straight bit with a 1/4" shank, I could find.
Here's a small crack in the other corner. The fence is set the exact distance between the router fence and the center of the (in this case) a 1/4" bit.
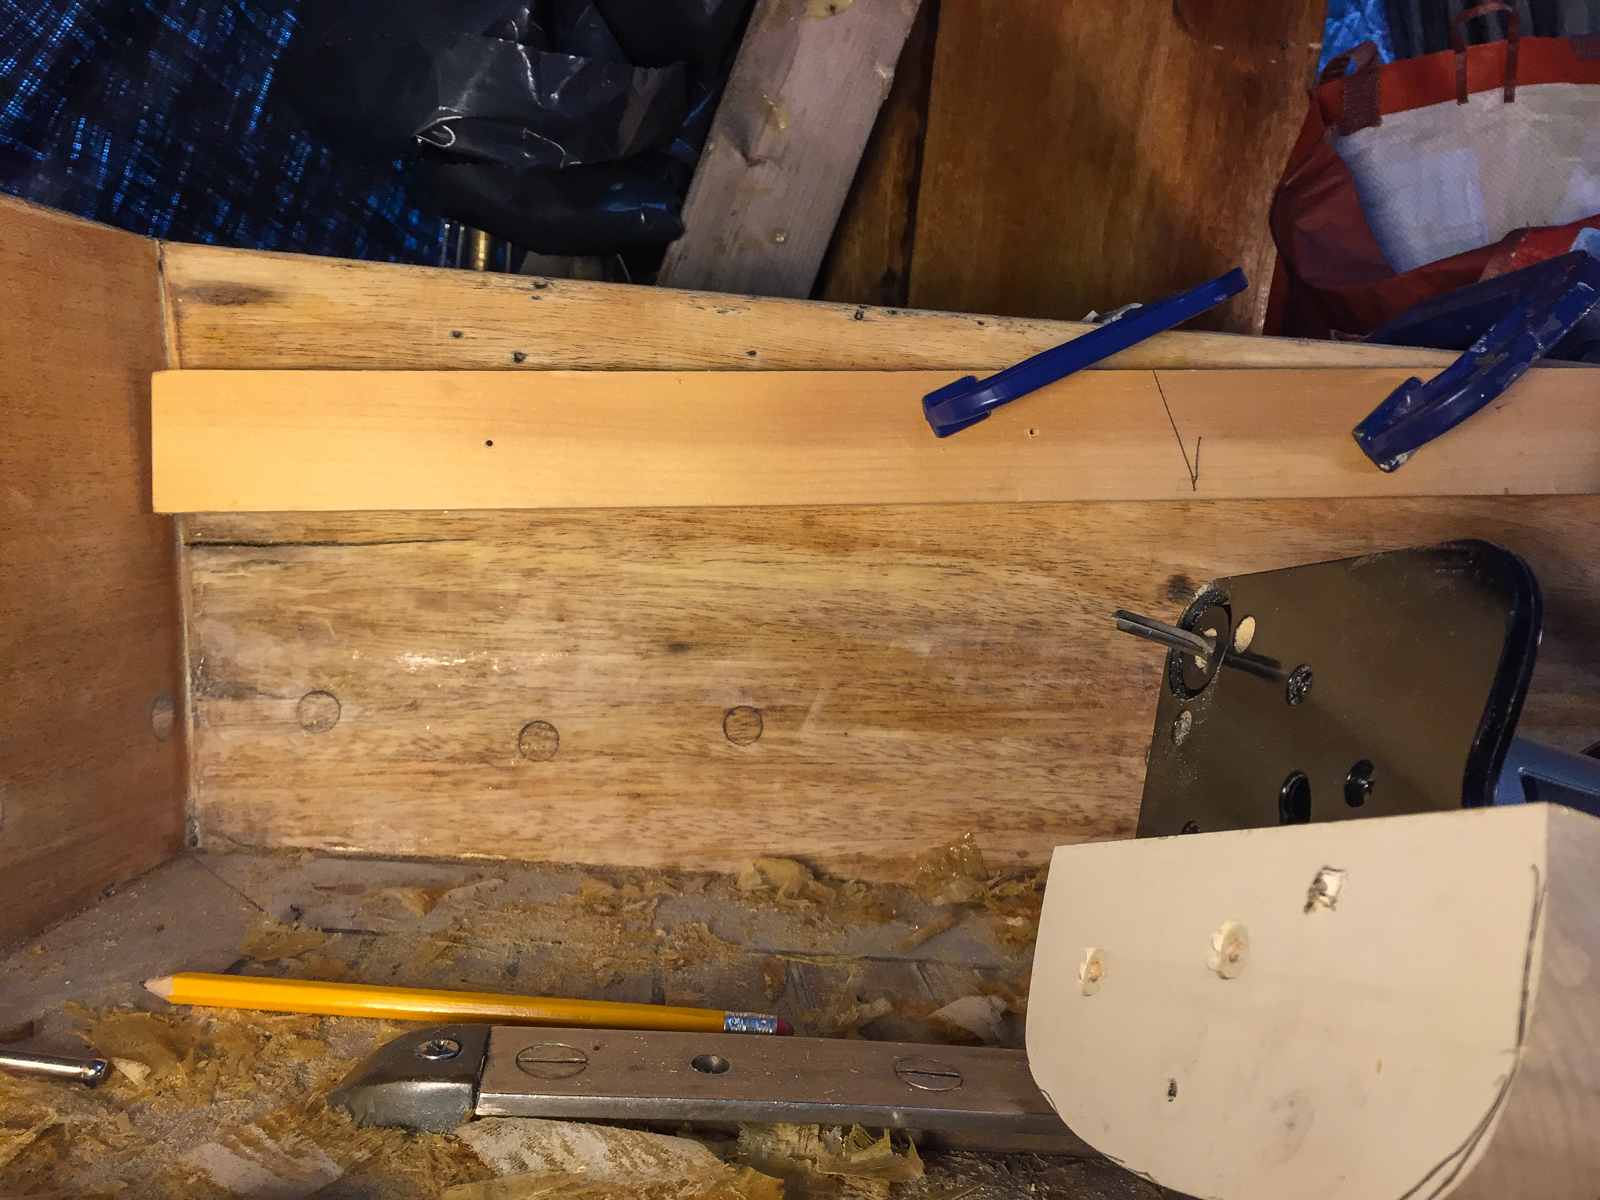
The off-set router base cuts the gains within a 1/2" of the corners. What's left is easily marked, cut with a sharp knife, and cleaned out with a sharp chisel.
That was fast! This stage (over the old method) is even faster. Take the router home and make the same cuts - only longer by a few inches - on a scrap of wood. Now rip pieces that will fit snuggly in the grooves in the scrap(and thicker than the depth of the gain). Use a sandpaper on a flat surface to fine tune a snug fit.
Now shape the rounded corners on your extra long patches. With a rough sawn circle and sandpaper on a flat surface, it's easier than it looks. Once you have a snug fit in the shop(that doesn't take long), with a bevel square and a fine handsaw, sandpaper, head back to the boat.
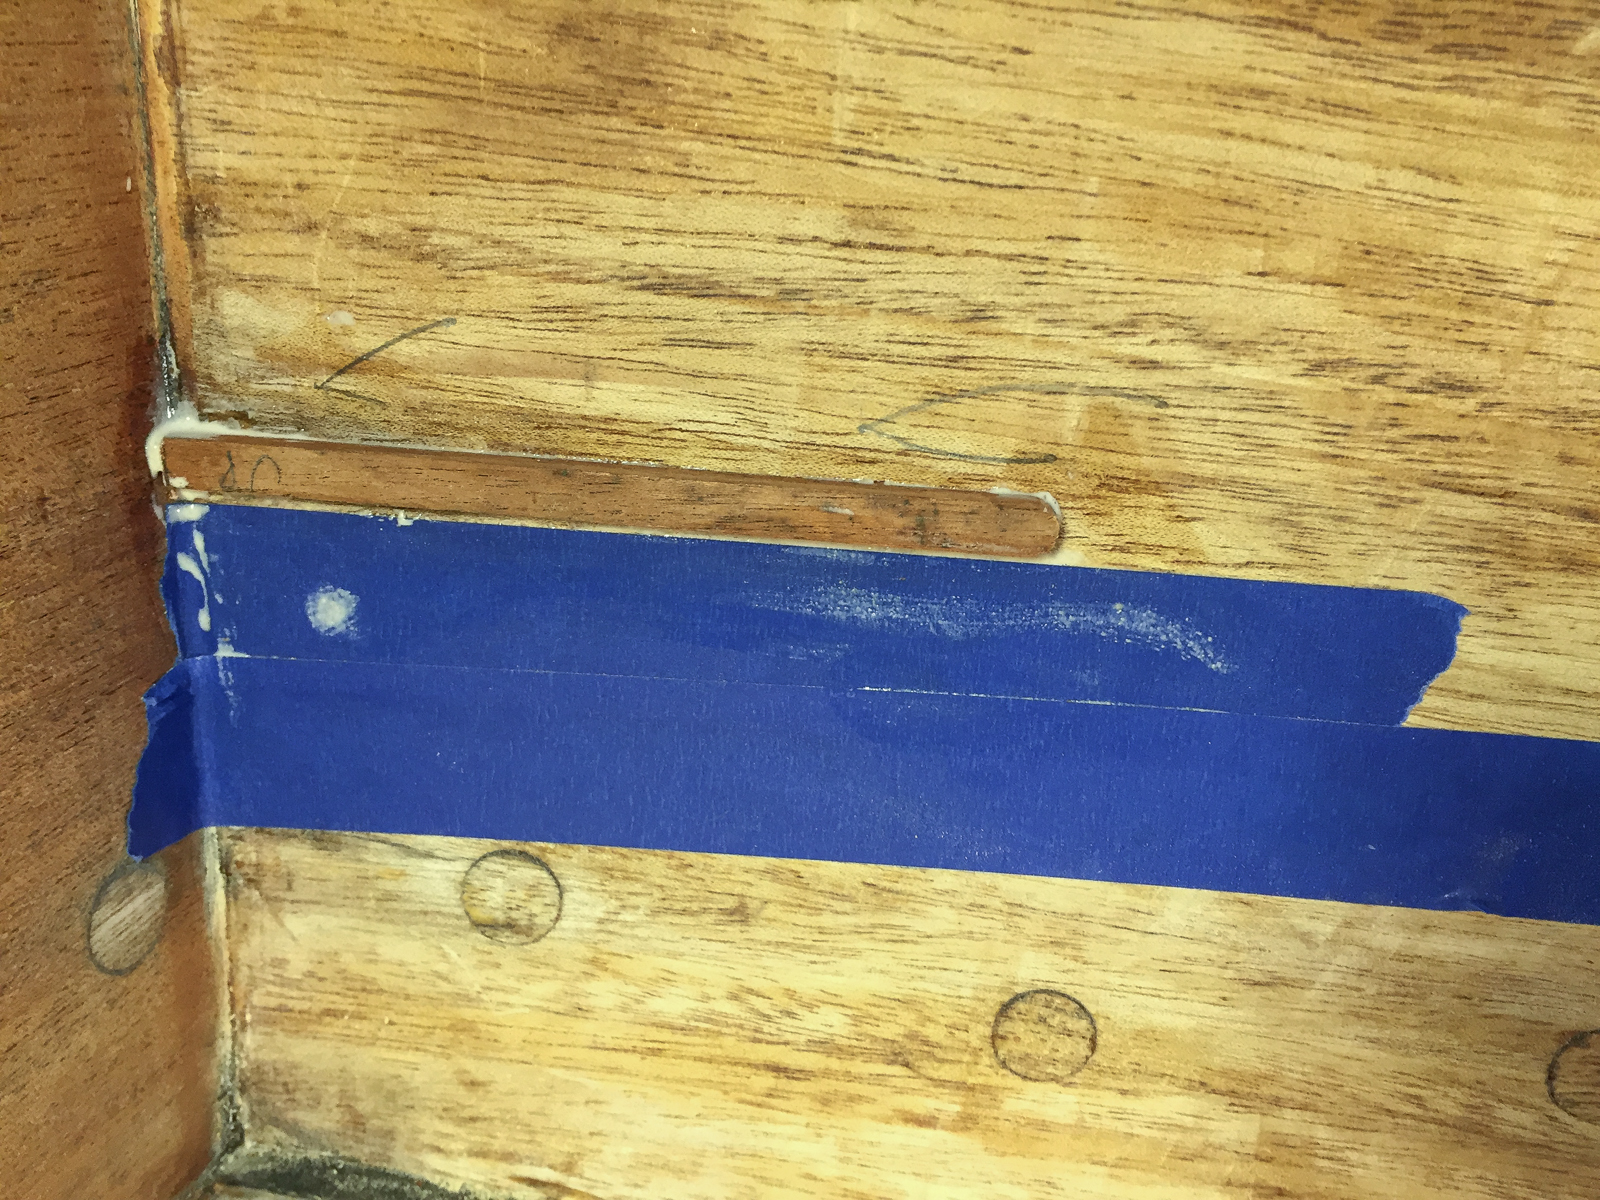
Carefully mark the length - angle, and finish fit the cut with sandpaper(again on a flat). Glue(waterproof/epoxy) and clamp(any which way you can).
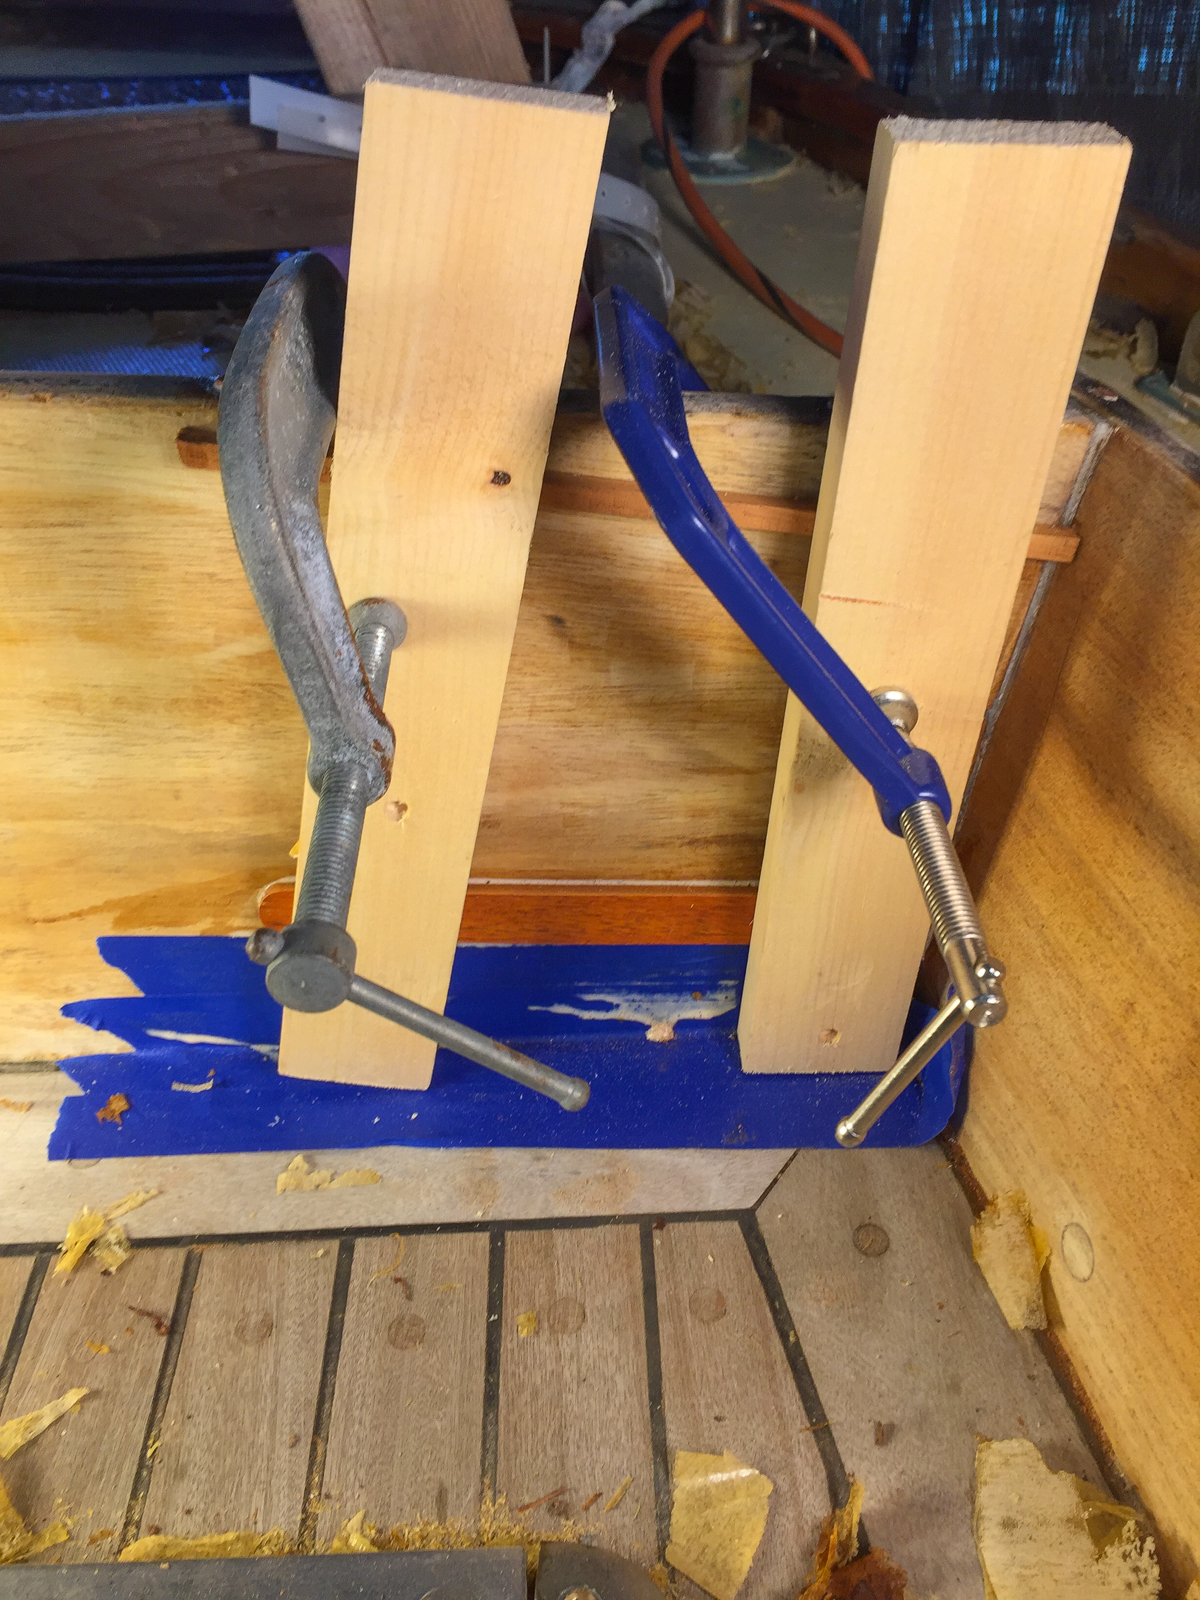
Your patch may be snug enough to just tap into the gain.
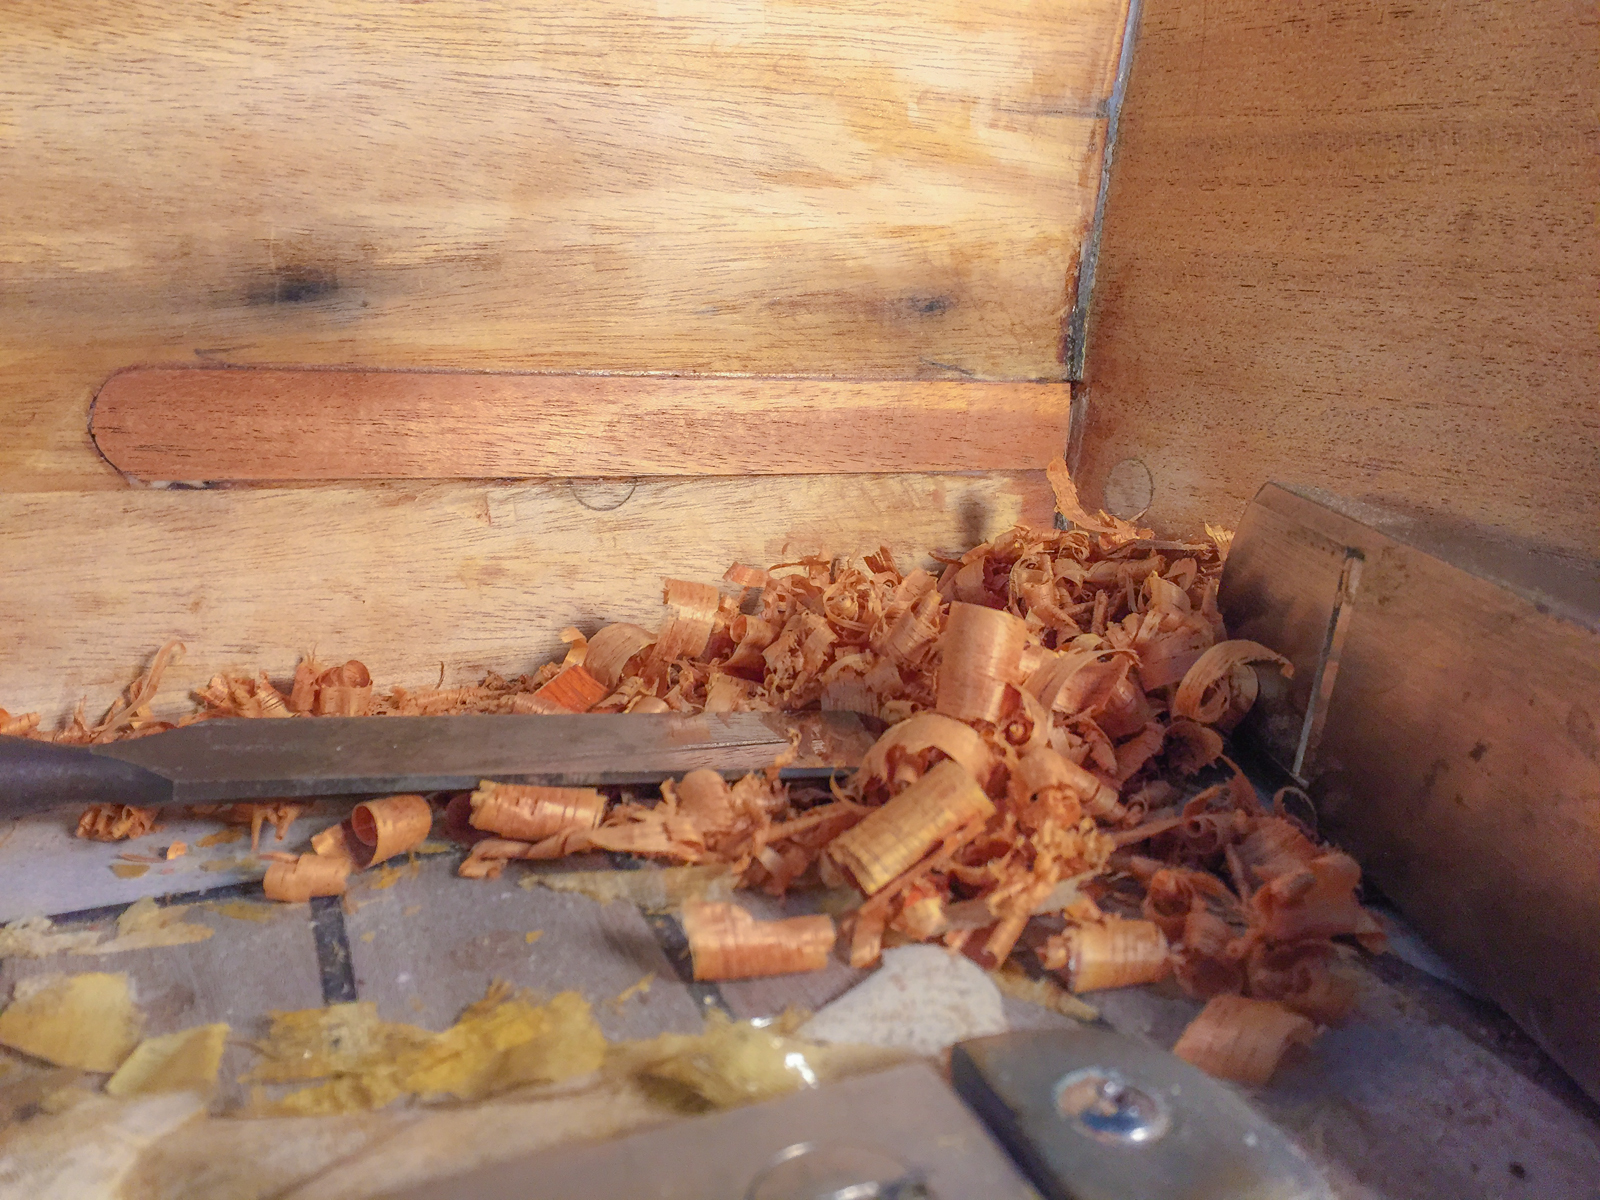
Once dry, Carefully pare off (with a sharp chisel/block plane) the excess to just above the old wood:
And sand flush, with 80 grit paper, as you prepare for renewing the varnish(which I am doing to the coamings after about 10 years from the last 'wooding')
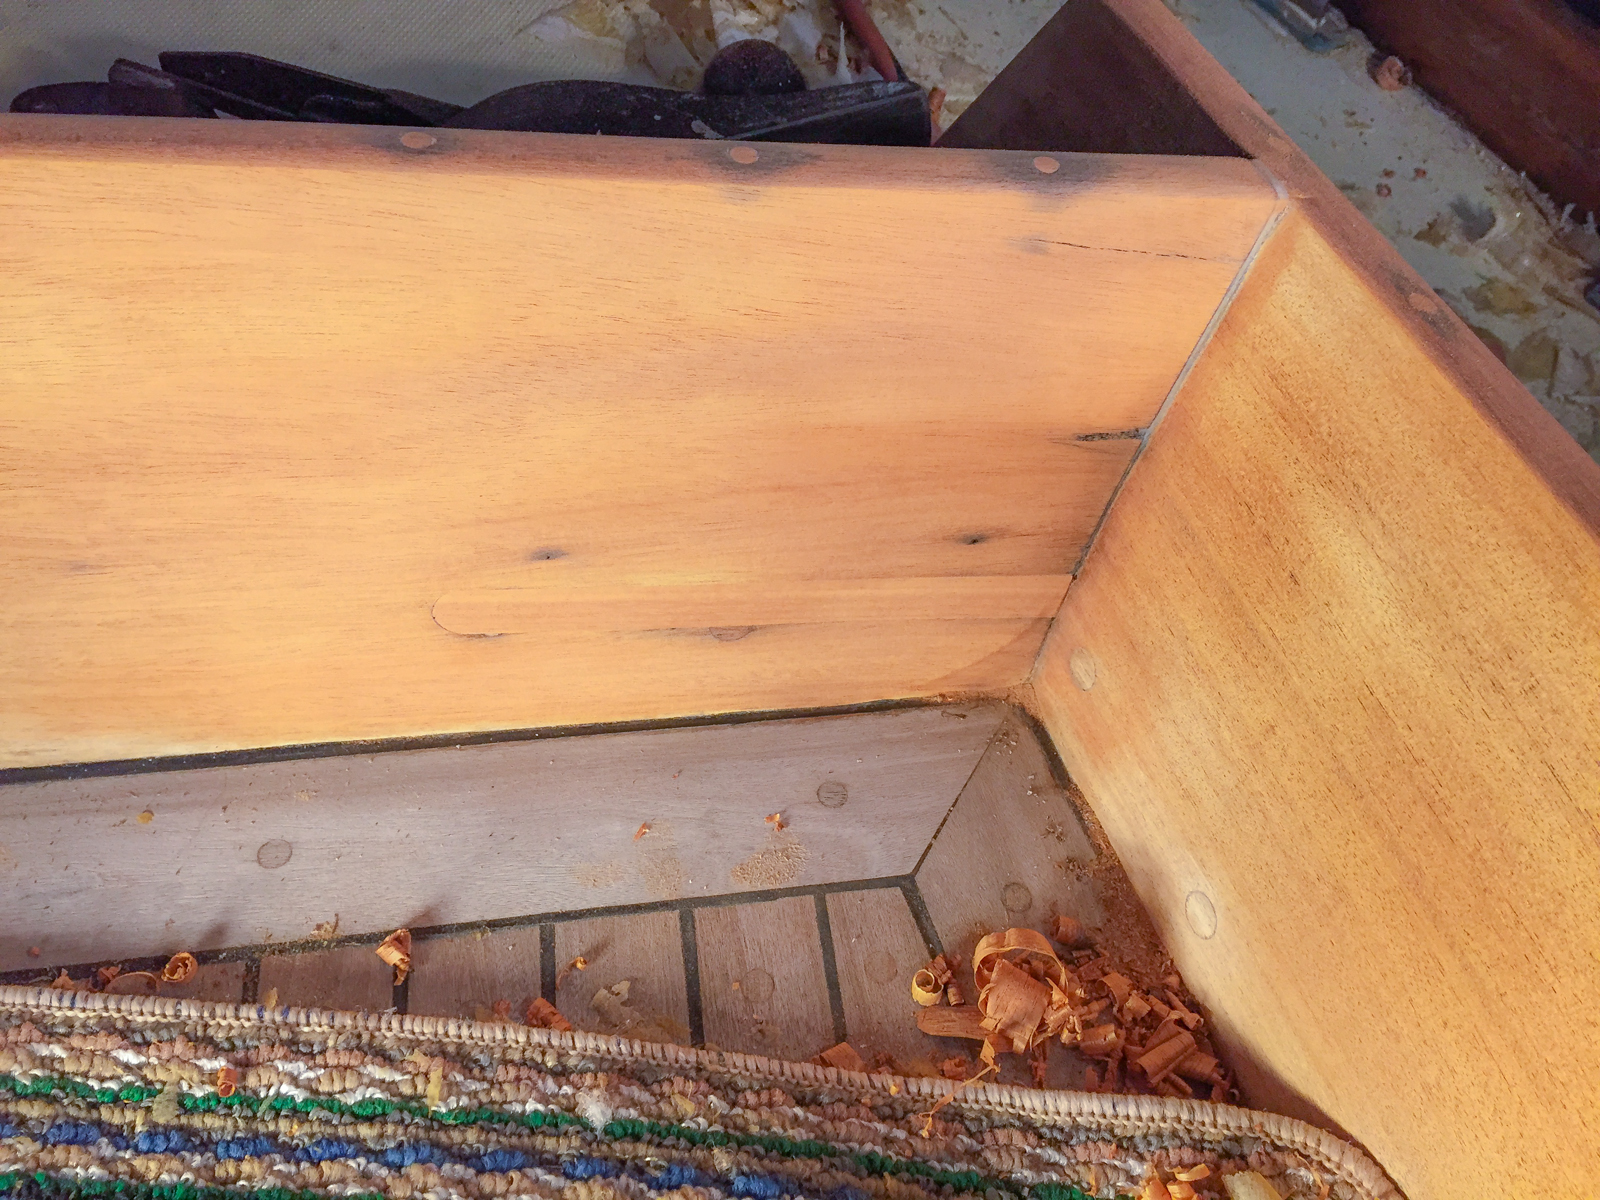
You can see I bored the mystery fastener holes(top of coamings) out for 1/4" plugs, now permanently glued to the wood. The smaller cracks, pin holes, will get filled with something after I've stained the coamings(which I think will hide more of the dark stains).
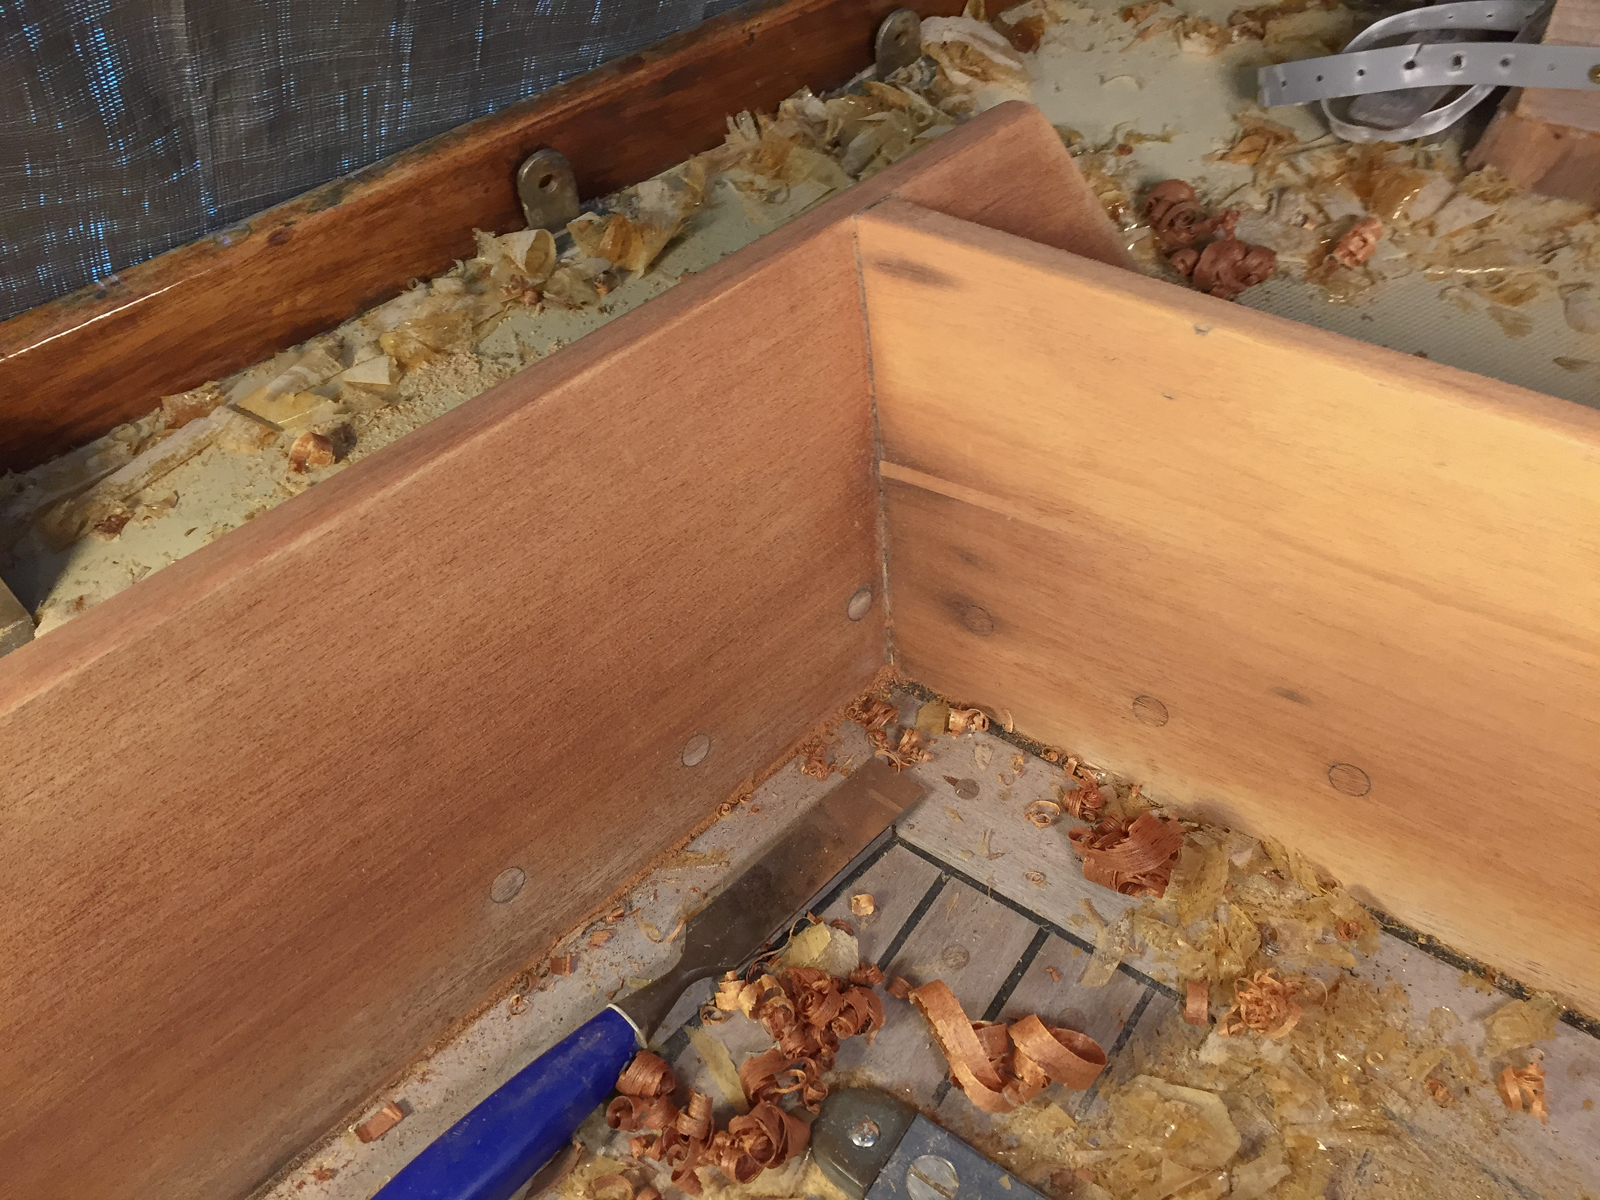
56 seasons of foot traffic has worn the tops of the coamings. I've taken a long joiner plane with a very sharp blade, and carefully trued the tops. With a sharp block plane and sandpaper, the profile of the tops is restored.
This corner is the worst spot:
I could have ripped this aft coaming out and replaced it. But it's still strong so I'd rather repair stuff that still works(hard to match new wood with old).
Somewhere back in time (before I owned the boat), somebody mounted something (any ideas?) to this corner. Look closely; the lower large split had 4 mounting holes which were filled long ago. The larger wood plugs at the same height(all around deck) cover the through bolts of the coaming to deck flange connection(bronze, in fine shape).
Looking closely again, you may see 5 similar holes (long ago filled), on top of the coamings where the unknown piece was mounted. Plus, somebody used a filler (polyester resin?) near the corner, where one of the mounting holes rotted out.
The old classic idea of a Dutchman repair, or a graving piece, was to cut a patch out of the same wood, place it over the damage-trace it, and cut a gain in the damaged piece, fit the patch. It's not too difficult but it takes time.
Heres a faster way: Using a small router with an off-set base, I screwed a scrap to the base as a guide for the router. Next, I clamped another scrap of pine to serve as a fence, on the coaming.
Turn on the router and starting at the corner, carefully plunge the bit (which is set 3/16" below the wood fence) into coaming and slide along the fence to a mark(I made) that covers the damage, and turn the router off. Hold it steady so the line is true.
The gain could have been a tad wider but 3/4" is the largest straight bit with a 1/4" shank, I could find.
Here's a small crack in the other corner. The fence is set the exact distance between the router fence and the center of the (in this case) a 1/4" bit.
The off-set router base cuts the gains within a 1/2" of the corners. What's left is easily marked, cut with a sharp knife, and cleaned out with a sharp chisel.
That was fast! This stage (over the old method) is even faster. Take the router home and make the same cuts - only longer by a few inches - on a scrap of wood. Now rip pieces that will fit snuggly in the grooves in the scrap(and thicker than the depth of the gain). Use a sandpaper on a flat surface to fine tune a snug fit.
Now shape the rounded corners on your extra long patches. With a rough sawn circle and sandpaper on a flat surface, it's easier than it looks. Once you have a snug fit in the shop(that doesn't take long), with a bevel square and a fine handsaw, sandpaper, head back to the boat.
Carefully mark the length - angle, and finish fit the cut with sandpaper(again on a flat). Glue(waterproof/epoxy) and clamp(any which way you can).
Your patch may be snug enough to just tap into the gain.
Once dry, Carefully pare off (with a sharp chisel/block plane) the excess to just above the old wood:
And sand flush, with 80 grit paper, as you prepare for renewing the varnish(which I am doing to the coamings after about 10 years from the last 'wooding')
You can see I bored the mystery fastener holes(top of coamings) out for 1/4" plugs, now permanently glued to the wood. The smaller cracks, pin holes, will get filled with something after I've stained the coamings(which I think will hide more of the dark stains).
56 seasons of foot traffic has worn the tops of the coamings. I've taken a long joiner plane with a very sharp blade, and carefully trued the tops. With a sharp block plane and sandpaper, the profile of the tops is restored.
