Separate Deck and Hull

Aug 16, 2019
5
MFG Whistler Candlewood Lake
Hi all,

First time on the forum and I'm looking for a little information if anyone has any input. I'm working on separating the hull and deck on my daysailer. Pretty sure it's a MFG Whistler, but hard to tell as it was "rescued" from the junkyard. Water ends up in between the two when I go out for a few hours and it usually drains a couple gallons afterwards.

I'd like to separate the two and do any repair to the hull that it needs. The rub rail and rivets were drilled out and I have most of it separated around the outside. I can separate the two about an inch, but I still get a lot of resistance from the inside. What's the best way to get them apart? Probably a stretch to ask, but is anyone familiar with this the inside of this that could shed a little light?

Thanks.
 
Aug 16, 2019
5
MFG Whistler Candlewood Lake
This is what I'm working with. Sorry the photos aren't great and I can get more if there is something that would help better. The parts I marked in orange or where I end up feeling the most resistance when working the deck off. I'm still working on getting the back separated, but I'm trying to work slowly so I don't crack more of the edge of the deck.

The blue and red arrows are the direction the last photos are taken of on the inside under the foredeck. The well where the mast sits can be seen and it looks pretty close to the sides. If that foam is what's holding it there what's the best way to get rid of it? Would it be possible the two are glued on the bottom under where I'd sit in the rear?

Overall.jpg
SideOverall.jpg
ResistOrange.jpg
BoatPhotoDirection.jpg
RedDirection.jpg
BlueDirection.jpg
 
Oct 22, 2014
21,104
CAL 35 Cruiser #21 moored EVERETT WA
Welcome @bornfrustrated
Look at image #5. The yellow stuff looks like insulation. It is more likely some form of adhesive that is used to tab along the joint to keep the two pieces together.

In most manufacturing the builders build the deck and hull separately. Then they lay up a glue or adhesive caulk on the hull, place the deck on top and then screw, rivet, or bolt the two in place. When the adhesive has cured the bolts are left but they become less important as the adhesive is the real bond. Our boats then are put under all sorts of stress from the water and the rigging. The manufactures put tabs and bulk heads in between the deck and the hull to strengthen the stress points and relieve the pressure on the deck joint.

The yellow stuff looks like a glued tab. This may be hanging up your separation of the deck from the hull. Your going to need to go in between the deck and hull and free any tabbing or bonding you find. Most likely on a boat that size where the stays are going to attach, the center board, the transom. It could be just about anywhere. These small boats were designed then models were constructed, and the builder put the boat in the water. By trial and error they found places that cracked or broke or leaked and changed their build procedure to address the needed change. Often the first boat is pretty banged up and does not resemble the boats that were built say. , 50 to 100 boats later.

Good luck.
 
Dec 28, 2015
1,850
Laser, Hunter H30 Cherubini Tacoma
I had to do a lot of internal work on my Laser and was faced with the same problem. I put 4 inch access ports strategical in the deck for access and did the rest from the outside. You can get fabric bags that fit into the ports to use for storage that work well.
I'm suprised you were able to get the two apart that far.
 
Oct 22, 2014
21,104
CAL 35 Cruiser #21 moored EVERETT WA
I'm suprised you were able to get the two apart that far.
I'm guessing, but I think his original assumption that the deck seal had weakened or failed in areas along the joint were a factor. Just having a difficult time as to how to try and do a fix. You could attempt together a hand inside from the boat and squirt some 5200 along the cleaned seam from the area of the Shroud attachment points to the bow on both sides... But I fear it would not be a perfect result. Certainly not like getting the deck completely off and having space to clean then reseal the deck.


You might try to get one of those scope cameras into the area of the stays (your orange marked areas) and hopefully get a picture of how it was put together. It may give you clues as to how to open up the area. Your Avatar @bornfrustrated "born frustrated" is how I feel. It is not time for a big hammer. It is time to exploration of hidden spaces.
 
Aug 16, 2019
5
MFG Whistler Candlewood Lake
Hi all, thanks for the input. I know there's probably going to be varied information, but is there a way to help break down the adhesive? It's pretty tight and I wouldn't be able to get a hand let alone any cutting tools inside to remove it. Something I could fill the inside with and let soak to break down the bond?
 
Oct 22, 2014
21,104
CAL 35 Cruiser #21 moored EVERETT WA
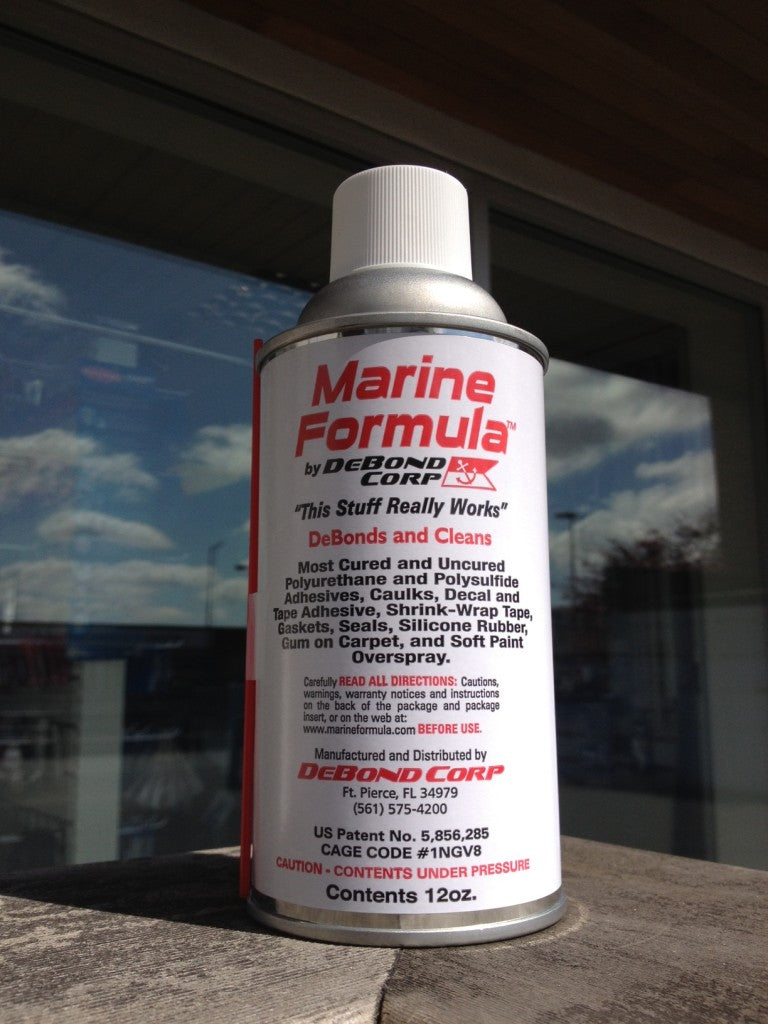
Guessing that the build used 3M’s 5200 product, 3M does make a “Debond” product that softens 5200.
Marine Formula™ is a specially formulated patented mixture that cleans and removes adhesives and sealants used on and inside the boat. Use Marine Formula™ to clean-up and remove these common marine adhesives and sealants:​
  • Cured 3M™ 5200 and other polyurethane adhesives. U.S. Patent No. 5,856,285
All I know is what I read about this product. Worth a shot.
Also sold on Amazon...