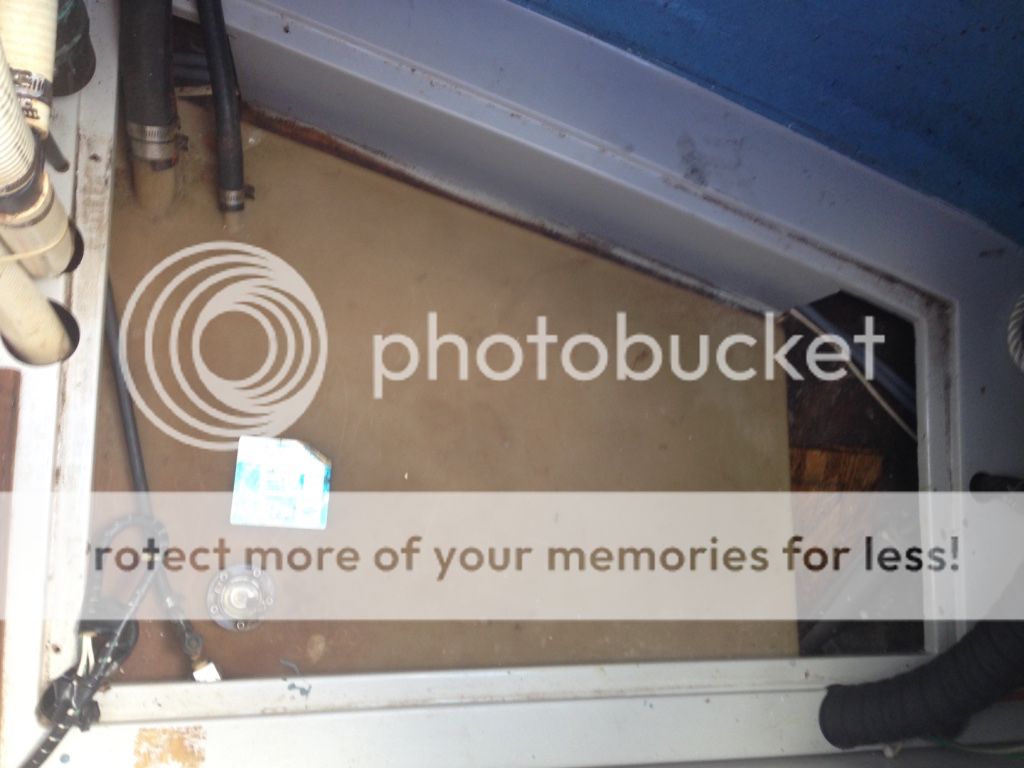
Replacing hoses in 302

Dec 7, 2013
97
O'day 302 Baltimore MD
How have you done it? I am getting ready to replace the exhaust hose and all the raw water/ sanitation lines. Many of these hoses run into never never land between the stateroom and the lazarette and I wonder how best to shove the new hose through. I had thought about using a coupler and fastening the new hose to the old hose and pulling it through, but not sure if that will work. Plus, I can't seem to find a 1 7/8 inch male to male coupler for the exhaust line.

Any suggestions? It looks like making a couple of those bends where I can't see or reach could be difficult.
 
Jan 4, 2006
7,264
Hunter 310 West Vancouver, B.C.
I had thought about using a coupler and fastening the new hose to the old hose and pulling it through, but not sure if that will work. Plus, I can't seem to find a 1 7/8 inch male to male coupler for the exhaust line.
Use a cheap, 2", vinyl coupling as a TEMPORARY coupling to pull the new exhaust hose through (and I'm assuming this is 2" wet exhaust hose). Use a couple of hose clamps to make sure it doesn't come apart. OR ................ if you have a short 1-1/2" dia. pipe nipple which has an OD of 1.90" you may be able to clamp it tight enough to hold while you pull.

The other piece of equipment I find invaluable for installing hoses is a hair drier for going around those tight bends. Heat it up to the point where you can't handle it with your bare hands and there isn't anywhere you can't thread it.
 
Feb 26, 2004
23,047
Catalina 34 224 Maple Bay, BC, Canada
A technique I used was to drill holes in the sides of the hoses and then tie them together with twine. Less expensive and smaller than couplings.

The reality is if you can't see it, it's gonna be a bitch to run it through. Dumpster Diving 101 is your guide.
 
Dec 2, 1997
8,944
- - LIttle Rock
Use a cheap, 2", vinyl coupling as a TEMPORARY coupling to pull the new exhaust hose through (and I'm assuming this is 2" wet exhaust hose). Use a couple of hose clamps to make sure it doesn't come apart. OR ................ if you have a short 1-1/2" dia. pipe nipple which has an OD of 1.90" you may be able to clamp it tight enough to hold while you pull.

The other piece of equipment I find invaluable for installing hoses is a hair drier for going around those tight bends. Heat it up to the point where you can't handle it with your bare hands and there isn't anywhere you can't thread it.
Use a male-male coupler to connect the old hose to the new. Do not use hose clamps...they'll get hung up on something you can't get to. Duct tape won't hold if you have to pull very hard. Instead, cut the ends of the old and new hoses very cleanly...you want to be able to butt them together on the coupling to create the smoothest unbroken surface possible. Secure both hoses to the coupler with PVC cement...you'll cut the new hose off right behind the coupler. Or try Stu's idea.

Heating any hose to bend it tighter than it will bend willingly is not a good idea because the outside of the radius will be stretched enough to weaken the hose and cause it to tear--if not immediately, within fairly short time...and soften the inside of the radius enough to kink it. (See photo). Instead, break the hose and insert an inline 90 or 45 degree radius fitting. Dometic/SeaLand has a complete selection....see page 35 in this brochure: SeaLand Marine Toilet Systems Product Guide
Kinked hose 2.JPG
 
Jan 4, 2006
7,264
Hunter 310 West Vancouver, B.C.
I appreciate the advice. Any ideas on where I can find these couplings?
Pay a fortune at Waste Marine or try a big box store and pay only a few $$$. They're only a temporary.

I like Peggy's idea of using PVC cement or even contact cement for a smooth exterior when pulling. Put it together wet and let it dry and most any solvent based glue will work. Just make sure you've got enough excess hose.
 
Last edited:
Dec 2, 1997
8,944
- - LIttle Rock
The male-male coupling is temporary, but inline radius fittings aren't. You can buy the bends from the plumbing department at any box hardware store, but they won't have hose barbs to fit 1.5" and 1" ID sanitation hose, which you'll need, and are only available from SeaLand...they're part #385341513. You'll use PVC cement to connect 'em to the bends. Google Dometic/Sealand distributors to find one, or you may be able to order directly from SeaLand (who now answers the phone "Dometic") in Ohio 800-321-9886
 
Jul 12, 2011
148
Oday 302 st pete
Hey Mack - I did my exhaust line, bilge hose and raw water to the head using Stu's suggestion. It also helped to detach the hoses from the fuel tank and remove its bracing to allow it to move around enough to get a little extra clearance.

It was a real PITA, but nice to get done.
 
Dec 7, 2013
97
O'day 302 Baltimore MD
Thanks everyone. It looks like a PITA....I am going to take a shot at the exhaust hose tomorrow......see how it goes.

The other hoses haven't come in yet.
 
Dec 7, 2013
97
O'day 302 Baltimore MD
So....I managed to get my exhaust hose replaced today, but it was not a lot of fun to do. I took Stu's advice and decided to try the string method. I cut four holes in each hose and tied a piece of nylon tie-line (square knots) from REI at opposing angles and then covered it with white gaffers tape (used in staging and theatre work). Everything was good until I realized that I couldn't move the line. I will probably bring this up in another thread, but the fuel tank was wedged up against the exhaust line and I couldn't move the move the line through without moving the tank.

Unfortunately, the tank is almost full, so it was difficult to move. I wedged a couple of small pieces of 1/4' ply underneath one side and it freed up the hose well enough to work it through. Since I was alone, I had to go below and push the old hose through 2 inches, go to the cockpit and pull out two inches, wash, rinse, and repeat. It took a long time, but I finally got all of it through.


Hopefully the sanitation lines will go easier next week.
 
Dec 2, 1997
8,944
- - LIttle Rock
This might help make it at least a little easier:

Prepping to do any work on any part of the sanitation system starts with thoroughly rinsing out the whole system with plenty of clean water before taking anything apart. Pump out the holding tank VERY thoroughly with lots of clean fresh water. Adding Raritan C.P. to the rinse will remove most of the odor. Rinse out the toilet, all hoses and any macerators or manual pumps, VERY thoroughly with lots and lots of clean water. If the hoses REALLY stink, it may help to smear a healthy glob of Vicks Salve under your nose before you start. If possible, schedule your project for a time when you can do it on a cool day. And be sure to create plenty of ventilation, especially in any closed areas in the bilge.

Put plastic garbage bags or disposable aluminum pans under hose connections to catch any spills. (Warming hoses with a blow dryer makes them easier to remove and replace). Have a couple of rolls paper shop towels (super heavy duty paper towels) handy...you'll need them.
Now you’re ready to start the real work.

Remove the highest hose connection first to minimize drips, and stick plugs (available from any hardware store) in the ends of the hose. Work on only one hose at a time...and take each section of hose all the way off the boat as soon as you get it loose (your dock mates may insist you take it all the way off the dock!). When taking a hose off a fitting, have a pan or a plastic trash bag under the connection to catch any drainage. Have lots of shop towels handy to mop up what misses the pan.

Removing hoses becomes much easier if you’ll heat them with a heat gun (I’ve always preferred using a blow dryer) to soften them up before trying to work them off. Unless you want to also replace all the fittings, do not pry them off with a screwdriver or saw them off...the screwdriver blade will dimple the fitting, the saw will cut into it, and the new hose won’t seal.

It’s often much easier to pull new hose through inaccessible places if you connect it to the old hose and pull the new through as you pull the old out. Use a male-to male connector. Use PVC cement to secure the ends of both hoses onto it. Do not use duct tape…it won’t hold if you have to pull hard. Do not hose clamps or anything that can get hung up as you pull the hose through, and be sure to butt the ends of the hose tightly together to create the smoothest uninterrupted surface possible. After you’ve pulled it through, cut the new hose cleanly behind the connector and dispose of the old hose and connector.

To put the new hose onto fittings, heat the hose with a blow dryer (use a heat gun only if you really know what you’re doing with one) to soften it. Be careful, and be patientl! You only want to warm the hose enough to slide it onto a fitting; overheating hose can damage it, causing collapse or tearing. Smear a little dish soap (or even better, K-Y surgical jelly; it’s much slipperier than soap and water soluble, so it dries out) on the inside of the hose and the outside of the fitting to lubricate the connection. Don’t use Vaseline or any grease...and don’t use ANY cement or sealant...only Teflon tape on the threaded end of tank fittings. Double clamp all the hose connections with screws on opposite sides of the hose, or at least 90 degrees apart if 180 degrees isn’t possible.

Important note: Plastic tank fittings are NPT (National Pipe Thread) standard, which are slightly (so slightly that it’s not noticeable to the naked eye in such a short piece) tapered. They’re also self-sealing. So when threading fittings into the tank, tighten only one turn past “hand tight,” plus enough to aim an elbow in the direction needed, no more. If the fitting leaks around the threads, wrap them with a couple of layers of Teflon tape. Over-tightening can result in a cracked female tank ftting, if not immediately, within a short time. That little “ping” sound is the last thing you want to hear coming from the tank.