Lewmar port light seal , replacing
- Thread starter mehmworld
- Start date
There are a couple tools shown on their seal replacement instructions, a "roller" and a "pusher" if you don't have it already this PDF it may be helpful.
https://www.lewmar.com/sites/defaul...loads/Product-Literature/Manual-B5967-A+B.pdf
https://www.lewmar.com/sites/defaul...loads/Product-Literature/Manual-B5967-A+B.pdf

Just wondering what year is your boat and where did you order or find place to order.
I have 2007 H36 and I have one leaking in heavy rain.
Nick
I have 2007 H36 and I have one leaking in heavy rain.
Nick
They have gaskets for lewmar and other ports available in the store on the site we're using now.
https://shop.sailboatowners.com/lewmar_ports.php
https://shop.sailboatowners.com/lewmar_ports.php
Last edited:
For anyone happening on this post... I successfully replaced the gaskets on six Lewmar Old Style size 1 port lights. It was one of the most irritating projects I've ever undertaken on land or sea but after a lot of trial and error I finally cracked the code. Sharing what worked for me in the hope that it will be helpful to others:
- Remove the port light frame from the boat. You do this by unscrewing the inner frame and gently inserting a stiff putty knife or chisel between the glass and the outer frame and prying away from the cabin top. You'll probably have to tap the knife with a hammer to get it to squeeze in there. You don't have to do this step but I highly recommend it - it will make it much easier to remove the old sealant and insert the gasket since you can get your hands all around the frame. Also you can do it at your dining room table while watching Netflix instead of sweating in your cabin - which is nice, as the prep can take a while. Finally, if you gaskets are worn out it's probably time to rebed those frames anyway so might as well take this opportunity while you're under the hood. Cover the hole with shrink wrap tape if the boat is not under cover.
- Remove all the old sealant from the groove. As someone said above, you gotta get it all. I used a set of dental-like picks from Harbor Freight, an old credit card, and a plastic putty knife. This is the worst part.
- Dry fit the gasket, as the instructions say. You might be tempted to skip this step. Don't. The dry fit will help you notice any problems that might arise when you finally go to seal the gasket in place. If you fail at that step you'll have to start over at step 2 and remove the sealant you just applied. (This comes from experience.) Pay attention to the proper orientation of the gasket as described in the instructions.
- HERE IS THE SECRET TO SEATING THE GASKET: The gasket will probably seat just fine into the groove on the straight parts of the frame put no amount of pushing with your fingers will get it to seat in the corners. Find yourself a thin, stiff piece of plastic, or better yet several pieces of plastic of varying thicknesses. I started with an old health insurance card but eventually graduated to a set of plastic feeler guages. Now, grab the frame at the corner with one hand and push down in the gasket firmly. With the other hand, take your feeler guage and insert it in between the fram and the gasket. The trick is to catch the lip of the arrowhead with the feeler. When you've got it, push down harder on the gasket as you slide the feeler all the way in. The idea is the use the feeler to pop the arrowhead into the groove. IMPORTANT: once the arrowhead is seeded it might pop back out again as you withdraw the feeler. Counteract this tendency by pushing down as hard as you possibly can on the gasket whil slowly removing the feeler.
- When you have successfully dry fit the gasket, pull it out, add a thin bead of silicone, and repeat step four. Ironically this can be a little easer because the wet silicone helps to lubricate the feeler as you slide it in and out between the gasket and frame.
Chris - thx for posting that. I spent 5 hours today trying to replace a gasket on one of my Lewmar portholes. I got the old one out and painstakingly cleaned out the groove (which took most of the time) but no matter how hard I tried I just couldn’t get the corners of the new gasket in when I dry fitted it. I’ll try your suggestions because I’ve also got 6 of them to do. Just bought a 1995 Beneteau Oceanis 321 three weeks ago & all of the opening portholes leak to some extent because the gaskets were never changed. Luckily I found a bag of the baskets on board so the prior owner was obviously getting ready to do it. Will let you know how it goes.
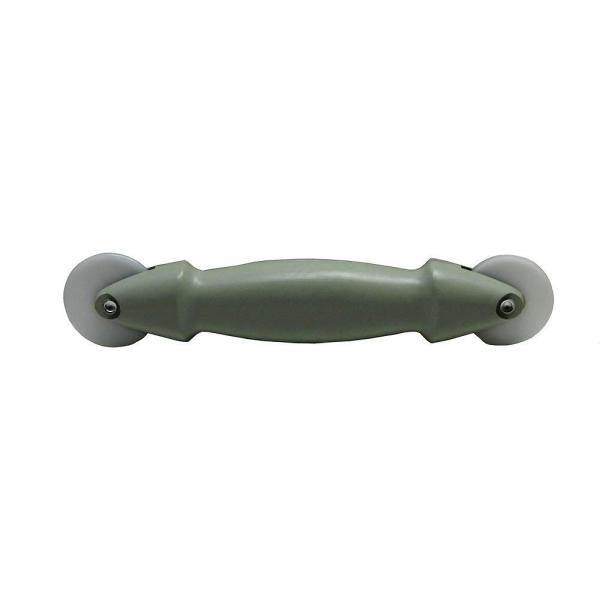
I replaced the gaskets on 6 Lewmar portholes. I used a cheap plastic window screen spline roller tool to seat the gasket into the groove. With your free hand, press and hold the gasket into position, then with the other hand, roll the spline tool firmly over the gasket about where the groove is located under the gasket. The arrowhead on the gasket should pop easily into the groove. As others have stated, the silicon adhesive will lubricate the groove so the arrowhead pops into the groove much easier.

Instructions from Lewmar: https://www.lewmar.com/sites/defaul...loads/Product-Literature/Manual-B5967-A+B.pdf
Ours is an 89 Hunter 30G. I got ours right here on the SBO store. Just call them if you can't find it.Just wondering what year is your boat and where did you order or find place to order.
I have 2007 H36 and I have one leaking in heavy rain.
Nick
Ken
I'm doing this now. I re-bedded all the ports a few weeks ago. I have now returned to replace the gaskets. I'm having a hell of a time, even with all the great advice. I think I have it all the way in for the dry fit, however I can't get the ports to close to save my life! Either I have the gasket inserted incorrectly or possibly it's not in all the way on the corners. Any ideas? Were you guys able to easily close your ports after fitting the new gaskets? I feel like it would take an act of god! Also to note, I changed all the lenses out and the dogs at the time I re-bedded them. Maybe the gaskets and the new lenses don't jive with one another? Thanks in advance.
Hi Lanealoha,I'm doing this now. I re-bedded all the ports a few weeks ago. I have now returned to replace the gaskets. I'm having a hell of a time, even with all the great advice. I think I have it all the way in for the dry fit, however I can't get the ports to close to save my life! Either I have the gasket inserted incorrectly or possibly it's not in all the way on the corners. Any ideas? Were you guys able to easily close your ports after fitting the new gaskets? I feel like it would take an act of god! Also to note, I changed all the lenses out and the dogs at the time I re-bedded them. Maybe the gaskets and the new lenses don't jive with one another? Thanks in advance.
I had the exact same problem, I was unable to close the port window. I tried to loosen up the screws at the "handle catch" but that only gave me a bit of extra play. Short of shaving the rubber off, not sure what to do next. Did you have any luck? Thanks, Mike
I gave up! After hours of pouring over forums and such, I have decided that I am just going tp replace with new ports. I've since replaced 2 on the port side and they close easily, and look great. With my wife and I both pushing on the old ones we still could not get them closed, in fact I snapped the handle on one dog trying to rotate it into closed position. The money I spent to up-grade with the thought of breathing new life into the old ports could have paid for at least 1 of the new ones....oh well
Thanks for the quick reply. Same here, I may also try Lewmar, but don't expect too much. I may just send the 3 unopened ones back. One bright side to all this, the new black clip-on screens I bought fit quite snugly around the frame and seem to have stopped leaks in at least 1or2 other portlights. No cheap, but they are good.I gave up! After hours of pouring over forums and such, I have decided that I am just going tp replace with new ports. I've since replaced 2 on the port side and they close easily, and look great. With my wife and I both pushing on the old ones we still could not get them closed, in fact I snapped the handle on one dog trying to rotate it into closed position. The money I spent to up-grade with the thought of breathing new life into the old ports could have paid for at least 1 of the new ones....oh well
I was just looking at the ones I removed and I only changed the lenses and the dogs. After looking at them I'm wondering if the new lenses and gaskets are not compatible with the old hinges. I'm thinking that maybe if the hinge was also updated if that would solve the problem? Looks like a little shim in there behind the OEM hinge would possibly make a difference as an alternative. I guess the thing is still getting that damn gasket in there. I'm sticking too my guns and just replacing with new, I don't want to sink any more time and $$ into delaying what so far has proven to be a PITA
My problem began when I changed the gasket out. Yes it is a PITA. All kinds of tools to clean out the old silicone, plastic, dental picks, and more. Test fitted the new gasket. Yes the screen roller tool does help as I used one as well. Still all the above may take hours!! With the new gasket in place, test closed the port light and pop goes one of two the hinges off the window!!!! it was the end of the day, but the window held tight to the new gasket and did not leak. Ordered a new window assembly( I have new style after 2000). No one mentions that the new window hinges are different (larger Screws on hinges) requiring new hardware to be installed where the portlight assembly needed to be removed! My portlights had tapered head 3mm allen head screws holding it in place. Of course some corrosion or original adhesive may have cause screw to bind and 1 allen head stripped!!!!
I just resorted to ordering the whole new assembly as a back up in case anything were to go wrong while attempting the full removal to replace damaged screw. Oh, but the portlight assembly now is different!!! no more tapered allen head screws. It appears it's easier to punch the hole rather than drill and counter sink. So be ready! It may be easy or it may be hard. I have several to do on my Beneteau. There is a big difference in the 18 YO gasket and the new one once installed. If any of the hinges or catches are sketchy, be mindful they may POP off!
Any thoughts on the best sealant when re-installing portlight?
So how did it go? I also own a 1995 281 and am about to replace all portlight gaskets.Chris - thx for posting that. I spent 5 hours today trying to replace a gasket on one of my Lewmar portholes. I got the old one out and painstakingly cleaned out the groove (which took most of the time) but no matter how hard I tried I just couldn’t get the corners of the new gasket in when I dry fitted it. I’ll try your suggestions because I’ve also got 6 of them to do. Just bought a 1995 Beneteau Oceanis 321 three weeks ago & all of the opening portholes leak to some extent because the gaskets were never changed. Luckily I found a bag of the baskets on board so the prior owner was obviously getting ready to do it. Will let you know how it goes.