

I wanted a roller furler for Aquaria. I still have my old Hobie 18 jib, which had been on a roller furler. I laid both my Mariner jib and the Hobie jib out on the lawn and they were nearly the same size.
Unfortunately, I didn't have the foresight to keep the roller furler when I was forced to scrap the Hobie. Looking into buying one, I found out just how expensive roller furlers can be. I found a used one online for under $300, and was just about to order it when inspiration struck. They are simple devices. I should be able to make one.
It seemed easy, but just finding a spool that would stand up to 12 to 14 wraps of the control line proved unreasonably difficult. Maybe bicycle parts, maybe large caster wheels. Then, how to get it to roll on the bow chainplate and stand up to the forestay tension?
AH HAH! I discovered the anchor swivel. For about 20 bucks, I ordered a marine stainless, ball bearing anchor swivel with a load rating of 4000lbs. It was perfect.
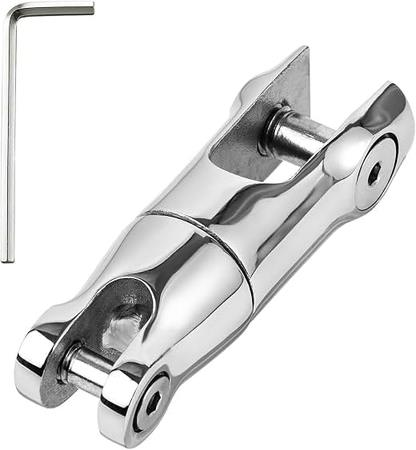
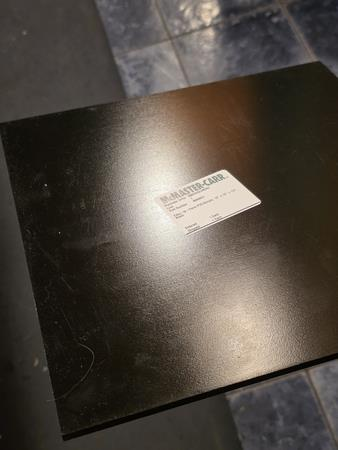
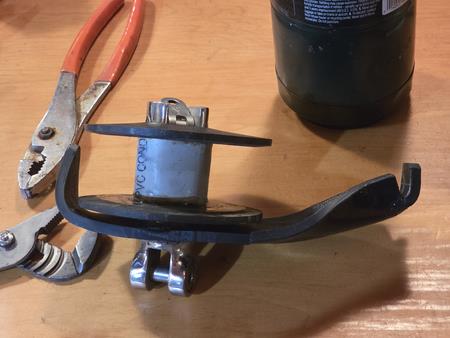
I gave up on finding a spool and finally decided to make one. The anchor swivel is approx 1.5 inches in diameter, so that would be the foundation of a PVC 1-½ pipe barrel with HDPE flanges cut out of a 12x12x1/4” sheet of high-density polyethylene, ordered at another $24, from McMaster-Carr. Now I have $45 in this project. The pipe I had from a past job installing electrical outlets throughout our gardens. White PVC has no UV protection, but gray and black PVC are UV resistant.
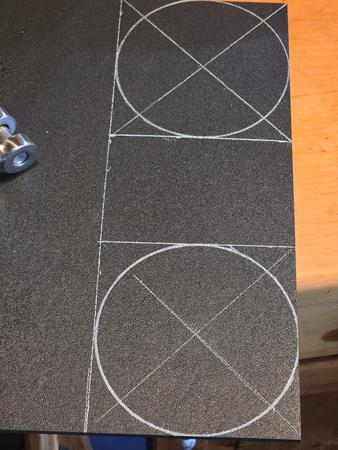
I estimated the sizes of my spool based on ⅜” control line, sketched out the parts of the spool on the 12x12 piece of plastic, then cut the pipe section to 1-½” length. I worked on how to fit the pipe section over the anchor swivel.
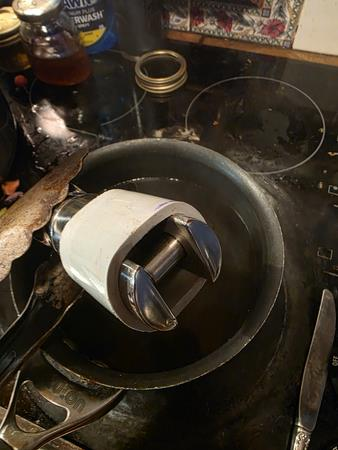
A pot of boiling water softened the PVC until it became quite pliable. After using tongs to elongate the rounded section at one end while it was submerged in boiling water, I slid the end of the anchor swivel over it. It worked. One must work fast, because it starts cooling as soon as you take it out of the water. I found it worked best to submerge the swivel right along with the PVC, so the metal holds the heat longer. When I was done, the PVC was molded fast right to the swivel's body.
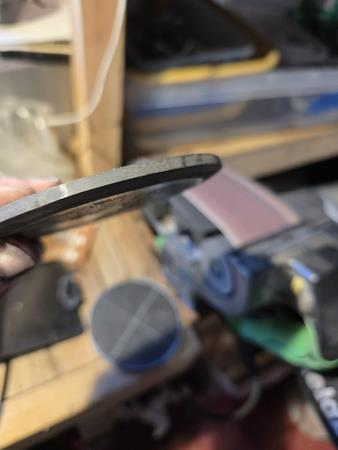
I cut out the spool flanges and the line guide with a scroll saw, sanded the parts smooth and beveled one edge of the flanges.
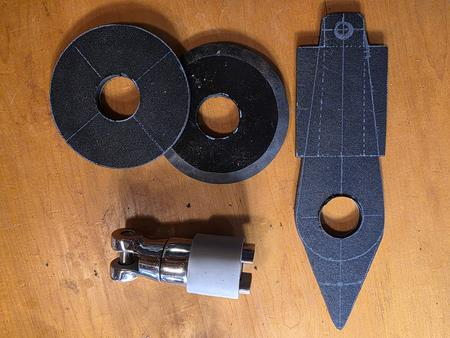
Next problem, how to get the flanges attached to the barrel, over the swivel? I didn't want them to be too loose around the swivel. Preferably, they would fit over the swivel shank just like the PVC barrel, with boiling water to stretch them out, and they could cool into a lock around the swivel. This was a problem when I tried to fit the flanges over both ends of the swivel, because one end was a different shape, more square where the 7/16” pin threaded through. So I had to reheat the swivel and barrel to separate them again.
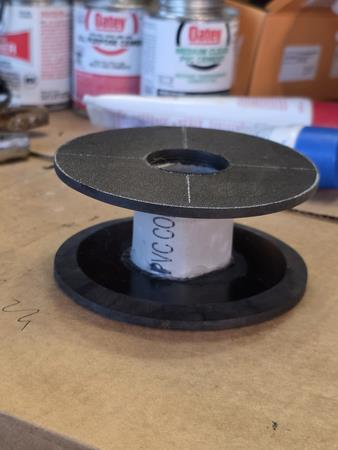
I used PVC general primer and glue from Lowes, to glue the three parts together. I think there may be better choices, but I'm lazy and impatient. The PVC glue makes a chemical bond, essentially making them one piece. I asked Gemini AI what would happen to my joint if I submerged the entire spool in hot water, and the answer was the bond would fall apart. If I could avoid any lateral movement, I could slide the whole thing together and the heated glue would rebond when it cools, but it doesn't hold with heat because the glue itself remains within the chemical bond of the two PVC parts and heat liquefies the glue again, re-separating the bond even though they are essentially melted together.
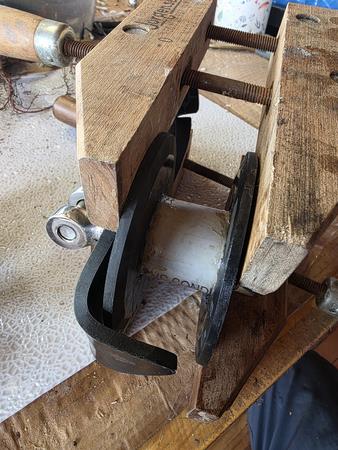
I tried it. It didn't work. The parts slid sideways at the slightest shake of my pliers. I settled on in-place assembly. I fit the bottom flange over the main shank in the hot water, then I worked the barrel back over the shank, and finally the top flange. I left about a 1/6th of an inch between the parts, worked the primer in with a bamboo skewer, then the glue and used wooden clamps to force them together for a few hours. It seems to have worked.
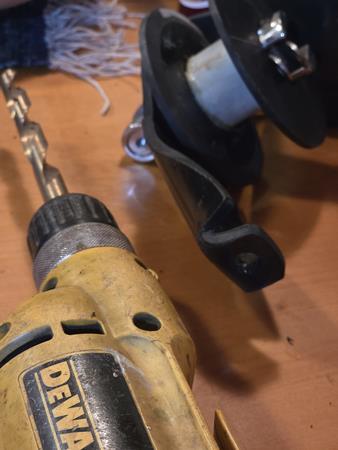
The line guide appears to work well, but I am concerned with the shrink fit and epoxy attachment to the other half of the swivel. I bent winged cutouts up on either side to improve stiffness, although the ¼” HDPE is pretty rigid on its own. I drilled a ½” hole in the end and am going to use ⅜” braided line for a control line. I can switch to a spliced cable and braided line if I need to.
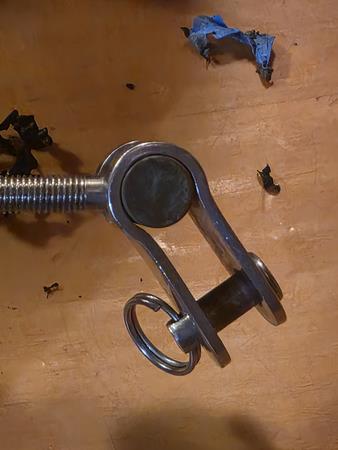
I scrounged a strap toggle off a broken turnbuckle. The 7/16” pin of the swivel is the same size as the barrel nut that captured the threaded post from the turnbuckle. Beautiful. The only issues here is that I couldn't use the same size strap toggle on the other end of the swivel because that gap in the swivel's body is only ½” wide, and the toggle itself is 9/16” wide. I need another toggle or shackle to attach the furler to the bow chainplate.
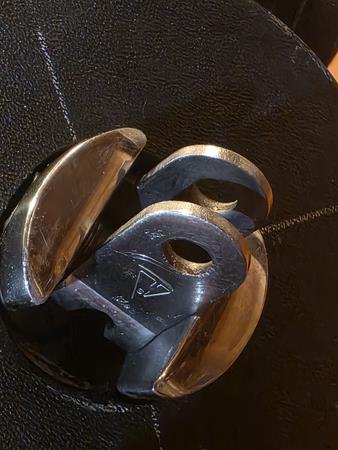
Overall, the project seems successful, actual money spent, besides an indeterminate amount of PVC glue and primer, was $44. We'll see how it stands up to actual fitting of the jib and sailing. Maybe I can get one more sail in before snow.
-Will
Unfortunately, I didn't have the foresight to keep the roller furler when I was forced to scrap the Hobie. Looking into buying one, I found out just how expensive roller furlers can be. I found a used one online for under $300, and was just about to order it when inspiration struck. They are simple devices. I should be able to make one.
It seemed easy, but just finding a spool that would stand up to 12 to 14 wraps of the control line proved unreasonably difficult. Maybe bicycle parts, maybe large caster wheels. Then, how to get it to roll on the bow chainplate and stand up to the forestay tension?
AH HAH! I discovered the anchor swivel. For about 20 bucks, I ordered a marine stainless, ball bearing anchor swivel with a load rating of 4000lbs. It was perfect.
I gave up on finding a spool and finally decided to make one. The anchor swivel is approx 1.5 inches in diameter, so that would be the foundation of a PVC 1-½ pipe barrel with HDPE flanges cut out of a 12x12x1/4” sheet of high-density polyethylene, ordered at another $24, from McMaster-Carr. Now I have $45 in this project. The pipe I had from a past job installing electrical outlets throughout our gardens. White PVC has no UV protection, but gray and black PVC are UV resistant.
I estimated the sizes of my spool based on ⅜” control line, sketched out the parts of the spool on the 12x12 piece of plastic, then cut the pipe section to 1-½” length. I worked on how to fit the pipe section over the anchor swivel.
A pot of boiling water softened the PVC until it became quite pliable. After using tongs to elongate the rounded section at one end while it was submerged in boiling water, I slid the end of the anchor swivel over it. It worked. One must work fast, because it starts cooling as soon as you take it out of the water. I found it worked best to submerge the swivel right along with the PVC, so the metal holds the heat longer. When I was done, the PVC was molded fast right to the swivel's body.
I cut out the spool flanges and the line guide with a scroll saw, sanded the parts smooth and beveled one edge of the flanges.
Next problem, how to get the flanges attached to the barrel, over the swivel? I didn't want them to be too loose around the swivel. Preferably, they would fit over the swivel shank just like the PVC barrel, with boiling water to stretch them out, and they could cool into a lock around the swivel. This was a problem when I tried to fit the flanges over both ends of the swivel, because one end was a different shape, more square where the 7/16” pin threaded through. So I had to reheat the swivel and barrel to separate them again.
I used PVC general primer and glue from Lowes, to glue the three parts together. I think there may be better choices, but I'm lazy and impatient. The PVC glue makes a chemical bond, essentially making them one piece. I asked Gemini AI what would happen to my joint if I submerged the entire spool in hot water, and the answer was the bond would fall apart. If I could avoid any lateral movement, I could slide the whole thing together and the heated glue would rebond when it cools, but it doesn't hold with heat because the glue itself remains within the chemical bond of the two PVC parts and heat liquefies the glue again, re-separating the bond even though they are essentially melted together.
I tried it. It didn't work. The parts slid sideways at the slightest shake of my pliers. I settled on in-place assembly. I fit the bottom flange over the main shank in the hot water, then I worked the barrel back over the shank, and finally the top flange. I left about a 1/6th of an inch between the parts, worked the primer in with a bamboo skewer, then the glue and used wooden clamps to force them together for a few hours. It seems to have worked.
The line guide appears to work well, but I am concerned with the shrink fit and epoxy attachment to the other half of the swivel. I bent winged cutouts up on either side to improve stiffness, although the ¼” HDPE is pretty rigid on its own. I drilled a ½” hole in the end and am going to use ⅜” braided line for a control line. I can switch to a spliced cable and braided line if I need to.
I scrounged a strap toggle off a broken turnbuckle. The 7/16” pin of the swivel is the same size as the barrel nut that captured the threaded post from the turnbuckle. Beautiful. The only issues here is that I couldn't use the same size strap toggle on the other end of the swivel because that gap in the swivel's body is only ½” wide, and the toggle itself is 9/16” wide. I need another toggle or shackle to attach the furler to the bow chainplate.
Overall, the project seems successful, actual money spent, besides an indeterminate amount of PVC glue and primer, was $44. We'll see how it stands up to actual fitting of the jib and sailing. Maybe I can get one more sail in before snow.
-Will


