The inevitable failure of the compression post began to show on our Hunter 34 :
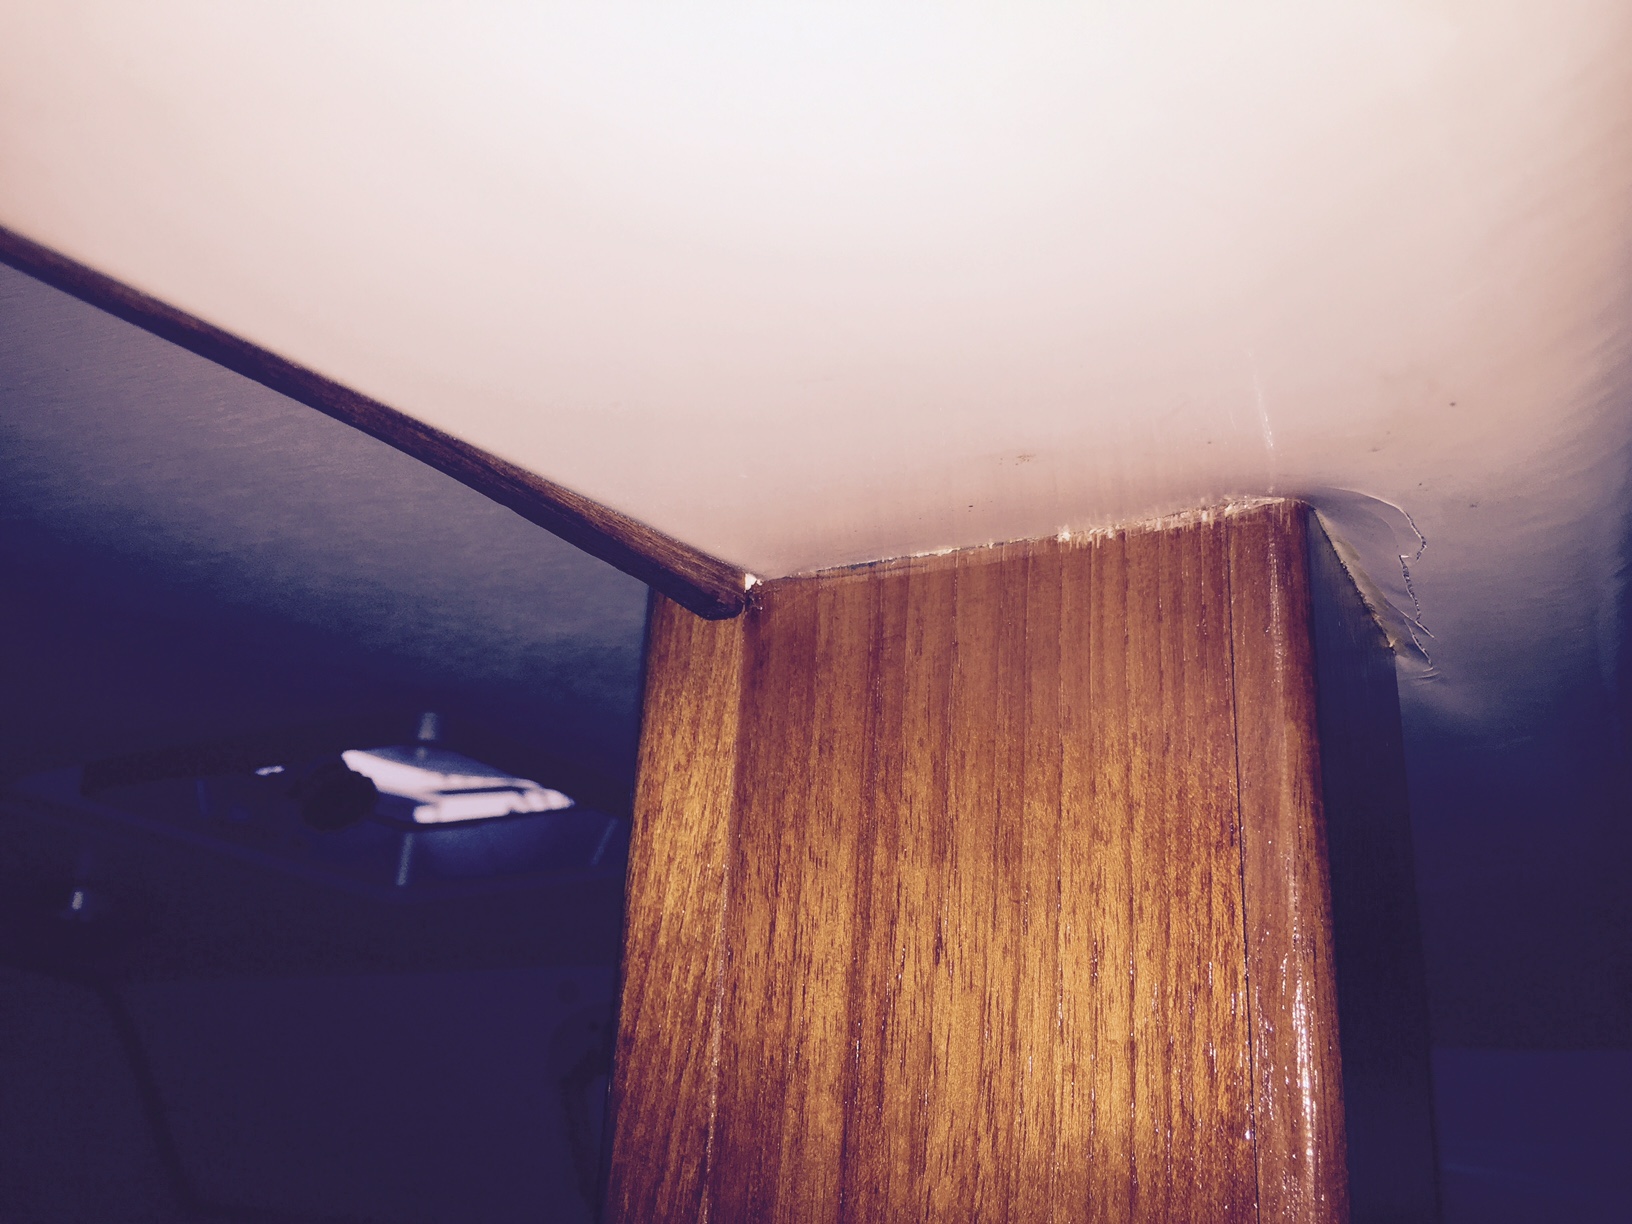
So I studied the solutions here on the forum. Especially Claude Auger's outstanding summary of his post repair and Allan Hadad's milled solution. (Allan was even kind enough to send me his CAD drawings and later check out the results of my approach when we were done.) However, I don't know anyone who can mill, and the quotes I got were insanely expensive. Also, after removing the wooden traverse beam, it seemed I was working with far less space than it appeared Claude and Allan had. I chalked this up to differences from boat to boat. It may look like we didn't get all the wood, but we did.
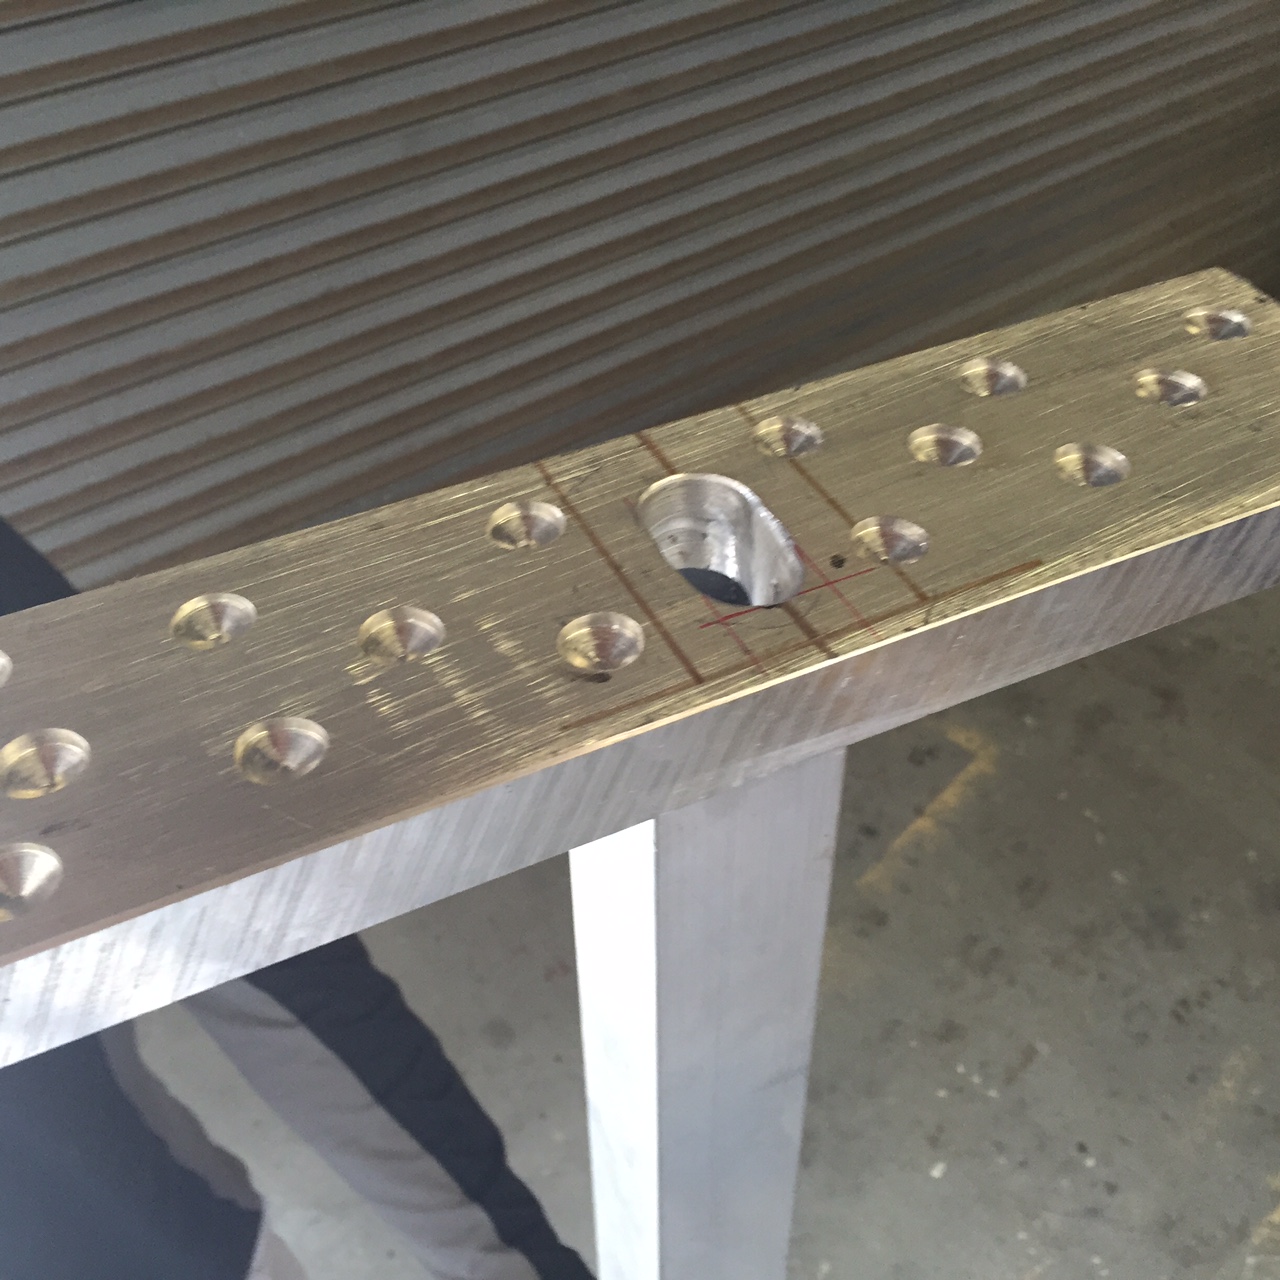
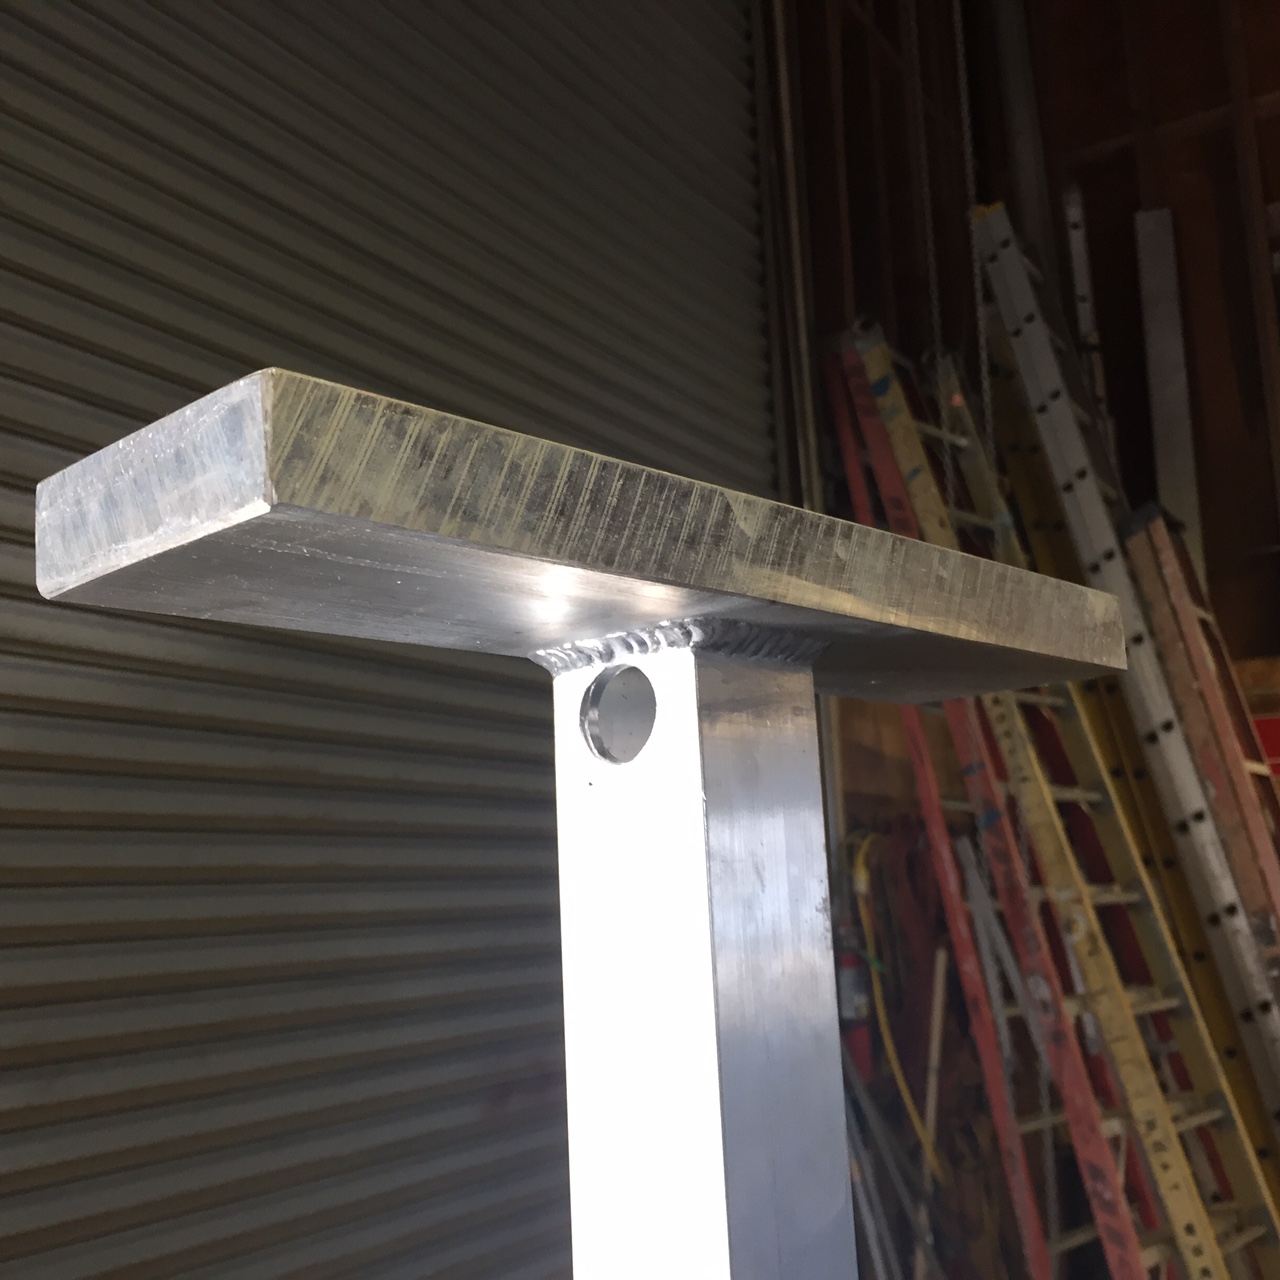
I went with hybrid from both approaches and went with welds. I chose to stay with the same metal, 6061 aluminum throughout and bought three pieces online. One "traverse beam," the post and the base plate. Oddly, I had to use two different sources for the aluminum, as I couldn't find a single supplier of plate and square tubing in 6061. Both were excellent. The pieces cut to order were exact and delivery was timely.
Traverse
Source: midweststeelsupply.com
Specs: 6061-T651 Plate, 1.5", 3.375" x 13" (your measurements will vary)
$25.62 after discount and not including shipping
Note: midweststeelsupply.com had a different special every day, usually 15%. If there's no discount today on "aluminum plate" or "all products," there likely will be tomorrow or the day after. Shipping prices are reasonable, considering the weight.
Base
Source: midweststeelsupply.com
Specs: 6061-T651 Plate, 1", 4" x 4" (we cut this down)
$6.36 after discount and not including shipping
Post
Source: onlinemetals.com
Specs: 6061-T6 square tube, 2" x .25", cut to '72 (this was the only piece not cut to order)
Price: $54.50 not including shipping
Construction
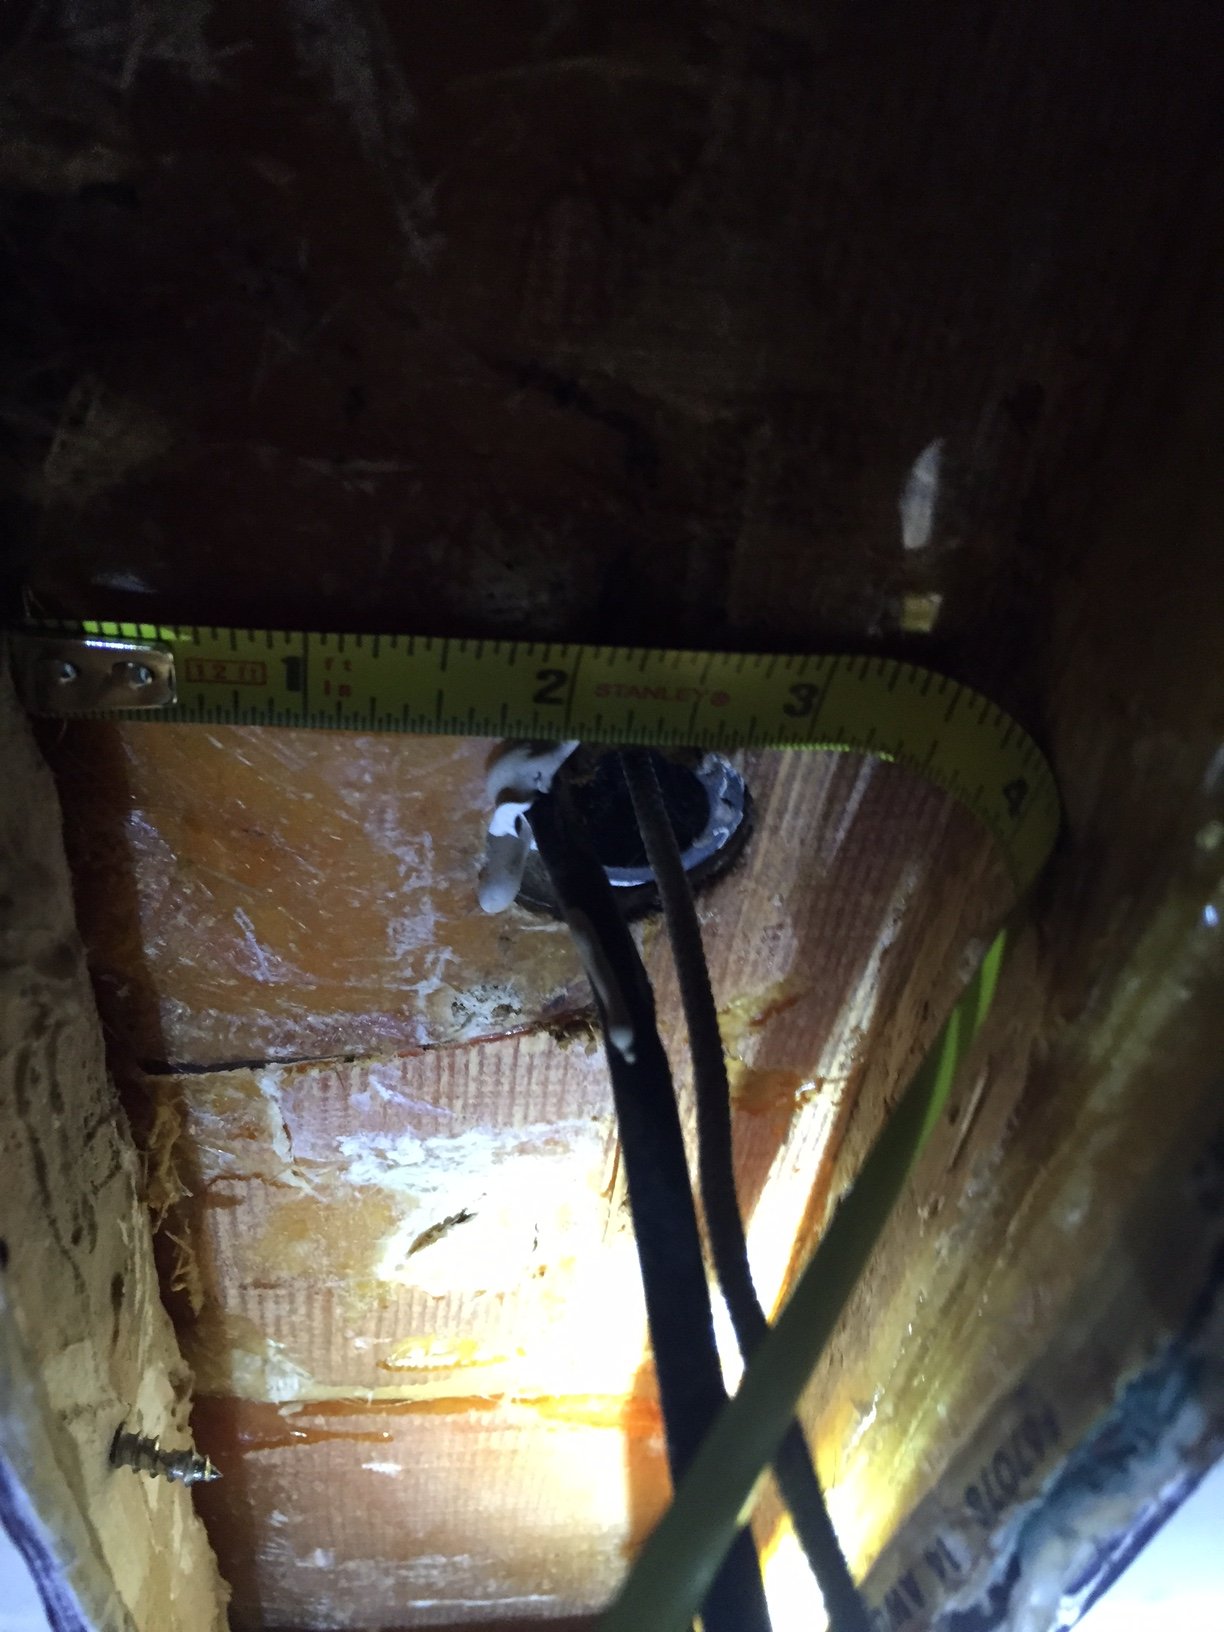
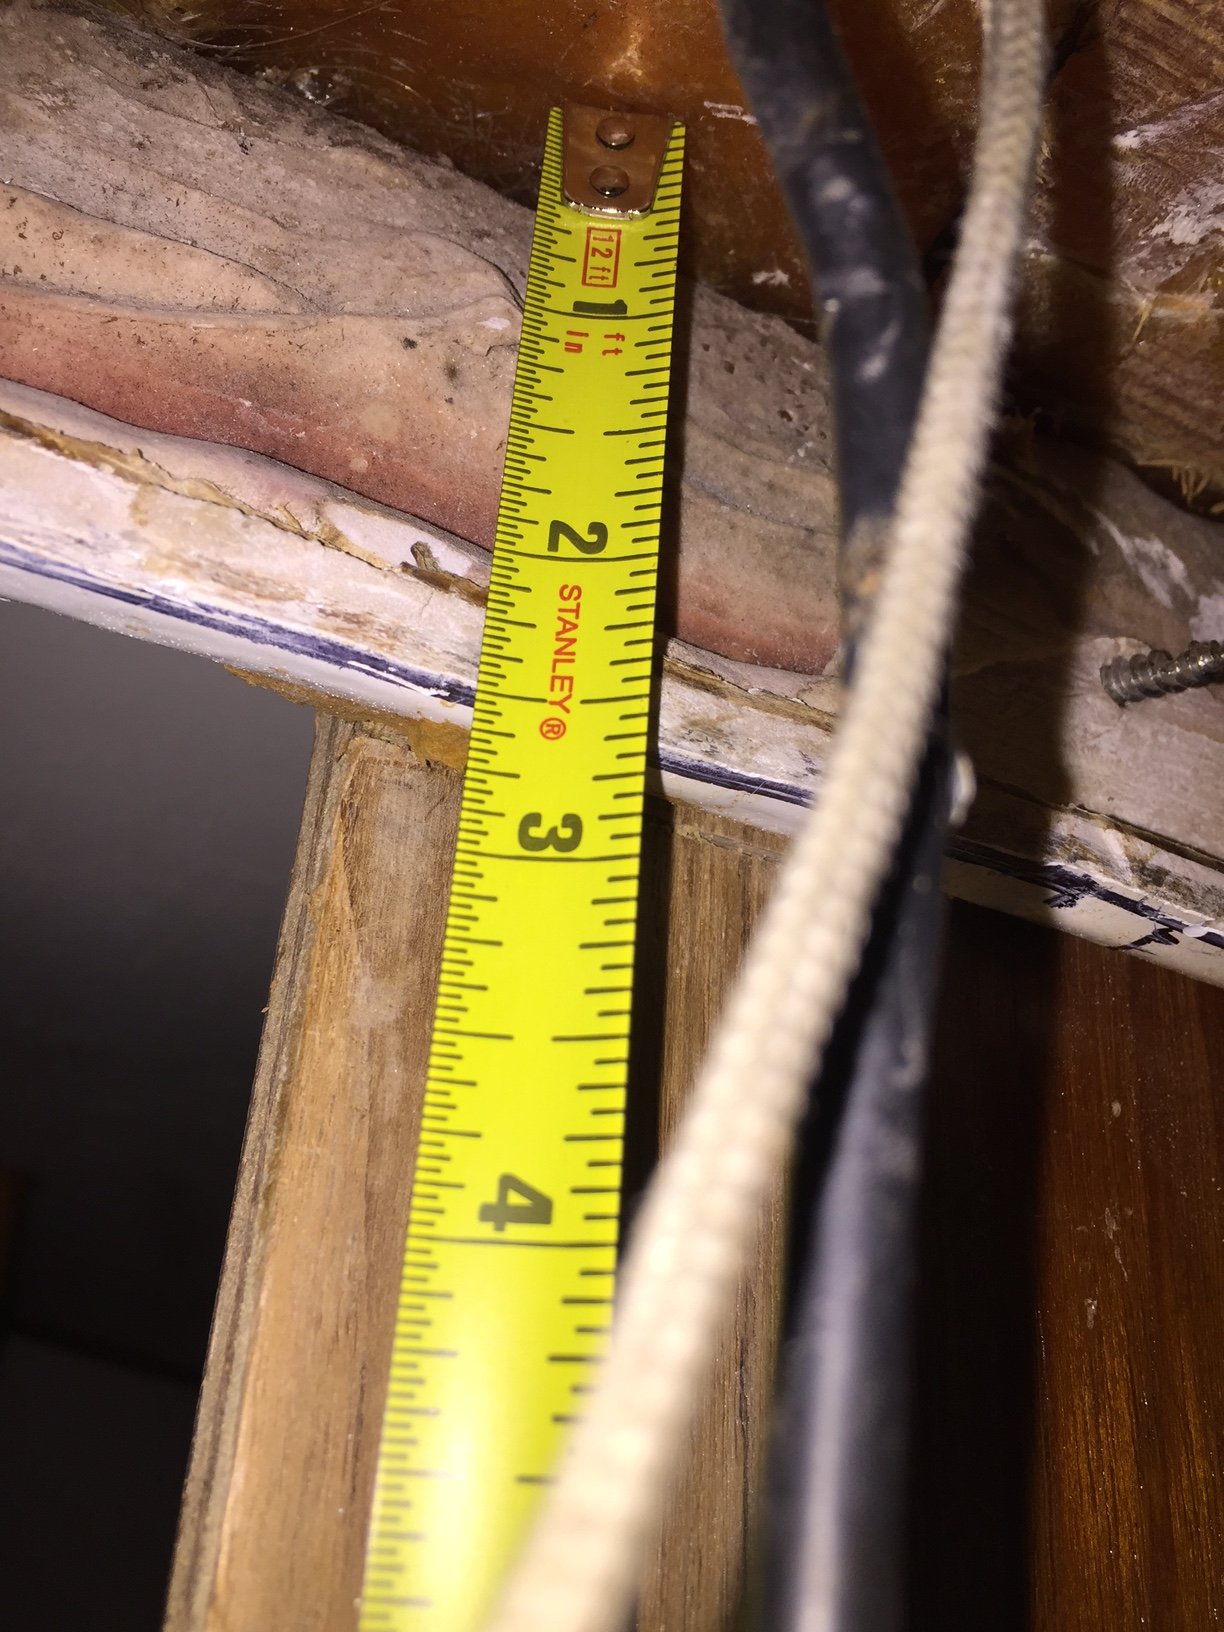
We pulled the stick and went on the hard. While I was getting bottom paint, we went to work on assembly. We used a drill press on the traverse beam to give it some grab on the epoxy and drilled an extended wire pass-through to be sure there would be space.
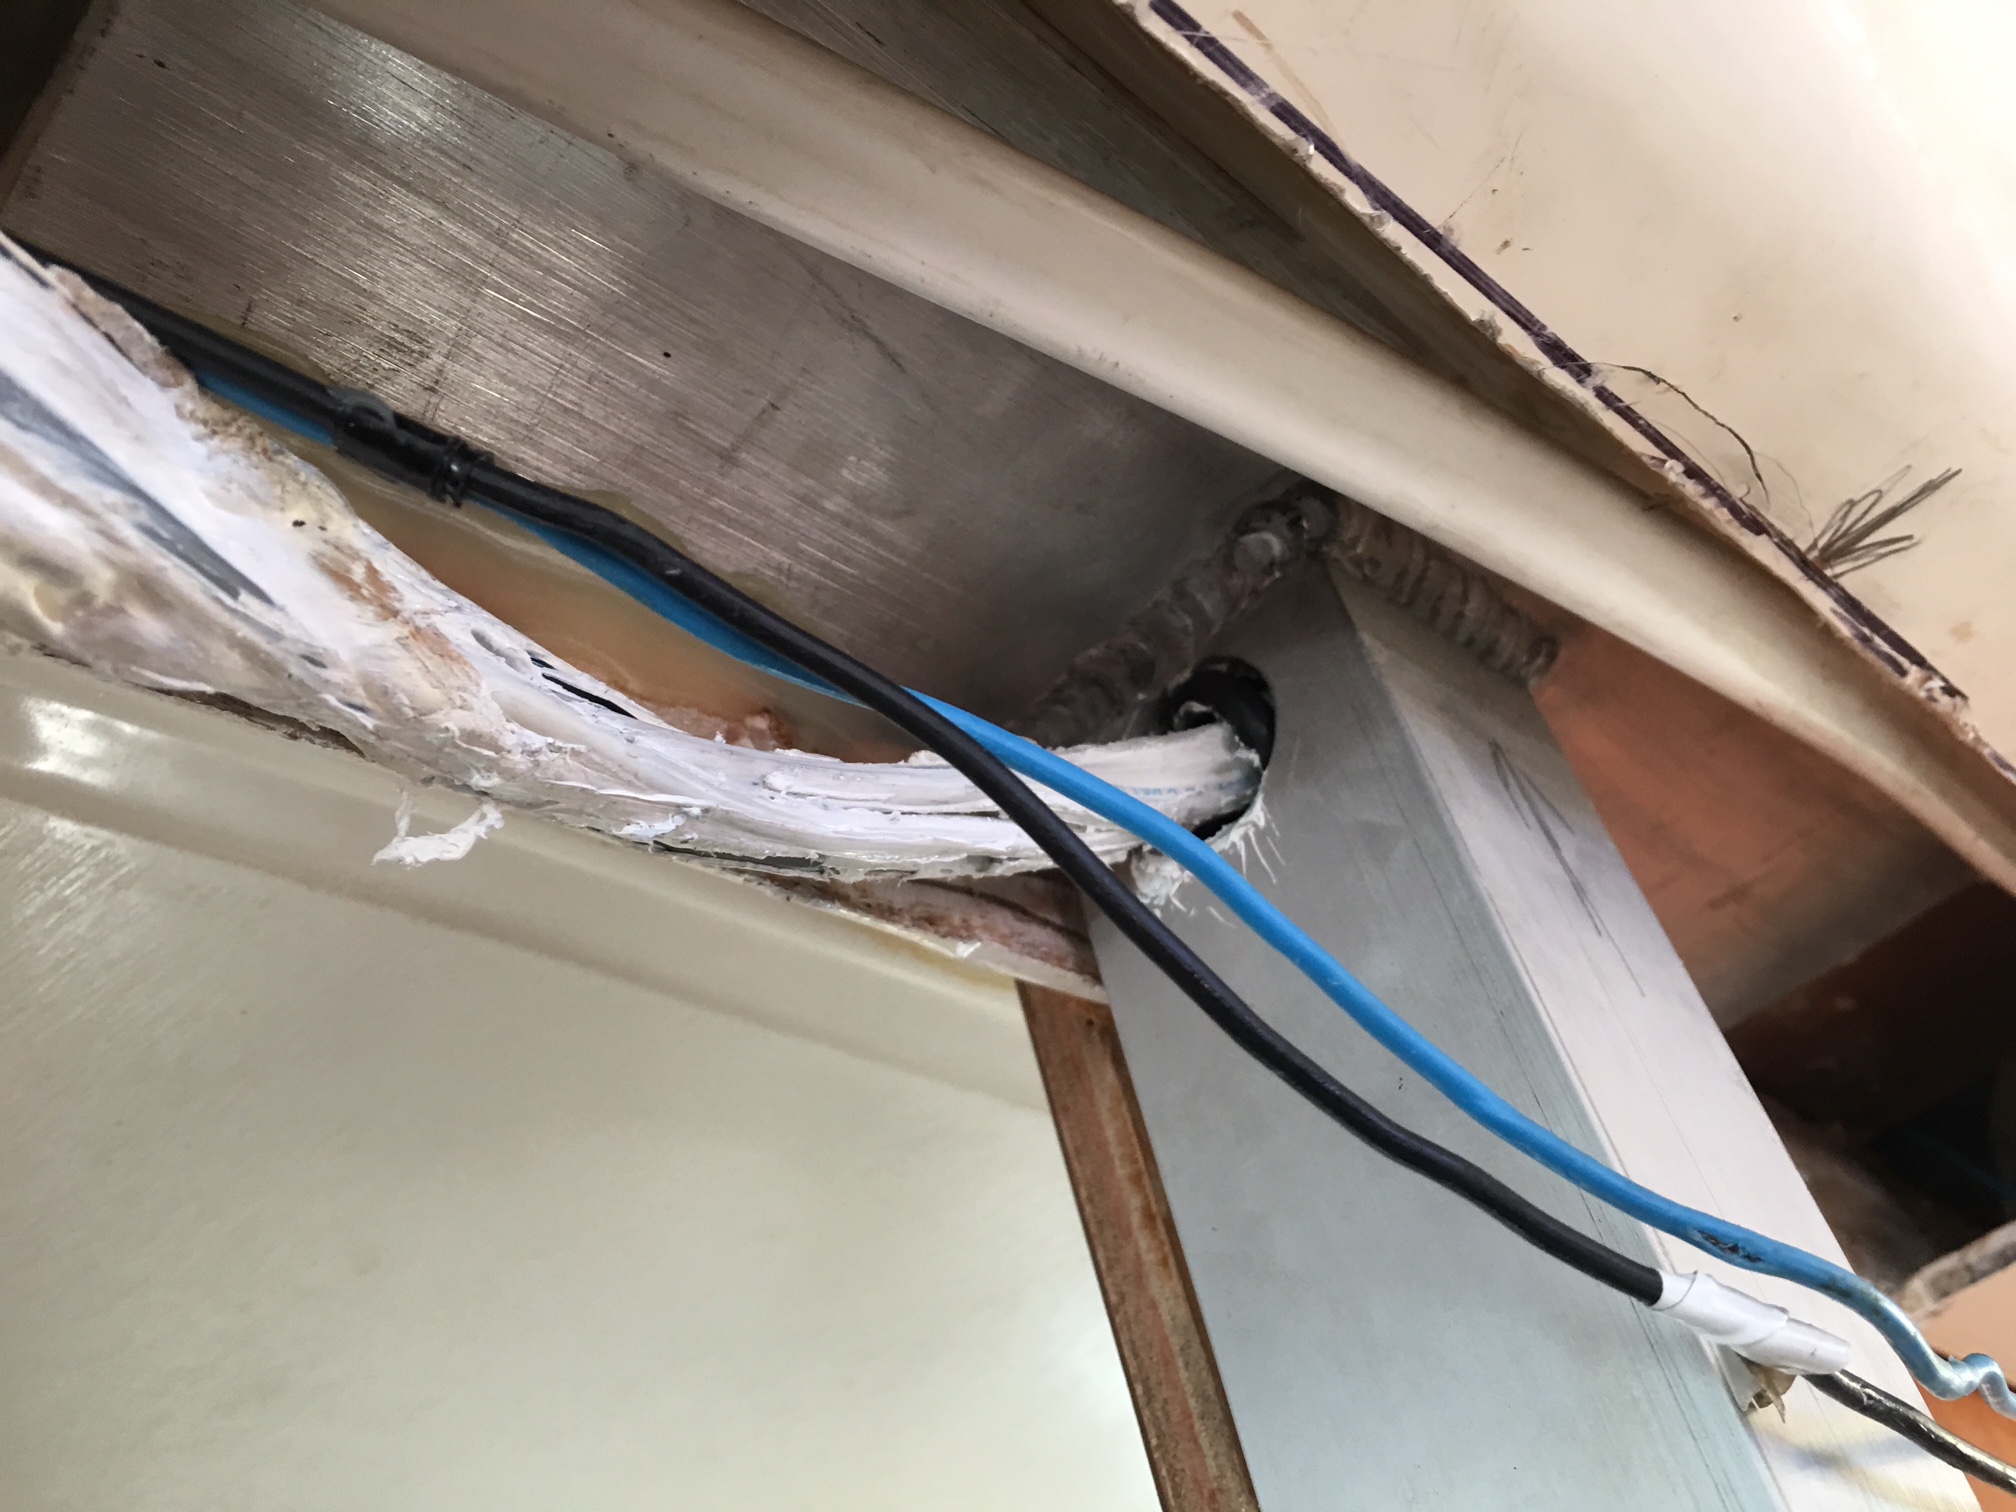
On the post tube, we drilled two holes. One to feed wires to port (all wiring, except the ground had been routed to port last year for convenience), and another for the ground at the bottom of the post to starboard. After much measuring, the post was cut and the pieces welded together.
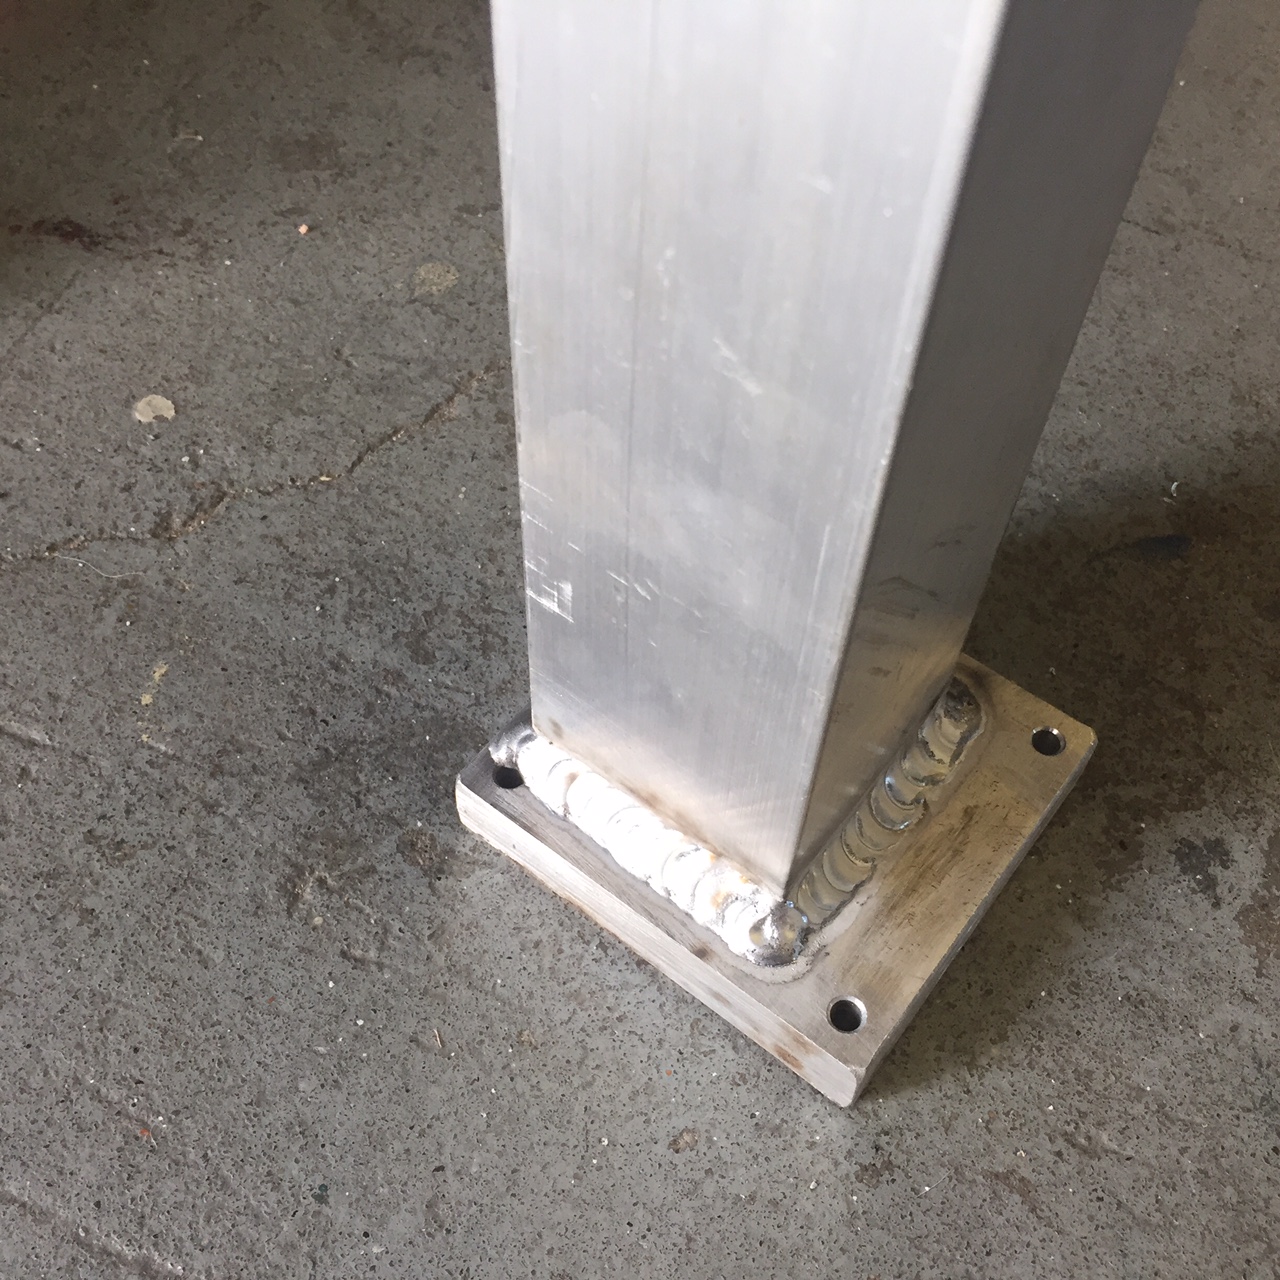
We jacked the deck slightly and after epoxy, the apparatus was slid into place. Used a small amount of 5200 under the base to keep it in place. Then we pulled the jacks out let it dry through the weekend. Stepped the mast and and ran the wires. There was a small incident with adhesive and the wires we fed through the deck plate I'd rather not talk about, but that explains the crap on the wiring. My bad.
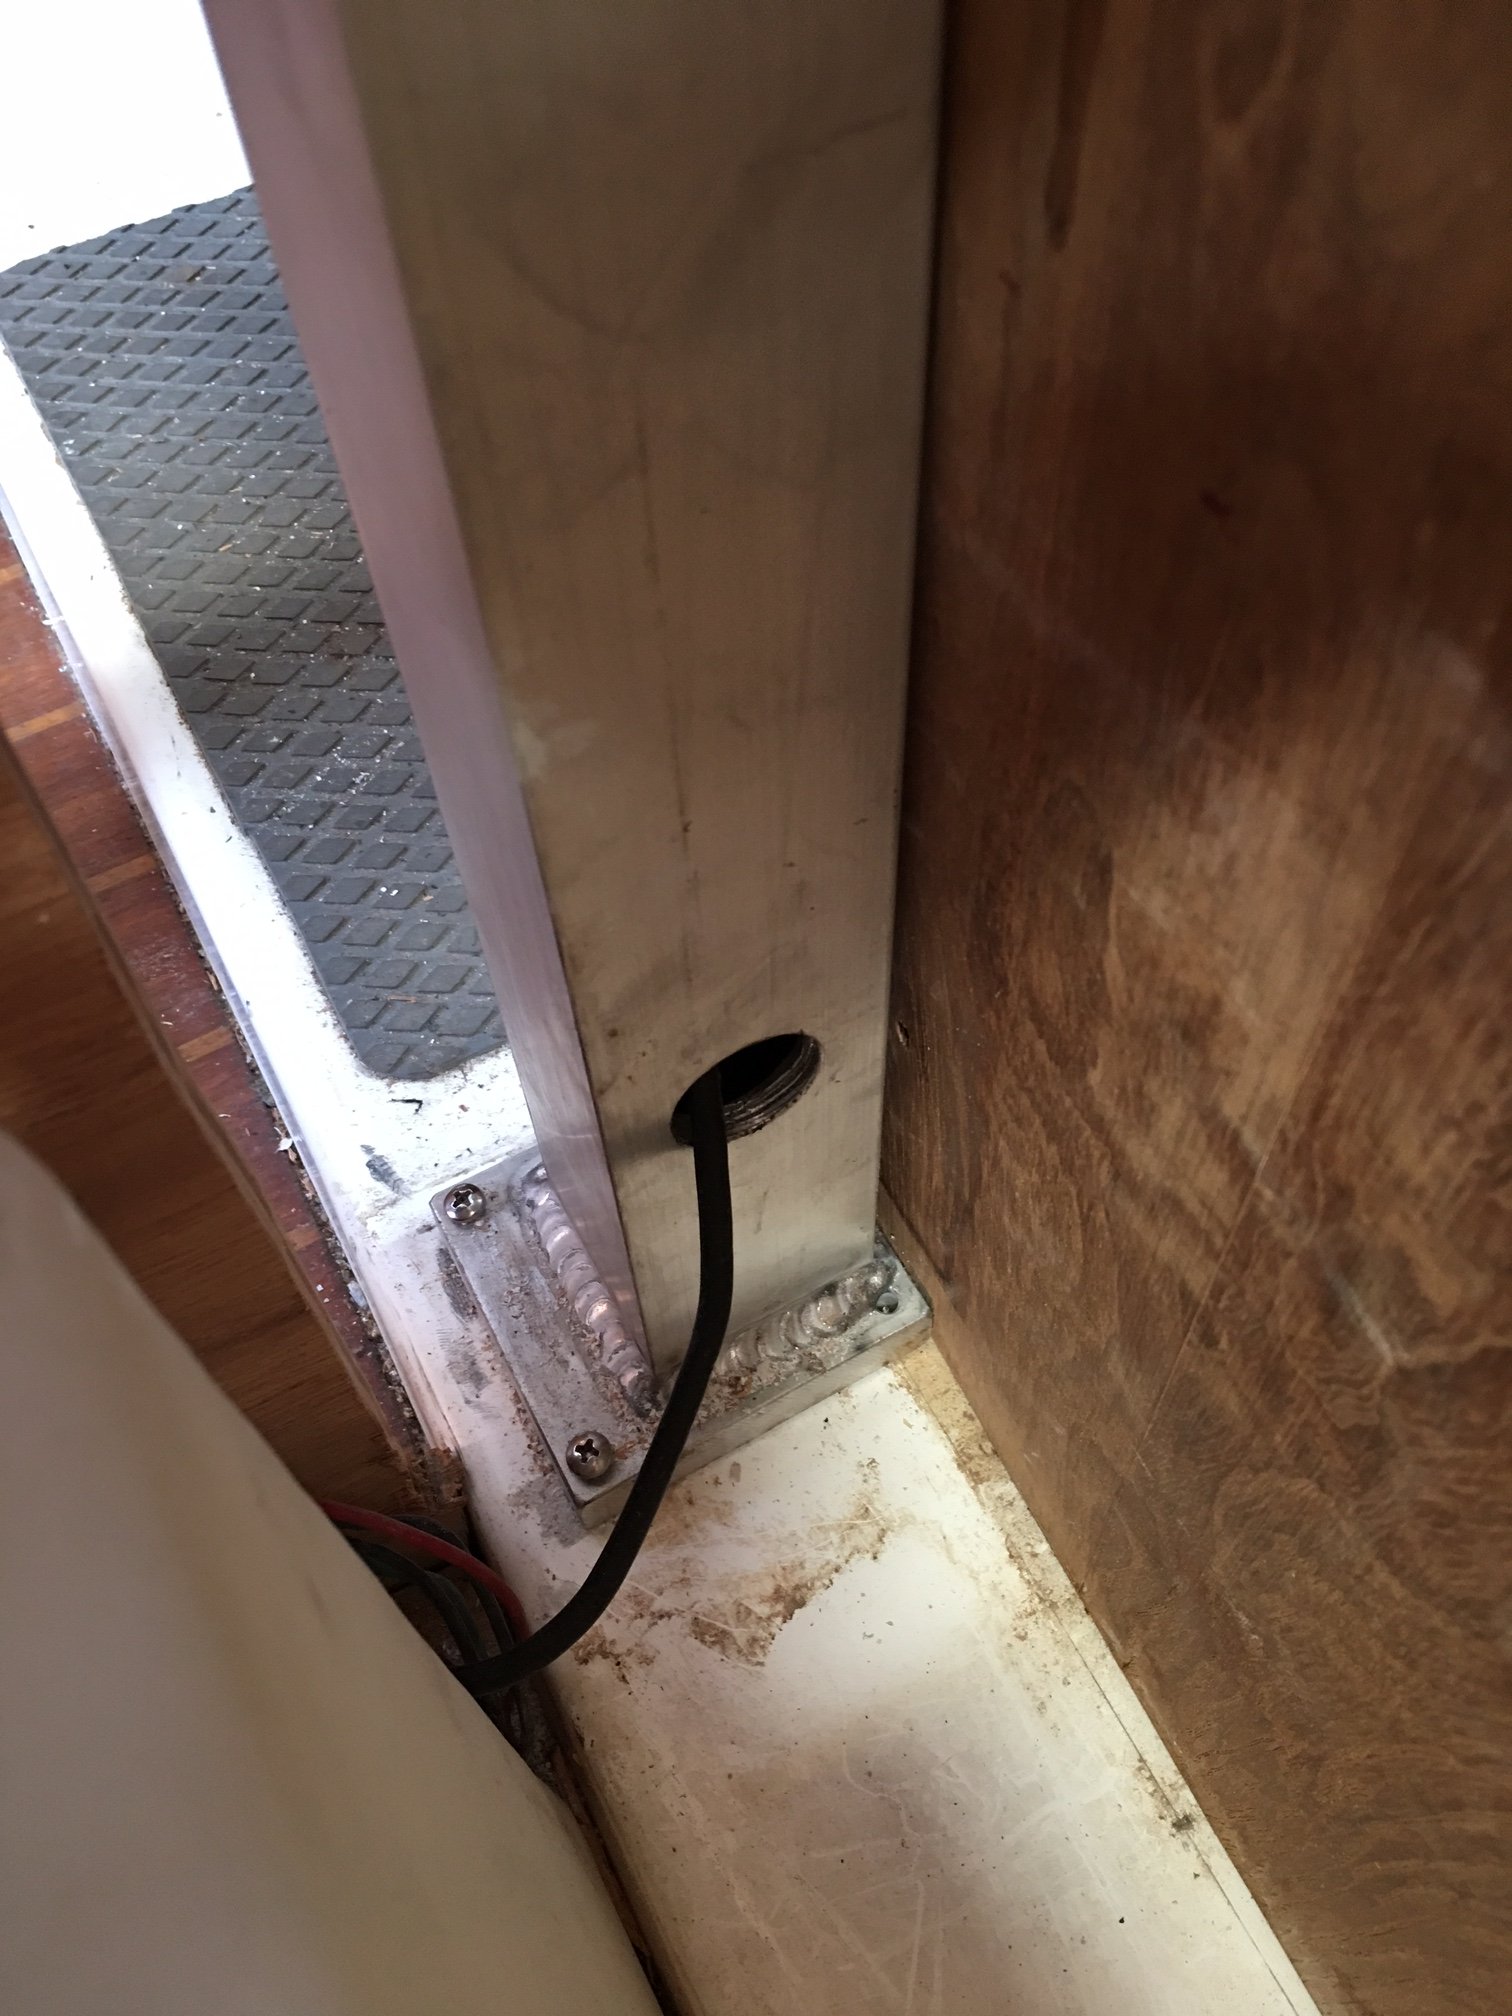
Here's the install after stepping the mast:
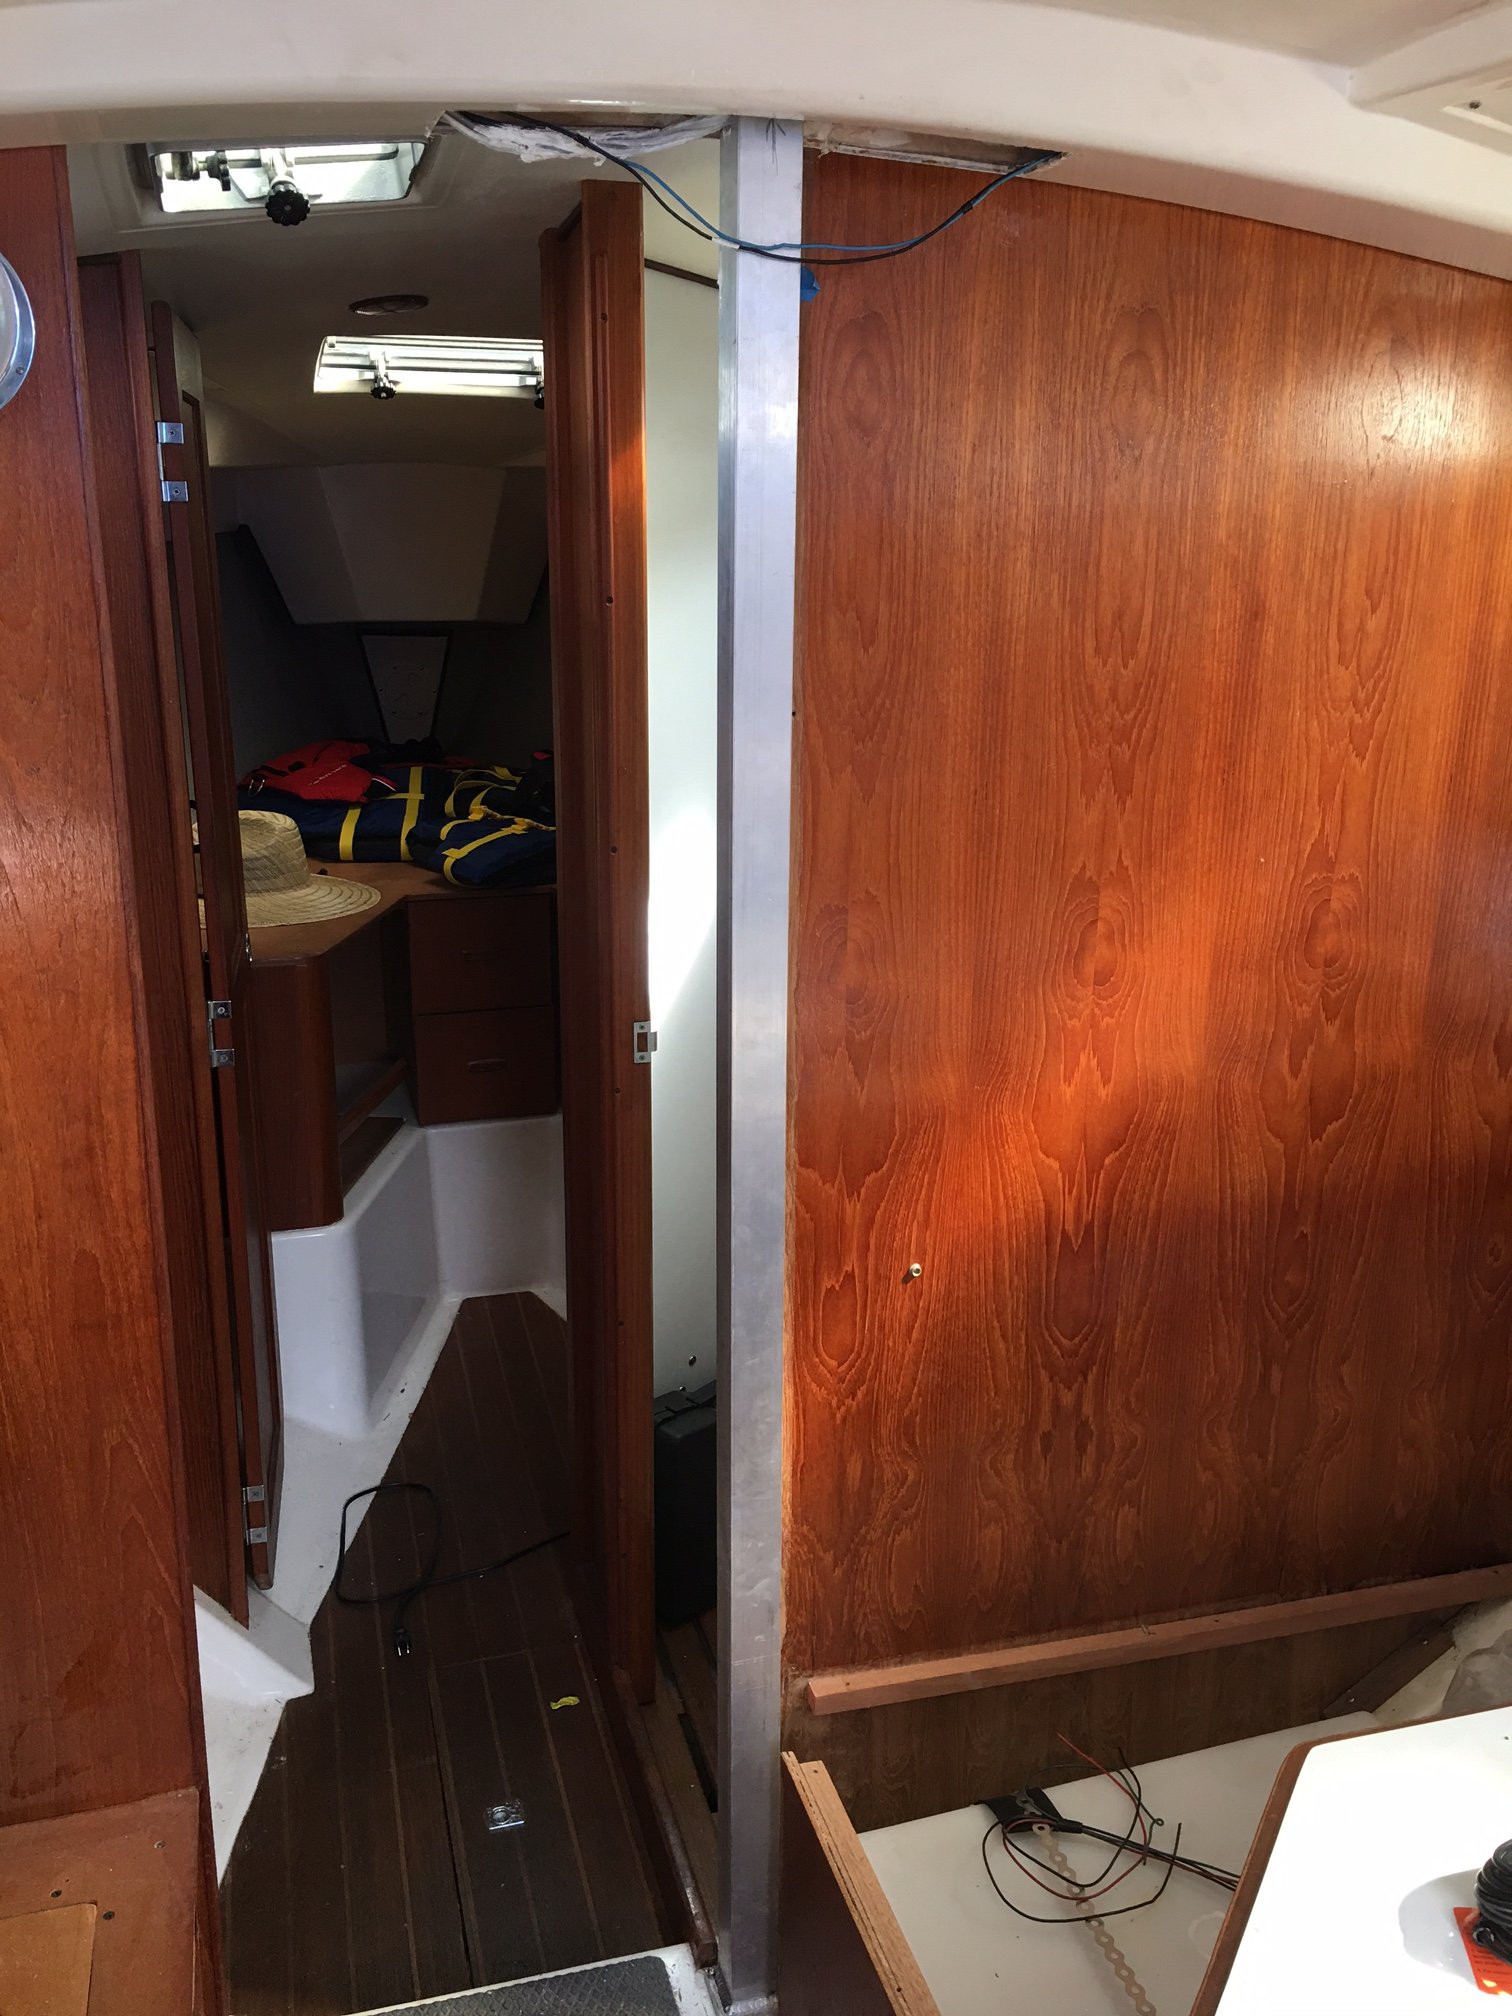
I still have to have the wood routed from the old post. Like Claude, I'll slide it in and install the door jam. I'll also do teak flashing to cover instead of glassing it in to allow for easy access to wiring. I'll post the final results.
I don't have much in the way of engineering aptitude, so given the options, I took from two approaches and sort of simplified them. Some may think its "under-engineered," or over-reliant on the welds. While it's not perfect and may not be as good as what Claude and Allan have done, it works. I am very grateful they offered their experience as a resource because this project stressed me out for months and I just want to sail. At the end of the day, I'm confident it's a hell of a lot stronger than what Hunter installed 31 years ago.
Full disclosure: I'm not particularly handy. This work was either done or supervised by the guys in the yard. I found a terrific welder who mostly works the on the fishing boats here. The welds set me back about $300. In my case, the money for the pro welder and pros in the yard was well spent. A man's got to know his limitations.
So I studied the solutions here on the forum. Especially Claude Auger's outstanding summary of his post repair and Allan Hadad's milled solution. (Allan was even kind enough to send me his CAD drawings and later check out the results of my approach when we were done.) However, I don't know anyone who can mill, and the quotes I got were insanely expensive. Also, after removing the wooden traverse beam, it seemed I was working with far less space than it appeared Claude and Allan had. I chalked this up to differences from boat to boat. It may look like we didn't get all the wood, but we did.
I went with hybrid from both approaches and went with welds. I chose to stay with the same metal, 6061 aluminum throughout and bought three pieces online. One "traverse beam," the post and the base plate. Oddly, I had to use two different sources for the aluminum, as I couldn't find a single supplier of plate and square tubing in 6061. Both were excellent. The pieces cut to order were exact and delivery was timely.
Traverse
Source: midweststeelsupply.com
Specs: 6061-T651 Plate, 1.5", 3.375" x 13" (your measurements will vary)
$25.62 after discount and not including shipping
Note: midweststeelsupply.com had a different special every day, usually 15%. If there's no discount today on "aluminum plate" or "all products," there likely will be tomorrow or the day after. Shipping prices are reasonable, considering the weight.
Base
Source: midweststeelsupply.com
Specs: 6061-T651 Plate, 1", 4" x 4" (we cut this down)
$6.36 after discount and not including shipping
Post
Source: onlinemetals.com
Specs: 6061-T6 square tube, 2" x .25", cut to '72 (this was the only piece not cut to order)
Price: $54.50 not including shipping
Construction
We pulled the stick and went on the hard. While I was getting bottom paint, we went to work on assembly. We used a drill press on the traverse beam to give it some grab on the epoxy and drilled an extended wire pass-through to be sure there would be space.
On the post tube, we drilled two holes. One to feed wires to port (all wiring, except the ground had been routed to port last year for convenience), and another for the ground at the bottom of the post to starboard. After much measuring, the post was cut and the pieces welded together.
We jacked the deck slightly and after epoxy, the apparatus was slid into place. Used a small amount of 5200 under the base to keep it in place. Then we pulled the jacks out let it dry through the weekend. Stepped the mast and and ran the wires. There was a small incident with adhesive and the wires we fed through the deck plate I'd rather not talk about, but that explains the crap on the wiring. My bad.
Here's the install after stepping the mast:
I still have to have the wood routed from the old post. Like Claude, I'll slide it in and install the door jam. I'll also do teak flashing to cover instead of glassing it in to allow for easy access to wiring. I'll post the final results.
I don't have much in the way of engineering aptitude, so given the options, I took from two approaches and sort of simplified them. Some may think its "under-engineered," or over-reliant on the welds. While it's not perfect and may not be as good as what Claude and Allan have done, it works. I am very grateful they offered their experience as a resource because this project stressed me out for months and I just want to sail. At the end of the day, I'm confident it's a hell of a lot stronger than what Hunter installed 31 years ago.
Full disclosure: I'm not particularly handy. This work was either done or supervised by the guys in the yard. I found a terrific welder who mostly works the on the fishing boats here. The welds set me back about $300. In my case, the money for the pro welder and pros in the yard was well spent. A man's got to know his limitations.
