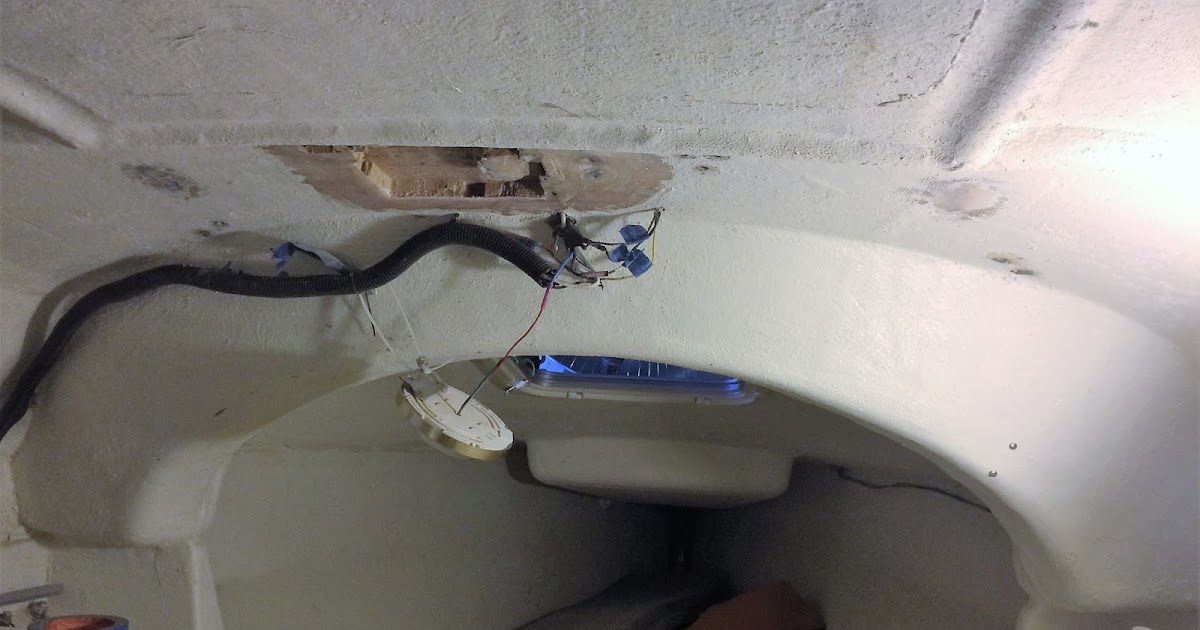
Time to fix the fore-deck before the rigging parts show up-- was always on the list, but now that I'll have upgraded stays and eye-bolts all round I wanted the stem fitting to stay put as well. I've been staring at the original pic of the underside of the fore-deck for a while contemplating the how and thought I would share:
Here's the original-- first challenge was trying to decide how to increase the overall structure-- definitely going to add the stem fitting support and tie it to the back end of the bow eye-- but that in and of itself doesn't solve the overall problem. In addition to the inherent weakness well documented -- the deck cleats rocked with ease and were leaking at best if not destined to leave at the first good pull:

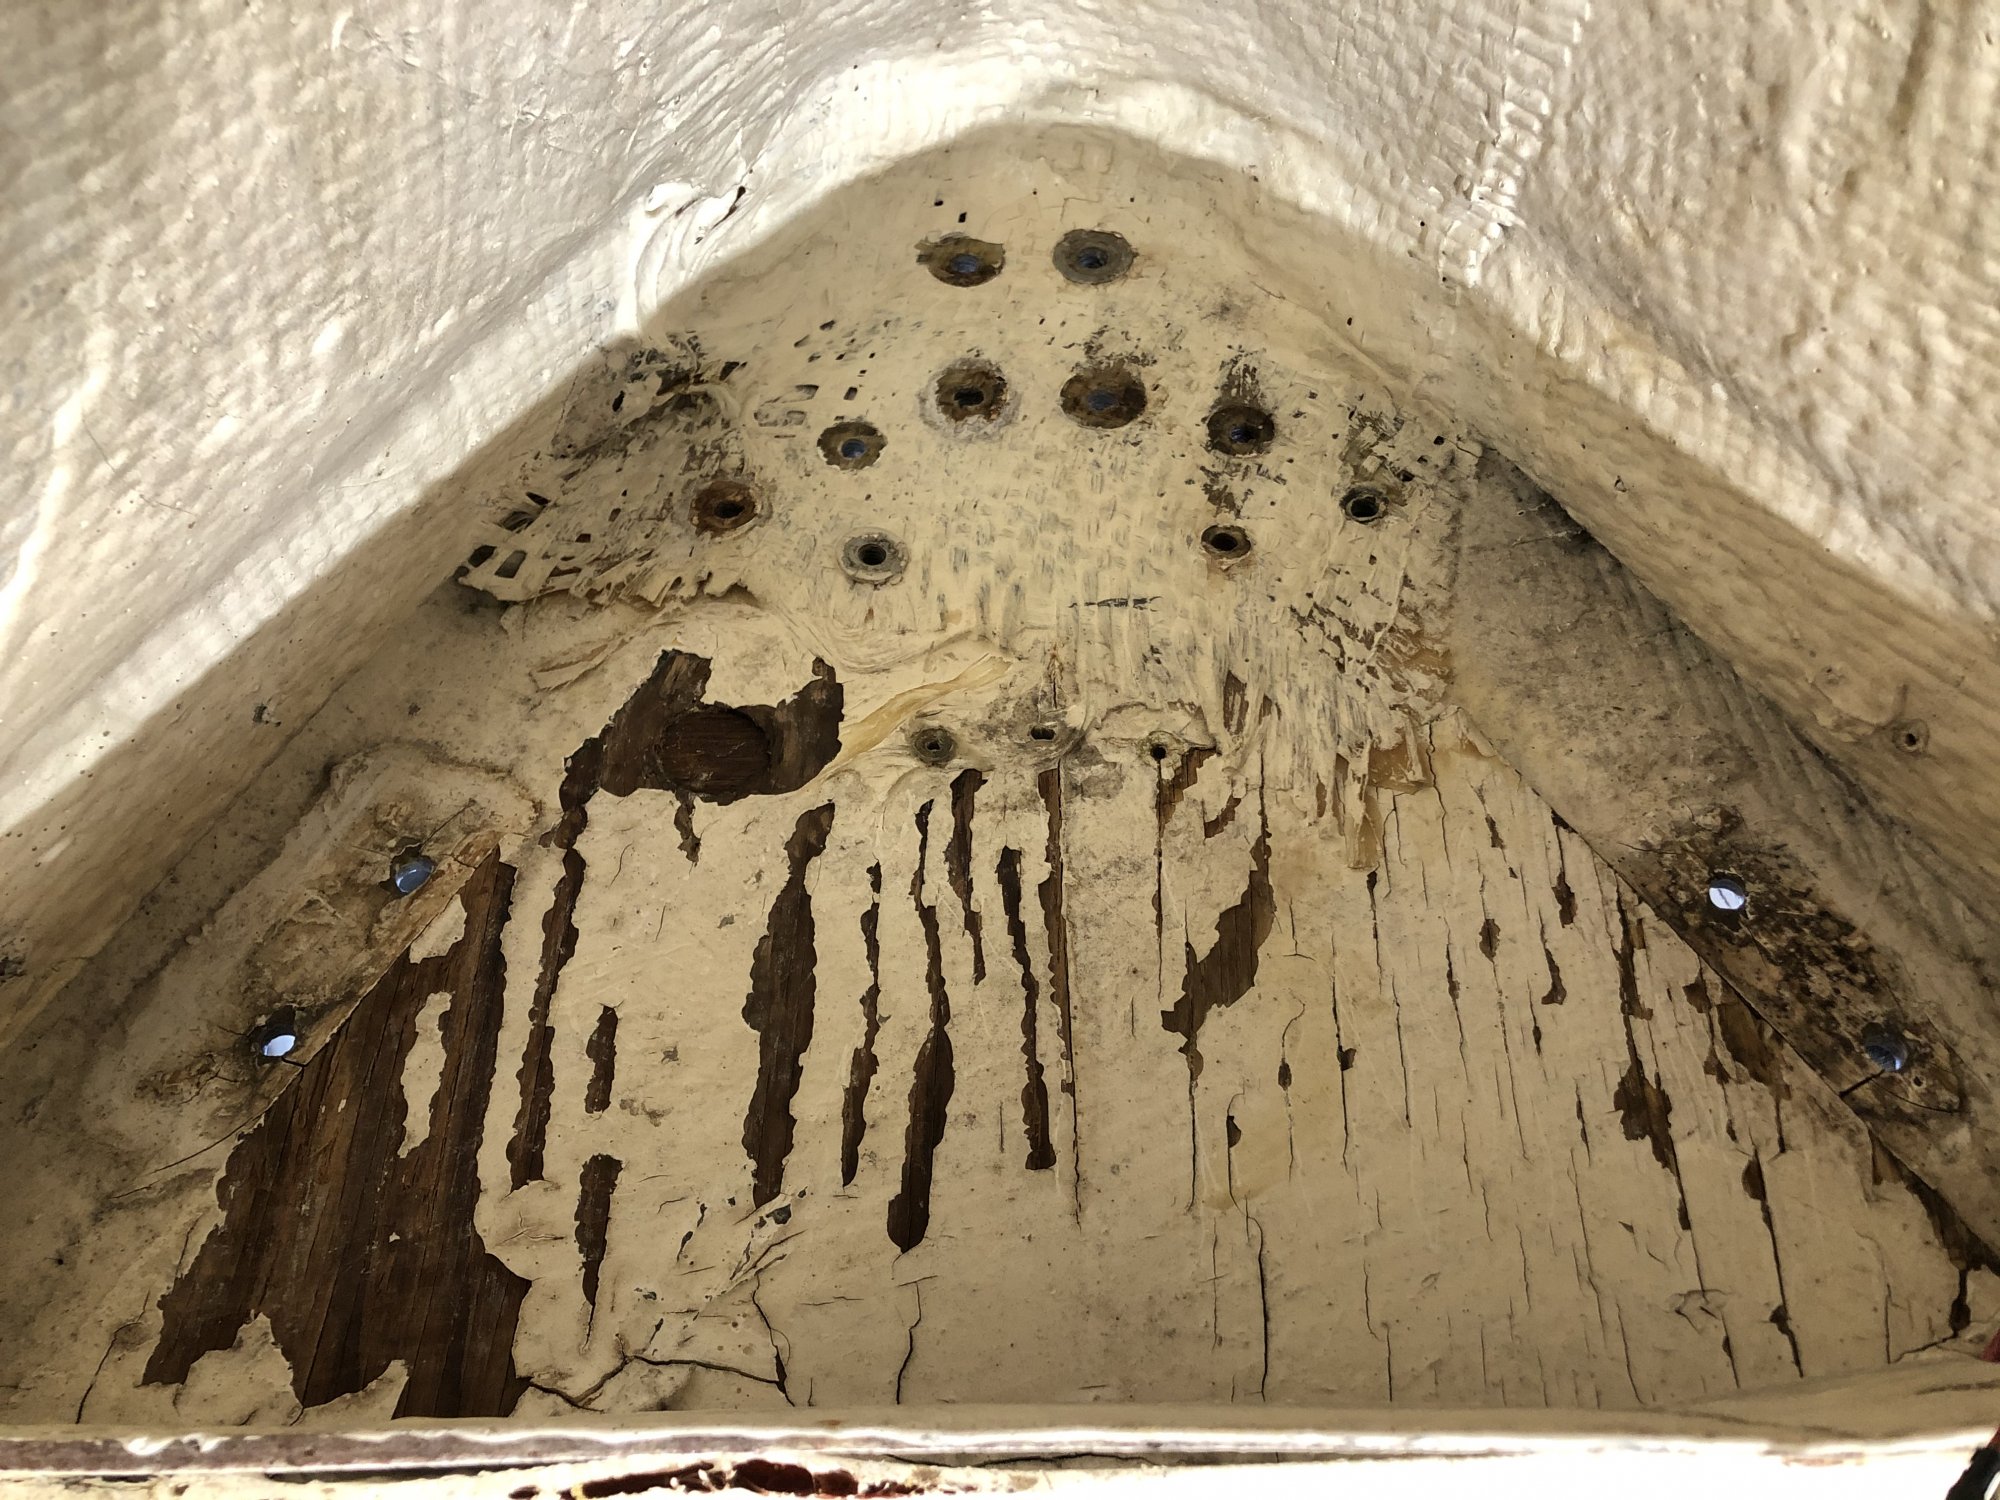
Fast forward multiple hours later and as usual 1/3 of the bolts came off with proper tools, 1/3 came off with brute force and creative use of slightly different tools, and yes the last 1/3 succumbed to death by dremel:
Took the time here to open up the checking cracks and see what the substrate condition was-- I had originally thought this was a bad piece of wood that would have to be ground or chipped away from the blob of glass at the peak. Was pleasantly happy to find solid thumps and no rot.
Had some fun here:
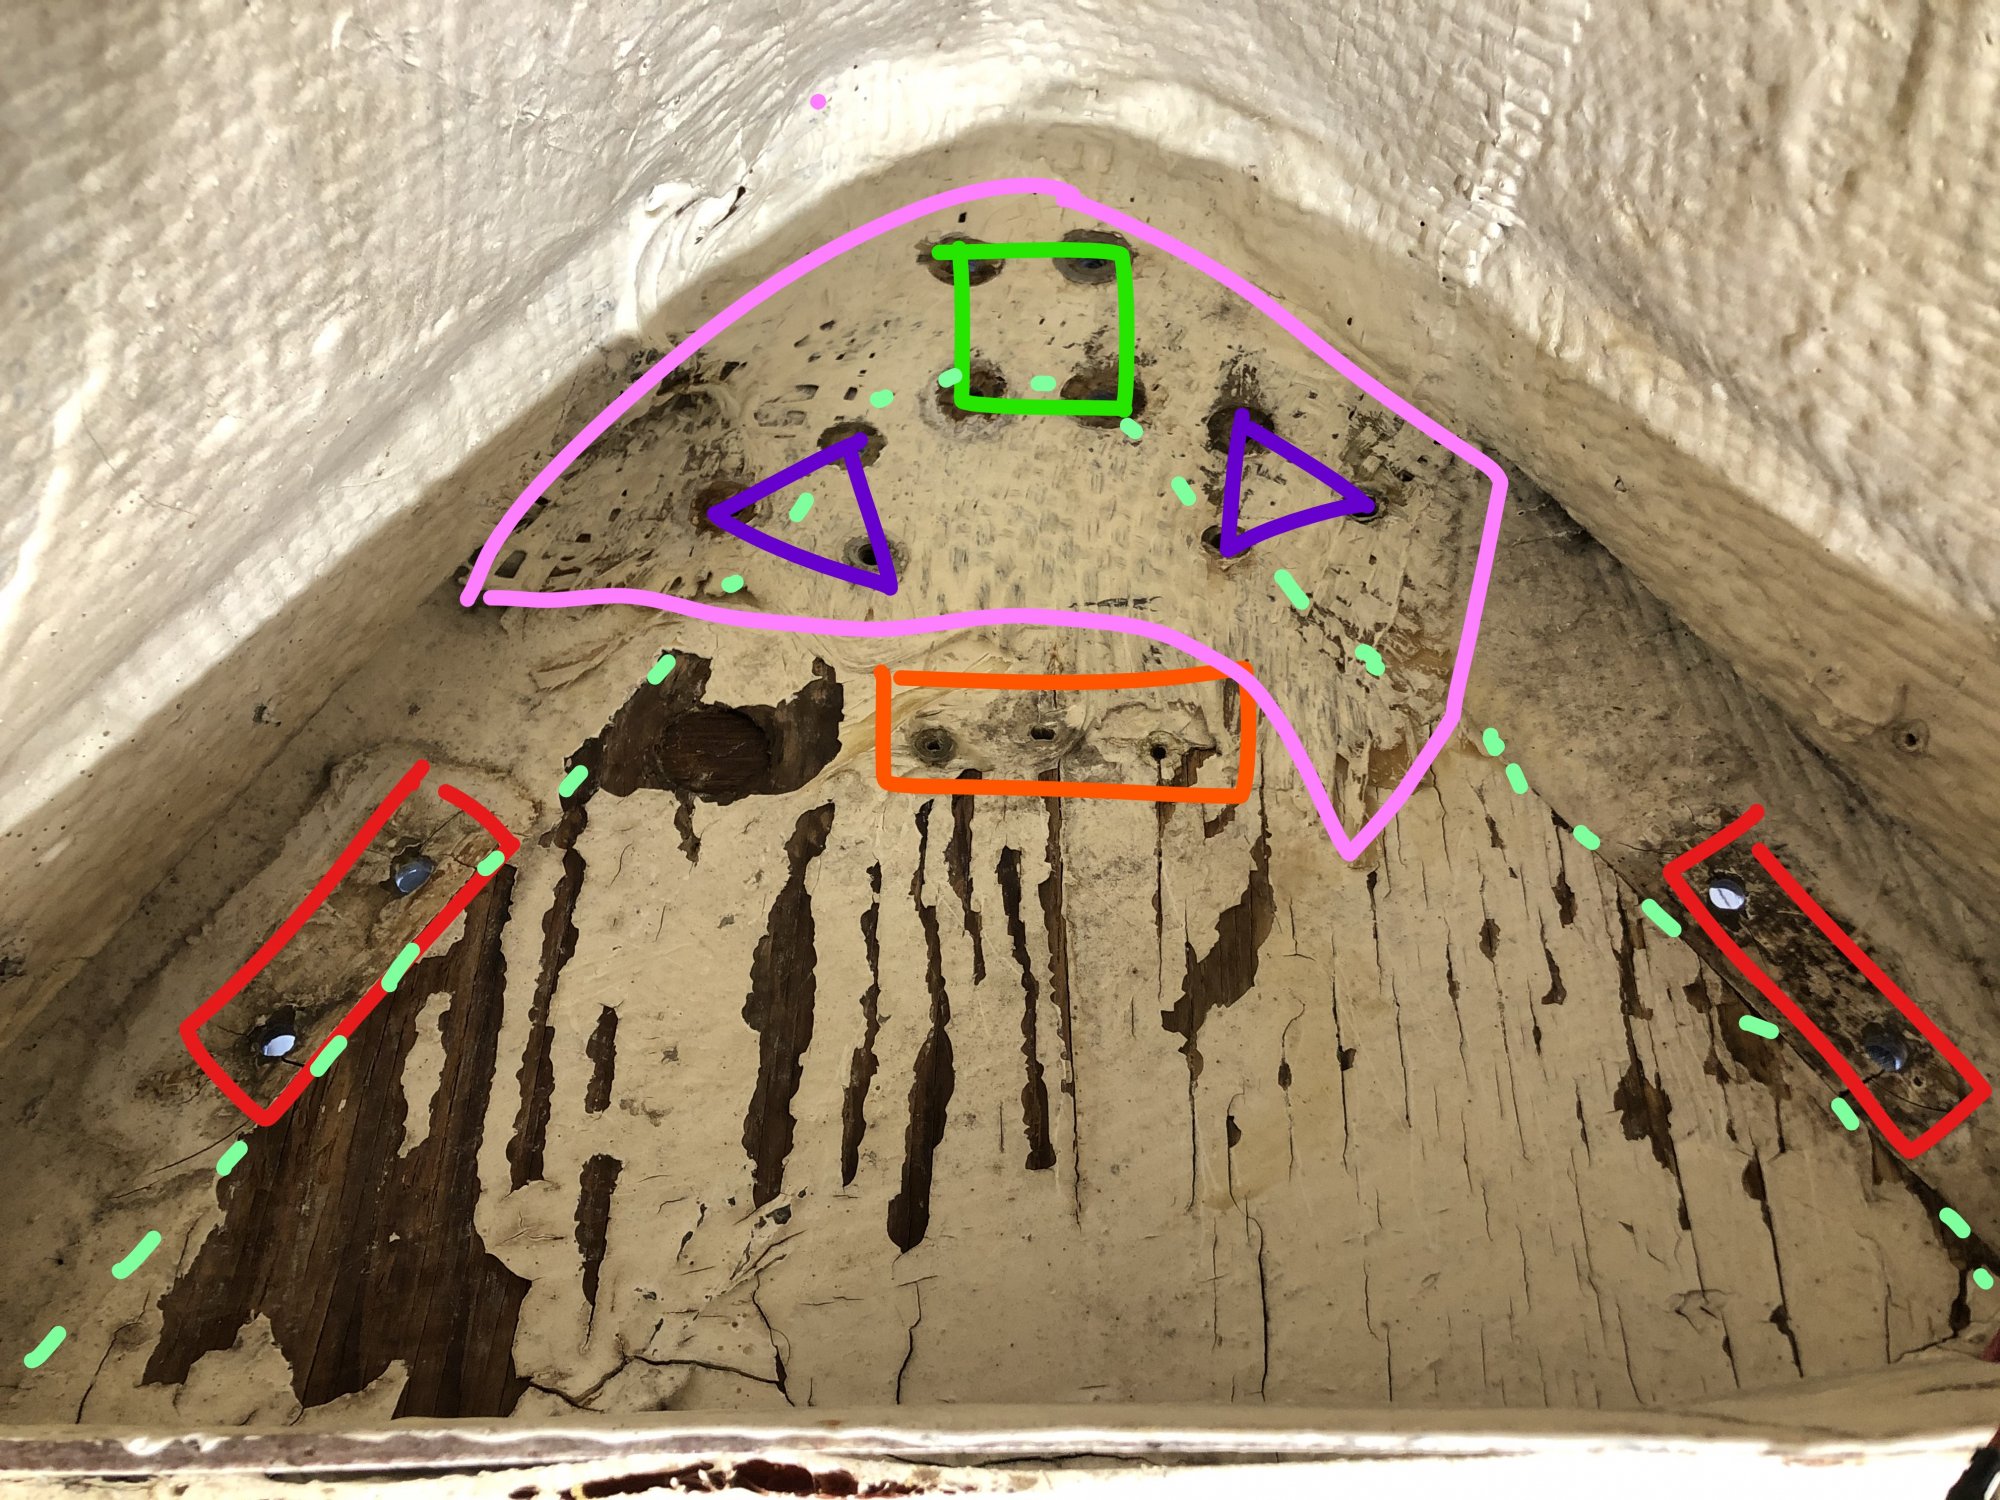
Dotted Teal line: is the furthest extent of the actual decking-- not just an add on piece as I was fearing. Good to know, but another problem:
Red outline is the deck cleats-- attached to almost nothing but the thin shell-- and the backing plates notoriously useless
Orange denotes where the bow light had two small through bolts and the wire feed
Purple are the foreward legs of the bow rail
Green for the Stem Fitting
and the Pink Blob is a smattering of glass which is the only saving grace for the forestay
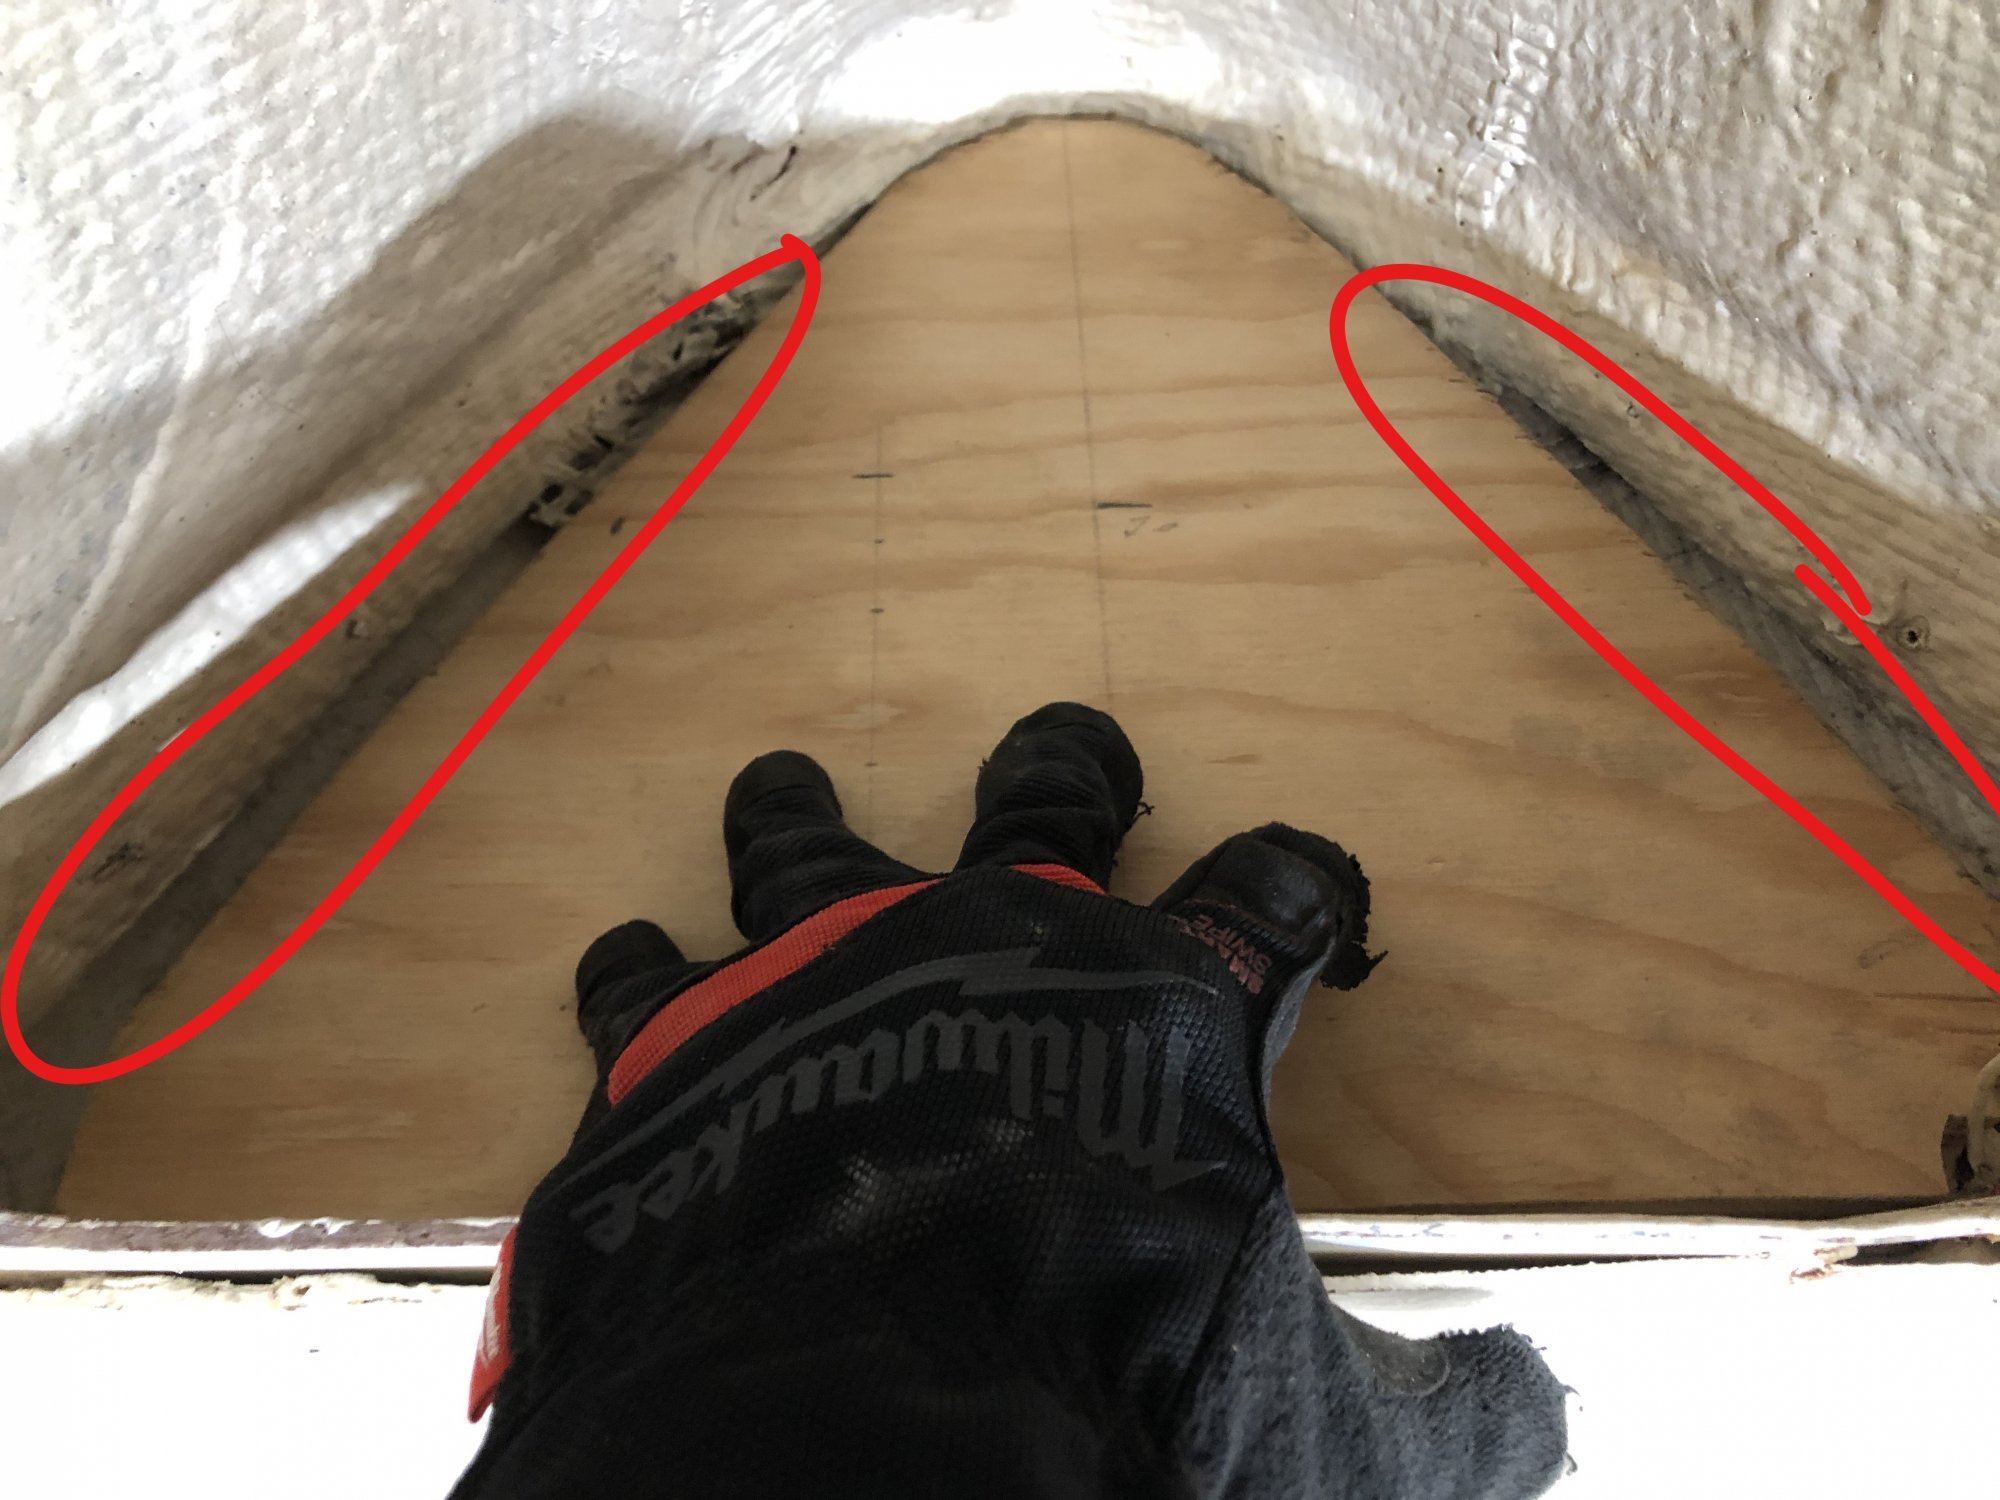
The plan is to overlay with a complete marine ply skin-- penetrating epoxied of course. Before it goes down the surface between the skin and the deck will be leveled in low density filler -- bonded flush with the ply with High Density filler. Dry fit as you see it and the outline gaps will receive a further flush coat of low density filler to smooth out that radius edge. Last will come some strips of biaxial glass to tie it together and a last coat of glass to seal it all up. All the holes overdrilled and filled, give the cleats some solid backing, add the stem fitting reinforcement for insurance and I think that will do it.
Let the upside down epoxy commence
Here's the original-- first challenge was trying to decide how to increase the overall structure-- definitely going to add the stem fitting support and tie it to the back end of the bow eye-- but that in and of itself doesn't solve the overall problem. In addition to the inherent weakness well documented -- the deck cleats rocked with ease and were leaking at best if not destined to leave at the first good pull:
Fast forward multiple hours later and as usual 1/3 of the bolts came off with proper tools, 1/3 came off with brute force and creative use of slightly different tools, and yes the last 1/3 succumbed to death by dremel:
Took the time here to open up the checking cracks and see what the substrate condition was-- I had originally thought this was a bad piece of wood that would have to be ground or chipped away from the blob of glass at the peak. Was pleasantly happy to find solid thumps and no rot.
Had some fun here:
Dotted Teal line: is the furthest extent of the actual decking-- not just an add on piece as I was fearing. Good to know, but another problem:
Red outline is the deck cleats-- attached to almost nothing but the thin shell-- and the backing plates notoriously useless
Orange denotes where the bow light had two small through bolts and the wire feed
Purple are the foreward legs of the bow rail
Green for the Stem Fitting
and the Pink Blob is a smattering of glass which is the only saving grace for the forestay
The plan is to overlay with a complete marine ply skin-- penetrating epoxied of course. Before it goes down the surface between the skin and the deck will be leveled in low density filler -- bonded flush with the ply with High Density filler. Dry fit as you see it and the outline gaps will receive a further flush coat of low density filler to smooth out that radius edge. Last will come some strips of biaxial glass to tie it together and a last coat of glass to seal it all up. All the holes overdrilled and filled, give the cleats some solid backing, add the stem fitting reinforcement for insurance and I think that will do it.
Let the upside down epoxy commence
Last edited: