Fill old windlass void with resin and re-drill for new windlass install

Feb 16, 2021
263
Hunter Legend 35.5 Bellingham
Rather than fabricating an entirely new plate for a new windlass install, I was thinking of filling in the void left by my last windlass and then re-drilling the appropriate holes to install the new windlass. I believe the backer board used in the prior install is Taco Marine "Plastic Lumber", though I'm not absolutely certain (is there a way to tell?). It's possible it's Starboard, but it is two sheets bonded to each other as well as to other shims, and I've read that Starboard does not bond well, which leads me to believe that it is not Starboard.

Either way, could I simply replace the SS top plate (on which the windlass will rest), then fill the former windlass' void with epoxy resin or fiberglass, wait for it to cure, then drill the appropriate holes for the new windlass, per its template?

I'm not familiar with plastics and how they relate to resins and don't know if this would work, but if it could, it would save me much time and effort (as well as money) as I wouldn't have to purchase new Starboard or Plastic Lumber and rebuild the entire piece.

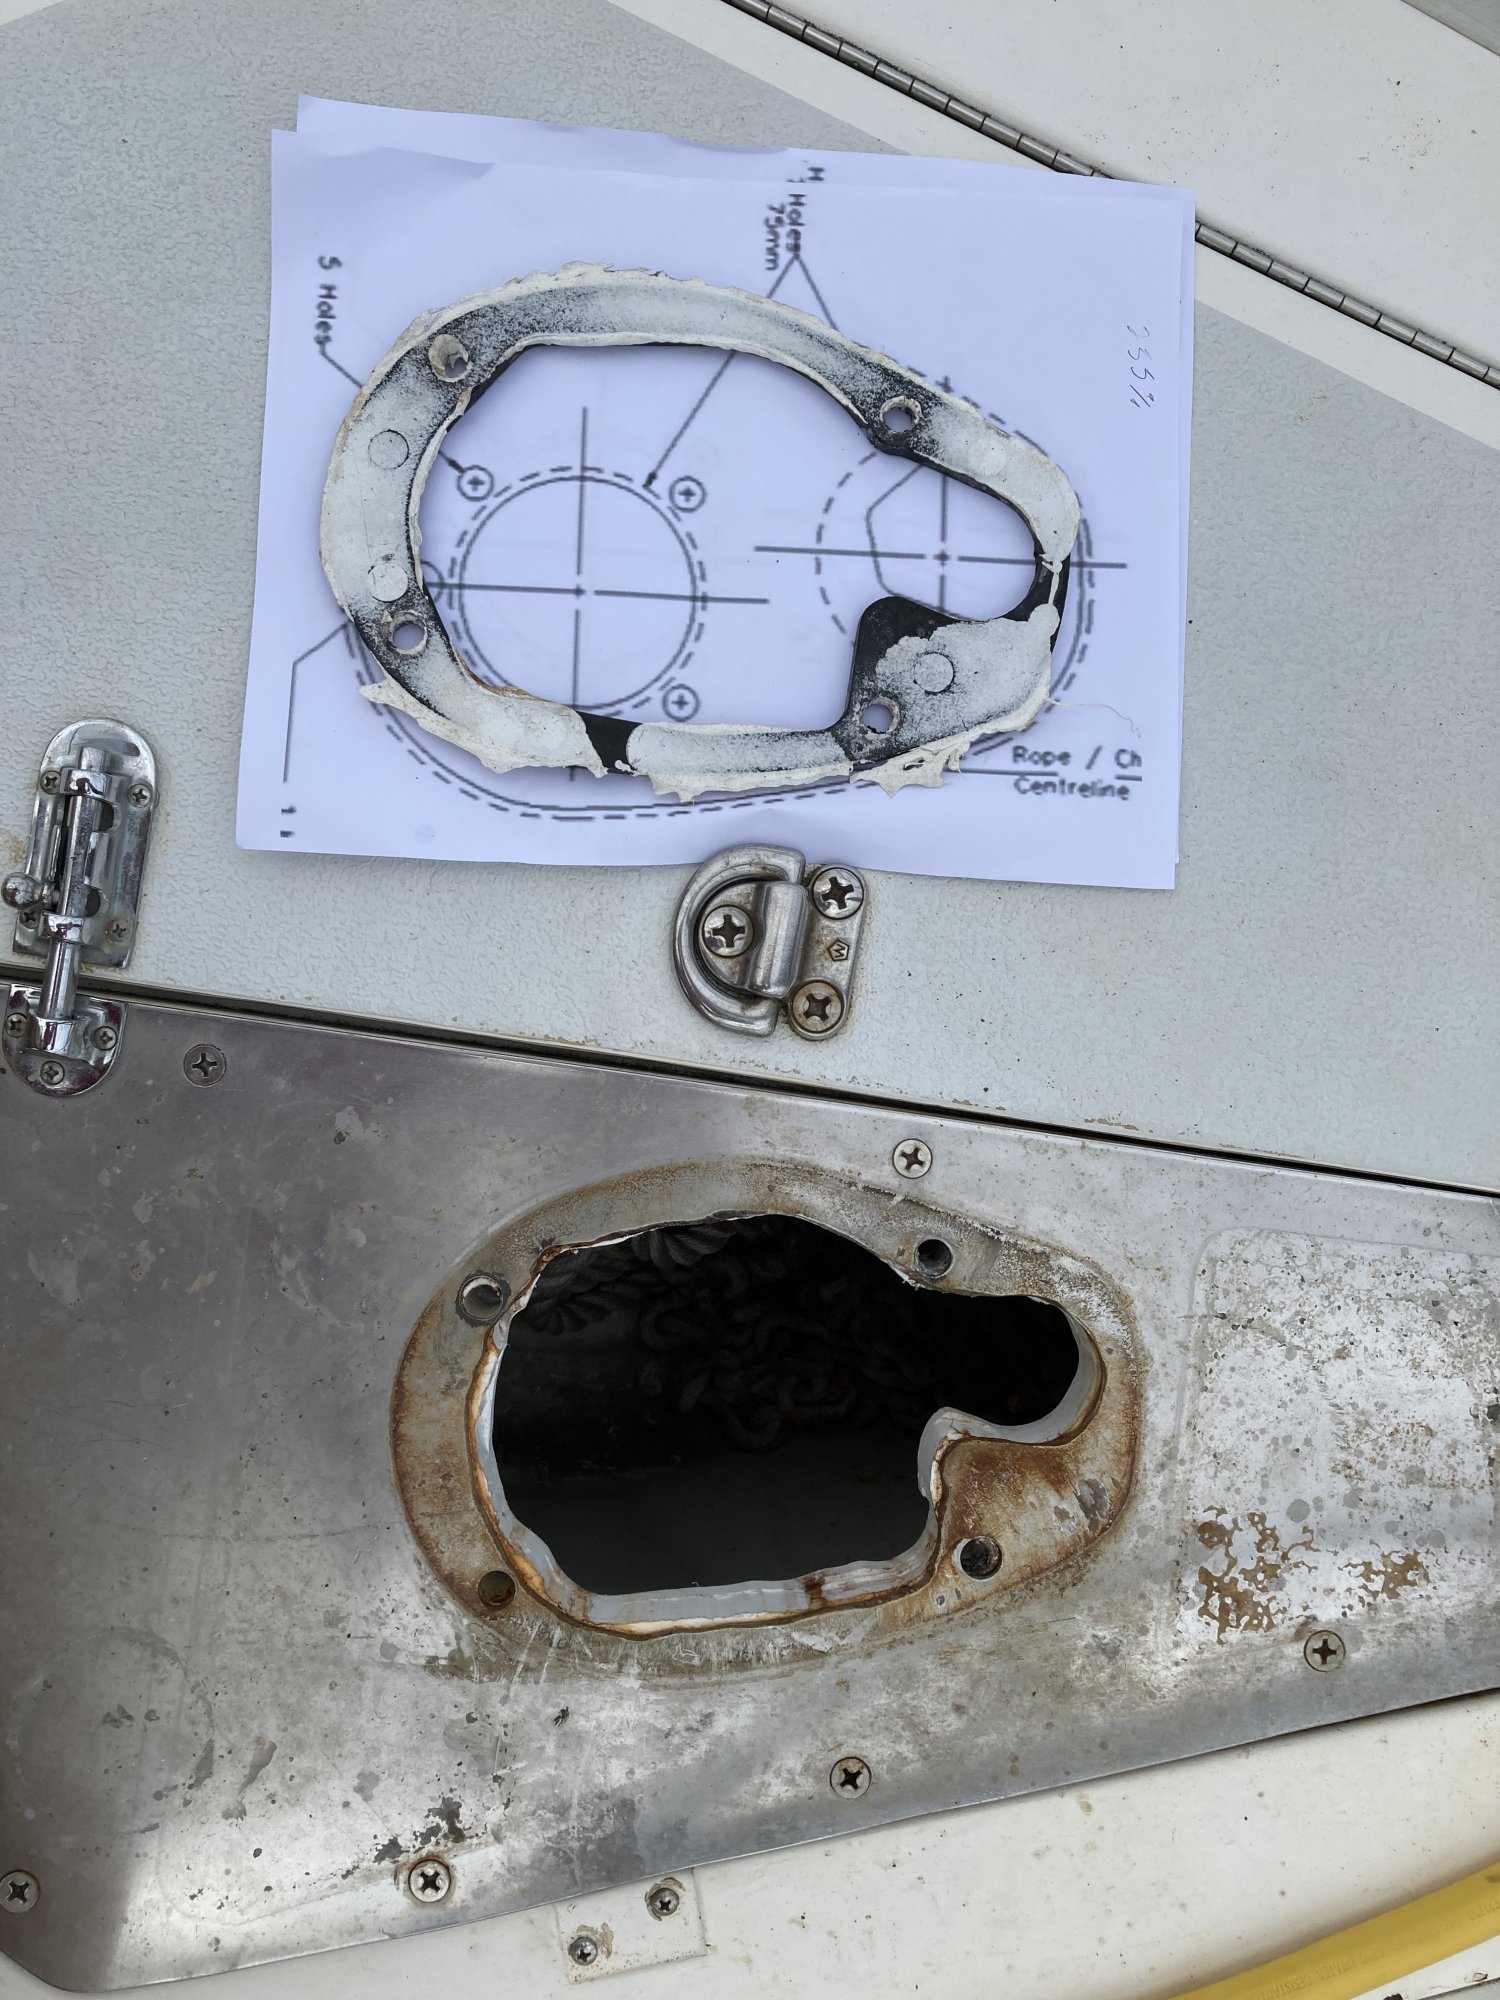
Exterior picture: Port side is anchor locker hatch, starboard side is mounting plate for windlass: 1/8" stainless steel plate on top of 1" plastic sheet (3/4" bonded to 1"4" sheet to make 1" combined).
IMG_9848.JPG

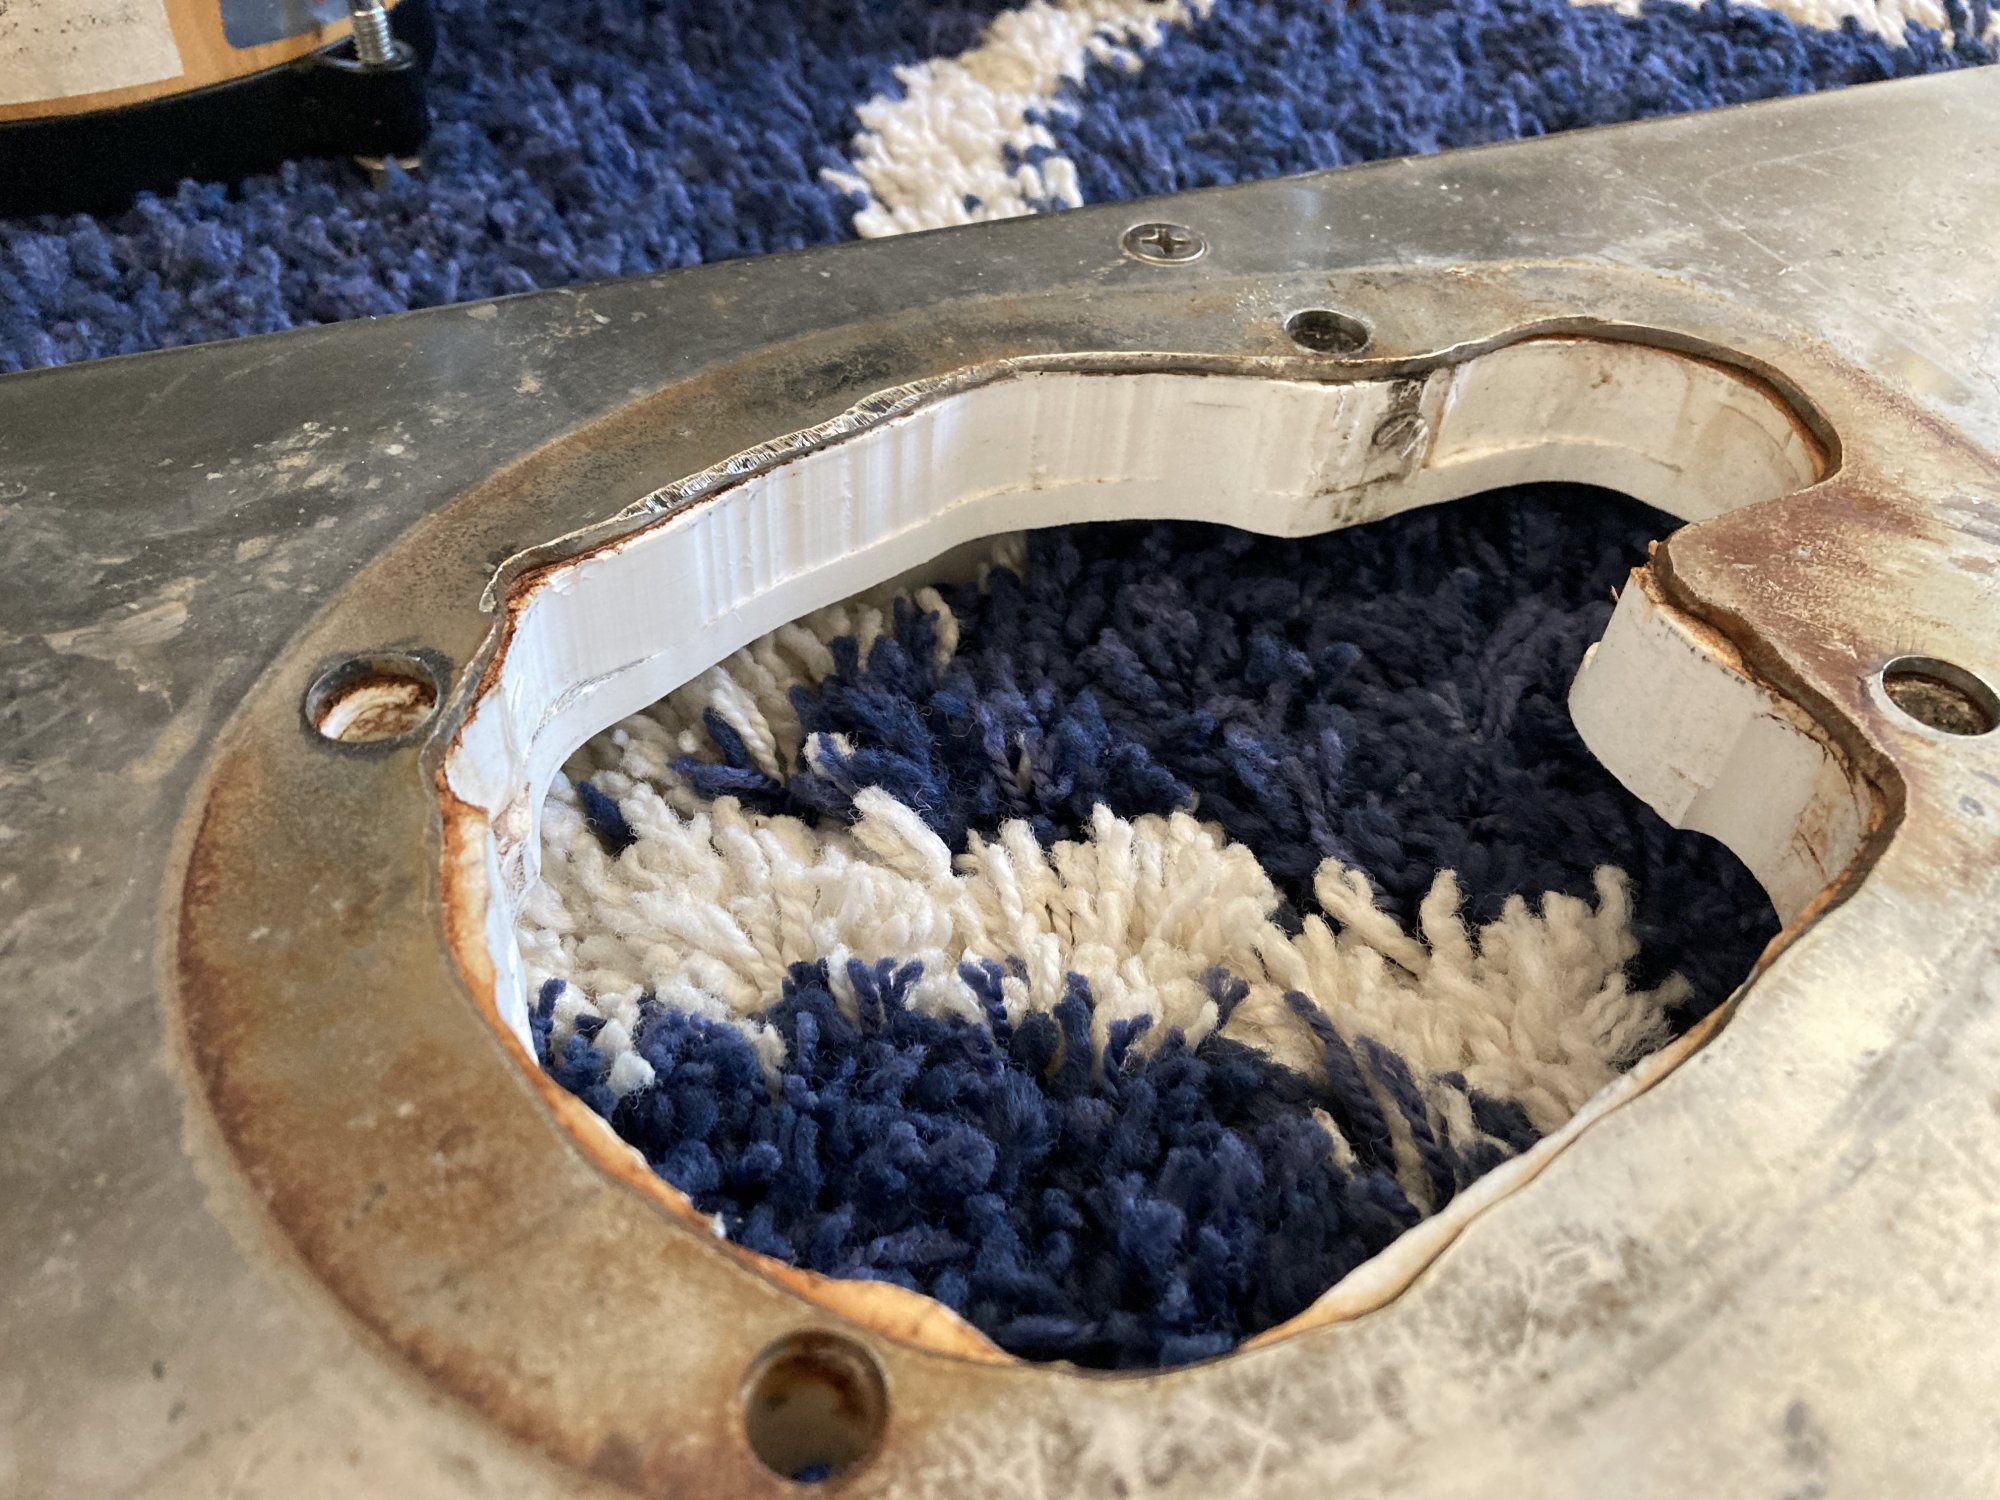
Exterior picture showing bonded plastic sheets and SS plate thickness.
64600616967__36BB80ED-7B58-4206-BFAD-FE71B0985FCB.JPG

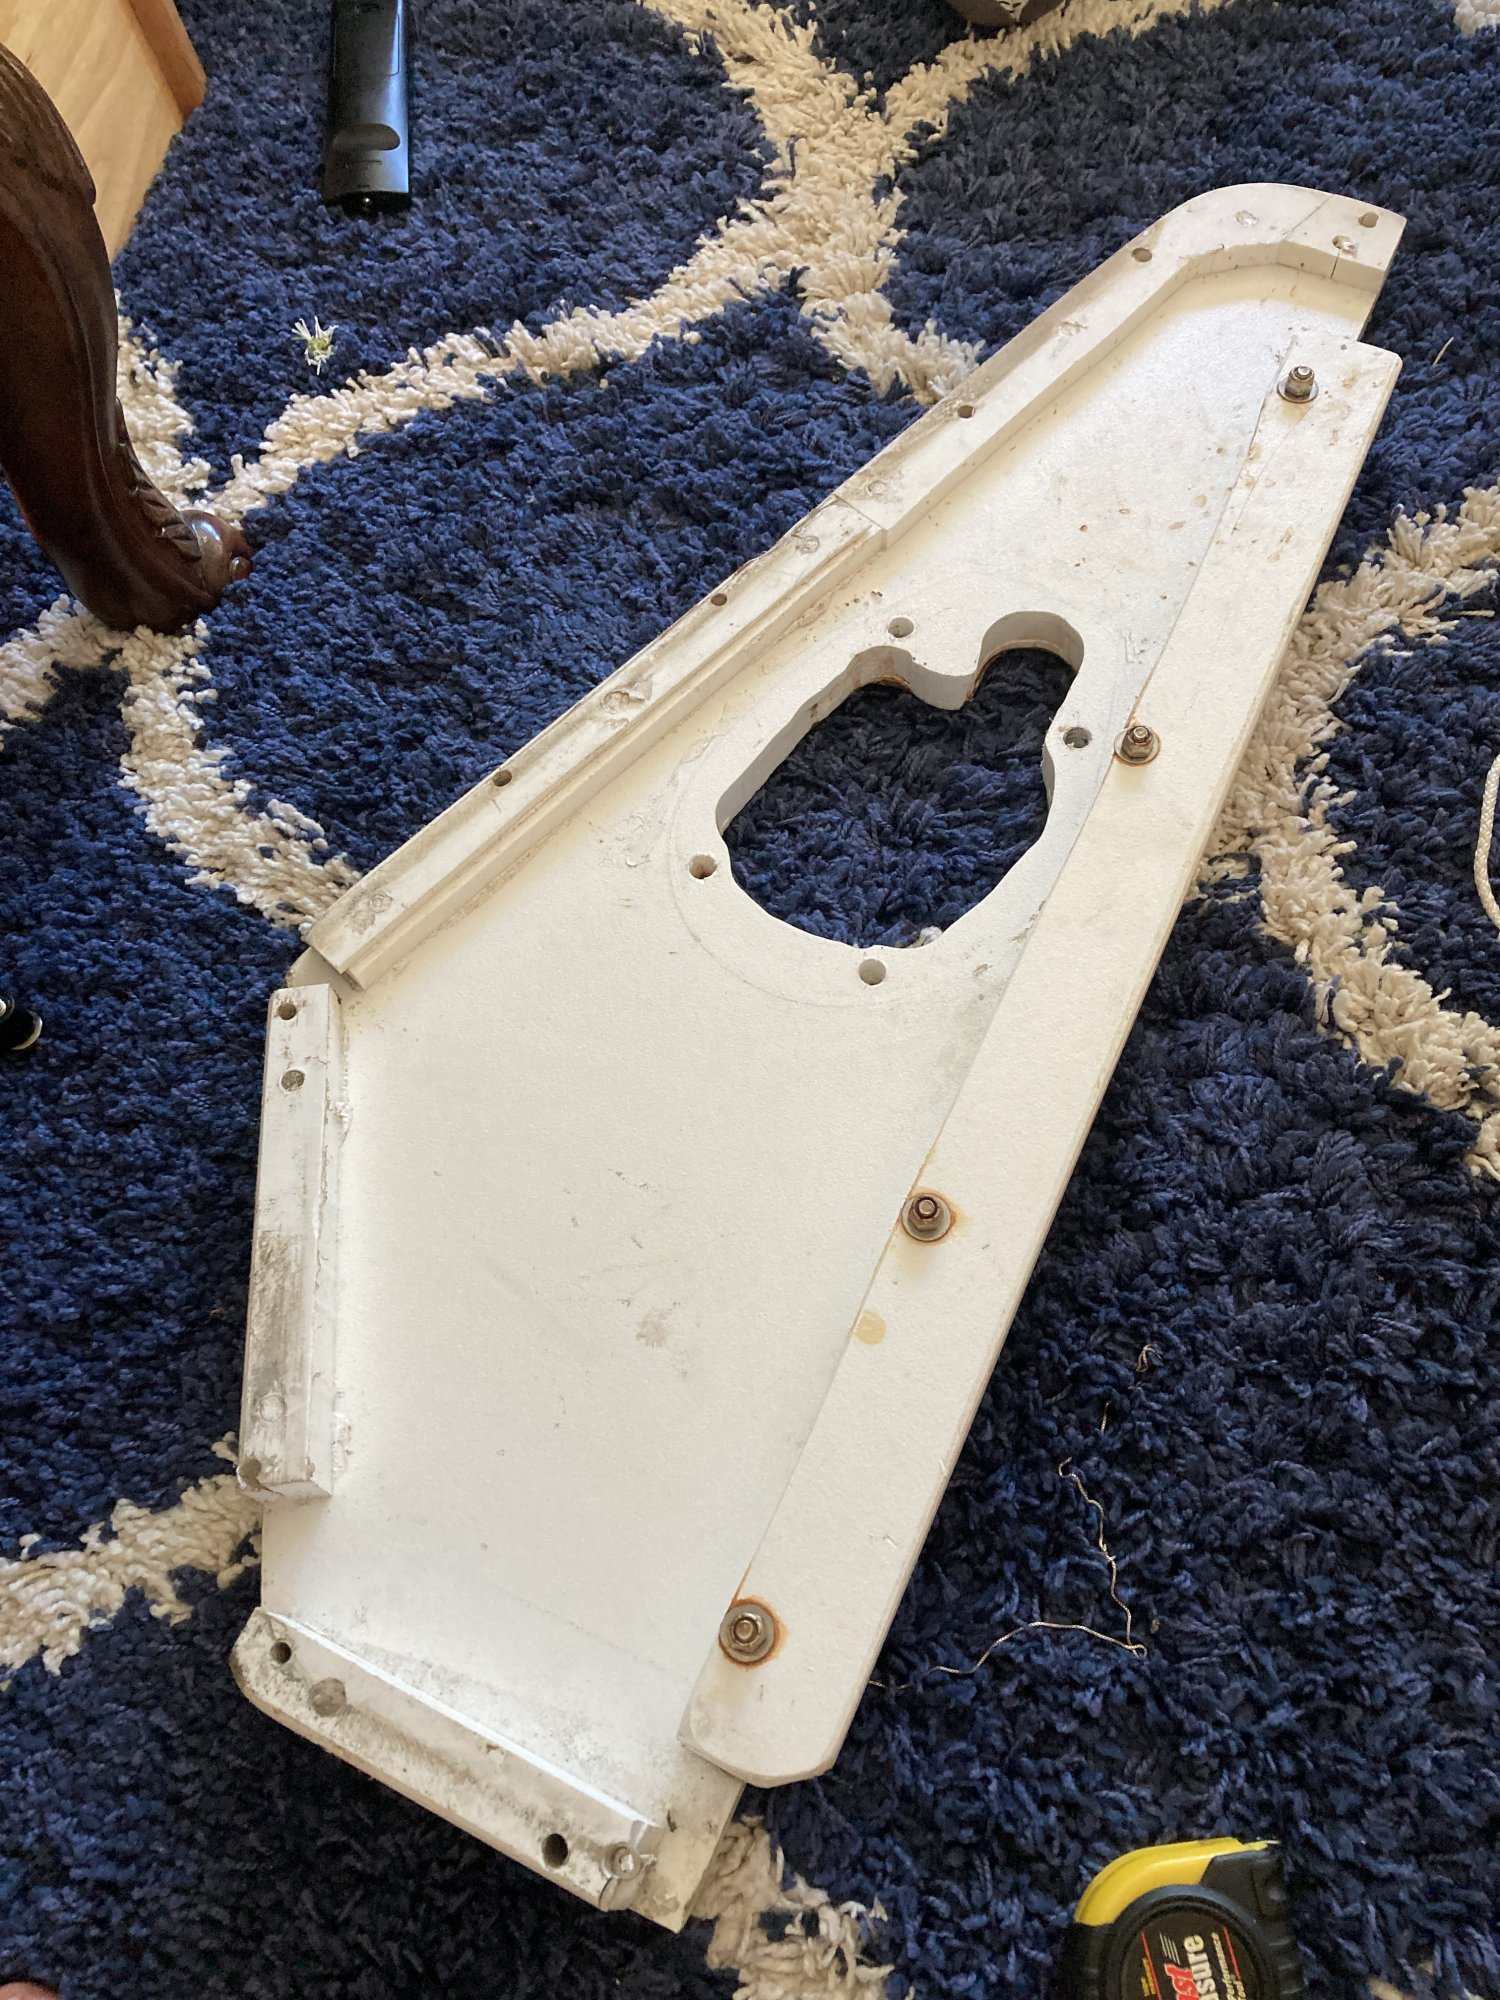
Under side (locker side) of windlass mounting plate, showing additional framing/shims attached to 1" plastic sheet. Outer holes are where bolts anchor top plate to anchor locker (via large washers overlapping flange in anchor locker).
64600721235__361F56B5-41C6-4E06-9799-64D038B980B0.JPG

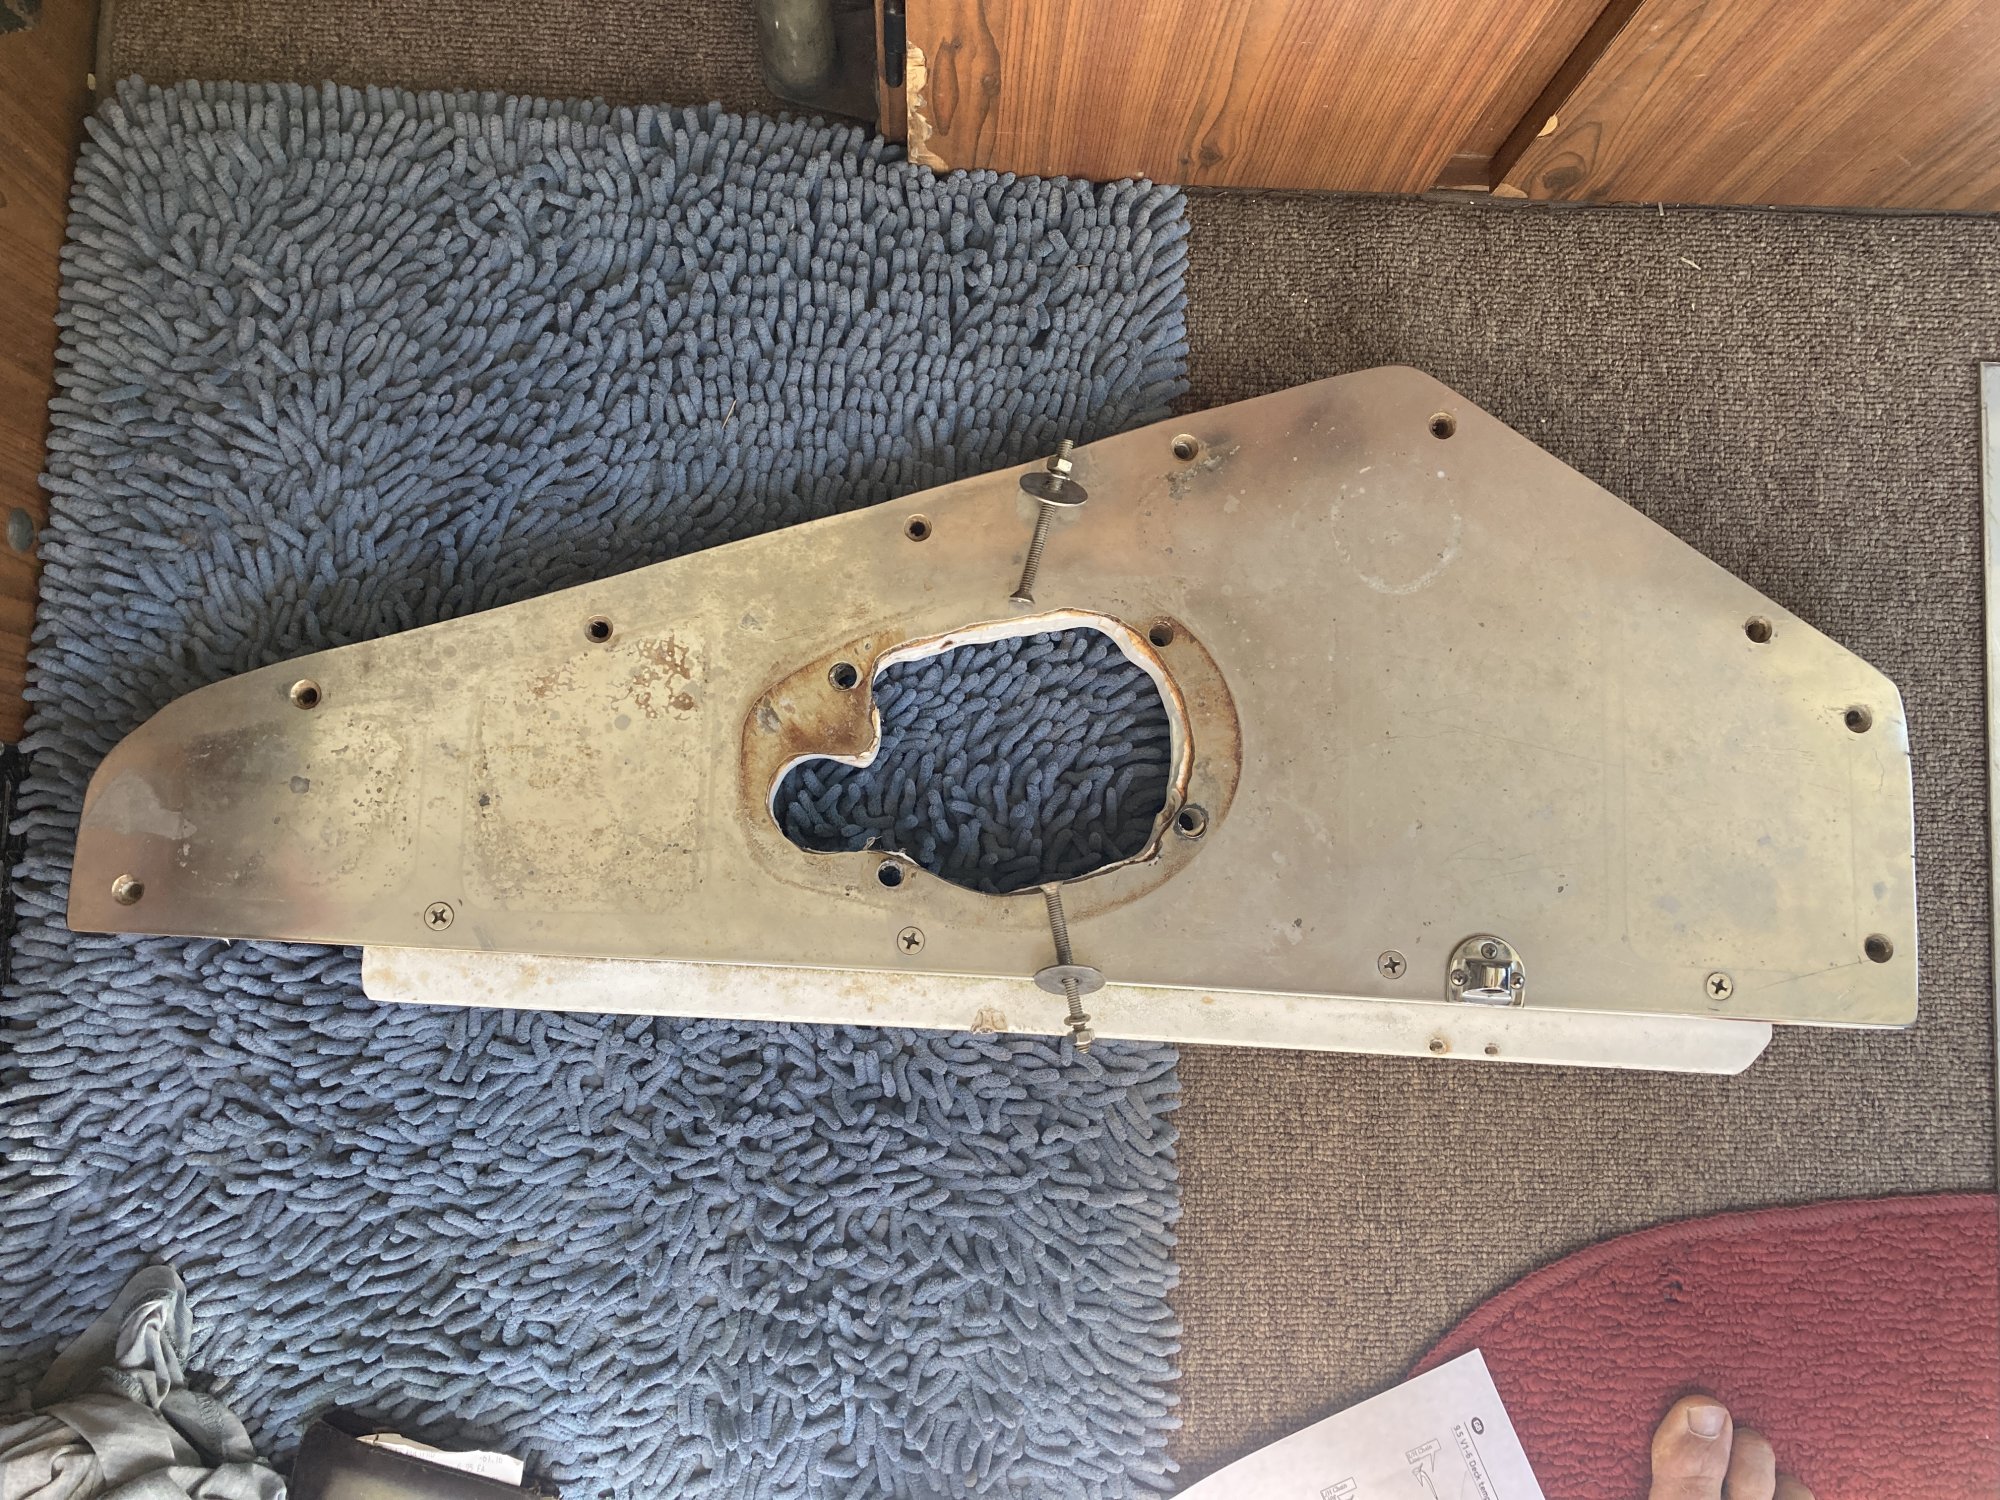
Exterior view: Empty bolt holes show where bolts and 1" washers (also pictured) attach windlass mounting plate to anchor locker.
IMG_9866.JPG
 
Last edited:
Jan 11, 2014
11,401
Sabre 362 113 Fair Haven, NY
Well, that was someone's better idea. Is the other half of the anchor locker cover built the same way with plastic reinforcements or is it the more traditional fiberglass construction?

Just filling the void with resin probably won't work well as there is very little surface area for it to bond to and the bond between the plastic and epoxy will be poor. The plug will want to pull out under load. That and resin without fillers or glass is brittle and will easily crack.

One option would be to remove the plastic, I suspect it is just there to stiffen the metal plate, have a new piece of metal welded into the hole and then reassemble the lid using G10 boards as the stiffener. This will not be an inexpensive option.

Another less expensive option would be plywood. It may require 2 layers of ¾" plywood bonded with epoxy and sealed with a couple of layers of glass.
 
  • Like
Likes: BigEasy
Jun 21, 2004
2,533
Beneteau 343 Slidell, LA
Absolutely agree with Dave’s assessment. Simply filling the existing cutout will not withstand the stresses associated with windlass loads. Reconstruction is the way to go.
 
Oct 2, 2008
3,807
Pearson/ 530 Strafford, NH
Perhaps I’m looking differently at your pictures, is the big ss plate on the outside serving as the base for the windlass? What puzzles me is that barrel bolt in your picture. Does that keep the locker lid closed? I don’t see much backing for the little screws holding the lid down by that bolt, so why would there be concern about stress on any filler if it was sandwiched between two stainless plates?

Or is your base on the non-opening side and you removed it to do the work?
 
Last edited:
Jan 11, 2014
11,401
Sabre 362 113 Fair Haven, NY
Perhaps I’m looking differently at your pictures, is the big ss plate on the outside serving as the base for the windlass? What puzzles me is that barrel bolt in your picture. Does that keep the locker lid closed? I don’t see much backing for the little screws holding the lid down by that bolt, so why would there be concern about stress on any filler if it was sandwiched between two stainless plates?

Or is your base on the non-opening side and you removed it to do the work?
Good questions and observation.

The load on the lid will be fore and aft, so the primary stress will be on the outer edge of the lid. On the original side there is a piano hinge, presumably there is a similar hinge on the windlass side or it is otherwise well secured. If the windlass was pulling from the starboard side, which could be the case if used to warp the boat to the dock, then that barrel bolt would probably not survive.

If adequately sized SS plates were installed on the top and bottom of the lid to fully capture the epoxy, then it is indeed just filler and it could work. A one side only plate would not be sufficient, that seemed to be the plan the OP was proposing.
 
Nov 6, 2006
9,892
Hunter 34 Mandeville Louisiana
How about using an oval stainless plate with the footprint of the old windlass and drilled for the new and old.. It looks like there is space to do that without interference amongst the bolts.. The heads of the old would have to be recessed (countersunk) so as not to interfere with the flatness of the base for the new windlass.. I think something like 10 gauge SS plate would be fine. Bolt the adapter plate to the existing locker cover then bolt the new windlass to the adapter plate ..
If the new windlass needs a better base, make a thick adapter inside of the hole out of laminated fiberglass board (G-10)
 
Last edited:
  • Like
Likes: All U Get
Feb 16, 2021
263
Hunter Legend 35.5 Bellingham
Very good thoughts everyone.

For clarity I have updated the pictures in the original post with descriptions and added another picture.

Well, that was someone's better idea. Is the other half of the anchor locker cover built the same way with plastic reinforcements or is it the more traditional fiberglass construction?
It is the original fiberglass anchor locker cover, cut to fit the starboard modified plate for mounting the windlass.

The existing SS plate is 1/8". I purchased a 5/32" plate of SS anticipating removing and replacing the entire plate, but it seems there would likely be additional fabrication required with this method and I like better the idea of attaching a new plate (why not weld it?), cut to the footprint of the new windlass onto the old footprint, then through bolting another 5/32" gauge SS plate on the underside of the 1" plastic sheet. The top plate bolt holes would definitely need to be countersunk to provide the new windlass an uninterrupted mounting surface (thanks for pointing that out @kloudie1).

Would I even need to fill the void if it were constructed this way? I suppose filling it would at the very least prevent salt water from accumulating and doing mischief within the void.

Alternately I suppose I could just drill some drain holes in the bottom plate and skip the filler.

On a side note: good point @dlochner regarding the unsupported side load when warping to starboard. I do have a drum and anticipated doing some warping. This is a side note and not fundamental to my main concern of installing the windlass and I don't want it to distract from that concern, but would appreciate PM on any thoughts on how to secure the plate such that warping to starboard would be possible without ripping the plate off the deck.
 
Last edited:
Jan 11, 2014
11,401
Sabre 362 113 Fair Haven, NY
Would I even need to fill the void if it were constructed this way? I suppose filling it would at the very least prevent salt water from accumulating and doing mischief within the void.
Filling the void will keep the plates from moving and deforming under load. The same principle as coring a deck, the balsa doesn't add strength, the strength is in the fiberglass skins, the core makes it stronger and reduces any flexing.

As for the side loading, bigger barrel bolts that are through bolted.
 

capta

.
Jun 4, 2009
4,772
Pearson 530 Admiralty Bay, Bequia SVG
If it was me, I'd get a wood worker to make you a nice teak mounting board to go over the old holes and redrill for the new windlass. Not only will it spread the load on the deck better, but it will look great varnished.
 
Feb 16, 2021
263
Hunter Legend 35.5 Bellingham
I am fabricating a new top plate out of 9 gauge SS, and have cut a bottom plate to reinforce it (sandwiching the plastic board). I plan to fill the void with some sort of filler (using the mounted top plate as a well), then drill the two 3” holes and mounting bolt holes per the V2 windlass template.

My question now is what sort of filler to use? It seems regular epoxy would be too thin and would run out before setting. Is there anything more viscous (or an additive that would increase the viscosity) that would bond well with the plastic board?
 

Attachments

Oct 22, 2014
21,088
CAL 35 Cruiser #21 moored EVERETT WA
Rather than a hole filled with epoxy fill the space with G10 or Coosa board. Both are an epoxy compatible product. They fill the space and you fill the edges that connect with the boat using thickened epoxy. You can mix it up your self or buy the premixed.

Thicken with fillers. Like these from Jamestown distributors. Jamestown Distributors

check out Andy at Boatworks Today for examples on mixing and fillingwith epoxy.
 
Feb 16, 2021
263
Hunter Legend 35.5 Bellingham
Very nice video with a skillful repair. I'm hoping my situation can be a bit simpler such as just pouring a thickened epoxy into the welled void, as it doesn't need to be "structural" as the steel plates will be bearing the load of the windlass.

Could I use West Systems 105 with 205 fast hardener, mix in 403 fibers to strengthen fill and then thicken with 407 low density gap filler? I figure I'd want to be able to make it proud and sand it down.

Or could I use this two part fairing compound by TotalBoat?
Or even this one part fairing compound by 3M?
 
Oct 22, 2014
21,088
CAL 35 Cruiser #21 moored EVERETT WA
Andy just posted info about epoxies that might be relevant to your project.

My thoughts are that the starboard and epoxy will not play well together. (Poor bond). This might introduce a path for water to find its way into your boat. With Koosa or G10 board the epoxy will form a water tight bound
 
  • Like
Likes: skunther