Deck fitting installation problem - O-Day 28

Fredct

.
Sep 21, 2020
86
Oday 28 Westbrook
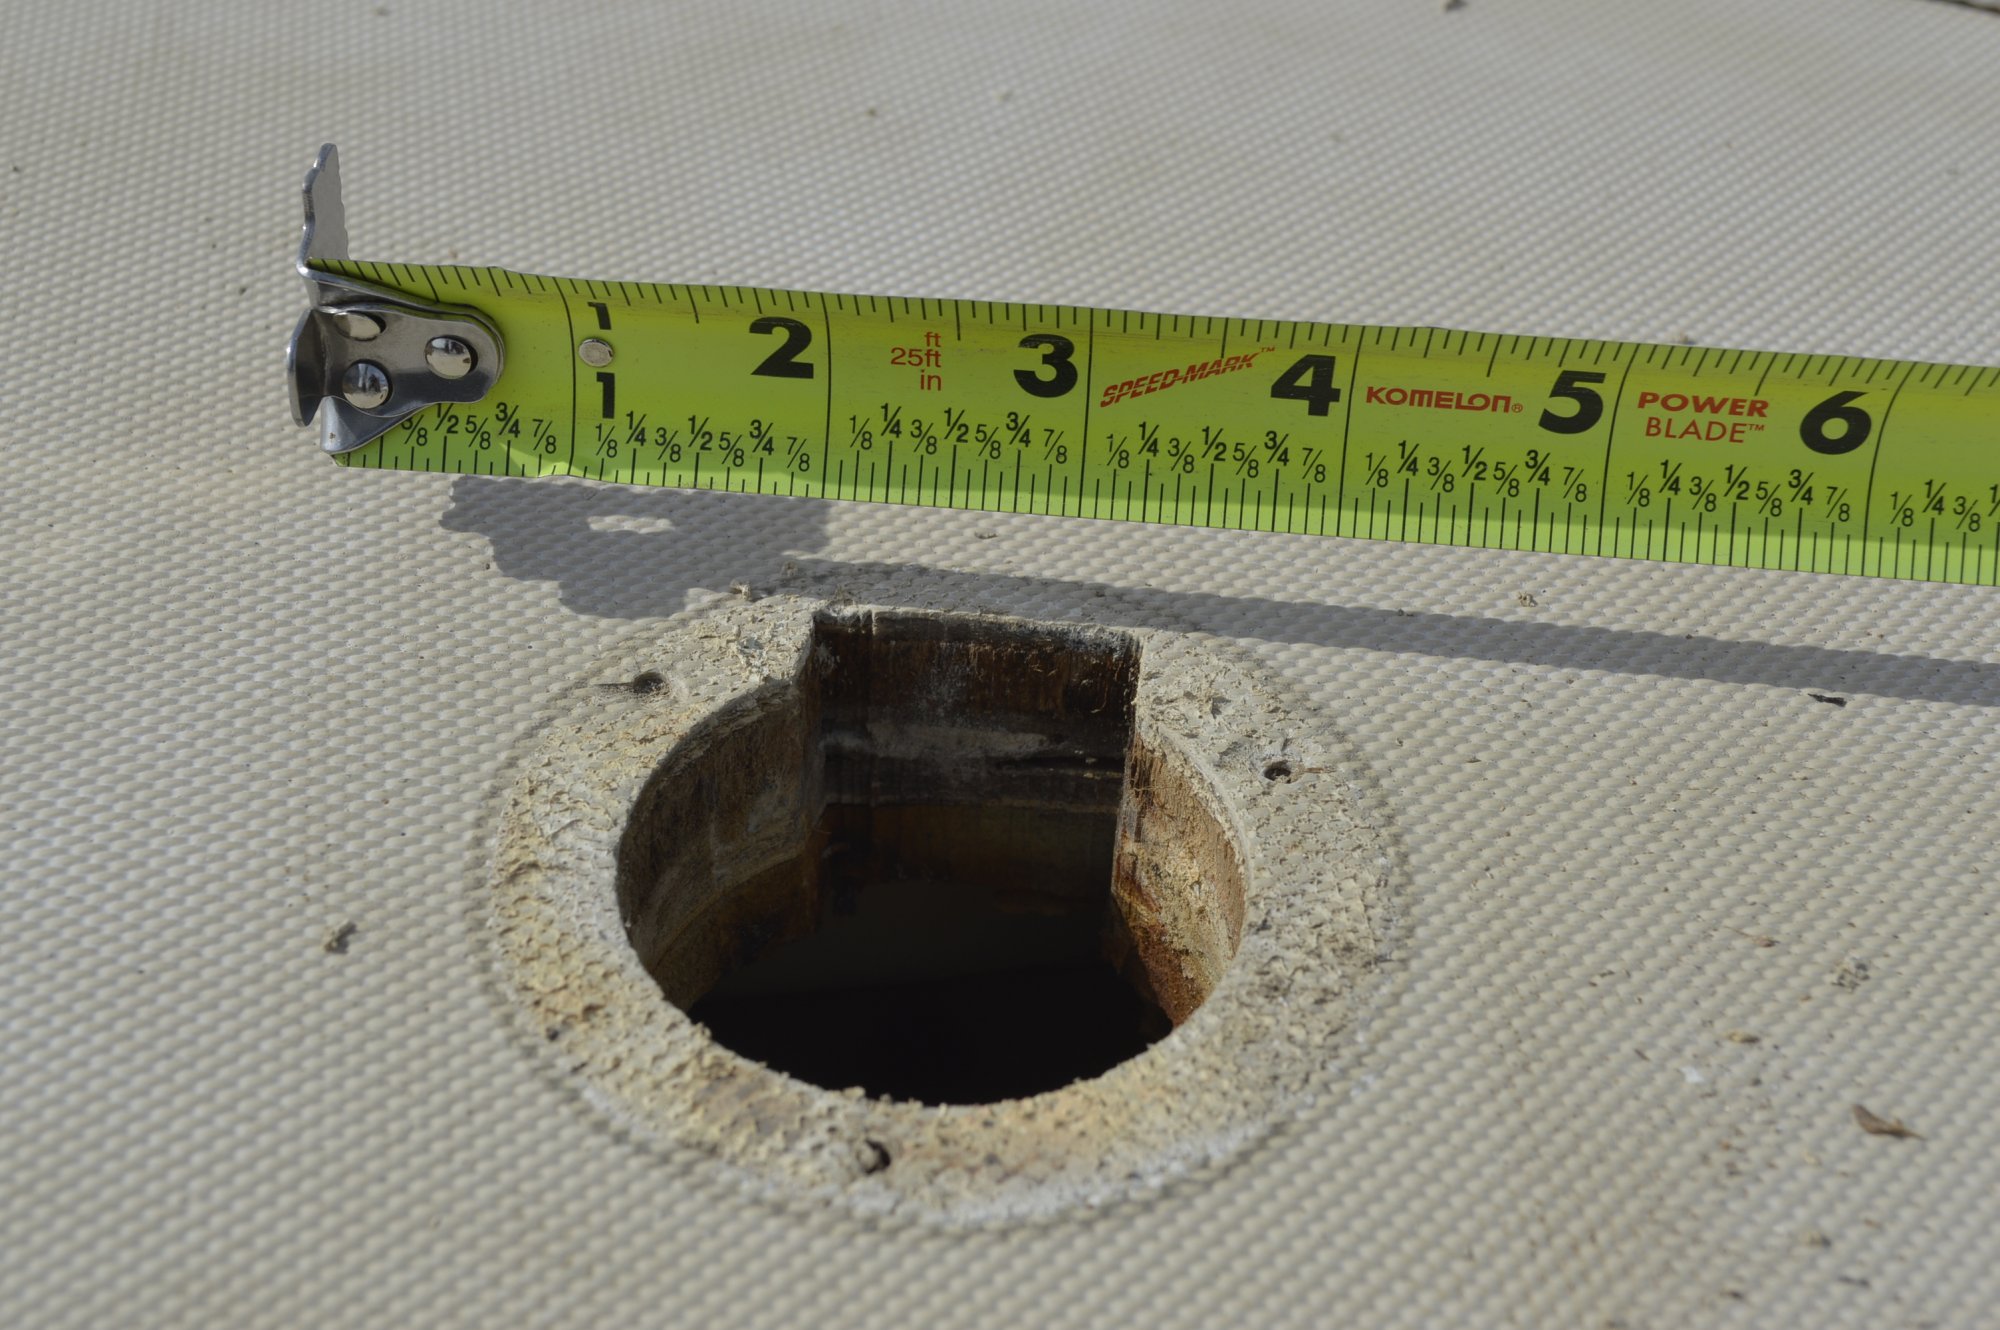
O-Day 28 1981 so old. I am replacing the entire waste system (tank and all). I had to pull out the deck fitting to remove the final bit of hose.

The fitting was held in place by 3 wood screws. No bolts through the deck and no backing plate. I bought new fitting which has a larger flange.

My problem: the wood is soft and moist. I cannot tell if the water logged area is "local" to the fitting or extends further. Boat in on land and will dry all winter.

Should I:

1- Ignore and screw new fitting in place using wood screws
2- Ignore BUT use thru-bolts with a proper backing plate on the inside of cabin
3- Remedy moisture issue (do not really know how) and then proceed according to 1

_DSC0194.JPG
 

dmax

.
Jul 29, 2018
980
O'Day 35 Buzzards Bay
I just replaced all my deck fills - you need to borrow or buy a moisture meter (cheapest is Ryobi at Home Depot, $40.00). Unfortunately, O'Day didn't seal these well and all four of mine had mositure in the surrounding wood core. The moisture meter will tell you the extent of the moisture. In my case, I was able to remove all of the moist wood back to dry wood (about an inch, using various tools), sealed it up with epoxy, re-drilled the hole and bedded new deck fills with butyl (not for the diesel deck fill, I used Life Calk there). Don't through-bolt the deck fill, it's not necessary. I couldn't find an exact match for the deck fills so I re-drilled new holes for the screws - these are in solid epoxy so the wood core is protected. Bevel the edges of the screw holes and the deck fill hole so the sealant is thicker there and provides more of a gasket. Fortunately, moisture travels slowly through the wood core (my deck is mostly cored with end-grain balsa).
Read this excellent article from MaineSail for more details:
 
  • Like
Likes: jssailem

Fredct

.
Sep 21, 2020
86
Oday 28 Westbrook
@dmax Read document. Thanks. How do I keep the epoxy in between the 2 glass layers? Isn't going to flow out through the center opening? Example in MarineHowto was for a bad hole. Mine is a bad opening...
 

dmax

.
Jul 29, 2018
980
O'Day 35 Buzzards Bay
Tape up the bottom of the hole - I used packing tape (which epoxy won't stick to) covered with Gorilla tape to ensure it stays there. One time I didn't use the Gorilla tape and had a leak that made a real mess (was able to clean it all up thankfully). Make sure everything is real dry - I applied heat from a heat gun several times and once just before pouring in the epoxy (heat helps the wood absorb more epoxy). Mix up some thickened epoxy and pour it in the hole, poking it with a popsicle stick or something to ensure you get good coverage and no air bubbles. You really shouldn't lay down epoxy thicker than 1/2" as it generates a lot of heat - I did a couple of them in one pour successfully but for the last two I added the epoxy in two stages. Read up on how to use epoxy before doing this. Because the deck is not level, you want to build a dam out of butyl or something on the downside to ensure the epoxy doesn't run down the deck. The dam will allow you to overfill the holes a bit to ensure the epoxy fills the uphill side of the opening. Once it all hardens, use a hole saw to redrill the hole for the deck fill. There's not a lot of stress on a deck fill so no need to through bolt it, self tapping screws into the epoxy is plent strong. It's pretty much the same as in the MaineSail article, it's just that hole is a little bigger (which makes gouging out wet wood so much easier).
 
  • Like
Likes: jssailem

Fredct

.
Sep 21, 2020
86
Oday 28 Westbrook
@dmax that's a large amount of epoxy. Why not make a form, slightly smaller then the existing hole and fill all around?
 
Sep 24, 2018
2,601
O'Day 25 Chicago
If you want to save on epoxy you could put a piece of wood in the middle. You still want something in the middle so your hole saw stays centered if using dmax's method. @dlochner would also be an excellent source of information for this repair
 

dmax

.
Jul 29, 2018
980
O'Day 35 Buzzards Bay
"@dmax that's a large amount of epoxy. Why not make a form, slightly smaller then the existing hole and fill all around? "

I did that with the first one but decided it wasn't worth the effort as it made ensuring the epoxy flowed to the edges more difficult so just went with pure epoxy (thickened) for the remainder. Wasted some epoxy but everything came out fine.
 

Fredct

.
Sep 21, 2020
86
Oday 28 Westbrook
Thanks to both of you. Since the cover is already on, I will wait till spring, Dremmel out the core and take it from there.
 

dmax

.
Jul 29, 2018
980
O'Day 35 Buzzards Bay
If you want to save on epoxy you could put a piece of wood in the middle. You still want something in the middle so your hole saw stays centered if using dmax's method. @dlochner would also be an excellent source of information for this repair
I didn't have a problem centering the hole saw, used a punch to put a divet in the center of the hole.
 
  • Like
Likes: daviddp
Jan 11, 2014
11,430
Sabre 362 113 Fair Haven, NY
If you want to save on epoxy you could put a piece of wood in the middle. You still want something in the middle so your hole saw stays centered if using dmax's method. @dlochner would also be an excellent source of information for this repair
Dig out as much wet core as you can. You may not be able to get all of it. If you can access the hole now, letting it dry out over the winter would be great. If not, this is the first job once the cover comes off. If you do it in the spring, figure out a way to keep water from getting in to the hole.

Once you are ready to do the repair, warm the area around the hole and the wet. This helps to drive out moisture. Seal the core with unthickened epoxy. As the deck and core begin to cool the wood will absorb the epoxy and seal the core. It will not take a lot of epoxy, maybe one or two pumps from a West System pump. The purpose of this to seal the wood and provide a good base for the next step.

After the initial epoxy application has had a little while (an hour or two) to set up, mix up some thickened epoxy. The epoxy should be about peanut butter consistency. Because the wood core has already been sealed, it won't suck epoxy out of the mixture.Don't use microballons, use silica or chopped fibers. The silica or chopped fibers will have better holding power for the self-tapping screws you will use when reinstalling the fitting. Use a putty knife or tongue depressors to work the thickened epoxy into the gap between the skins. If it is more than ½" deep, do this in multiple layers, waiting a couple of hours between applications. Just keep building it up until the gap is filled. There is no need to fill the entire opening.

The inside of the hole will not be smooth, so use a hole drill to clean it up or a rasp or a sanding bit in a drill or Dremel tool. Remount the fitting with butyl tape and self-tapping screws.

Oh, yeah be sure to put something below the hole to catch the inevitable drips. ;) And then have a :beer:.
 

dmax

.
Jul 29, 2018
980
O'Day 35 Buzzards Bay
Yes, I forgot a step, I sealed the wood with penetrating epoxy before filling.
 

Fredct

.
Sep 21, 2020
86
Oday 28 Westbrook
@dlochner Ok very good tip. I will core out this weekend to to give it extra drying time. I intend to check periodically over the winter.
 
Jan 11, 2014
11,430
Sabre 362 113 Fair Haven, NY
@dlochner Ok very good tip. I will core out this weekend to to give it extra drying time. I intend to check periodically over the winter.
If there is any chance of water getting under your cover, find a way to keep out of the opening. And put a bucket below the hole.
 

dmax

.
Jul 29, 2018
980
O'Day 35 Buzzards Bay
Thanks to both of you. Since the cover is already on, I will wait till spring, Dremmel out the core and take it from there.
Start out with the dremmel tool but in my case the dremmel couldn't reach in far enough, especially regarding the underside of the top layer of fibreglass. What I did was take some long thin phillips screwdrivers and put an approximately 30 degree bend in them (one at ~2 inches, the other at ~3 inches from the point) - this allows you to scrape the underside of the top layer with good purchase and reach deeper into the hole than the dremel will allow (even with the extension tool).