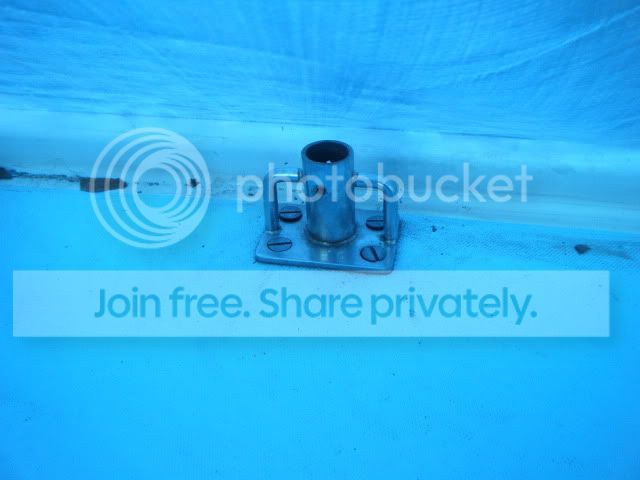
Bedding padeye for spinnaker guy

Status
Not open for further replies.

Smitty

.
Sep 16, 2005
108
Cal 28-2 Milford, CT
On the bow deck of my Cal 28-2 i have a padeye for a block that's used to turn the spinnaker foreguy. The deck construction at that location is a fairly thick, cored fiberglass deck, roughly 1/2" space and the inner, fiberglass overhead over the V Berth.

It's been leaking a bit for a couple of years. Last season, I pulled it, drilled the holes a bit oversized, dug the core out of the deck for about 1/4" around the holes, filled the holes with thickened West System, redrilled the holes (still somewhat oversized) and put the padeye back bedded with Life Caulk. The real problem is it's impossible to really tighten the nuts without compressing and possibly cracking the inner deck because of the space between it and the deck. So, as expected, one side is still leaking.

I'd really like to fix this. Any new ideas on something that will work? I thought of using butyl tape instead of Life Caulk, but I've never used it. Would it work in this situation and, if so, how would I apply it?

--Smitty
 
Jan 22, 2008
8,050
Beneteau 323 Annapolis MD
When you redid the holes, did you leave an epoxy"tube" that went from deck to liner? Maybe a half-inch hole, but drilled 1/4 inch. It would be like a spacer that would have allowed tightening up the bolts.
 

Smitty

.
Sep 16, 2005
108
Cal 28-2 Milford, CT
I tried to but it didn't work. I couldn't figure out how to keep the epoxy from running into the space between the two layers. Even thickened quite a lot it still seeped out and didn't form a tube.
 
Oct 26, 2008
6,432
Catalina 320 Barnegat, NJ
I used Butyl tape for 2 pad eyes and a new traveler track that I installed this spring. They haven't leaked this spring (which has been the most miserable spring on record!)so I suspect they are going to be just fine.

Maine Sail has a guide on how to use it in his forum so be sure to read it.

For my traveler track, I had 16 #10x24 machine screws to deal with so I basically layed a continuous tape along the bottom of the track and fixed it in place over the holes (countersunk holes) aligning it with just 2 screws, one at each end. I then pushed the rest of the screws through the holes while the track was in place. I made a small donut around the shank at the base of each screw head to seal the holes in the countersunk holes of the track. I also put a small patch over each hole but mainly I relied on pressure to squeeze the butyl tape into the countersunk holes in the deck.

You don't want to turn the screw to tighten so the really tricky part was getting the backing washer and nut in place with space for only one index finger to work with (gravity was not my friend)! But once the nut was in place, I tightened the nylock nuts down without turning the screws so that the butyl tape wouldn't shred around the screws. Once everything was tightened down, I had a nice bead of butyl material squeezed around the entire track so I was very confident about the seal. Cleaning up that bead was not as easy as it looks, though.

The pad eyes were a bit easier because with just 4 screws for each pad eye, I had everything positioned in place with butyl tape donuts on both sides of screw shank as MS describes. I had an easier time tightening the nuts with more room for my fingers to fix the backing plates and nylock nuts prior to tightening down.

I snugged the screws down enough to get a good bead squeezed out all the way around, but I didn't snug it down to refusal. When I drilled out the holes for the pad eyes (on the coaming of the stern) I also was fearful of crushing the core. I am using the pad eyes to anchor my new back stay adjustment system for a split back stay.

BTW, when I did the traveler track, I was so focused on doing the butyl tape right that I actually started to put the track down and started to tighten a few screws before I realized that (like an idiot) I forgot to install the traveler components on the track (which are held captive once the track is down). I had to pull the track off again and I was cursing myself because that tape is so sticky and and doesn't come up easily. It took me half an hour to clean-up the butyl tape to start over and I hadn't had much more pressure than gravity and a slight amount of pressure on 2 screws to see how much it had adhered. I had to start with new tape because removing the original tape intact was impossible.
 
Nov 6, 2006
10,220
Hunter 34 Mandeville Louisiana
Cut/drill small holes through the inner liner to allow the nuts/washers to bear on the underside of the deck instead of the liner..The holes should allow you to use a socket to tighten.. You can then plug the liner holes after shortening the bolts.. The plugs can be plastic or a little decorative wood plate ..
 
Oct 2, 2006
1,517
Jboat J24 commack
I have gone with SS backing plates above and below deck in high load places BUT you really need to deal with the core in that area as unpleasant as that is

It has to be realy bad if you cant fill it


Oct 26, 2008
6,432
Catalina 320 Barnegat, NJ
Kloudie, wasn't sure what you were refering to ...

The existing holes though the liner were just 1-1/4 inch dia. I didn't want to make them wider because then I would have to make new trim. I bought shorter screws because I didn't see a purpose in the original ones being about half inch longer (until I said ah ha when I was trying to balance a washer and a nut on the tip of my index finger while poking it thru a hole that was just wide enough for the washer! The liner now has a few nuts and washers rattling around on the inside. Anyway, it was a circus but the job got done!
 
Nov 6, 2006
10,220
Hunter 34 Mandeville Louisiana
Scott.. was addressing Smitty's problem of the liner collapsing because the nuts are putting pressure on his liner (from what I read in his post) instead of bearing on the deck.. ?? Seems like he needs to do sorta what you've done.. Your post got there first.. :~)
 
Status
Not open for further replies.