Another rubrail question

Status
Not open for further replies.

RECESS

.
Dec 20, 2003
1,509
Catalina 27 . St. Mary's Georgia
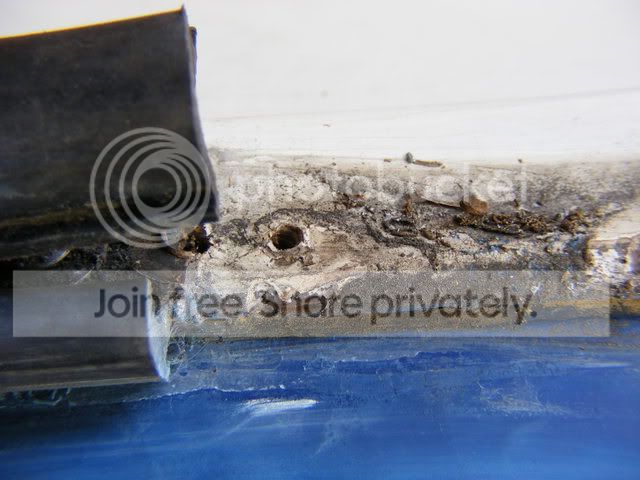
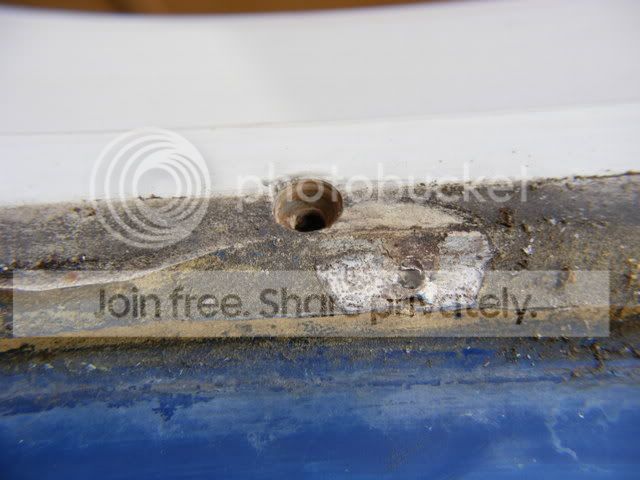
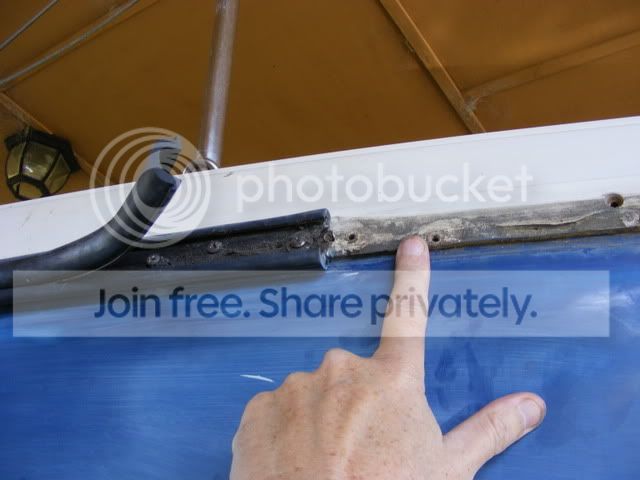
I am at a point with my sanding that I need to start removing the rub rail and of course an ounce of prevention is worth 10 lbs of cure. Under this Non-Oday rubrail is what looks like a strip of synthetic cork material. Is it standard application? Do you just go after it with a good thick putty knife? It looks to be on there rather well.


Mar 28, 2007
637
Oday 23 Anna Maria Isl.
cork?

Dave- I am not positive but I think what you are viewing is the lip of the deck. It sits on the top of the hull like a lid or hat- and forms a ridge that is hidden under the rub rail. To me your rub rail looks factory. Usually there are screws in the rub rail backer that hold it to the hull. Under the rub rail backer you should see screws that were used to attach the deck to the hull. This ridge also helps to keep the rub rail backer lined up as it is applied around the boat. If I have misunderstood your question, try me again. If you are talking about the sealer that the factory put under the rub rail backer- wipe it down with a rag soaked in "oops". Wipe over it several times to saturate as much as possible. Let it soak in at least an hour. Then use a heat gun on low and a putty knife to scrape it off.Oops is available in all sizes in the paint area of most hardware stores.
 

RECESS

.
Dec 20, 2003
1,509
Catalina 27 . St. Mary's Georgia
I guess I am asking should I remove the rub rail backer

or just caulk all the holes and then a layer of caulk when I attach a new rub rail? I wanted to make sure whether I should remove the backer or if you just recauld around it, and in the holes?
 
Mar 28, 2007
637
Oday 23 Anna Maria Isl.
backer

If you do not remove the plastic backer, there should be no holes to caulk. The new rubrail should push into the existing backer (if it is a compatible pattern). If you replace the backer you will want to fill all the old screw holes and start over with new screws. You could try to use old screw holes but it takes awhile to find them and line them up
 

RECESS

.
Dec 20, 2003
1,509
Catalina 27 . St. Mary's Georgia
I am following you now.

There was soo much grime and dirt under the rub rail backing that the gel-coat looks like there is a softer strip of adhesive or a cork like substance. (finger is pointing at the area) I scrapped it with my finger nail and it is just 28 years of grime trapped under the rub rail backing. I thought it was standard to have a white backing on an O'Day.

I am replacing this rub rail, the boat is in great shape and the rub rail and backing just looks very old.

Thanks for the help Lance. I wanted to make sure before I started doing something I would regret.

 
Mar 28, 2007
637
Oday 23 Anna Maria Isl.
Just one last thought-if you are going to put on new backer with new screw locations, I would use a small drill bit to make a pilot hole for each screw. This will help to keep that flange from fracturing as the screw is seated. You want to make a hole that is still small enough for the screw threads to get a bite. Squirt a little sealer in each hole before you drive in the screw. On a more fun note, I am making an offer on an O'Day 26 today and am excited! Sorry one more thought- After you get all old material off, you may find it helpful to use a pencil to mark the approx spot you want new screws so that you dont half overlap an old hole and waller it out. You want the new holes more or less in between the old ones.(you will see the old ones were not perfectly spaced to start with) You will not be able to easily see the old holes as you lay on the new backer so make a guide mark in pencil just above where backer will lay to help with drill spacing. When you get ready to attach new backer get a helper to hold backer while you drill pilot holes and drive screws. Two screw guns or at least a quick change tip really helps in this process.
 

RECESS

.
Dec 20, 2003
1,509
Catalina 27 . St. Mary's Georgia
That is exciting news!

The two best days of a boat owner. The day he buys, and the day he sells. I have done those days too often.

I hope it all goes well on the 26.:yeah:
 
Mar 28, 2007
637
Oday 23 Anna Maria Isl.
one last, last thought

On the sections of backer that are tight bends at transom corners and bow-soak them awhile in a pan of hot water and they will be much easier to work. Good luck.
 
Sep 27, 2008
95
Catalina 30 Lake Champlain
More on Replacing Rub Rail

Dave,

I replaced the entire rub rail and gunwale molding on my Oday 23 last spring. I received a lot of invaluable advice from sailors on this forum (thanks again!), but here are a few things I learned.

First, Lance is right that having two drills for this process is a good idea. It will keep you from having to change bits a thousand times!

Drilling pilot holes is really a great idea to avoid fracturing, as Lance suggested.

I tried to use existing holes as much as possible, but in cases where I couldn't, I filled them with thickened epoxy and drilled new ones. I also put a little caulking on each screw, as Lance suggested.

I tried Lance's idea of putting the molding (which is very stiff and not easy to work with around the bow and stern corners) into warm water, but it didn't soften the molding enough. So, following advice I received from someone on this site, I used a heat gun. That worked fine. I still found the corners very tricky to do.

I bought the molding from Rudy at D&R Marine, and it came in three coiled 20-foot pieces. Several people had suggested stretching the coils out in the sun for a few days before doing the job. This was great advice, and I'd suggest doing that.

Finally, I found that I needed to replace the caulking on the hull-to-deck joint. My boat is a 1983, and I don't think the PO (who bought the boat new in '83) ever removed the rub rail. So the caulking was old and had shrunk in many places. This was tricky, because when I tried to pull the overlapping deck gently away from the hull to get caulking under the overlap, it would threaten to crack. This turned out to be a tedious job. (And I'm not sure I did it right, since I think I still have a few leaks in that joint.)

The whole job wasn't necessarily difficult, but since I hadn't done it before, I found myself making mistakes as I tried to follow advice I received from this forum. It took me twice as long as I'd expected! But it's done.

I hope this helps.

By the way, Lance, good luck with your new boat.

Bob
 

RECESS

.
Dec 20, 2003
1,509
Catalina 27 . St. Mary's Georgia
Thanks Bob

I will have to check the areas under the overlap. I am purchasing from Rudy also.
 

TimCup

.
Jan 30, 2008
304
Catalina 22 St. Pete
Sorry I'm late to the party!

Hope you check back again. As usual, Lance's info is spot on, but I'll share my experience replacing the rub rail and backer.

In my case, the rub rail itself wasn't bad, but the white backing was cracked in lots of places and looked like crap. Some helpful points-

- the backer plate is held on by 7 billion stainless steel screws. I know I was the second person to replace the backing, because there were actually 14 billion holes underneath! MANY of my screws were bent, surprising given their thickness. After removing the backing, I filled all the holes with 5200. As we all know, it will outlast the boat, and since I was using it as a filler and not an adhesive, I felt comfortable using it.

The backer plastic has predrilled holes, but if the hole lines up with an existing filled hole, just drill through the plastic near it. It drills easily, doesn't crack. I never used pilot holes, but maybe I just got lucky.

Using a heat gun for the bow and aft corners- works great, but care is called for. I screwed the plastic tight right up to the turn, then tried to bend the plastic around the corner, while applying heat. Patience is called for- the heat gun appears to have no effect at first, but suddenly the plasticgets REALLY soft. make the turn around the curve, and put in another screw and you're done. Rushing actually leads to the plastic liquifying JUST before it turns brown.... or so I've heard...


I wasn't satisfied with the first side, and actually redid it. While it seemed like the rail was perfect, as I stepped away from the boat and looked down the side, I could see that the screws weren't on a perfect line. It becomes more obvious when you install the black rubber...a slight wavy look. "Wavy" sounds alot better for a boat than it looks.

I caulked the seam with lifecaulk, because I also had leaks when heeling hard, or in rough seas. It works well. I also, as Brian said, caulked the screws- actually drilled the screws 3/4 down, then caulked under the head. Was a little sloppy, but when the rubber goes on, it's all hidden anyway.

All in all, an easy job, and really made a difference visually. Good luck..


cup
 

RECESS

.
Dec 20, 2003
1,509
Catalina 27 . St. Mary's Georgia
Thanks Tim

I was actually thinking of running a chalk line and then snapping it where the top line of the new backing will sit. I figured that I would get a true line by using a chalk line. This is the second rubrail. There are holes from the original rubrail. I asked the PO if they had replaced the rubarail and she said she had but did not recaulk the seam.

What type of heat gun are we talking about?
 
Sep 27, 2008
95
Catalina 30 Lake Champlain
Rubrail again

Tim,

A question: in your post you say you caulked the seam with Lifecaulk. Which seam do you mean? The seam where the ends of the pieces of backer (molding) meet, or the seam between the molding and the hull?

I ask because when I did this job it wasn't clear to me what exactly needed caulking. When I spoke to Rudy at D&R Marine before doing the job, he suggested drilling tiny (eighth-inch) holes in the bottom of the molding (the backer) so that any water that gets in there could empty out. That didn't seem right to me. I assumed that a tight seal around that molding would be best, since it covers the hull-to-deck joint.

Also, I second Tim's suggestions about working the molding around the corners. His description fits my experience exactly.

Bob
 
Status
Not open for further replies.