New Tiller in the works...

Status
Not open for further replies.
Jan 19, 2010
12,947
Hobie 16 & Rhodes 22 Skeeter Charleston
Hey All

Just thought I'd share my adventures with wood and glue from earlier today. I started the fabrication of a new tiller and so far it is a lot easier (and less time consuming) than I expected.

I'm still waiting for the glue to dry and I'll post more pics later but here is a start (see pics below).

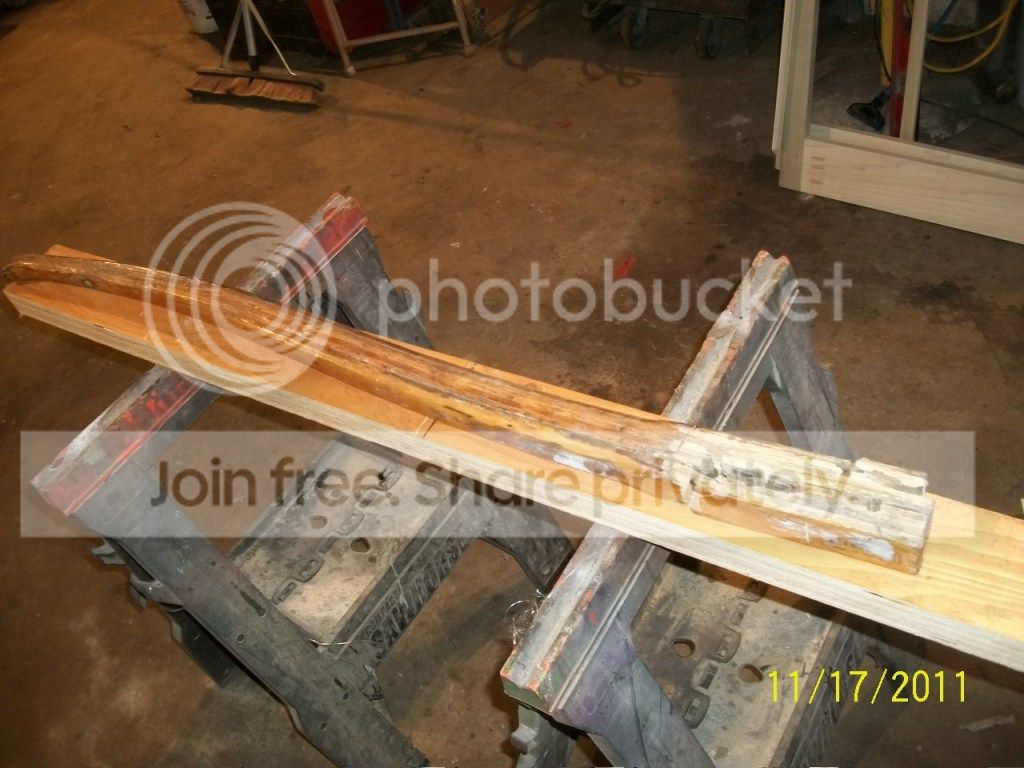
1) I picked up some pine and oak planks from Lowes 4' long by 3" wide by 0.25" -- three oak and two pine. (See Pic 1)

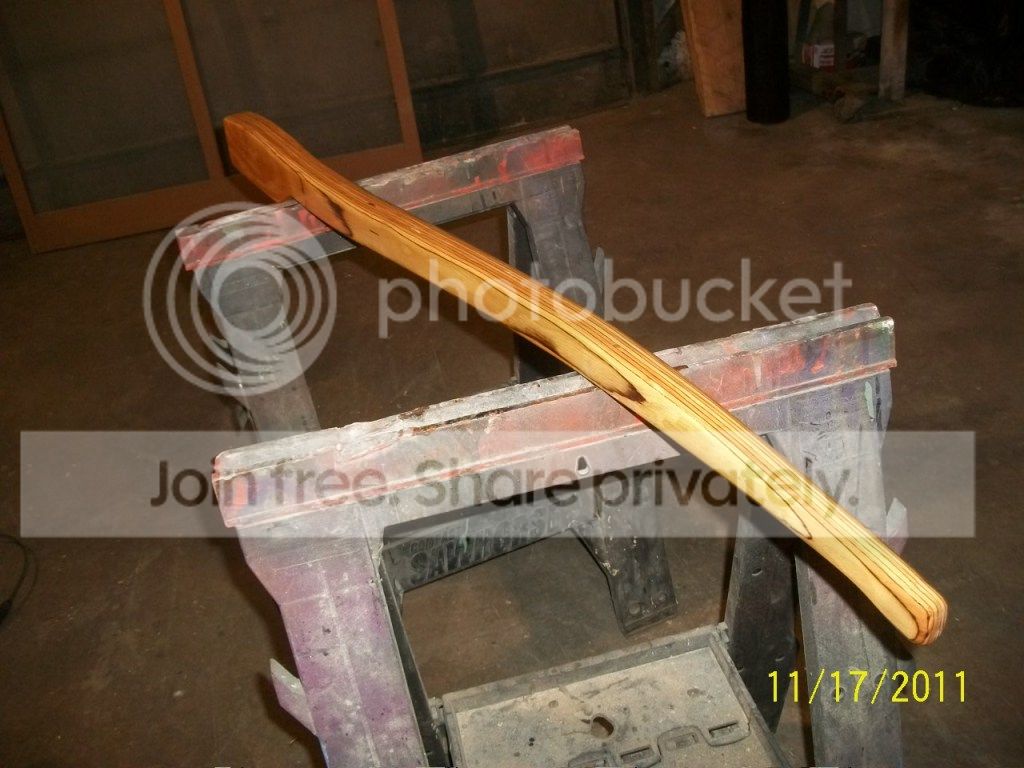
2) I made a jig on the floor of my shed so I could get a curve into the design (see Pic 2).

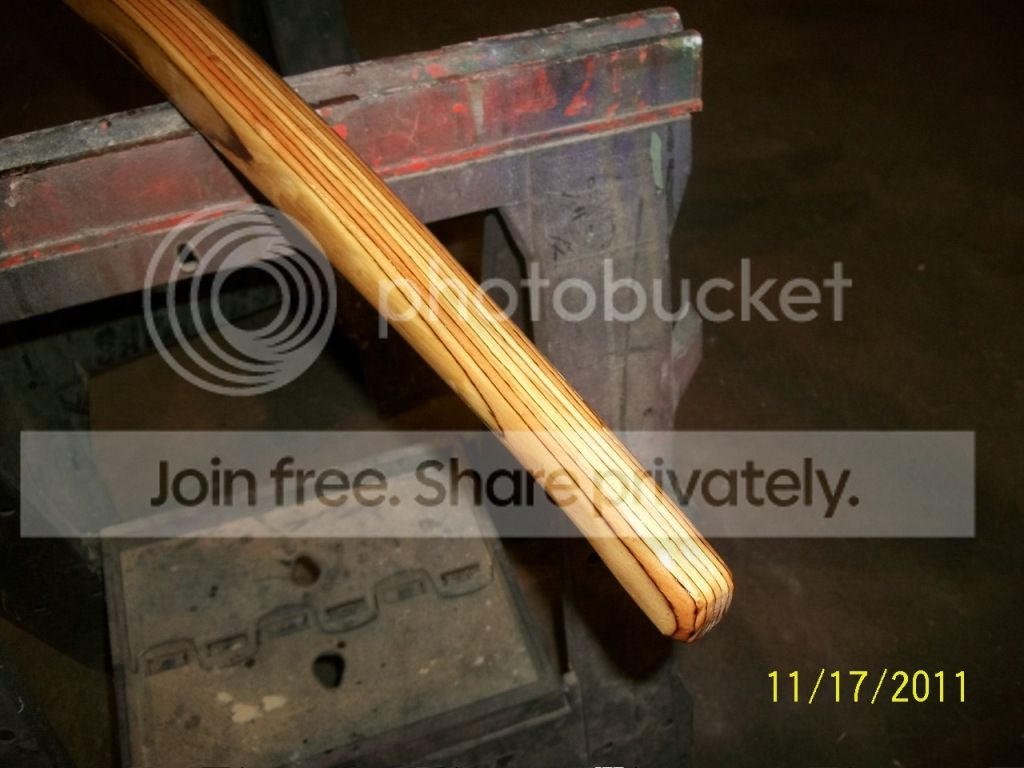
3) I put down some plastic sheeting so I would not glue my new tiller to the floor of my shed :eek: (see Pic 3) then I smeared Tightbond III to the planks, put them in the jig and clamped (see Pic 3).

So far I have less than $30 of material into this tiller. When the glue dries I'll trim the edges, shape some and put on many coats of spar varnish ... that should do it.


A few tips...

1) use long drywall screws (or decking screws) to put the jig blocks into the floor. Use only one screw. You want the block to be able to rotate and form fit to the curve.

2) Don't be afraid to start this job. It took me less than 30 min. to have it in clamps and ready to walk away from.

3) You will need to remove the third and forth jig block (from left to right) while you are setting the planks, then you bend the planks and place the third block to hold it in place. Then set the counter curve and set the forth block.
 

Attachments

Last edited:
Sep 2, 2011
1,041
Hunter 27 Cherubini Alum Creek State Park
Can't wait to see the finished tiller. I made a similar bending jig on a piece of plywood for a wheelbarrow handle I made into a tiller for my last boat. I steamed it in a box then put it in the jig for a week. It looked great, but eventually straightened back out.
 

tsheie

.
Jan 9, 2012
52
San Juan 7.7 Bayfield WI
Oak and pine are nice, but ash and cherry--That's a combination for both beautiful color AND strength.. Tip: use your old tiller as the curved clamping block for the new tiller; then you don't have to attach to any fixed objects or the floor. Don't forget to embed your tiller extension socket into the end before you glue and clamp it all together..
 

MrUnix

.
Mar 24, 2010
626
Hunter 23 Gainesville, FL
I am planning on doing the same thing for my H23.. I actually initiated the project by purchasing the planks, but could only find 3/4" stock, so I need to re-saw them down to quarter inch. That is where I got sidetracked :). I'm hopping I can get back to working on it soon and will remember your tips!

Cheers,
Brad
 
May 22, 2011
159
MacGregor 25 San Diego
You know what? That looks great. As a woodworker, I would have steamed the plies, but whatever works - works. More pix, please. That's gonna be soooo pretty!

GToast: Was that a solid piece of wood, or plies (layers glued together)? If it was plies, I can't understnd it happening.

Dave
 
Sep 2, 2011
1,041
Hunter 27 Cherubini Alum Creek State Park
davenlynn said:
You know what? That looks great. As a woodworker, I would have steamed the plies, but whatever works - works. More pix, please. That's gonna be soooo pretty!

GToast: Was that a solid piece of wood, or plies (layers glued together)? If it was plies, I can't understnd it happening.

Dave
Not plies, solid ash.
 
May 22, 2011
159
MacGregor 25 San Diego
GToast: That explains it. If you steam wood, it should be in thin pieces or held in shape by fasteners, otherwise it will have a tendancy to loose it's bend. Won't always happen, just when you don't want it to.
 
Jan 19, 2010
12,947
Hobie 16 & Rhodes 22 Skeeter Charleston
Oak and pine are nice, but ash and cherry--That's a combination for both beautiful color AND strength..
That does sound nice.... I just used what was on the shelf, pre-cut, at Lowes. Simple but not as nice as it could have been.


Tip: use your old tiller as the curved clamping block for the new tiller; then you don't have to attach to any fixed objects or the floor.
Great tip! I'll keep that one in my tool box of ideas. In this case, I'm building a new Tiller for my Rhodes 22 that I'm restoring and not replacing the tiller on my MacGregor 22 that I'm sailing. The tiller on the Rhodes has long ago passed on to kindling. So I would not have been able to do that even if I had thought of it.
 

DannyS

.
May 27, 2004
933
Beneteau 393 Bayfield, Wi
GToast: That explains it. If you steam wood, it should be in thin pieces or held in shape by fasteners, otherwise it will have a tendancy to loose it's bend. Won't always happen, just when you don't want it to.
Agreed. Steaming a big hunk of wood like that would work for a while but it spent it's whole life straight and would want to return to the original state without a little help to keep the curve. The glue in the layup sandwich is what helps the wood maintain the curve.
I'm a sculptor and I do alot with bent wood. Ash or white oak are great woods for steaming, although if the wood is thin and the curves are not extreme, as in a tiller, there's no need for steam.
Fun project!
 

Attachments

Squidd

.
Sep 26, 2011
890
AMF Alcort Paceship PY26 Washburn Wi. Apostle Islands
I cheated... I got a full 2" x 4" chunk of "Micro Lam" from the lumberyard (scrap beam cut off- $5.00)


Cut , ground, routered, and sanded to shape...


And a couple coats of Spar to protect...


Has a nice look to it although vertical rather than traditional horizontal build up...
 
Jan 19, 2010
12,947
Hobie 16 & Rhodes 22 Skeeter Charleston
I cheated... I got a full 2" x 4" chunk of "Micro Lam" from the lumberyard (scrap beam cut off- $5.00). Cut , ground, routered, and sanded to shape...

And a couple coats of Spar to protect...

Has a nice look to it although vertical rather than traditional horizontal build up...

BRILLIANT!:theman:

I used micro lam beams when I remodeled the basement. That should have occurred to me. :redface:
 
Sep 2, 2011
1,041
Hunter 27 Cherubini Alum Creek State Park
The tillers I like best have just a slight arc to them, and are shaped from a single block of mahogany.
 
Jan 19, 2010
12,947
Hobie 16 & Rhodes 22 Skeeter Charleston
More pics... Varnish on

Well I took a break from working and spent an hour in the shed. I got the tiller shaped using a power planer and an orbital sander. I used the planer to knock the edges of the laminate square and to knock the edge off of the top and bottom. I guess a router would have been the "proper" way to do this but the planer worked. Then I sanded starting at 60 grit - > 100 grit -> 180 grit.

She looks great. I hung the tiller and put the first coat of varnish on.

This was a fun one and took less than two hours.
 

Attachments

Sep 25, 2008
961
Macgregor & Island Packet VENTURE 25 & IP-38 NORTH EAST, MD
Squidd, I accidently mounted my new tiller (it was a straight one) with a vertical orientation, and it flexed alittle when sailing in higher winds. I didn't like the spongy feeling, so I turned it 90 degrees and remounted it and its stiff as a board (sorry for the bad joke).
 
Jun 12, 2010
936
Oday 22 Orleans Marina, NOLA
Ah, the wonder that is laminated wood. Considering the cost of pre-fabricated tillers this looks like a great project.
 

Squidd

.
Sep 26, 2011
890
AMF Alcort Paceship PY26 Washburn Wi. Apostle Islands
Squidd, I accidently mounted my new tiller (it was a straight one) with a vertical orientation, and it flexed alittle when sailing in higher winds. I didn't like the spongy feeling, so I turned it 90 degrees and remounted it and its stiff as a board (sorry for the bad joke).
Should be OK with the micro lam in vert orientation.. That's pressure formed multiple veneer mfg wood.. Pretty tough stuff in any direction...
 
Status
Not open for further replies.