I just wanted to give a quick update on how the removal goes in case anyone ever has this happen. This is from after the transmission removal.
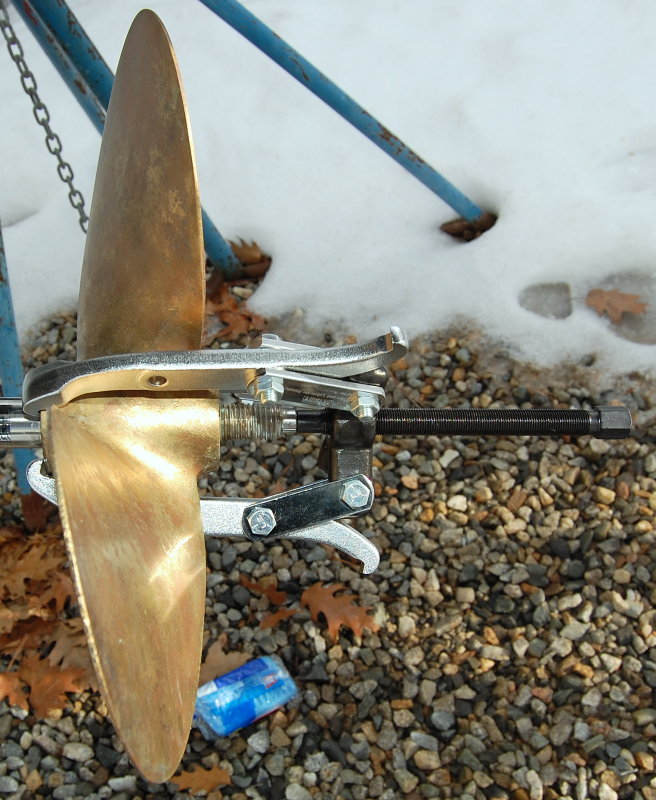
Pulling the prop: I needed to pull the shaft to be able to work in the engine compartment. This is nothing more than a 7" gear puller from my local auto parts store for about $35.00. I've pulled many sailboat props with it..
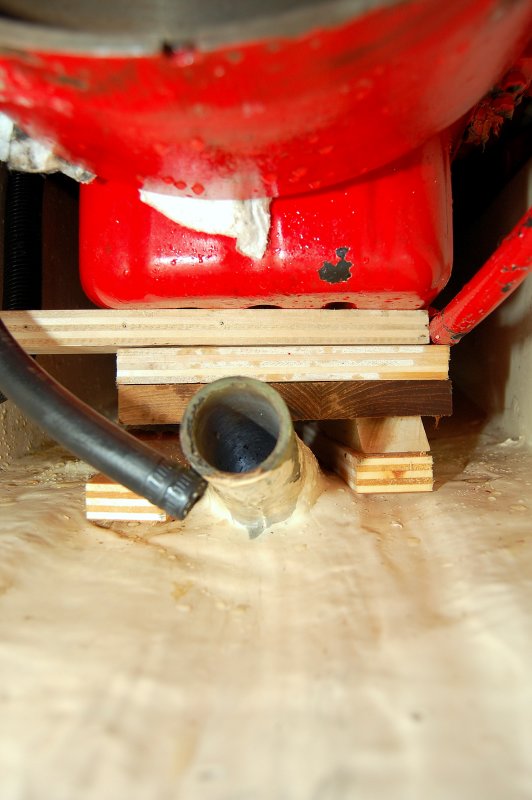
Support The Motor: I used my trusty scissor jack, from an old Honda Civic, to raise the motor enough to block it and support it from under the oil pan. In order to remove the bell housing you must support the engine somehow.
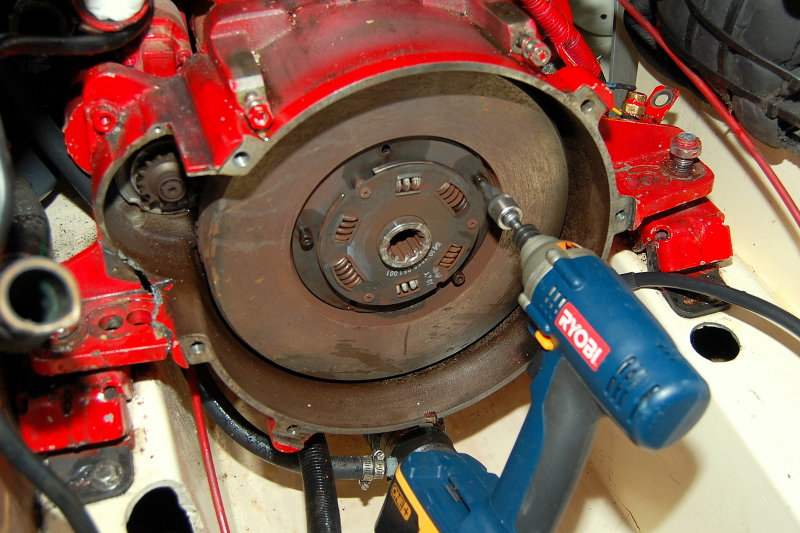
Remove Damper Plate: For this you'll likely need an impact wrench because the bolts have Loc-Tite on them. Impact wrenches are an AMAZING tool and prevent stripped nuts and often sheared bolts when removing. I was able to use my little Ryobi for this.
Remove Flywheel Bolts: For this task you'll need a real impact wrench! A little battery powered one probably won't cut it. Rather than lug my air compressor to the boat I purchased one of the 120v AC impact wrenches rated at almost 300 foot pounds of torque. The bolts came out with no problem at all.
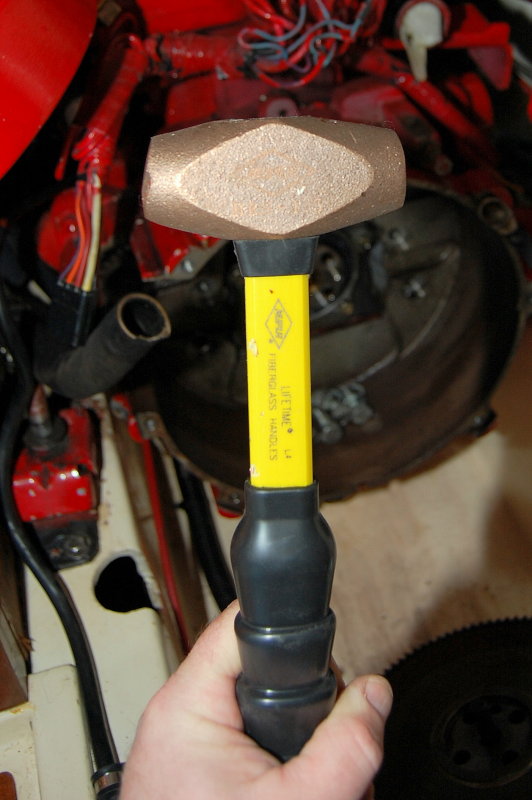
Removing Flywheel: This is going to be the toughest part of the job. Like brake rotors the flywheel tends to rust to the crank shaft. DO NOT just hit the flywheel with a regular hammer as you will damage it. Unfortunately for me I could not find my trusty old lead hammer and needed to make a trip to Grainger for a new Brass hammer. This will almost always require a metal to metal hit. You can use a Brass, Copper or Lead hammer. I tried my plastic 4lb dead blow, nothing, I then tried my large Estwing framing hammer hitting a block of Maple wood and still nothing. Two whacks with the Brass hammer and she broke free. The right tool for the job...:dance:
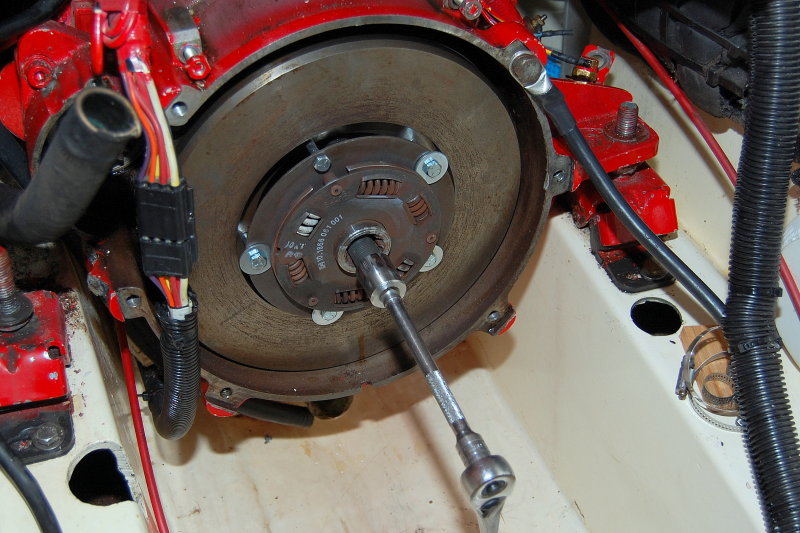
Pulling The Flywheel From The Shaft: just because it broke free did not mean I could just slide it off the shaft. My gear puller was not wide enough to fit the bolt holes for the damper plate so I improvised and put my gear puller behind the damper plate with longer bolts.

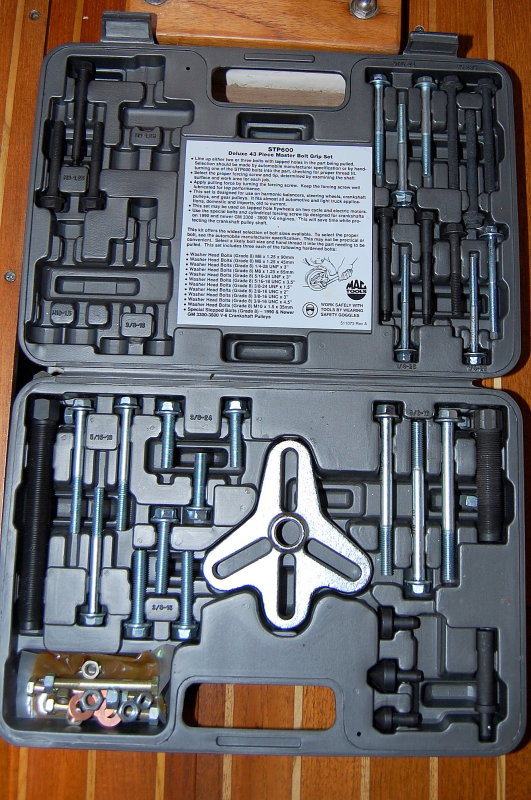
MAC Tools STP-600 Gear Puller Set: I know someone will ask... It's a MAC STP-600. Picked it up at a pawn shop for $35.00!
Removing The Flywheel: I DO NOT recommend using the damper plate as a gear or flywheel puller unless it is already broken free from the hub and you are just sliding it off. Bell housings are tight and as such you can't always get your fingers behind there to pull it off. Flywheels are also VERY heavy so if you like your fingers I don't advise using them in between the bell housing and the flywheel. Here I have inserted my hub puller behind the damper plate with longer 2" bolts. It slid right off with no harm to the damper plate.
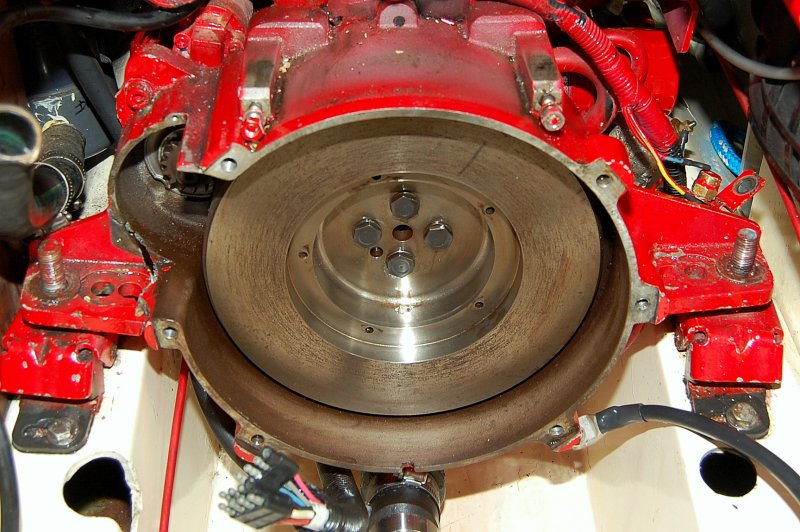
Flywheel Off: Now that the flywheel is off you can see the rear main engine seal and the six bolts that hold the bell housing to the engine block.
I am a believer in the old saying "while you're in there".... A such I will be replacing the rear main seal, rebuilding the starter, replacing the bellows for the PSS seal, truing the shaft and replacing all the engine hoses and AWAB hose clamps. I will also take this opportunity to boil out the heat exchanger and paint all the engine components I have removed before re-installing them. "While you're in there........" Can you tell I grew up restoring antique show cars??
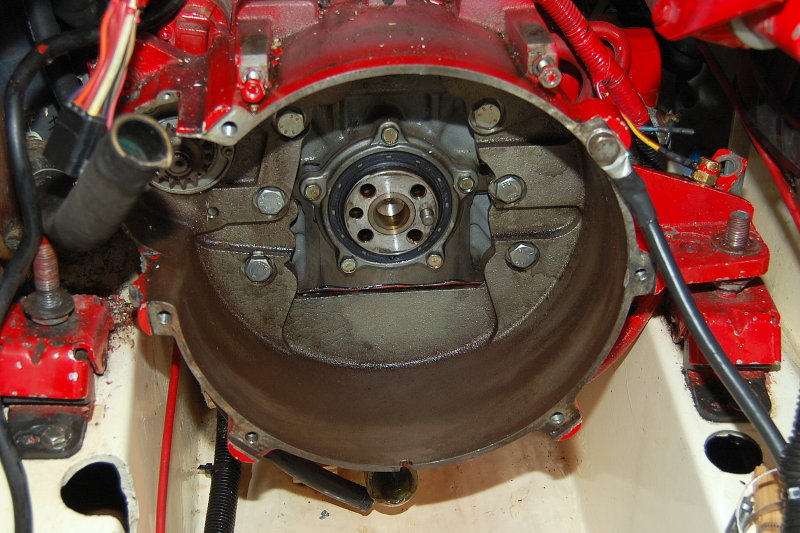
Bell Housing Removed: As you can see there is a good reason why I use a PSS shaft seal. With a V-Drive changing the packing is next to impossible. I also do not want any salt water sling hitting my oil pan. Note the pure lack of rust or corrosion on the oil pan! This motor has over 2800 hours on it.

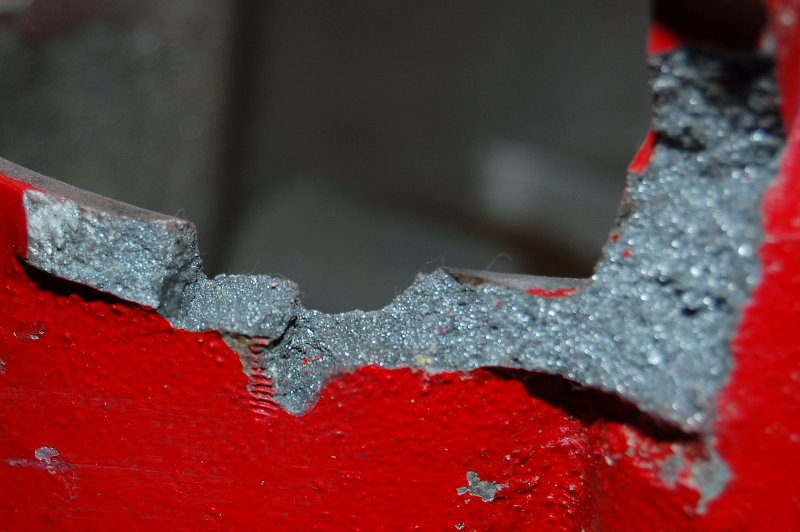
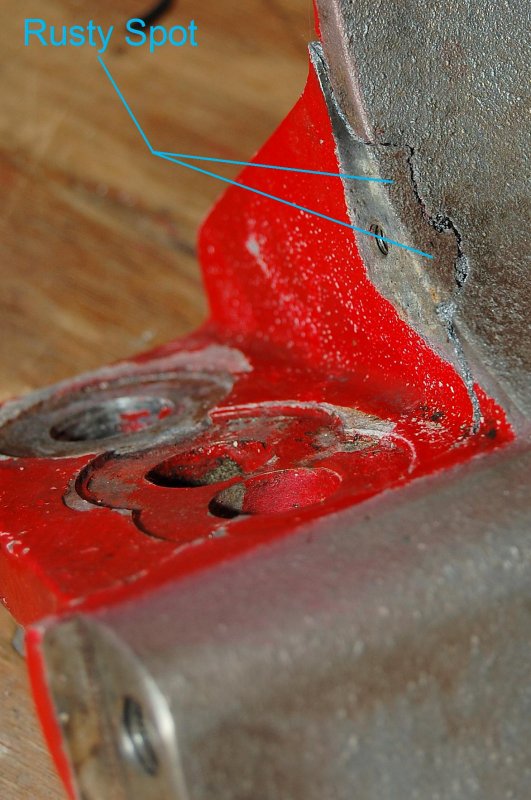
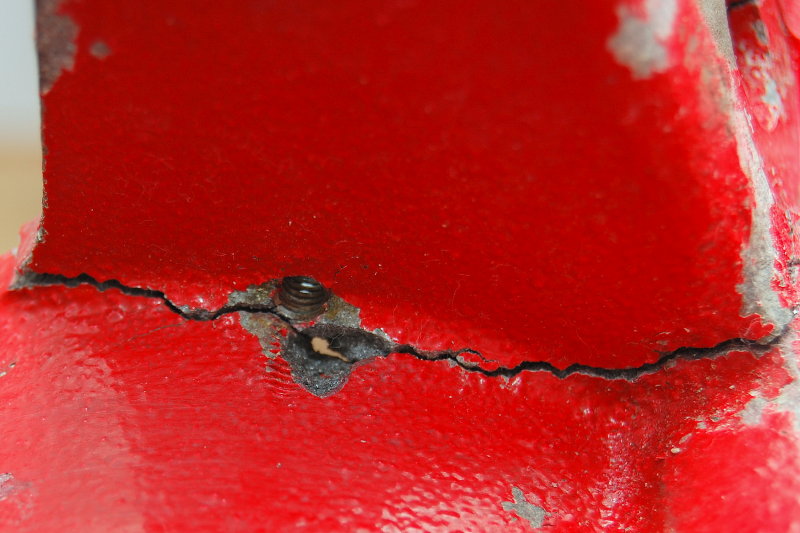
The Crack: The more I look at this crack and examine it, the more and more convinced that this was a bad casting that finally let go and not the result of floating line. It looks like this tapping could have played a part in the weakening of the casting but I'm no metallurgist..
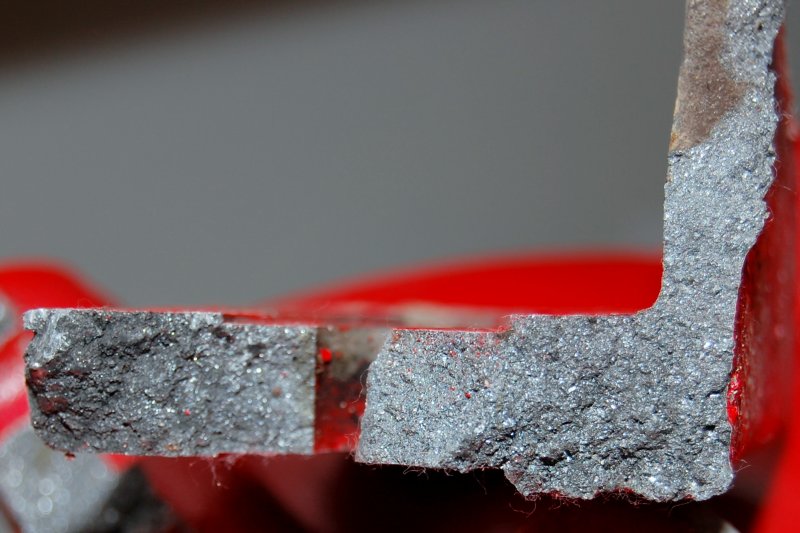
More Crack: To my eyes this casting looks suspect and not very uniform in density?? Anyone know more about this sort of thing??
Pulling the prop: I needed to pull the shaft to be able to work in the engine compartment. This is nothing more than a 7" gear puller from my local auto parts store for about $35.00. I've pulled many sailboat props with it..
Support The Motor: I used my trusty scissor jack, from an old Honda Civic, to raise the motor enough to block it and support it from under the oil pan. In order to remove the bell housing you must support the engine somehow.
Remove Damper Plate: For this you'll likely need an impact wrench because the bolts have Loc-Tite on them. Impact wrenches are an AMAZING tool and prevent stripped nuts and often sheared bolts when removing. I was able to use my little Ryobi for this.
Remove Flywheel Bolts: For this task you'll need a real impact wrench! A little battery powered one probably won't cut it. Rather than lug my air compressor to the boat I purchased one of the 120v AC impact wrenches rated at almost 300 foot pounds of torque. The bolts came out with no problem at all.
Removing Flywheel: This is going to be the toughest part of the job. Like brake rotors the flywheel tends to rust to the crank shaft. DO NOT just hit the flywheel with a regular hammer as you will damage it. Unfortunately for me I could not find my trusty old lead hammer and needed to make a trip to Grainger for a new Brass hammer. This will almost always require a metal to metal hit. You can use a Brass, Copper or Lead hammer. I tried my plastic 4lb dead blow, nothing, I then tried my large Estwing framing hammer hitting a block of Maple wood and still nothing. Two whacks with the Brass hammer and she broke free. The right tool for the job...:dance:
Pulling The Flywheel From The Shaft: just because it broke free did not mean I could just slide it off the shaft. My gear puller was not wide enough to fit the bolt holes for the damper plate so I improvised and put my gear puller behind the damper plate with longer bolts.
MAC Tools STP-600 Gear Puller Set: I know someone will ask... It's a MAC STP-600. Picked it up at a pawn shop for $35.00!
Removing The Flywheel: I DO NOT recommend using the damper plate as a gear or flywheel puller unless it is already broken free from the hub and you are just sliding it off. Bell housings are tight and as such you can't always get your fingers behind there to pull it off. Flywheels are also VERY heavy so if you like your fingers I don't advise using them in between the bell housing and the flywheel. Here I have inserted my hub puller behind the damper plate with longer 2" bolts. It slid right off with no harm to the damper plate.
Flywheel Off: Now that the flywheel is off you can see the rear main engine seal and the six bolts that hold the bell housing to the engine block.
I am a believer in the old saying "while you're in there".... A such I will be replacing the rear main seal, rebuilding the starter, replacing the bellows for the PSS seal, truing the shaft and replacing all the engine hoses and AWAB hose clamps. I will also take this opportunity to boil out the heat exchanger and paint all the engine components I have removed before re-installing them. "While you're in there........"
Can you tell I grew up restoring antique show cars??
Bell Housing Removed: As you can see there is a good reason why I use a PSS shaft seal. With a V-Drive changing the packing is next to impossible. I also do not want any salt water sling hitting my oil pan. Note the pure lack of rust or corrosion on the oil pan! This motor has over 2800 hours on it.
The Crack: The more I look at this crack and examine it, the more and more convinced that this was a bad casting that finally let go and not the result of floating line. It looks like this tapping could have played a part in the weakening of the casting but I'm no metallurgist..
More Crack: To my eyes this casting looks suspect and not very uniform in density?? Anyone know more about this sort of thing??