I bought the boat 3 years ago knowing the I -Beam was needing replacement. I have been battling a water leak from the mast base into the cabin via the mast wires. Knowing the water isn’t just going into the cabin but also into the core, I needed to address it. Both required removing the compression post so that’s were my story begins..........

Compression Post Removal
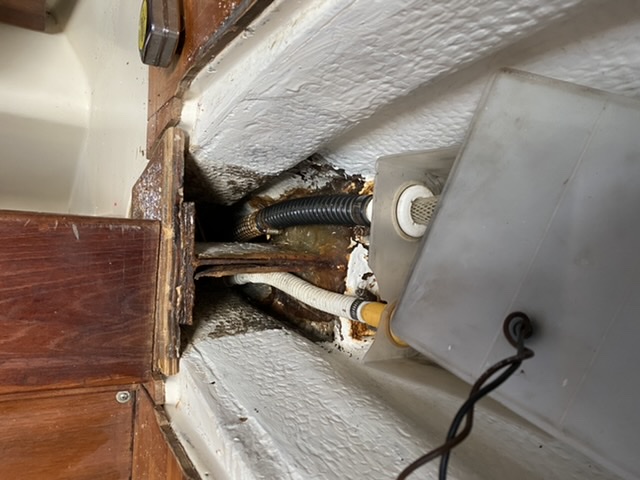
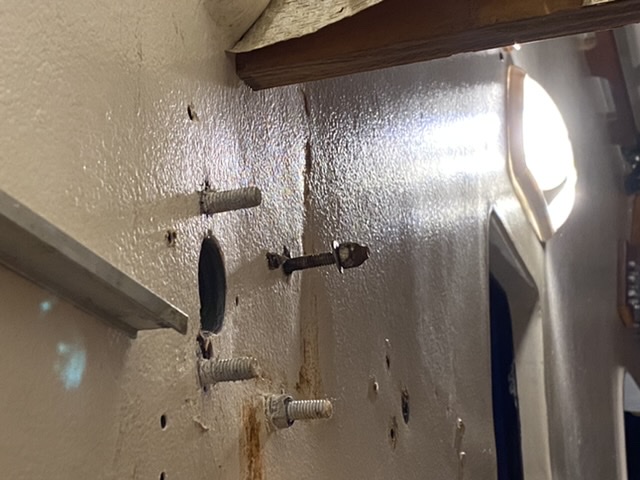
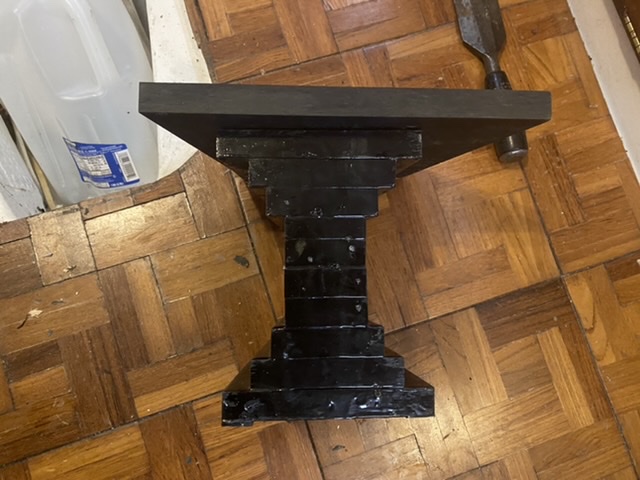
I loosened up the rigging and jacked up the roof with a assortment of screw and bottle jacks. This process and the following “jacking" was by far the most challenging. Spreading the load, lifting as close to the mast plate but having room to work is a pain. I got it to were I could sledge the post out. I believe this is not the original post as it is larger than I’ve seen in pictures and it is rabbited into the bulkhead. No rot anywhere but the plywood it sits on was crushed and it was obvious the post was not sitting plumb on it.
Mast Wire Leak
The original hole was 1 inch. I increased it to 1.5 by pulling the wires up through the cabin and out the mast via a 1.5” hole in the side of the mast by the base plate. I then enlarged the hole. I took a thick rubber chemical glove and cut a hole in the middle finger and ran the wires through it, zip tied it and put a bunch of butyl tape up in the finger then zip tied the other end of the finger making a seal. I ran the wires back through into the cabin then threaded a section of 1.5” plastic conduit around the wires and up into the hole making it flush with the cabin ceiling. I then spent the next hour placing 3m 4200 around the conduit with a wire coat hanger, not fun. I then pulled the cuff off the glove over the conduit and prayed it wouldn’t leak. Good news it didn’t.
No pictures
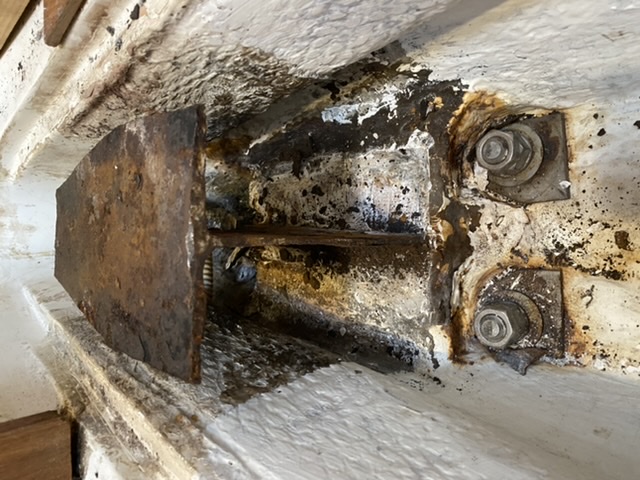
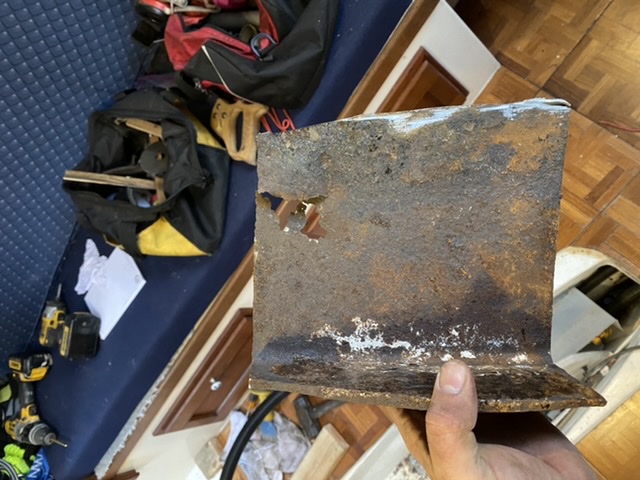
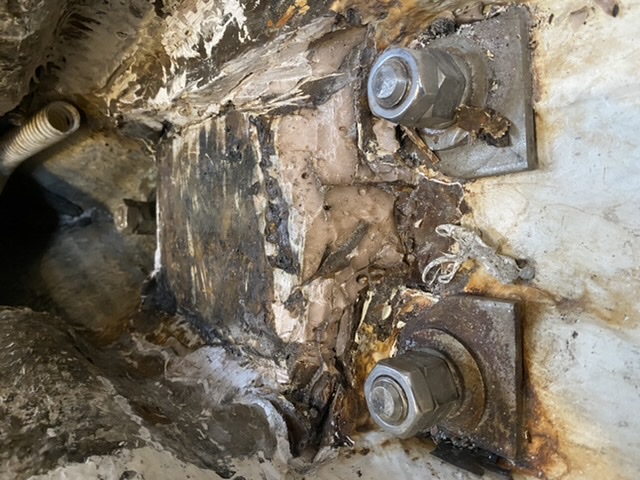
IBeam Removal
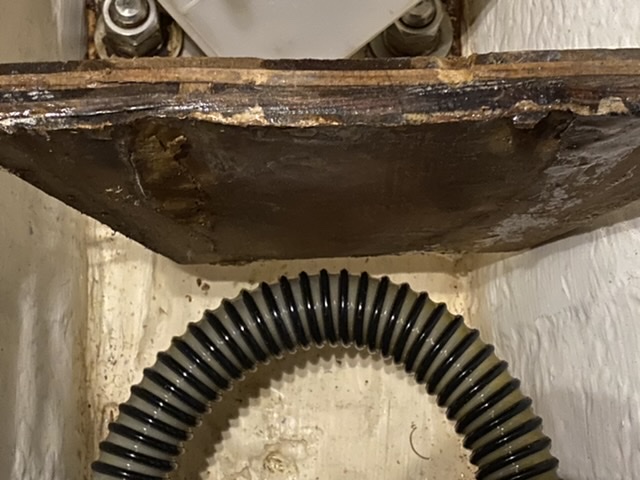
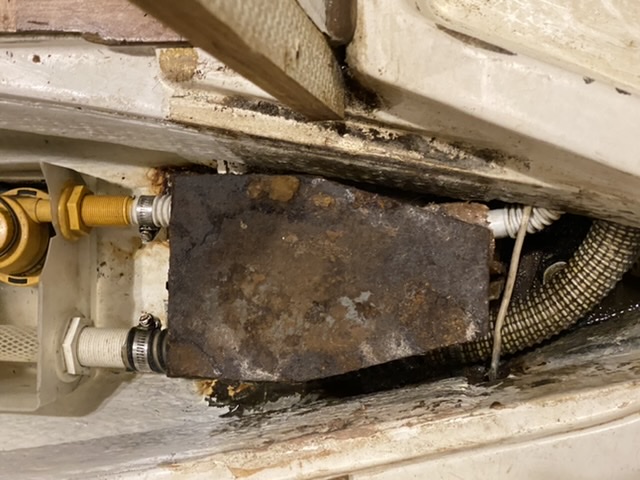
I took my HF multitool and a handful of blades and cut the perimeter of the fiberglass encapsulating the steel. I believe the I beam is original but the fiberglass isn’t, let me know if this isn’t true. Probably installed when the compression post was replaced. I cold chiseled it all of and cut the vertical and top off with my angle grinder, then removed the base exposing about 4 inches of resin filler as the base for the I-Beam. Cleaned it all up and painted the bilge in that area. Found the front vertical section of the I-Beam rusted through and the fiberglass was actually holding it all up.
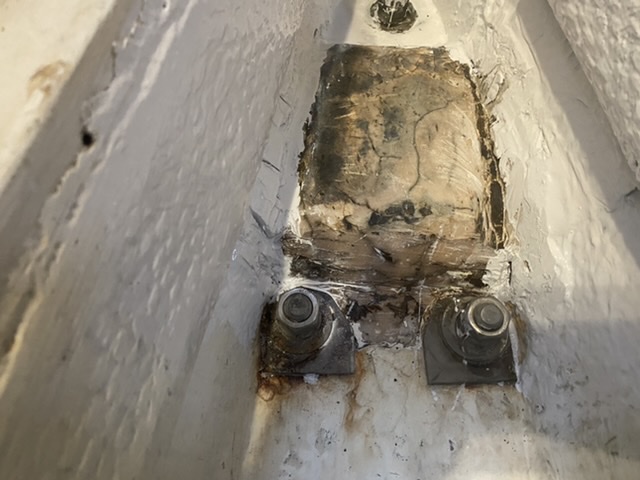
New I-Beam
I went back and forth on what to use and went with a product called PaperStone. It is a phenolic composite used for countertops and other stuff. I’m very familiar with it being I fabricated all of the countertops in my house with it. I expoxied the layers together then drilled vertically through it in two places and expoxied two sections of 7/16 all thread for lateral strength. I fabricated a new plate for the compression post to sit on and screwed it to the new IBeam. I mixed up a bunch of West Systems epoxy with a bunch of compression filler powder to the consistency of cookie dough and set it all into it. Having it all screwed together set the correct elevation once placed in the ledges off the bilge. Once it started hardening, I was able to shape it with my finger. .
Compression Post Removal
I loosened up the rigging and jacked up the roof with a assortment of screw and bottle jacks. This process and the following “jacking" was by far the most challenging. Spreading the load, lifting as close to the mast plate but having room to work is a pain. I got it to were I could sledge the post out. I believe this is not the original post as it is larger than I’ve seen in pictures and it is rabbited into the bulkhead. No rot anywhere but the plywood it sits on was crushed and it was obvious the post was not sitting plumb on it.
Mast Wire Leak
The original hole was 1 inch. I increased it to 1.5 by pulling the wires up through the cabin and out the mast via a 1.5” hole in the side of the mast by the base plate. I then enlarged the hole. I took a thick rubber chemical glove and cut a hole in the middle finger and ran the wires through it, zip tied it and put a bunch of butyl tape up in the finger then zip tied the other end of the finger making a seal. I ran the wires back through into the cabin then threaded a section of 1.5” plastic conduit around the wires and up into the hole making it flush with the cabin ceiling. I then spent the next hour placing 3m 4200 around the conduit with a wire coat hanger, not fun. I then pulled the cuff off the glove over the conduit and prayed it wouldn’t leak. Good news it didn’t.
No pictures
IBeam Removal
I took my HF multitool and a handful of blades and cut the perimeter of the fiberglass encapsulating the steel. I believe the I beam is original but the fiberglass isn’t, let me know if this isn’t true. Probably installed when the compression post was replaced. I cold chiseled it all of and cut the vertical and top off with my angle grinder, then removed the base exposing about 4 inches of resin filler as the base for the I-Beam. Cleaned it all up and painted the bilge in that area. Found the front vertical section of the I-Beam rusted through and the fiberglass was actually holding it all up.
New I-Beam
I went back and forth on what to use and went with a product called PaperStone. It is a phenolic composite used for countertops and other stuff. I’m very familiar with it being I fabricated all of the countertops in my house with it. I expoxied the layers together then drilled vertically through it in two places and expoxied two sections of 7/16 all thread for lateral strength. I fabricated a new plate for the compression post to sit on and screwed it to the new IBeam. I mixed up a bunch of West Systems epoxy with a bunch of compression filler powder to the consistency of cookie dough and set it all into it. Having it all screwed together set the correct elevation once placed in the ledges off the bilge. Once it started hardening, I was able to shape it with my finger. .
Last edited:
