Hunter 320 Steering Issue

Kevy

.
Nov 27, 2018
48
Hunter 320 Nanaimo
Hi all,

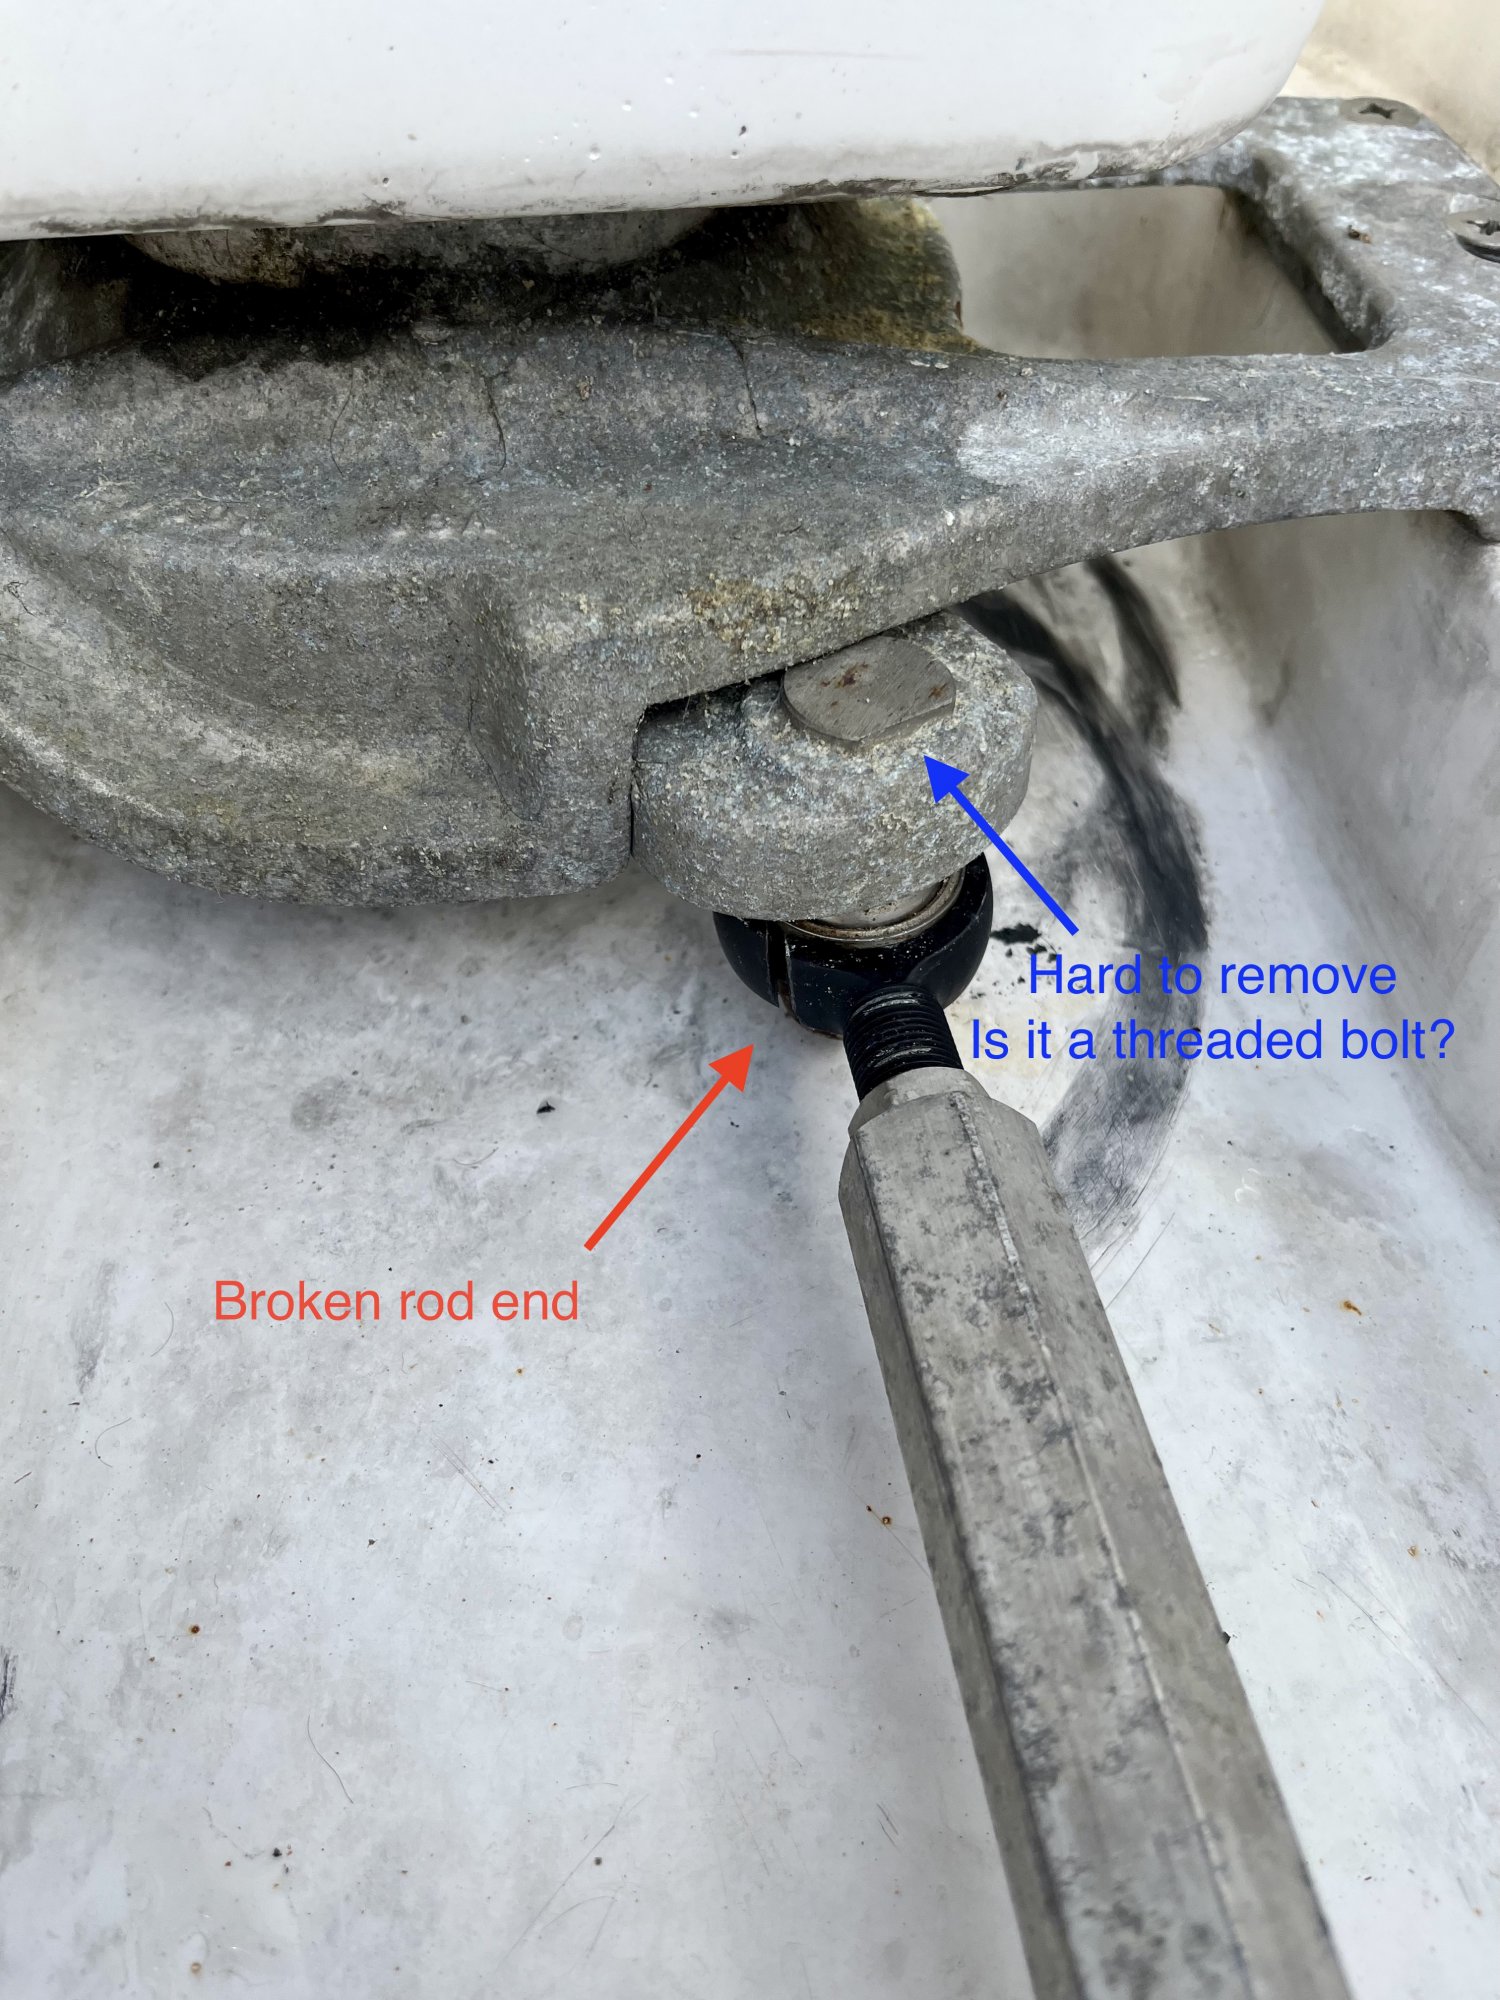
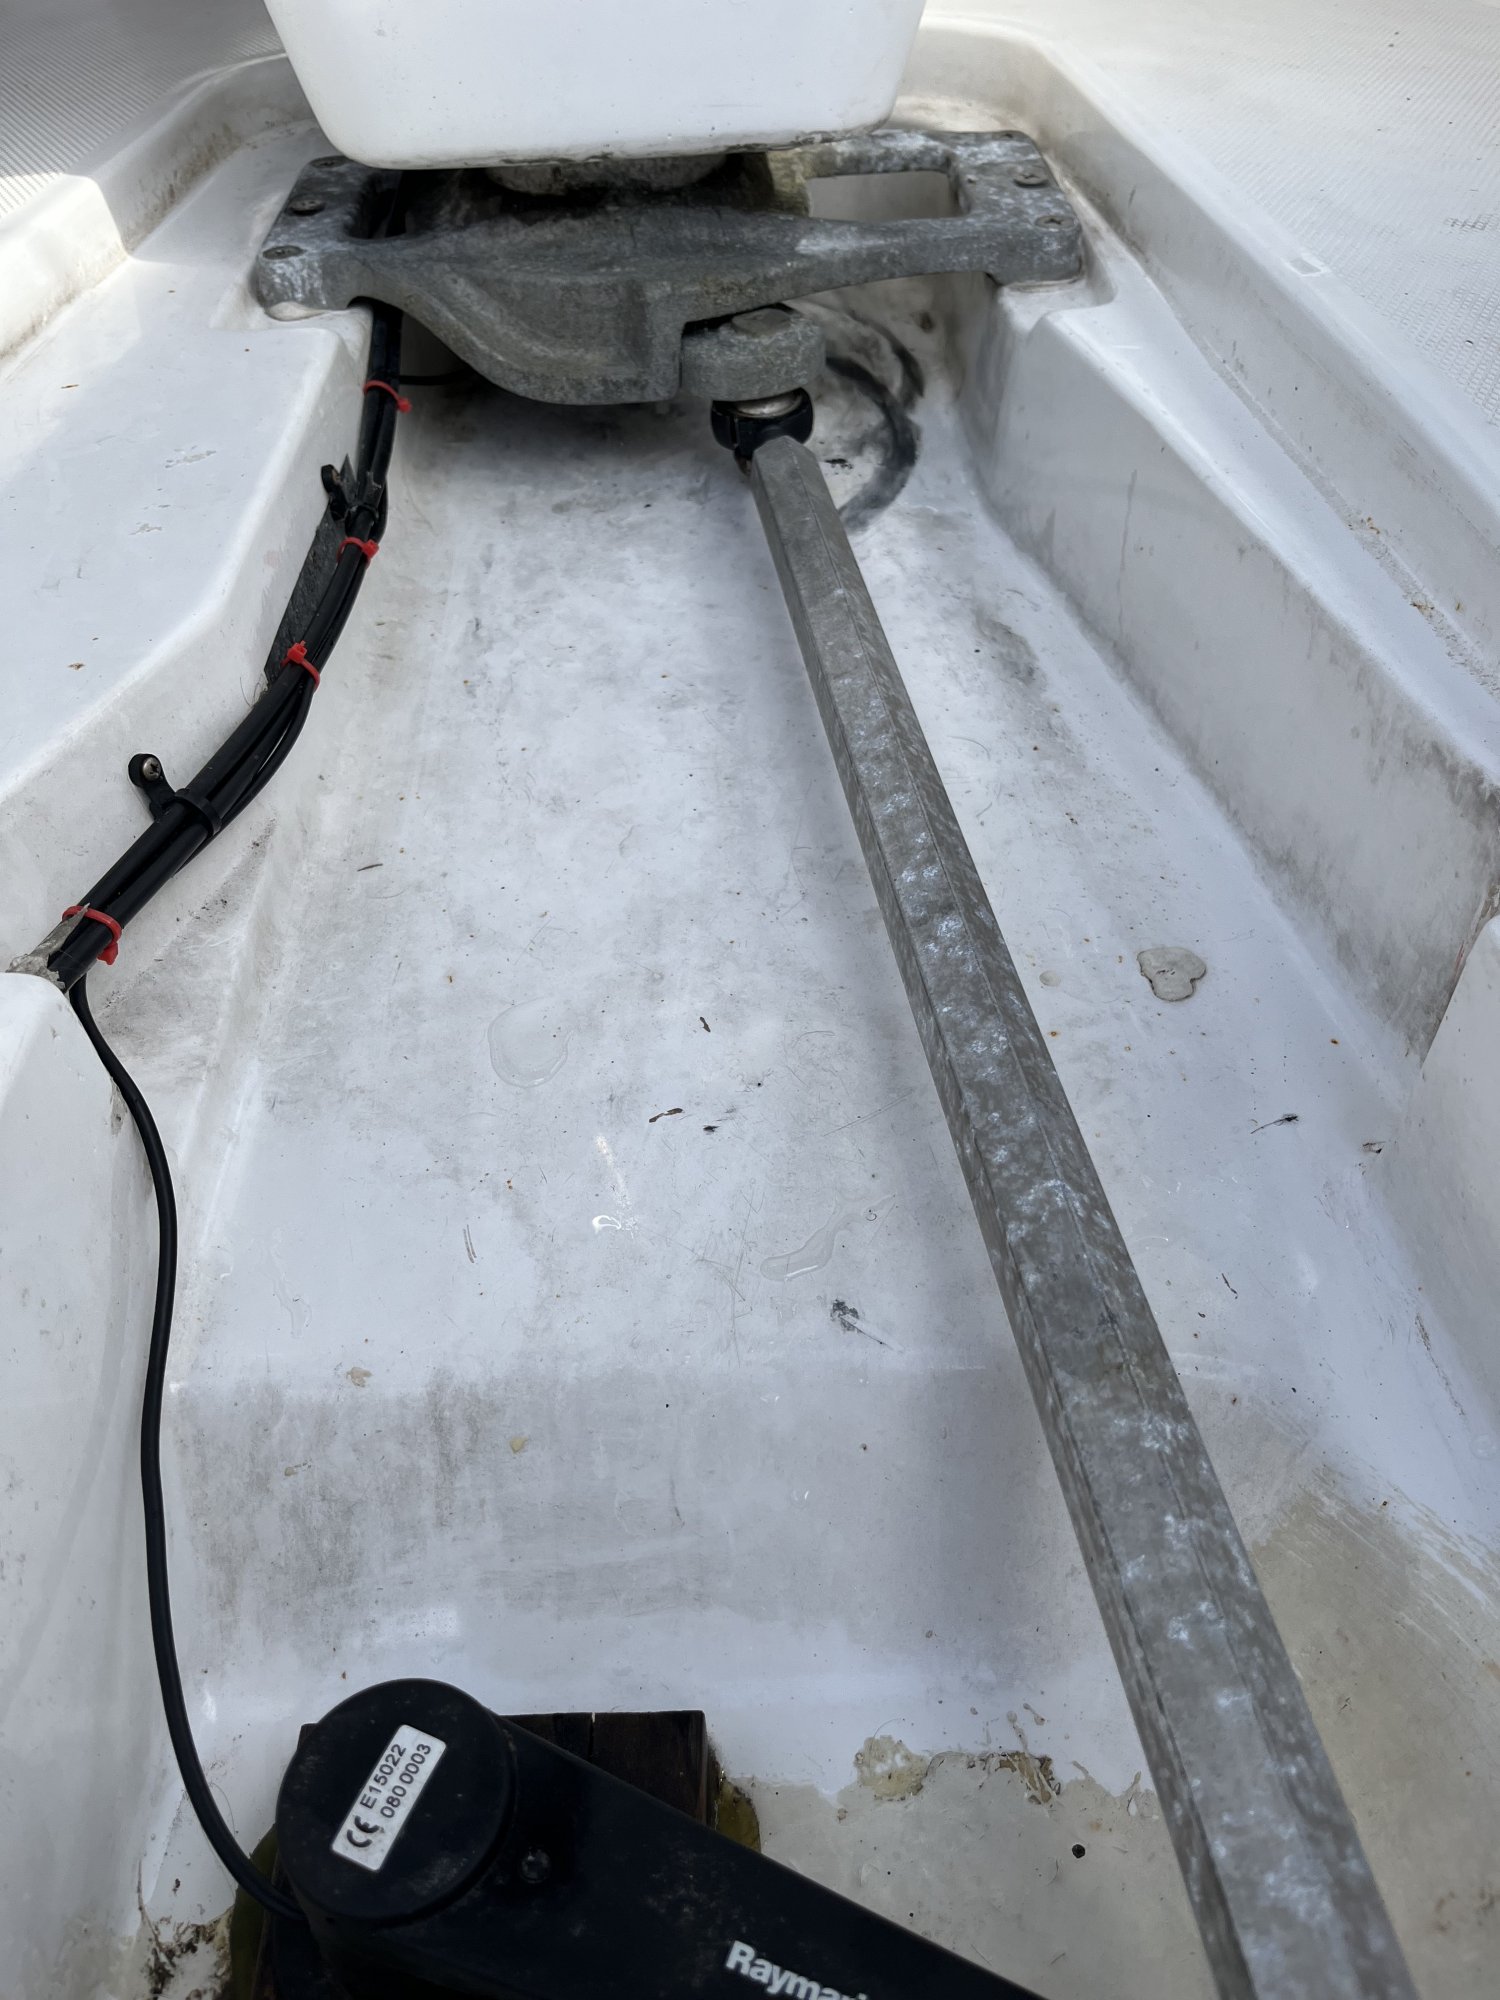
Wondering if anyone has had a similar experience with their steering. Our boat has pedestal steering with a rod to the rudder (as pictured). One of the rod ends broke causing the arm to fall. We were fortunately able to continue to steer as the broken rod end was still around the nut, but I'm having trouble removing the arm and ends to replace (I have replacement parts from Edson).

The issue for me is getting the bolt out. It's been suggested that the dissimilar metals are hard to remove (probably steel into aluminum) and some PB and heat might work. Anyone had a similar issue?

Cheers!

Kev

IMG_4839.jpeg


IMG_4841.jpeg


IMG_4838.jpeg
 
Jan 7, 2011
4,789
Oday 322 East Chicago, IN
You might need to chat with Edson and see what the pay say about those connections…I wouldn’t think that tey are threaded based on the lack if a hex head for putting a wrench on it…but there is at least 1 flat side (if the opposite side is flat, maybe it is meant to unscrew)…

What is on the bottom of the pin/bolt that holds the arm on the pin /bolt? Something must be under there or the arm would just fall off it seems.

You sure don’t have much room or clearance. Might require you to take things apart more than you want to try and get it apart…

And yes, regardless of the type of pin/bolt, I bet it will be a bear to get out due to the issue with dissimilar metals. The quadrant piece looks pretty rough as it is.

I checked Edison’s website for the steering plan for the H320….they don’t show one…but the H340 looks similar…


Good luck…it looks like a project:(

Greg
 
  • Like
Likes: Kevy
Sep 26, 2008
554
Hunter 340 0 Wickford, RI
Are you sure you need to remove the bolt? A few years back my friend had his 340 ball joint linkage snap, just as yours did. Same one in fact. Same spot.
We removed the nut from “under“ the black ball joint. Dropped the broken one down and off the bolt.
What you need to remember is the rod is ”Reversed Thread”!
Loosen the holding nut on the ball joint and rod (reversed Thread) . That will allow you to unscrew the ball joint from the rod. “Reversed Thread”!
I am empathizing this because we all forget and revert back to regular thread mode.
As a foot note, I’m not saying you, but what happened to your linkage was due to failure to grease the joint.
It is a very overlooked maintenance spot. But really should be the first on the spring commissioning list.
I wipe last years grease off and reapply a new light coating of waterproof grease each spring, to both ball joints.
There is a lot of friction that is created at these two spots with every turn.
I hope this helps you.
 
  • Like
Likes: Kevy

Kevy

.
Nov 27, 2018
48
Hunter 320 Nanaimo
Thanks all. Indeed it was a maintenance point that I was ignorant of so happy to take the blame. I'll try to remove the nut underneath but there's still not enough clearance to remove and replace the end without lifting the pedestal (which seems like more work). Appreciate the helpful posts all.
 
Jan 4, 2006
6,495
Hunter 310 West Vancouver, B.C.
I was working on my boat today (because we never get wind in the summer) and came upon the above post by @Kevy while eating lunch. Interesting, I don't remember ever lubricating ball joints under the cockpit sole. Seeing as I had less than no interest in what I was previously doing, this was the perfect diversion.

After removing the cockpit sole, here we see an arm with two ball joints. The arm is aluminum and the ball joints are SS.
1694404479844.png


Here is the forward ball joint the OP is removing.
1694405232165.png


If at all possible, avoid removing the bolt and just remove the nut on the underside and install the new ball joint.

If the bolt must be removed, the only way the bolt is coming up and out without removing the entire pedestal, is to grind out the thinnest possible section (approx. 1/32") of the aluminum pedestal mounting plate between the lines shown below in order to pull the bolt upwards. I saw the aluminum pedestal is held in place with most likely 5200 and is not coming out without one hell of a fight.
1694405745590.png

I say minimal thickness of the edge because there is a lip around the underside of the aluminum plate for additional strength. Try not to weaken this lip.


Arm moved over for grinding.
1694406121279.png


Here is the nut to be removed from the ball joint.
1694406337192.png


I don't know if you have the tools and skills necessary to do this work, but unfortunately it's that or have your steering fall apart ay the most inopertune moment.

Next, WHY did the forward ball joint crack :

1694407108677.png


This joint has seen some heavy abuse and it has nothing to do with lubrication. And not just once, but repeatedly. The joint is SS and very likely forged when manufactured. It's is strong.

IMO, the ball joint was subjected to severe impact loading when the boat was moving at a couple of knots in reverse and the rudder became caught in the reverse current and suddenly moved from straight back all the way to starboard. The momentum of the rudder due to its weight plus the mass of water working against it (about the same as the water forced against the area of the rudder) would have subjected the ball joint to severe stress and eventually caused its failure.

I would recommend also checking your rudder post, rudder post bearing, and the rudder itself for damage the next time the boat is on the hard.
 
  • Like
Likes: Ken13559
Jan 4, 2006
6,495
Hunter 310 West Vancouver, B.C.
Oh crap !

1694453987999.png


After opening my eyes a little wider, I see there is no way to remove the old ball joint and install the new one without lifting the SS bolt. This is going to grow into a full scale project unless someone (@Tally Ho ?) can come up with a better idea.
 

Kevy

.
Nov 27, 2018
48
Hunter 320 Nanaimo
Damn Ralph, nice write up. I'll get down to the boat hopefully on Tuesday and give all of this a try. I'm hoping I can remove without taking out the bolt or grinding, but if necessary I'll get to it.
Oh crap !

View attachment 219780

After opening my eyes a little wider, I see there is no way to remove the old ball joint and install the new one without lifting the SS bolt. This is going to grow into a full scale project unless someone (@Tally Ho ?) can come up with a better idea.
Yep! That's my concern. In fact, before I discovered it was broken the only thing keeping us steering for a time was the broken end being caught on that nut. Having to lift the bolt will be tough but like I said, going to try some PB blaster and some heat (probably not at the same time lol).
 
Jan 4, 2006
6,495
Hunter 310 West Vancouver, B.C.
Having to lift the bolt will be tough but like I said, going to try some PB blaster
You MAY be able to assist the bolt in coming up by placing a metal plate under the bolt and its nut as shown :

1694463465395.png


1694464330955.png


You will need to use extreme caution at this point as the force of the nut could easily lift the binnacle and toss it over the side of your boat. The binnacle supports are only weak aluminum held to the cockpit floor with screws. I would suggest soaking the top of the bolt and top of the nut and then tightening the nut until you have a slight force and leave overnight. If the SS bolt decides to turn, it will allow the penetrant to get into the joint and get things moving. Remember to do the small amount of grinding to allow the SS bolt head ? ? ? ? ? such as it is, to clear the overhead obstruction.

Slow and steady will win this race, as long as nothing else goes wrong.

Remember to coat all aluminum/SS contacts with a parting compound when this goes back together.
 
Oct 29, 2005
2,356
Hunter Marine 326 303 Singapore
You guys made me scratch that itch.....now I have to go check my steering rod and ball joint....:huh: