First part was three weeks ago...
I cut out the first section, a small section just where the mast was...After I cut this section out I couldn't find dry core, so I borrowed the brokers moisture meter and checked it, and the meter shows a huge section is wet, like 3'x4'. But IT LIES! Ok it doesn't lie, I just don't know how to use it properly. So I started cutting, and only cut into dry core. Now I'm REALLY pissed. So I pull up maine sail's instructions again, and go at it with the moisture meter again and only cut what shows REALLY wet.
So long story short I cut out a section about 1' wide and 3' long. All of it on areas with non-skid so it's not that bad. I did not take pictures of the final part because I was too dirty and annoyed to go down to my van and get my camera again. I'll post pics of that tomorrow.
On a good note, I went at the rest of the deck and it's dry everywhere else. Well, some areas show "moist" but after what I went through before, "moist" really means "dry"
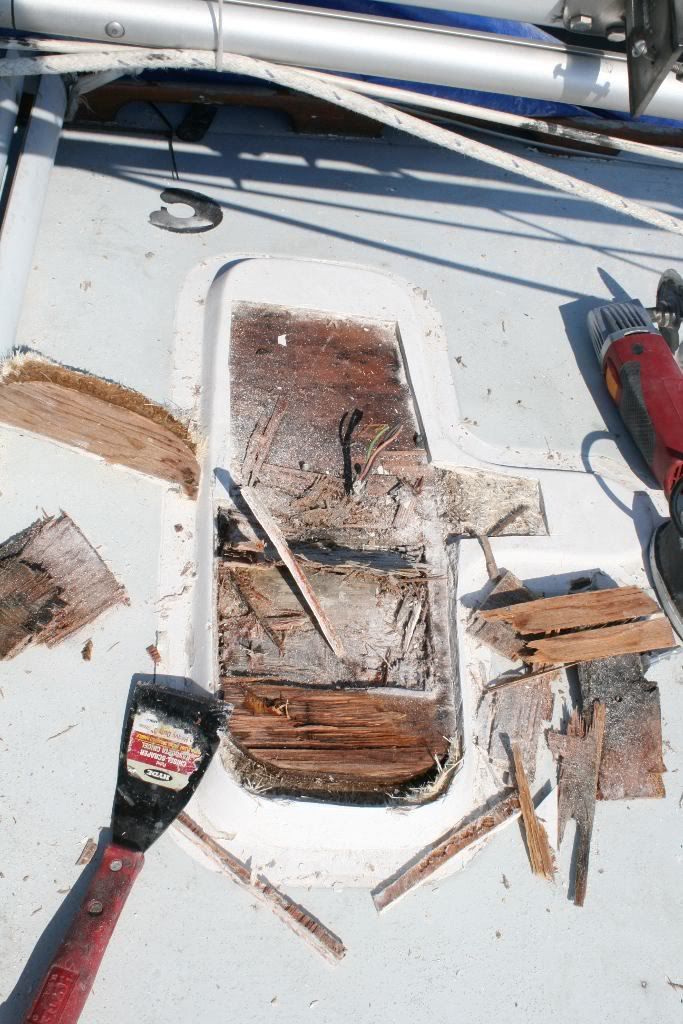
This is the first layer, wet 1/2" plywood...

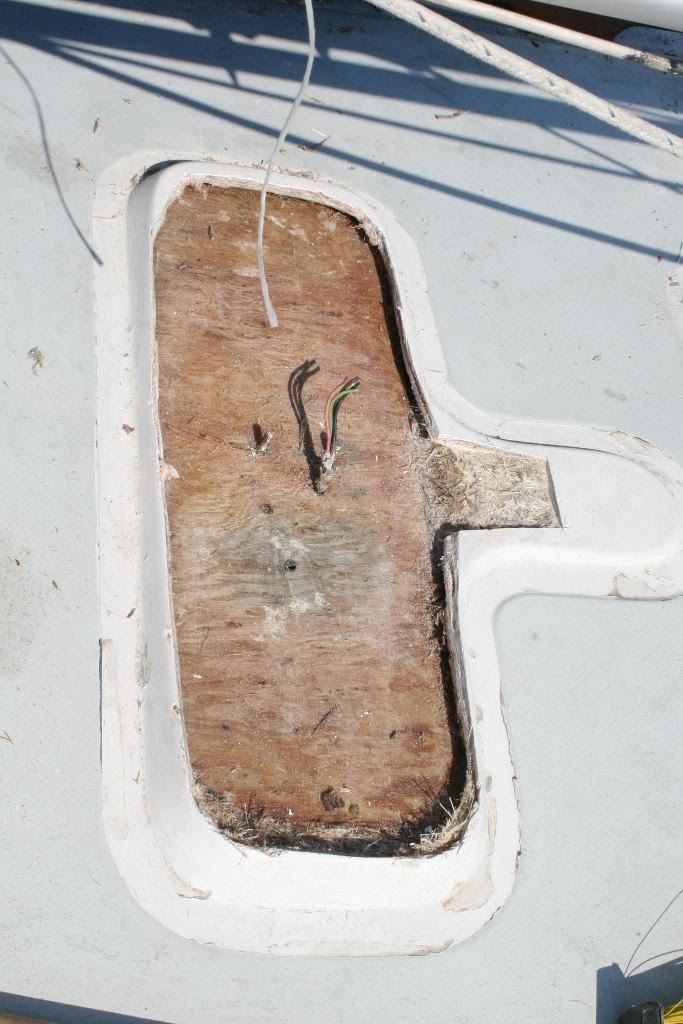
Wet plywood removed, this is the actual deck. Why Hunter made the deck two layers here? I dunno...

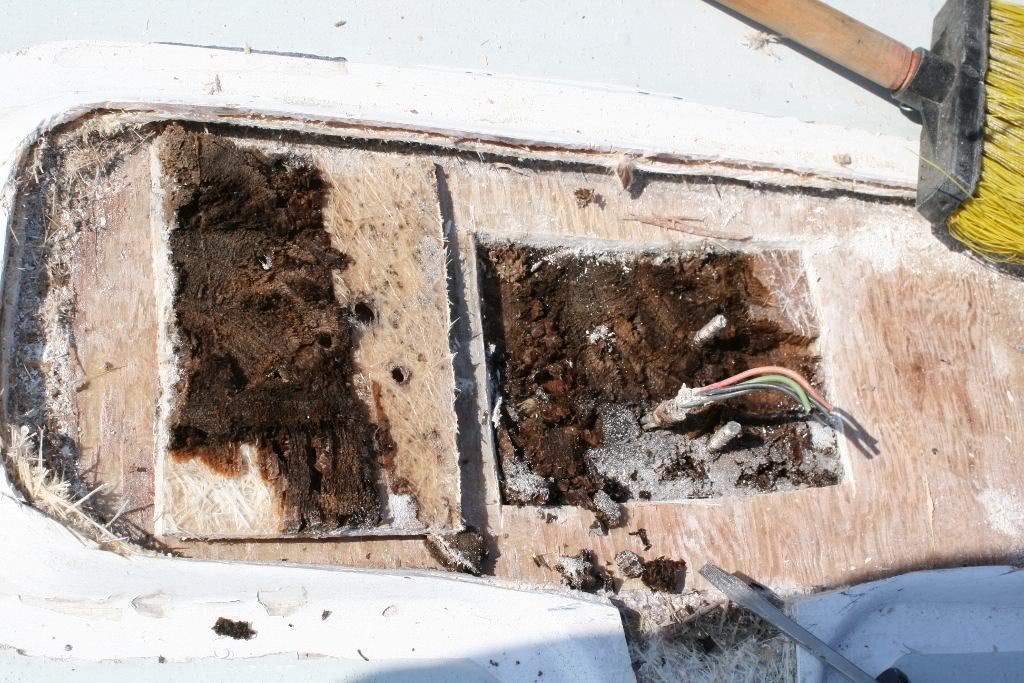
And this is what's underneath. Balsa...Under the mast. :shrug Why?!? If they would have just glassed in some more plywood sealed off from the rest of the core, there wouldn't be a problem! Yeah the plywood would still be wet, but it would be a much easier fix. Now I gotta recore, and reskin 3 square feet of deck.

FFWD to this week
We had some really warm temps, so I made a lot of progress on the step, this is probably not the right way...
Using an old (not really old, just wrong sash from when I replaced them last year, got 6 extras now) window I rebuilt the part that I cut out with epoxy and about 8 layers of 10oz cloth, and roving. Then added a 3/4" of aluminum plate under the mast, and plywood elsewhere. Then covered with another 5 layers of cloth and roving...

Then this is where it gets tricky, none of the gaps between what I made and what was left were even, I had to think overnight about what I would do here. So what I did was in the areas that are not loaded under the mast, I layed down some 3/8" plywood in thickened epoxy, slid some small pieces under the deck where I had carved out some rotten core, and filled all the gaps with thickened epoxy. Under where the mast sits I put a layer of the backing plate material I made for the thru-hulls. Then since I had half the foam left from the rudder repair, I covered the bottom of the step with wax paper, mixed some foam, and poured it in. It took three tries before I got all the gaps filled to where I could stick everything back together with thickened epoxy. I cut the foam away from under where the mast sits and filled that area with thickened epoxy...

Then slather on the epoxy, this too two attempts to fill any voids. Slather it on, squeeze it down, pry it up, and slather some more on areas that didn't get squeezed. Then wedge stuff under the mast to weigh it down, and I screwed the edges down (fill those holes later) I did all this yesterday...

Today was another spectacular day, 82 degrees at my house when I left, 68 degrees at the marina (4 miles away!) today I ground everything (nearly) flat, beveled the gaps, filled the gaps with thickened epoxy, and glassed all the seams. It's all starting to come together now, I was really worried that this part would be a lot harder than it was.
Ground..

Glassed...

It's still going to take a lot of work to fair it all out, but it's mostly flat right now even if you really can't tell in the pictures.

My supplies and working environment. Oh, when I was nearly finished two little kids came by selling glasses of lemonade for a quarter. I gave them a buck for 2 glasses


I cut out the first section, a small section just where the mast was...After I cut this section out I couldn't find dry core, so I borrowed the brokers moisture meter and checked it, and the meter shows a huge section is wet, like 3'x4'. But IT LIES! Ok it doesn't lie, I just don't know how to use it properly. So I started cutting, and only cut into dry core. Now I'm REALLY pissed. So I pull up maine sail's instructions again, and go at it with the moisture meter again and only cut what shows REALLY wet.
So long story short I cut out a section about 1' wide and 3' long. All of it on areas with non-skid so it's not that bad. I did not take pictures of the final part because I was too dirty and annoyed to go down to my van and get my camera again. I'll post pics of that tomorrow.
On a good note, I went at the rest of the deck and it's dry everywhere else. Well, some areas show "moist" but after what I went through before, "moist" really means "dry"
This is the first layer, wet 1/2" plywood...

Wet plywood removed, this is the actual deck. Why Hunter made the deck two layers here? I dunno...

And this is what's underneath. Balsa...Under the mast. :shrug Why?!? If they would have just glassed in some more plywood sealed off from the rest of the core, there wouldn't be a problem! Yeah the plywood would still be wet, but it would be a much easier fix. Now I gotta recore, and reskin 3 square feet of deck.

FFWD to this week
We had some really warm temps, so I made a lot of progress on the step, this is probably not the right way...
Using an old (not really old, just wrong sash from when I replaced them last year, got 6 extras now) window I rebuilt the part that I cut out with epoxy and about 8 layers of 10oz cloth, and roving. Then added a 3/4" of aluminum plate under the mast, and plywood elsewhere. Then covered with another 5 layers of cloth and roving...

Then this is where it gets tricky, none of the gaps between what I made and what was left were even, I had to think overnight about what I would do here. So what I did was in the areas that are not loaded under the mast, I layed down some 3/8" plywood in thickened epoxy, slid some small pieces under the deck where I had carved out some rotten core, and filled all the gaps with thickened epoxy. Under where the mast sits I put a layer of the backing plate material I made for the thru-hulls. Then since I had half the foam left from the rudder repair, I covered the bottom of the step with wax paper, mixed some foam, and poured it in. It took three tries before I got all the gaps filled to where I could stick everything back together with thickened epoxy. I cut the foam away from under where the mast sits and filled that area with thickened epoxy...

Then slather on the epoxy, this too two attempts to fill any voids. Slather it on, squeeze it down, pry it up, and slather some more on areas that didn't get squeezed. Then wedge stuff under the mast to weigh it down, and I screwed the edges down (fill those holes later) I did all this yesterday...

Today was another spectacular day, 82 degrees at my house when I left, 68 degrees at the marina (4 miles away!) today I ground everything (nearly) flat, beveled the gaps, filled the gaps with thickened epoxy, and glassed all the seams. It's all starting to come together now, I was really worried that this part would be a lot harder than it was.
Ground..

Glassed...

It's still going to take a lot of work to fair it all out, but it's mostly flat right now even if you really can't tell in the pictures.

My supplies and working environment. Oh, when I was nearly finished two little kids came by selling glasses of lemonade for a quarter. I gave them a buck for 2 glasses


