Hunter 170: Hull cracks repair, rudder mount rebuild, motor mount build, trolling motor electrical solution, inspection holes, hull painting

May 31, 2022
10
Hunter 170 San Antonio
Hi fellow sailors,
This forum is absolutely amazing. And special thanks to @stickinthemud57 for great introduction and long and detailed emails. Hopefully, we can continue that here as I make progress.

Here's my story and I open this post with ask for support and advise from experienced people, so I get this project through and get on the water again. So also, I apologize in advance for lacking some proper terms, as I'm still learning the vocabulary.

I am new to sailing as I only owned Laser 2 for a few months and went out with it only several times at Canyon Lake, Texas and had absolute blast. I fell in love with the feeling being powered by wind.
I was fortunate that I was gifted a project Hunter 170 boat from a very generous person, that started the work on this boat, but it is kinda in the middle when I got it. After I got the boat, I sold my Laser 2 and from the money, I ordered new sails for this Hunter 170 from Precision Sails and I already receive them.

  1. He built enclosed section in the front that replaces the tarp section on the original design. The plywood is covered with three layers of fibergrass and the front has been varnished. I'm planing to sand the edges, do some fairing and paint white, then place non skid on top.

    1659468693341.png 1659468774414.png

  2. Cracks. Lots of them. The previous owner already filled in lots of cracks using Plexus and sanded some of them, so most is ready for putting primer on and paint with Krylon Paint White and Clear Gloss on top of it. I see only two small cracks that I need to fill in, so I'm going to use Dremel tool to create a V shape groove and fill it with Plexus, and then sand it flush.

    1659474106147.png 1659474171589.png.1659474397104.png. 1659474504416.png. 1659474612063.png

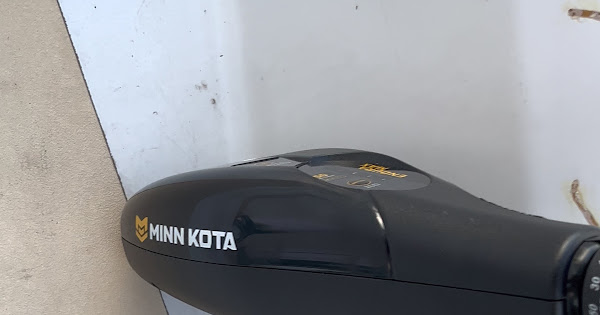
  3. Hull Hatches for inspection/access holes. Here where I want to build the hatches. on the rudder, for rudder work. I've seen that done from other people here, so I guess it's ok. Then for the motor, I want to use Minn Kota trolling motor and for it I need battery power. I want to put the battery (in waterproof casing) under that wooden enclosing in the front, then have a hatch to the right of that, have an waterproof connection for the power line, then put and glue pvc pipe under the starboard bench and have another hatch opening and connection for the marine wire (that will go through the pvc). Once I build the motor mount the motor will be right there and the cable will just connect to the connector next to the hatch.
    Please, let me know if that idea could work and if opening those hatches will not hurt the structural integrity of the hull?

    1659475014221.png. 1659475067830.png. 1659475119742.png

  4. Motor mount. I'm looking at the option to have someone to weld for me stainless steel L-bracket 6"x4"x3" (LWH), but I'm not sure if it will come up too expensive. I see people mount those Minn Kota motors on kayaks, so I wonder if I can build it with plywood pieces covered in carbon fiber and screw it on the mount location. Do you think that would be strong enough? I kinda think it would be fine. I only want to have that motor to slowly push me away from the lake ramps a bit in a deeper water, so I can then slowly work on the sails.
 
Last edited:
May 31, 2022
10
Hunter 170 San Antonio
5. Finally, the rudder. This is by far the biggest concern of mine how to put it together. Previous owner started on this, but I'm left with this cut out of the back of the mount where all the rotted wood was cleaned up and area prepared. He explained to me that he planned to use fiberglassed plywood shaped in that triangular way that would stick inside of that hole. About 3 pieces stuck together. then they would be screw together from the sides and then maybe use carbon fiber on top for the strength. Then I would use big piece of high quality wood and the rudder mount would be screwed to it and into that wood that fills the hole.
I see some people used just a couple of plates in front and inside and bolt the rudder mount on it. That would be a faster and easier for sure. What would you advice me here?

1659476016755.png. 1659476074814.png. 1659476112377.png. 1659476157760.png
 
Apr 11, 2020
718
MacGregor 26s Scott's Landing, Grapevine TX
Interesting treatment at the cuddy cabin. Looks like it would work well to protect camping gear and such from rain and chop.

It's great the PO did the patching work. Hopefully it will hold up, but only time will tell.

With the paint, you may find the paint alone will do the trick. I used a clear coat over my paint, and it did not go on clear as advertised and resulted in a slightly uneven appearance.

Regarding the access hatches, it would make sense to place one up front so that air can circulate between there and the bilge plug opoening when you have it out of the water. I would wait until I had the need to access a particular area to decide where to put the other ones. I'm not sure the rudder castle would be a good place since the integrity at the back has already be compromised. Other opinions may vary.

I don't think a plywood mounting bracket would last very long, and it would be too sad to see your motor end up in Davy Jone's locker. If you are handy and have access to large, stout vise, you could make one out of aluminum plate (at least 1/8" I would say) with bolted-on cross braces. Hopefully the lumber inside the hull at the mounting point is still sound, but that would surprise me, so mounting the bracket to the boat might be a challenge.

It looks like the proposed solution is to build back the rudder castle with wood and lag-bolt the rudder bracket into that, correct? If so, keeping the inside dry is going to be very important to avoid rot over time.

Have fun with your project, and let us know how things go!
 
May 31, 2022
10
Hunter 170 San Antonio
Hi @stickinthemud57,

the cuddy cabin is very cool. It has three compartments actually. The front one I will use for storing anchor rope and chain, once I later install anchor holder on the port side of the bow.

If I go for the wood rebuild on rudder mount (most likely), I will then not need the hatch there, since there's nothing to tighten from the inside in that case. I may re-enforce the whole that area somehow with carbon fiber for strength.

When it comes for the motor mount, I most likely will have my neighbor weld for me L-bracket to the size, If I can find some scraps at one of local steel company places. I'm also worried that the wood is rotten under that mount. It doesn't feel soft as from outside, but once I drill the holes, I'll know.. I hope I don't need to do the whole rebuild of that area like mentioned in one of the threads here.
All I want is to make this boat in sailable condition, so I can start enjoying sailing it for a couple of years or so, and then I'll give it away. So I don't want to invest too much (it is costing me a ton for parking already)

Thanks. I'll keep this posted as I make some progress.
 
May 31, 2022
10
Hunter 170 San Antonio
So, I've finished the trolling motor wiring and setup.
I've purchased Minn Kota Endura Max trolling motor from and Minn Kota Battery Power Center that will hold the battery in front of the center board inside the cuddy cabin.
1660788672142.png. 1660788713265.png

I needed a connection close to the motor mount for the motor. I've got trolling motor waterproof plugs and mount one in the back by the motor mount and one under the cuddy cabin close to where the battery will be located.
Inside the hull I've fished Marin wire 14 gauge that connects two adapters. Needed to drill 1" hole for the adapters, then screw them in and sealed them with marina sealant. In the front I had to drill 6" hatch so I can grab the wire. Wasn't easy, but somehow made it and grabbed the wire.
1660788866354.png. IMG_8525.jpg. IMG_8534.jpeg. IMG_8536.jpeg. IMG_8537.jpeg. IMG_8540.jpeg. IMG_8541.jpeg
 
May 31, 2022
10
Hunter 170 San Antonio
Here's the initial demo of the setup with trying the motor. Or at least I'll attempt to upload a video...
IMG_8562.jpeg. IMG_8563.jpeg. IMG_8565.jpeg

This battery is just for testing wiring. I'll actually buy from Walmart, the Marina deep cycle battery...
 
Apr 11, 2020
718
MacGregor 26s Scott's Landing, Grapevine TX
Looks like a nice clean install of the power outlets. Stringing that wiring had to be a lot of fun!
 
May 31, 2022
10
Hunter 170 San Antonio
After cracks were made in a "v" shape with the dremel tool and filled with Plexus MA310 glue, I've used TotalBoat Polyester Fairing Compound to flatten the lines. Then I used the spray paint mentioned above and really looks good. I could aim for perfection really and you wont even see the cracks, but I'm happy how is turning out.
I've used that Fusion Clear Gloss at the end and that makes it almost the same as the original hull.

Before After
IMG_8630.jpg. IMG_8632.jpg

IMG_8631.jpg IMG_8633.jpg


Now, just to go around and finish all the cracks.
 
May 31, 2022
10
Hunter 170 San Antonio
yeah, almost there. I'm working on finishing that rudder mount hole. Almost there, so I'll share some photos once I'm done.
I constantly need to move the boat away from my front driveway, because HOA doesn't let me keep it there ... :/
Also, since this boat was bought on auction before it was gifted to me, there's a missing title for it, so my plan is to go and just try it without sails, just with the trolling motor, to get the feel of it and see if it'll float :D

TPWD, said they will need 2-6 months to review my bonding title request... WTH
 
May 31, 2022
10
Hunter 170 San Antonio
The mount is complete. Will try to mount it on a boat soon.
I've used HDPE plastic 0.5 inch cutting boards stacked together. 3x0.5" gives me 1.5" thick board that is very very strong and it holds the motor great.

For the bracket I've used 4mm stainless steel L bracket for industrial shelfs.


I only need to glue them together with G-flex to help out the 4 stainless steel bolts that hold them to the bracket.

IMG_8606.jpeg. IMG_8605.jpeg
 
Last edited:
May 31, 2022
10
Hunter 170 San Antonio
Well, I’ve finished the major repairs and actually took the boat to the lake to test the trolling motor out, along with testing the motor mount and the rudder mount repairs.
Here’s the video I made at the lake:


Let me know what you think and if you wanna see more pictures of the repairs.

Can’t wait to try sailing this boat. Feels like it can go pretty fast.

Cheers!